Spooky Halloween Monster Cookies

This post may contain affiliate links, please visit our privacy policy for details.
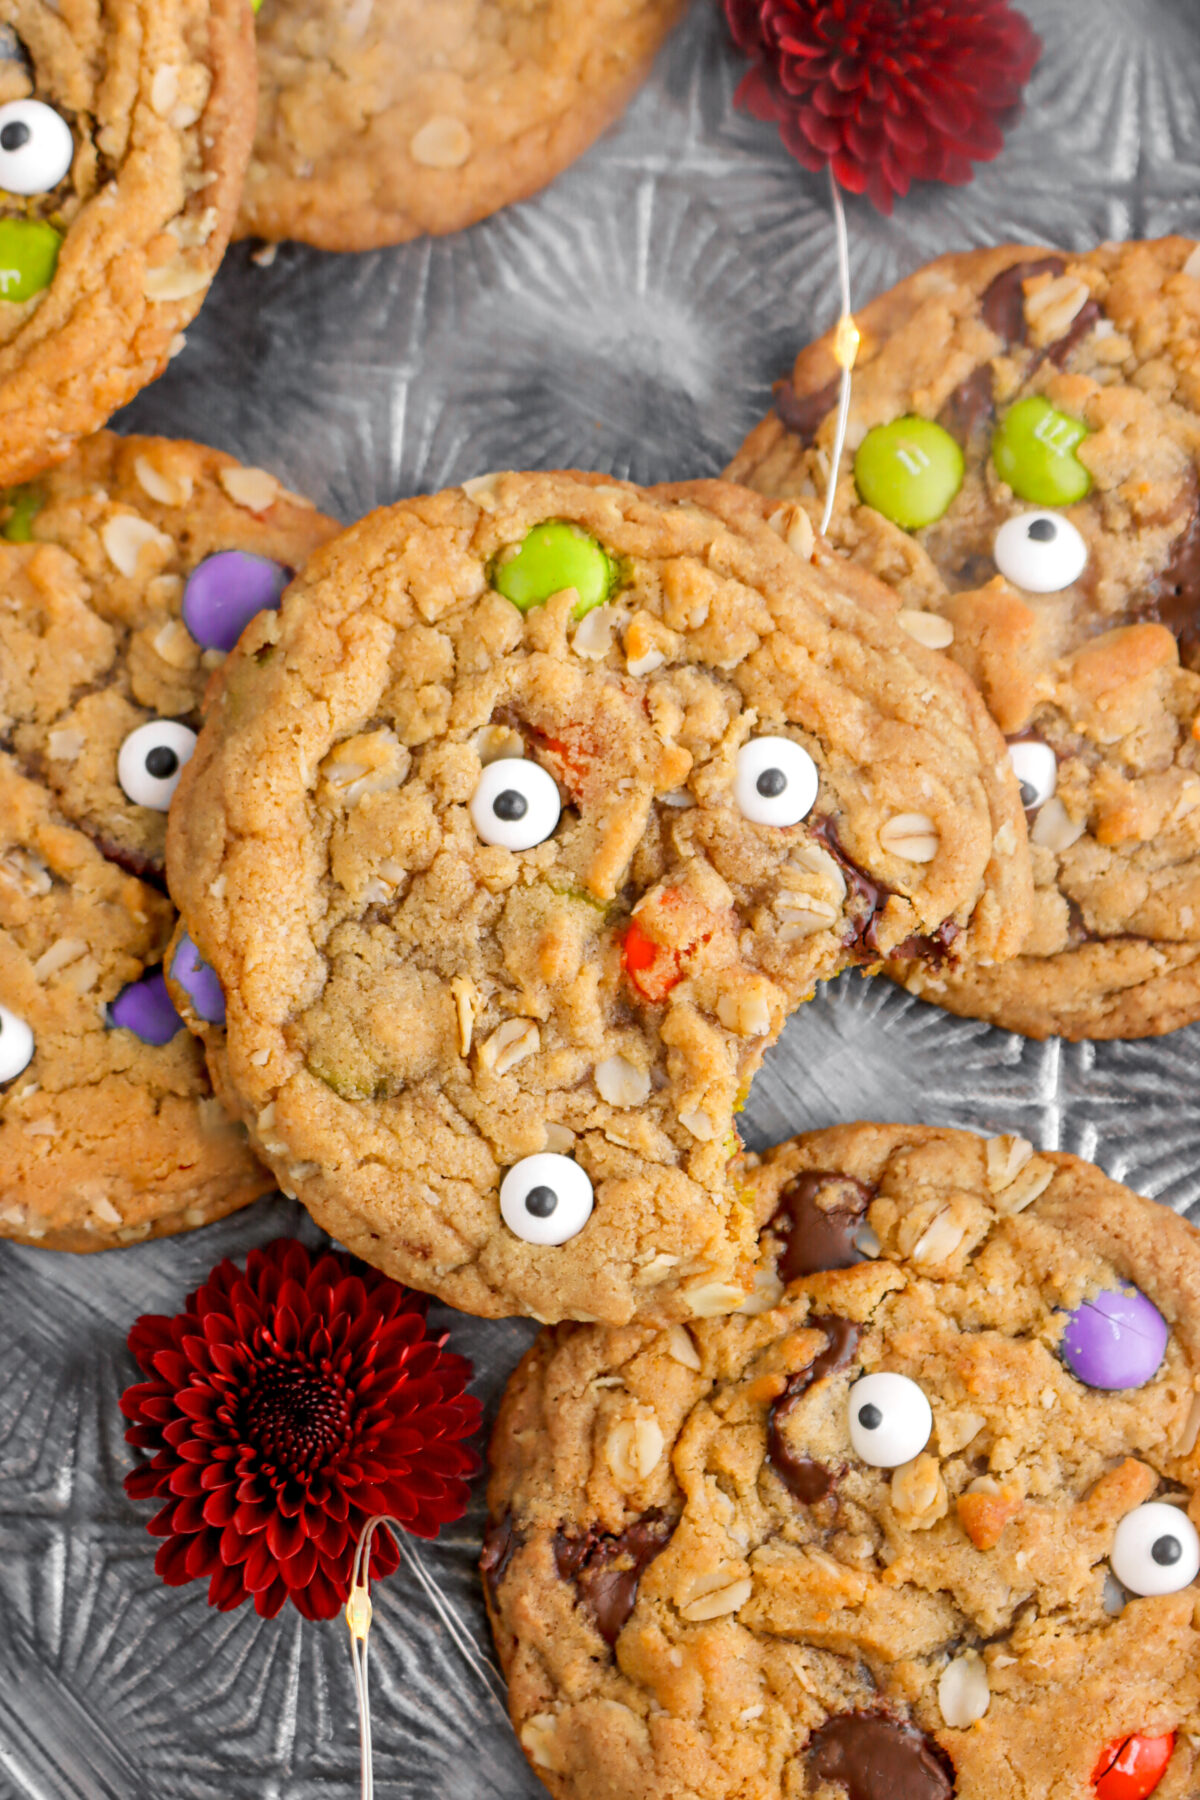
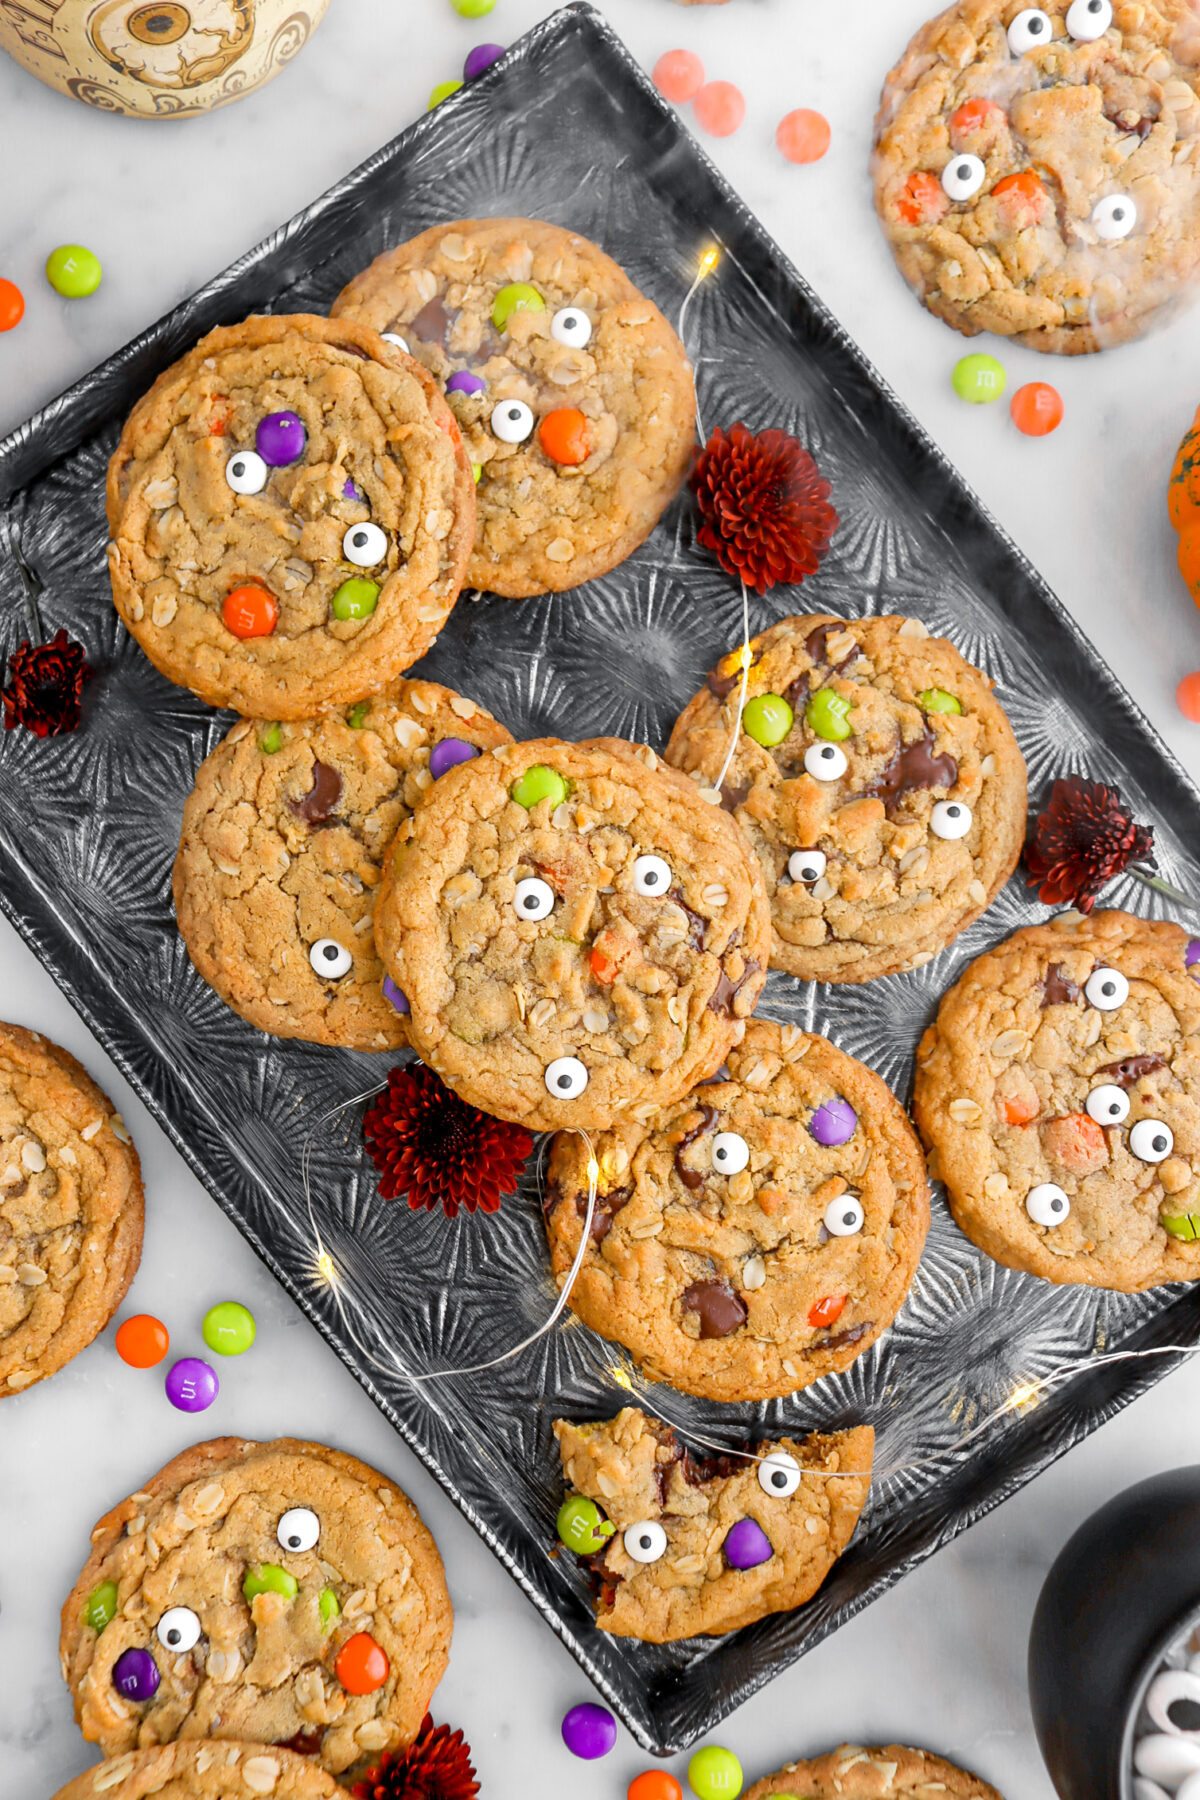
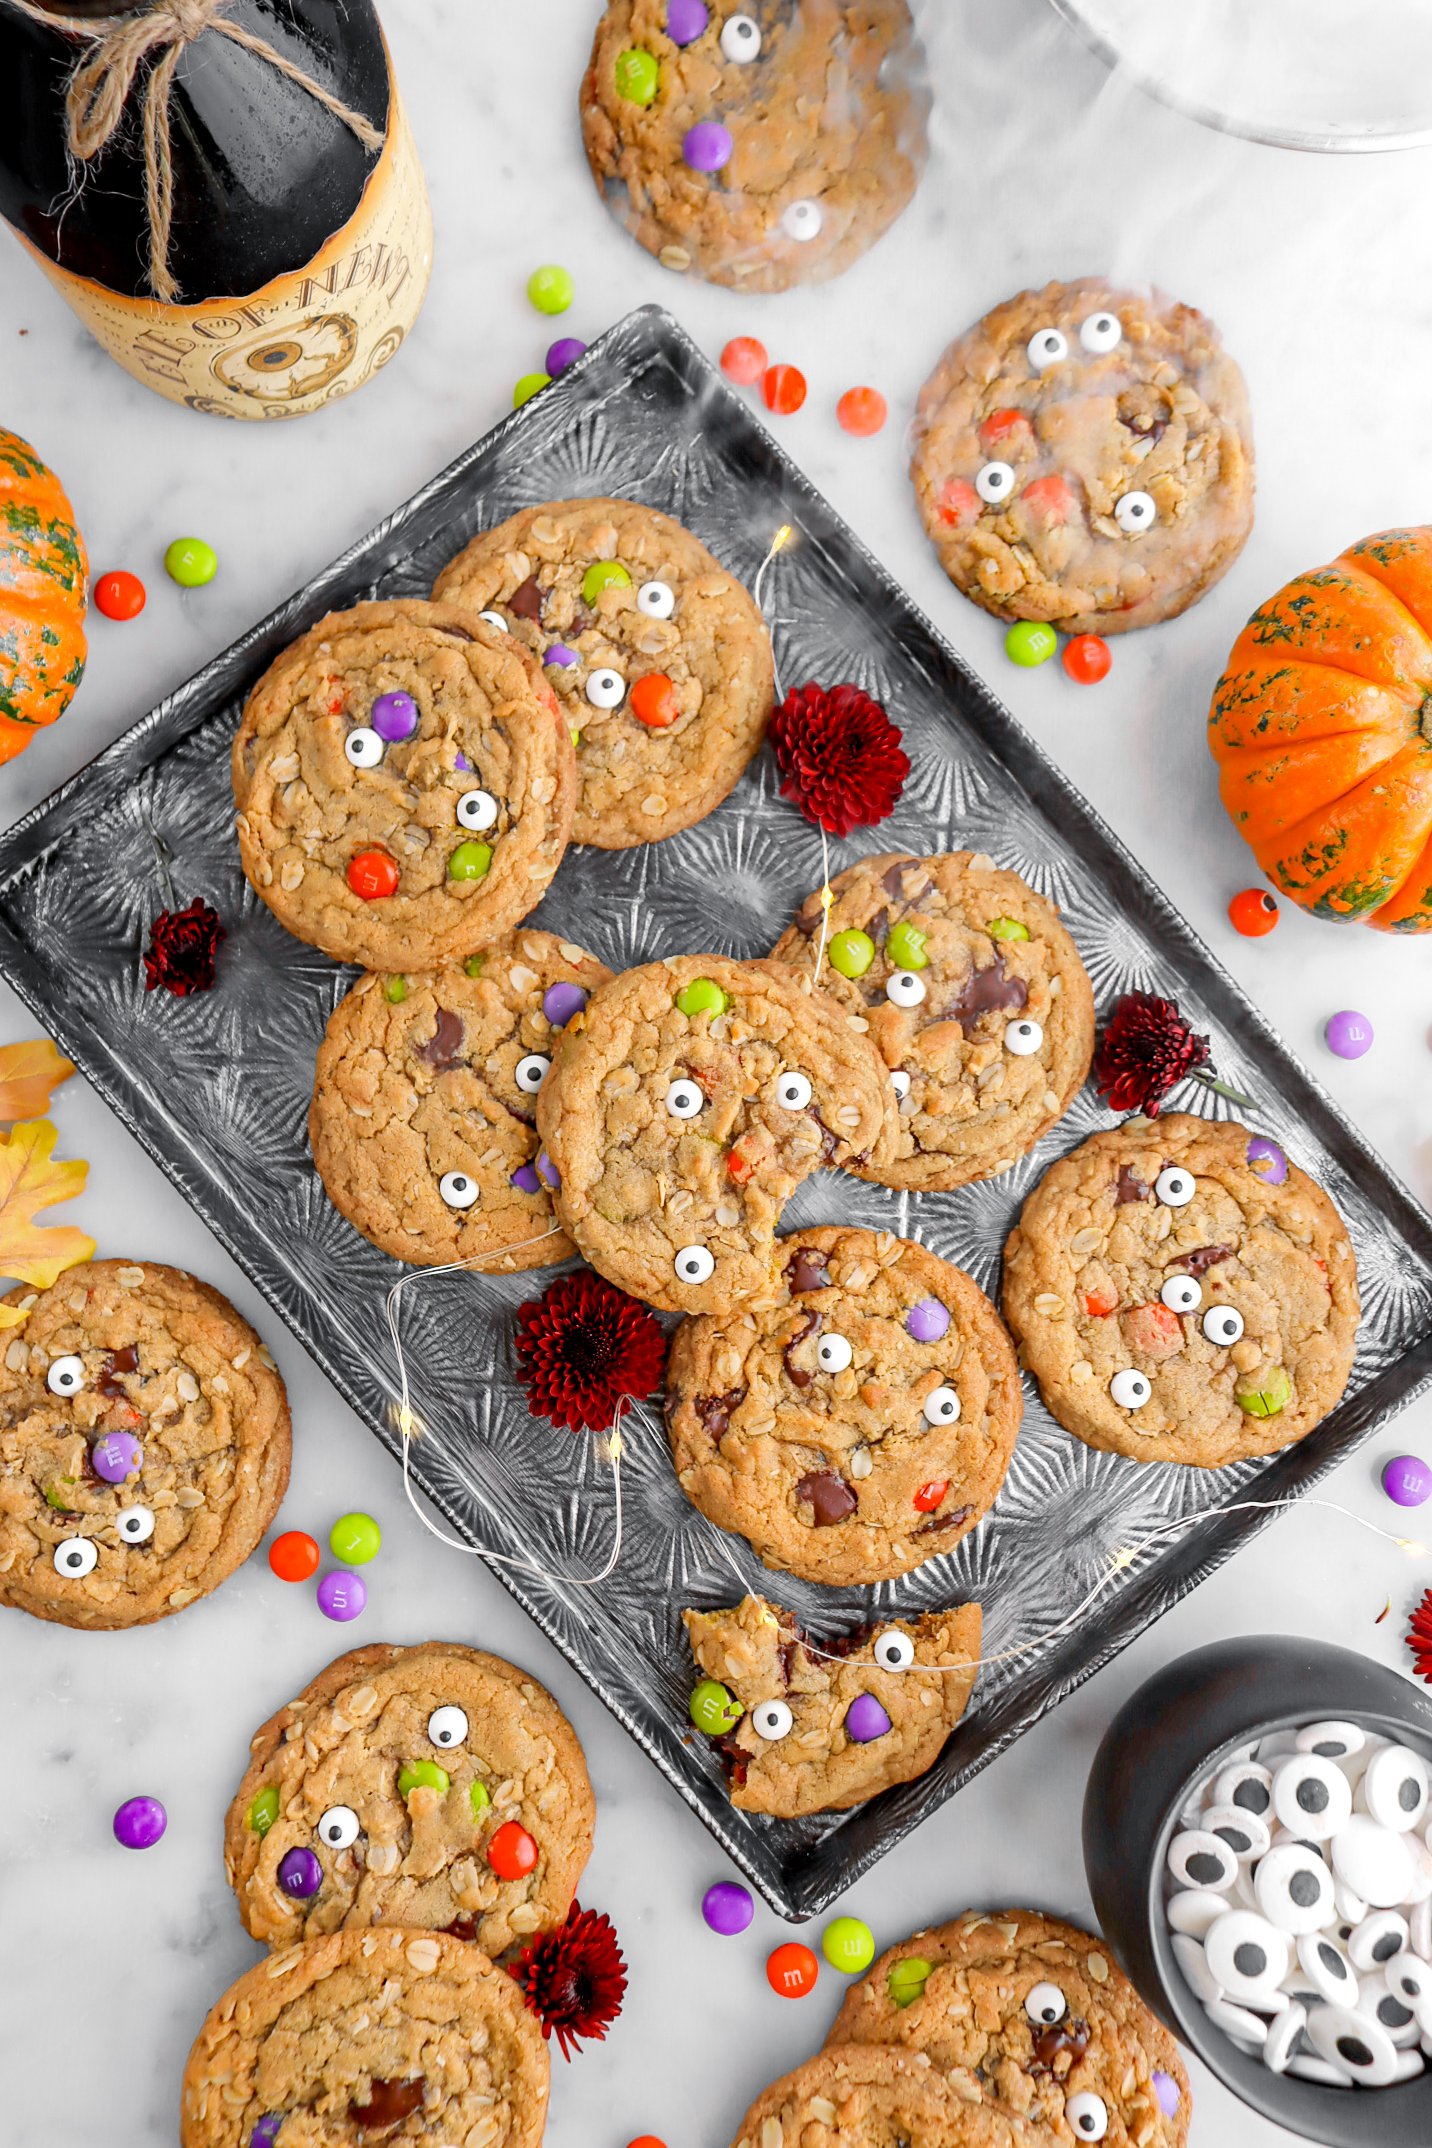
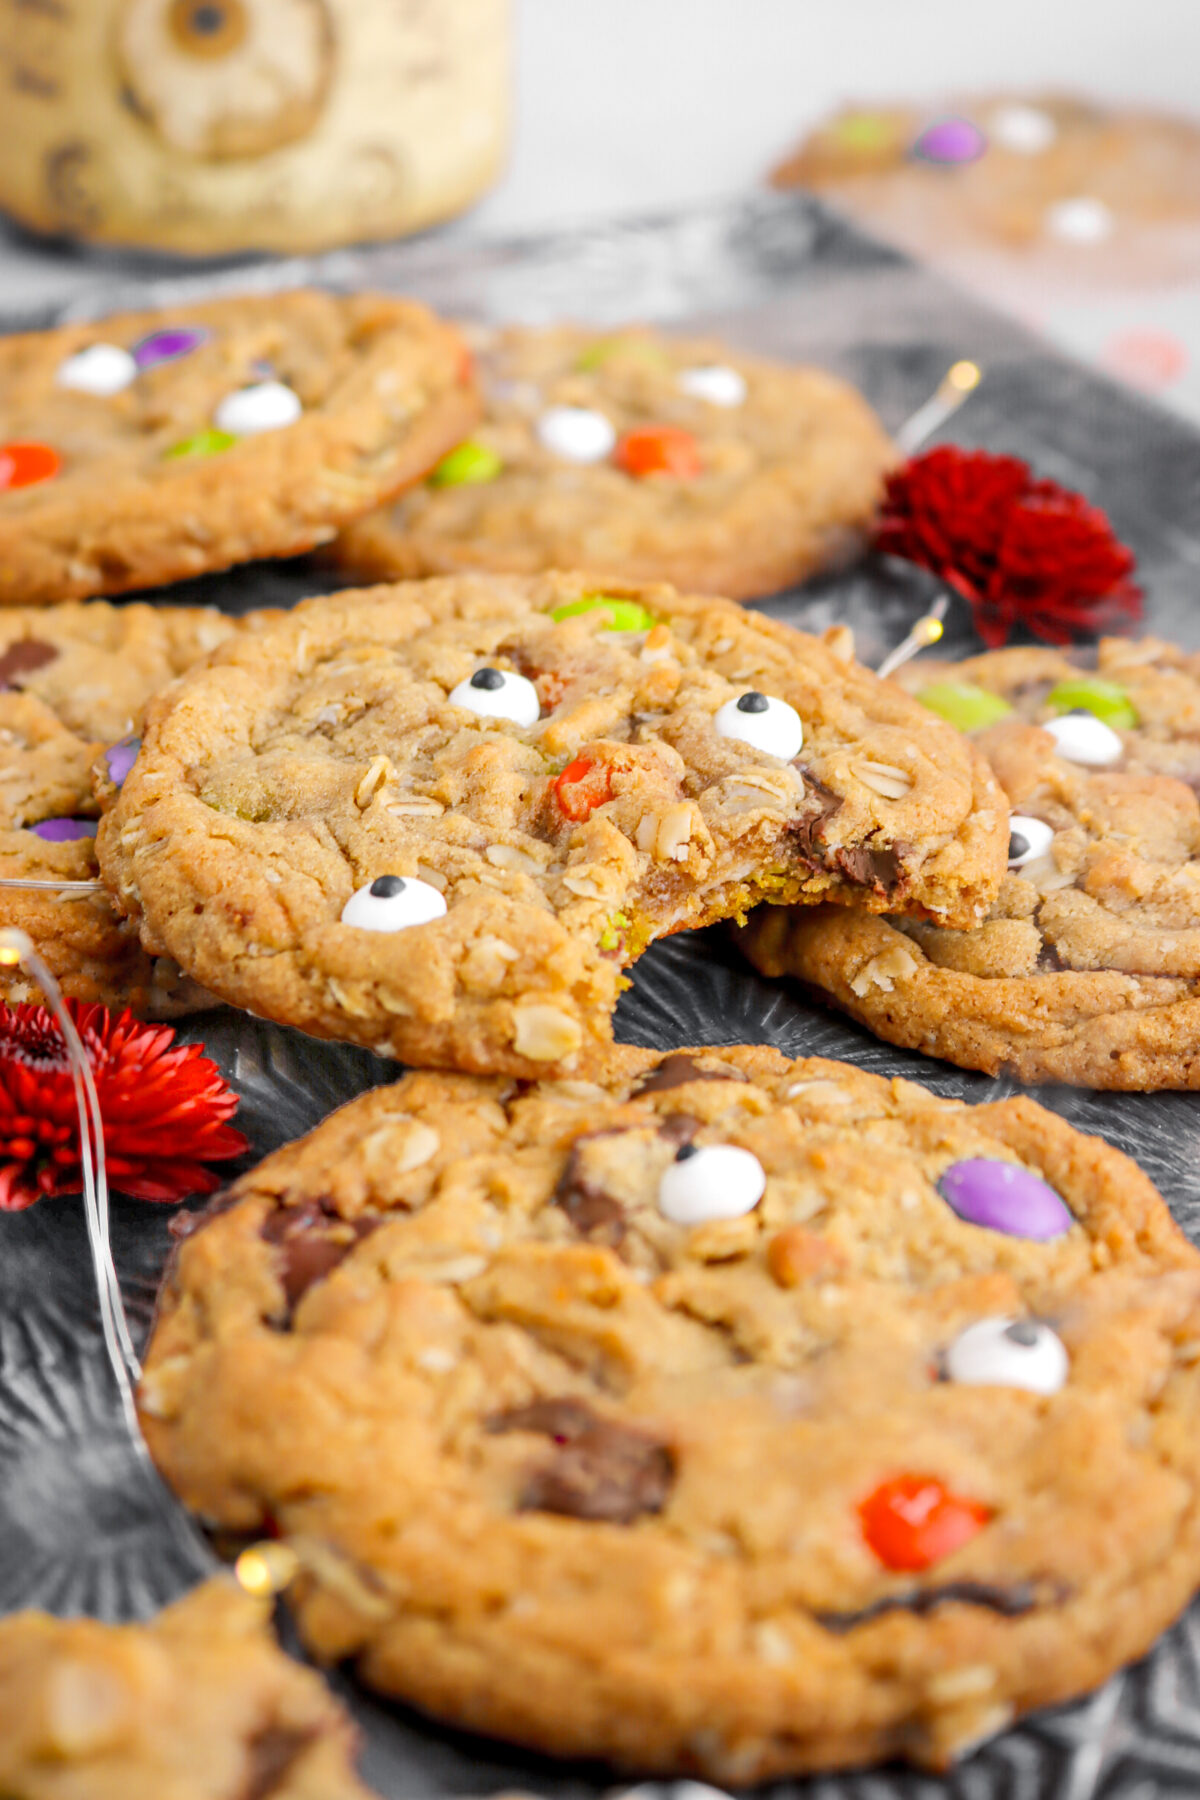
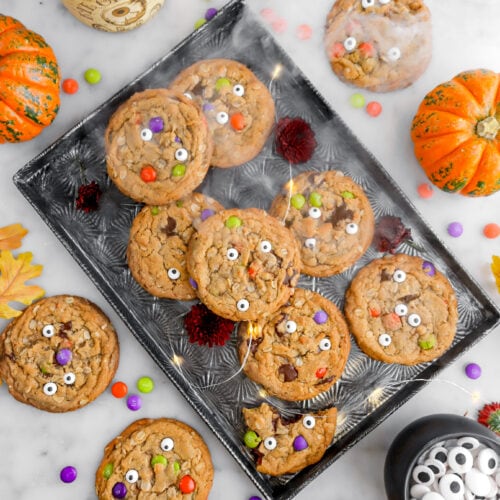
Creep it real this Halloween with these oh-so spooky Halloween Monster Cookies! Every bite is terrifyingly delicious. A soft and chewy brown sugar cookie mixed with creamy peanut butter, oats, chocolate chips, and M&M’s! It’s the perfect combination of flavors and textures. Crispy edges, chewy middles, gooey chocolate chips, and crunchy candy. There’s just SO MUCH to love! Then, right after baking, each cookie is decorated with spooky candy eyes to really give them an almost frighteningly cute look. Truly the perfect cookie to bake for all of your Halloween baking needs.

About The Recipe
The countdown to Halloween has begun! It’s finally time to get the cobwebs and cauldrons out and embrace the very spooky season.
Ever since I was little, I have always loved Halloween. Dressing up, trick-or-treating, the parties, the candy…every aspect of the season, I adored.
So, I say it’s time to enjoy some spooky stories with mugs of cider as we marathon Halloweentown, Haunted Mansion, Twitches, and pretty much every other Disney Halloween movie.
Which brings us to today’s recipe. Funnily enough, monster cookies have been one of our most requested recipes. Though, between me and you, they are not something my mom and I had ever heard of!
It took a little bit of googling to figure out what they were, but once we did…we fell in love with idea!
Since they were called monster cookies, my mom and I thought they would be the perfect recipe to share for Halloween!
Though, the name wasn’t quite enough. My mom and I bought some candy eyes and Halloween M&M’s to really give these cookies a spooky, but oh-so cute vibe!

But, I will admit, these cookies took quite a bit of testing to get just right. With the addition of oats and peanut butter, it made these cookies stiff and dry. Almost cake-like in texture.
We were not fans at ALL. So, we went back to the drawing board and tweaked the recipe. Added more sugar, a dash more butter, changed amounts of peanut butter and oats…
We finally got a perfect cookie!
Every bite is soft, chewy, peanutty, extra sweet, and just melt in your mouth delicious.
They are truly the perfect cookie to bake up this Halloween!
What Are Monster Cookies?
Thick and chewy, monster cookies are what we like to call…kitchen sink cookies! A soft peanut butter cookie, loaded with oats, chocolate chips, and M&Ms.
Our super easy recipe yields in chewy, crispy edged, perfectly thick cookie that is sure to have everyone asking for more!
Reasons You Will Love These Monster Cookies
- Made in one bowl with no electric mixers needed!
- Comes together in just minutes.
- Nutty, chocolate-y, and SO. GOOD.
- The perfect cookie for Halloween!
- Can be made ahead of time.
- Ready to eat in less than an hour.

Equipment Needed
- Mixing Bowl
- Whisk
- Rubber Spatula
- Sheet Pans
- Large Cookie Scoop
Ingredients
Full ingredient amounts and instructions can be found in the recipe card at the bottom of the post.
- Salted Butter – For this recipe, we opted to use salted butter to keep these cookies from being too sweet, while also enhancing their flavor.
- Brown Sugar – By using all brown sugar, it creates an extra delicious chewy cookie.
- Creamy Peanut Butter – This is what adds the peanutty flavor to every bite.
- Large Eggs – Eggs act as a binder, as well as contributing to the structure, flavor, texture, and even the color!
- Vanilla Extract – Adds a depth of flavor to every bite.
- All-Purpose Flour – Regular unbleached all-purpose flour gives these cookies the perfect structure and texture.
- Rolled Oats – For these cookies, you will need rolled oats (also known as steel cut oats). Do not use instant oatmeal!
- Baking Soda – Not only does baking soda provide just the right amount of rise to these cookies, but it also promotes spread and chewiness!
- Halloween M&Ms – To give these cookies a little more festive flair, we opted to use halloween colored M&Ms!
- Chocolate Chips – We like to use bittersweet chocolate chips in this recipe to keep things from becoming too sweet!
- Candy Eyes – This is optional, but it does add a fun decorative element to these cookies.

How To Make Halloween Monster Cookies
Step 1: Prepare cookie dough
In a large bowl, whisk butter and sugar together.

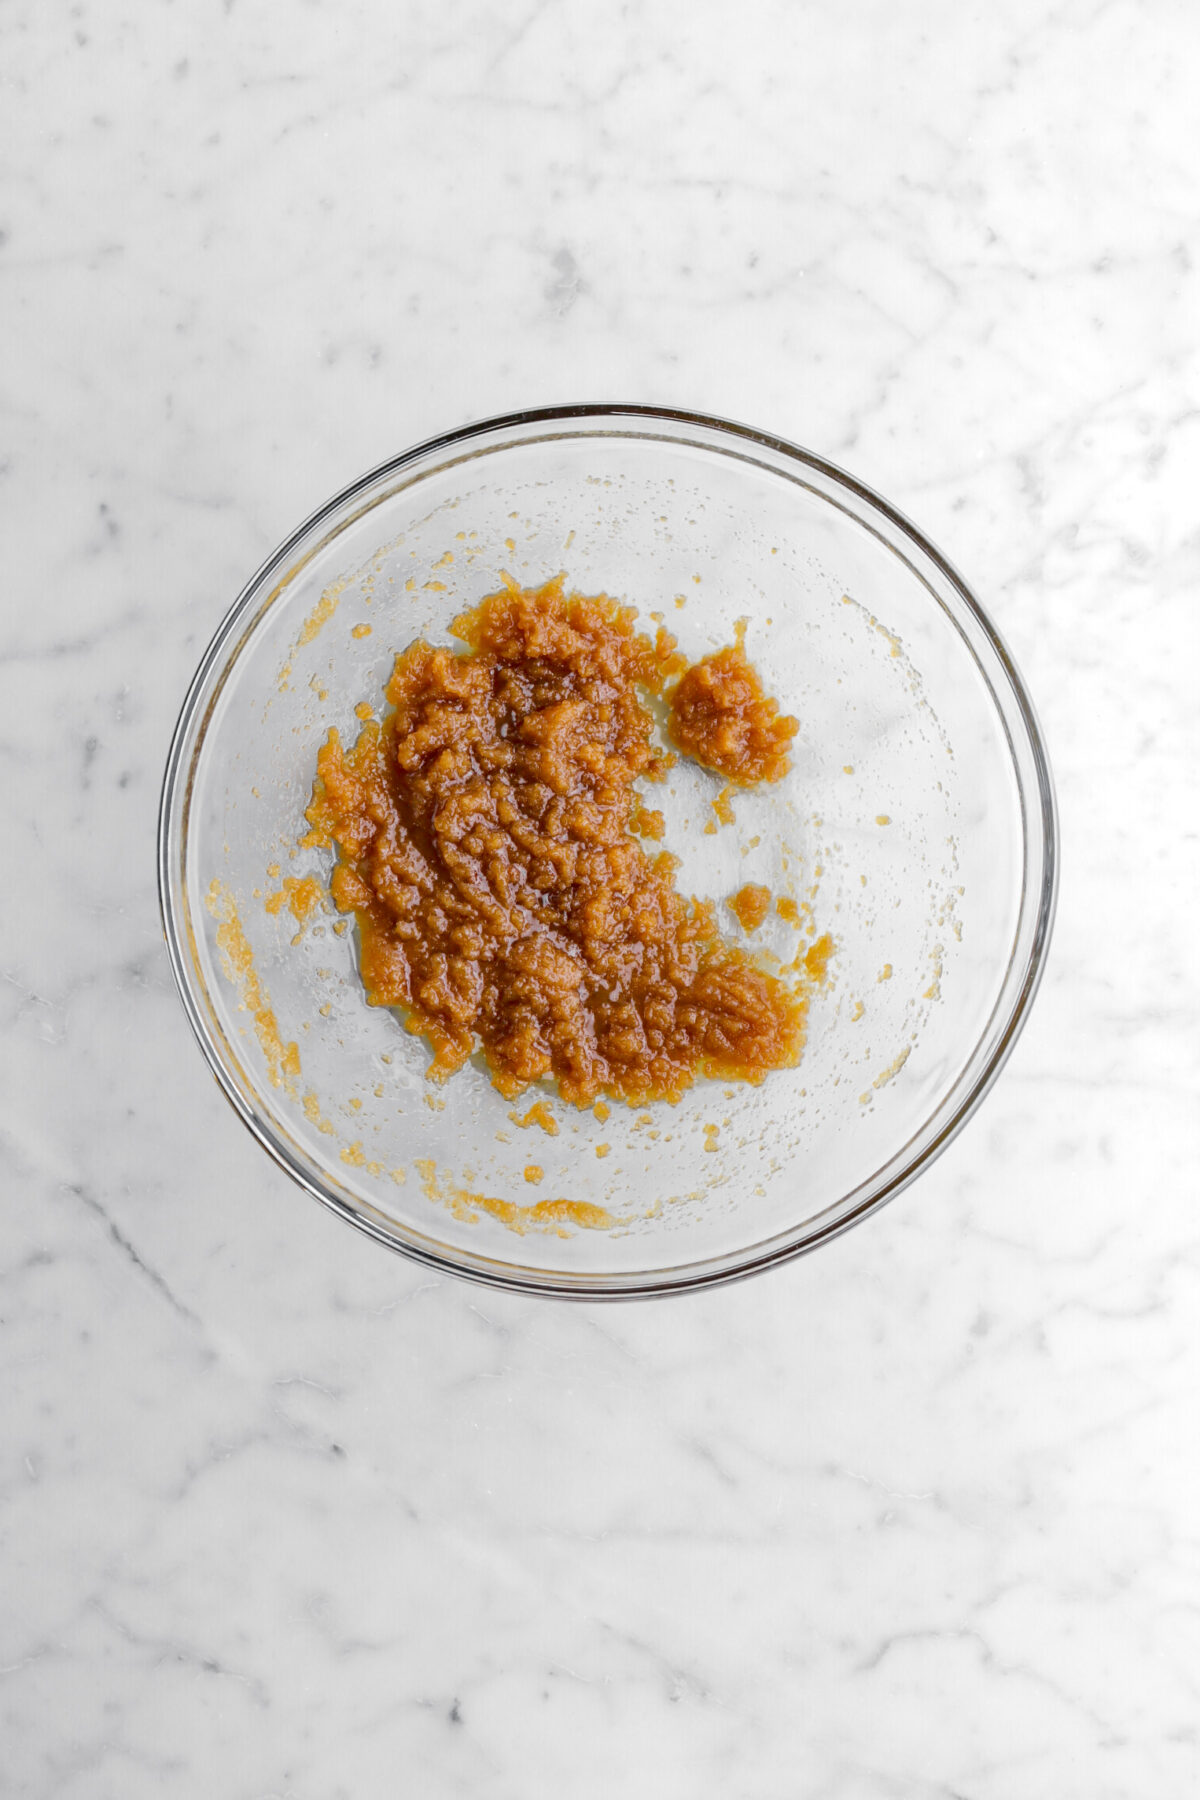
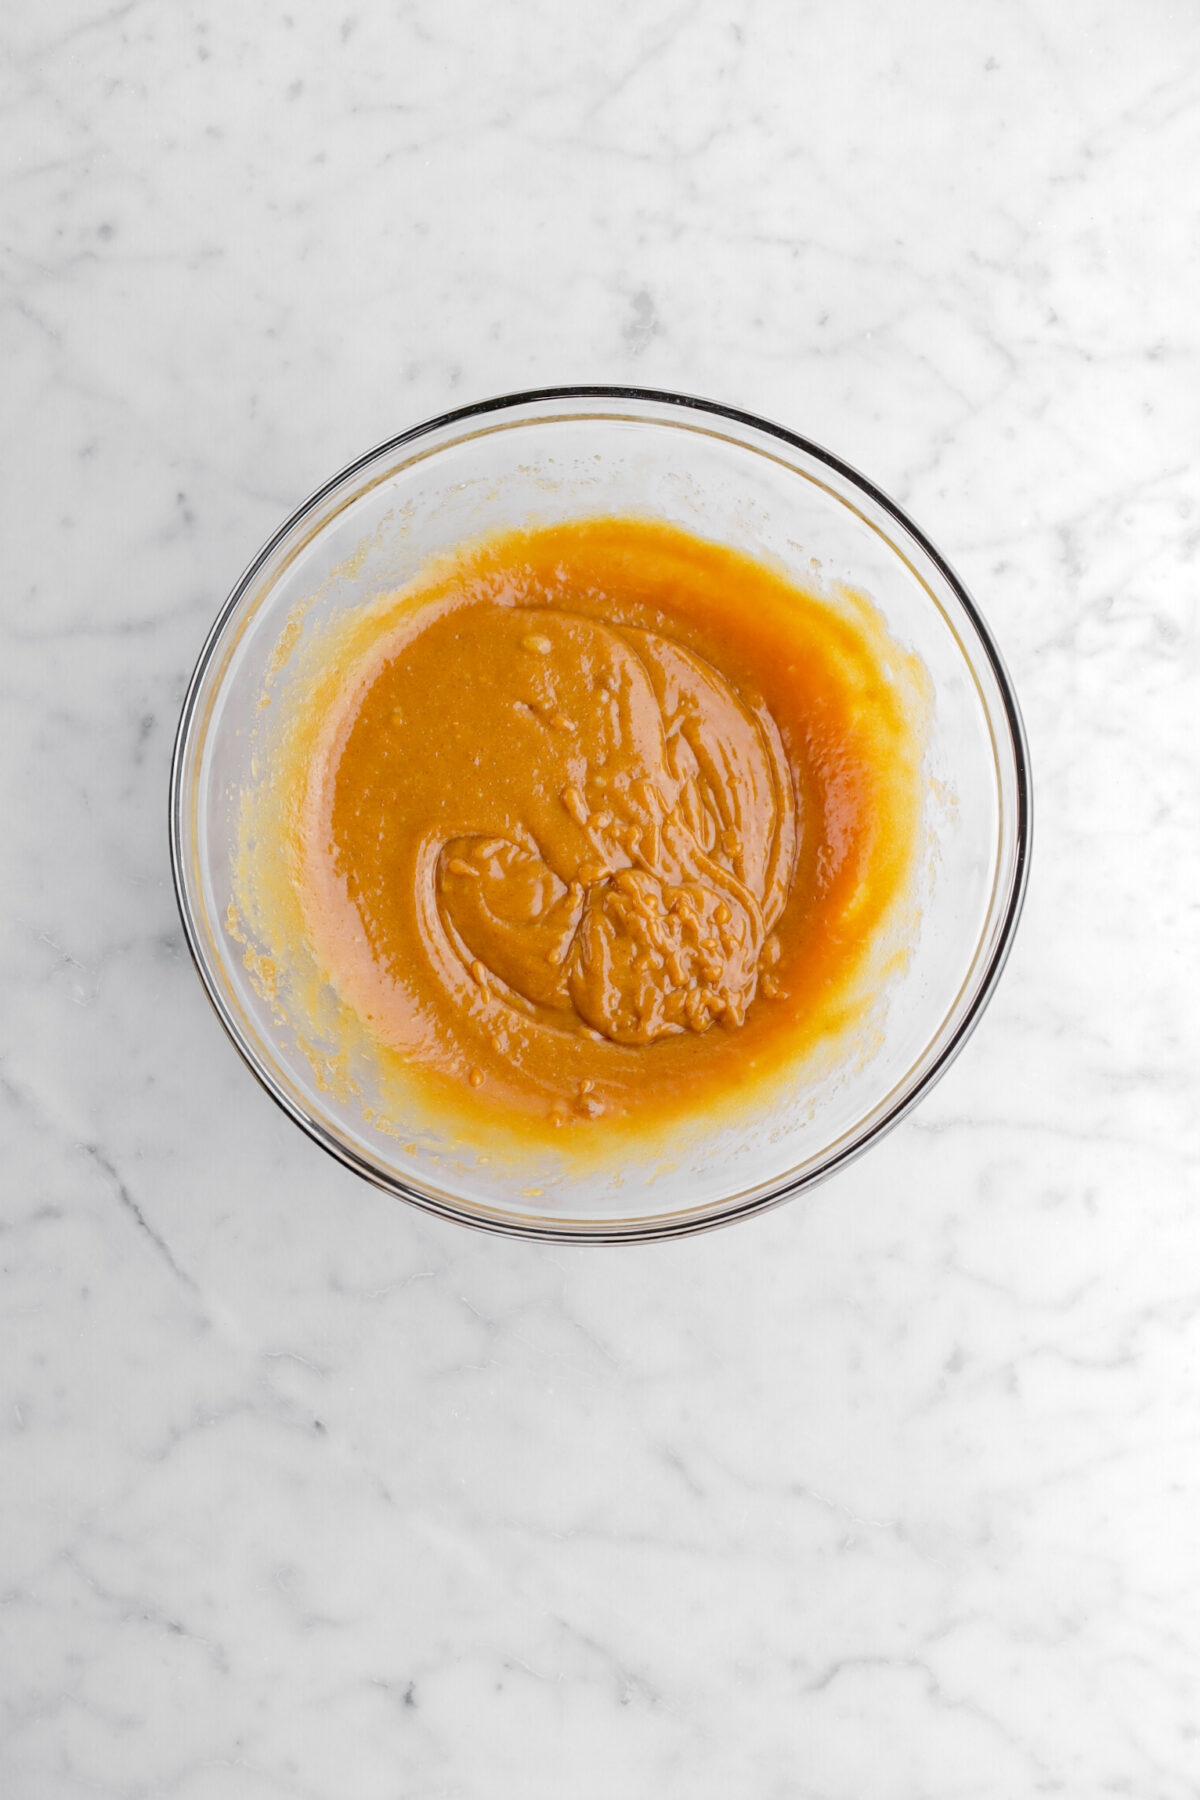
Add peanut butter, eggs, and vanilla. Whisk until completely incorporated.

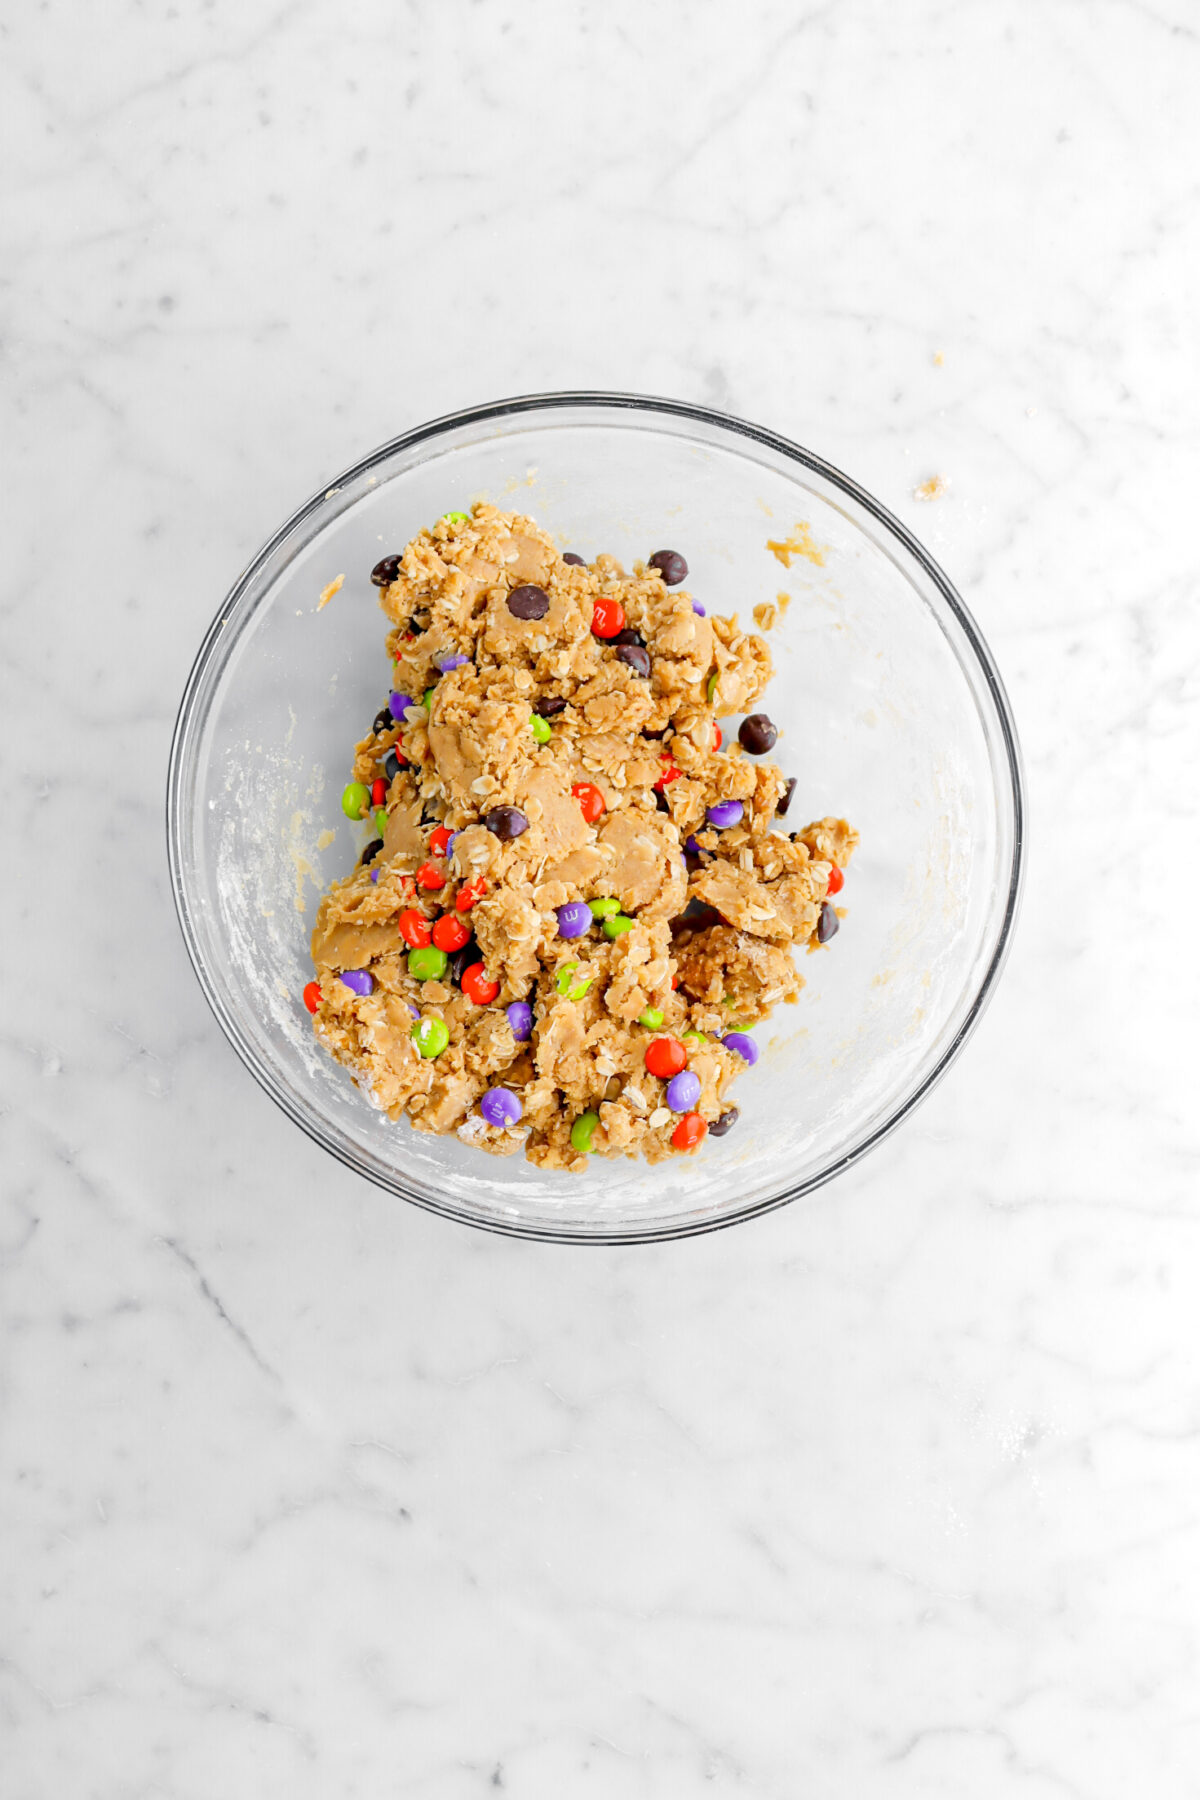
Add flour, oats, and baking soda. Stir until combined.


Fold in m&m’s and chocolate chips.

Step 2: Bake
Use a 3 Tablespoon cookie scoop to portion dough onto prepared pans. Bake for 12-14 minutes, until just staring to color around the edges.


Remove from oven and add candy eyes, if using.

FAQ’s and Troubleshooting
Absolutely! If you would like to add a little more crunch to these cookies, using crunchy peanut butter would be a delicious addition.
Of course! Once the cookie dough is mixed and swirled, place each cookie dough ball on a lined sheet pan. From there, freeze until hardened. Once the cookie dough balls are frozen solid, you can place in a freezer safe zip-top bag and freeze for 1-2 months.
This could be caused by two things! Either the cookies were over-baked or the flour was over-measured. Both of these can cause your cookies can cause your cookies to be dry.
If the cookies didn’t spread while baking, this is due to too much flour being added to the cookie dough. Be sure to not add too much flour!
These cookies are, what I like to call, super spreaders. They are made with brown sugar and baking soda, which all leads to a chewier, softer cookie…but that also means they spread A LOT! Though, no worries! Below, I’ve listed how to make these cookies go from drab to fab with just a few simple steps.
How To Achieve A Perfectly Round Cookie
The first step is to always use a cookie scoop! It helps get each cookie the exact same size, but also, there is a little trick that we almost always use when it comes cookies.
Using a biscuit cutter that’s larger than the cookie, we bump the cookies while they’re still very hot to fit inside the cutter and circle around them to create the perfect round shape!
What To Make With Leftover Cookies
If you have any leftover cookies, there are a few delicious ways to use them up in a few and fun dessert!
- Make ice cream sandwiches!
- Chop them and fold them into a brownie batter.
- Crumble them and put them in a milkshake.
- Decorate a cake with them!
How To Store
IMO, I cannot resist these cookies as soon as they come out of the oven! Though, if you have any leftover, these cookies can be stored in an airtight container or zip-top bag and kept in the fridge for 5 – 7 days. If desired, you can also freeze them in a freezer safe bag for up to 3 months!
You can also make these cookies all the way to step 8, then freeze the cookie dough on a lined sheet pan! Once the cookie dough is completely frozen, place them in a zip top bag and keep in the freezer for up to 3 months.
Substitutions
- Crunchy peanut butter can be used instead of creamy, if desired.
- Almost any nut butter you like can be used instead of peanut butter.
- This recipe can be made gluten-free if you use your favorite 1:1 gluten-free all purpose flour.
- These cookies can also be made vegan if plant-based butter, your favorite vegan egg, and your favorite vegan chocolate candies, as well as plant based chocolate chips.
- You can also make this recipe dairy-free by using a plant-based/dairy-free butter.
Looking for more recipes like this? Here are a few you may like:


Expert Tips
- Be careful to not over-mix the cookie dough! Just stir the flour in until there are no more pockets of flour.
- It’s best to use light colored sheet pans for these cookies.
- Don’t forget to line your baking sheet.
- It’s best to use a cookie scoop to ensure all cookies are the same size and they don’t get over-mixed.
- The cookie dough can be frozen and baked at a later date.
- Do not over bake these cookies! When in-doubt, take them out. These cookies are best when they are just barely baked. It provides the perfect soft and chewy texture. They should just barely begin to brown around the edges.
- These cookies spread A LOT! It’s best to place 6 cookies per pan and then use a large biscuit cutter to reshape your cookies.
- If you choose to add the candy eyes, make sure to add them after baking while the cookies are still hot!
When you make these Spooky Halloween Monster Cookies, leave a comment down below and/or give this recipe a rating! We love hearing from you and answering any questions you might have! Also, be sure to tag us on social media and hashtag it #BakersTable.
Spooky Halloween Monster Cookies
Ingredients
- ¾ cup salted butter, melted
- 1¼ cups brown sugar, firmly packed
- ½ cup creamy peanut butter
- 2 large eggs, room temperature
- 1¼ teaspoons vanilla extract
- 1¾ cups all purpose flour*
- 1 cup rolled oats
- ⅔ teaspoon baking soda
- ½ cup Halloween m&m’s
- ½ cup bittersweet or semi-sweet chocolate chips
- candy eyes, optional (after baking)
Instructions
- Heat oven to 350℉.
- Line 3 sheet pans with parchment paper. Set aside.
- In a large bowl, whisk butter and sugar together.
- Add peanut butter, eggs, and vanilla.
- Whisk until completely incorporated.
- Add flour, oats, and baking soda.
- Stir until combined.
- Fold in m&m's and chocolate chips.
- Use a 3 Tablespoon cookie scoop to portion dough onto prepared pans.
- Bake for 12-14 minutes, until just staring to color around the edges.
- Remove from oven and add candy eyes, if using.
Notes + Tips!
- Crunchy peanut butter can be used instead of creamy, if desired.
- Almost any nut butter you like can be used instead of peanut butter.
- This recipe can be made gluten-free if you use your favorite 1:1 gluten-free all purpose flour.
- These cookies can also be made vegan if plant-based butter, your favorite vegan egg, and your favorite vegan chocolate candies, as well as plant based chocolate chips.
- You can also make this recipe dairy-free by using a plant-based/dairy-free butter.
- Be careful to not over-mix the cookie dough! Just stir the flour in until there are no more pockets of flour.
- It’s best to use light colored sheet pans for these cookies.
- Don’t forget to line your baking sheet.
- It’s best to use a cookie scoop to ensure all cookies are the same size and they don’t get over-mixed.
- The cookie dough can be frozen and baked at a later date.
- Do not over bake these cookies! When in-doubt, take them out. These cookies are best when they are just barely baked. It provides the perfect soft and chewy texture. They should just barely begin to brown around the edges.
- These cookies spread A LOT! It’s best to place 6 cookies per pan and then use a large biscuit cutter to reshape your cookies.
- If you choose to add the candy eyes, make sure to add them after baking while the cookies are still hot!
Tools You May Need (affiliate links)
– Still Hungry? –
Here are a few recipes may like!


