Homemade Pita Bread
This post may contain affiliate links, please visit our privacy policy for details.
Easy, fun to make, and oh so delicious. This Homemade Pita Bread is sure to be your new favorite bread for sandwiches or even snacking! Made with only five super simple ingredients, it is naturally dairy-free, vegan, and takes only a few hours to make!
About The Recipe
My mom is an avid bread baker. She created this Pita Bread recipe about 10 years ago, and it’s been a favorite ever since.
Not only is it quick to prepare, but it’s also a lot of fun to bake! We usually use a hot pizza stone for the best results, but you can also bake them in a hot skillet if you prefer.
With summer in full swing, pita bread makes for an ideal base for quick, customizable sandwiches. Fill them with your favorite toppings or try our Chicken Caprese Sandwich for a delicious treat.
Pitas are also fantastic for dipping in hummus, serving alongside any meal, or adding to a Charcuterie Board. And if you’re feeling creative, use them to make individual pizzas!
Pitas truly are the ultimate flatbread!
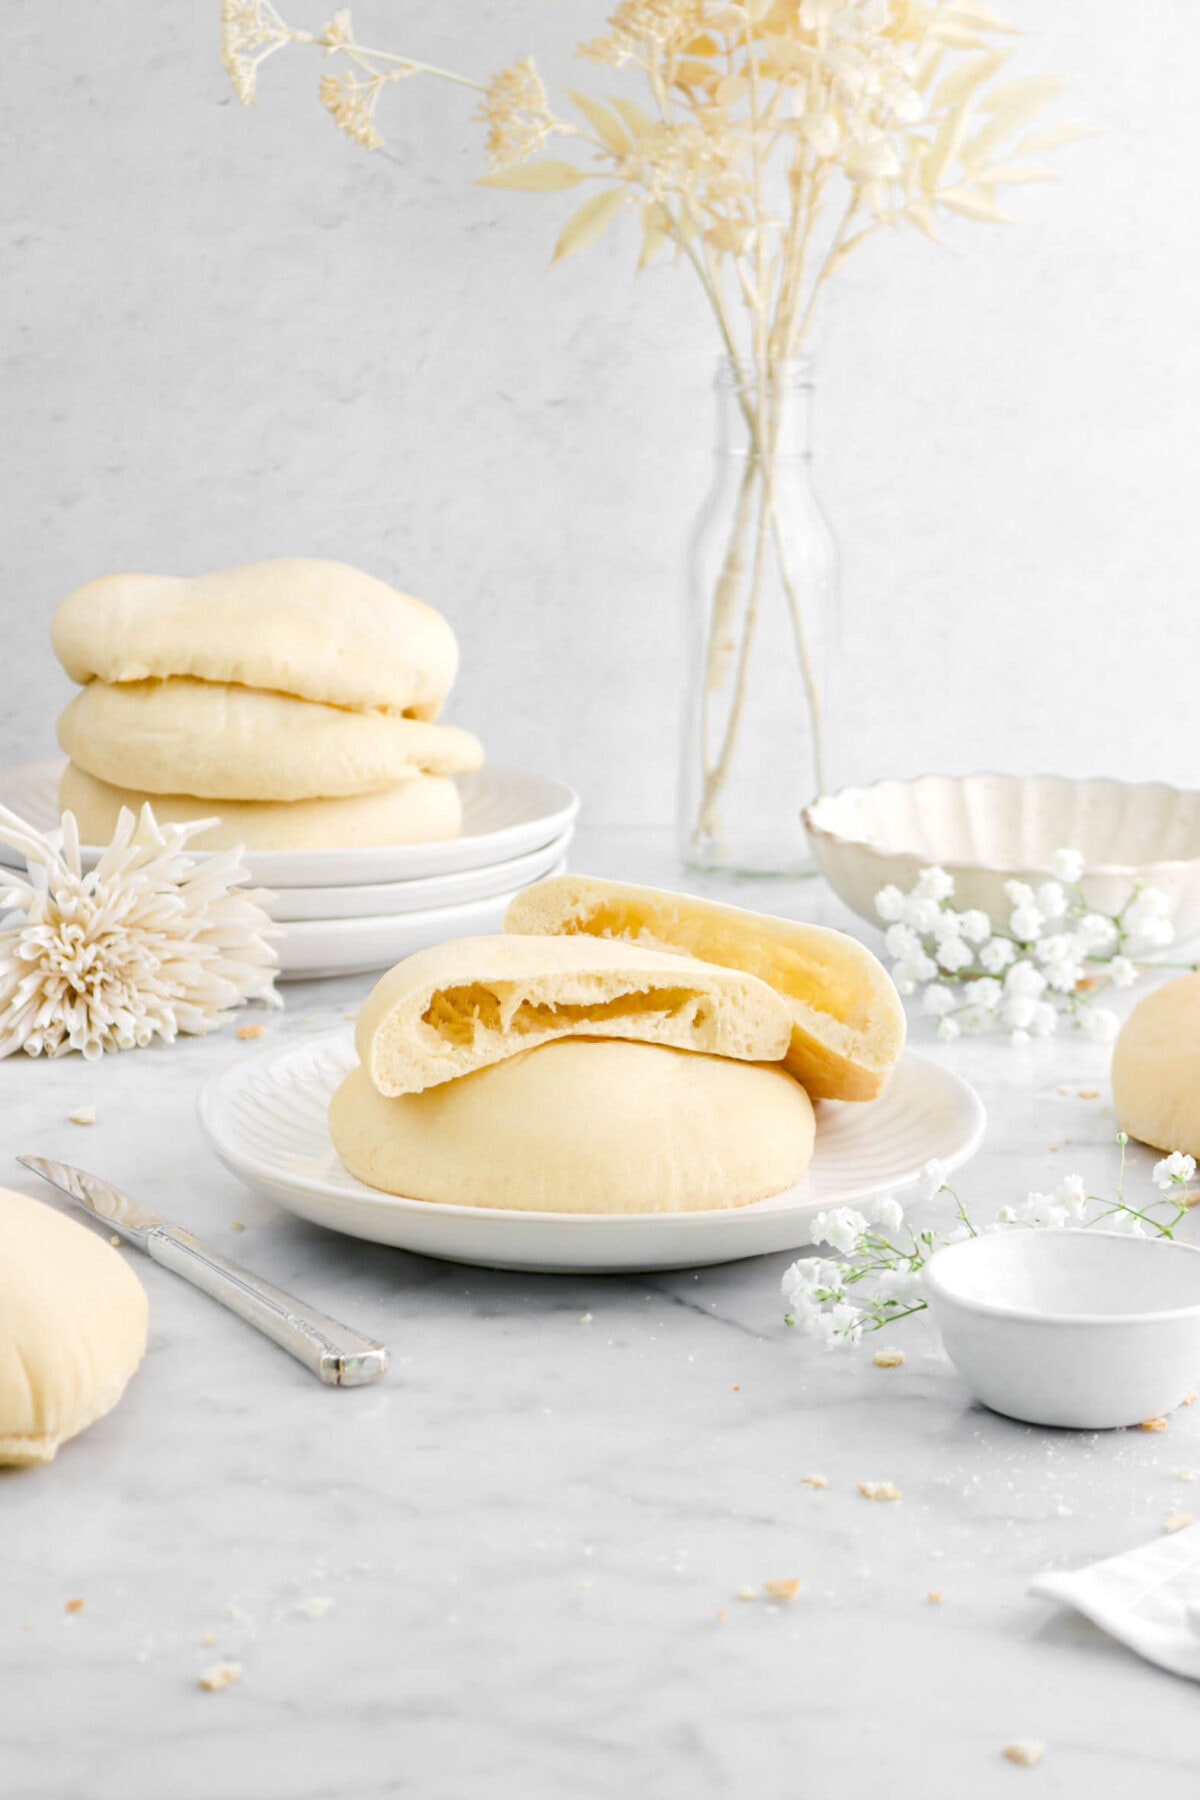
What is Pita Bread?
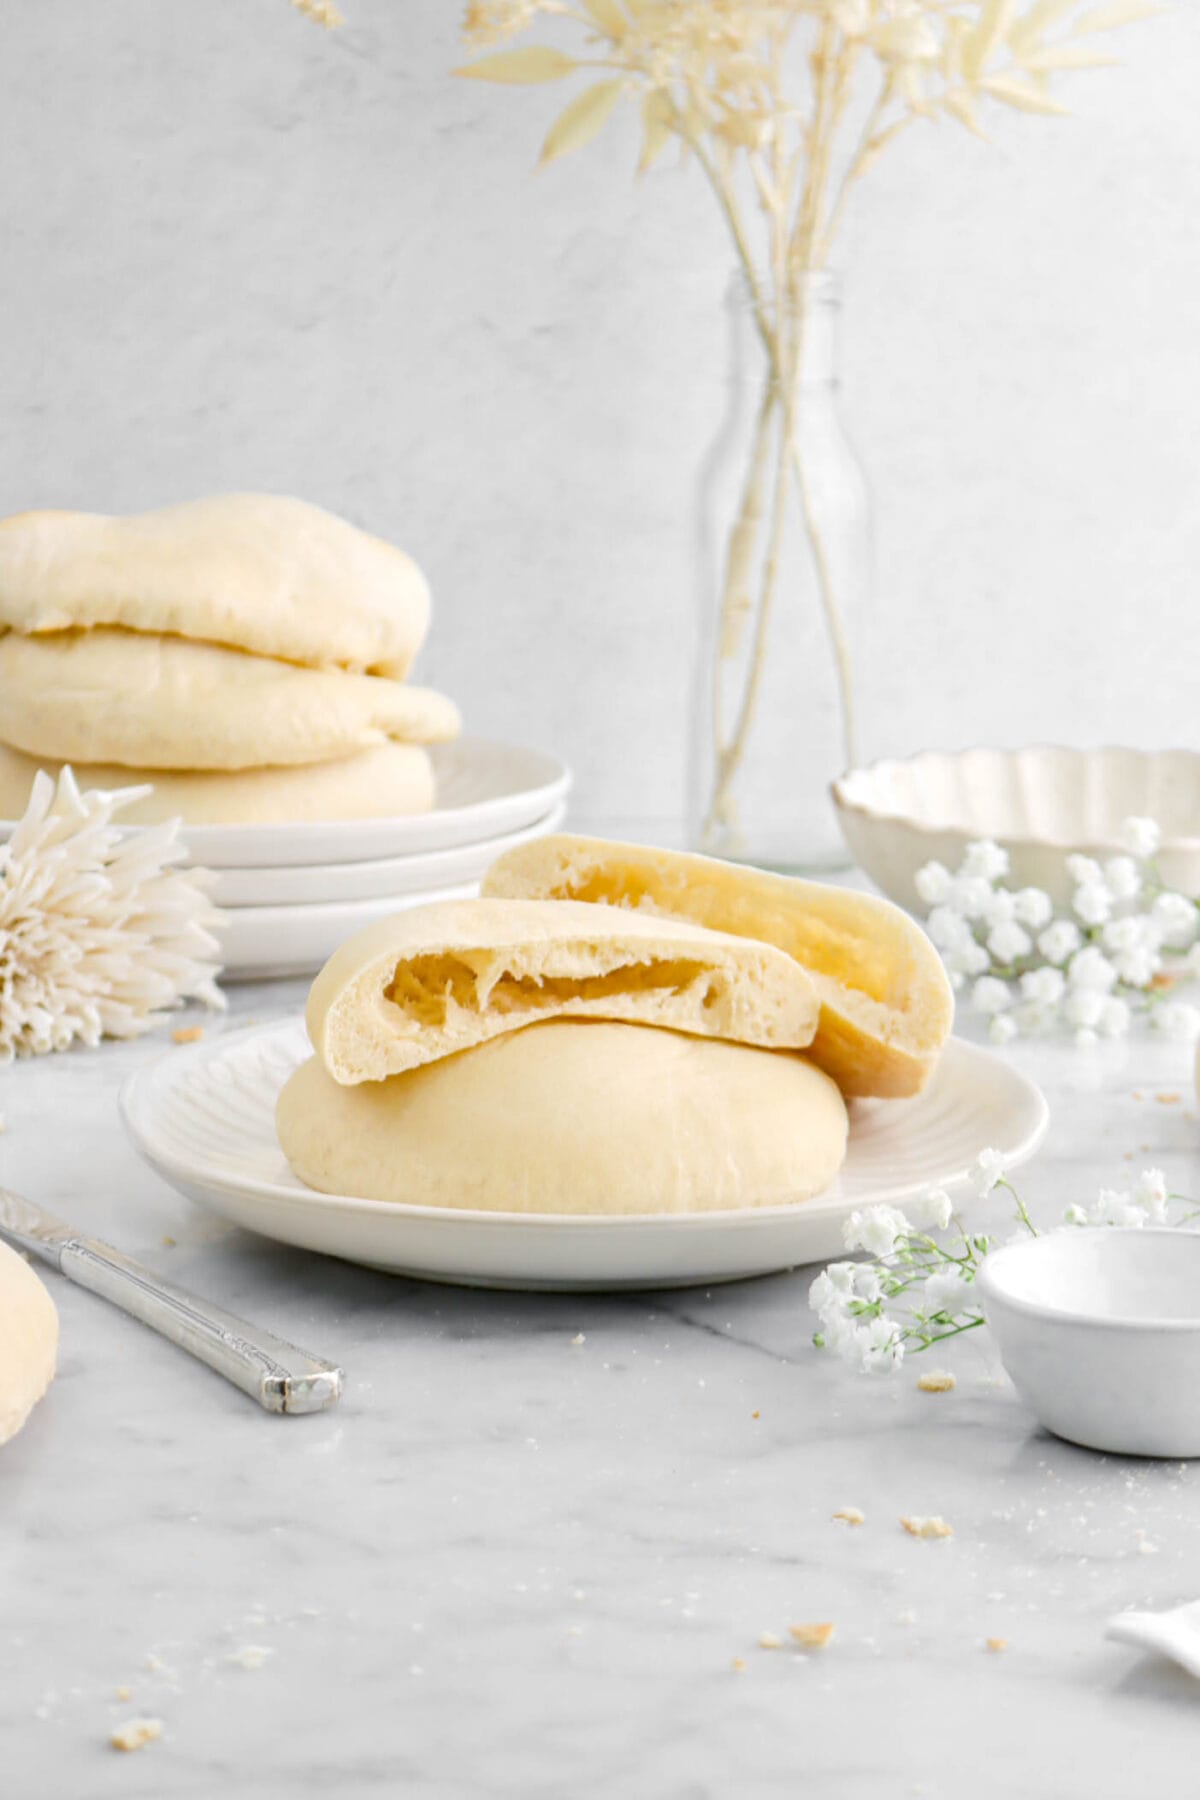
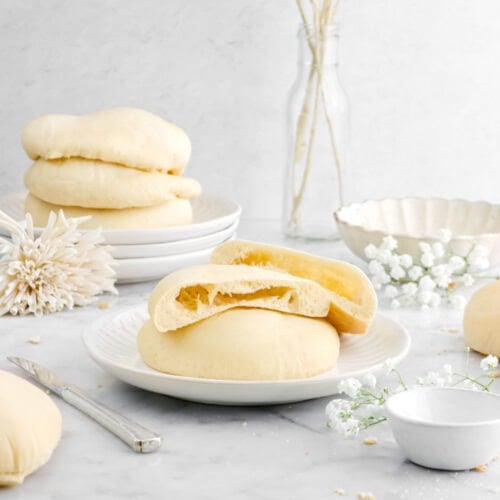
Pita (or pitta) bread is a leavened bread traditionally made from flour, water, and yeast. Cooked on a hot stone until puffy and served alongside many delicious dishes! We made our pita with the traditional ingredients, but with the addition of olive oil and salt to give it a little more flavor!

Reasons You Will Love This Pita Bread
- It’s super simple to make!
- Requires minimal ingredients.
- Ready to eat in 2-3 hours.
- Perfect for sandwiches, dipping in soups and stews, or even hummus!
- Naturally vegan and dairy-free.
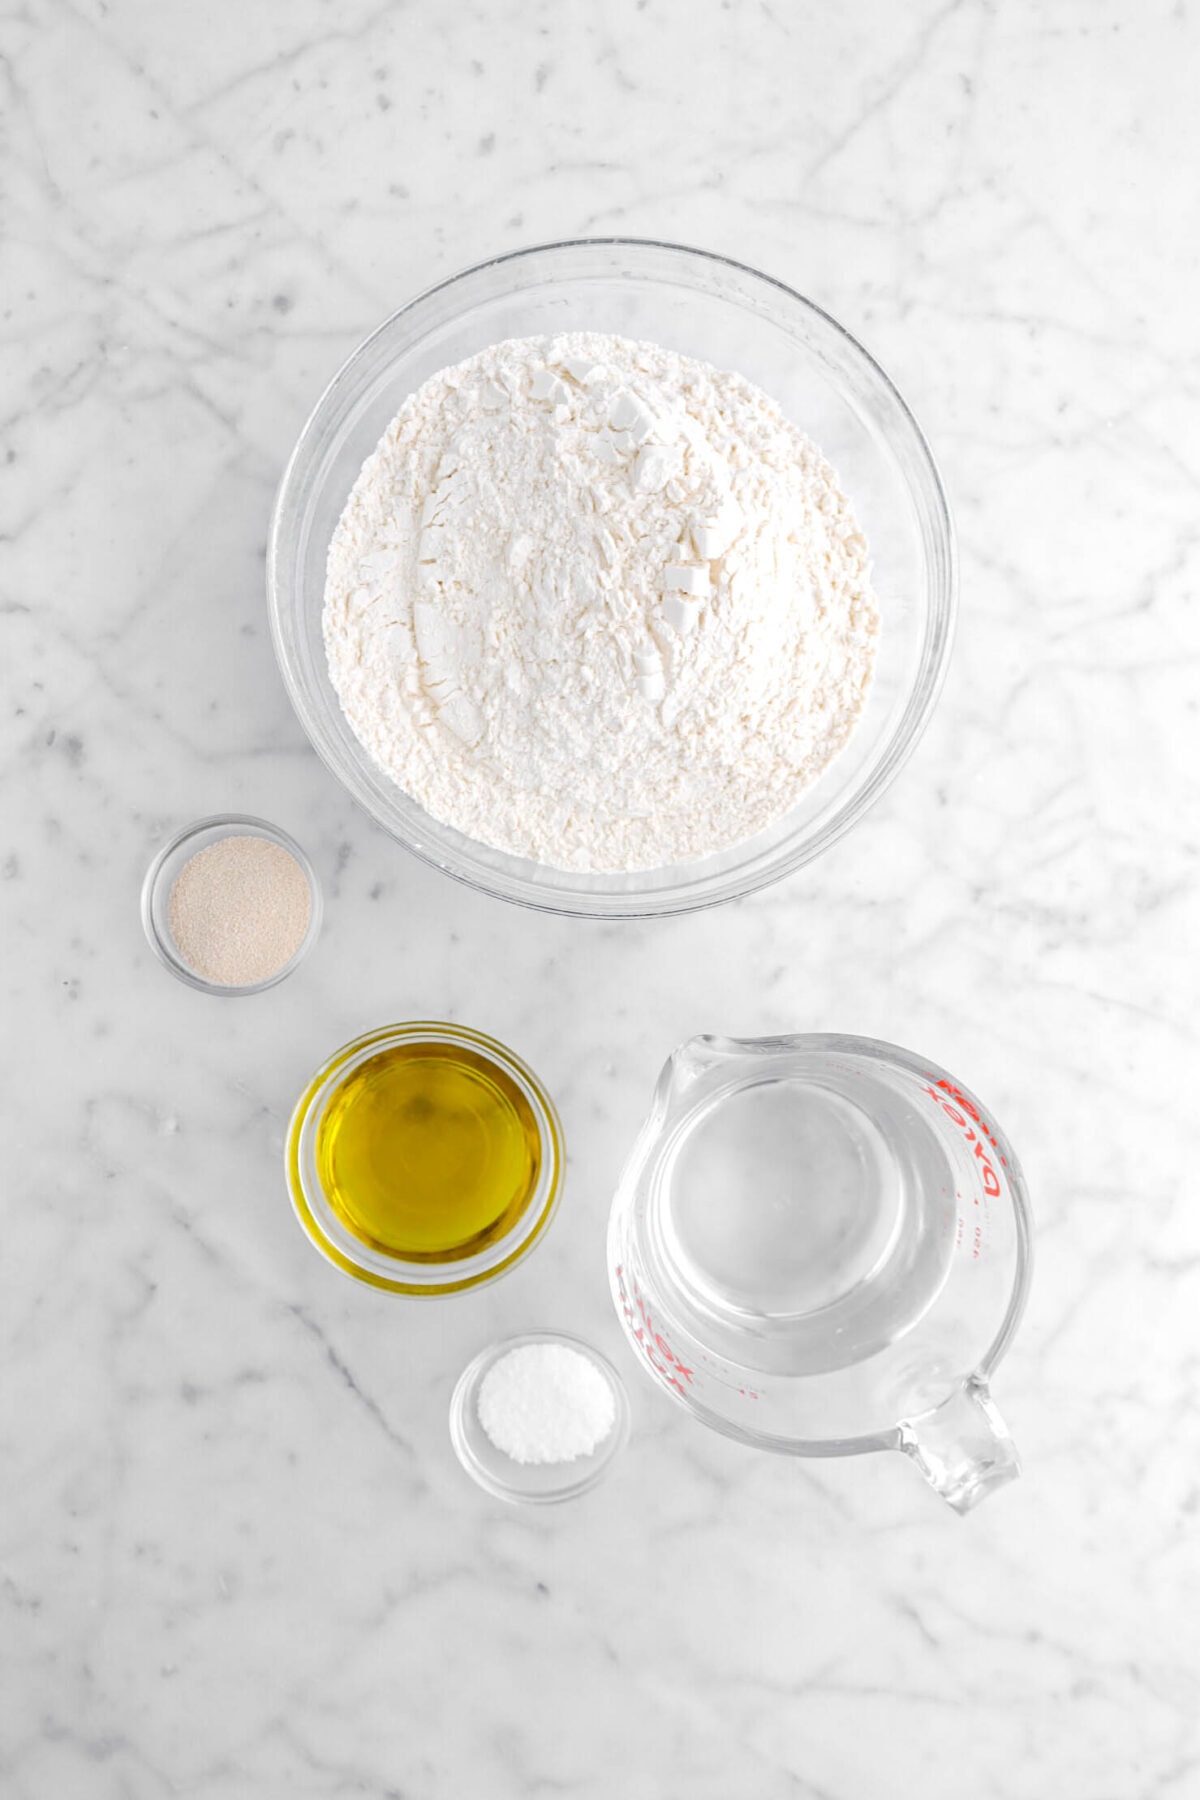
Ingredients
(Full ingredient amounts and instructions can be found in the recipe card at the bottom of the post)
- Bread Flour
- Instant Yeast
- Water
- Olive Oil
- Kosher Salt
How To Make Pita Bread
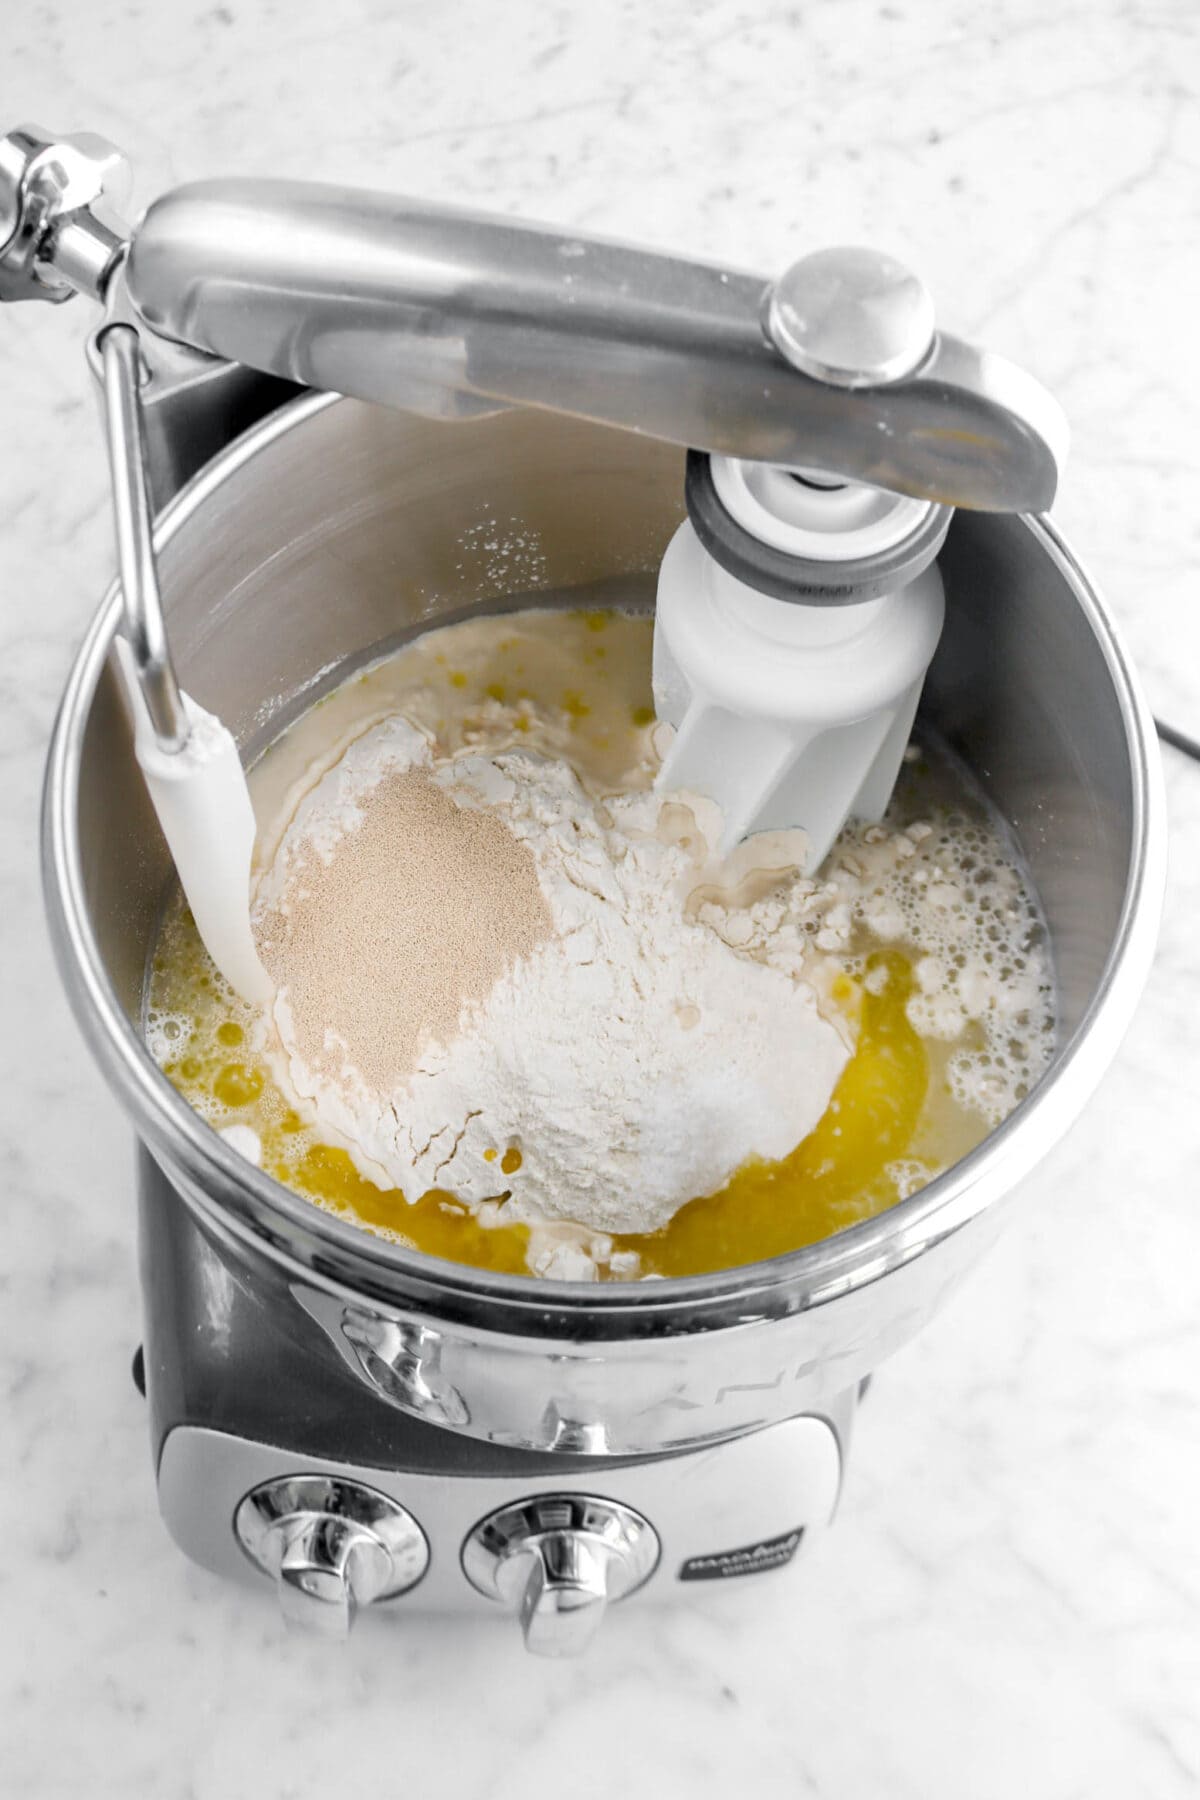
Step 1: Make the dough and proof
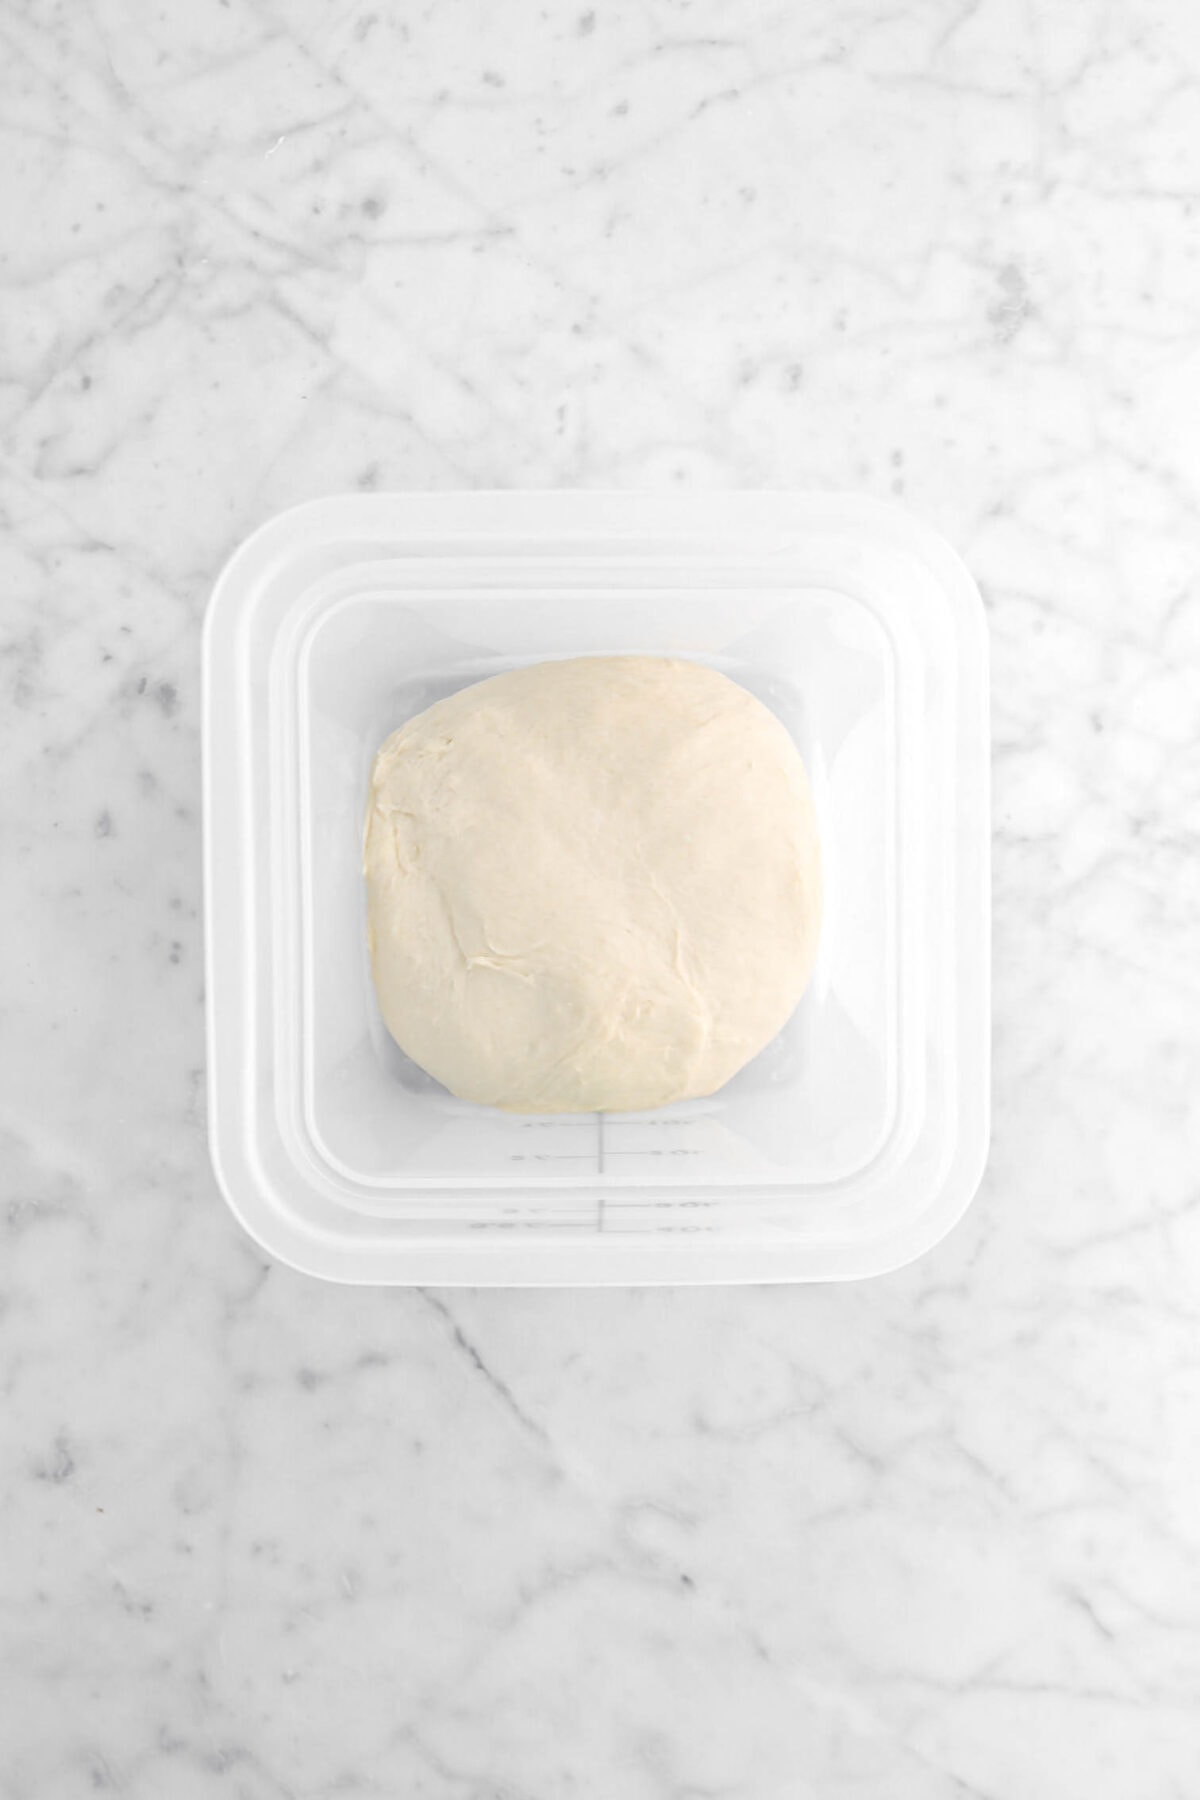
In the bowl of a stand mixer fitted with the dough hook, combine all ingredients. Mix on low speed 1 minute. Increase speed to medium. Knead for an additional 10 minutes, or until the dough is smooth and elastic.

Place in a clean, covered container. Allow to rise until doubled in bulk, about 90 minutes.

Step 2: Divide
Turn dough out onto a clean surface. Divide into ten equal pieces. Round each piece. Cover and allow to rest for 20 minutes.


Step 3: Roll out
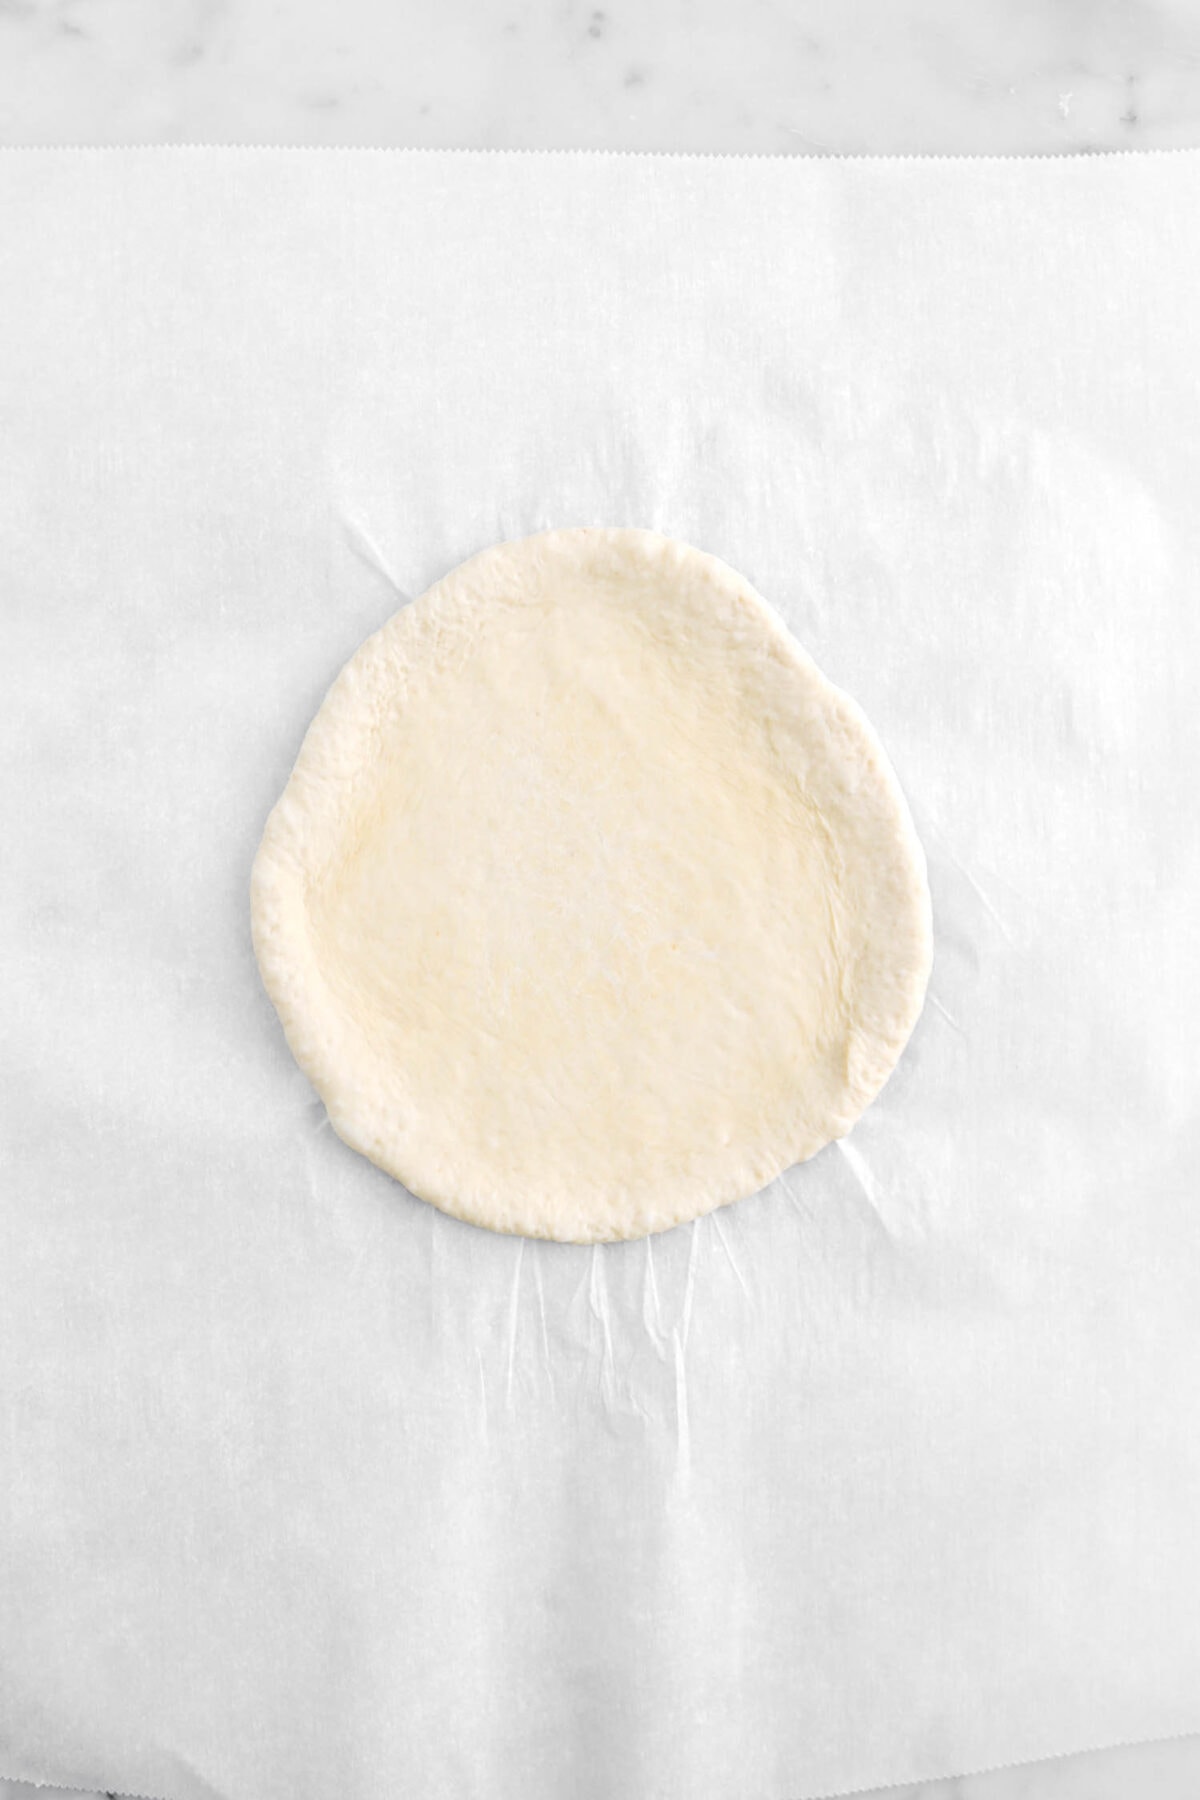
Roll each piece into a 6-inch circle. Cover and allow to rest for 10 minutes.

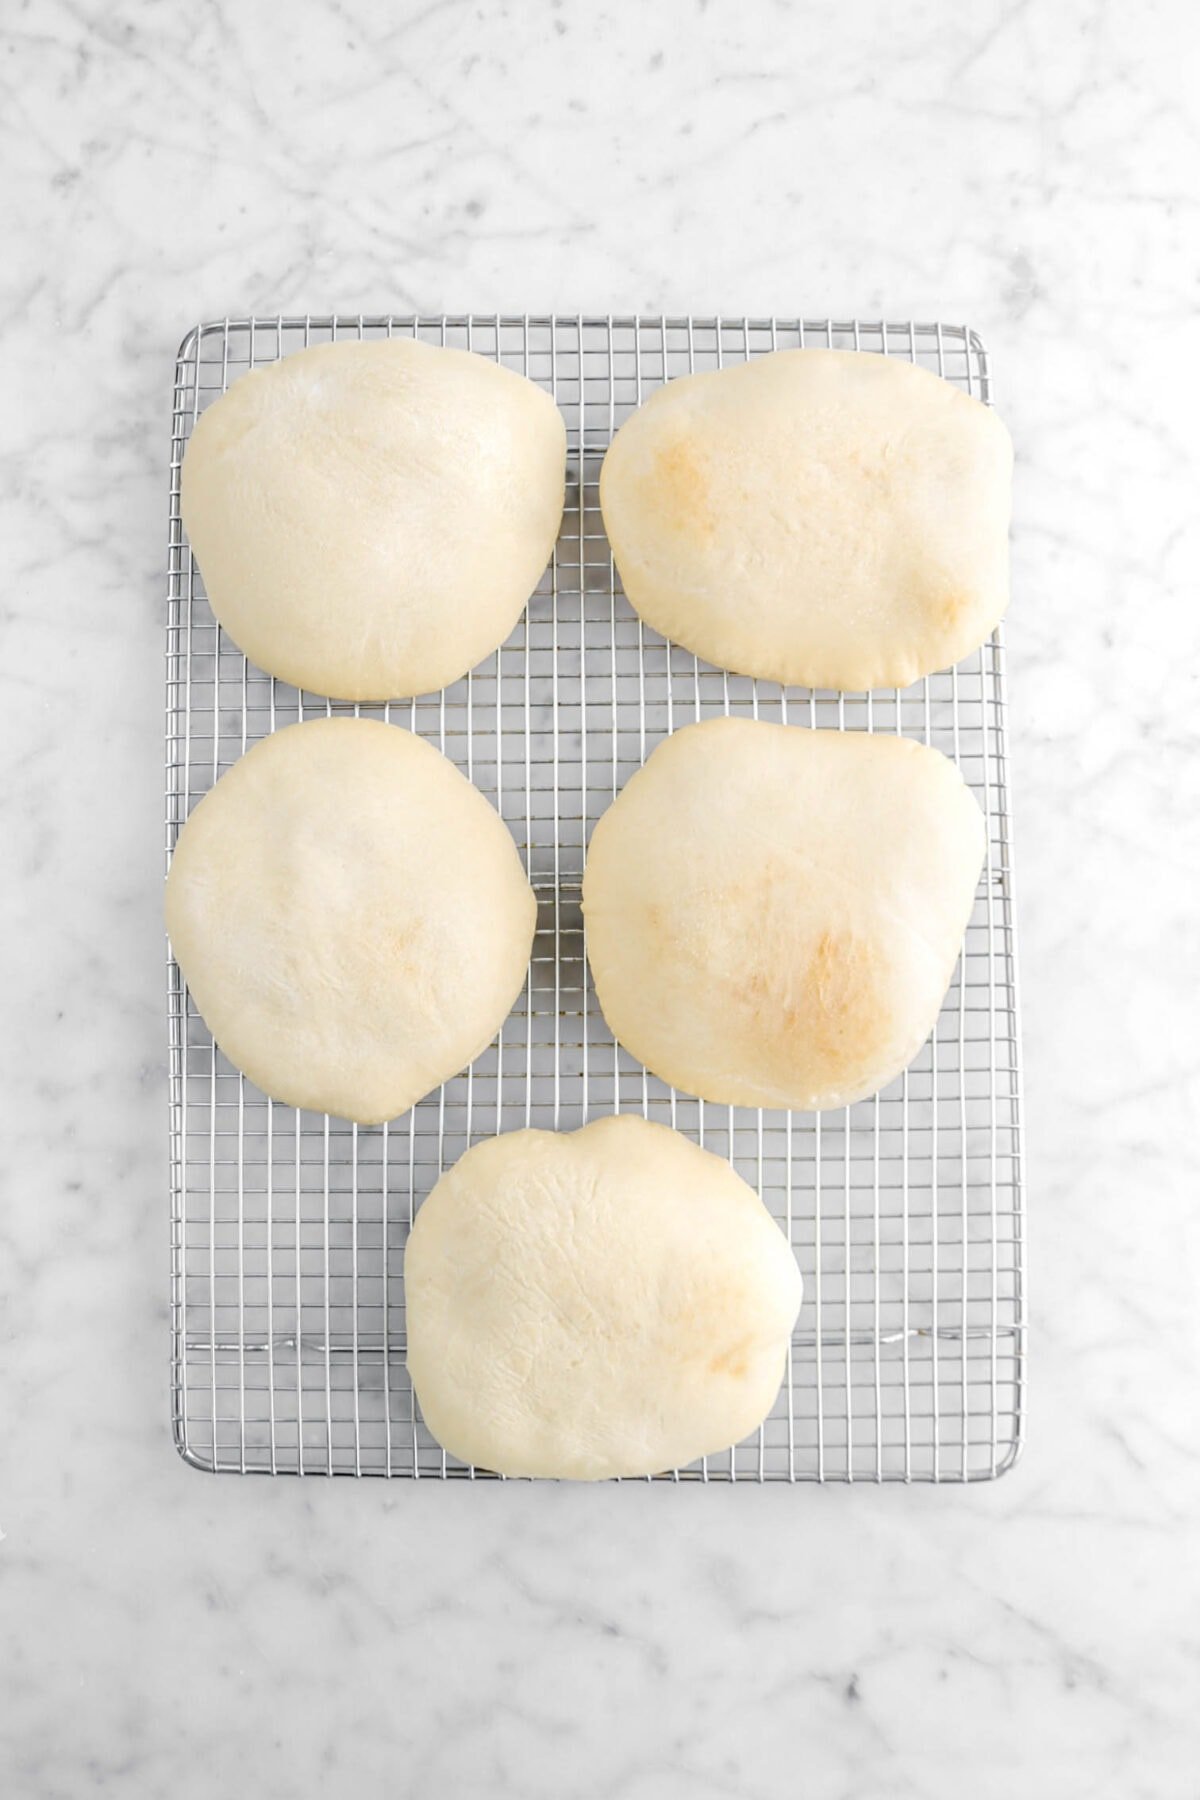
Step 4: Bake
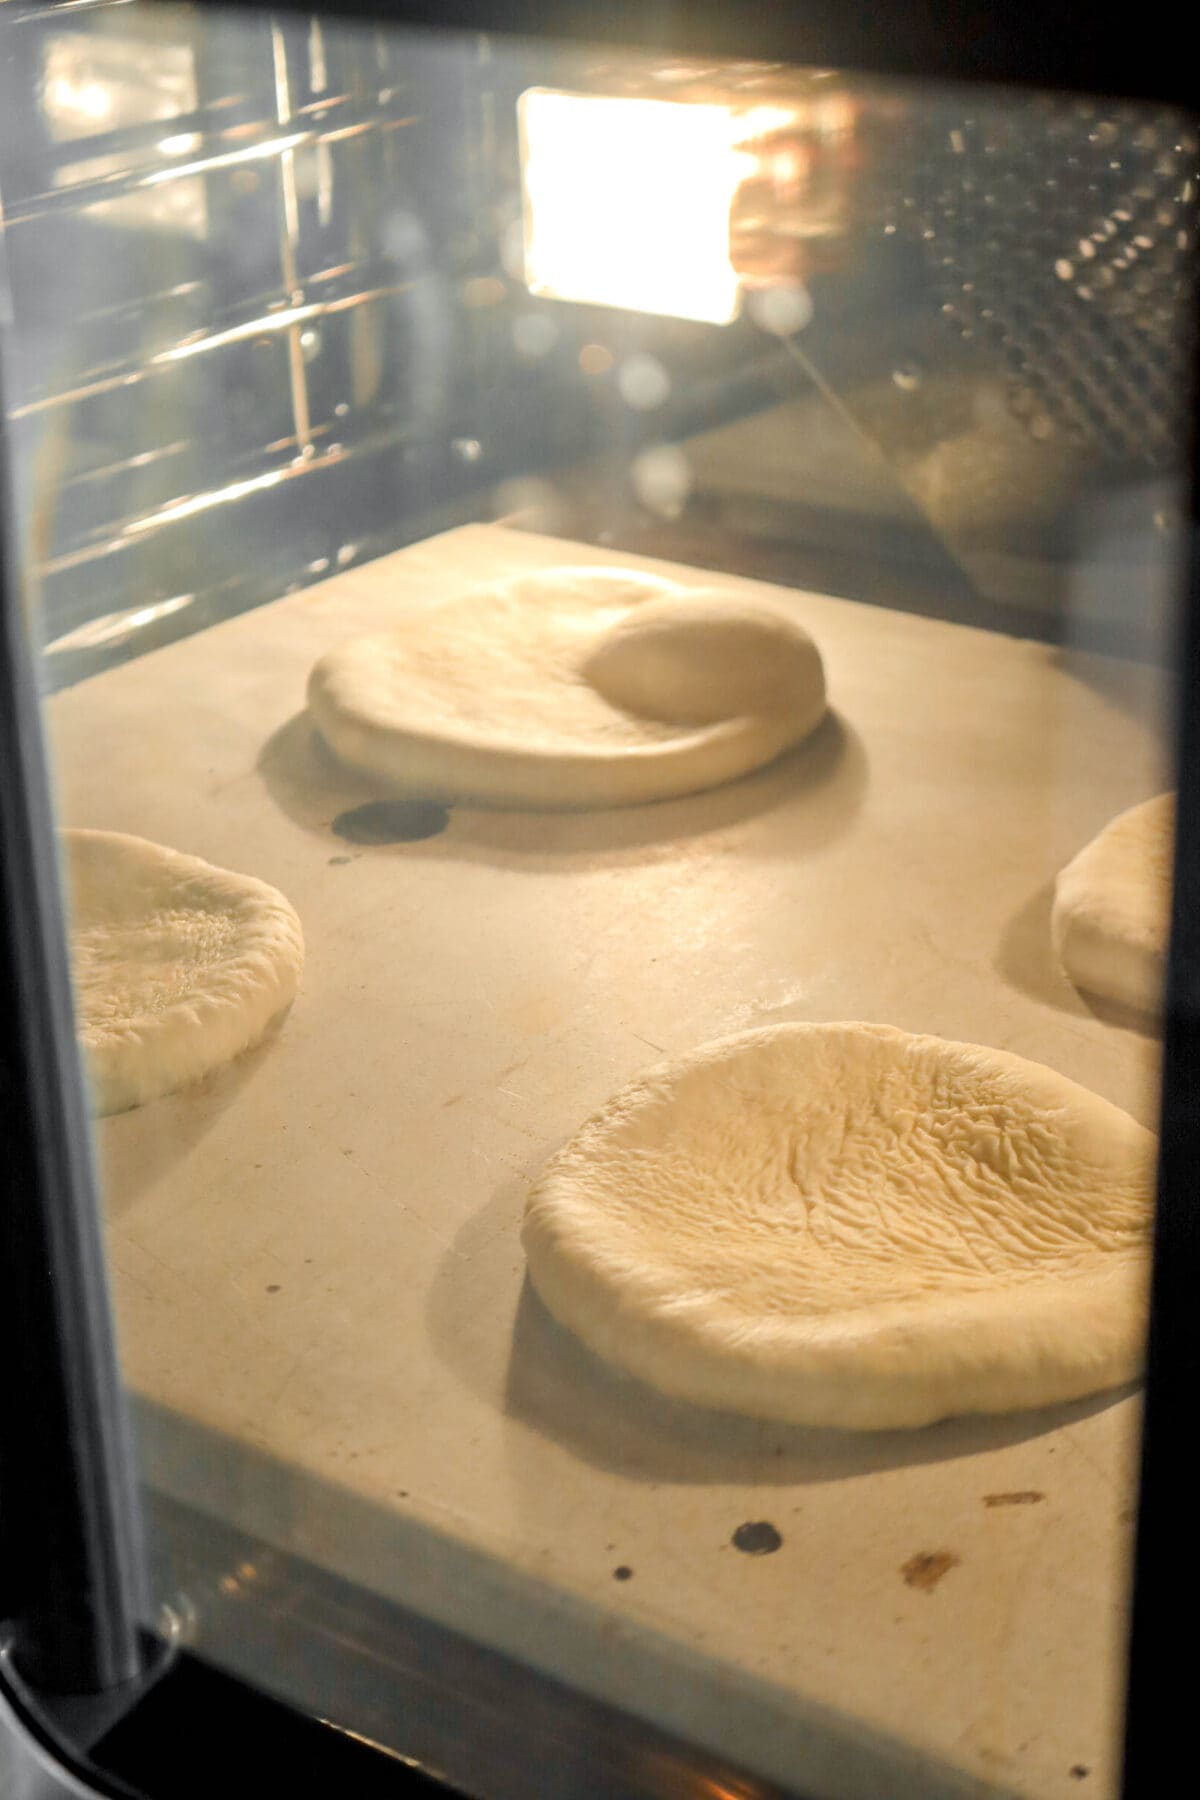
Just before baking, spritz or brush each round with water. Place as many rounds on stone as will fit. Bake until puffed, about 3 minutes.

Remove from oven to cooling rack.
Pita Bread FAQ’s
Can I make this recipe without a mixer? Yes. But it is much easier to do with a mixer. By hand, it will take quite a bit longer to knead. Of course, if your looking to build your forearms, this is the perfect exercise.
How can I tell when my dough is kneaded properly? A properly kneaded dough should be smooth and shiny. Refer to the pictures above if you need help!
My dough isn’t rising in the times stated in the recipe card! The recipe card/post states the times it took our dough to rise. We live in Texas and often use a bread proofer. If you don’t own a bread proofer, we highly recommend one! If you suspect something may be wrong, check your yeast!
Why does my dough have a tough skin on top? Once the dough is turned out of the container and shaped, it NEEDS to be covered, otherwise a skin will form over the top. You can use plastic wrap or a lint free kitchen towel to cover it.
Why are my pita not puffing? If your pita doesn’t puff, it’s because your baking stone wasn’t hot enough. A hot stone is CRUCIAL to getting the classic puff in a pita. But, a flat pita doesn’t mean it’s inedible! It’s just a really delicious flatbread.

What To Make With Pita Bread
Once the pita’s are made and you’ve enjoyed a sandwich (or three), you may be wondering what else you can make with this bread. Here are a few of our favorite ways to use this bread other than sandwiches!
- Gyros
- Dipped into hummus, soups, stews, or even salsa/guacamole
- Served alongside charcuterie/snack boards
- Pizza (I’ve been making a lot of Margherita pizzas on these!)
- Served with your morning eggs
- Cut into triangles and toasted in the oven like chips to make nachos
How To Store
Freshly baked pitas are always the best, but since this recipe makes 10, you’re more than likely to have some leftovers. No worries, though! This recipe freezes REALLY well. Just store the cooled pitas in an airtight, freezer safe zip top bag. Also, feel free to lay some parchment paper or wax paper in-between each pita to keep them from sticking together!
The bread will last about 2-3 months frozen.
Looking for more recipes like this? Here are a few you may like: Homemade Naan, Multigrain Sourdough Bread, Whole Wheat Sourdough Fig and Walnut Bread, Multigrain Sourdough Bread
When you make this Homemade Pita Bread, leave a comment down below! We love hearing from you and answering any questions you might have! Also, be sure to tag us on social media and hashtag it #BakersTable.
Homemade Pita Bread
Ingredients
- 4 cups bread flour
- 1½ teaspoons kosher salt
- 1 Tablespoon instant yeast
- 2½ Tablespoons olive oil
- 1½ cups water
Instructions
- In the bowl of a stand mixer fitted with the dough hook, combine all ingredients.
- Mix on low speed 1 minute.
- Increase speed to medium.
- Knead for an additional 10 minutes, or until the dough is smooth and elastic.
- Place in a clean, covered container.
- Allow to rise until doubled in bulk, about 90 minutes.
- When dough has proofed, heat oven with stone to 450°F/230℃.
- Turn dough out onto a clean surface.
- Divide into ten equal pieces.
- Round each piece.
- Cover and allow to rest for 20 minutes.
- Roll each piece into a 6 inch circle.
- Cover and allow to rest for 10 minutes.
- Just before baking, spritz or brush each round with water.
- Place as many rounds on stone as will fit.
- Bake until puffed, about 3 minutes.
- Remove from oven to cooling rack.
Notes + Tips!
- Depending on the temperature in your kitchen, the proofing time can be as little as 30 minutes.
- The easiest way to divide the dough is to use a bench knife.
- Each round should be 3.3 ounces.
- The bread should still be pale after cooking.
- Pita will release from the stone when done. If it doesn’t release, leave it a little longer, about 30 seconds to 1 minute.
- Use a pizza peel to remove bread from oven.
Tools You May Need (affiliate links)
– Still Hungry? –
Here are a few recipes may like!