Multigrain Sourdough Bread
This post may contain affiliate links, please visit our privacy policy for details.
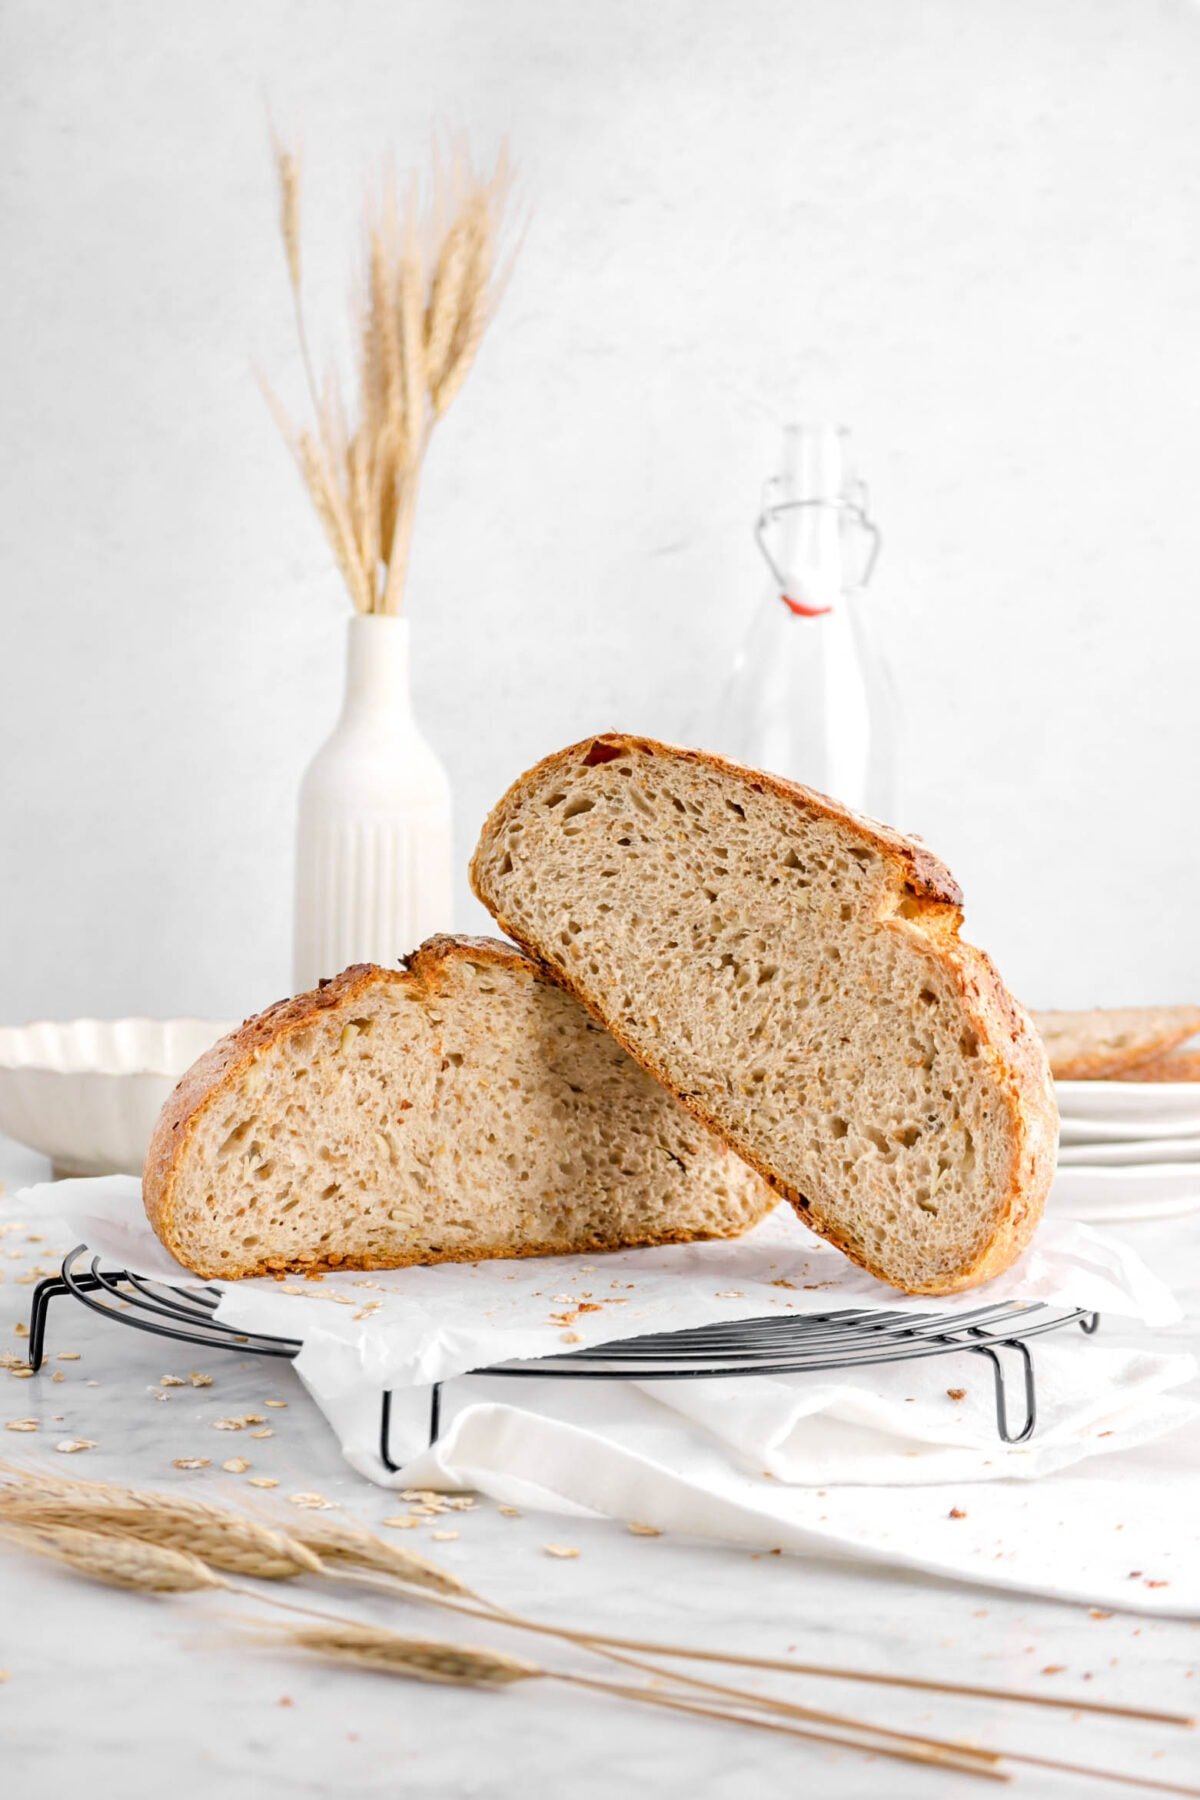
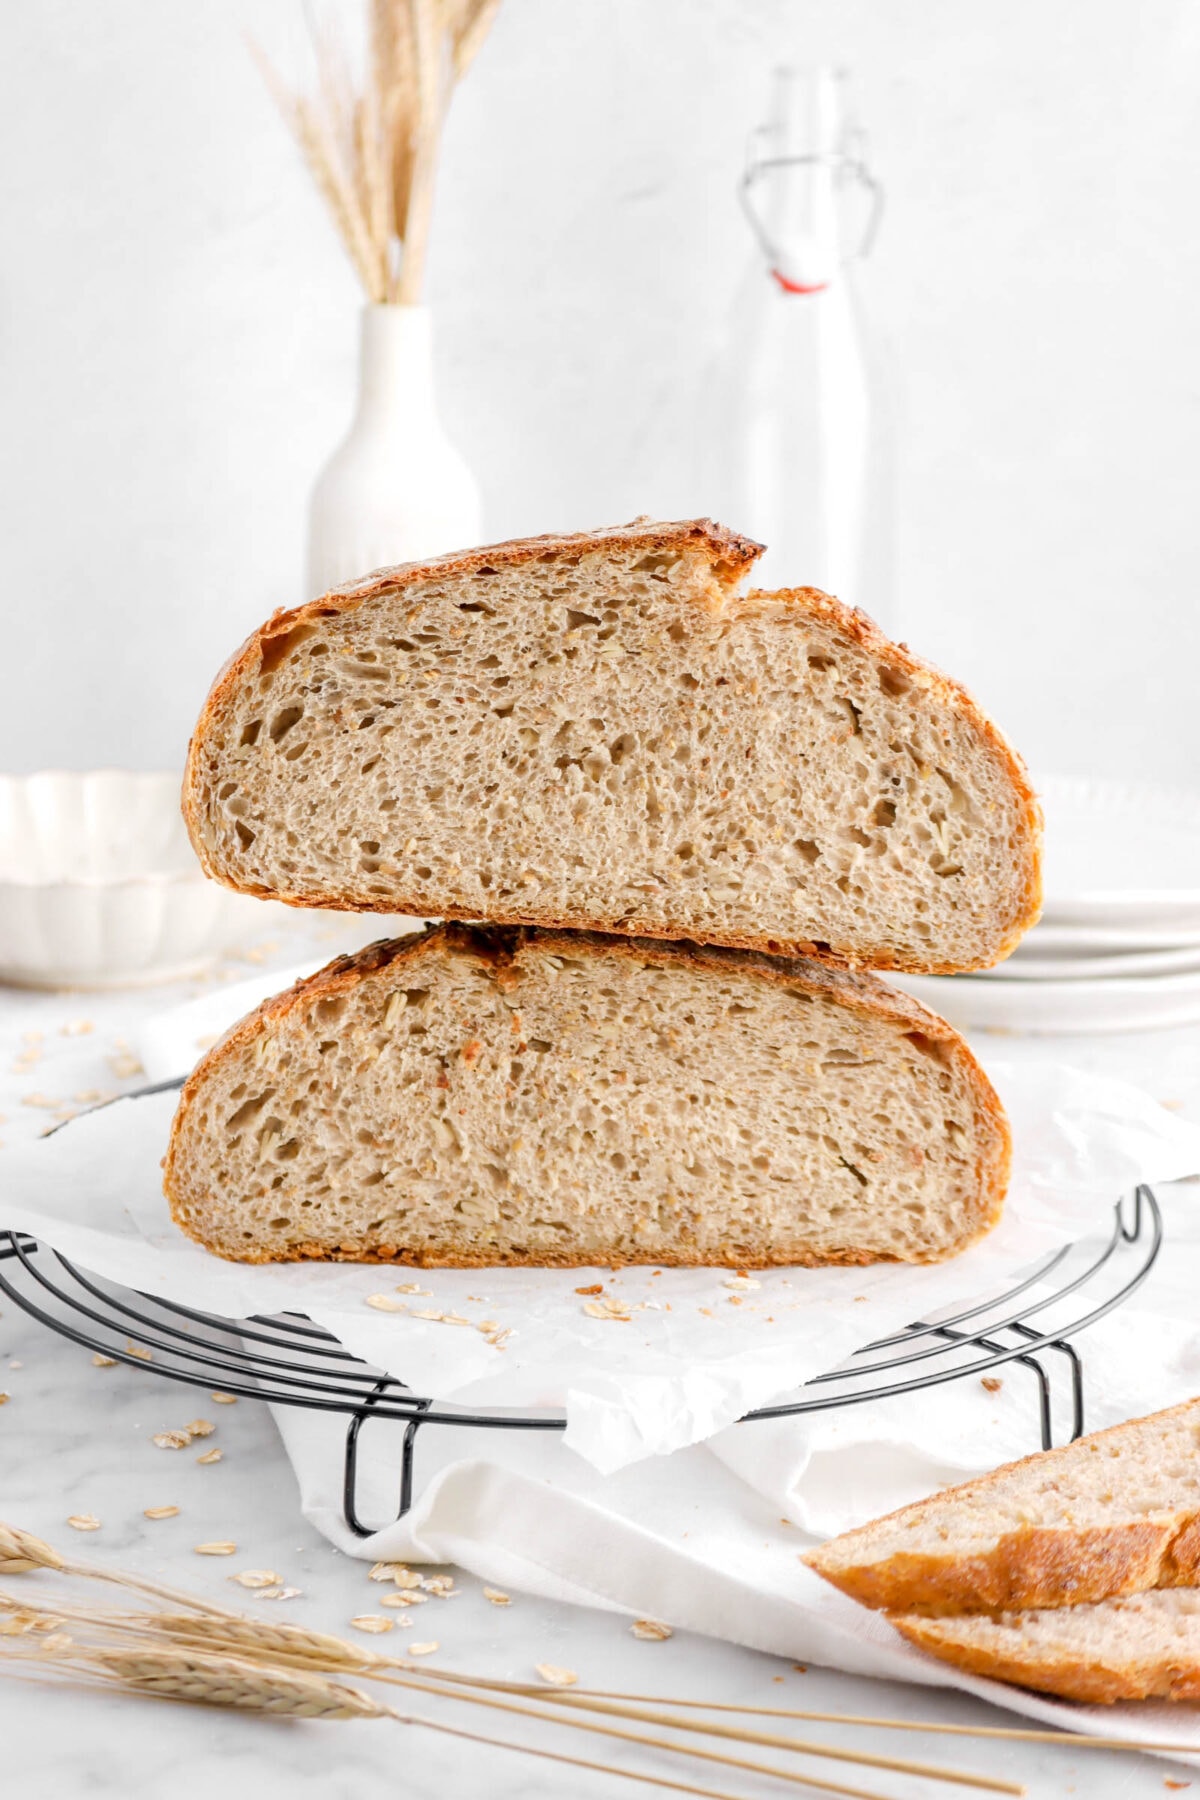
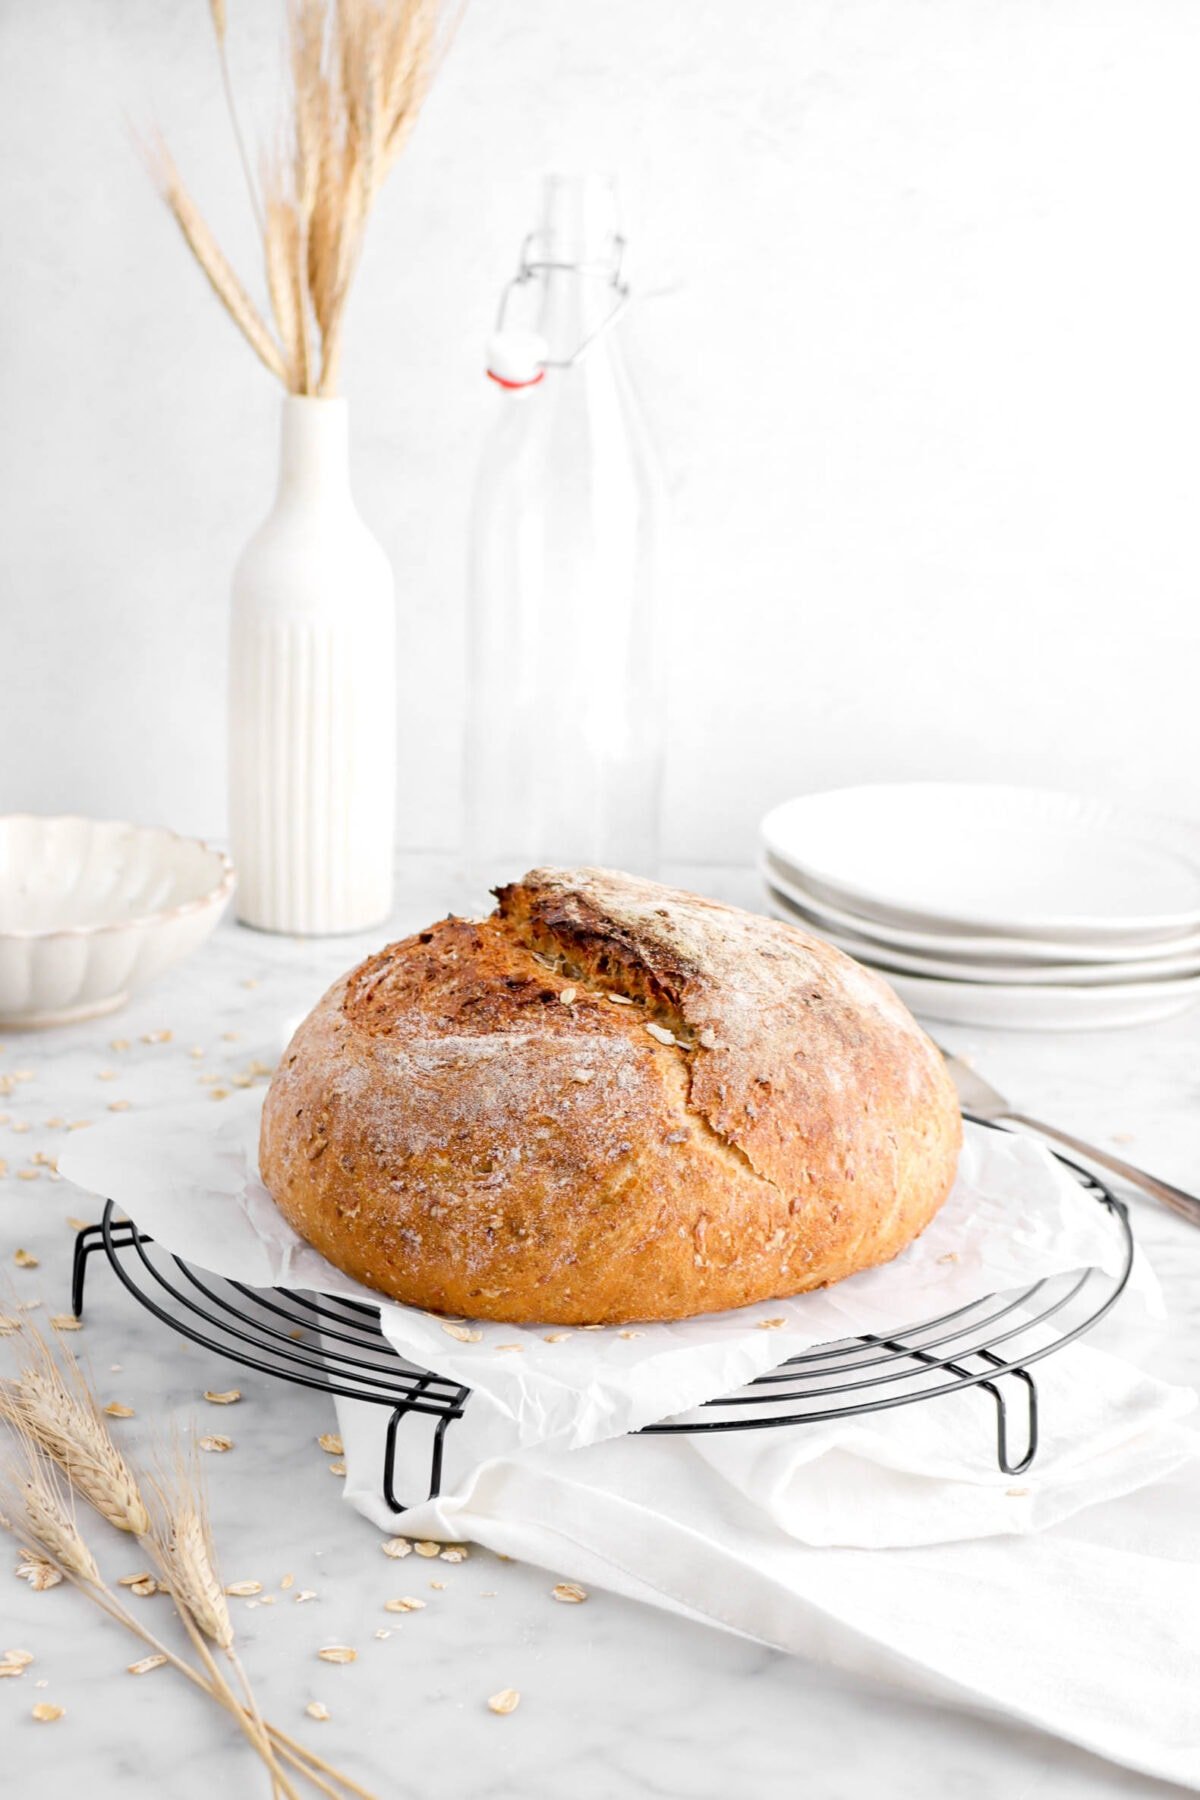
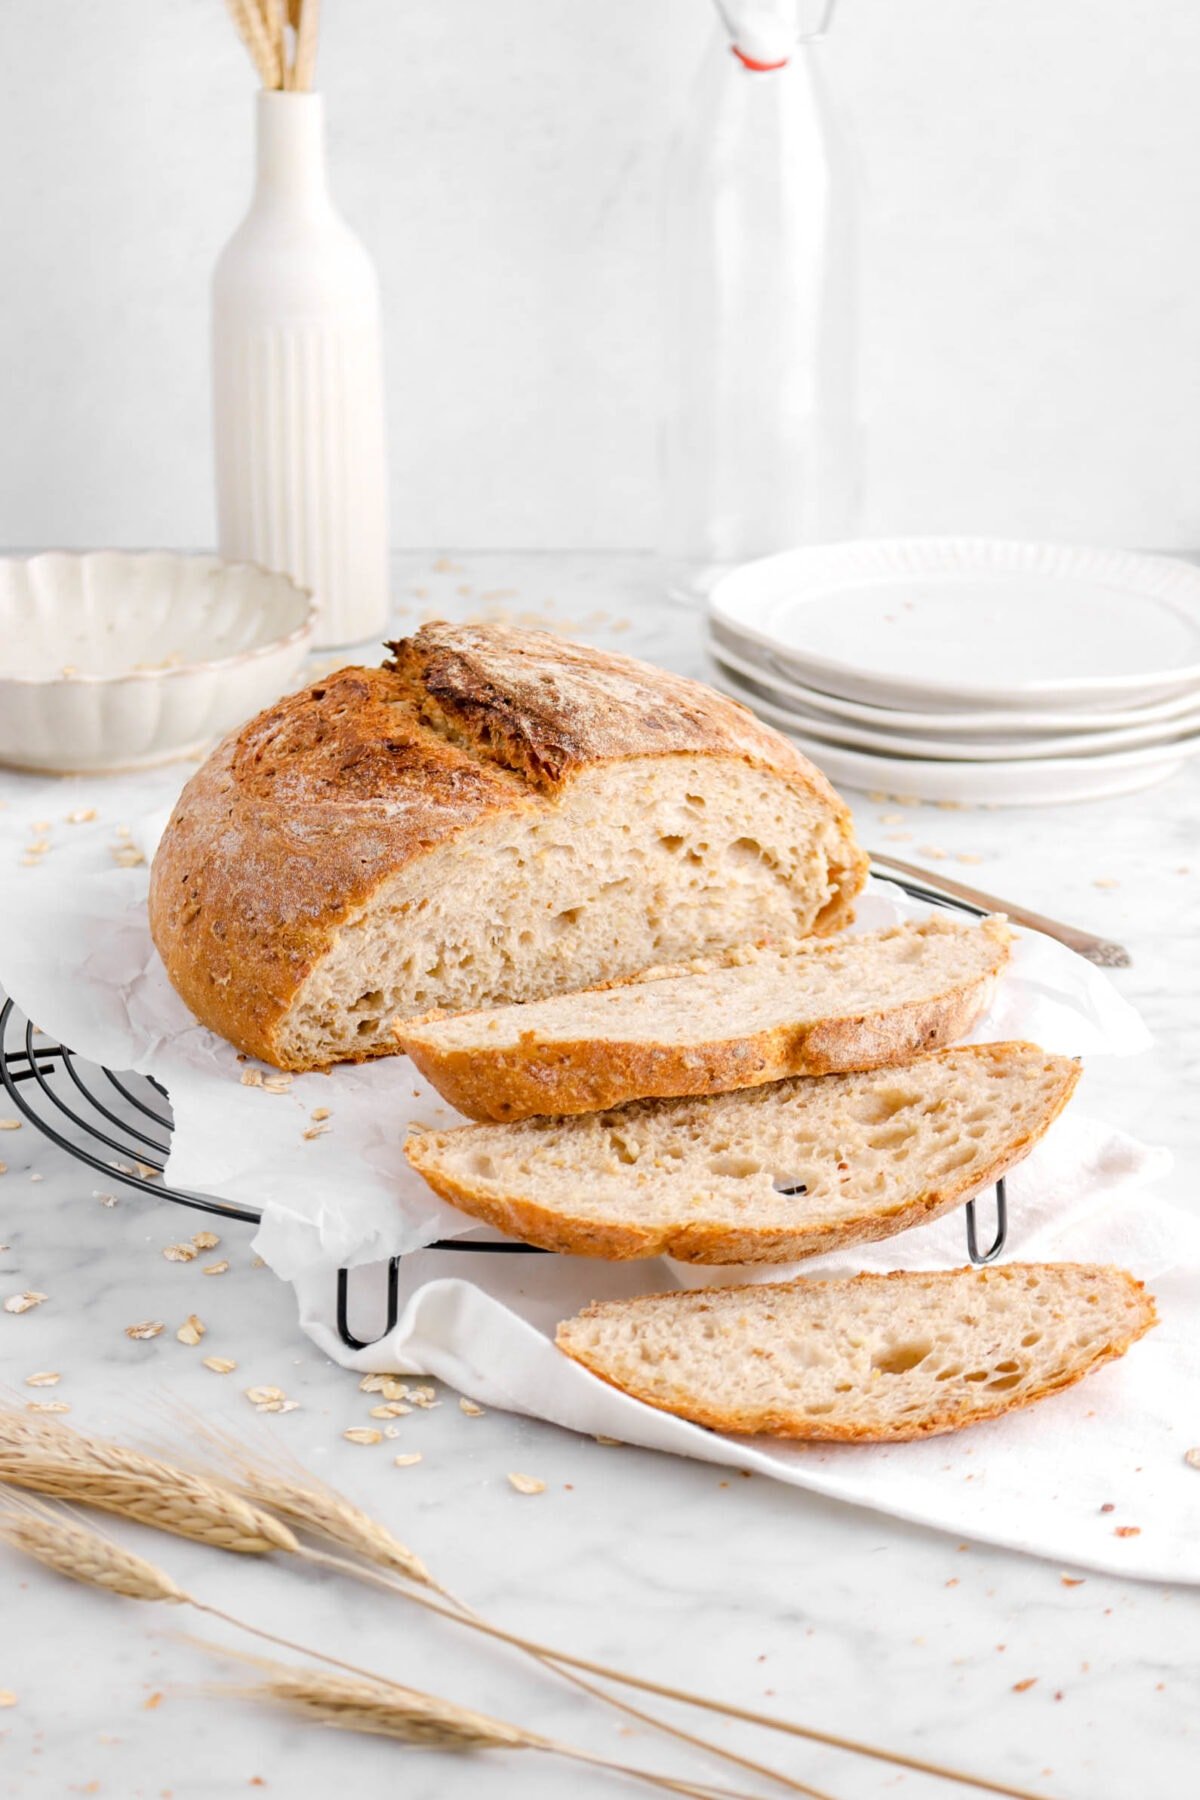
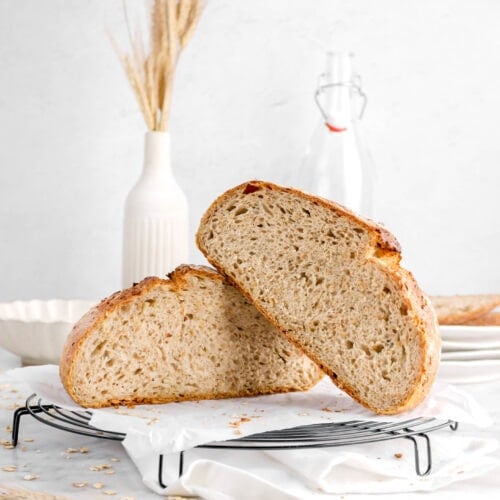
This Multigrain Sourdough Bread is guaranteed to be your new favorite bake! A crunchy crust on the outside, light and soft on the inside, and loaded with FIVE different whole grains. It’s truly the most delicious sourdough bread. The best part? It’s SO much better than store-bought…and makes beautiful companion to your breakfast or dinner table. It’s actually so much easier to make than you would think and oh so impressive. Best served toasted with a generous smear of salted butter or even thinly sliced avocado. Trust me, you will LOVE this bread. Serve alongside your favorite breakfasts for delicious toast, with dinner, or simply on its own. SO. GOOD.
About The Recipe
Just three words. Multigrain. Sourdough. Bread. Ohhhh, yes. Sourdough baking just got a whole lot better.
After you all LOVED our Fig and Walnut Bread so much, we decided to share one of our favorite breads to eat! We discovered a multigrain sourdough in Florida at our local grocery store. It was our absolute FAVORITE, but since we moved a few years ago, we haven’t been able to find a suitable replacement. Nowhere here sells a multigrain sourdough.
So, after two years of searching, my mom decided that she would develop her own! It’s taken quite a few test bakes to get it just right, but we finally achieved it! There’s just enough sourdough to give it plenty of sour flavor, while hints of grains compliment the overall flavor. It’s truly is SO good.
However, this bread is made a little unconventionally. We love a traditional sourdough as much as anyone else, but it just takes so. long. I mean, it’s sooooo worth it, but if you could have a loaf of sourdough just a little faster, wouldn’t you prefer that?
Well, with this recipe, that’s just the case! We added just a little bit of yeast to help with the rise, as we have a lot of grains in this bread. Old-fashioned oats, flaxseeds, steel cut oats, sunflower seeds, PLUS whole wheat! It is the ultimate multi-grain bread, but it needed a little bit of help from the yeast.
But don’t let the addition of yeast deter you. This multigrain sourdough is ABSOLUTELY delicious and oh so worth the wait. Every bite is nutty, full of flavor, with just the right amount of sour flavor from the sourdough starter.
Why You Need Make This Multigrain Sourdough Bread ASAP!
- This bread is naturally vegan.
- Made with a blend of whole wheat flour and bread flour.
- Has lots of whole grain goodness.
- A perfect use for sourdough.
- Gives you a delicious loaf of bread to enjoy in the mornings!

Ingredients
(Full ingredient amounts and instructions can be found in the recipe card at the bottom of the post)
For The Whole Wheat Starter:
- Sourdough Starter
- Water
- Whole Wheat Flour

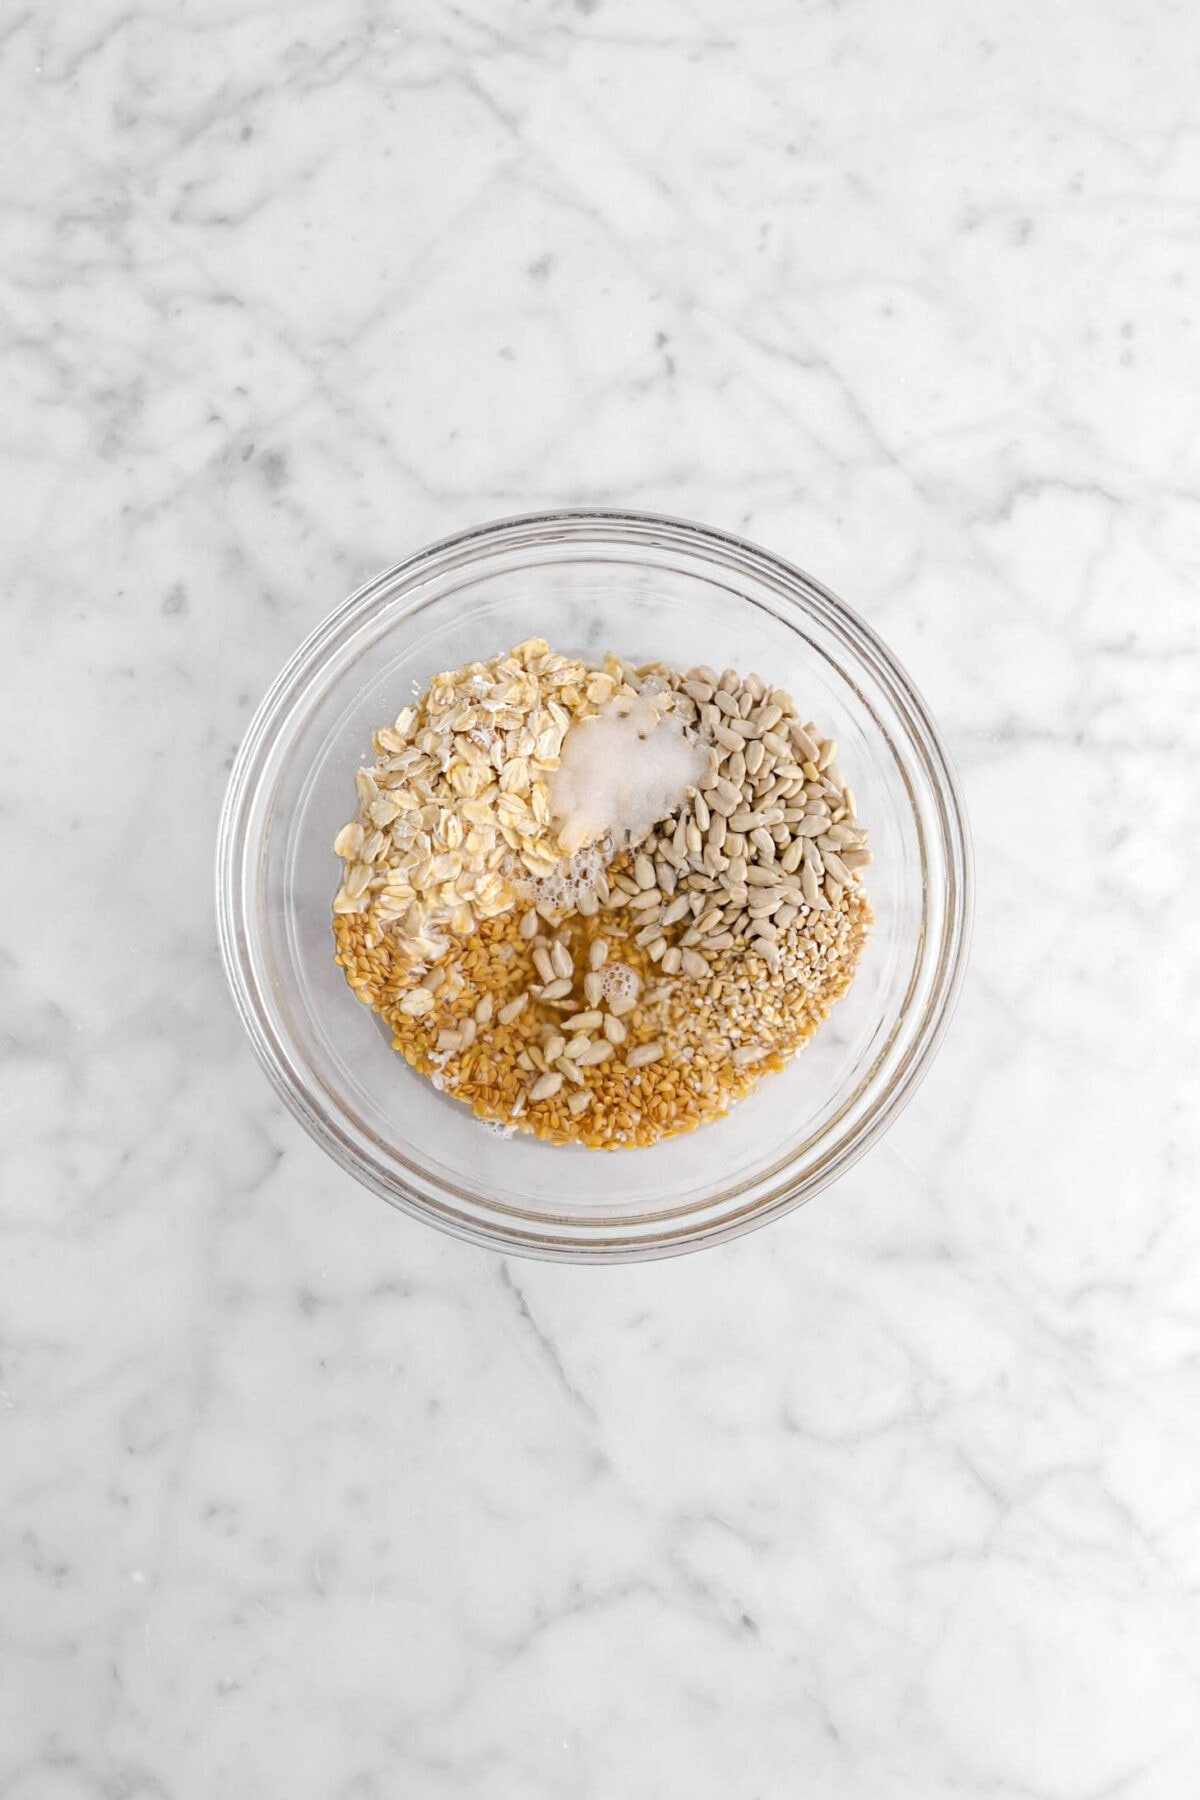
For The Soaker:
- Flaxseeds
- Steel Cut Oats
- Sunflower Seeds
- Old Fashioned Oats
- Salt
- Boiling Water

For The Final Dough:
- Bread Flour
- Water
- Instant Yeast
- Honey
- All of the starter
- All of the soaker

How To Make Multigrain Sourdough Bread
Step 1: Make the whole wheat starter and soaker
The night before you want to bake the bread, you will need to make the whole wheat starter and the soaker. First we are going to make the starter. To do this, combine water and sourdough in a glass bowl and whisk until well combined and there are no lumps of starter.


Add in the whole wheat flour and beat well. Proof at 70℉/21℃ for 12-16 hours (If you’re not using a proofing box, cover the starter with plastic wrap and set aside for 12-16 hours).


In a new bowl, combine the flax seeds, steel cuts oats, sunflower seeds, old fashioned rolled oats, salt, and boiling water. Stir until combined. Cover with plastic wrap and allow to stand at room temperature for 12-16 hours.


Step 2: Make the final dough
The next morning, combine the bread flour, water, yeast, honey, the starter, and the soaker in the bowl of an electric mixer. Mix on low speed for 3 minutes. Switch to dough hook, if using. Increase speed to medium and continue to mix for 3-4 minutes.

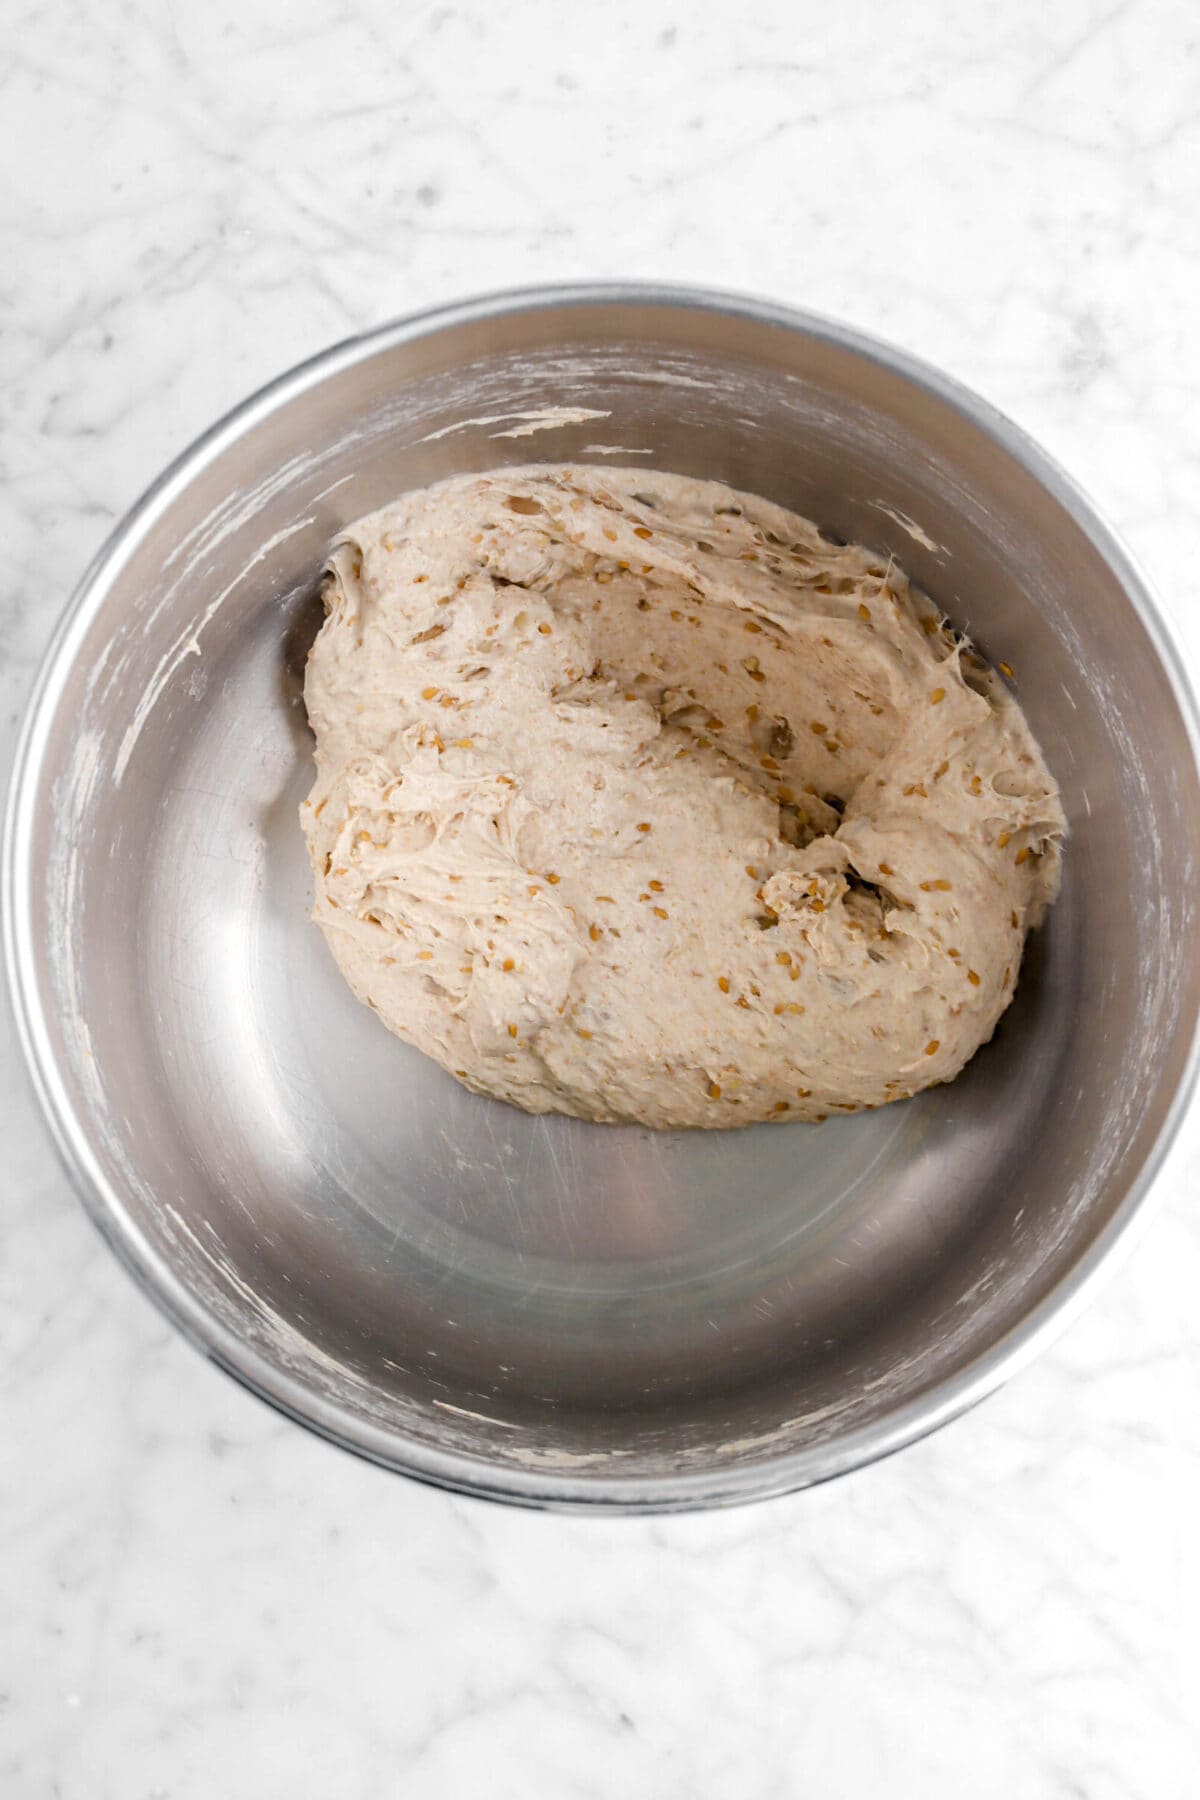
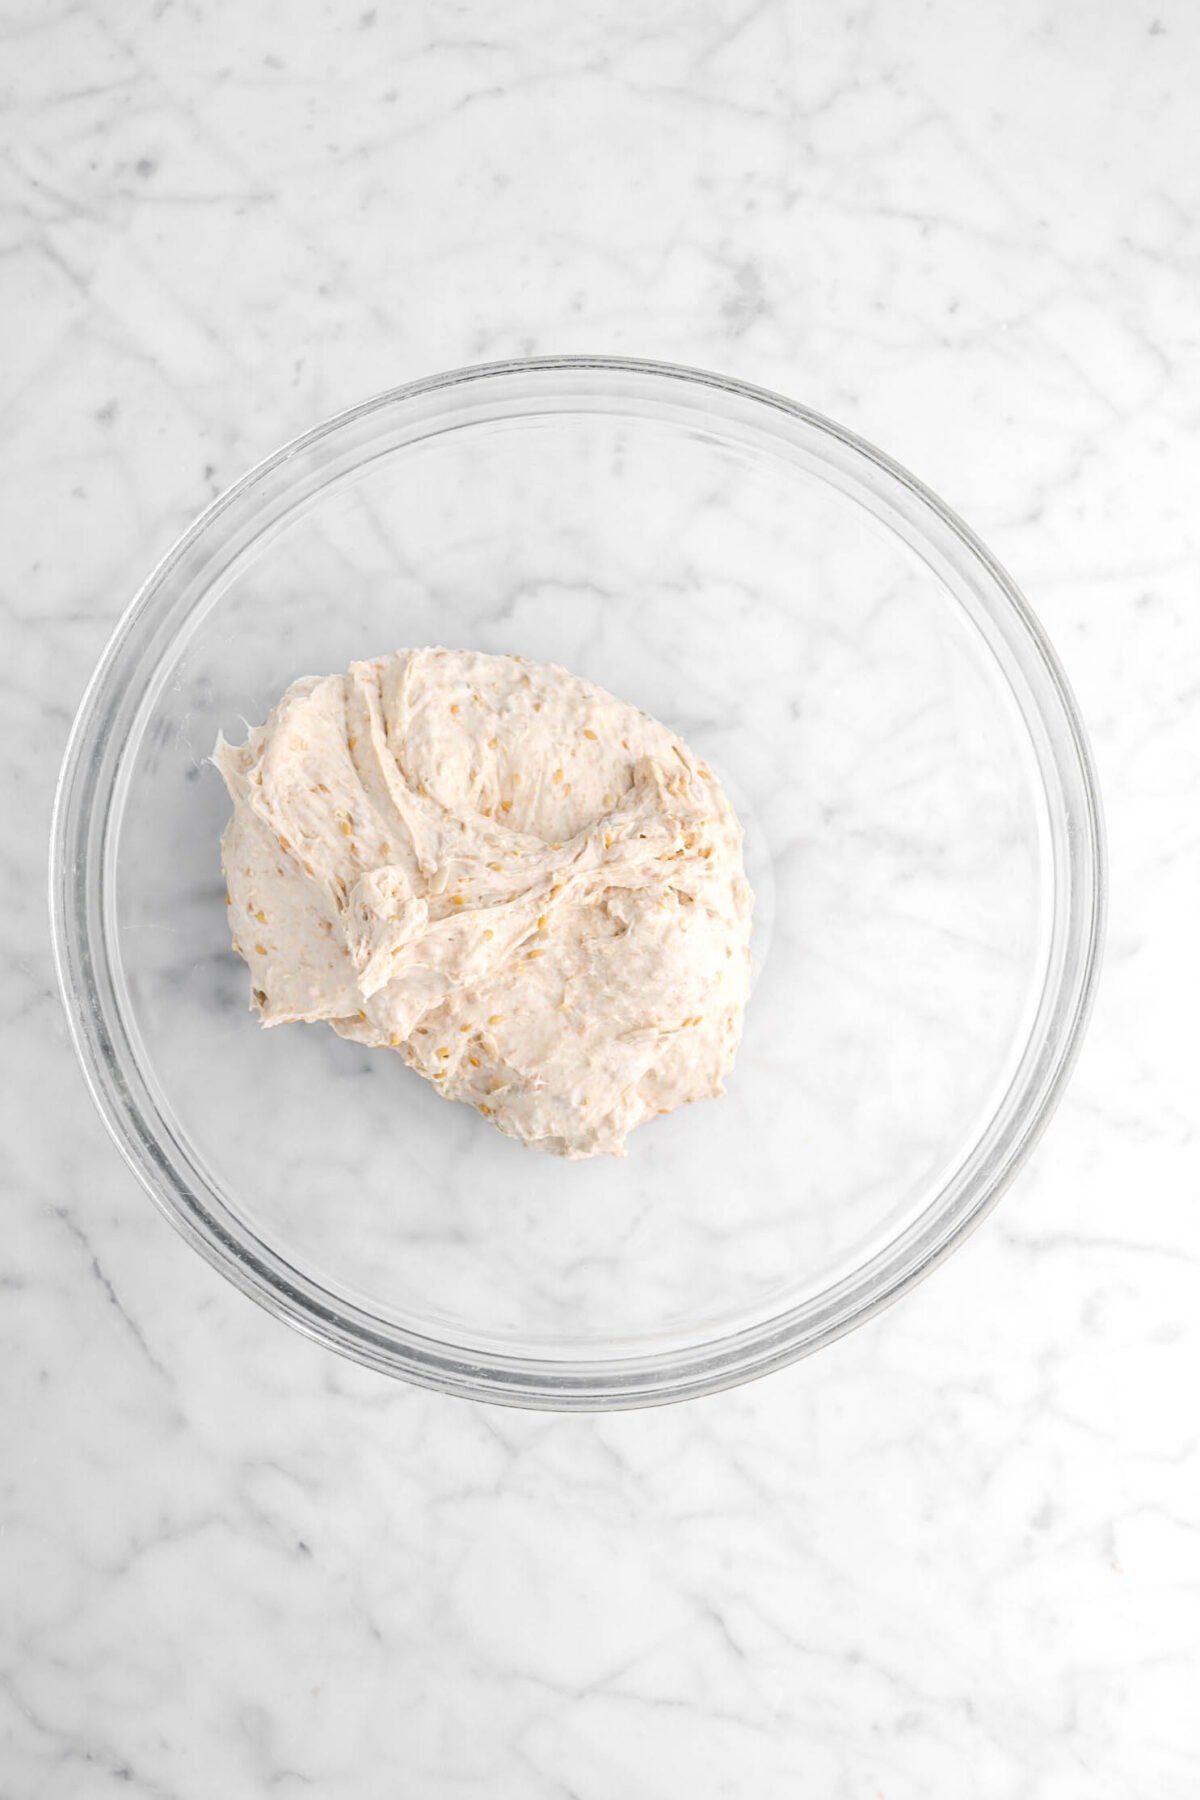
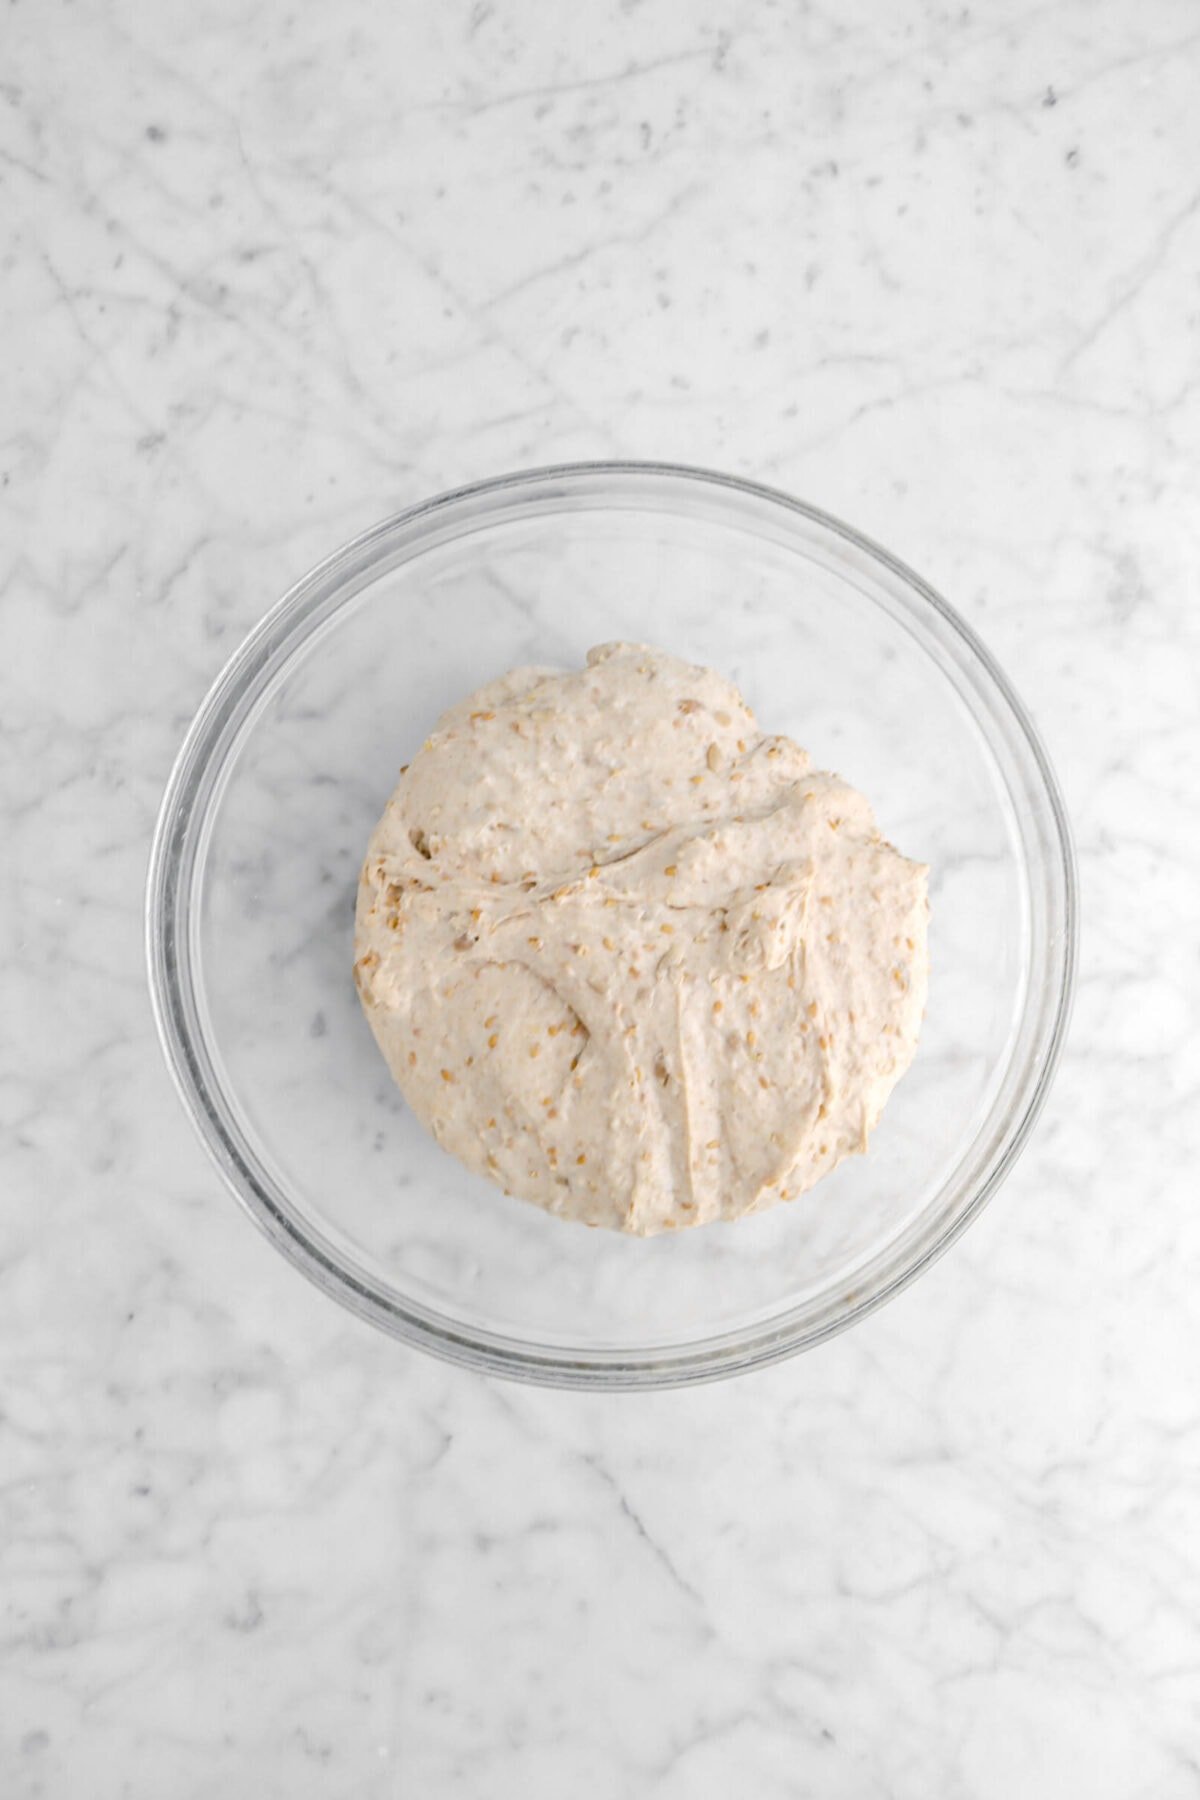
Step 3: Proof
Turn the dough into a clean glass bowl and proof at 78℉/26℃ for 1 hour (cover with plastic wrap if not using a proofing box).
Step 4: Shape and proof
Turn the proofed dough out onto a lightly floured surface and gently deflate.
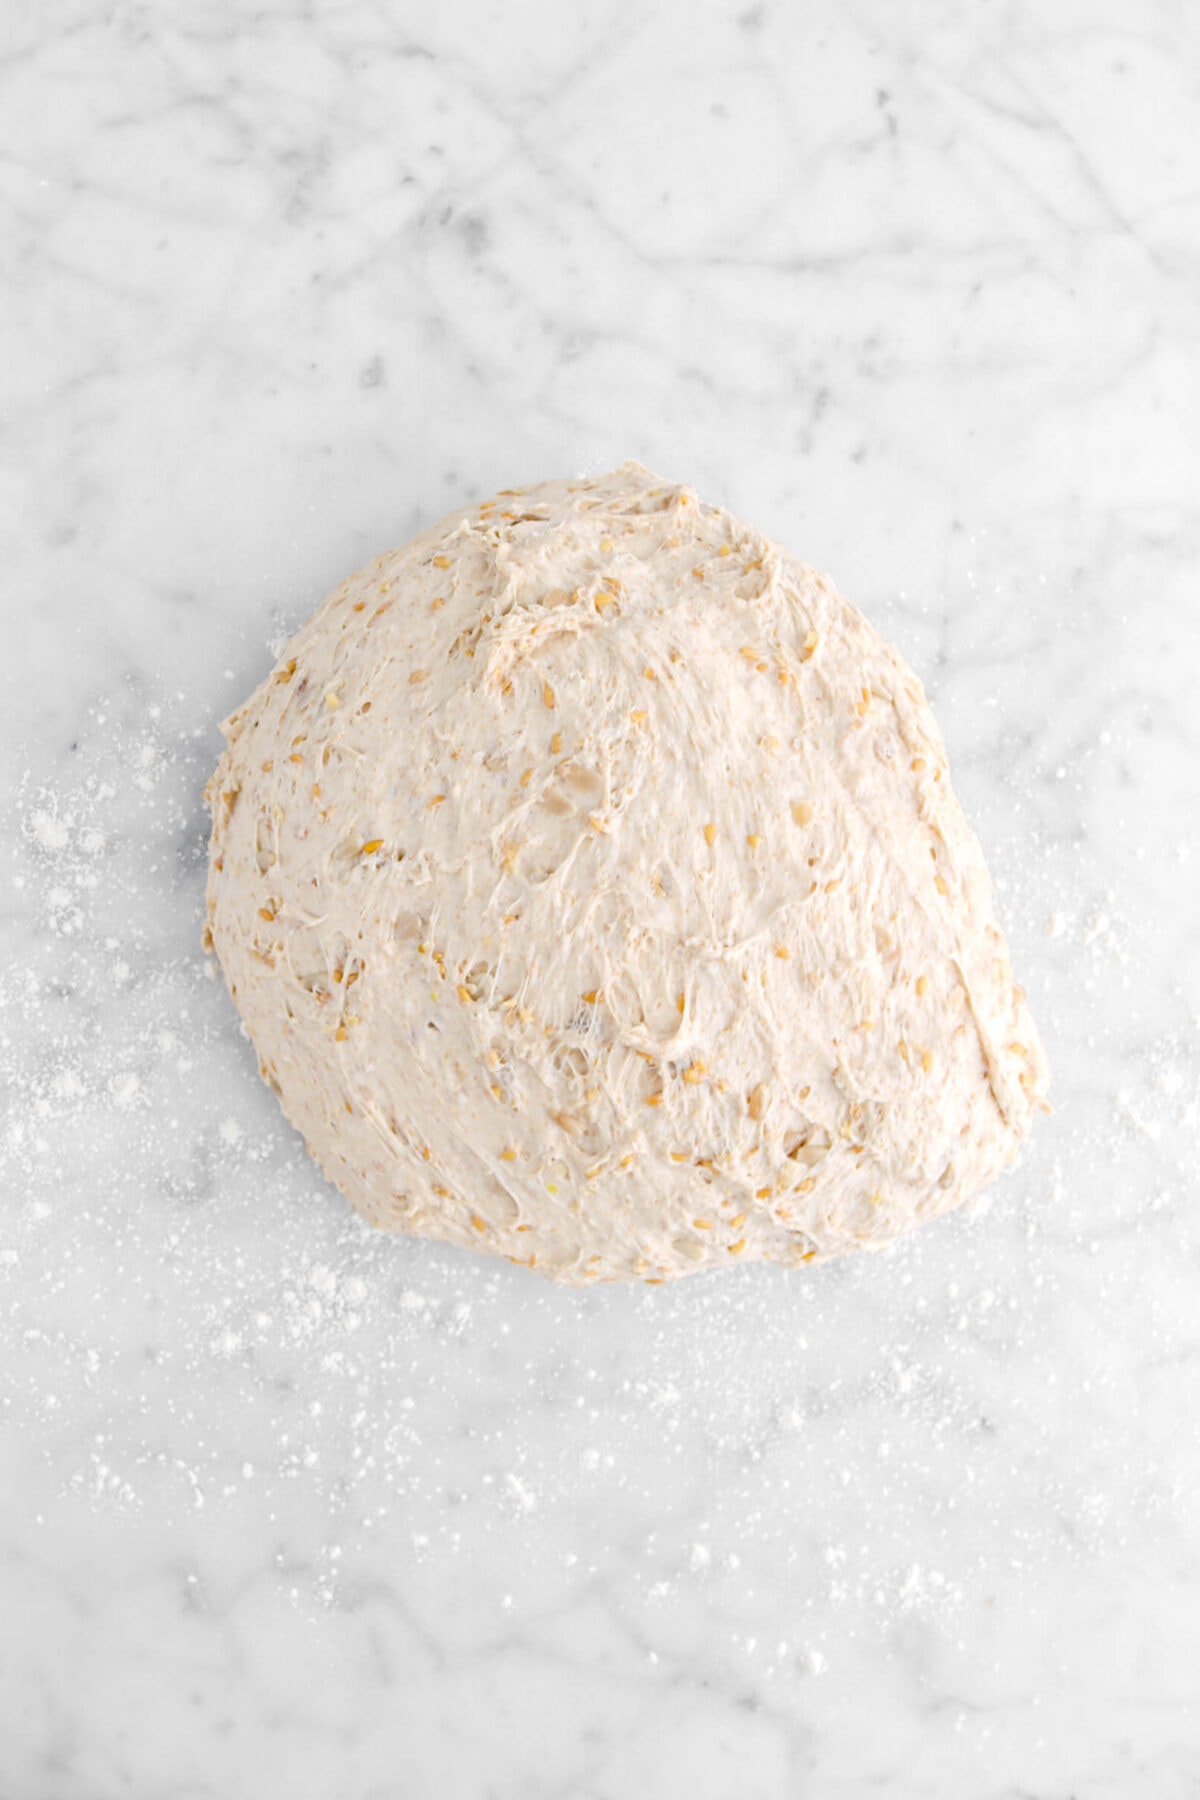
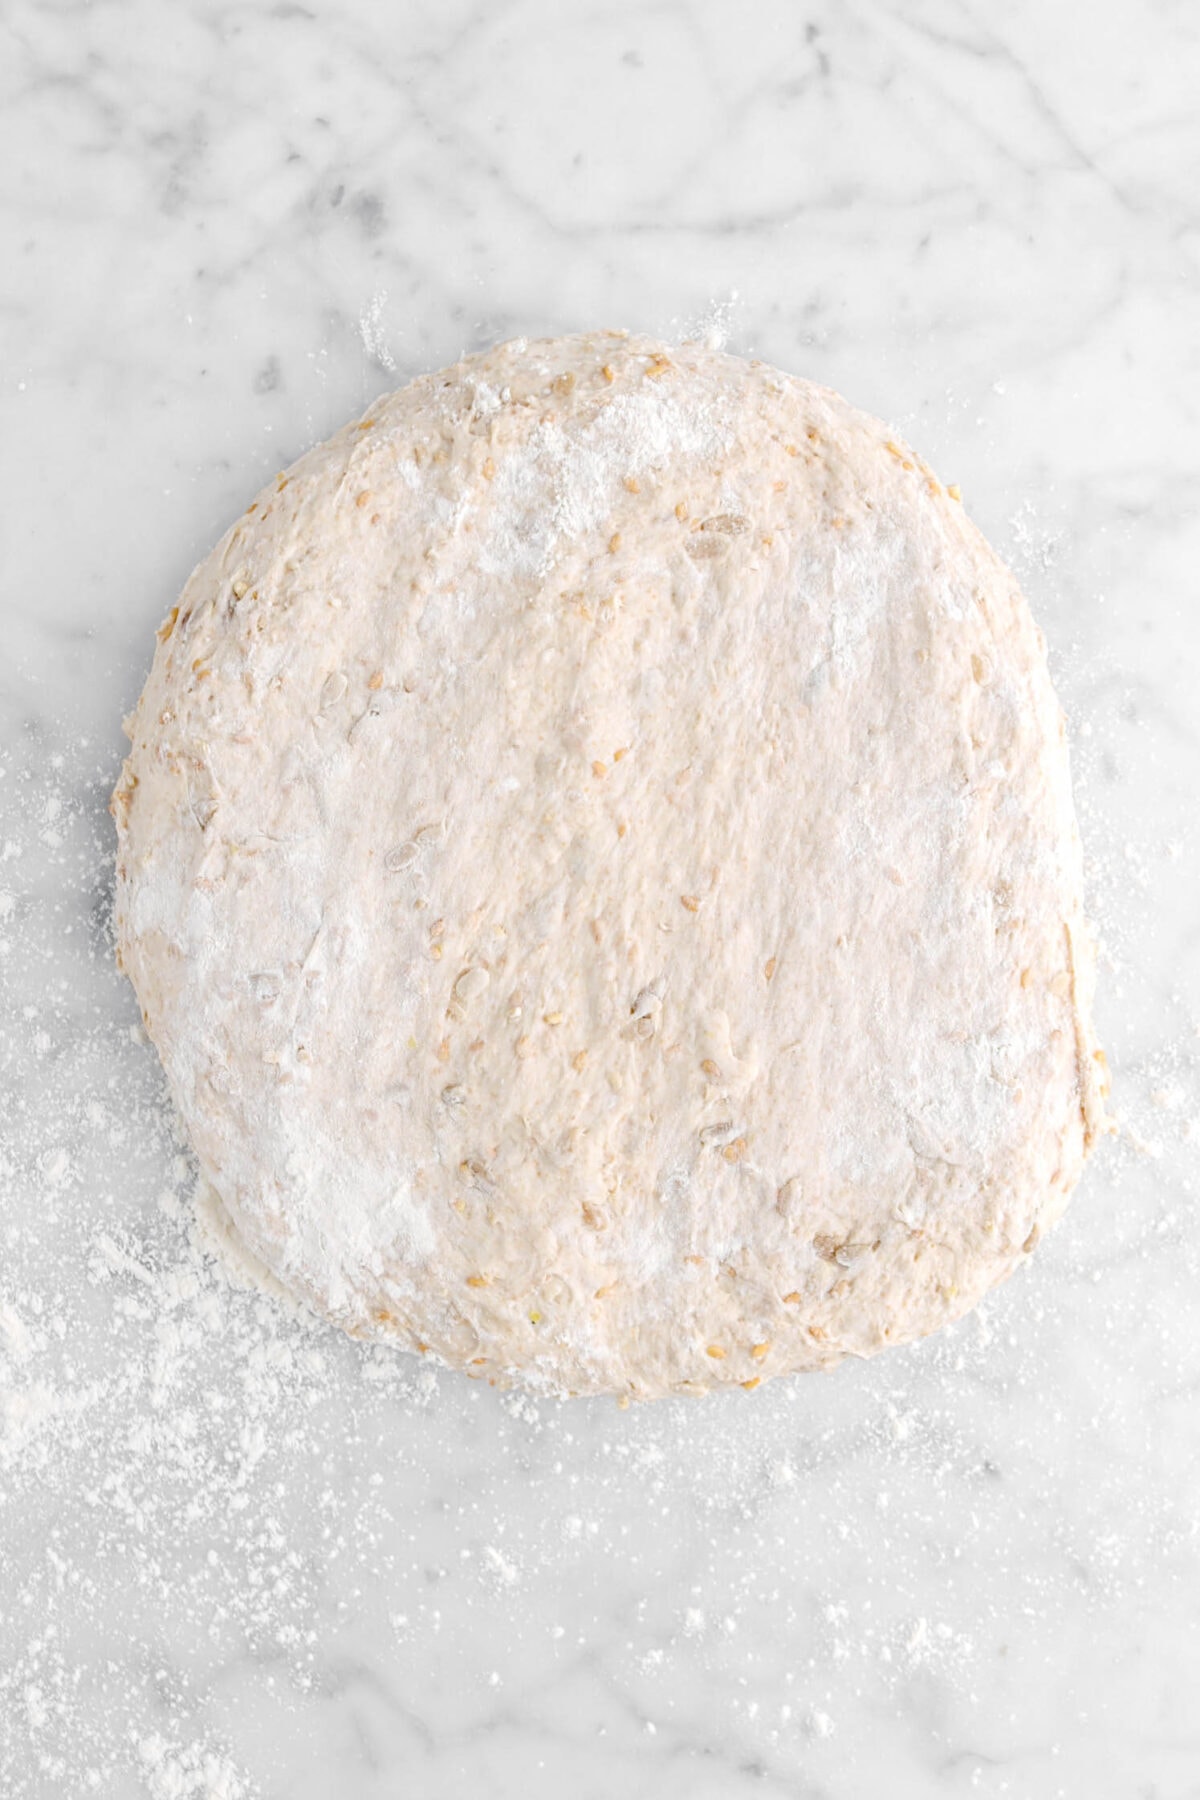
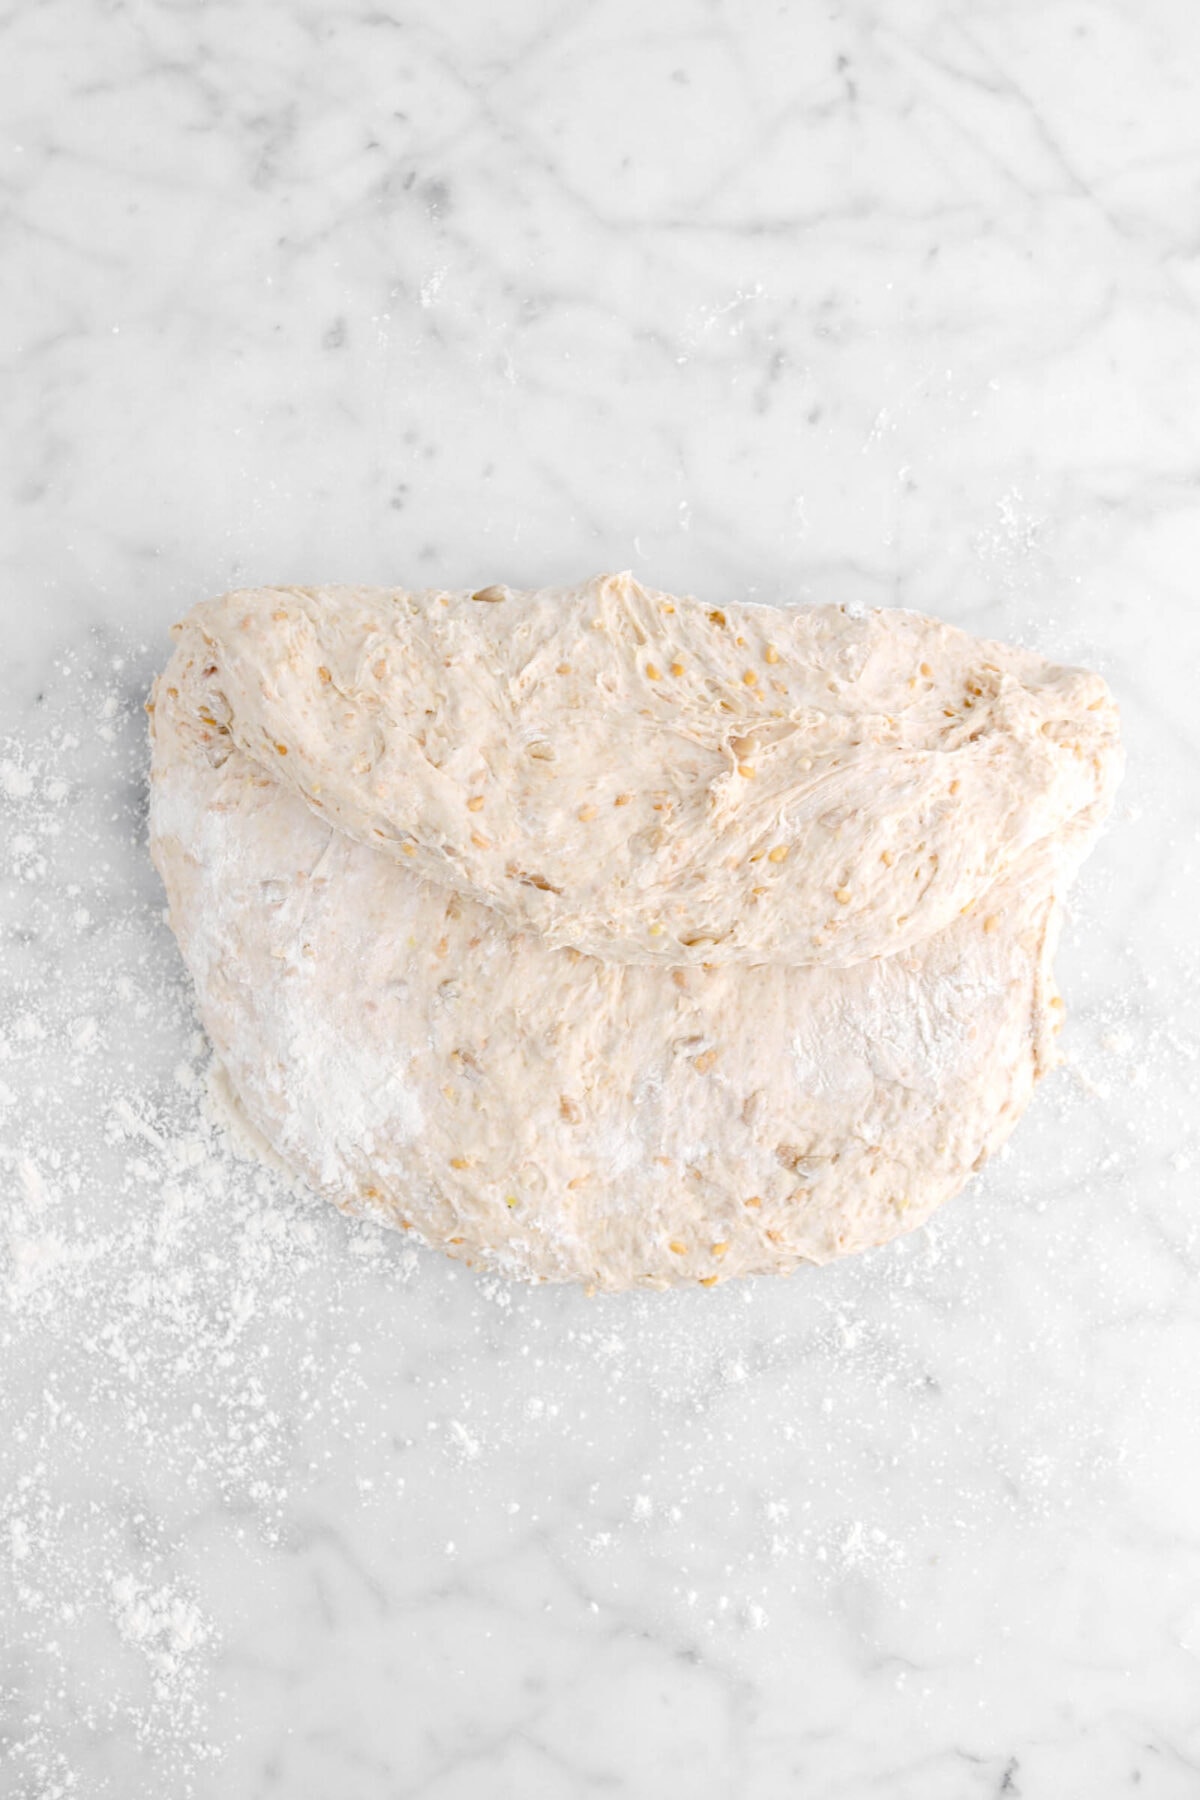
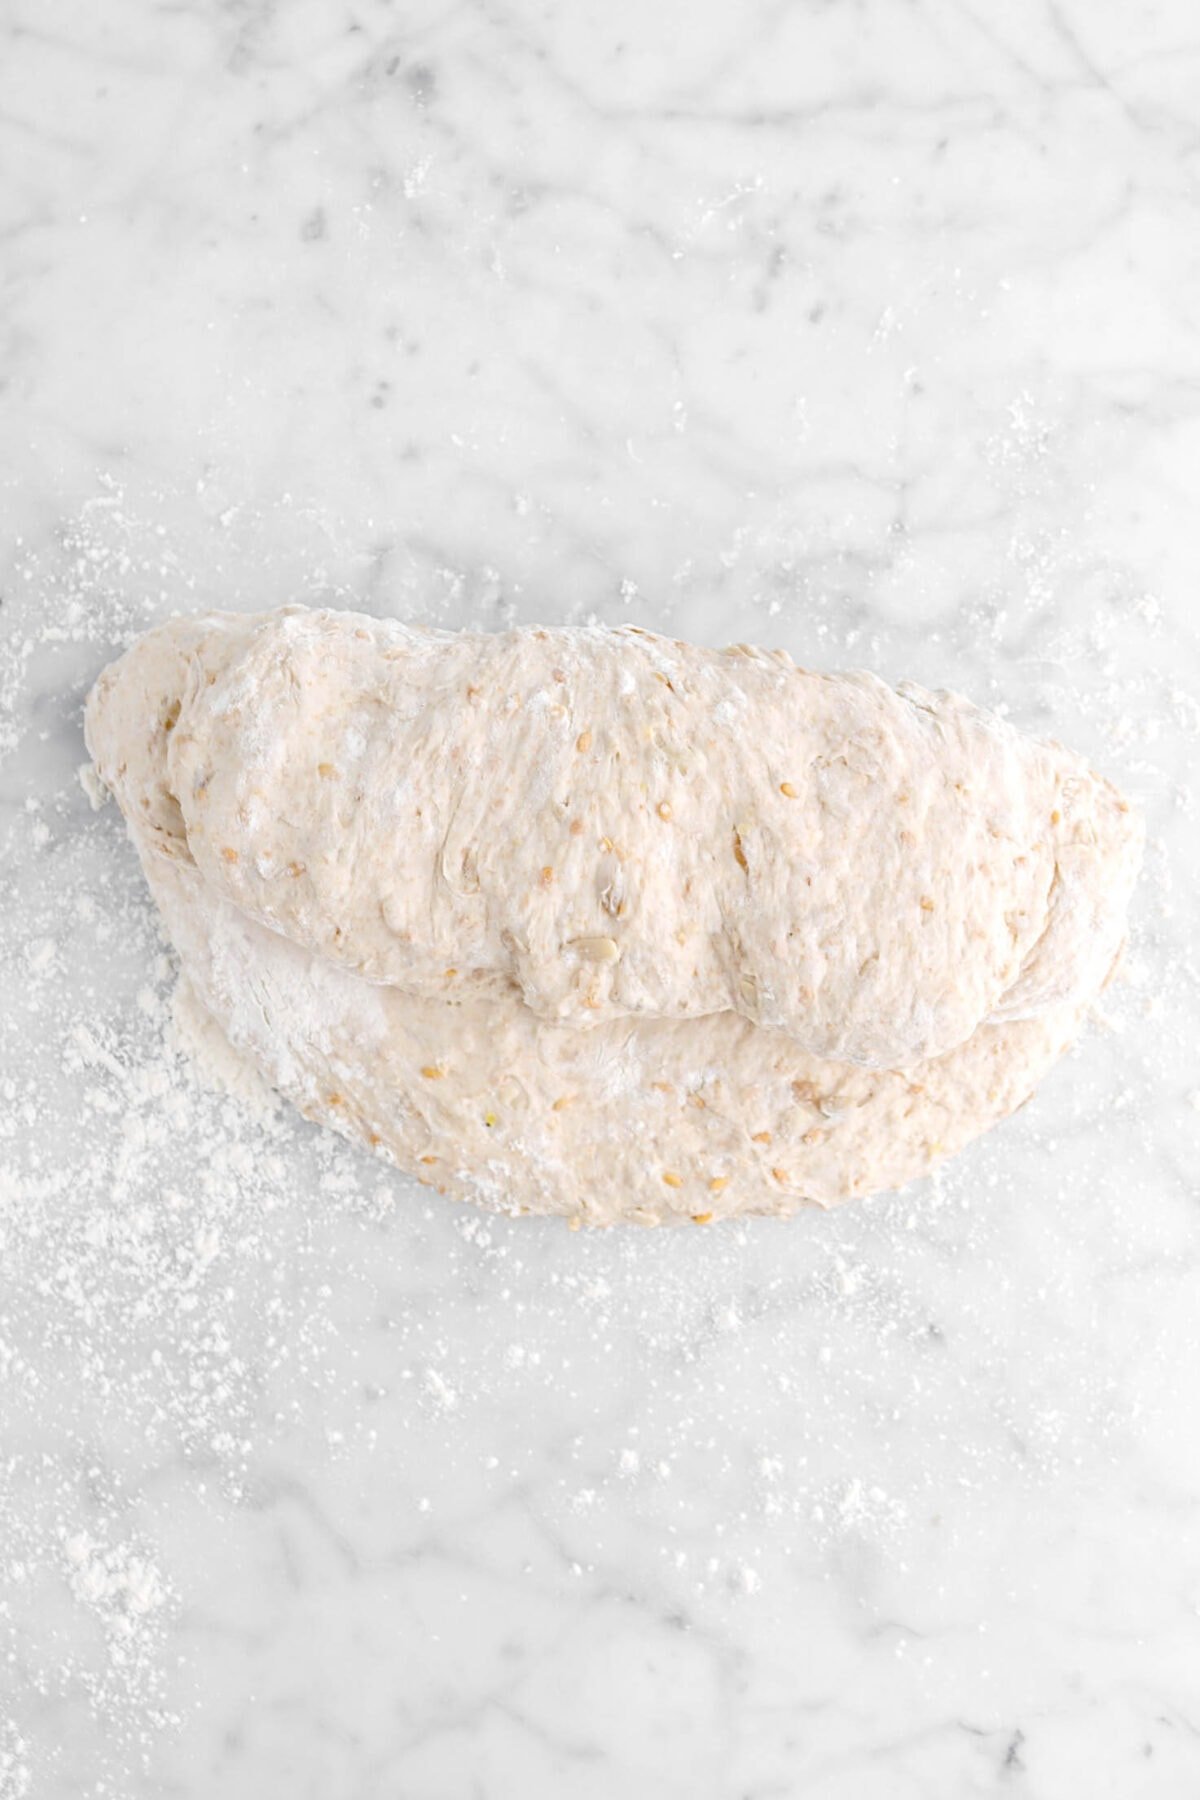
Fold the top third of the dough over towards the middle. Fold in the right and left corners. Roll dough towards you, tucking it tightly. Tuck ends under. Use a bench knife, or your hands, to round and tighten the dough.


Place the shaped dough, bottom side up, in prepared banneton. Proof at 80℉/27℃ for 1 hour (cover with a tea towel or plastic wrap if not using a proofing box).


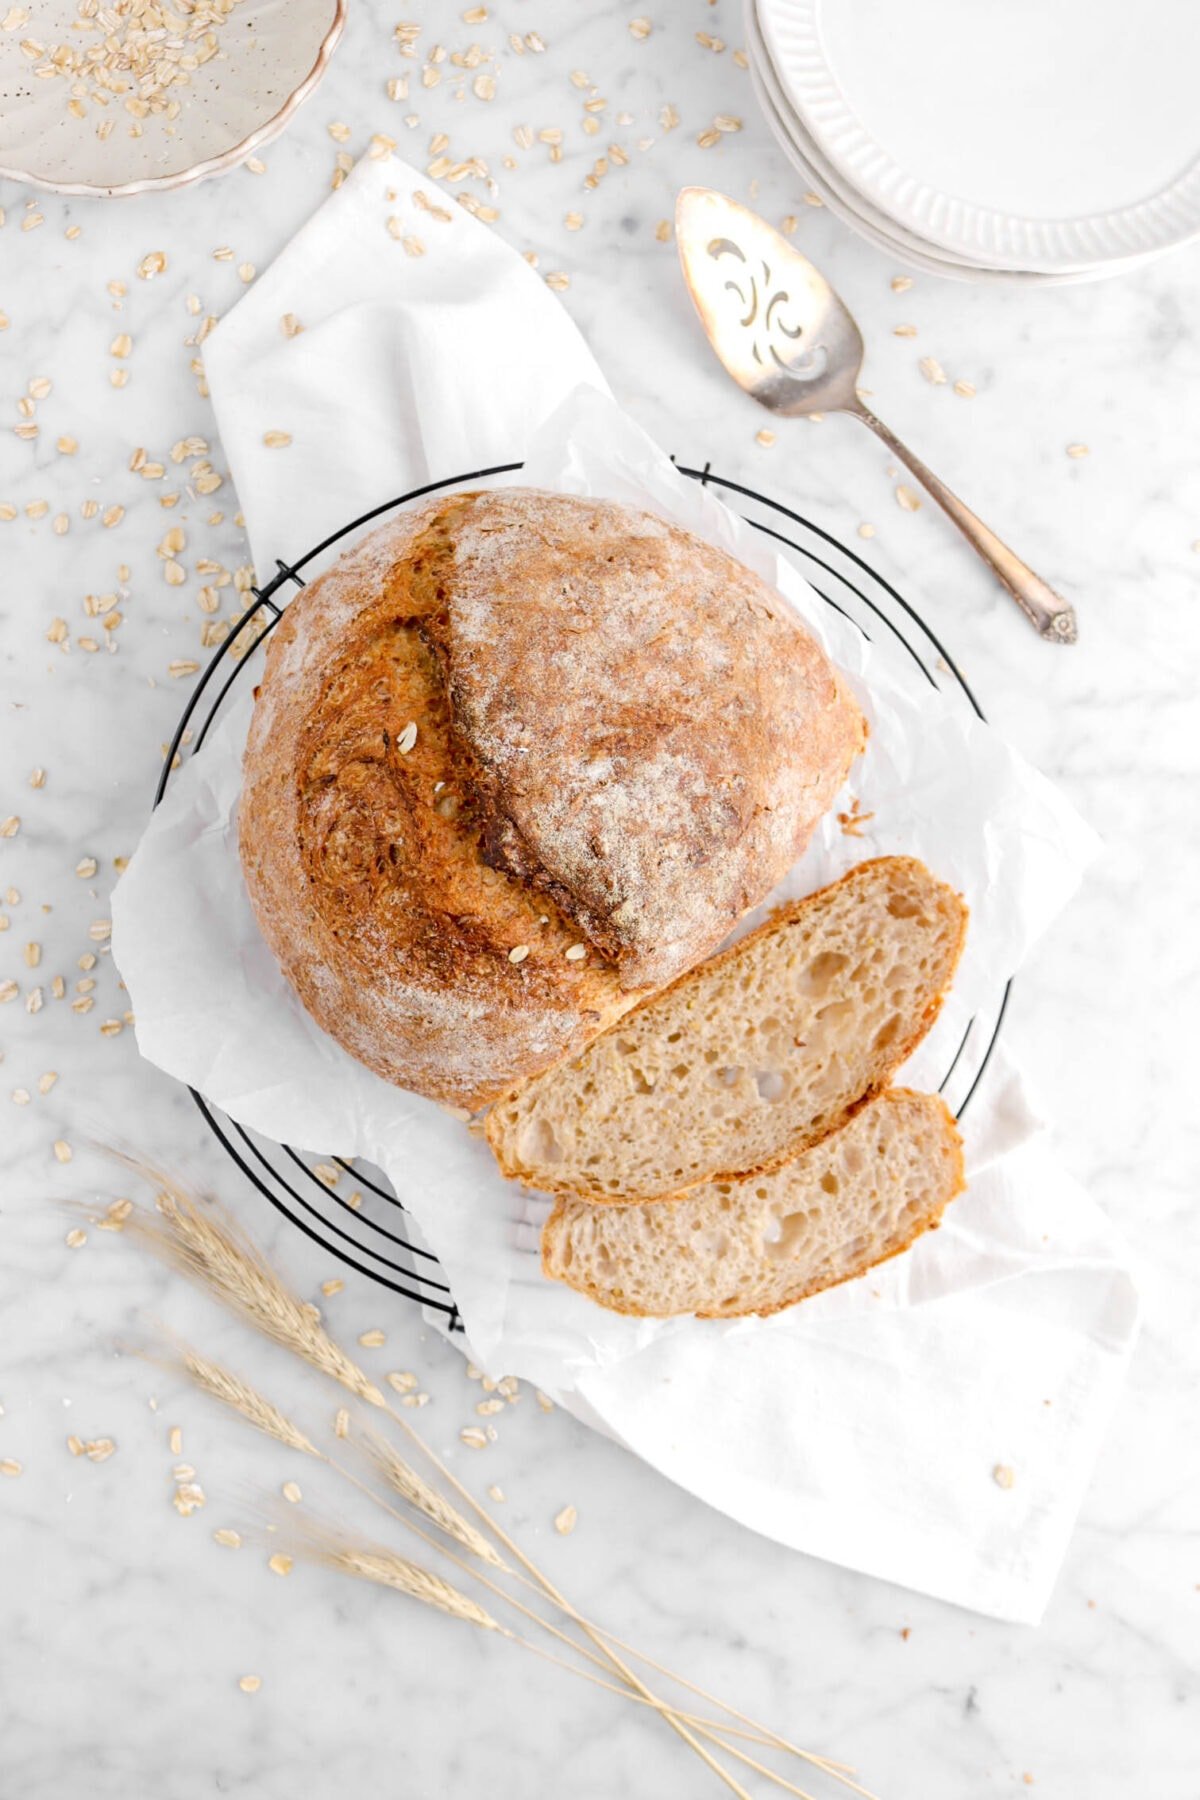
Step 4: Score and bake
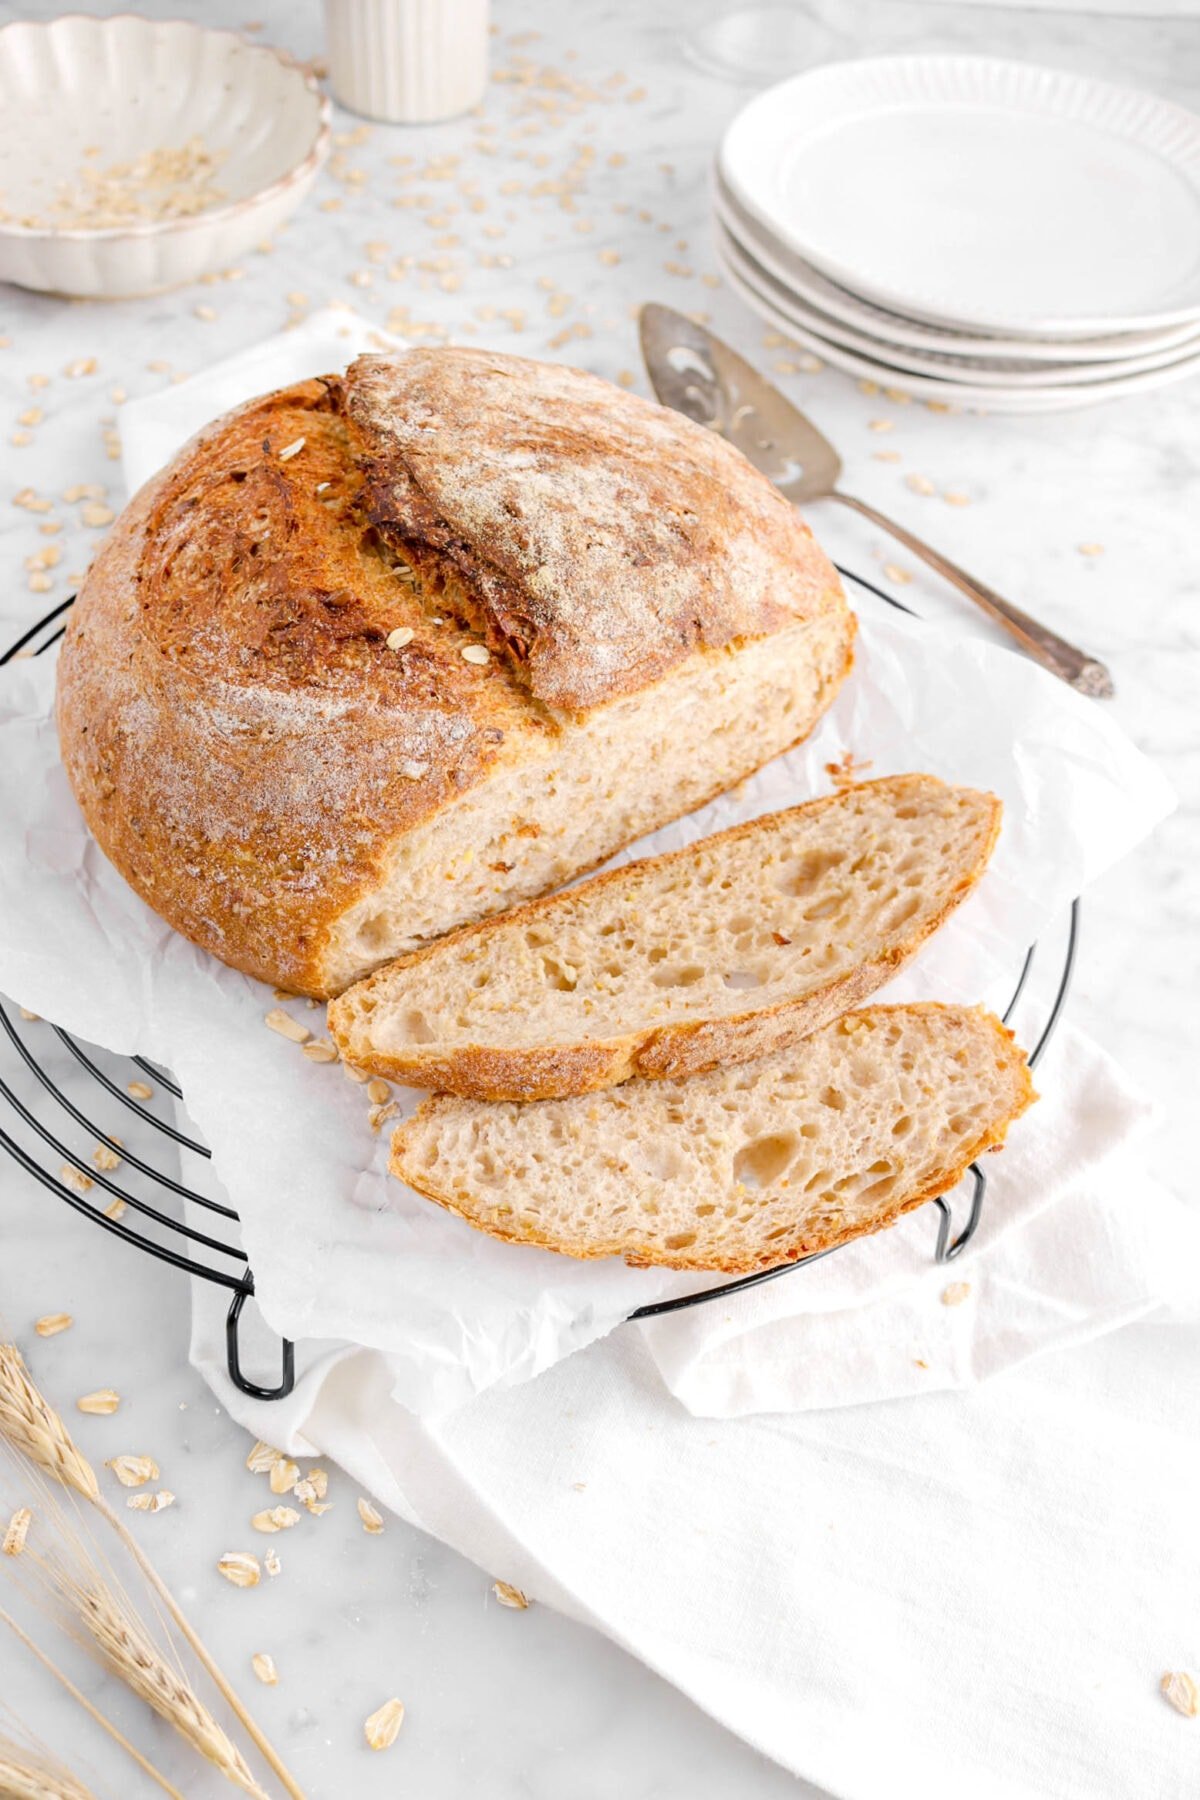
Turn loaf out onto a piece of parchment paper and score the bread.


Carefully, place bread in preheated Dutch Oven and cover with lid. Bake at 450℉/232℃ for 15 minutes. Lower the oven temperature to 425℉/218℃ and take off the lid and bake for another 30 minutes. Take out of oven and let cool completely before serving.
Frequently Asked Questions
How do I make a sourdough starter? If you don’t have a sourdough starter, there’s no worries! You will need 5 days to make a sourdough starter. Use our recipe and guide How To Make A Sourdough Starter In 5 Days to make one!
Why is there yeast in this recipe? This bread has a LOT of added grains that weigh it down, and it’s also made with whole wheat flour. While making it without yeast is possible, we wouldn’t recommend it. Adding the yeast helps give it some much-needed lift.
Why did my bread not rise in the oven? This could be so many things from the dutch oven not being preheated/preheated enough to the ingredients added to the dough. The most common problem is actually over-proofing. We highly recommend investing in a good quality proofing box to help with this issue. Though, if you follow the directions below exactly, you should have a perfect loaf every time!
What type of bread lame should I use? With so many different bread lames on the market, it can be confusing. Each one is used for something specific, actually! A straight blade is used for both traditional and decorative scoring. A curved blade is used for achieving that iconic ear you see in bakeries. While it’s possible to use each lame/blade for the opposite intention, it’s always easiest to try and use the tools as they were meant to be used. If you do not have a lame, we recommend purchasing one, but a very sharp or serrated knife can be used.
How can I tell when the bread is properly baked? The most important thing is to follow the times and directions of the recipe card! Though, if you’re unsure, you can actually tap the bottom of the bread and listen. If the bread sounds hollow, it’s baked through! You could also use a thermometer to see if it’s cooked. A properly baked loaf of bread should have an internal temperature of 212℉/100℃.
What To Make With Multigrain Sourdough Bread
The wonderful thing about this multigrain bread is that it has so many uses! Below are a few of our favorites.
- Toast for breakfast in the mornings.
- Used as sandwich bread.
- Served alongside charcuterie boards.
- Chopped into cubes for croutons or savory bread pudding.
How To Store This Bread
Once this bread is baked and cooled, you can actually store it a few different ways! In a zip top bag or linen bread bag and left at room temperatures for about 3-4 days, in the fridge for about 1 week, OR wrapped with aluminum foil and kept in the freezer for up to 2 months!
Just keep in mind that if kept in a zip top bag, this bread’s crust will soften and no longer be crunchy. You can always slice it and toast it in the toaster or place the loaf in the oven for a few minutes to get the crust crunchy again!

When you make this Multigrain Sourdough Bread, leave a comment down below! We love hearing from you and answering any questions you might have! Also, be sure to tag us on social media and hashtag it #BakersTable.
Multigrain Sourdough Bread
Ingredients
Whole Wheat Starter
- ½ cup sourdough starter
- ¼ cup water, lukewarm
- ½ cup whole wheat flour
Soaker
- 2½ Tablespoons flaxseeds
- 2 Tablespoons steel cut oats
- 3 Tablespoons sunflower seeds
- 3 Tablespoons old fashioned rolled oats
- 1¼ teaspoons kosher salt
- ½ cup boiling water
Final Dough
- 1⅝ cups bread flour
- ½ cup water, lukewarm
- ⅔ teaspoon instant yeast
- 1½ teaspoons kosher salt
- 1½ teaspoons honey
- All of starter
- All of soaker
Instructions
Whole Wheat Starter
- In a small glass bowl, whisk together starter and water.
- Stir in flour.
- Beat well.
- Cover with plastic wrap.
- Proof at room temperature (about 70℉/21℃) for 12-16 hours.
Soaker
- In a small glass bowl, stir together flax seeds, steel cuts oats, sunflower seeds, old fashioned rolled oats, and salt.
- Pour boiling water over the mixture.
- Stir until combined.
- Cover with plastic wrap.
- Allow to stand at room temperature for 12-16 hours.
Final Dough
- In the bowl of an electric mixer, combine bread flour, water, yeast, salt, honey, the starter, and the soaker.
- Mix on low speed for 3 minutes.
- Switch to dough hook, if using.
- Increase speed to medium.
- Continue to mix for 4-5 minutes, until the dough comes together and cleans the bowl.
- Turn into a clean glass bowl.
- Proof at 78℉/26℃ for 1-1½ hours, or until nearly doubled in bulk. (Cover with plastic wrap if not using a proofing box with a water tray.)
- Line a round banneton with a cover or a tea towel.
- Sprinkle with rice flour. Set aside.
- Turn dough out onto a lightly floured surface.
- Gently deflate.
- Fold the top third over toward the middle.
- Fold in the right and left corners.
- Roll dough towards you, tucking it tightly.
- Tuck ends under.
- Use a bench knife, or your hands, to round and tighten the dough.
- Place it, bottom side up, in prepared banneton.
- Proof at 80℉/27℃ for 1-1½ hours, until noticeably risen. (Cover with a tea towel or plastic wrap if not using a proofing box.)
- While loaf is proofing, heat oven to 450℉/230℃.
- If you are using a cloche to bake, put that in the oven now. If you are using a baking stone, put that in the oven along with an empty sheet pan or cast iron skillet on the rack below the stone.
- Turn loaf out onto a piece of parchment paper.
- Score, as desired.
- Place in cloche and replace lid or use a peel to slide onto stone. If using stone, pour at least 2 cups water into empty pan as soon as you put the bread on the stone.
- Close oven door immediately.
- Bake for 15 minutes.
- Lower temperature to 425℉/220℃. If using a cloche, remove the lid now.
- Continue baking an additional 30 minutes, or until loaf is done.
- Remove from oven.
- Place loaf on a wire cooling rack.
- Allow to cool completely, about 1½ -2 hours, before slicing.
Watch How To Make This Recipe Below!

Notes + Tips!
- If you’re new to sourdough and don’t have a starter, use our How To Make A Sourdough Starter in 5 Days guide!
- If you already have a sourdough starter, but it seems to be a little sluggish/doesn’t have that healthy smell, we recommend giving it about a week of really working to revive it. You can find out how to do this/get more tips in our Sourdough Starter Guide.
- Be sure to read through all the directions before beginning this recipe.
- Use a tea kettle to safely boil the water needed for the soaker.
- Do not use any roasted or salted nuts in this recipe.
- You will need old-fashioned (rolled) oats AND steel cut oats.
- Use glass bowls for the proofing.
- Rice flour works best to flour your banneton to prevent sticking.
- You can use a dutch oven, or a baking stone to bake this bread.
- If you are using a proofing box with a water tray, you will not need to cover the dough to proof it.
- Remember to preheat either the dutch oven or baking stone!
- To tell if the bread is properly proofed, press down gently on the top of the bread with a floured finger. If it springs back quickly, it needs to proof a bit longer. If it stays indented, it is over proofed. You can still bake it, and it will taste fine. It just won’t be the pretty loaf you hoped for. If it springs back slowly, the bread is properly proofed and ready to cook.
- The bread is done when it sounds hollow if tapped on the bottom. A thermometer inserted into the loaf should read 205℉-210℉/96℃-99℃.
Tools You May Need (affiliate links)
- 5 ½ Quart Dutch Oven
– Still Hungry? –
Here are a few recipes may like!


I have read and re-read this beautiful recipe and I have 2 questions….where is the Whole Wheat flour other than in the Whole wheat Starter? and also 1 5/8 cups bread flour….and ?Whole Wheat flour? 1 5/8 cups of any flour does not make a loaf of bread. Please explain and advise. I’m wanting to make the loaf but feel there are missing parts. Also, at the heading of the recipe it states “45 minutes” for bake time. In the recipe it only mentions 15 minutes at 450 degrees then an addditional 10 at 425 degrees. Where are the other 20 minutes? Help, please.
Hi! Great questions. This recipe is multigrain (not a 100% whole-wheat dough). The whole wheat is in the starter, and the additional grains are in the soaker. The 1 5/8 cups listed is just the bread flour added in the final mix—there’s additional flour in the starter and bulk from the soaked grains, which is why it makes a full-size loaf. Also, thank you for catching the bake-time discrepancy! That was a typo and it’s been corrected. The correct time is also in the post as are step-by-step photos. If it helps, the recipe card has metric weights, too. Let me know if you have any other questions.
I made your recipe and it was very good but it seems like some salt is missing. I expected to be adding additional salt with the flour. (Total about 1 Tablespoon in all). Am I wrong?
Hi Linda! You are not wrong. I went back and looked at my formula. It is definitely short about 1 1/2 teaspoons. I must have just missed it when I was typing it in. Thank you so much for calling it to my attention! I will get it fixed immediately.
Your recipe instructions indicate the lid stays on the cloche during the entire baking time. Every recipe I’ve used up until now, always say to remove the lid at some point. I just to make sure the lid stays on the entire time. Correctz?
Hi Pat! You are correct. It is stated correctly in the post. I just missed it in the recipe card. Thanks for catching that! I’ll fix it now.