Pumpkin Sourdough Bread
This post may contain affiliate links, please visit our privacy policy for details.
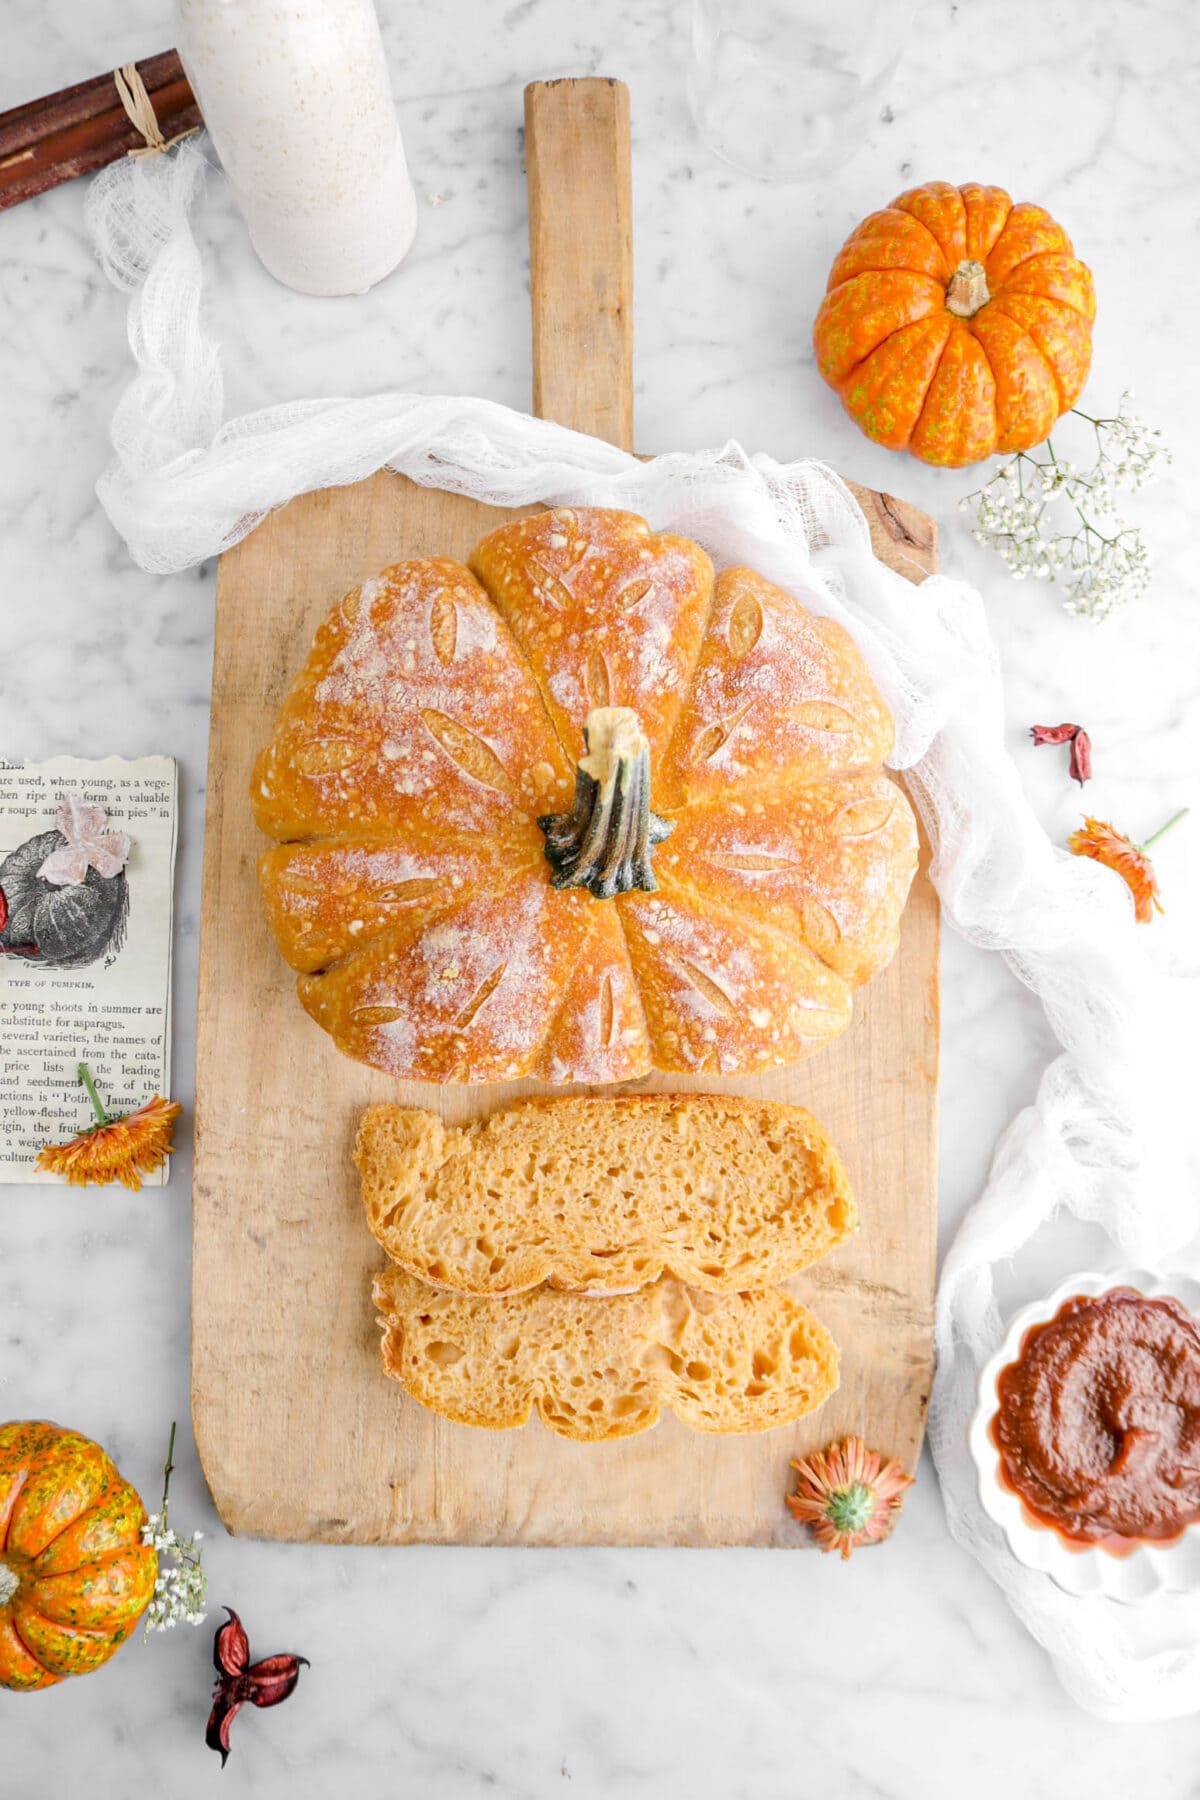
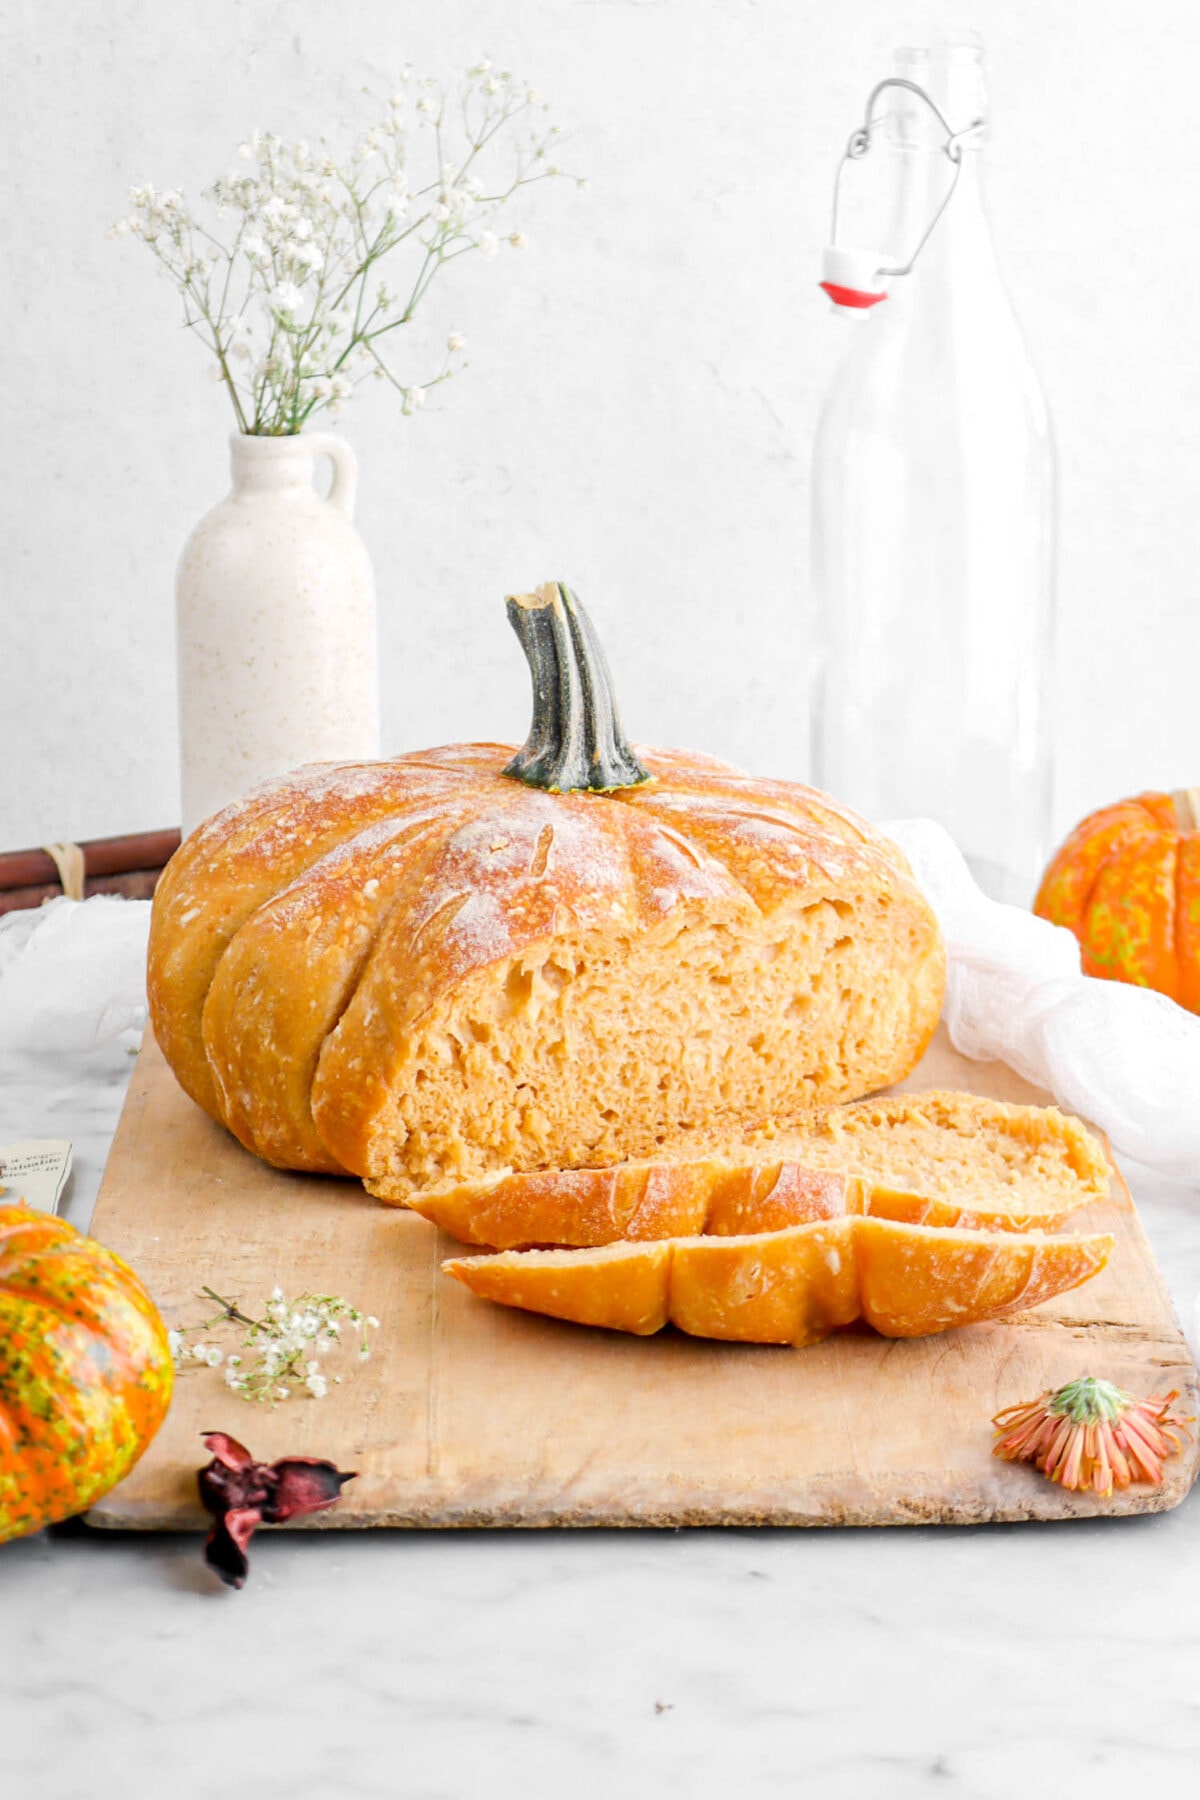
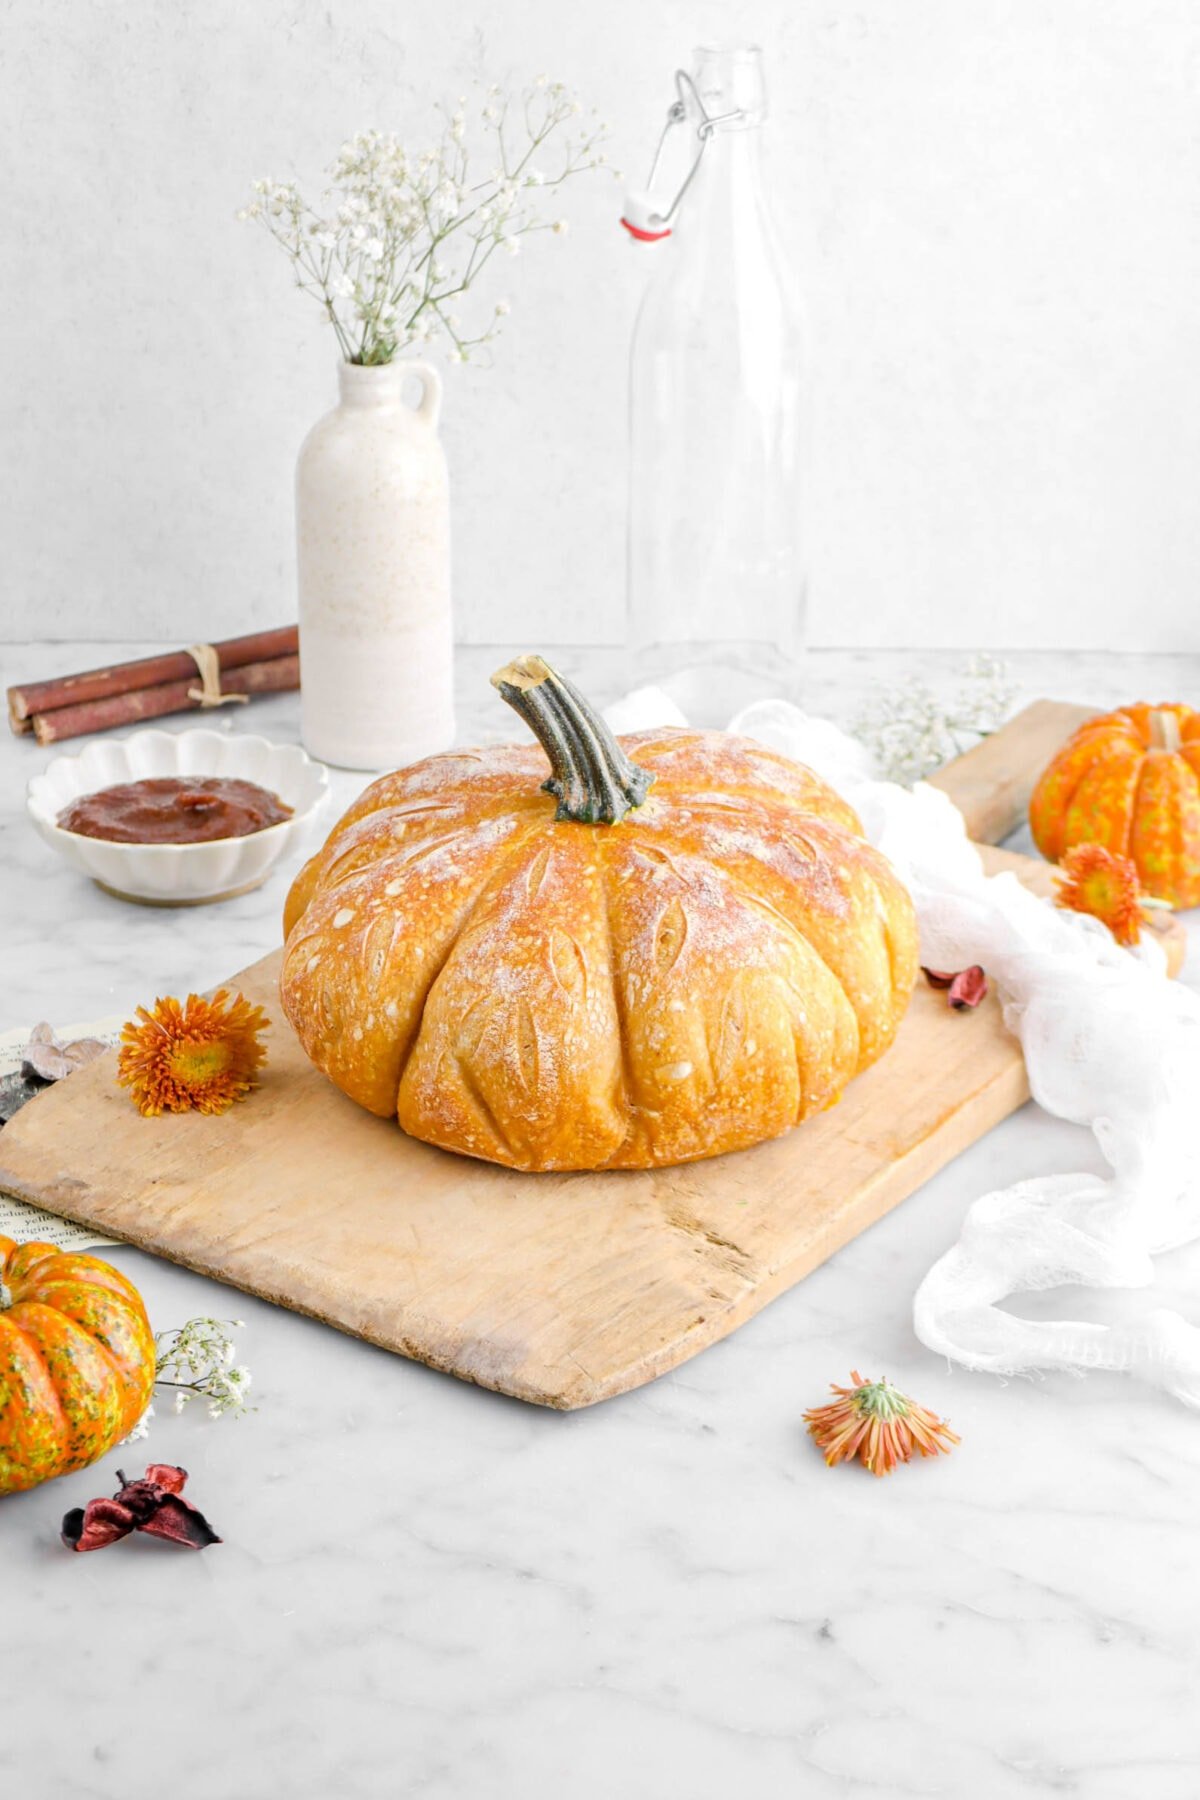
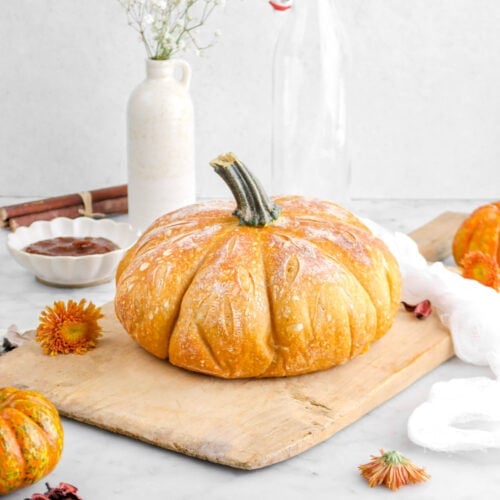
The perfect loaf of bread to bake this Fall…Pumpkin Sourdough Bread! Think, a traditional sourdough bread but with the addition of puréed pumpkin to give it just a little bit of flavor, and shaped just like a pumpkin for an impressive, but so simple bread that’s guaranteed to be a serious crowd pleaser. Crunchy and gorgeously browned crust, with a soft, chewy, and light interior. It’s the only bread you’ll want to serve all season long! Bonus? It’s naturally vegan, delicious, and the perfect compliment to almost any and every meal! From serving alongside a holiday dinnner or a charcuterie board, to making sandwiches. The possibilities are limitless and delicious!

About The Recipe
Weekends are for baking, you know? Especially now with the holidays right around the corner. It’s such a cozy time and, in our opinion, there’s nothing better to bake on a chilly afternoon than a loaf of sourdough bread.
I mean, is there really anything better than a freshly baked loaf of bread?
Though, bread can be a lot to manage while trying to juggle everything else going on. So, we decided to make this pumpkin bread a little bit easier, especially with the holidays so soon!
This loaf is made without the addition of yeast. Why? Well, yeast speeds up the process, which means you get a loaf of bread sooner, but that also means you need to be able to work with the dough a lot more often.
Without the yeast, the process takes about 3 days. Which, sounds like a long time, I know, but I promise it’s worth it! Your actual hands-on time is like…ten minutes. The rest? The dough is hanging out in the fridge, slowly proofing, and developing some amazing flavor.
Which means, you can plan accordingly and have everything ready right when you need it!
But, if I’m being honest, the best part of this loaf is the look of it (and eating it, of course!). I mean, it’s such a simple thing to do, but it makes a dramatic difference, and it’s really impressive to look at!
This pumpkin sourdough is honestly the perfect loaf of bread to serve at Thanksgiving, especially since it’s such a large loaf. Enjoy with friends and family, alongside your favorite dishes for an unforgettable holiday meal.
Reasons You Will Love This Pumpkin Sourdough Bread
- So much easier to make than you might think.
- A delicious Fall twist on the classic sourdough bread!
- Naturally vegan.
- Can be used to make sandwiches, french toast, or just served as-is.
- Subtle in flavor, which makes it a real crowd pleaser!
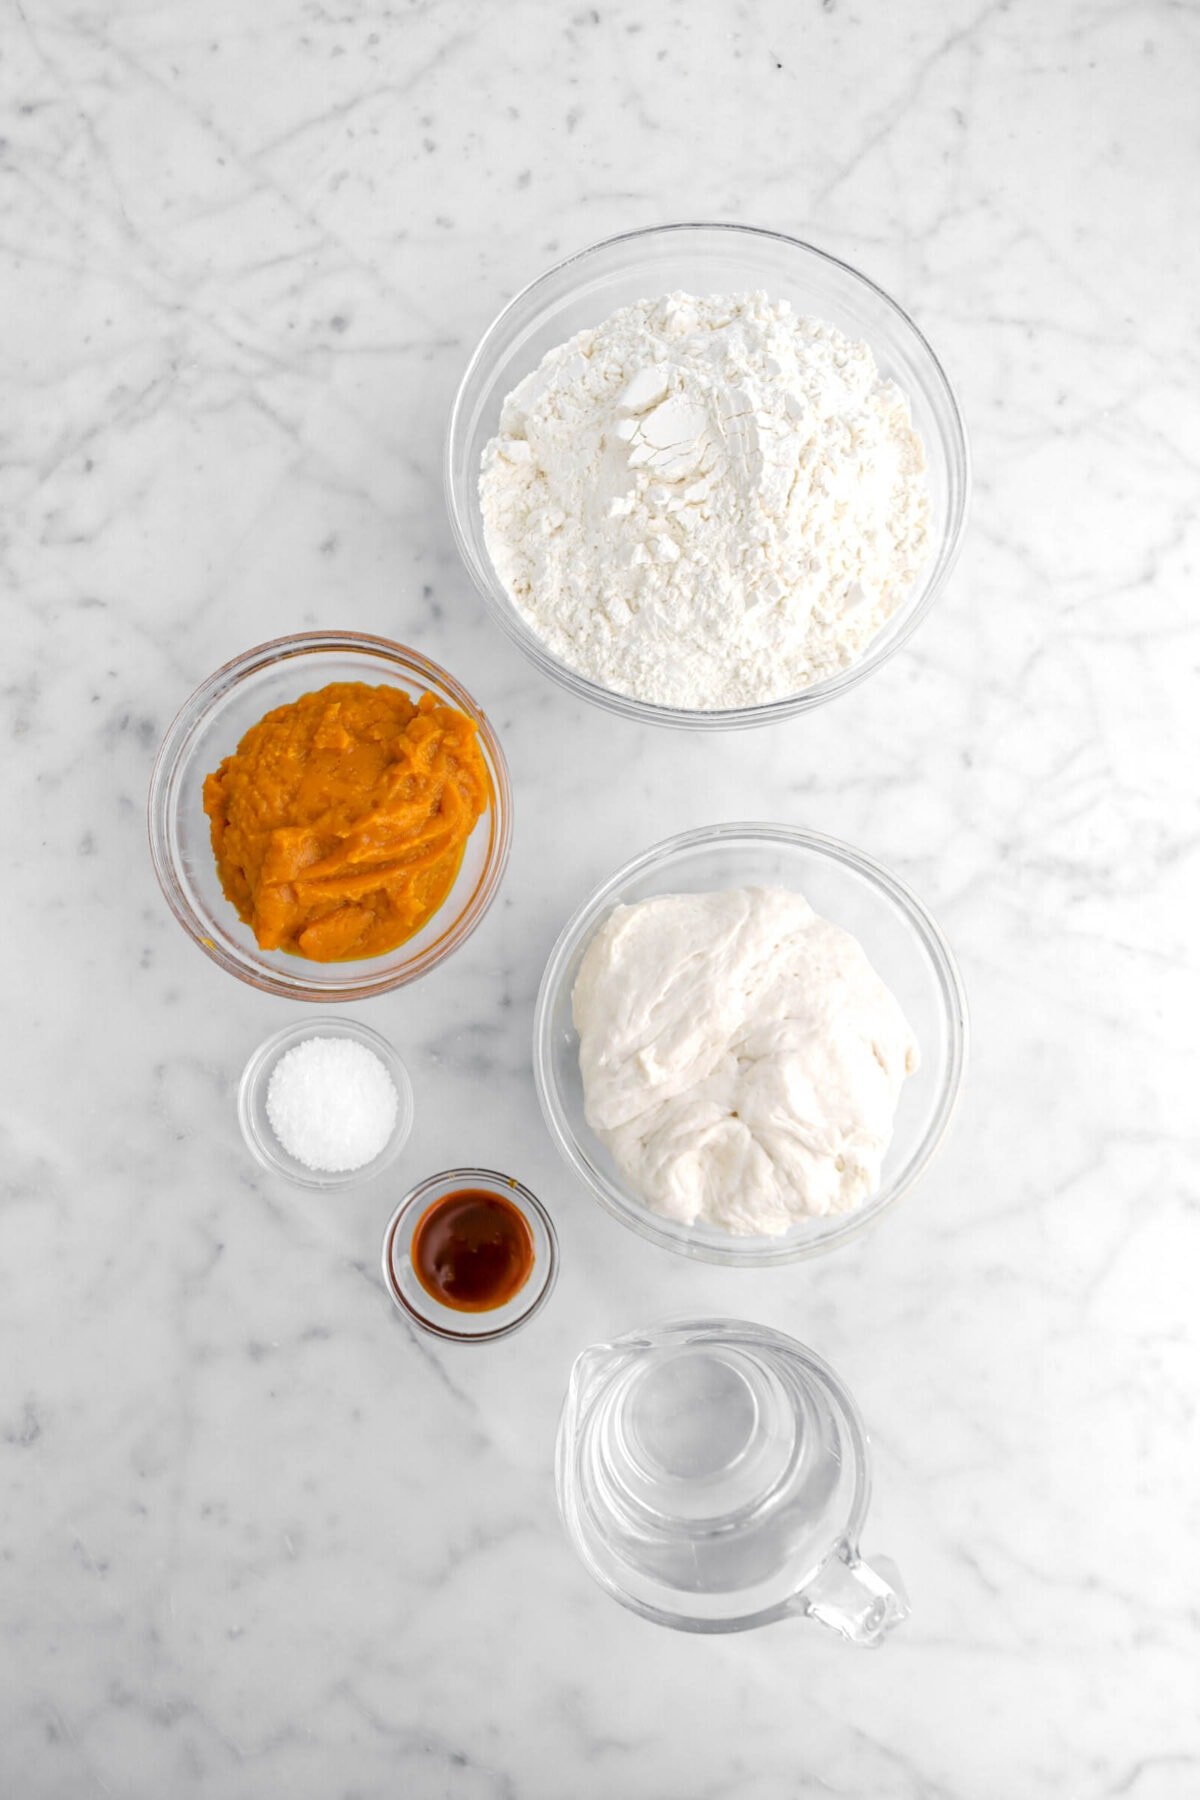
Ingredients
(Full ingredient amounts and instructions can be found in the recipe card at the bottom of the post)
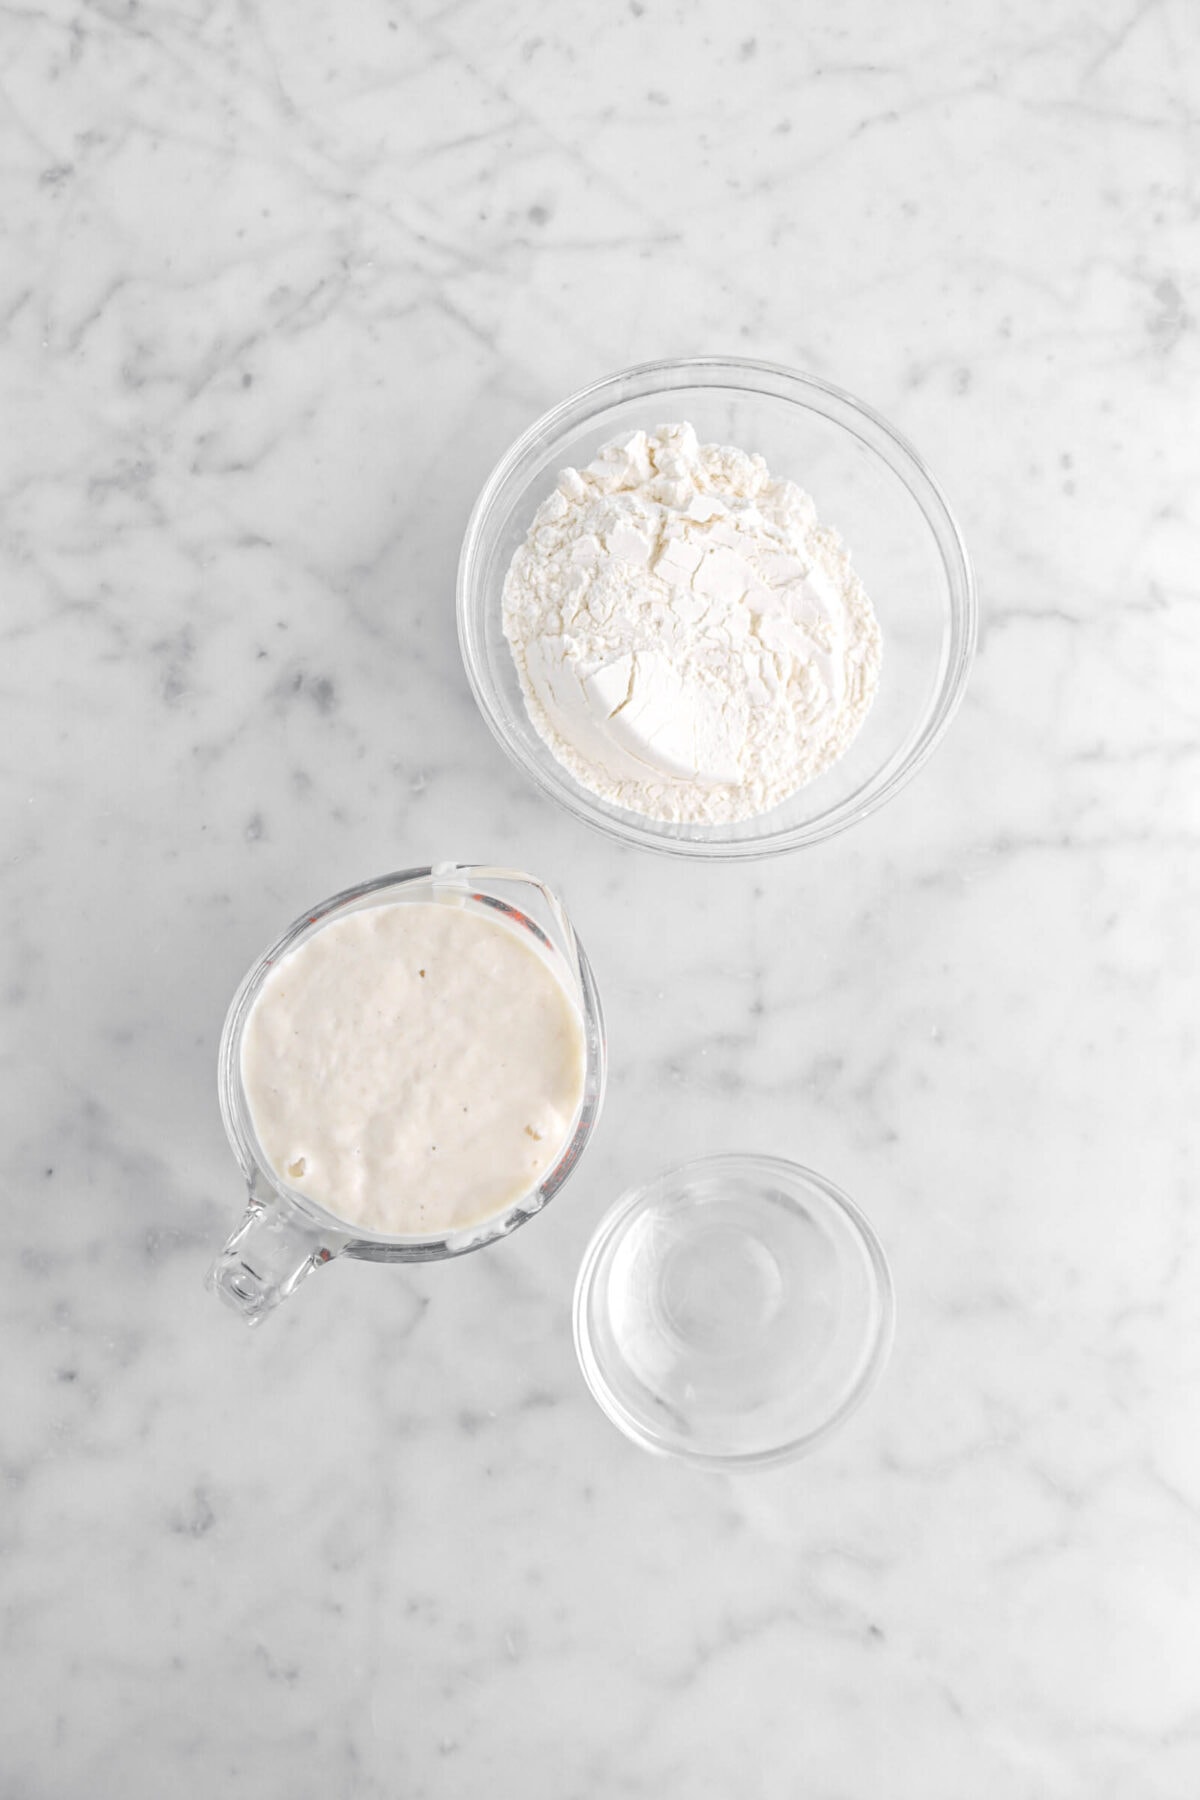
For The Firm Starter:
- Bread Flour
- Sourdough Starter
- Lukewarm Water
For The Bread:
- All of The Firm Starter
- Lukewarm Water
- Pumpkin Purée
- Barley Malt Syrup
- Bread Flour
- Kosher Salt
How To Make Pumpkin Sourdough Bread
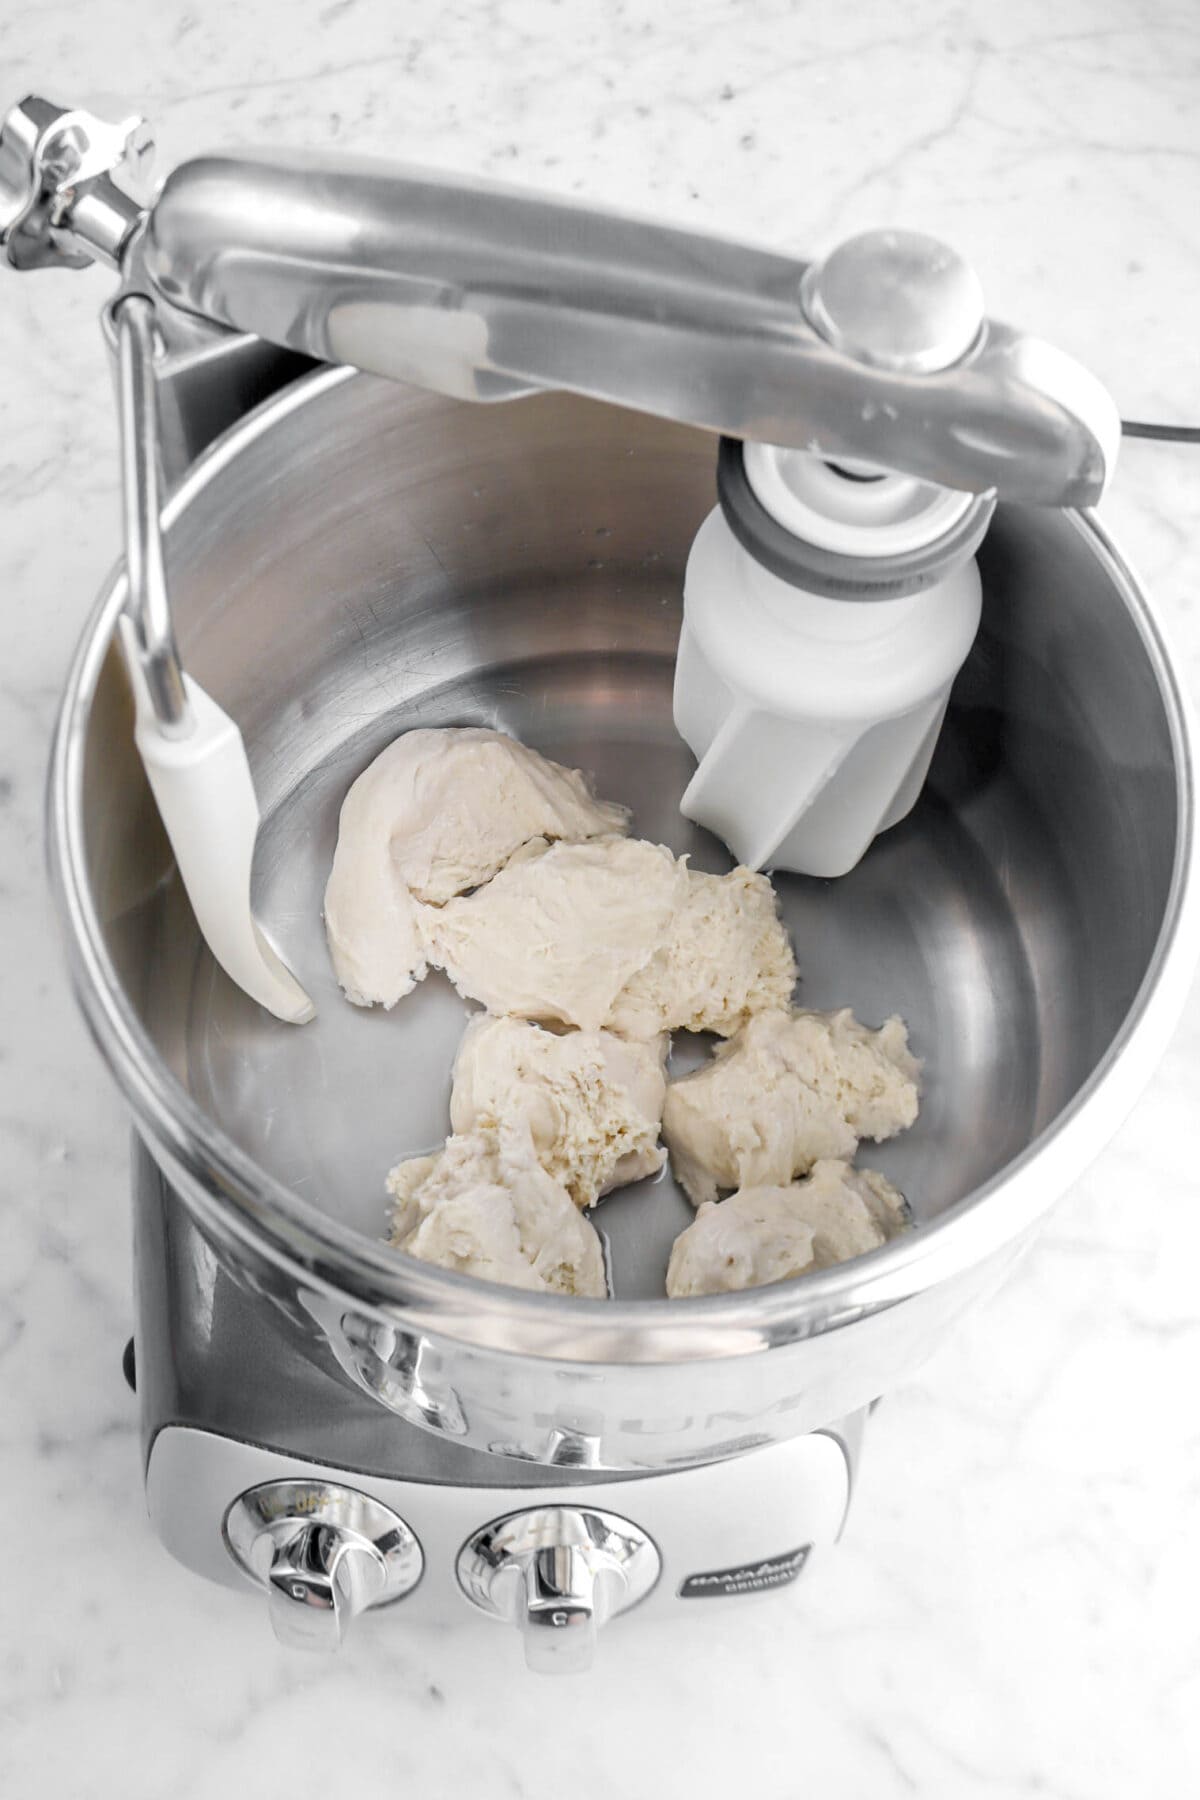
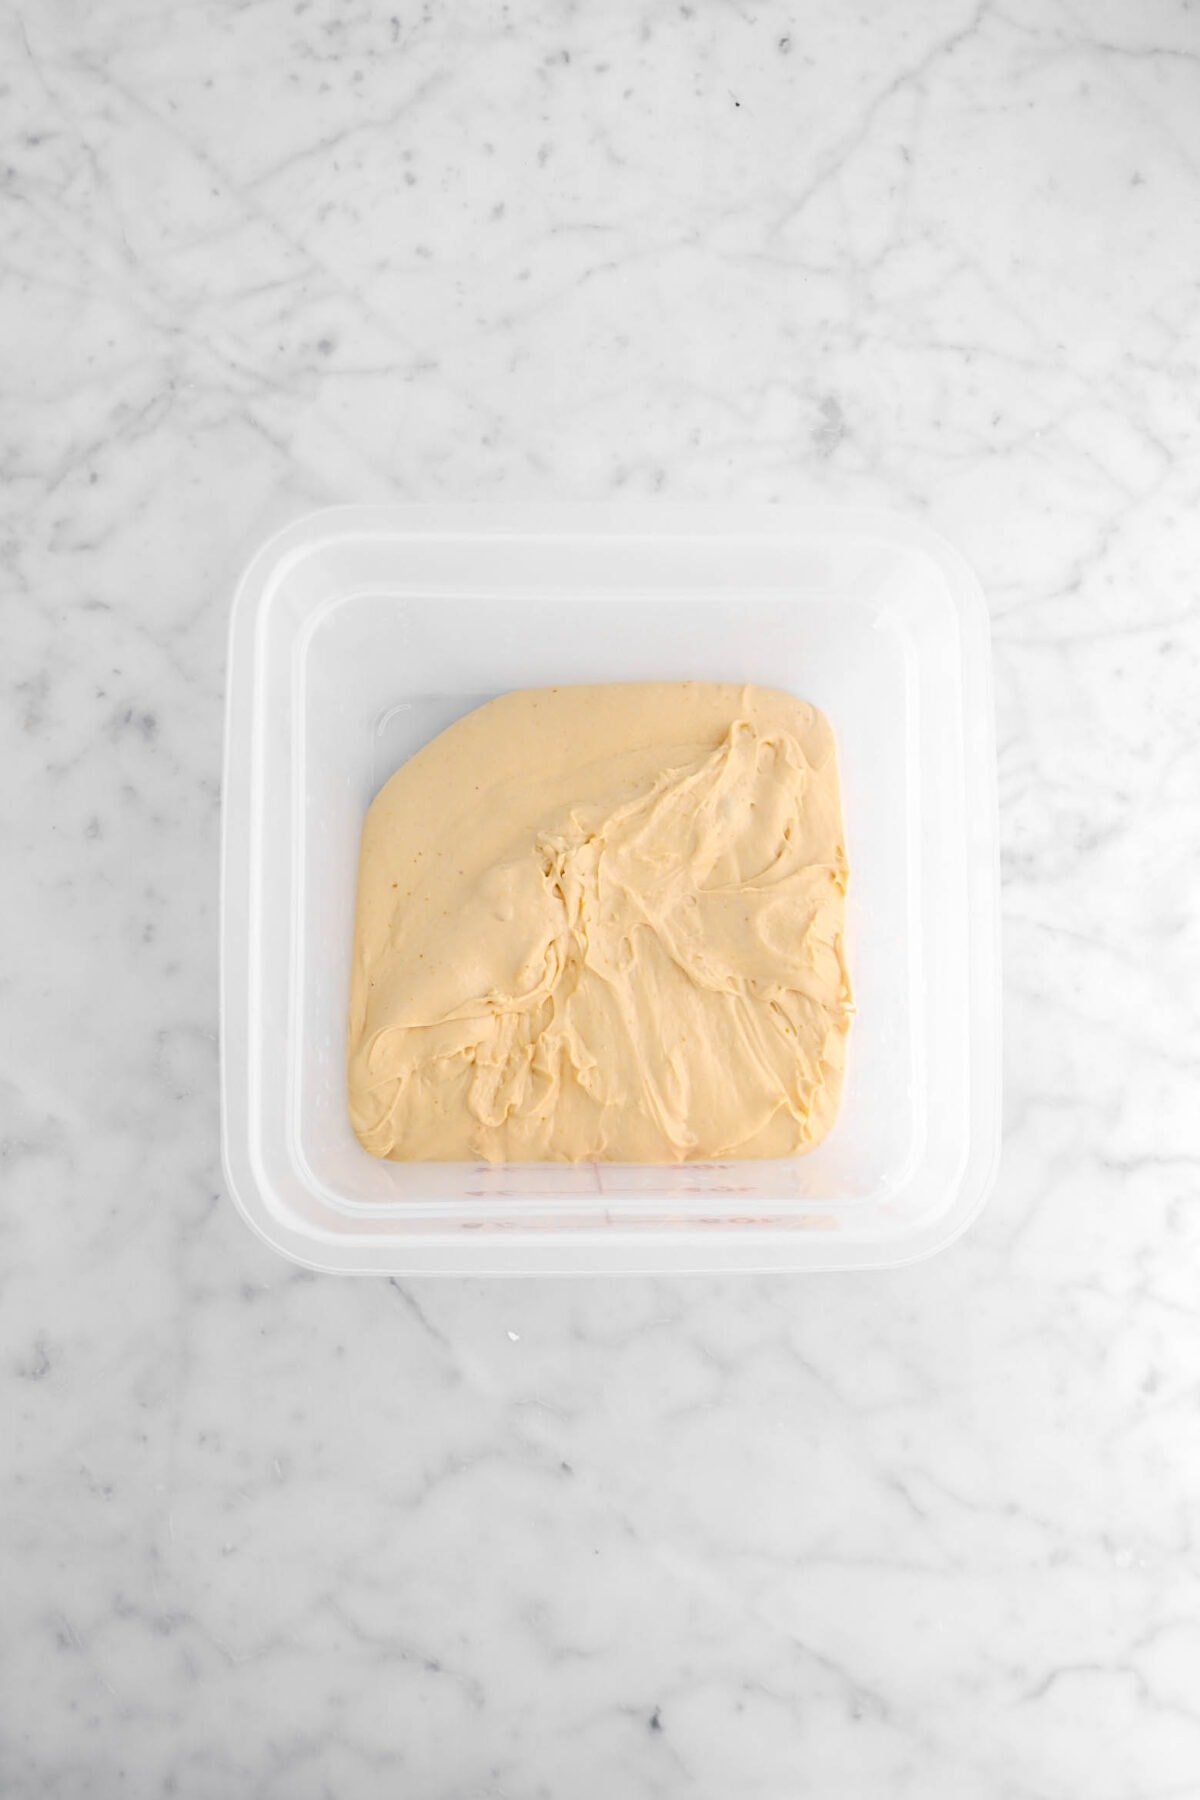
Step 1: Make the firm starter
Combine sourdough starter, water, and bread flour in the bowl of a stand mixer. Mix on low speed until combined, about 1-2 minutes. Increase speed to medium. Knead until dough is smooth, about 4-5 minutes.
Place dough in a covered container. Allow to rise in a warm place until doubled in bulk, about 4 hours. Place starter in refrigerator overnight.

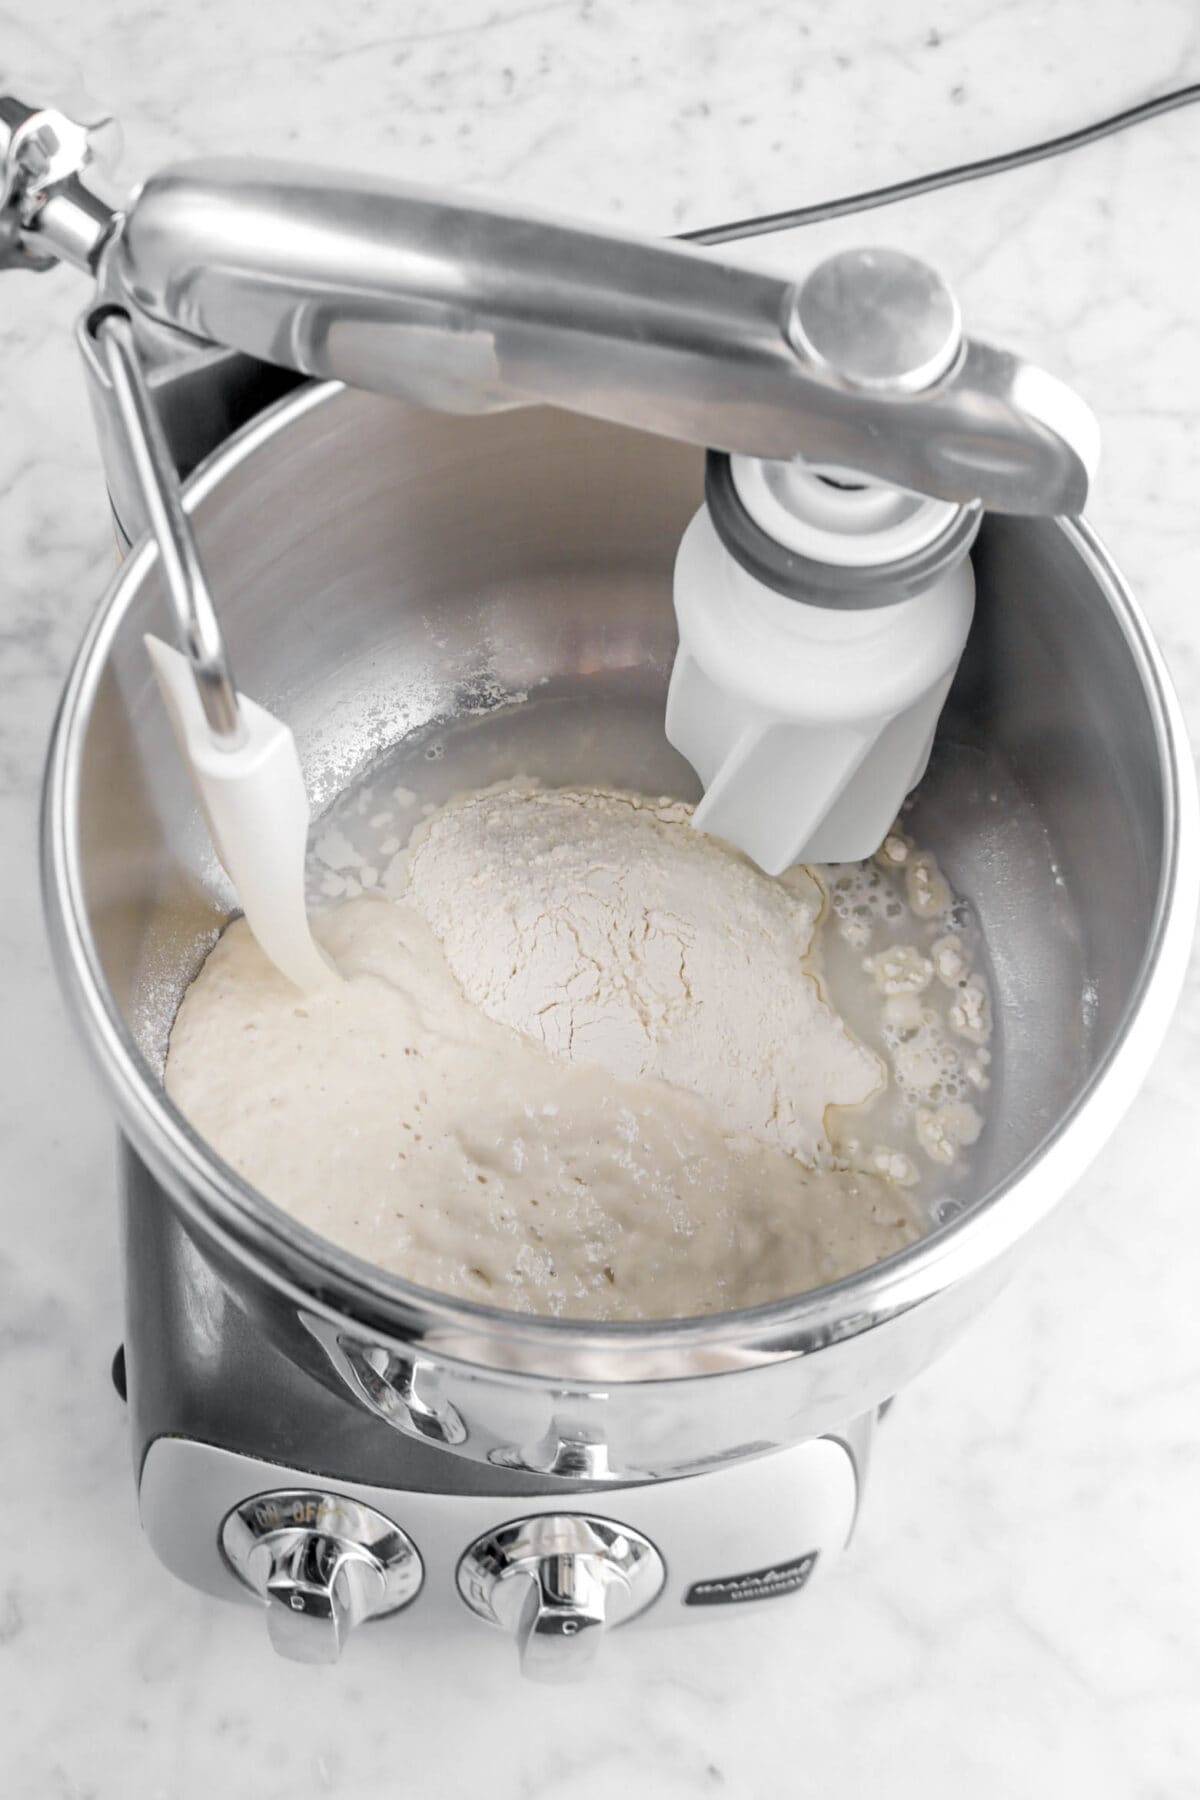
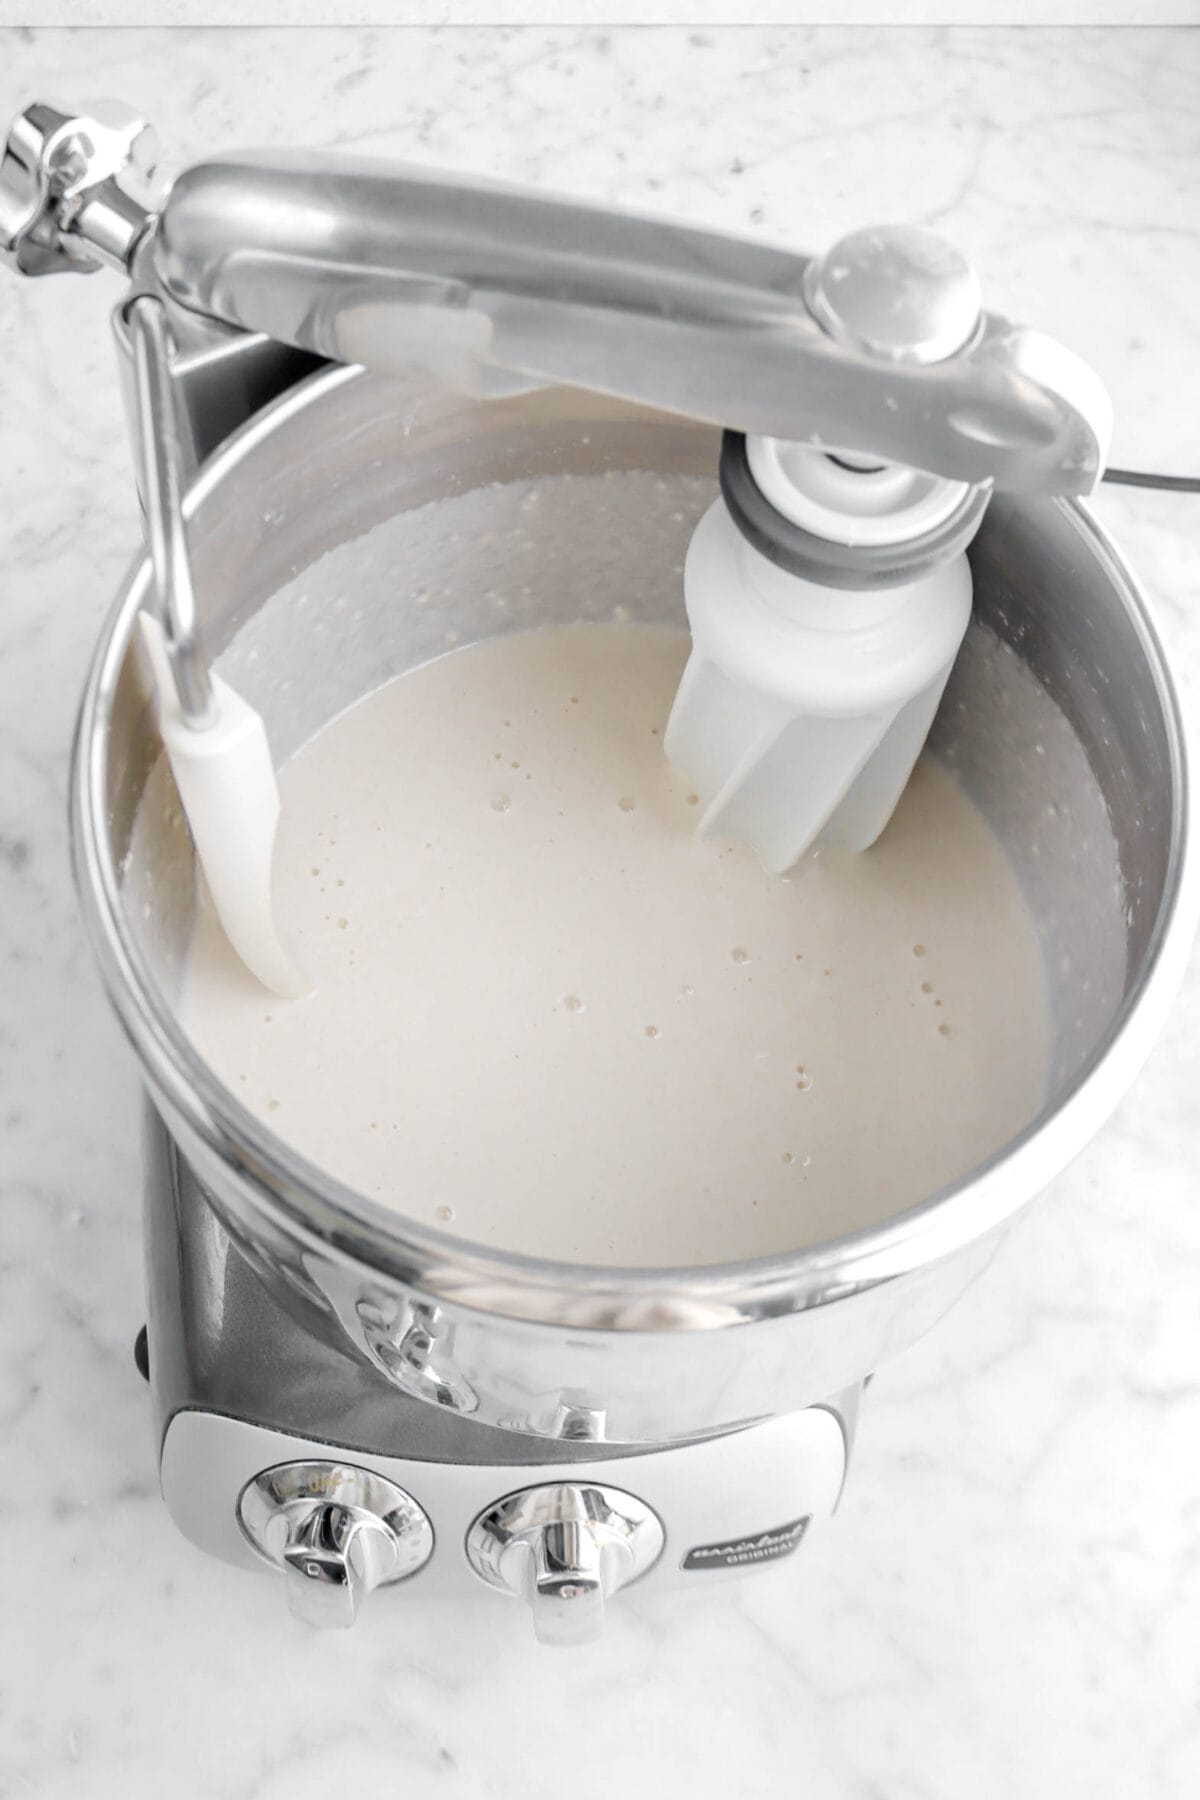
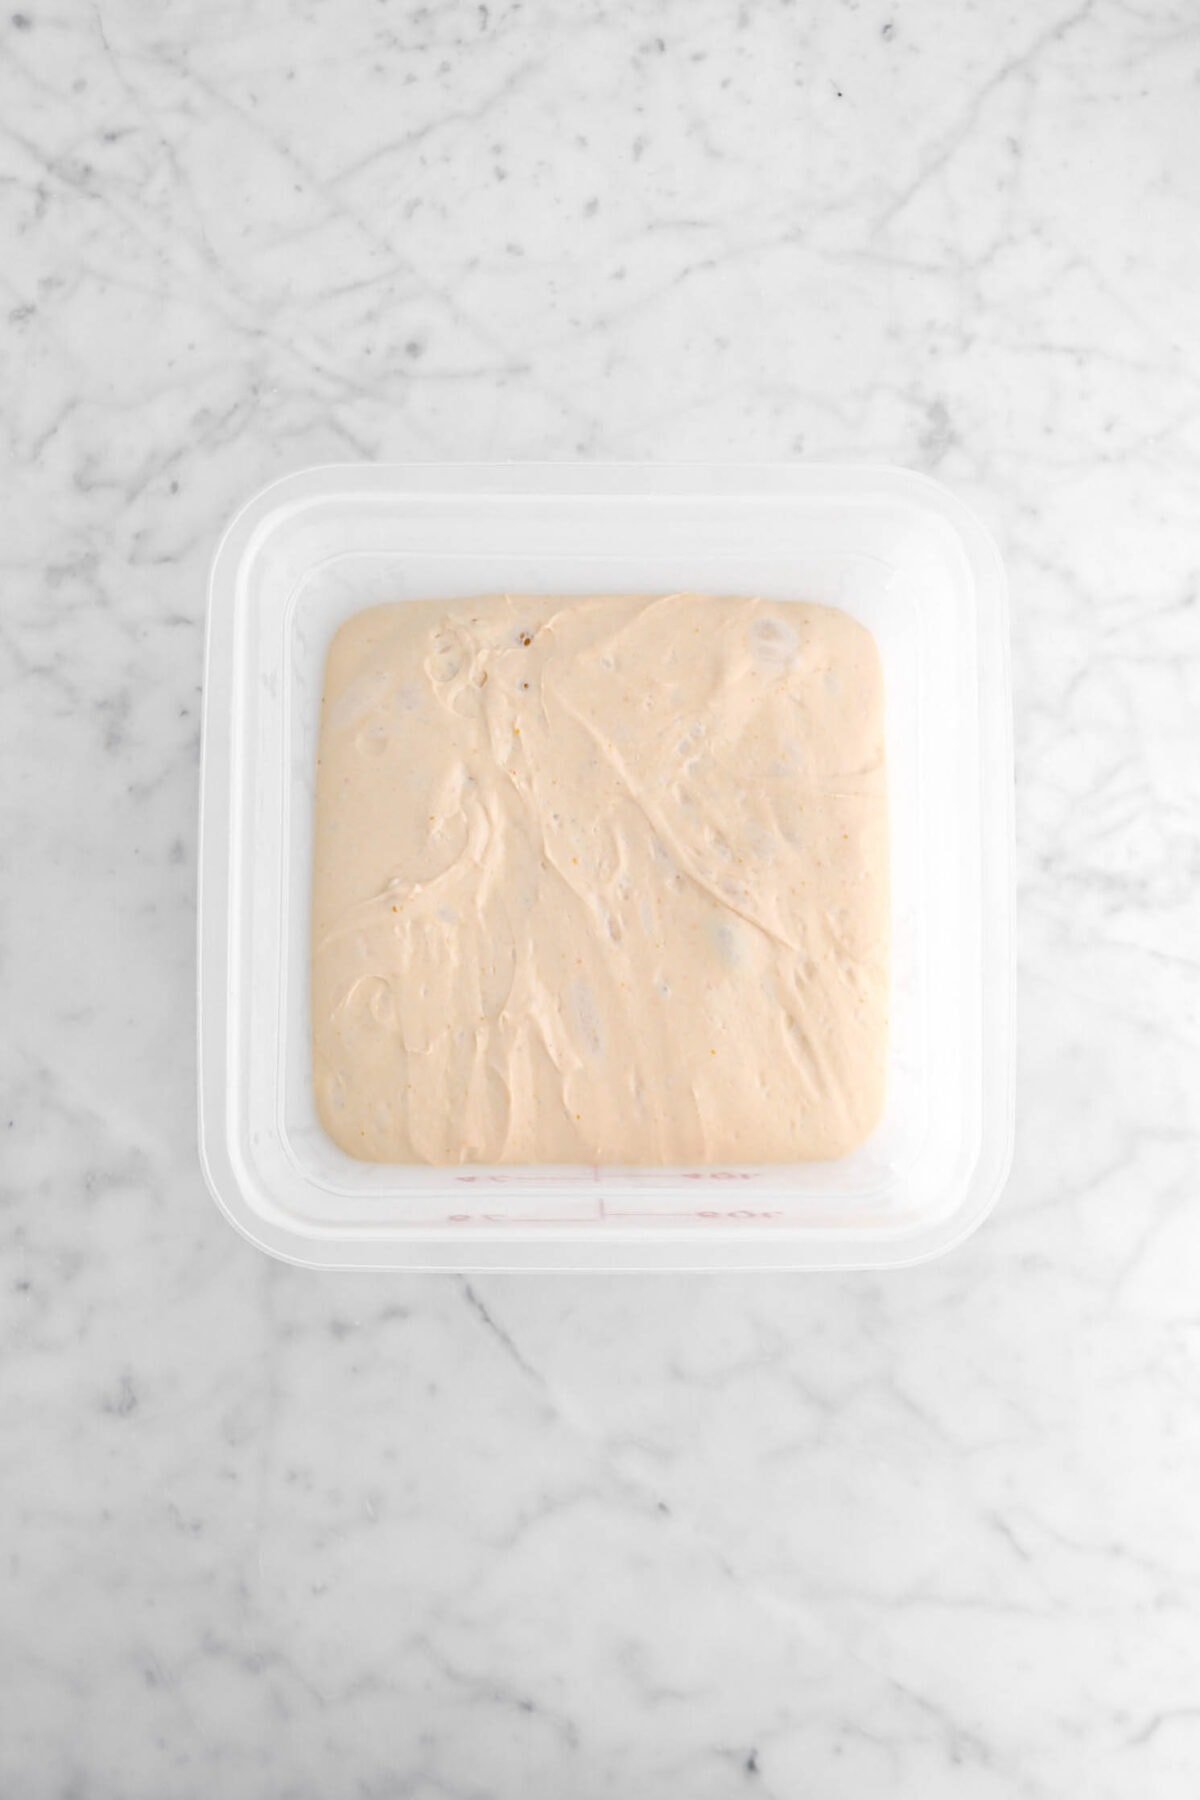
Step 2: Make the bread dough
In the bowl of a stand mixer, combine water and firm starter. Mix on medium low speed until combined, about 3-4 minutes.
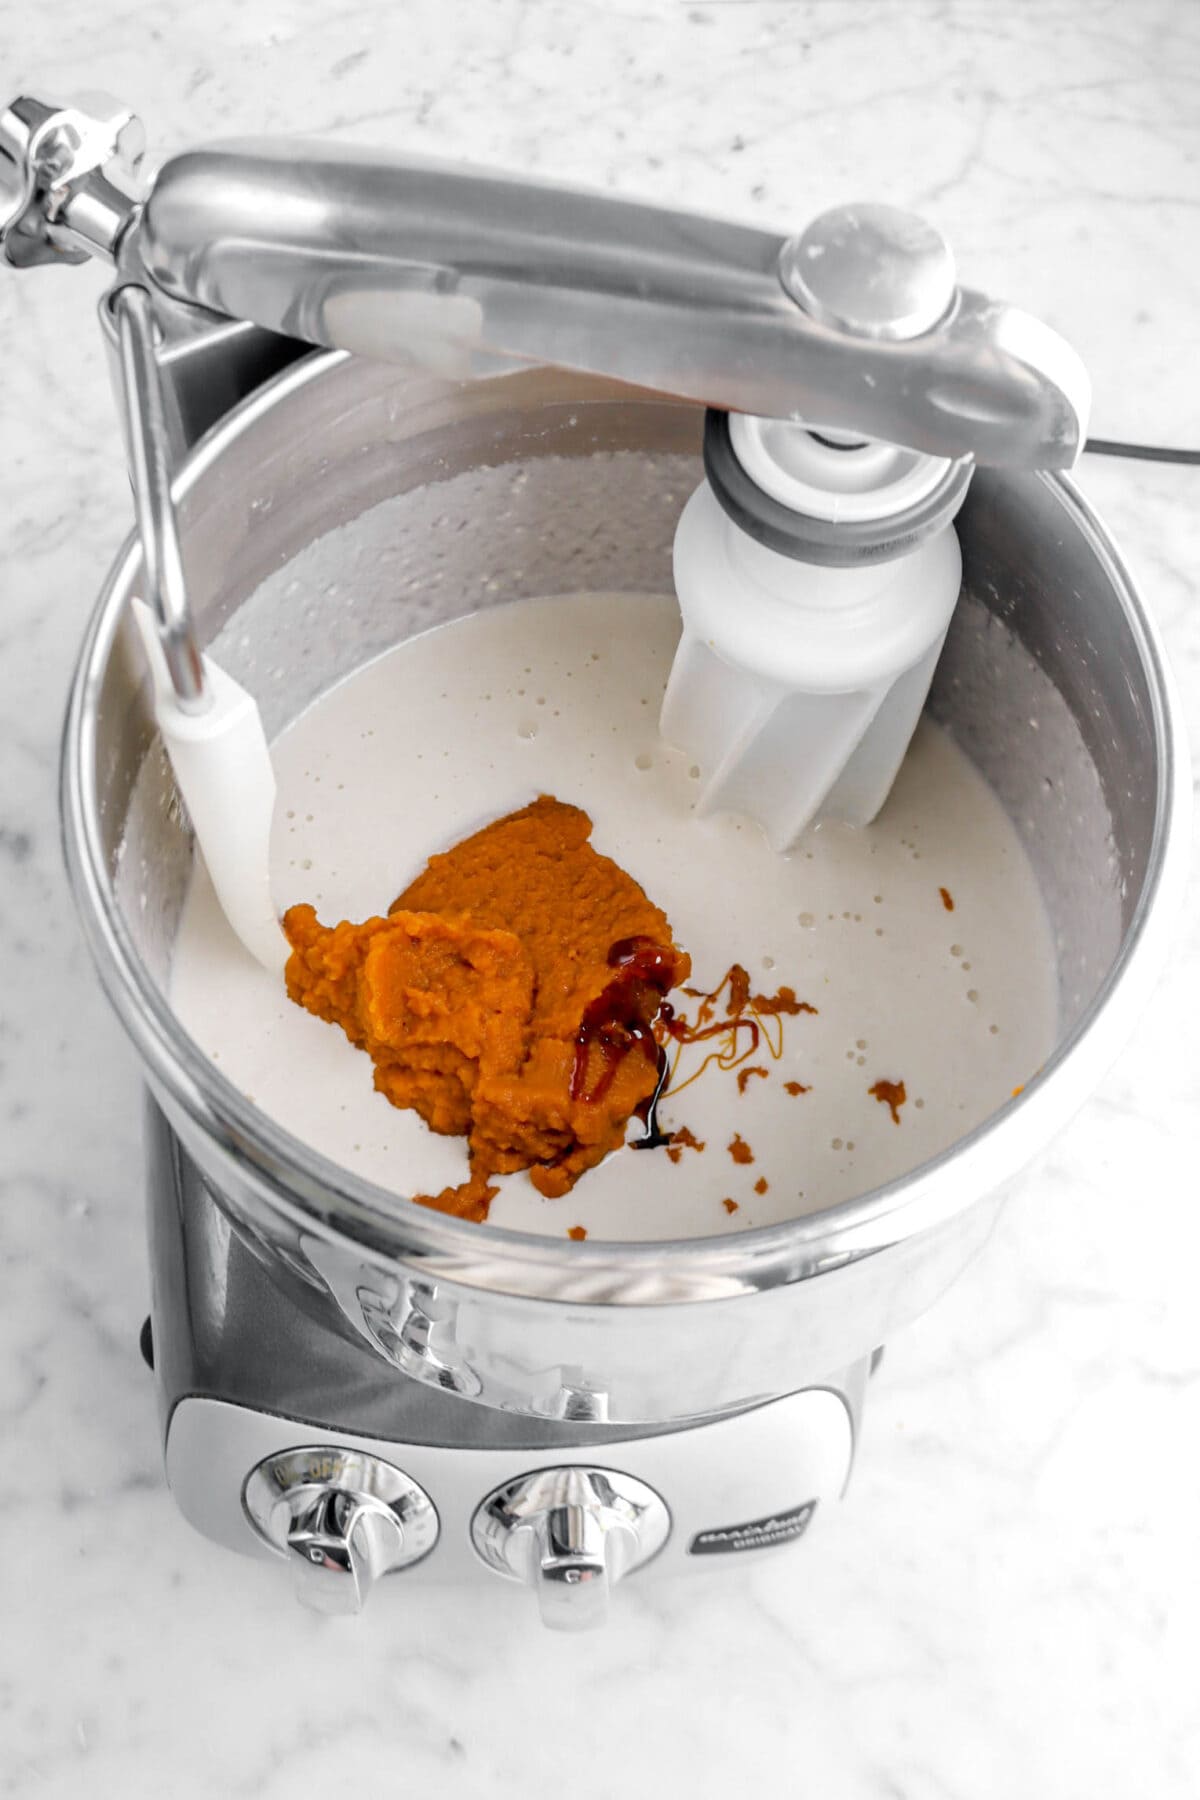
Add pumpkin and barley malt and mix until combined, about 1-2 minutes.
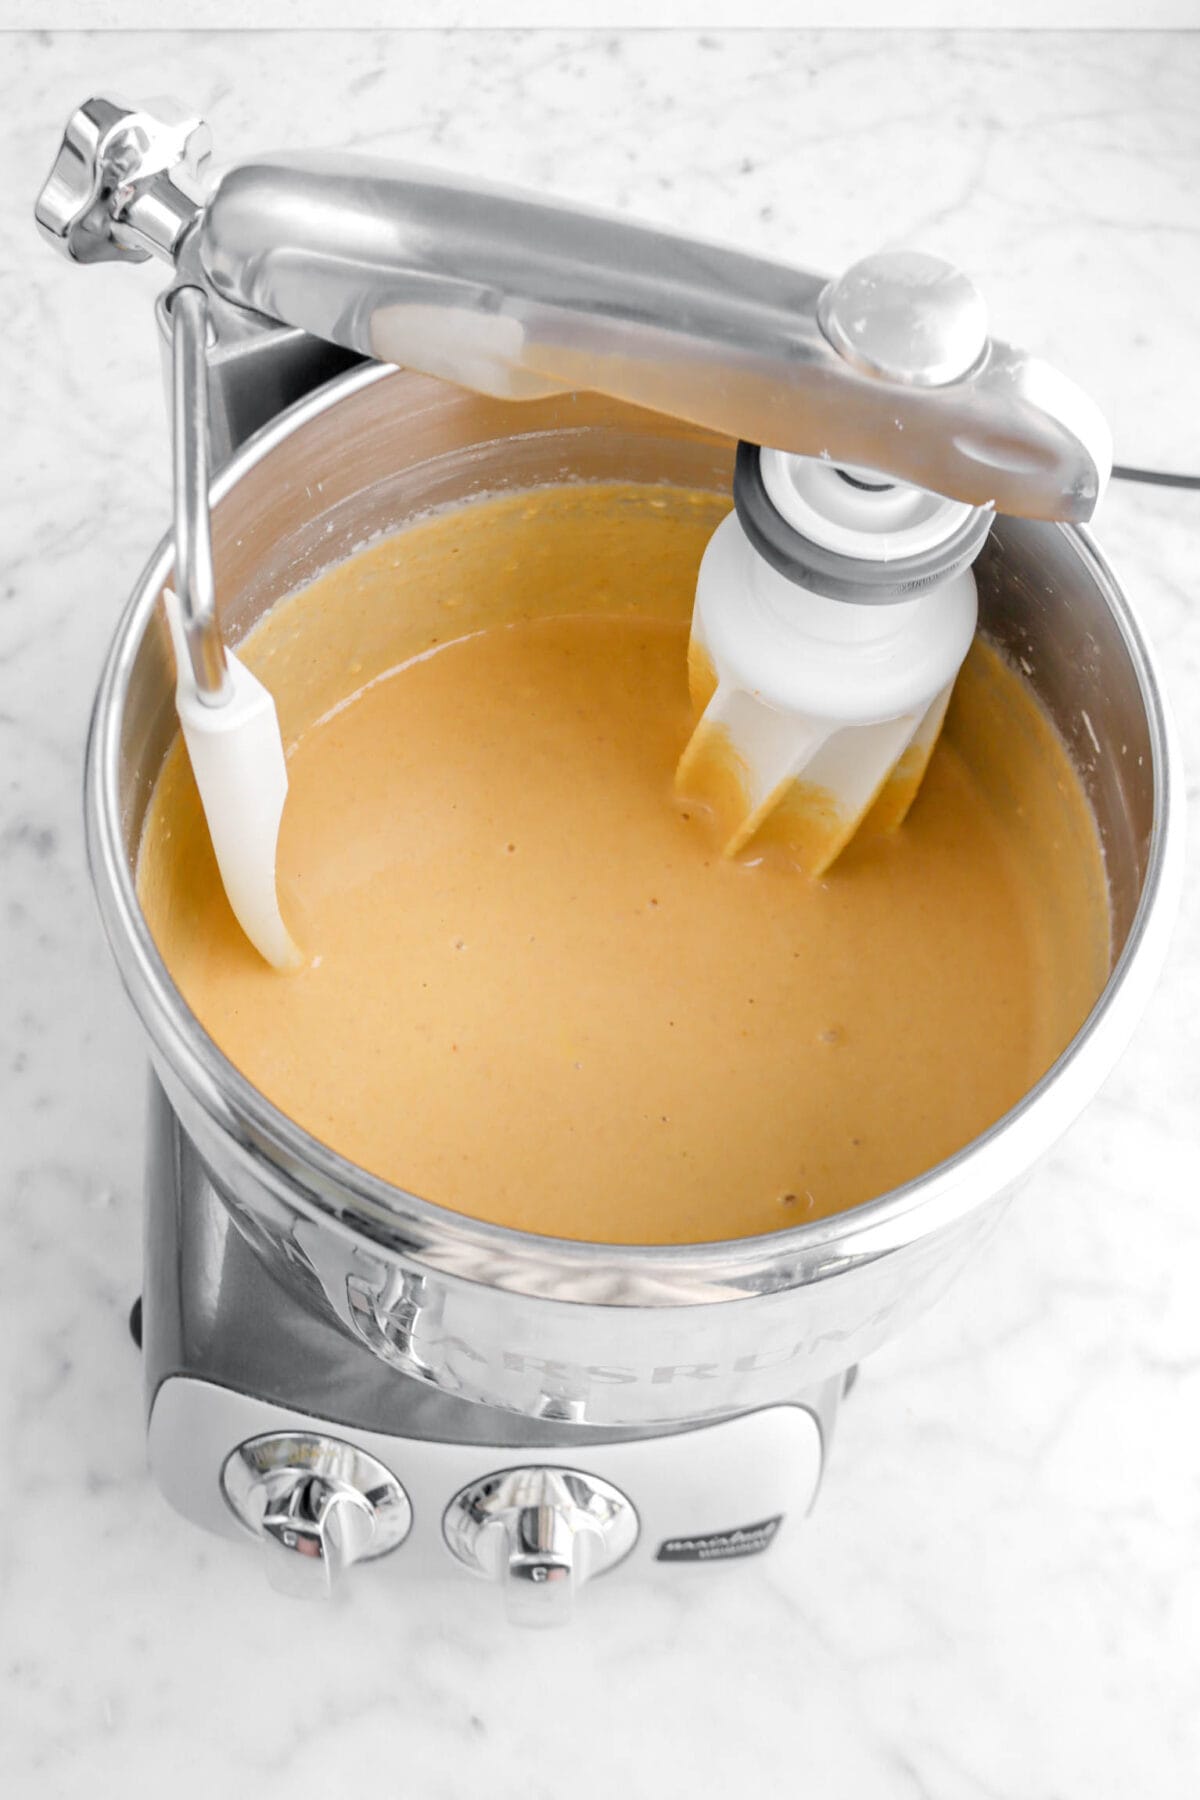
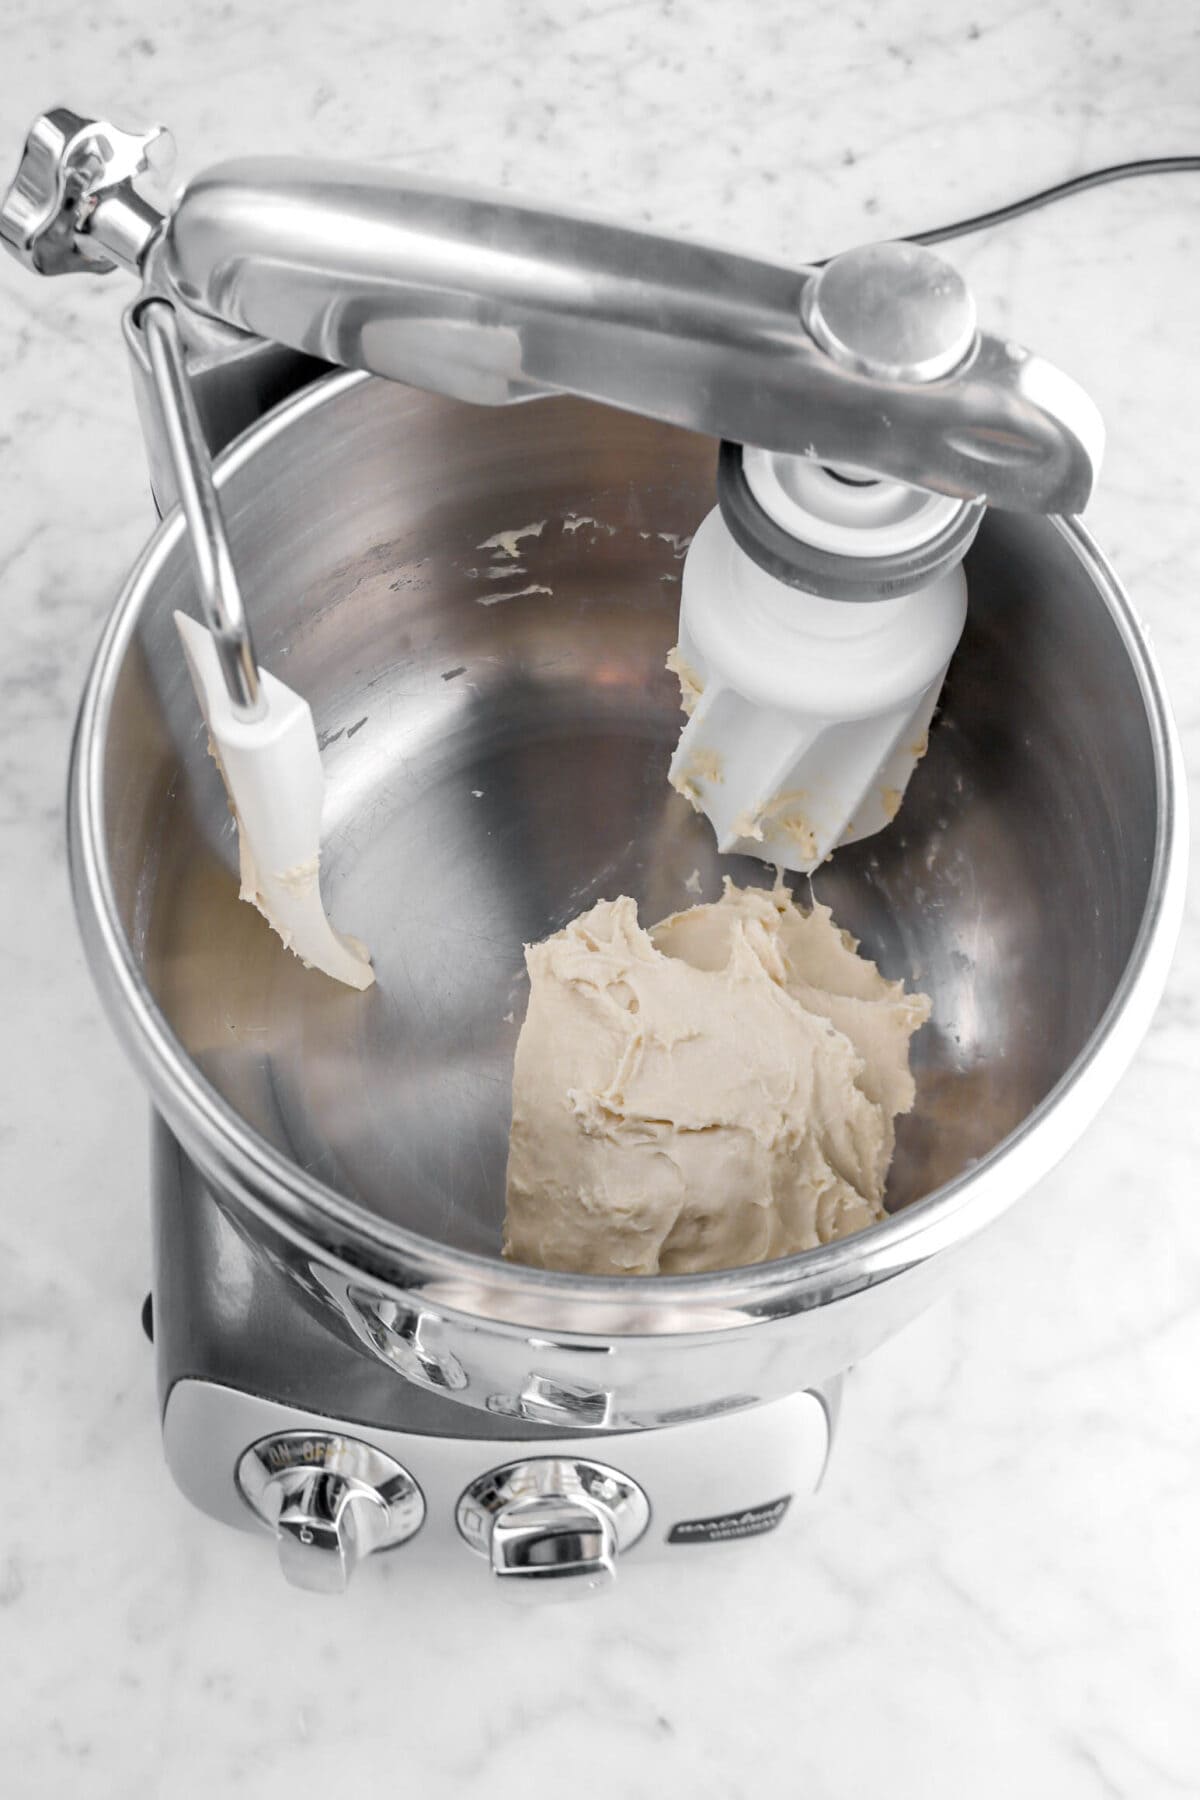
Add the flour and mix on low speed until combined, about 1-2 minutes. Increase speed to medium high and knead for 5 minutes.
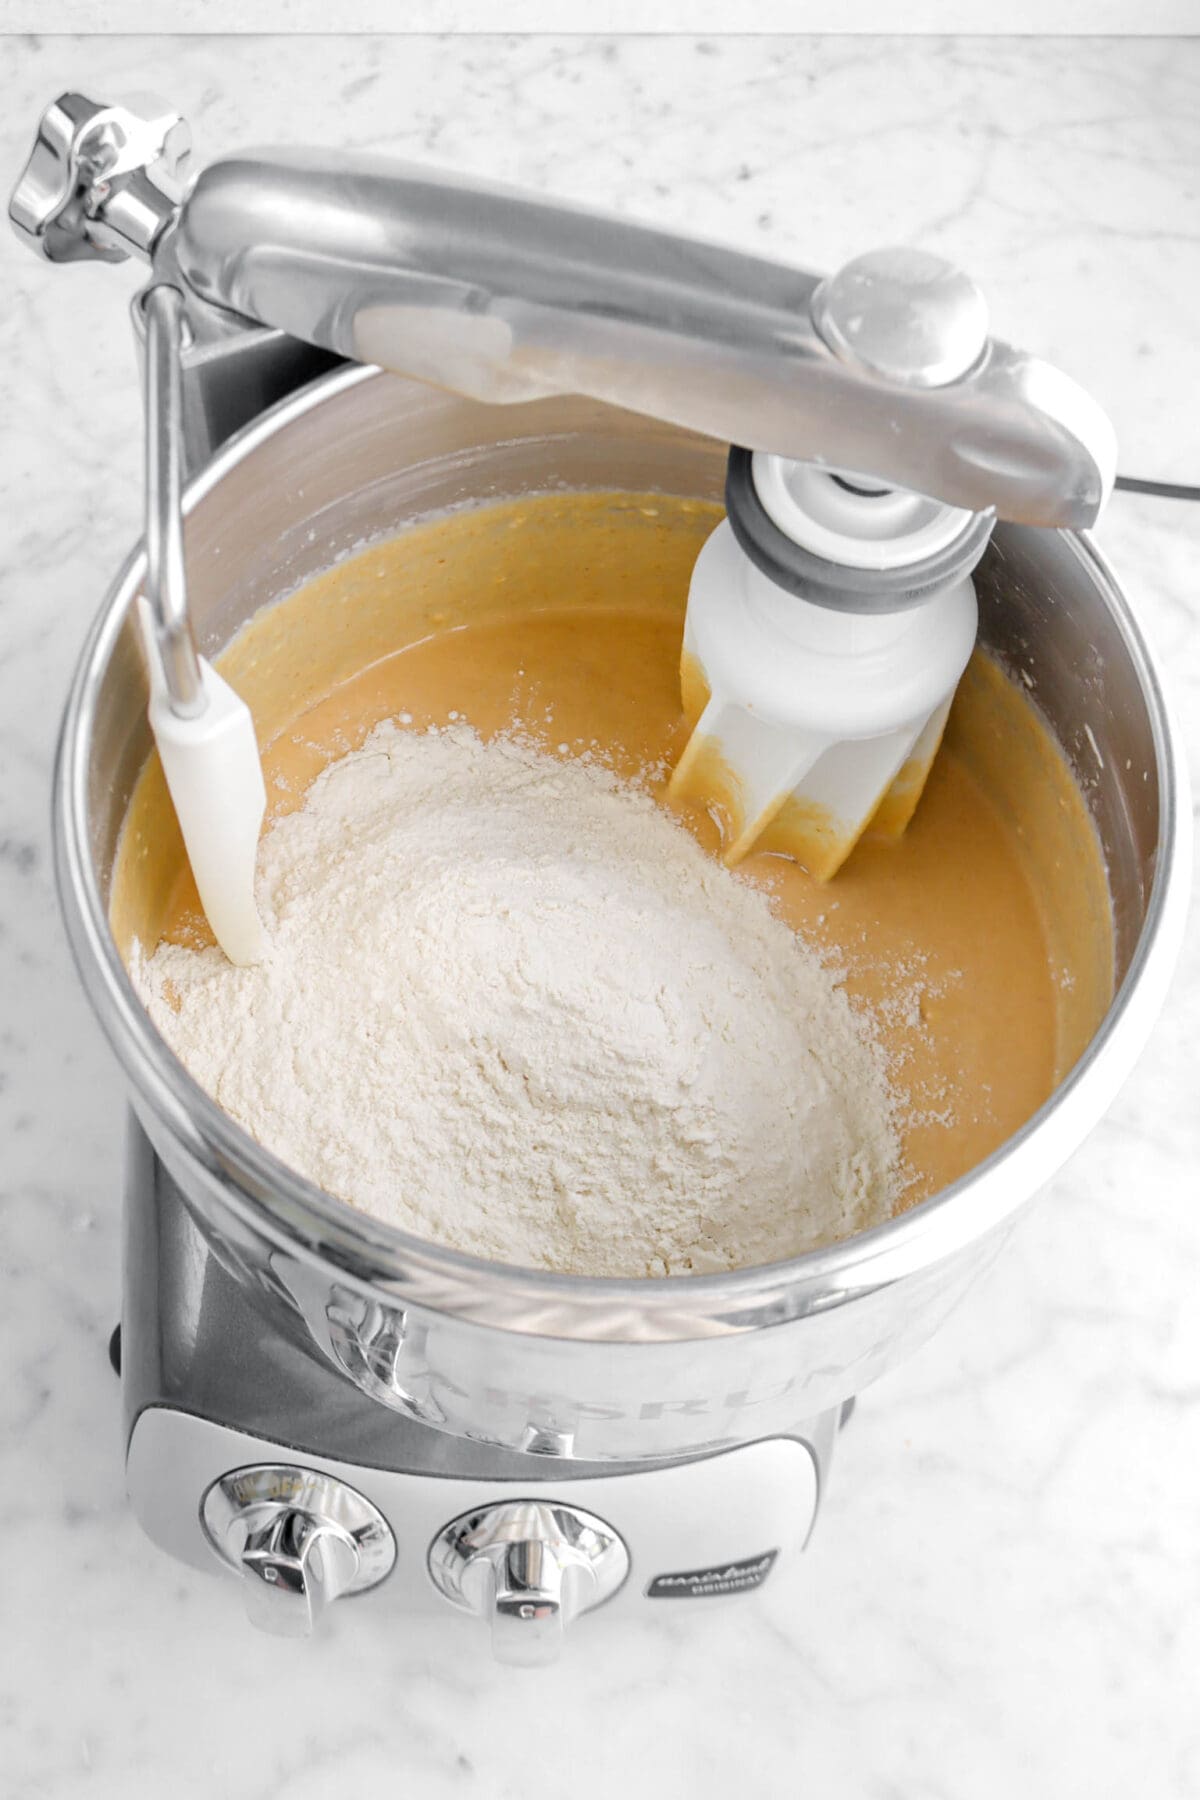
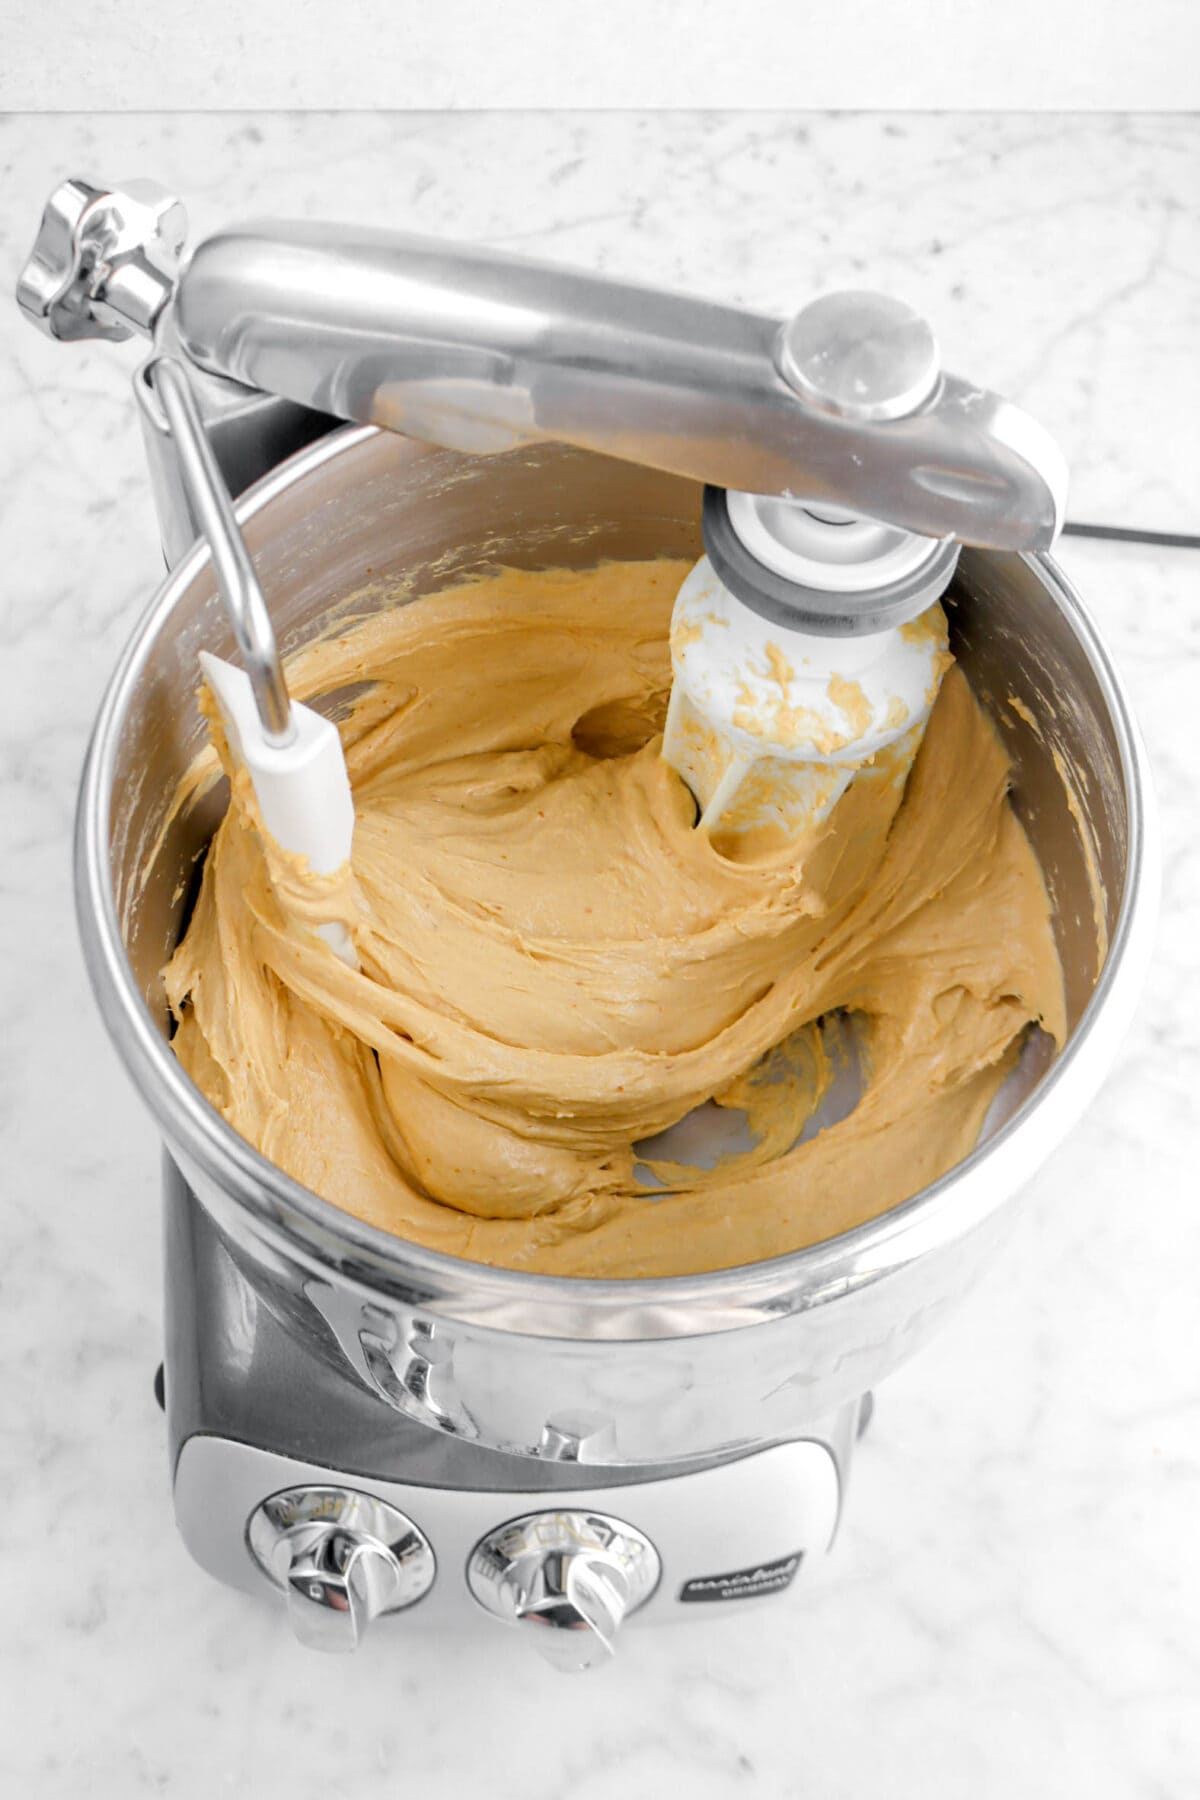
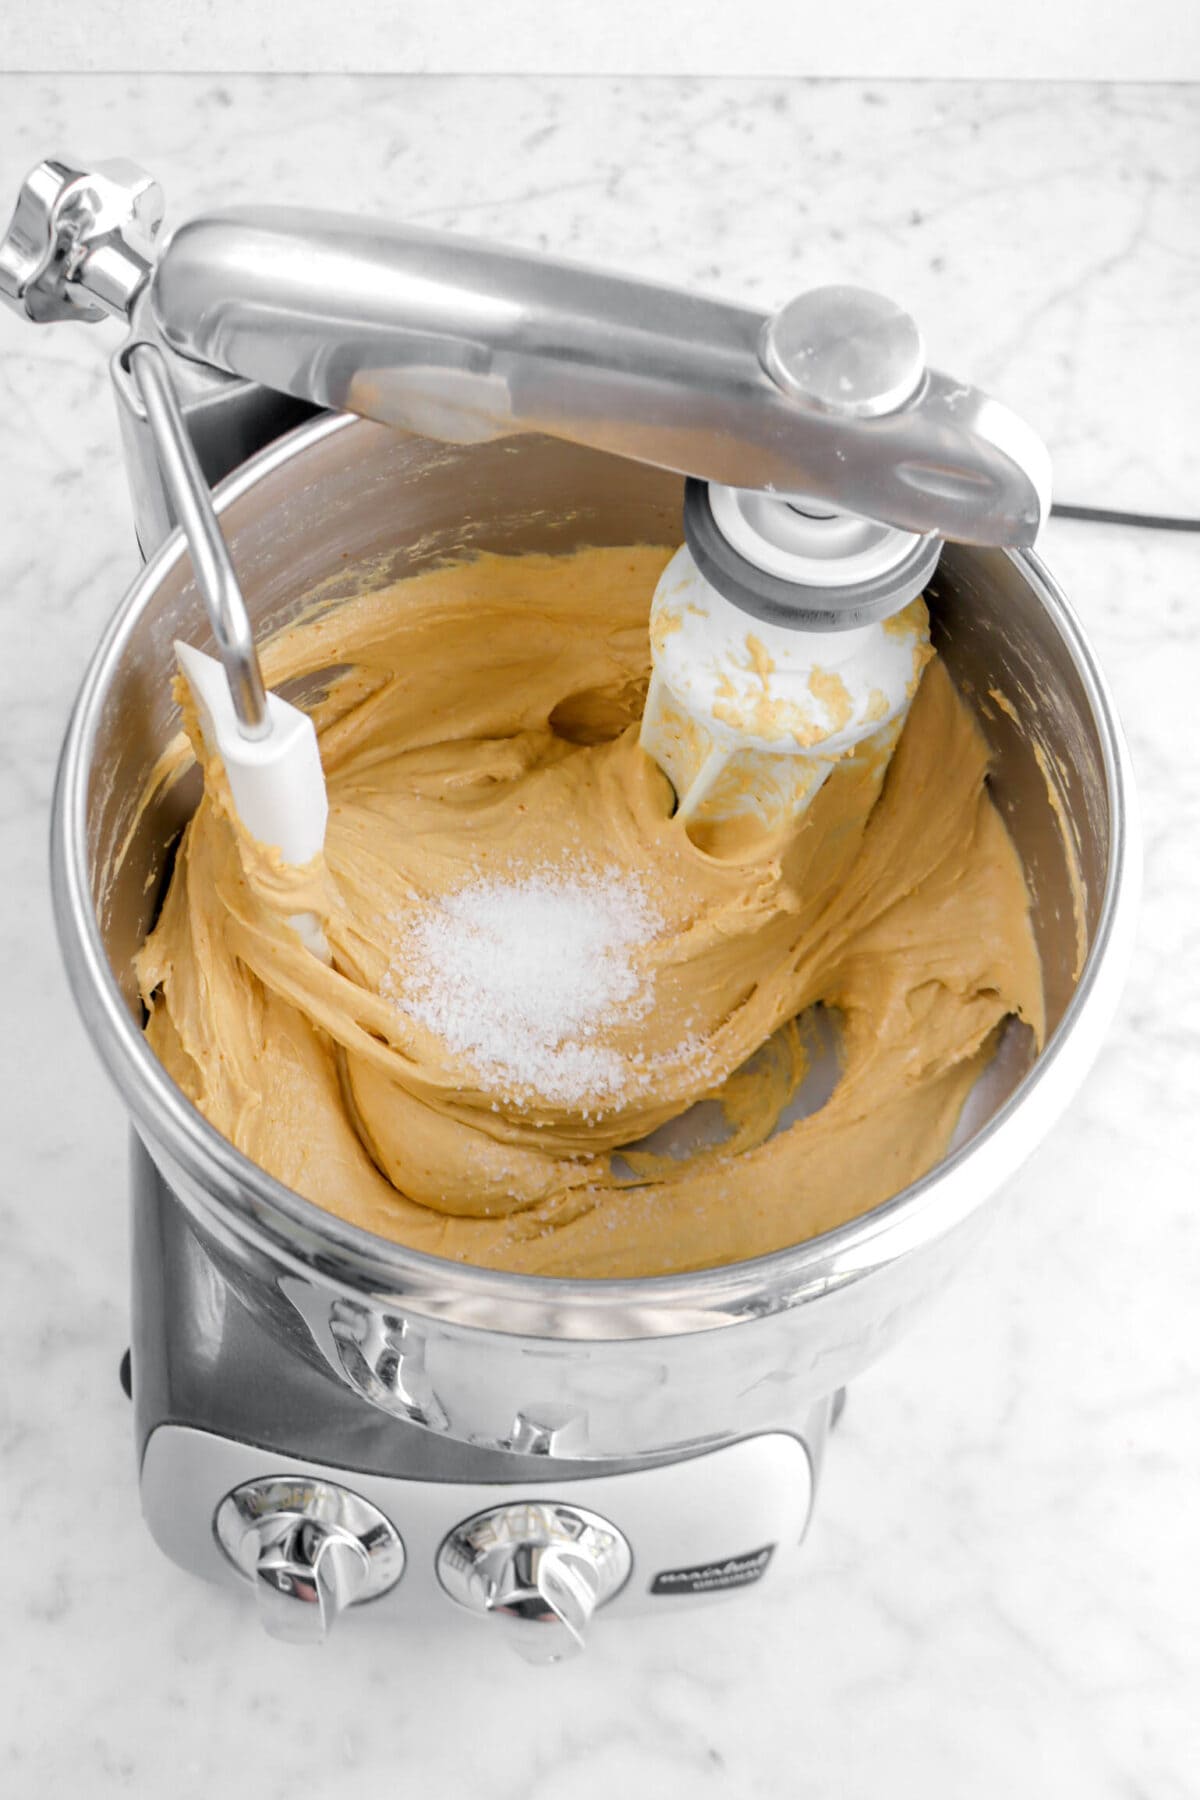
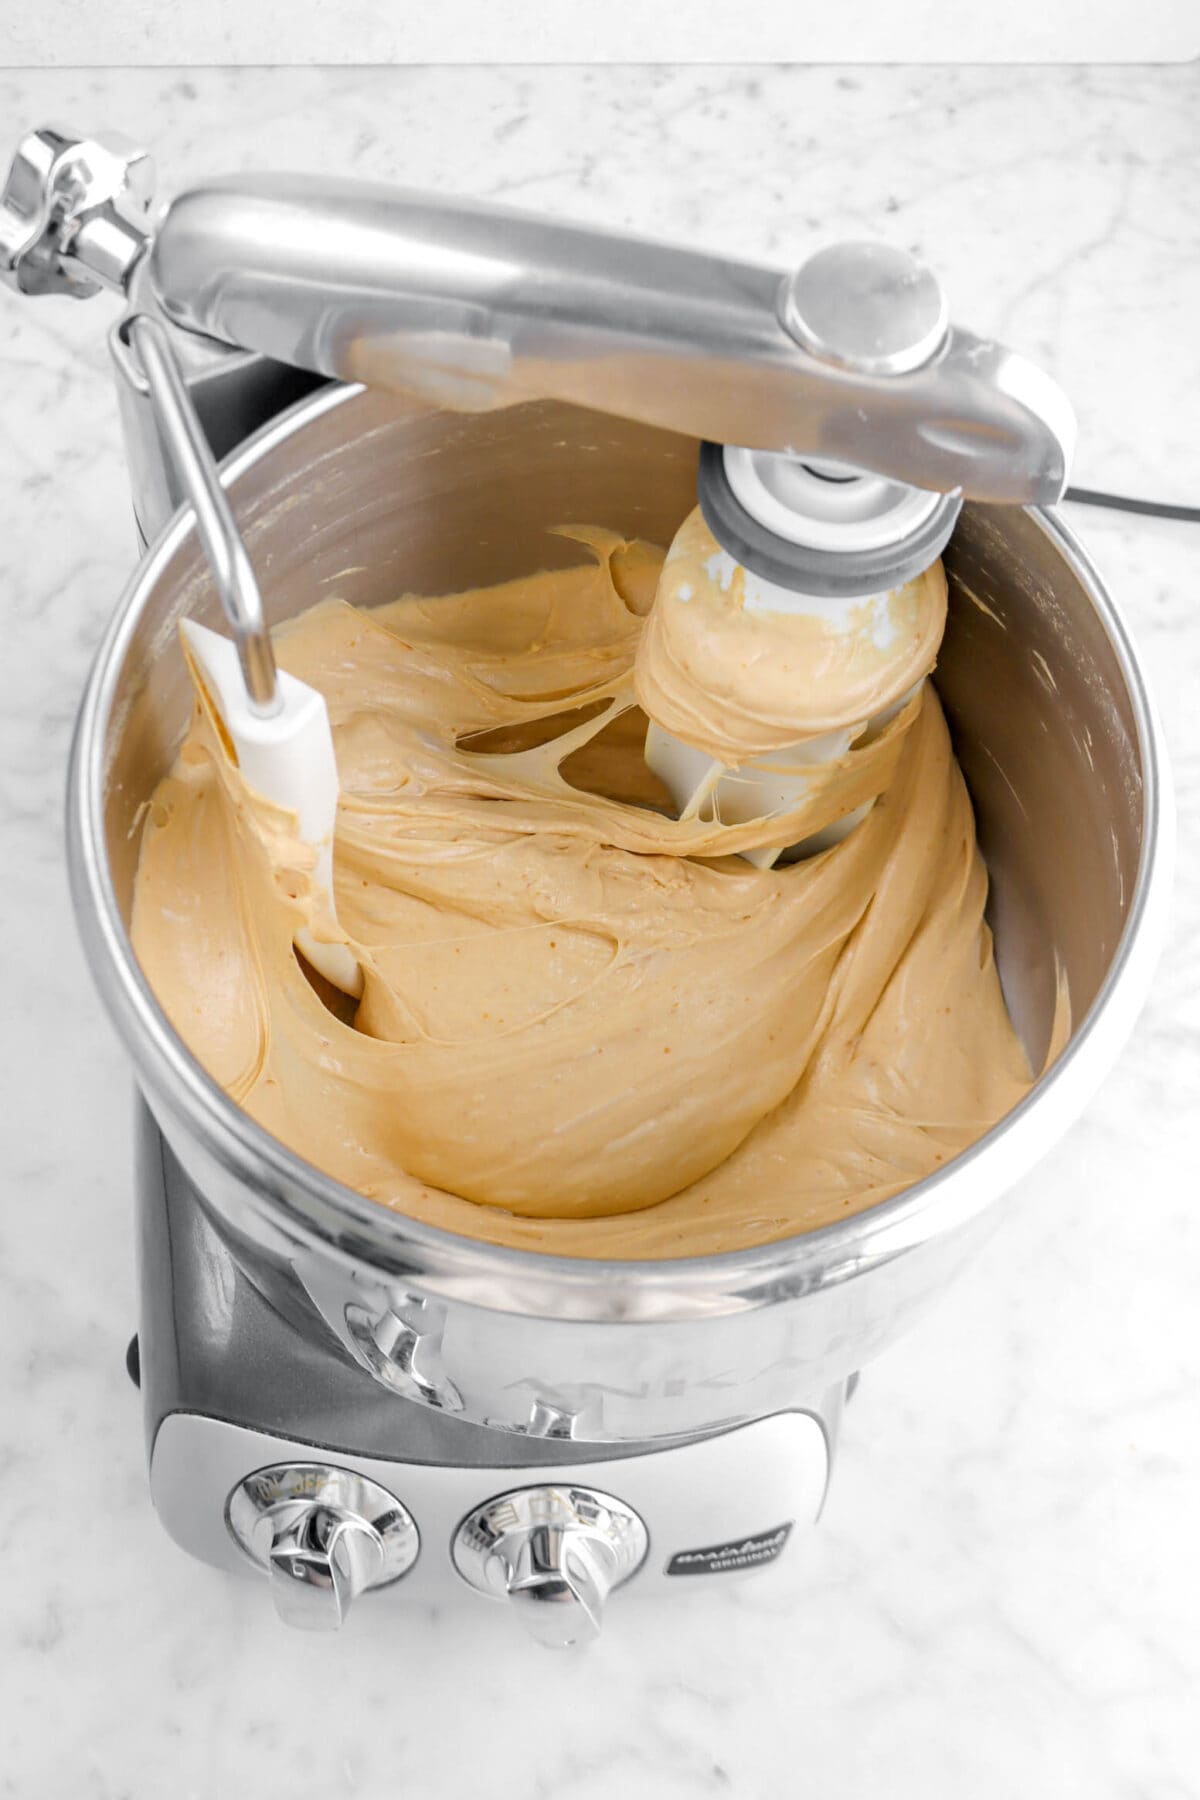
Add the salt and knead until dough is smooth and elastic, about 5 more minutes.
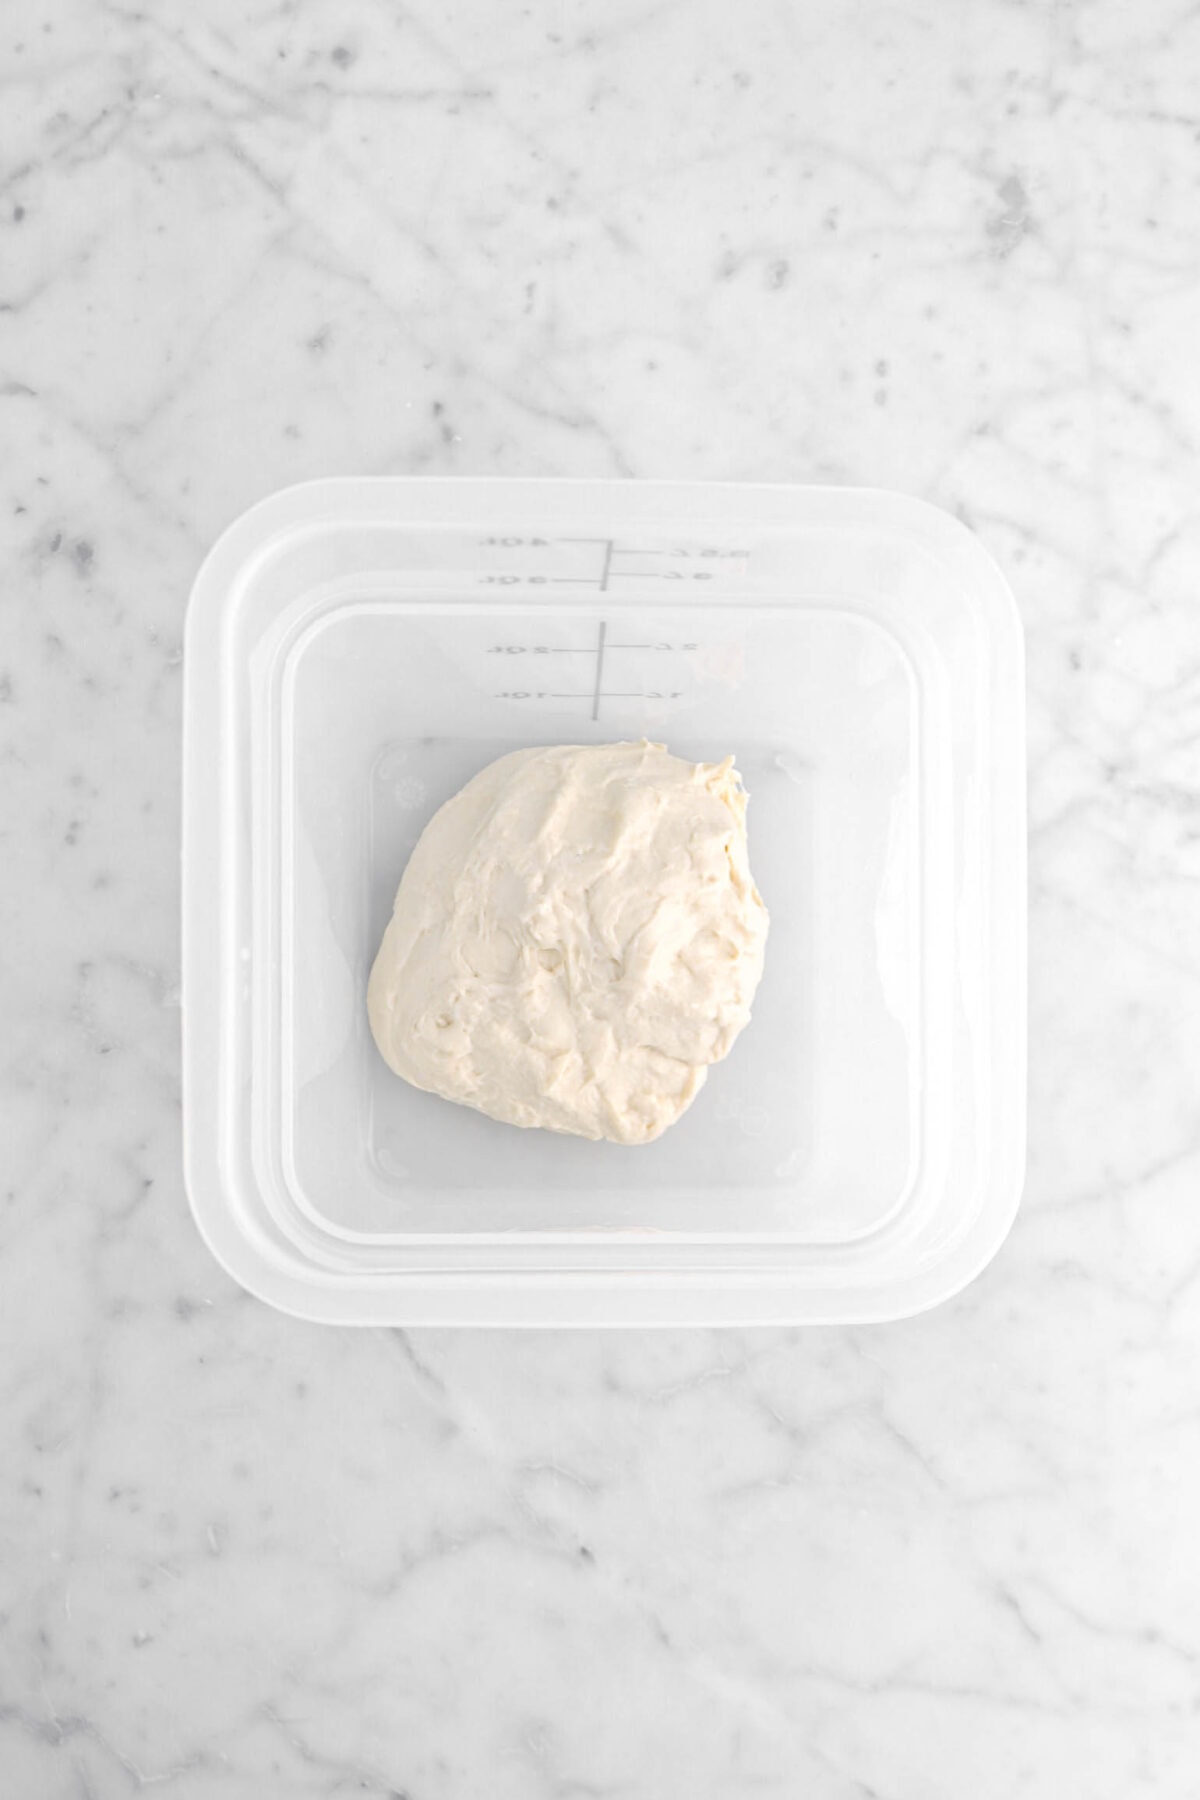
Step 3: Prove
Place dough in a covered container. Allow dough to rise until doubled in bulk, about 4 hours.
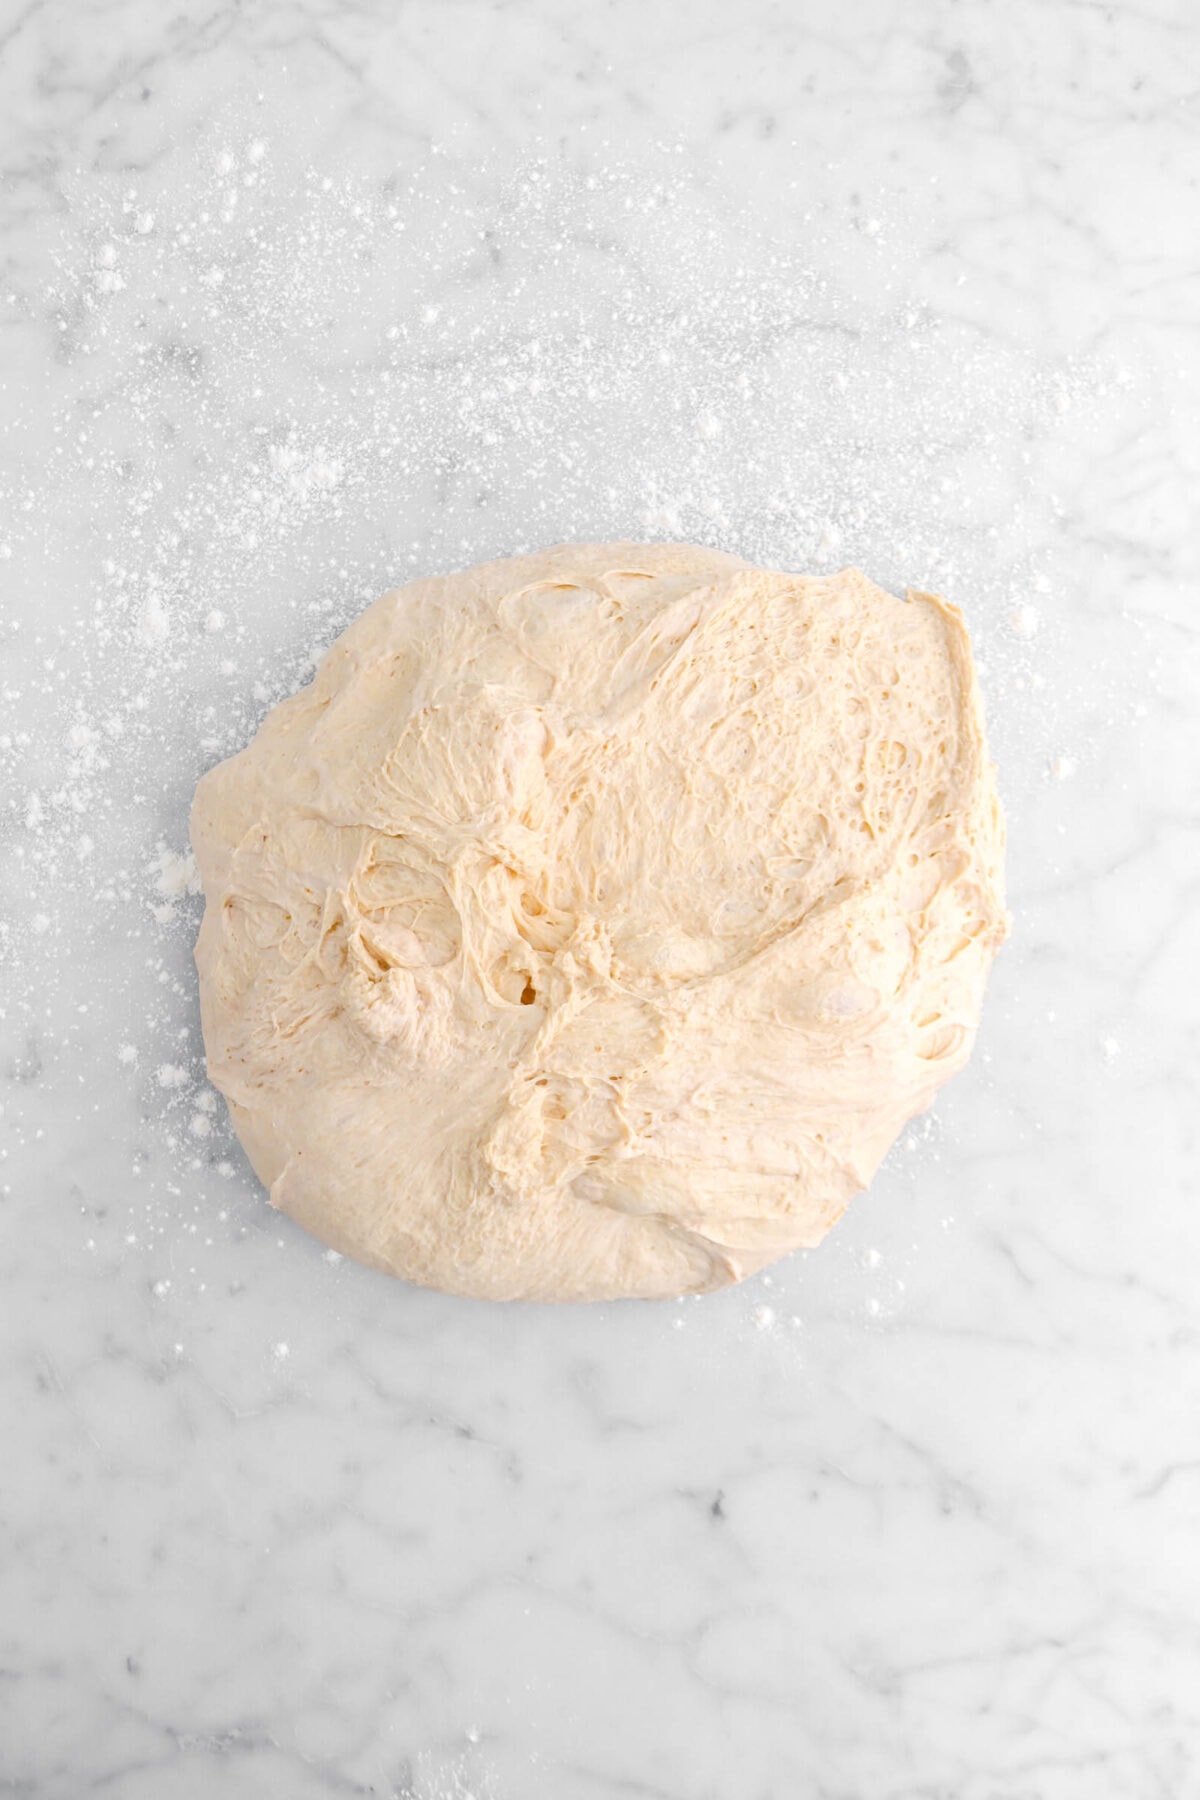
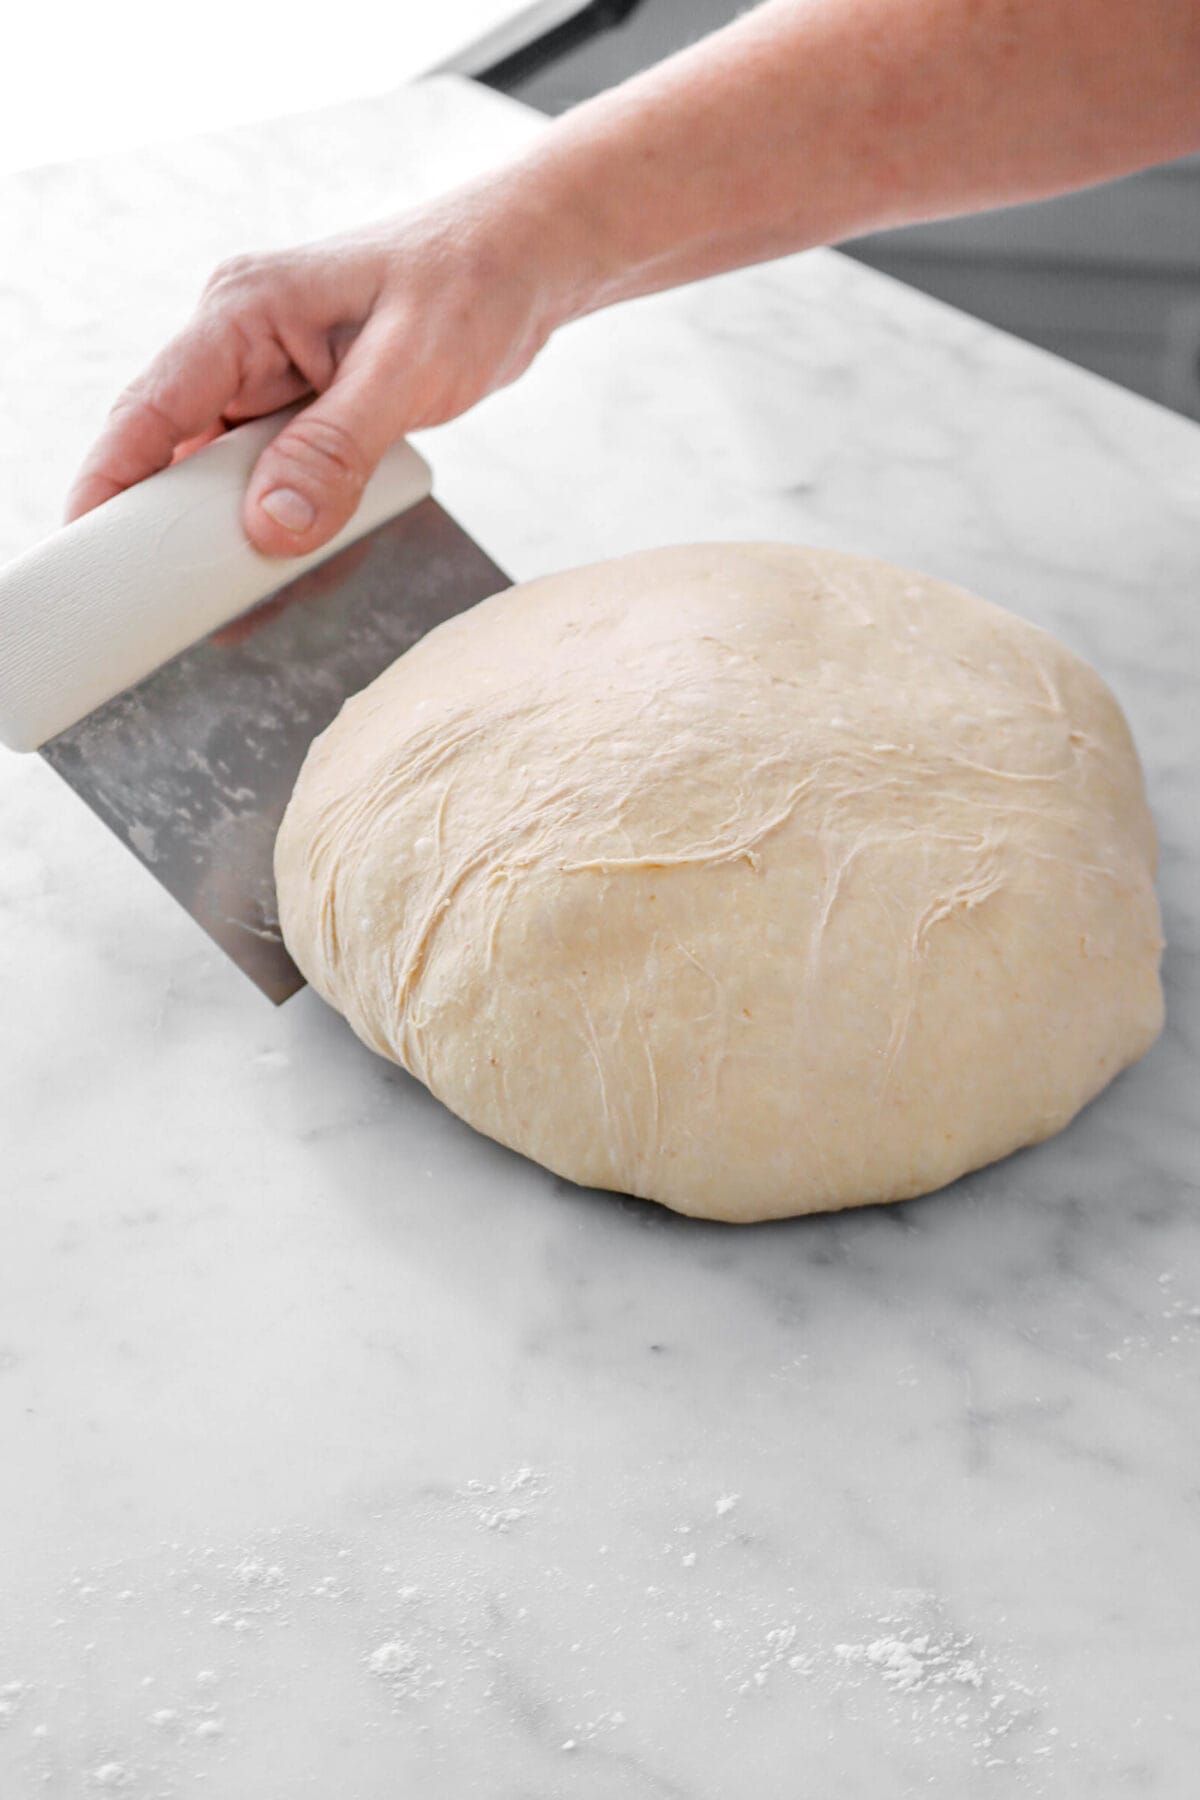
Step 4: Shape and prove
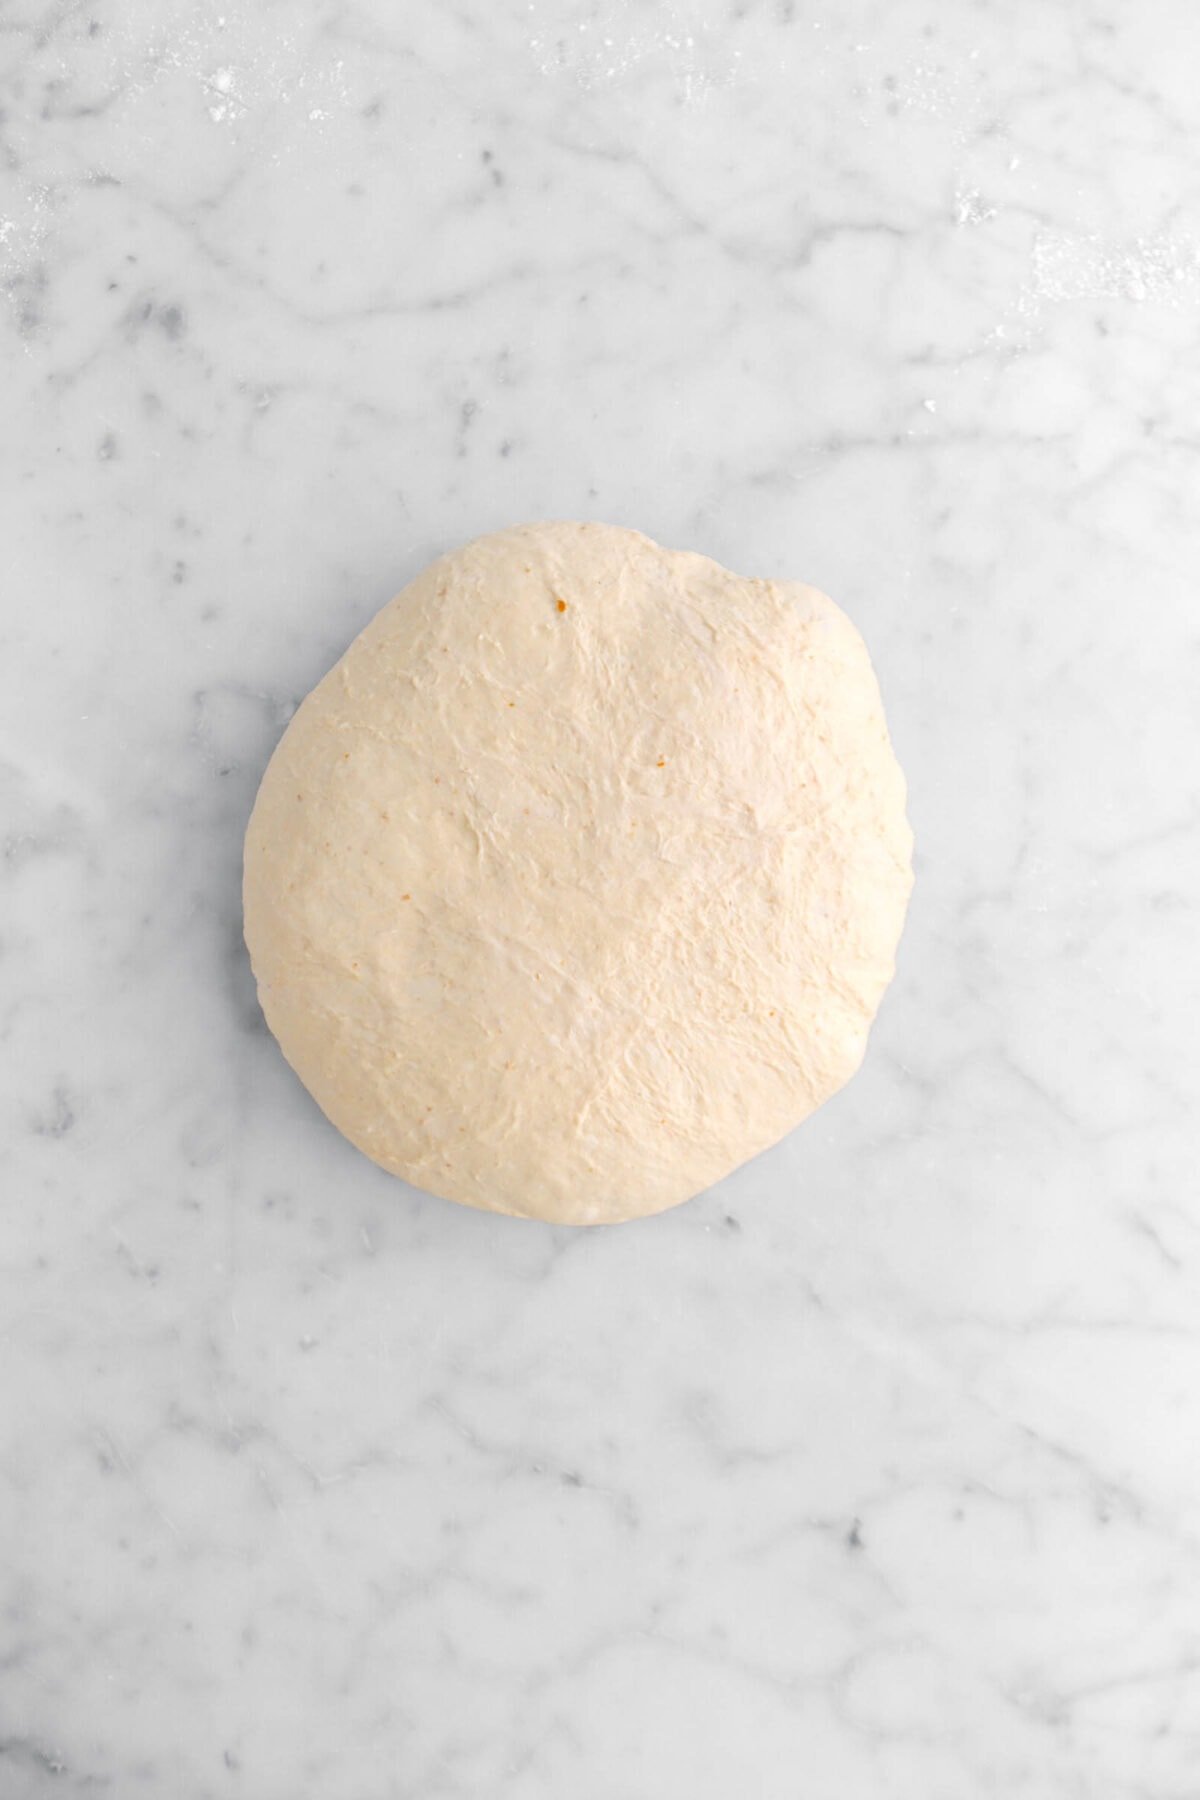
Turn dough out onto a lightly floured surface. Use a bench knife, or you hands (either floured or wet) to round the dough and pull it tight.
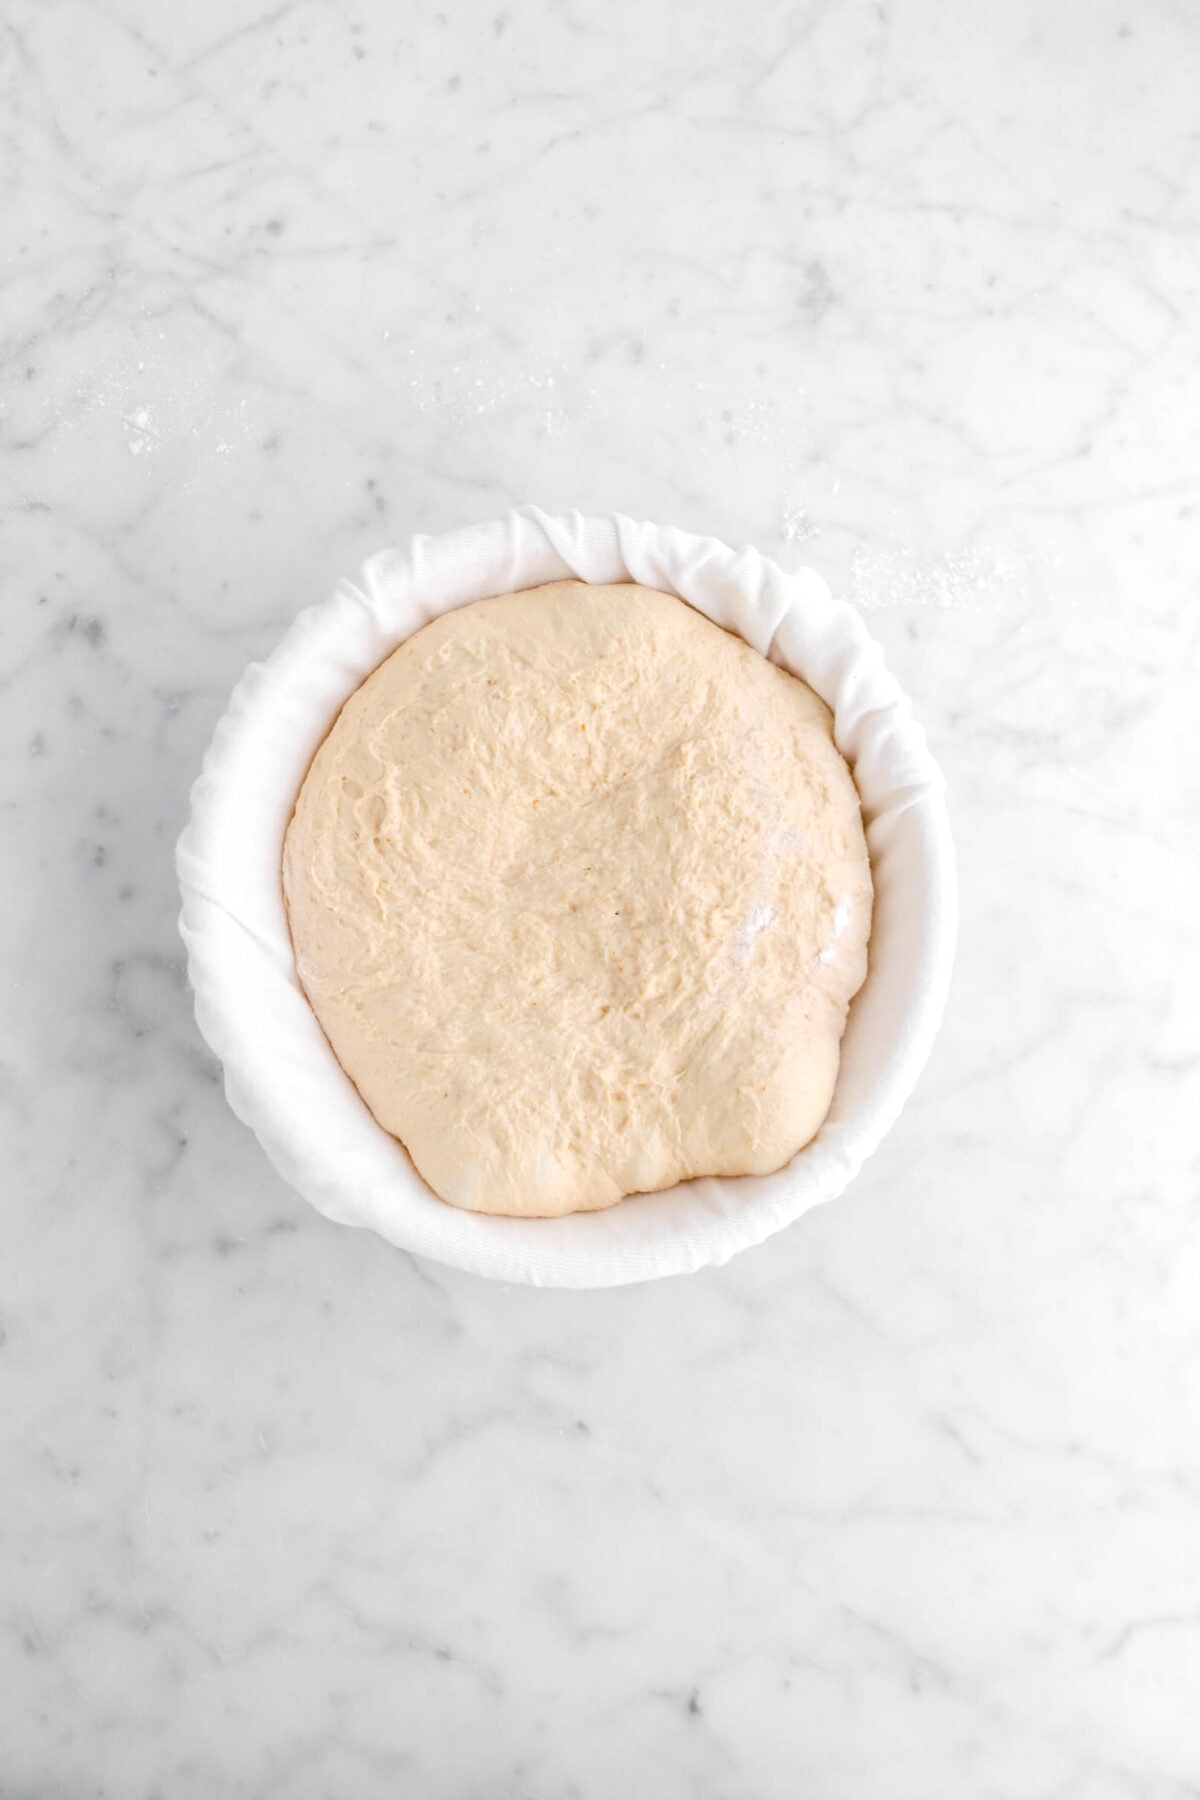
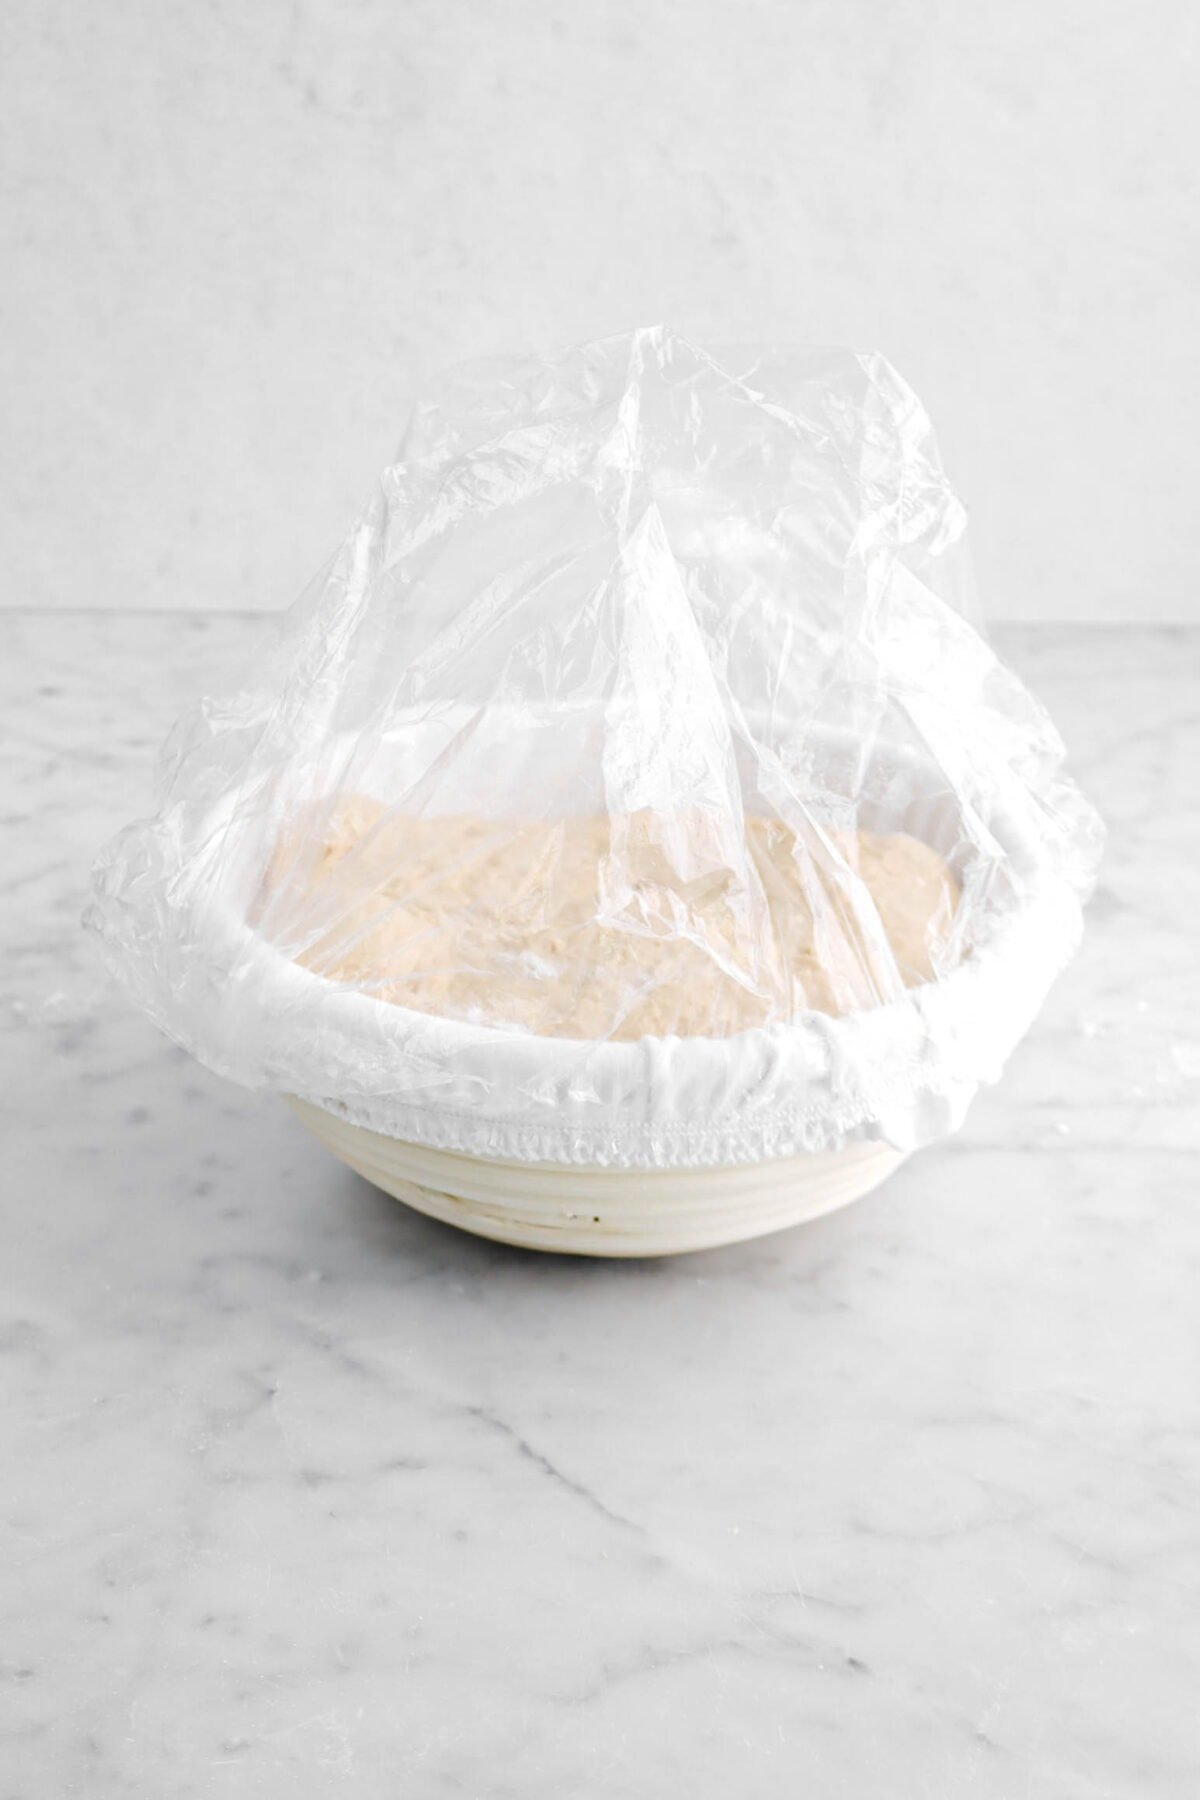
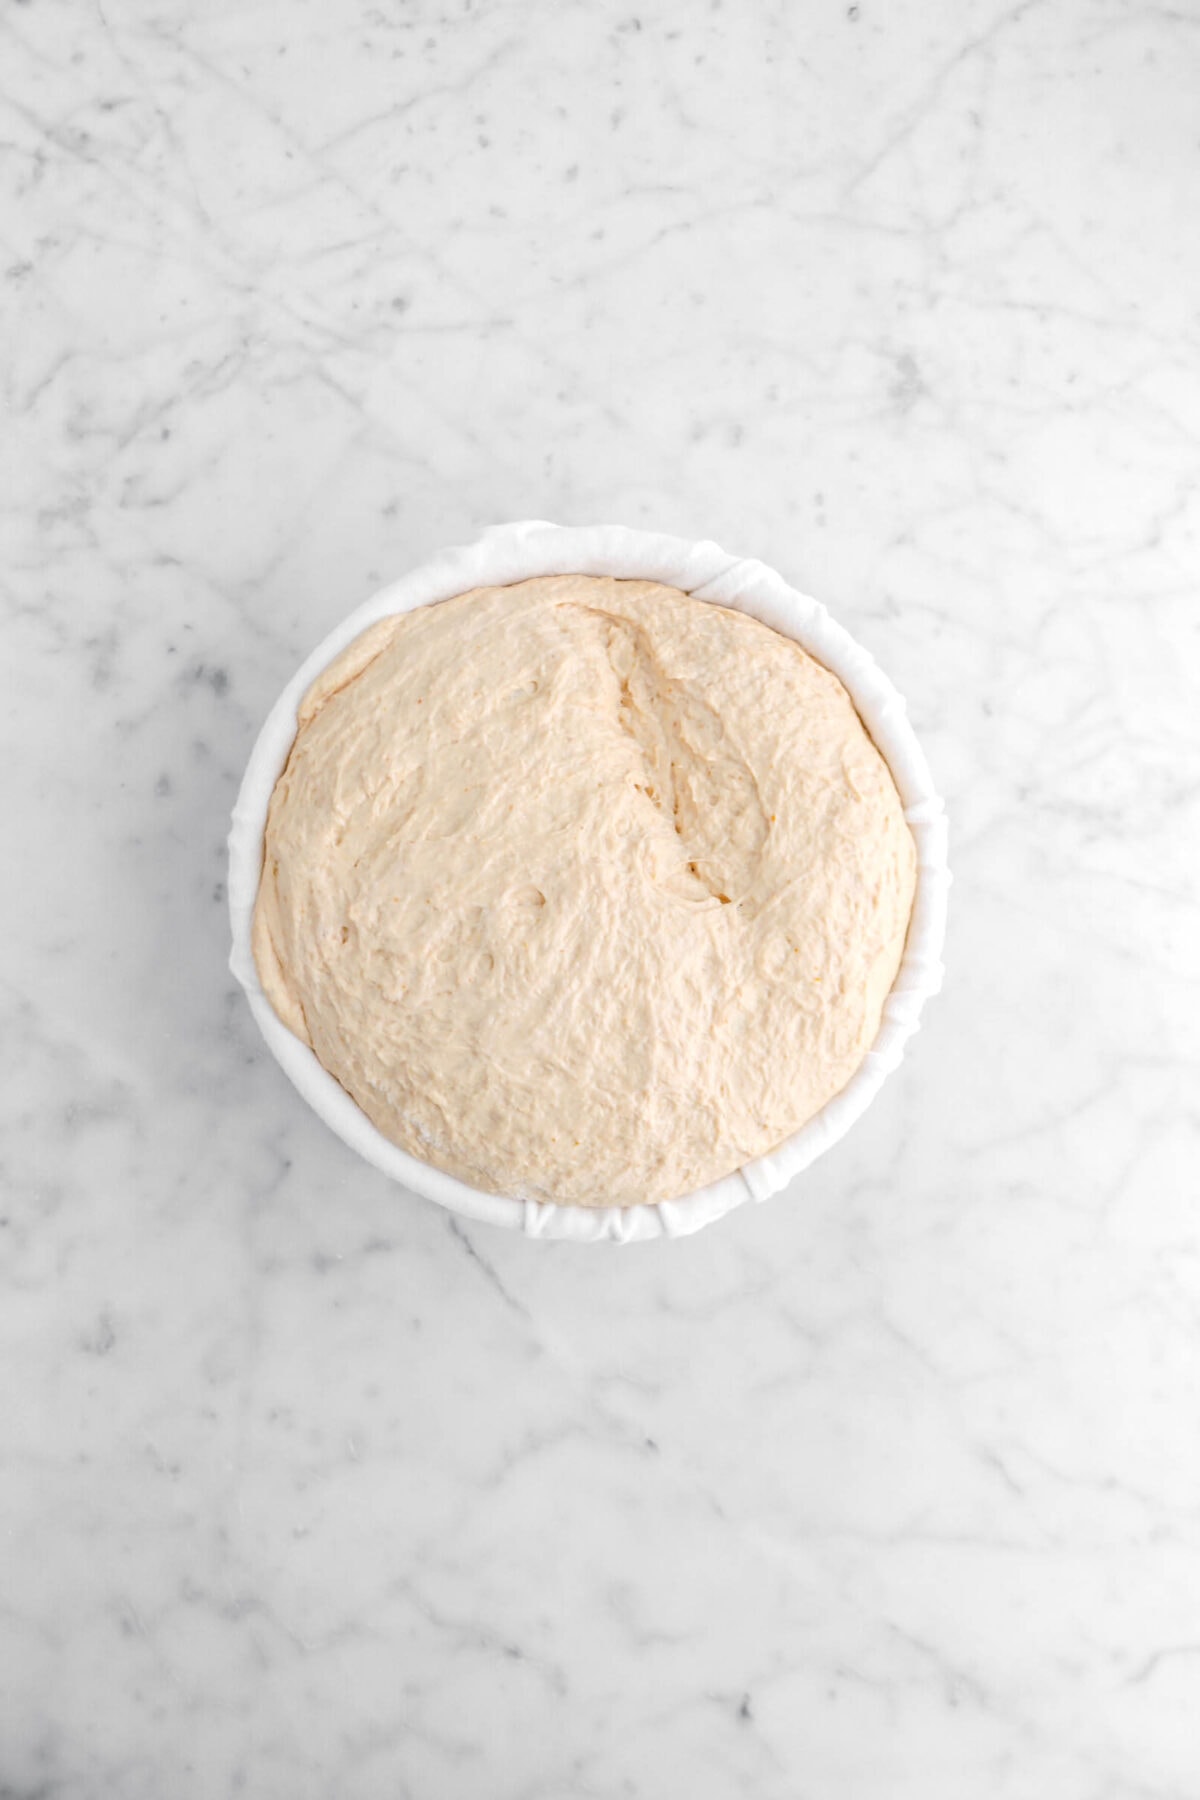
Place dough upside down in prepared banneton. Cover with a disposable shower cap, or plastic wrap. Place in refrigerator overnight.
Step 5: Shape
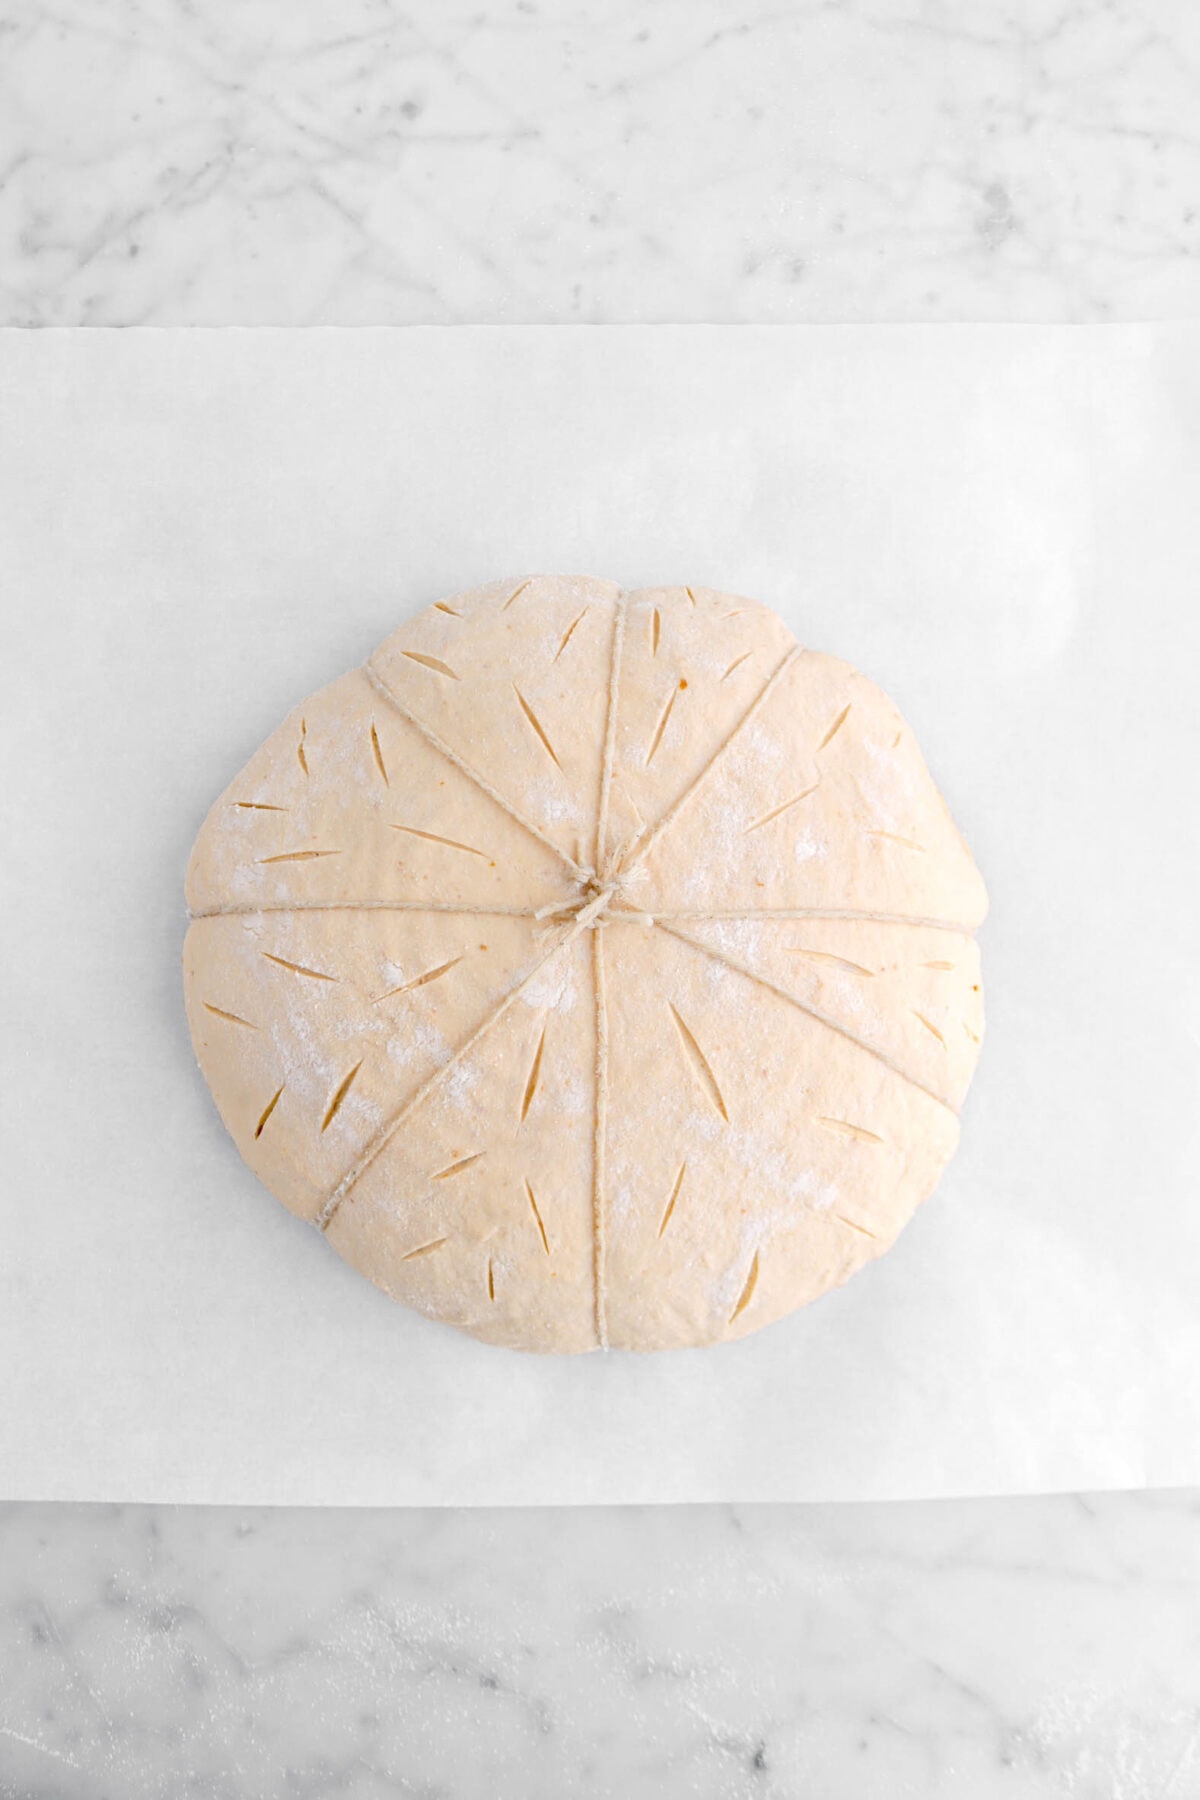
When ready to bake, cut 4 pieces of kitchen twine, each 24 inches long. Soak pieces of twine in vegetable oil. Draw your fingers along each string to squeeze out excess oil.

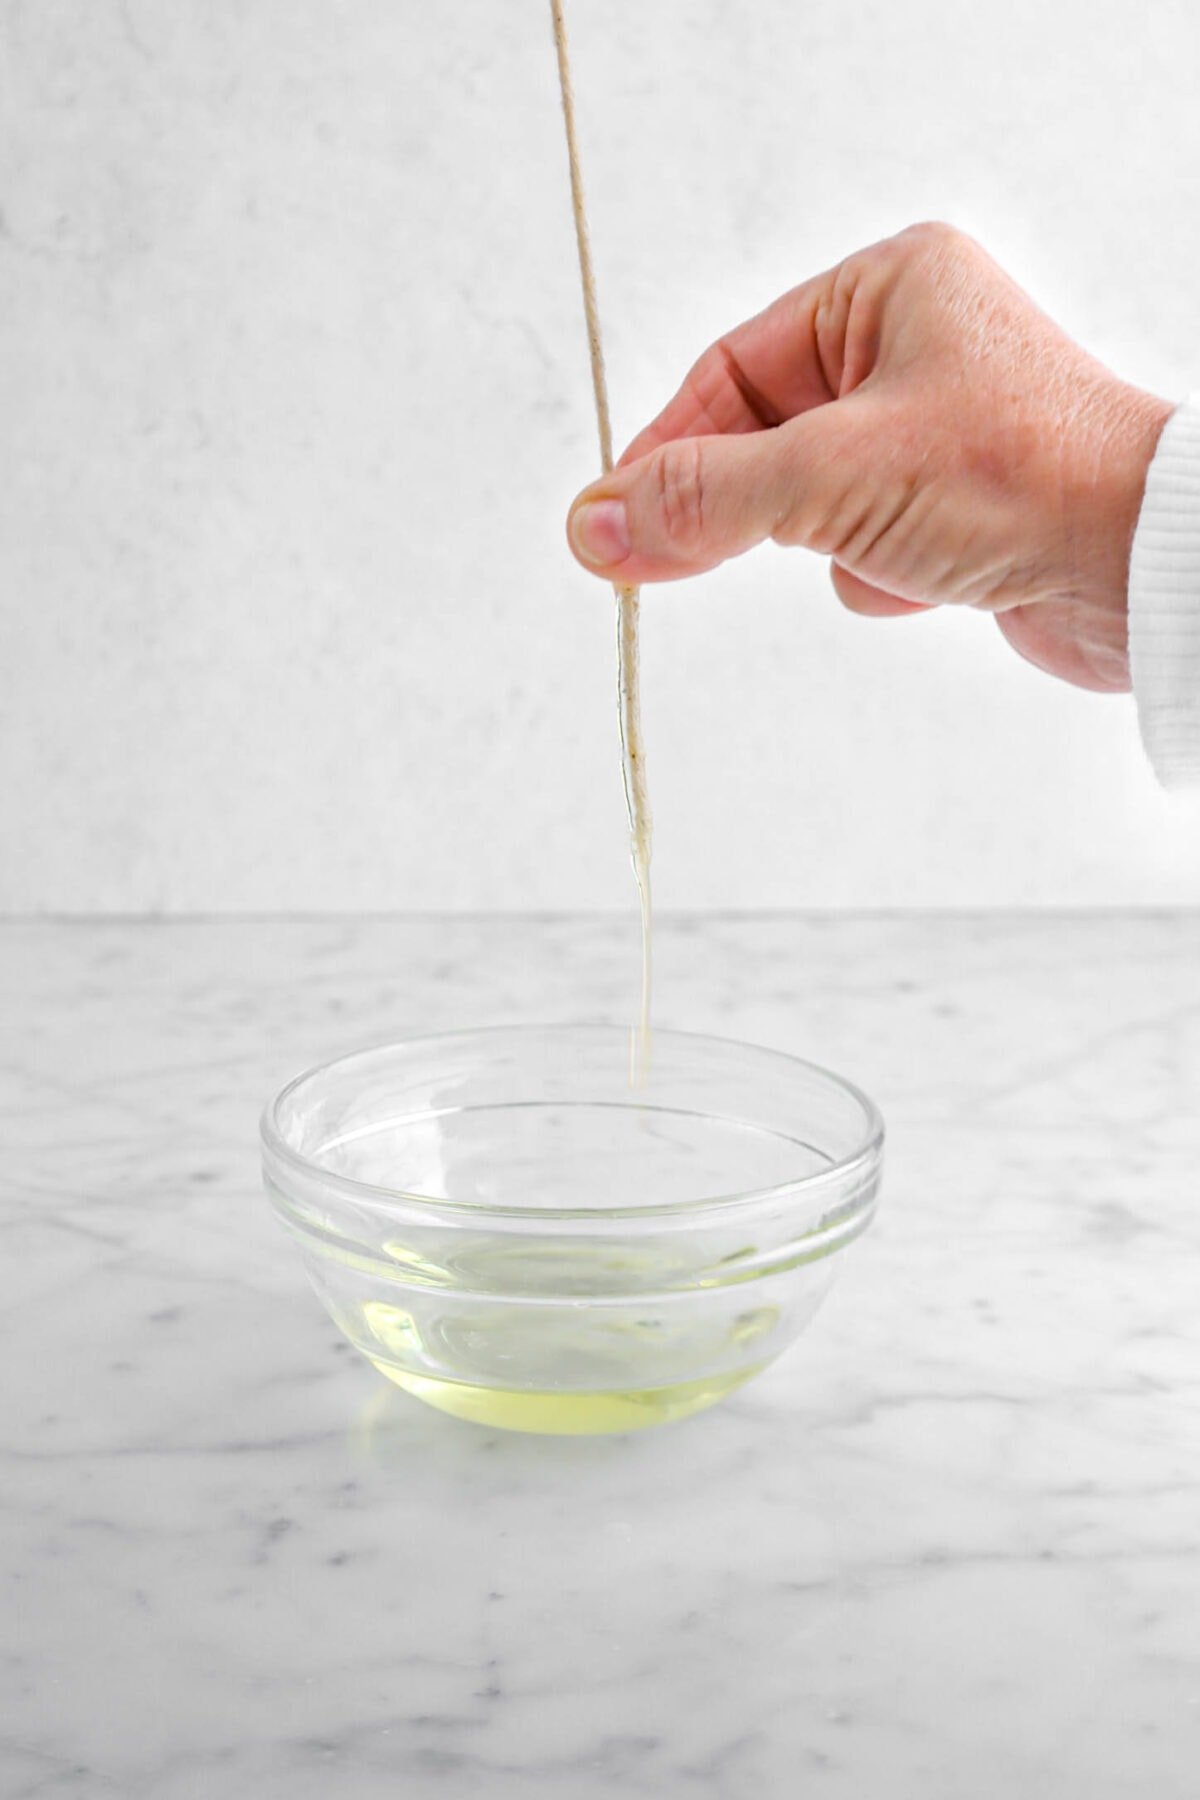
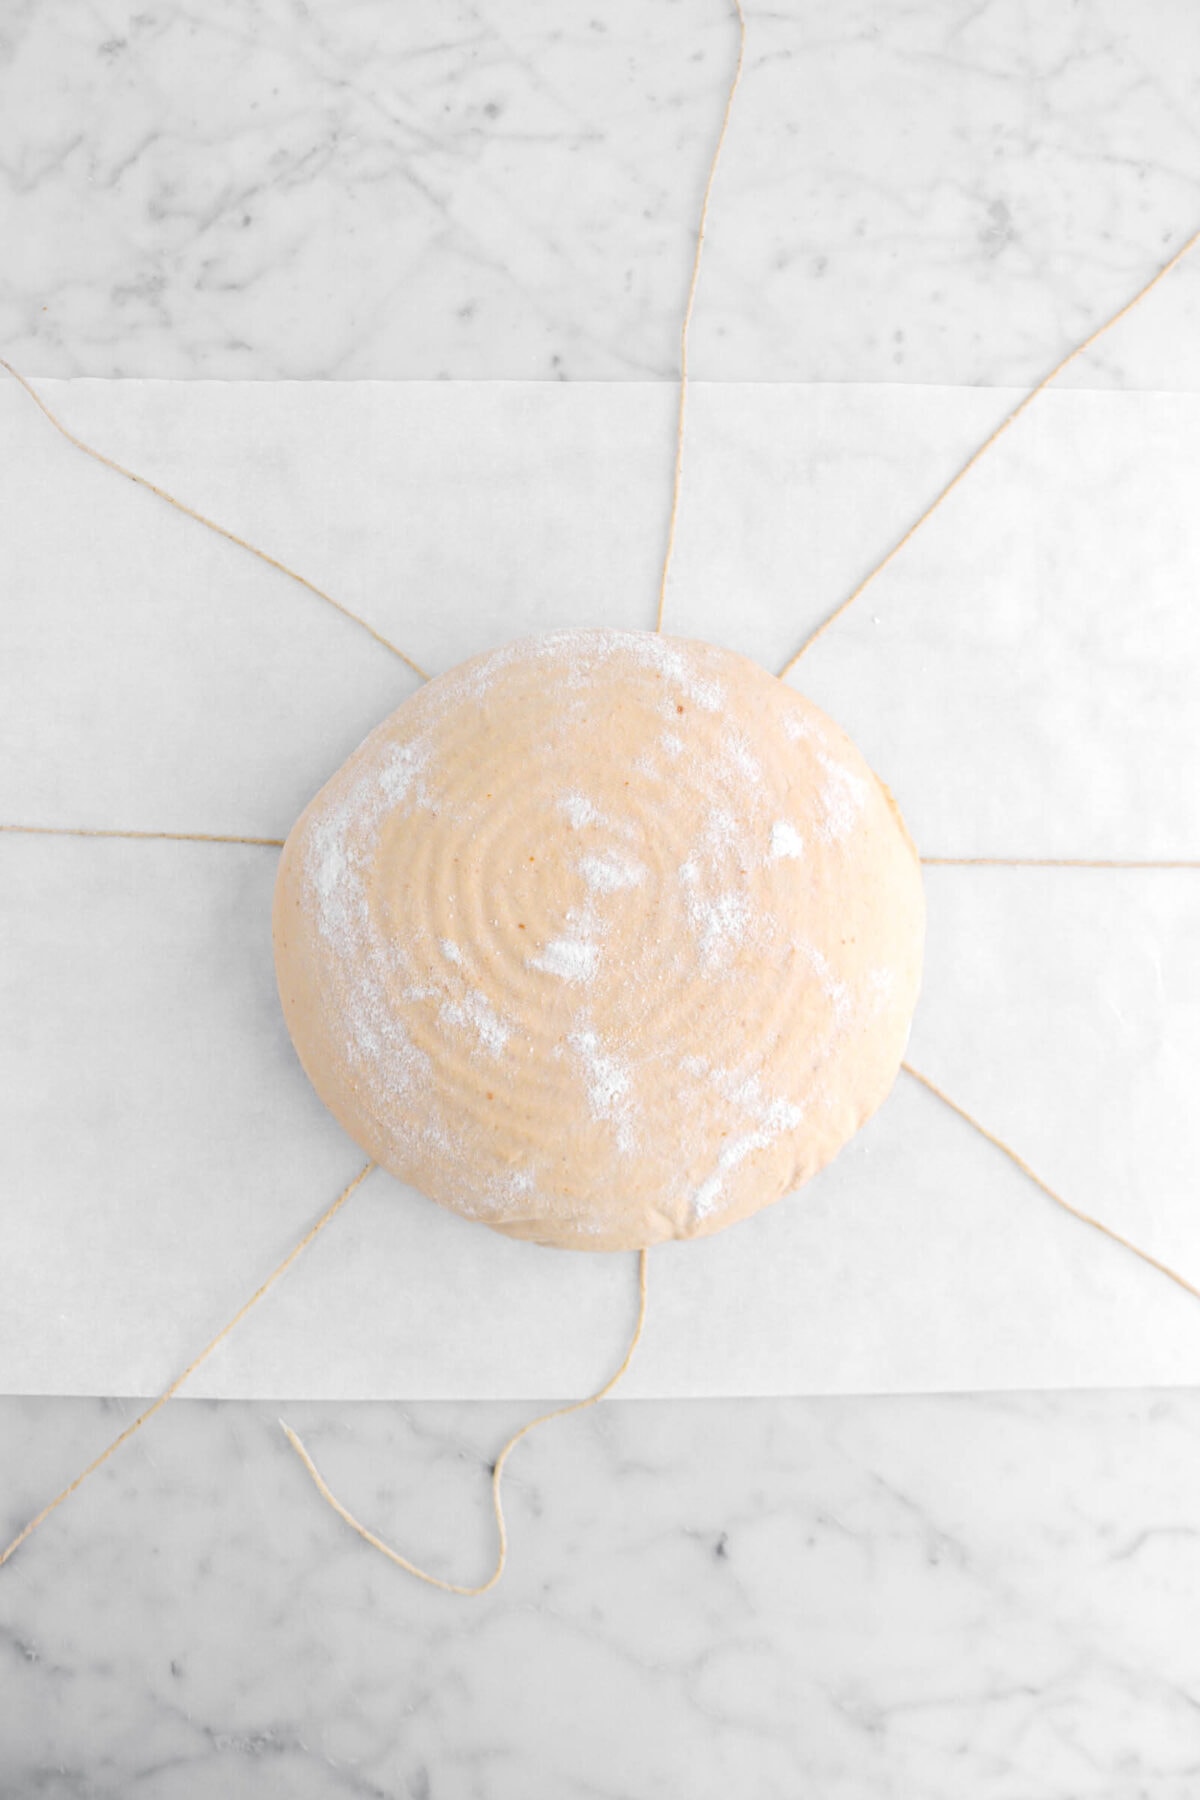
Place strings in a starburst pattern on a piece of parchment paper.

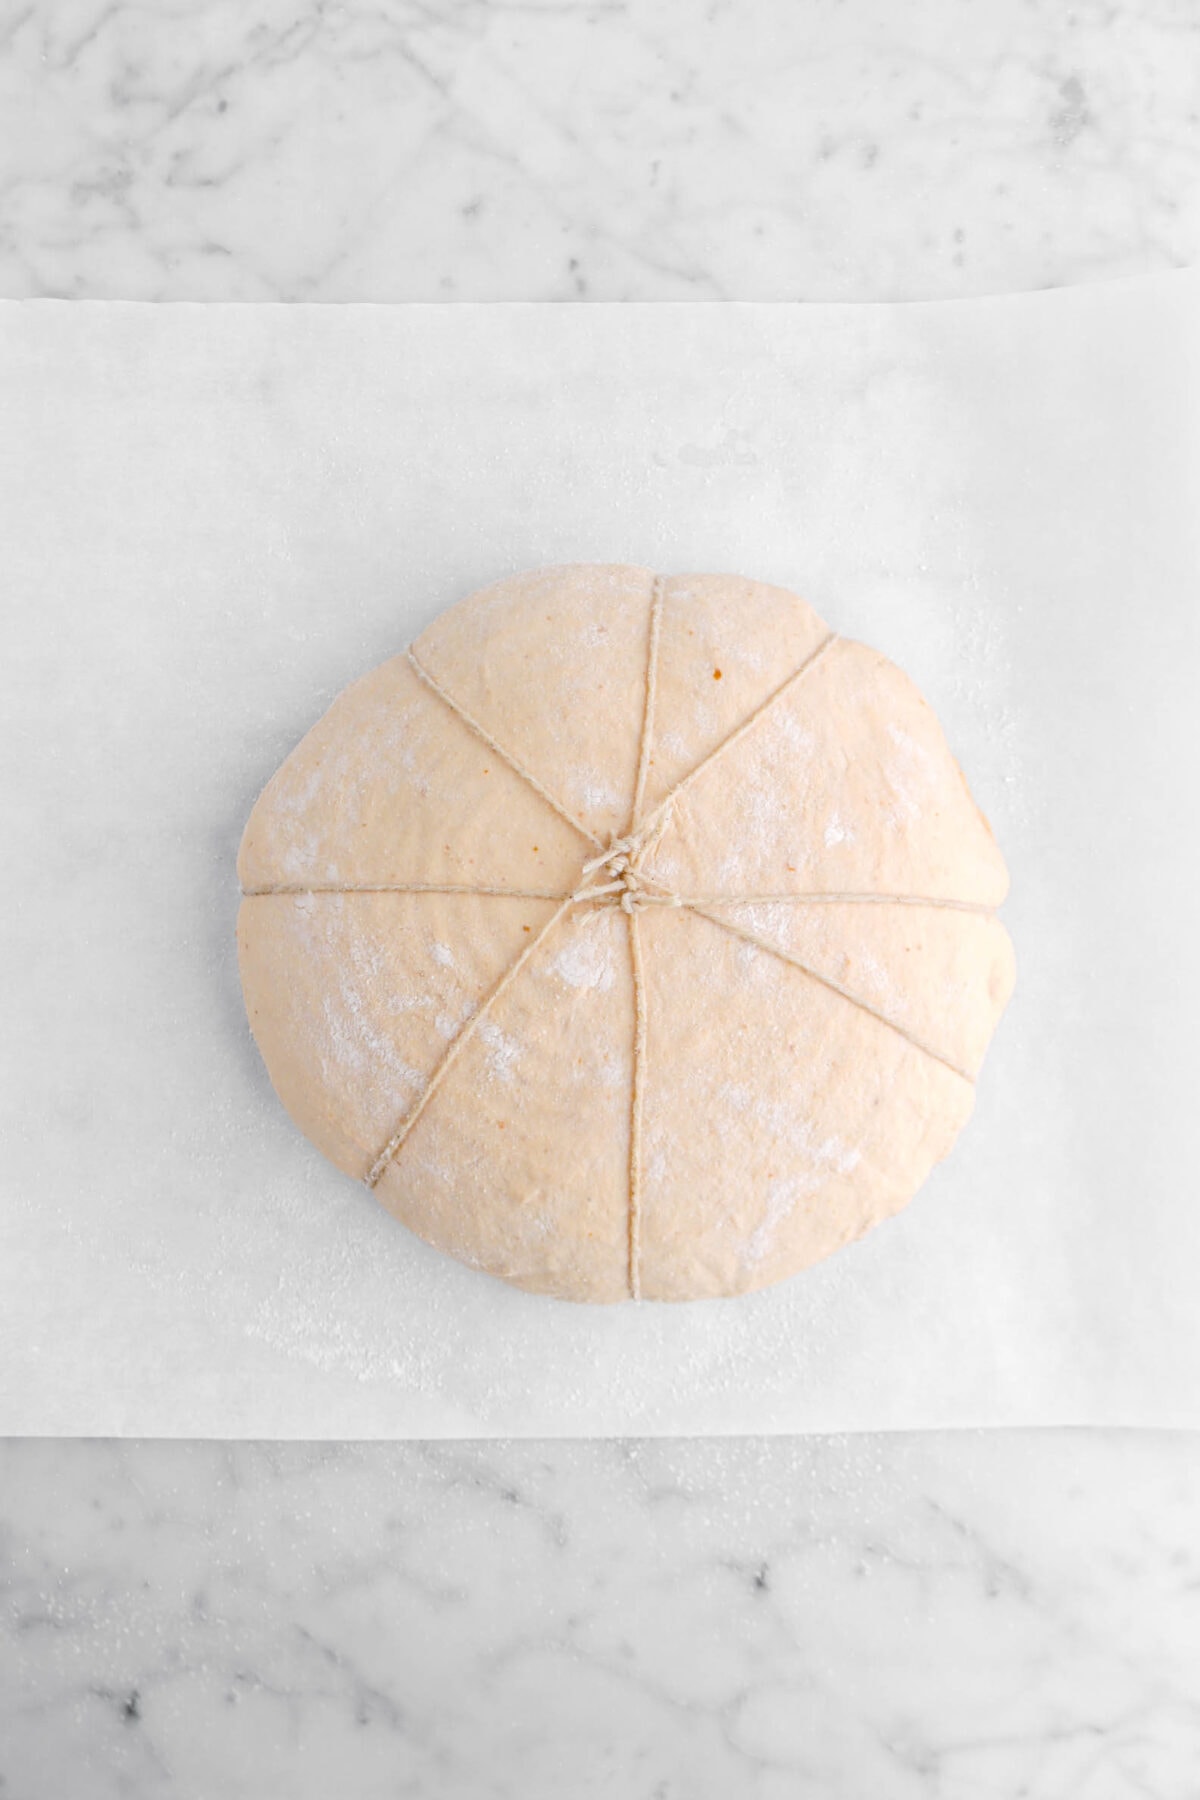
Turn dough out onto strings with the center on the dough lining up with the center of the strings. Tie the strings over the dough, dividing it into eighths.
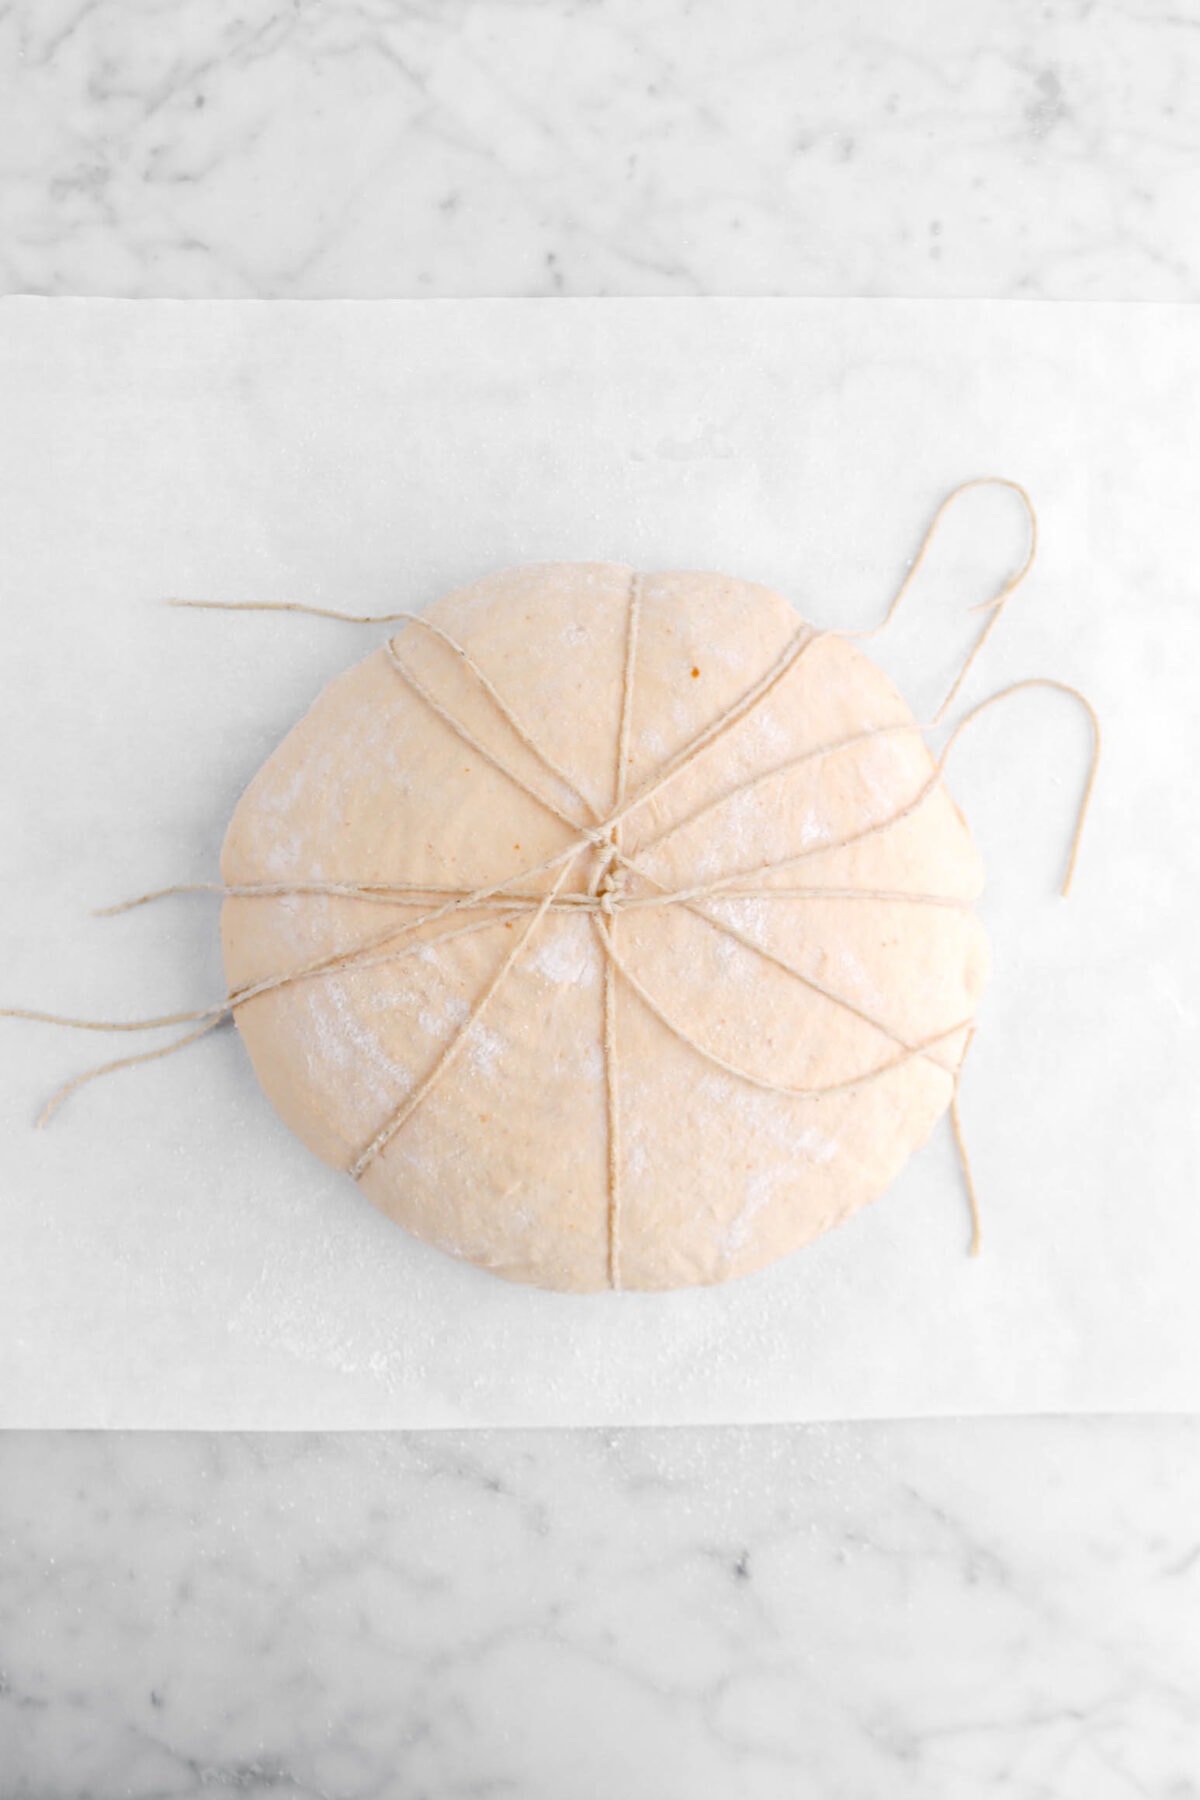
Snip off the excess string. Use a lame, or razor blade, to make slashes about ¼ inch deep in dough in desired pattern.
Step 6: Bake
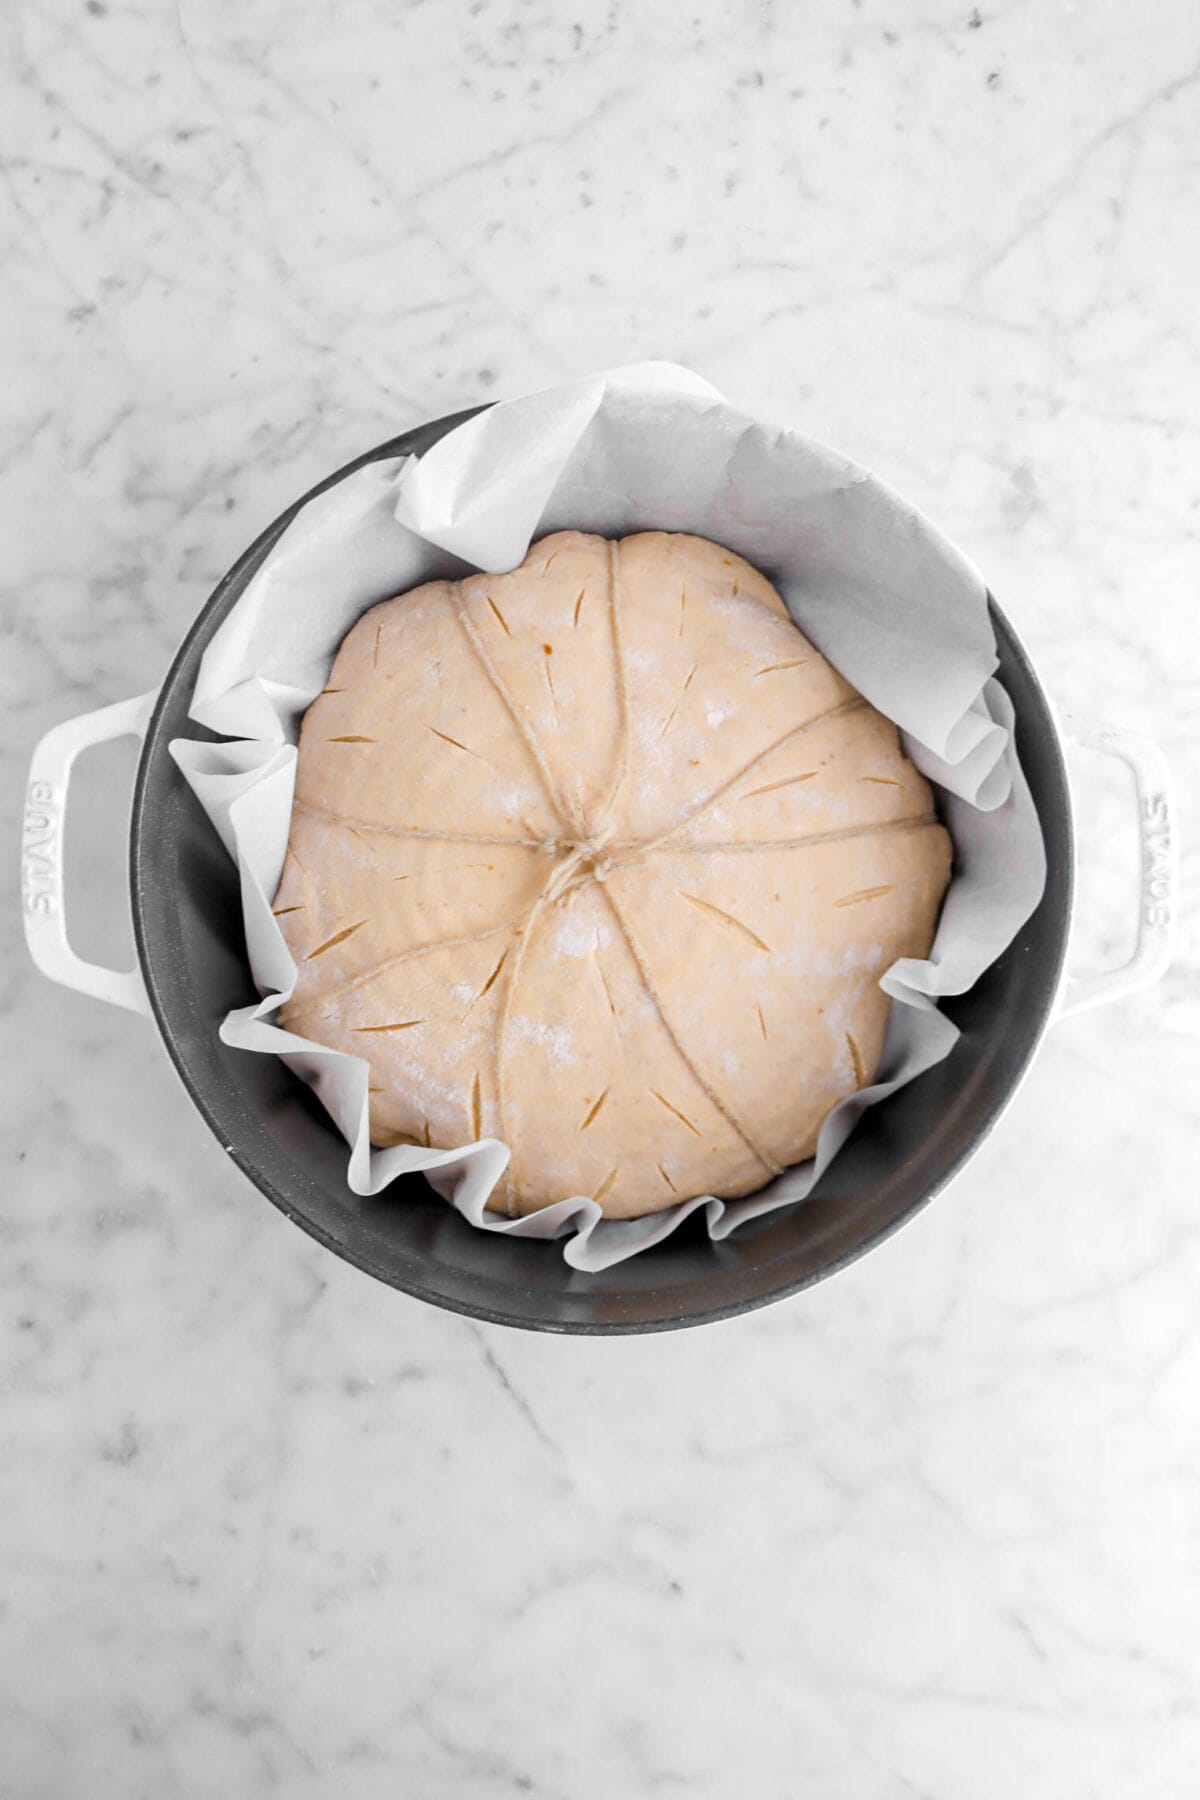
Lift bread by parchment and set it into preheated Dutch oven. Cover and bake for 20 minutes. Remove the lid and bake for an additional 30-35 minutes, until bread is golden and tests done. Carefully remove bread from Dutch oven. Snip and remove the strings.


Frequently Asked Questions
How do I make a sourdough starter? If you don’t have a sourdough starter, there’s no worries! You will need 5 days to make a sourdough starter. Use our recipe and guide How To Make A Sourdough Starter In 5 Days to make one!
How tight should I tie the twine? Since the cooking twine is what gives this pumpkin bread it’s shape, it needs to be tied relatively close to the loaf. Try and keep it just so the twine is tight enough that the knot is touching the bread. You do not want tie the twine so tight that it digs into the bread before baking!
What type of bread lame should I use? With so many different bread lames on the market, I’m sure it can be confusing. Each one is used for something specific, actually! A straight blade is used for normal scoring and decorative scoring. A curved blade is used for achieving that iconic ear you see in bakeries. While it’s possible to use each lame/blade for the opposite intention, it’s always best to try and use the tools as they were meant for. If you do not have a lame, we recommend purchasing one, but a very sharp knife can be used.
Why did my bread not rise in the oven? This could be so many things from the dutch oven not being preheated enough to the ingredients added to the dough. The most common problem is actually over-proofing. We highly recommend investing in a good quality proofing box to help with this issue. Though, if you follow the directions below exactly, you should have a perfect loaf every time!
How can I tell when the bread is properly baked? The most important thing is to follow the times and directions in the recipe card! Though, if you’re unsure, you can actually tap the bottom of the bread and listen. If the bread sounds hollow, it’s baked through! You could also use a thermometer to see if it’s cooked. A properly baked loaf of bread should read an internal temperature of 212℉/100℃.
What can I use as a stem for the bread? While the bread is shaped like a pumpkin, a decorative stem really makes ALL the difference! What we did was purchase a pie pumpkin (or, sugar pumpkins) and, after baking the bread and letting it cool, I took a sharp serrated knife and carefully cut the stem of the pie pumpkin off. This provides a hyperrealistic look to the bread and, from far away, it really does look like a REAL pumpkin! Though, if that’s not something you want to do, you can simply place a cinnamon stick in the center of the bread.
What To Make With Pumpkin Sourdough Bread
This pumpkin bread is such a fun and festive bake, but it IS quite a large loaf. So, there are bound to be some leftovers. Here are a few of our favorite ways to use this bread.
- Toasted for breakfast in the mornings and smeared with pumpkin butter.
- Used as sandwich bread.
- Chopped into cubes for croutons or bread pudding.
- Sliced for Pumpkin French Toast.
- Turned into bread crumbs and toasted for topping recipes like Mac and Cheese.
How To Store
Once this bread is baked and cooled, you can actually store it a few different ways! In a zip top bag and left at room temperatures for 2-3 days, in the fridge for 1 week, OR wrapped with aluminum foil and kept in the freezer for up to 2 months!
If kept in a zip top bag, this bread’s crust will soften and no longer be crunchy. You can always slice it and toast it in the toaster or place the loaf in the oven for a few minutes to get the crust crunchy again!
Looking for more recipes like this? Here are a few you may like: Multigrain Sourdough Bread, Pumpkin Cinnamon Rolls, Pumpkin Butter Babka, Homemade Pumpkin Pie
When you make this Pumpkin Sourdough Bread, leave a comment down below! We love hearing from you and answering any questions you might have! Also, be sure to tag us on social media and hashtag it #BakersTable.
Pumpkin Sourdough Bread
Ingredients
Firm Starter
- 1 cup bread flour
- 1 cup sourdough starter
- ⅛ cup lukewarm water
Bread
- All of the firm starter
- 1 cup lukewarm water
- 1 cup pumpkin purée
- 1 teaspoon barley malt syrup
- 3 cups bread flour
- 2 teaspoons kosher salt
Instructions
Firm Starter
- In the bowl of mixer fitted with the dough hook, combine flour, starter, and water.
- Mix on low speed until combined, about 1-2 minutes.
- Increase speed to medium.
- Knead until dough is smooth, about 4-5 minutes.
- Place dough in a covered container, or in a bowl in a proofing box.
- Allow to rise in a warm place until doubled in bulk, about 4 hours. If using a proofing box, set to 85℉/29℃.
- Place starter in refrigerator overnight.
Bread
- Set starter out about 1 hour prior to mixing final dough.
- In the bowl of a stand mixer fitted with a flat beater, combine water and firm starter.
- Mix on medium low speed until combined, about 3-4 minutes.
- Add pumpkin and barley malt.
- Mix until combined, about 1-2 minutes.
- Switch to dough hook.
- Add flour.
- Mix on low speed until combined, about 1-2 minutes.
- Increase speed to medium high.
- Knead for 5 minutes.
- Add salt.
- Knead until dough is smooth and elastic, about 5 more minutes.
- Place in a covered container, or in a bowl in a proofing box.
- Allow dough to rise until doubled in bulk, about 4 hours. In a proofing box, set temperature to 80℉/27℃.
- While dough is proofing, line a 9-inch banneton with a liner or tea towel.
- Dust with rice flour.
- Turn dough out onto a lightly floured surface.
- Use a bench knife, or you hands (either floured or wet) to round the dough and pull it tight.
- Place dough upside down in prepared banneton.
- Cover with a disposable shower cap, or plastic wrap.
- Place in refrigerator overnight.
- At least 1 hour before you are ready to bake, place Dutch oven on middle shelf of oven, and heat oven to 375℉/190℃.
- When ready to bake, cut 4 pieces of kitchen twine, each 24 inches long.
- Soak pieces of twine in vegetable oil.
- Draw your fingers along each string to squeeze out excess oil.
- Place strings in a starburst pattern on a piece of parchment paper.
- Turn dough out onto strings with the center on the dough lining up with the center of the strings.
- Tie the strings over the dough, dividing it into eighths.
- Snip off the excess string.
- Use a lame, or razor blade, to make slashes about ¼ inch deep in dough in desired pattern.
- Lift bread by parchment and set it into Dutch oven.
- Cover.
- Bake for 20 minutes.
- Remove lid.
- Bake for an additional 30-35 minutes, until bread is golden and tests done.
- Carefully remove bread from Dutch oven.
- Snip and remove the strings.
Notes + Tips!
- If you’re new to sourdough and don’t have a starter, use our How To Make A Sourdough Starter in 5 Days guide!
- If you already have a sourdough starter, but it seems to be a little sluggish/doesn’t have that healthy smell, we recommend giving it a few days of feeding to revive it. You can find out how to do this/get more tips in our Sourdough Starter guide!
- Be sure to read through all the directions before beginning this recipe.
- Make sure that you are using pumpkin purée and NOT pumpkin pie filling.
- You can substitute honey or molasses for the barley malt.
- If using a proofing box, you will need to use glass bowls.
- Rice flour works the best to flour your banneton to prevent sticking.
- You can use a dutch oven or a baking stone to bake this bread.
- If you are using a proofing box with a water tray, you will not need to cover the dough to proof it.
- To help with shape, cut the parchment paper into a round before placing your bread into the dutch oven. Just be sure to leave yourself enough parchment paper on either end to grab and hold!
- For the best results, carefully remove the twine from the bread while it’s still hot. This helps keep the twine from sticking!
- A fully baked sourdough should be around 205℉/96℃ – 210℉/99℃.
Tools You May Need (affiliate links)
– Still Hungry? –
Here are a few recipes may like!