
Flaky Sourdough Discard Biscuits
This post may contain affiliate links, please visit our privacy policy for details.
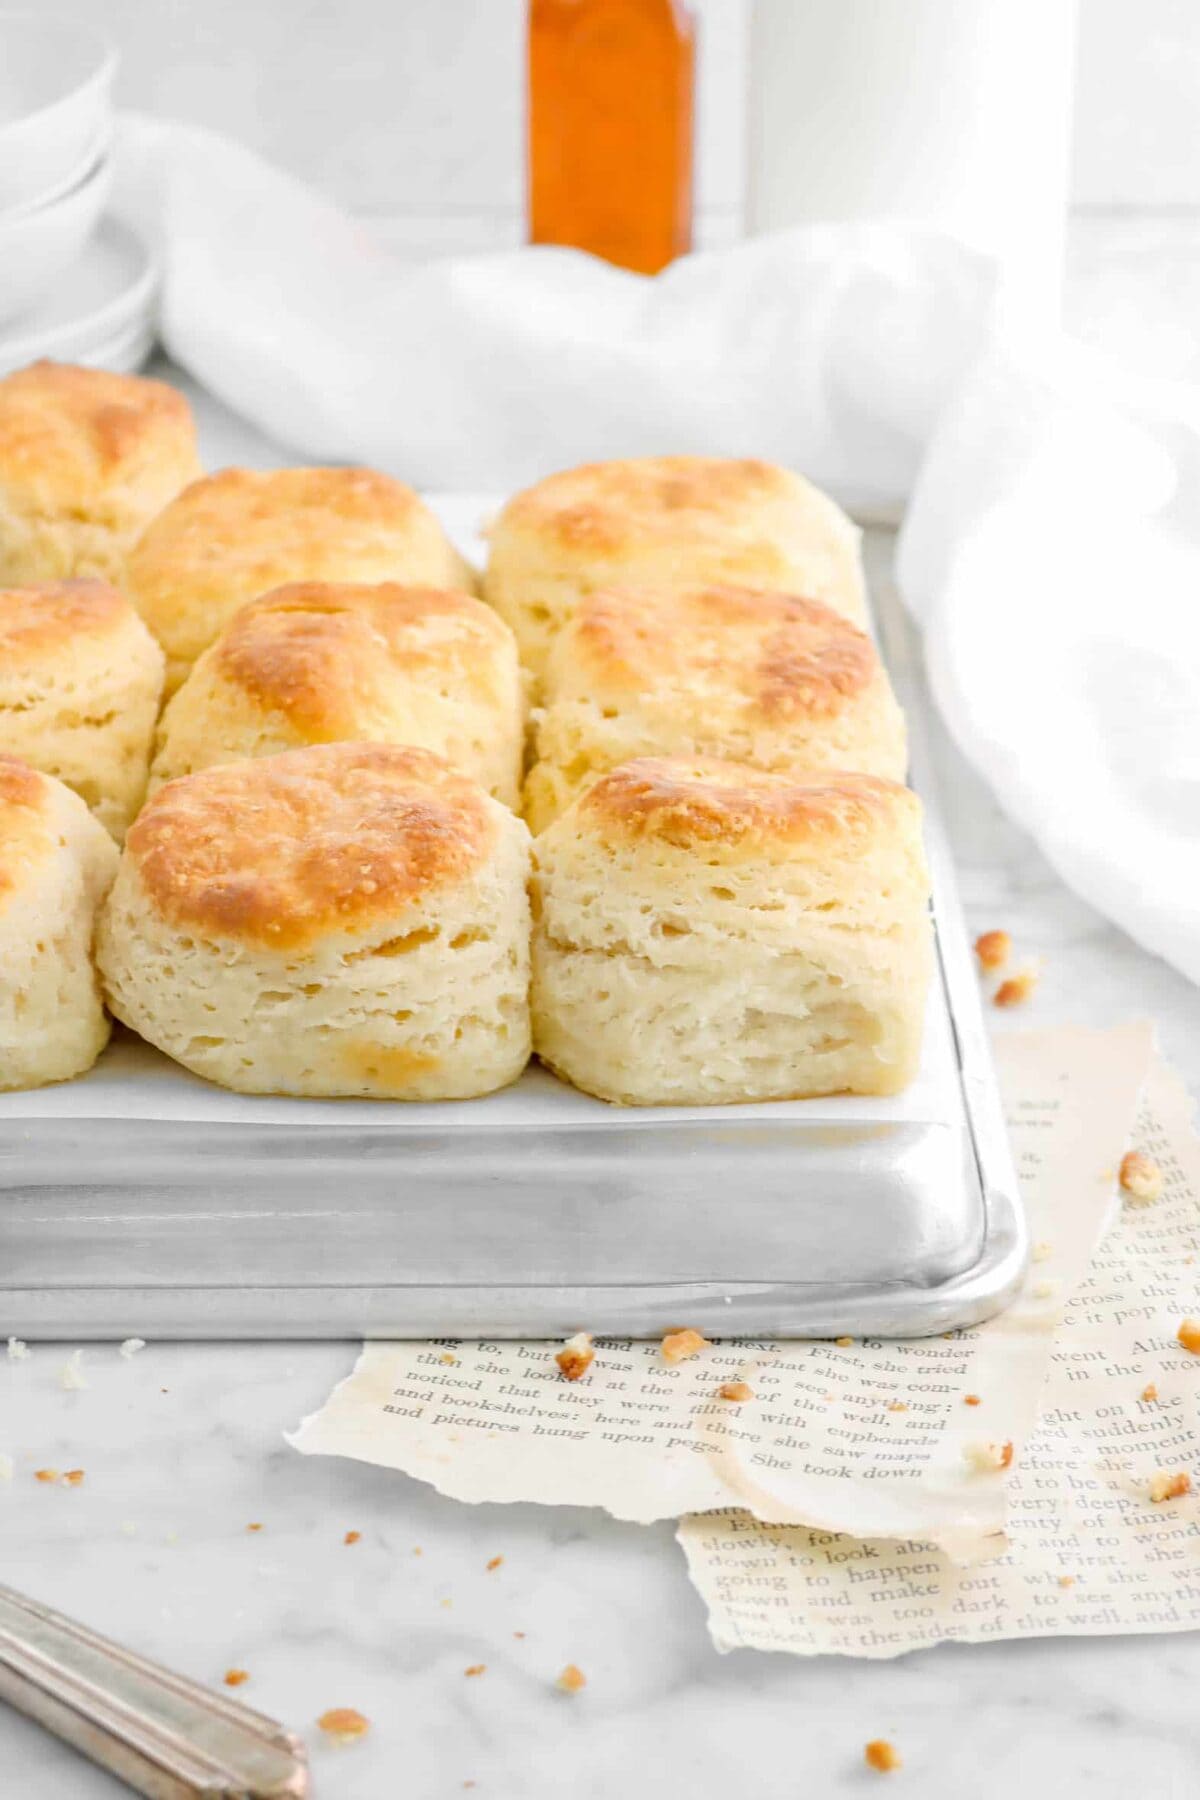
Move over, ordinary biscuits! These sourdough discard biscuits offer a delightful twist on the classic. They’re not just delicious – they’re incredibly easy to make, too.
Imagine: buttery, tender, and flaky biscuits crafted with just six pantry staples. Plus, they help you use your sourdough discard!

A Sourdough Twist On Biscuits!
We love our Southern Buttermilk Biscuits, but we are always looking for ways to use our sourdough discard. These savory, buttery, flaky biscuits are the perfect breakfast that combines our love of sourdough and breakfast treats!
Plus, you can pair them with our homemade jams (strawberry and raspberry are our favorites!) or Belgian waffles for an incredible breakfast spread.
Here’s Why You’ll Love These Biscuits:
These biscuits aren’t just a way to use up discard; they’re
- Easy and Quick To Make: Made with just a handful of pantry staples and your discard, these biscuits are budget-friendly and require minimal prep work!
- Flaky Perfection: Cold butter and a light touch create layers of flaky goodness that melt in your mouth with every bite.
- Tangy Twist: The sourdough discard adds a subtle tang that complements the richness of the butter, offering a unique and delightful flavor profile.
- Super Versatile: Enjoy them warm with butter for breakfast, build a hearty breakfast sandwich, or serve them alongside dinner for a delicious side dish.
- No Leftovers (Probably 😉): These irresistible biscuits are perfect for satisfying cravings throughout the day, from breakfast to a late-night snack.

You Only Need 6 Ingredients!
- All-Purpose Flour
- Baking Powder & Soda
- Salt
- Unsalted Butter
- Sourdough Discard
- Buttermilk

What Exactly is Sourdough Discard?
Sourdough starters are beloved for their tangy flavor and ability to create beautiful breads. But what about the leftover discard?
So, what is discard? When you feed your sourdough starter, you discard a portion of the older starter to make room for fresh flour and water. Anything leftover about 5 hours after feeding is generally considered discard. This leftover portion is still bursting with active yeast and natural bacteria, making it a perfect ingredient for recipes like these delicious biscuits!
While discard might not be ideal for building a new loaf of multigrain sourdough bread due to its increased acidity, it’s a goldmine for flavorful recipes. These sourdough discard biscuits are a testament to that!

Success Tips For Sourdough Biscuits:
We have been making biscuits 30+ years and we have learned the tried-and-true tricks will turn your flat, dry biscuits into the best biscuits ever. This is everything we’ve learned:
- Combine the sourdough and milk: When we first started making these biscuits, we found it difficult to incorporate the sourdough starter into the dough. To avoid this, we found that whisking the buttermilk and sourdough together loosens the starter just enough to incorporate it easily into the dough.
- Grating in cold butter: Our biggest secret to flaky, buttery biscuits! Not only does grating in the butter ensure the perfect pockets of butter, but using cold butter creates steam as it melts in the oven…which means, you have extra flaky biscuits!
- Don’t overmix: This one is SO important! Never overwork your biscuit dough. Over-handling your biscuits leads to hard, flat biscuits. Use a very light hand when mixing. We recommend using a rubber spatula to keep the warmth of your hands away from the butter!
- Folding method: Another secret to flaky biscuits! You’ll find more info on this below.
- Don’t twist the cutter: Have you ever done everything right with a biscuit recipe but still have it come out flat? Well, twisting the biscuit cutter can seal the edges of the biscuits and keep it from rising properly! So, make sure you have a sharp cutter and apply even pressure to cut through the dough.
- Place the biscuits together: By placing the biscuits next each other on the pan, the biscuits will rise upwards instead of outwards to create taller, flakier biscuits!


The Secret To Flaky Layers
Don’t skip folding! Once you turn out the dough, this is is a crucial step for flaky biscuits. This will take you no longer than 2 minutes and it creates the delicious layers!
First, we shape the dough into a rectangle. Then, fold bottom ⅓ of dough up, then top ⅓ down. Repeat this step 2-3 times for the best biscuits!


✳ Recipe FAQ’s
More Breakfast Recipes:



When you make these Sourdough Biscuits, leave a comment down below! We love hearing from you and answering any questions you might have! Also, be sure to tag us on social media and hashtag it #BakersTable.
Happy baking!
x, Caylie

Flaky Sourdough Discard Biscuits
Ingredients
- 2 cups all purpose flour
- 1 Tablespoon baking powder
- ½ teaspoon baking soda
- ¾ teaspoon salt
- ½ cup unsalted butter, very cold
- 1½ cups sourdough starter, cool
- ½ cup buttermilk, cold

Instructions
- Heat oven to 400℉/200℃.
- Spray sheet pan with cooking spray. Set aside.
- In a medium bowl, whisk starter and buttermilk together until buttermilk is fully incorporated. Set aside.
- Sift flour, baking powder, baking soda, and salt together in a large bowl.
- Grate butter into flour mixture.
- Toss together lightly.
- Add starter mixture.
- Stir together gently.
- Turn out onto floured surface.
- Sprinkle top with flour.
- Roll to about ½ inch thick.
- Fold bottom ⅓ of dough up, then top ⅓ down.
- Turn over.
- Repeat the rolling and folding process 2-3 more times.
- Roll dough to ¾ inch thick.
- Cut with a 3-inch cutter and place on prepared sheet pan.
- Bake for 20-25 minutes, until golden brown.
- Brush tops with melted butter, if desired.
Notes + Tips!
- Cold, Cold, Cold: This is super important! Use cold butter for the best results. Cold butter creates steam during baking, resulting in those beautiful flaky layers.
- Don’t Overwork the Dough: Mix just until the ingredients are combined. Overmixing develops the gluten, leading to tough and dense biscuits.
- Don’t Twist The Cutter: If you twist the cutter when cutting the biscuits, this will seal the edges and keep the biscuits from rising.
- Don’t Peek: Resist the urge to open the oven door too frequently while the biscuits are baking. This can disrupt the rise and prevent them from reaching their full potential.
- Brush The Tops (Optional): For a golden brown exterior, brush the tops of your biscuits with melted butter or milk before baking.
- Chill If Needed: If your kitchen is warm, consider chilling the dough for 20-30 minutes before baking. This allows the cold butter to solidify again and creates better lift.
- Preheat Properly: A preheated oven is essential for even baking and those flaky layers.
Tools You May Need (affiliate links)
– Still Hungry? –
Here are a few recipes may like!


Probably the best biscuits I’ve ever made! Thank you!
Im still really new to sourdough, so this may be a dumb question. Can I use it straight from the fridge?
Hi Beth! There are no dumb questions. You really need to let it sit at least an hour out of the fridge before using. Let me know if you have any other questions.
Should the sour dough starter be fed or are you using discard?
Hi Lori! Use the discard, then feed your sourdough. Let me know if you have any more questions.
I got 0 rise on these biscuits. They came out completely flat. Not sure what happened 😕
Hi Katie! Did you check the dates on your baking powder and baking soda? Let me know if you have any other questions.
I think I realized my mistake, I just rolled the dough out too thin.
Thanks for letting me know.😊 I’m so glad you figured it out!
Awesome biscuits. Like they say don’t overwork the dough. I use them for biscuits and sausage gravy, then I use the leftovers for breakfast sandwiches. I take a sausage patty, make circle molds of scrambled egg, and a piece of cheese. I let everything cool separately, make the sandwiches, wrap them individually in plastic wrap then aluminum foil, seal them in freezer bags and freeze. We have eaten them 2 months later and they were still soft and wonderful.
Hi Kristi! That’s SUCH a good idea! Thank you for sharing that 😊. We’re so happy that you love this recipe!! x, Caylie
Can you freeze dough to cook later?
Hi Leigh! You can, but keep in mind they will take longer to bake. You can also bake them slightly under what is called for, about 5 minutes less, then freeze them. They’ll take less time to finish.
These are my family’s favorite biscuits, I made a double batch and froze the dough. So anytime I want to make biscuits I just pop a couple in the air fryer at 400 for about 16 minutes! So good, son wants me to quadruple the recipe! We have made them for fresh breakfast sandwiches or sausage biscuits and gravy!
Hi Leigh! We’re so happy to hear that you and your whole family love this recipe. I love the idea of freezing the dough to get fresh biscuits! That’s SO smart! We hope you find more recipes to love and share with your family on our blog 🫶 x, Caylie
Excellent! Making more to freeze!! The best we’ve tasted.
Hi Jamie! We’re so happy to hear that!! These are definitely something we love, too. Thank you for making (and loving!) our recipe. I hope you find more to love on our blog! 😊 x, Caylie
I haven’t decided about making this recipe again. Glad I read the comments, because mine turned out soupy too and had to add a cup of self rising flour. Not sure the reasoning to not incorporate the butter into the flour. I used a Pampered Chef flat pan and about had a fire from the butter running off the pan. Kitchen filled with smoke.
Hi Mary! If you had fully read the comment, her starter was pure liquid. Mine is not. Please refer to my answer and her comment back. I’m not sure where you got the butter not being incorporated in the flour. It is grated in and fully incorporated. I’m also not sure why you added self-rising flour. However, if that is the flour you used for the entire recipe, I hope you omitted the baking powder and salt. Let me know if you have any other issues or questions. I’m always here to help you troubleshoot and figure out what went wrong.
Need to add “frozen butter” to the ingredients list.
Hi Karen! Thanks for the catch! It’s updated now.
This is my go to recipe. Delicious and perfect every time. Just made a double batch with cheddar and jalapeños! They are still in the oven but it smells amazing!
Hi Megan! Thank you so much for making our recipe! We’re so glad to hear you love them. Adding the cheddar and jalapeños sounds AMAZING!! We hope you find more recipes that you love on our blog 🥰
Happy holiday’s! x, Caylie
This recipe was so simple to make and turned out delicious! Very soft and yummy!
Hi Hope! We’re so glad to hear you love this recipe 🥰 It’s definitely one of our favorites! x, Caylie
What is your recipe for starter
Hi Pam! You can get our recipe for sourdough starter by Clicking Here! Hope this helps and please let us know if you have any other questions 😊 x, Caylie
I tried it! It came out great. I actually doubled the recipe and got 26 large biscuits. My family loved them!
I’ve been testing biscuit recipes for at least one year. I’ve made these biscuits several times. They are the best!!! I don’t like grating butter. I find the process to be very messy and tedious. Instead, I cut frozen butter into very small cubes then place them back into the freezer while I prepare the rest of the ingredients. I use a fork to stir the cubes of butter into the flour. I never use my hands as I think this causes the butter to cool and soften too much before baking.
Thanks bunches for this great recipe.
Lee Ann from Alexandria, Louisiana
Hi Lee Ann! We’re glad to hear you love these biscuits as much as we do. They’re a great use for sourdough discard! Thanks for the review and we hope you’ll find more recipes to love on our blog!! Xo, Caylie
Do you feed your starter before you use it in the recipe?
Hi Holly! Use your starter discard to make the biscuits, then feed your starter.
I have been looking for the perfect biscuit recipe and after many fails, you came to the rescue. Best biscuit ever, thank you for sharing this awesome recipe.
Should this be 4 cups of flour. I had a very runny batter instead of dough! I added 2 cups of self-rising in…. now I’m doing the math and realizing I probably should have added 2 cups of all-purpose. 🙁 Not sure how they will turn out. They are in the oven now.
Hi Jennifer! I’m sorry to hear you had a batter rather than a dough. We’ll go back through this recipe, troubleshoot, and see what the problem is. Thank you for letting us know! I hope the biscuits come out okay! Xo, Caylie.
Hi, Jennifer! I went back and re-made the sourdough biscuits this morning to try and troubleshoot for you. Mine came out just as pictured. The only thing I can think of is that your sourdough starter may be more liquid than mine. Mine is pretty thick. I feed 2 cups of starter with 2 cups of flour and 1 1/2 cups water. I never pour off below 2 cups because I use it so much!😂 I hope this helps.
That’s definitely it then – my started is all liquid! I had no idea there were different kinds.😂 I feed mine with sugar, water, and a three tablespoons of instant potatoes. They still turned out great! I’m absolutely trying them again! This time I’ll double the flour, baking soda, baking powder and salt.