French Lemon Tart with Pâte Sucrée Crust (Tarte au Citron)
This post may contain affiliate links, please visit our privacy policy for details.
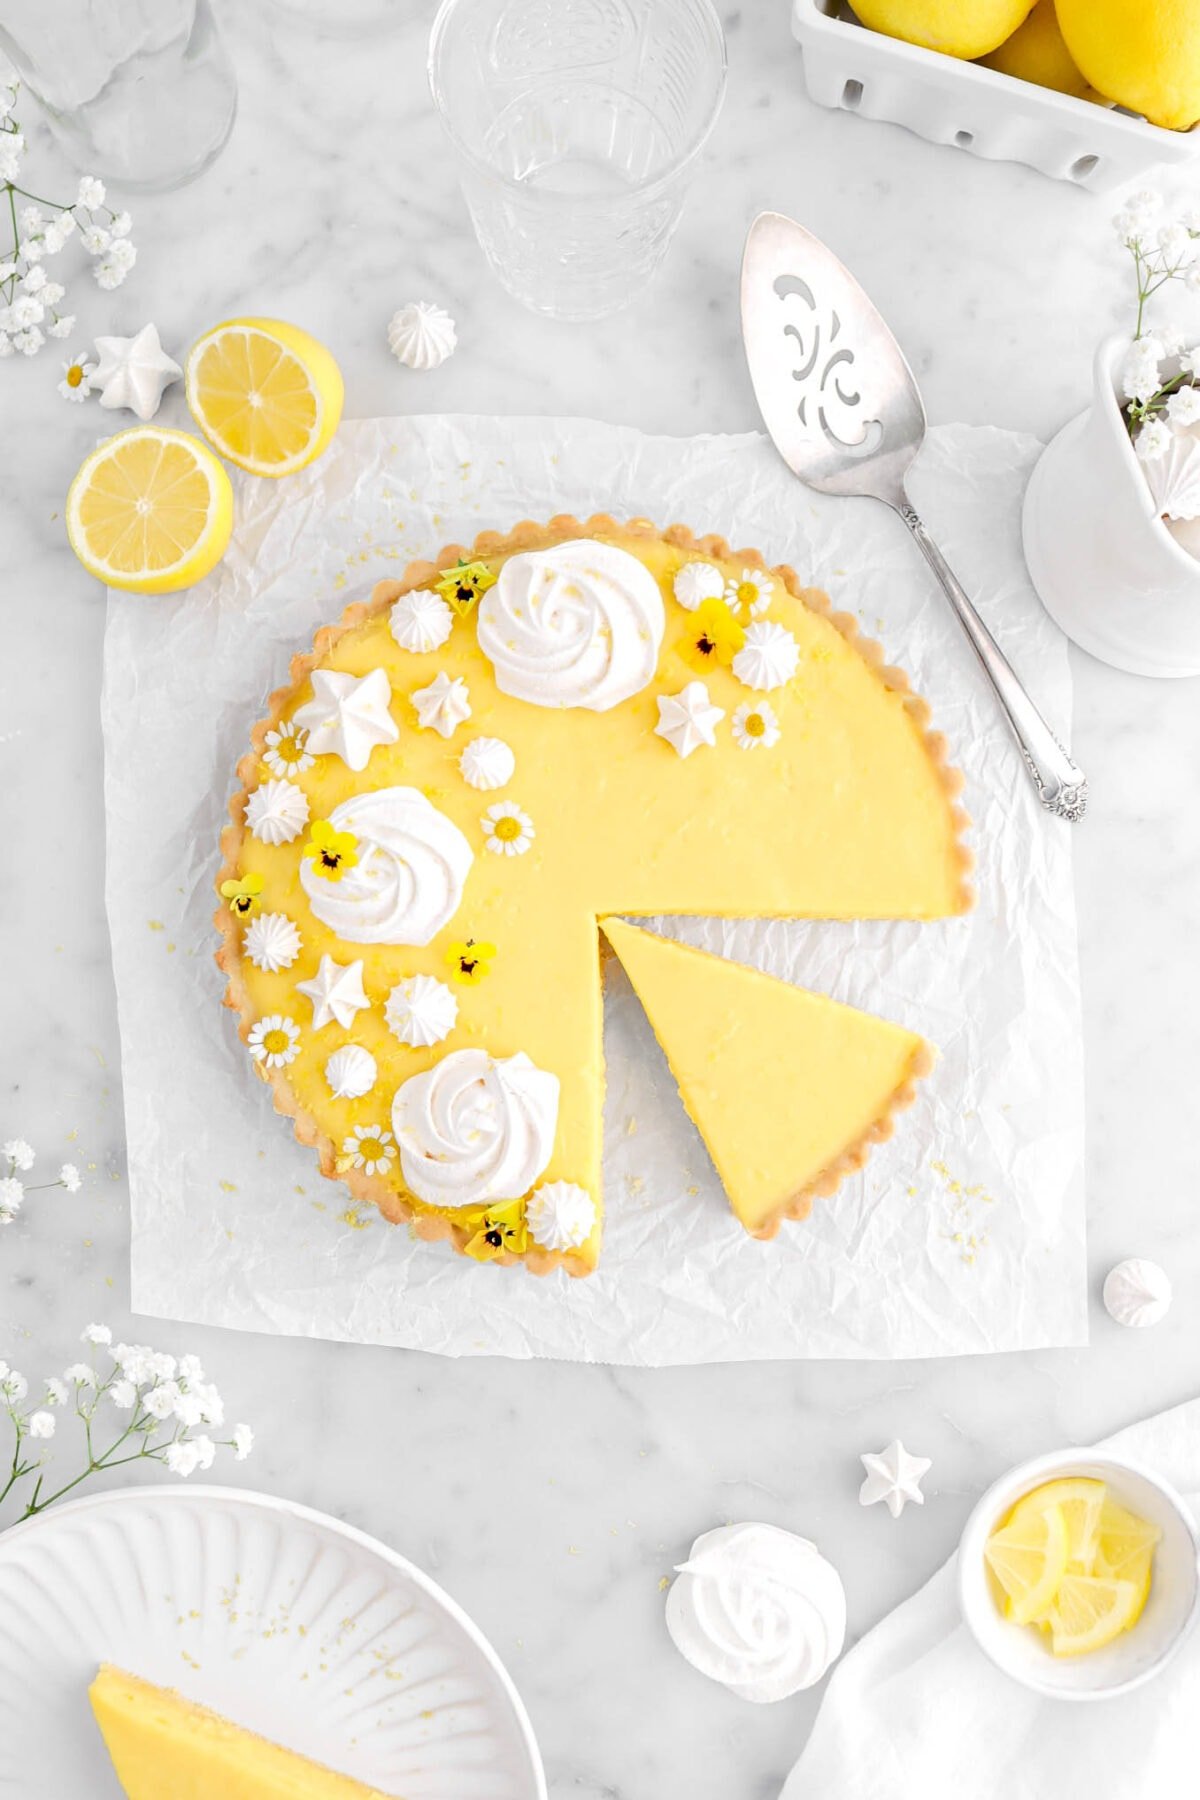
If you’re in need of an extra delicious, but oh-so impressive dessert that everyone is sure to love, then this French Lemon Tart (aka Tarte au Citron) is the decadent treat you’ve been searching for! A buttery, sweet, and oh-so easy to make sweet pastry that’s infused with lemon zest and baked to golden perfection. Then, it’s filled with a dreamy lemon pastry cream! Every bite of this decadent tart is perfectly sweet, tart, tangy, and SO. GOOD. It’s the perfect dessert to make all year long!
About The Recipe
It’s been almost a full year since we last shared a tart recipe! Can you believe it? Once we realized this, my mom and I knew we needed to make a new tart ASAP!
Though, this time, we wanted to make something that was a little more traditional, but also something we knew you all would love.
And since lemon is one of our more popular flavors on the blog, we thought a tart au citron would be perfect!


It sounds fancy…and difficult, but I assure you that this tart is actually SO much easier to make than you might think.
The crust is made with only a handful of ingredients and pre-baked! That means, you don’t need to worry about baking the filling and burning your crust.
Though, with this recipe, we added some lemon zest to the crust just to bring forward a little more lemon flavor.
But the real show-stopper of this dessert is the pastry cream!

Rich, silky, extra lemon-y, tangy, and perfectly sweet. It is everything you could ever wish for with a lemon dessert!
Bonus? This tart can be made ahead of time!
It is the perfect decadent dessert to enjoy on special occasions, but especially on holiday’s.
Reasons You Will Love This Lemon Tart
- Dreamy, decadent, and melt-in-your-mouth delicious!
- Can be made in-advance.
- The crust is infused with lemon zest to give this tart a little extra lemon flavor.
- Perfect for spring, summer, fall, or even winter holiday’s.
- A serious crowd pleaser!

Equipment Needed
- Food Processor
- Parchment Paper
- Rolling Pin
- 9 Inch Tart Pan
- Pie Weights
- Sheet Pan
- Mixing Bowls
- Whisk
- 4 Quart Saucepan
- Offset Spatula
Ingredients
(Full ingredient amounts and instructions can be found in the recipe card at the bottom of the post)
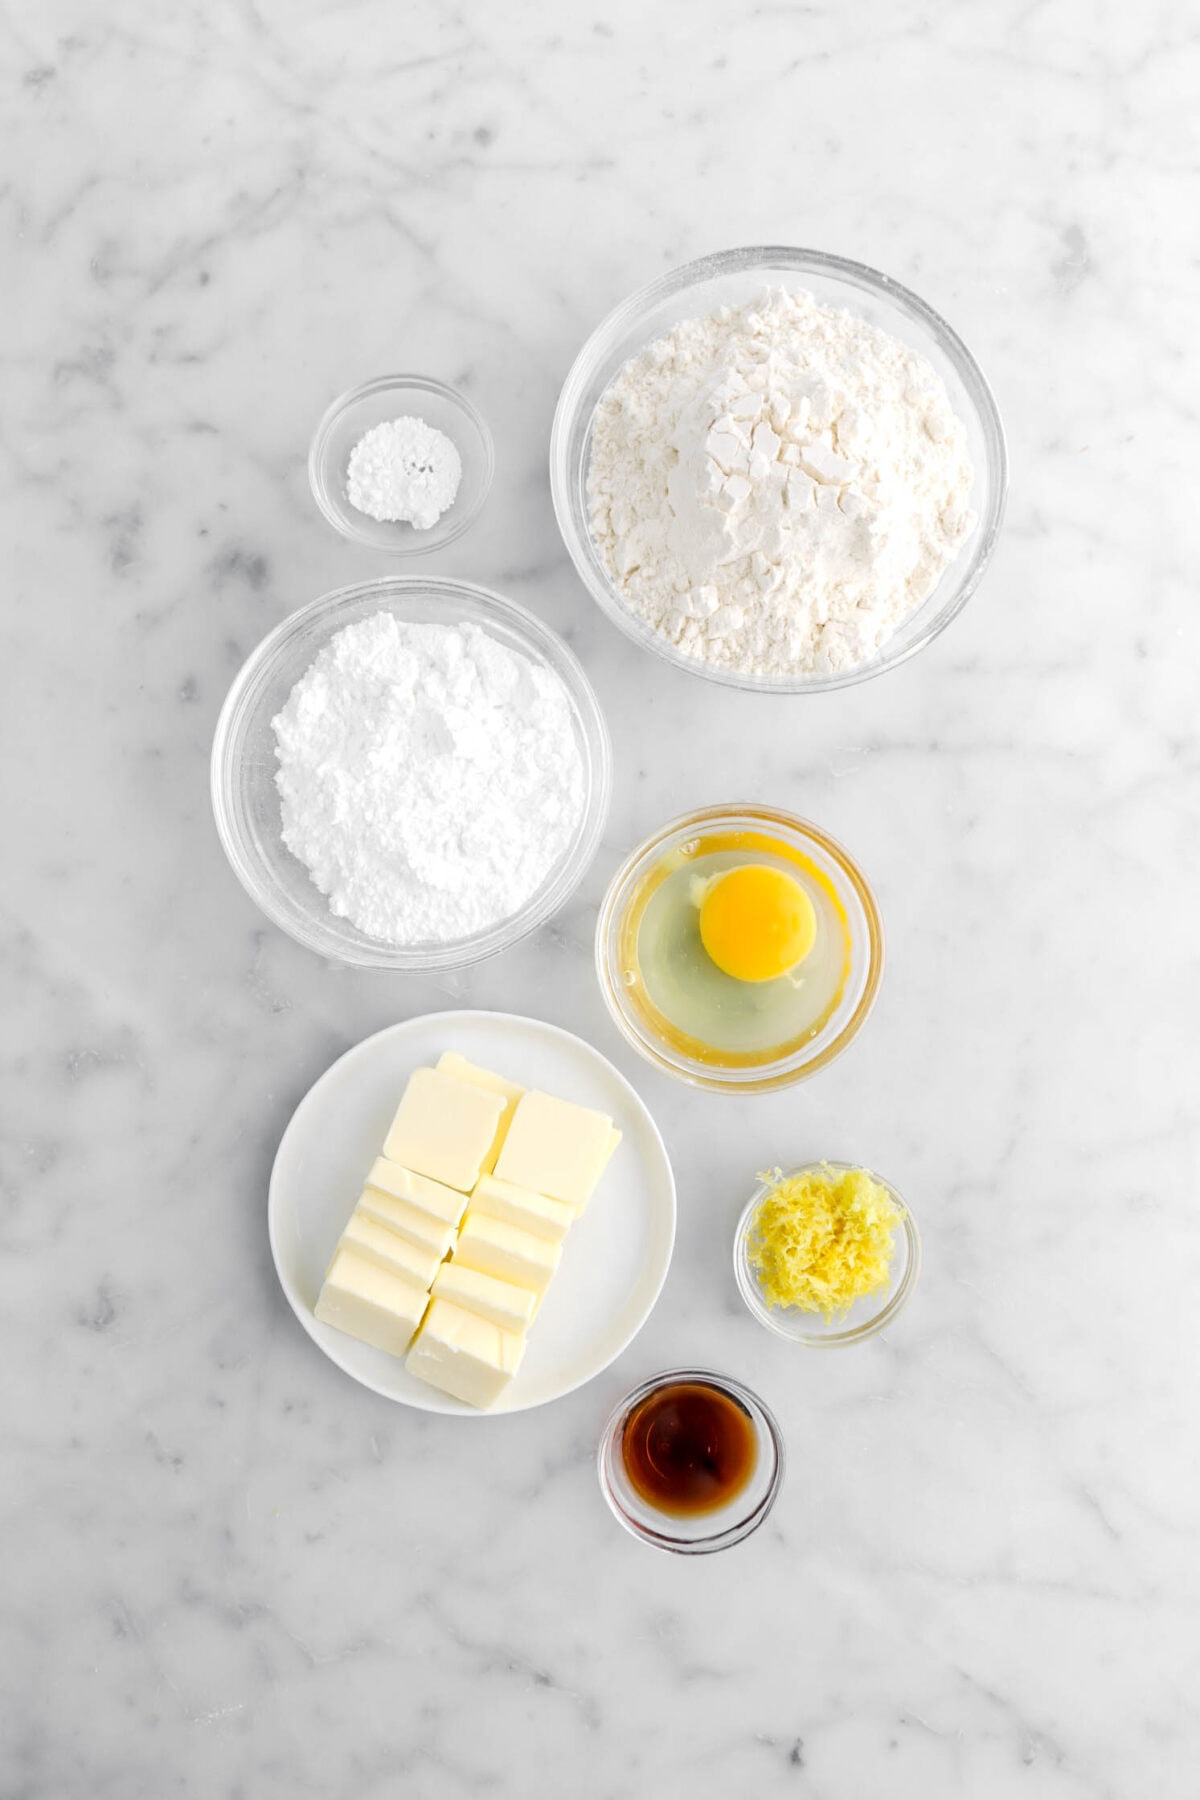
For The Crust:
- All-Purpose Flour – No need for fancy flours in this recipe! All-Purpose Flour gives this crust the perfect structure.
- Powdered Sugar – Using powdered sugar gives this crust it’s tender texture, while also lending the perfect amount of sweetness.
- Baking Powder – Leavening is essential in baking! It creates the perfect texture and structure.
- Lemon Zest – We added a little bit of lemon zest to bring the lemon flavor all the way through this tart!
- Salted Butter – Creates a tender, buttery, and oh-so delicious texture.
- Large Egg – Adding an egg makes for a richer crust that makes this tart totally irresistible!
- Vanilla Extract – A splash of vanilla adds a delicious undertone.
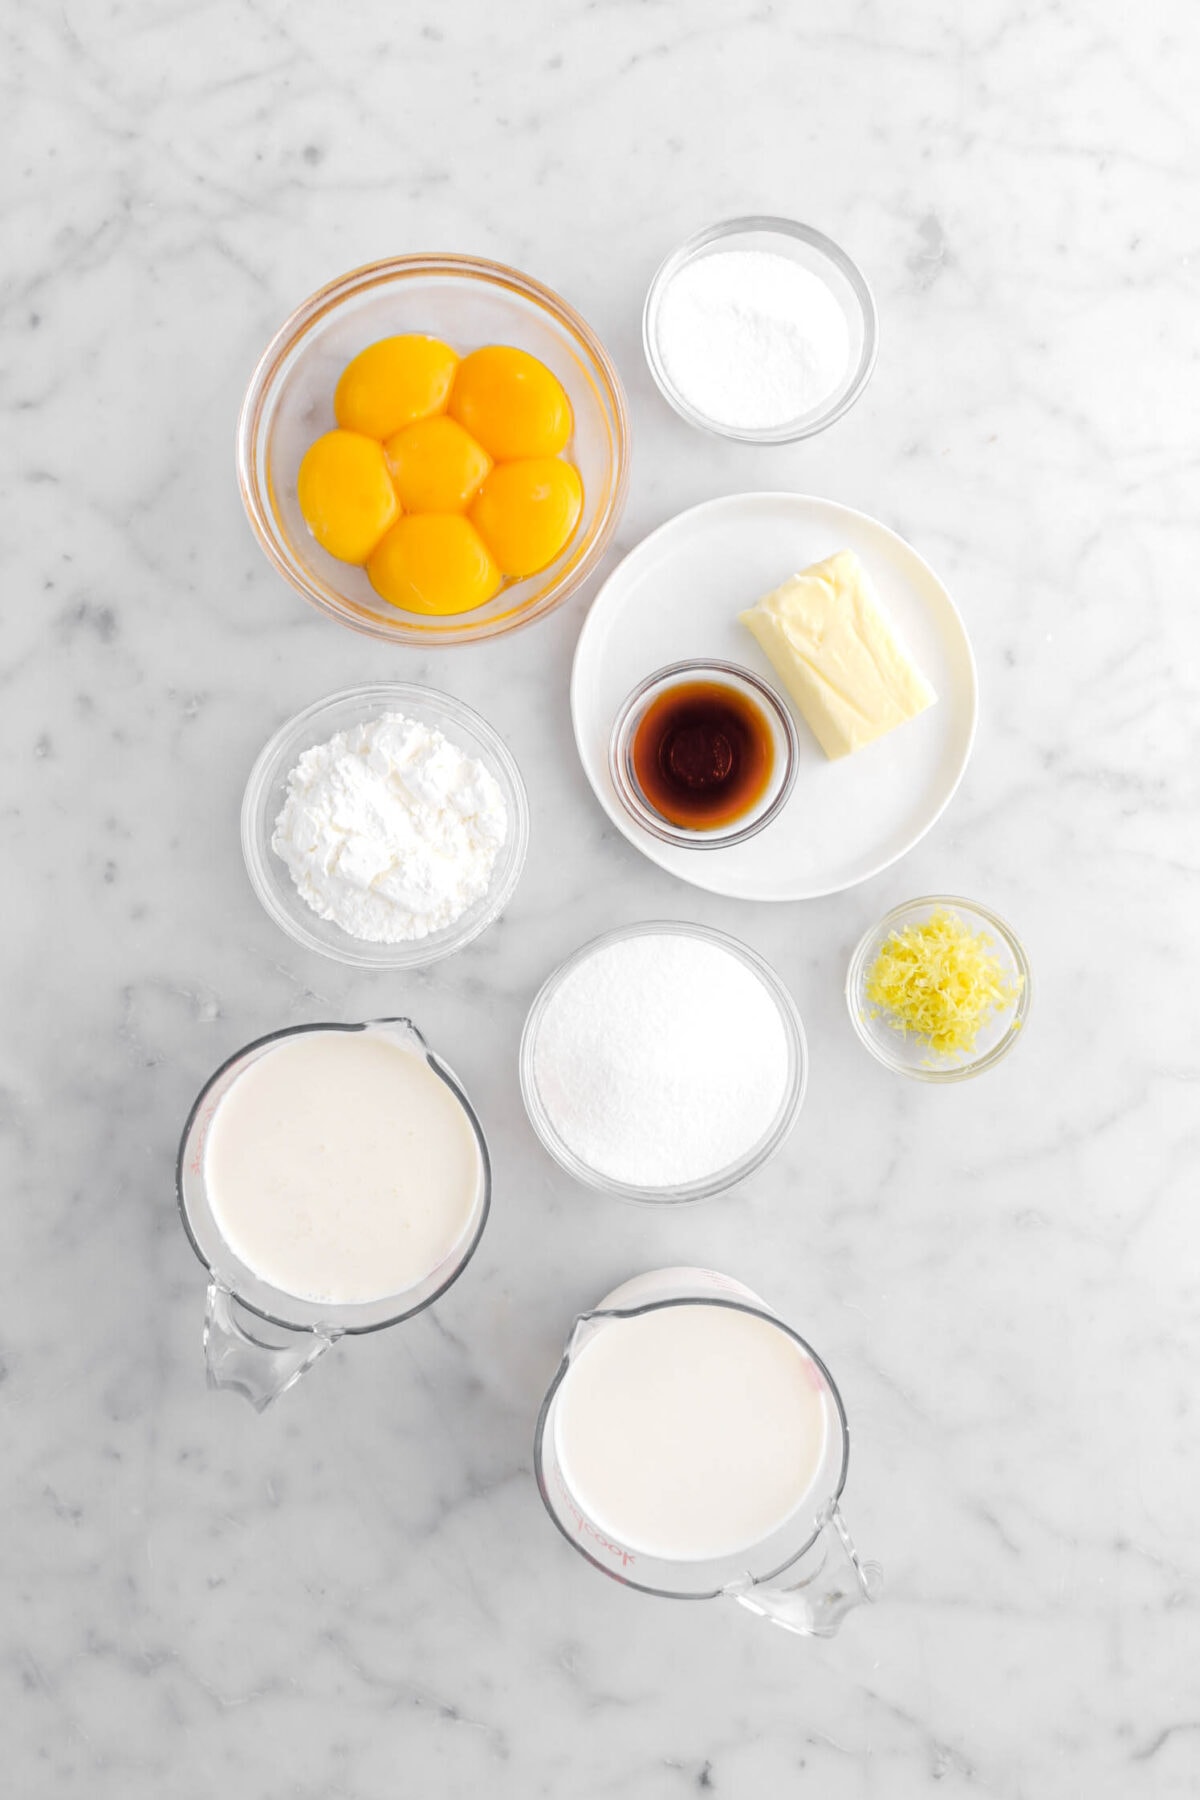
For The Filling:
- Corn Starch – This thickens the pastry cream.
- Granulated Sugar – You will need to divide the sugar into two, as some of the sugar needs to go into the corn starch and some needs to be added to the milk mixture!
- Egg Yolks – You will need 6 egg yolks for this recipe, but no worries! You can use the excess egg whites to make breakfast the next morning or make our meringue cookies.
- Whole Milk – Heating the milk is how the eggs are tempered.
- Heavy Cream – Using the combination of heavy cream and whole milk creates a richer, more decadent pastry cream.
- Salted Butter – Remember to set your butter out ahead of time to come to room temperature!
- Vanilla Extract – Adds a delicious undertone to this pastry cream.
- Lemon Zest – Using lemon zest adds a bright pop of lemon flavor!
How To Make This Lemon Tart
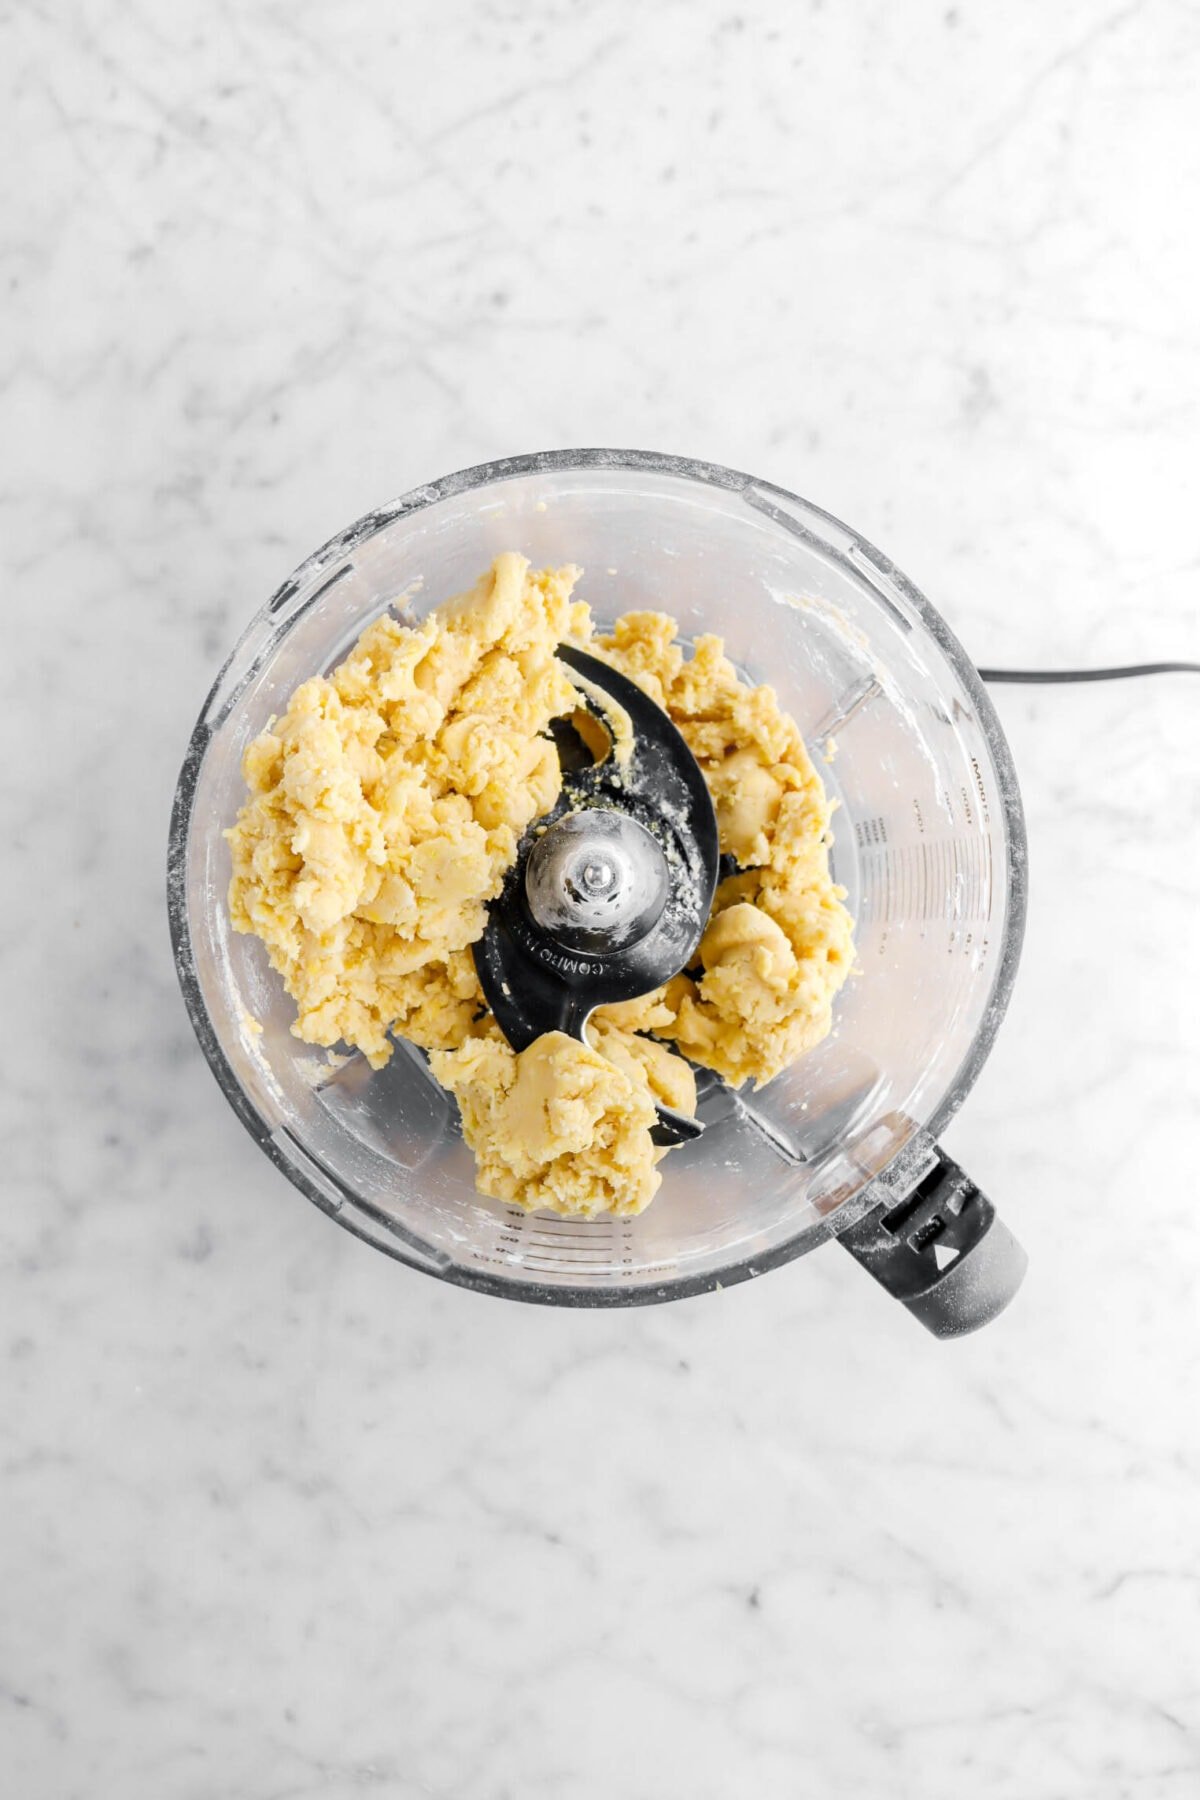
Step 1: Prepare dough
In the bowl of a food processor fitted with a dough blade, combine flour, sugar, baking powder, and lemon zest. Pulse to mix.
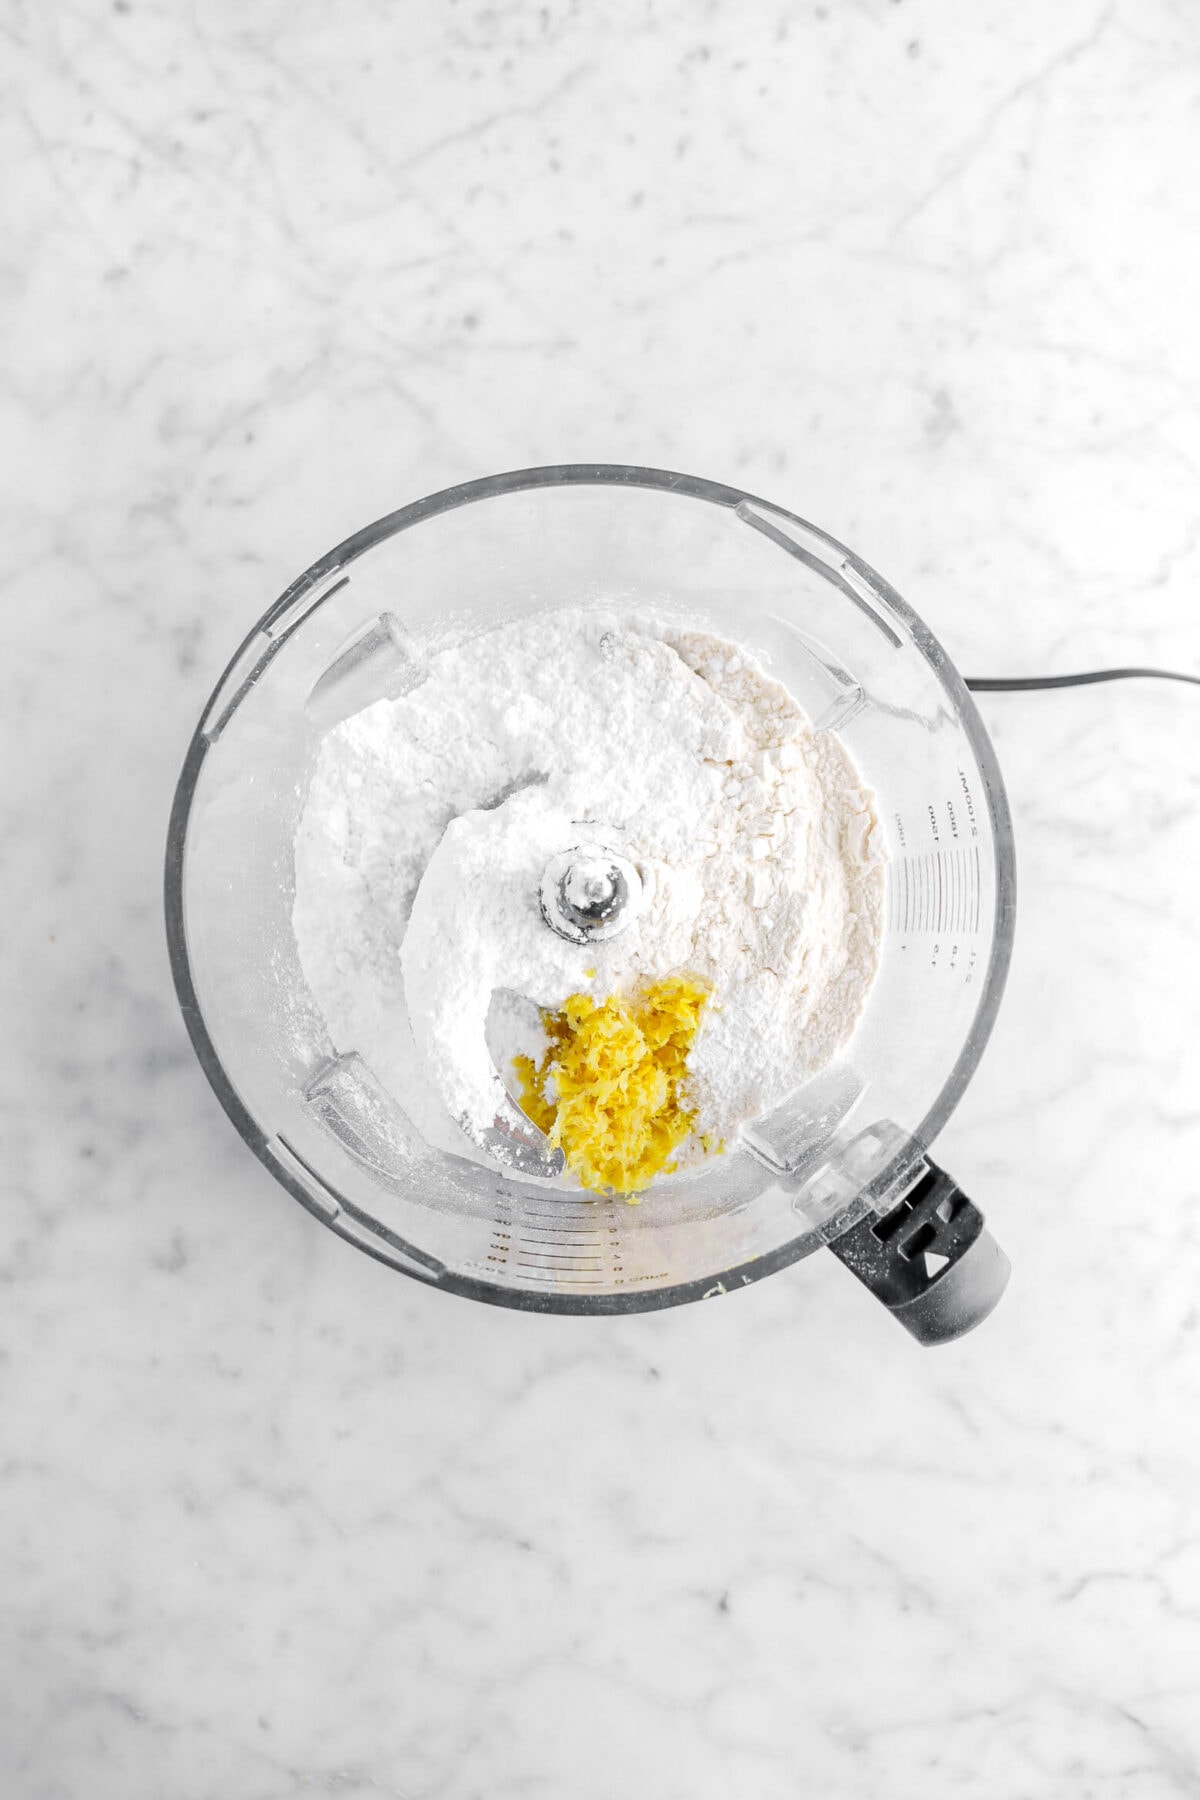
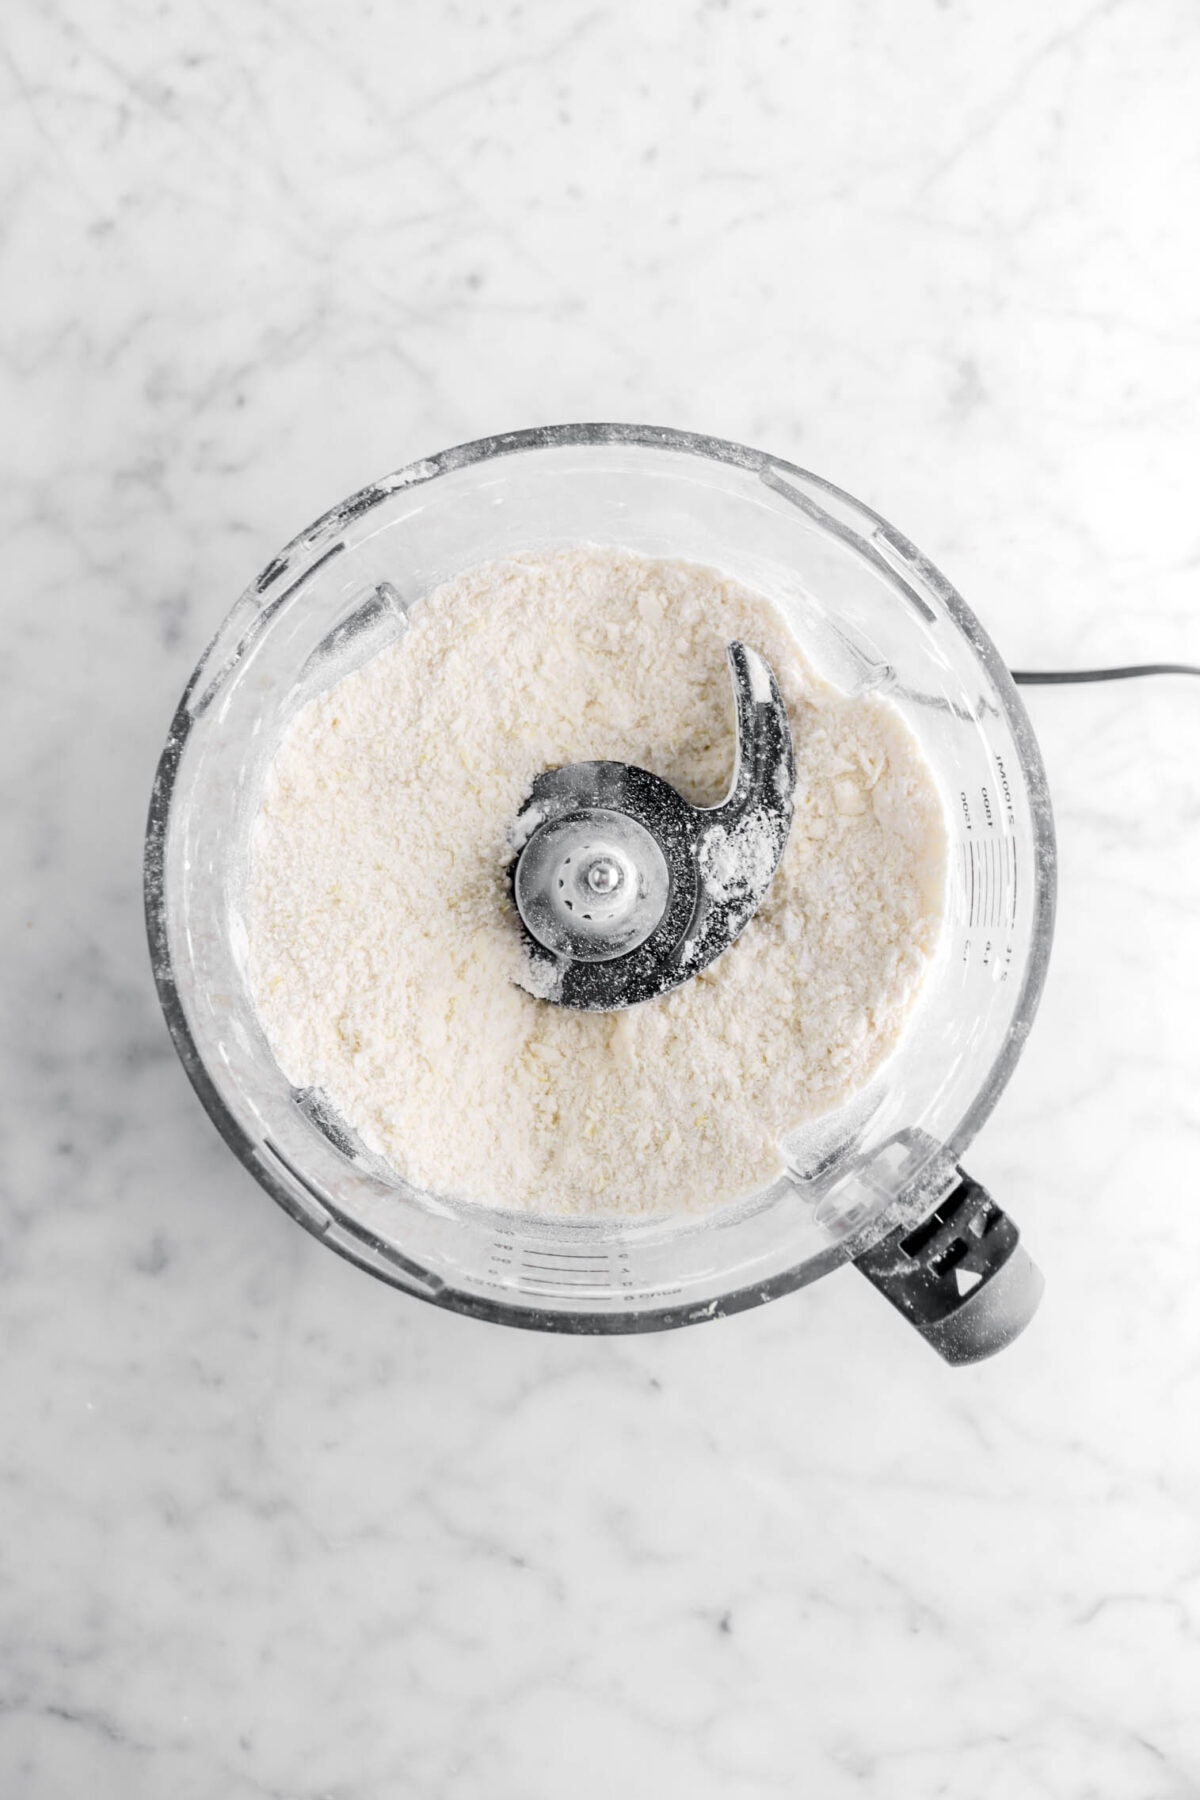
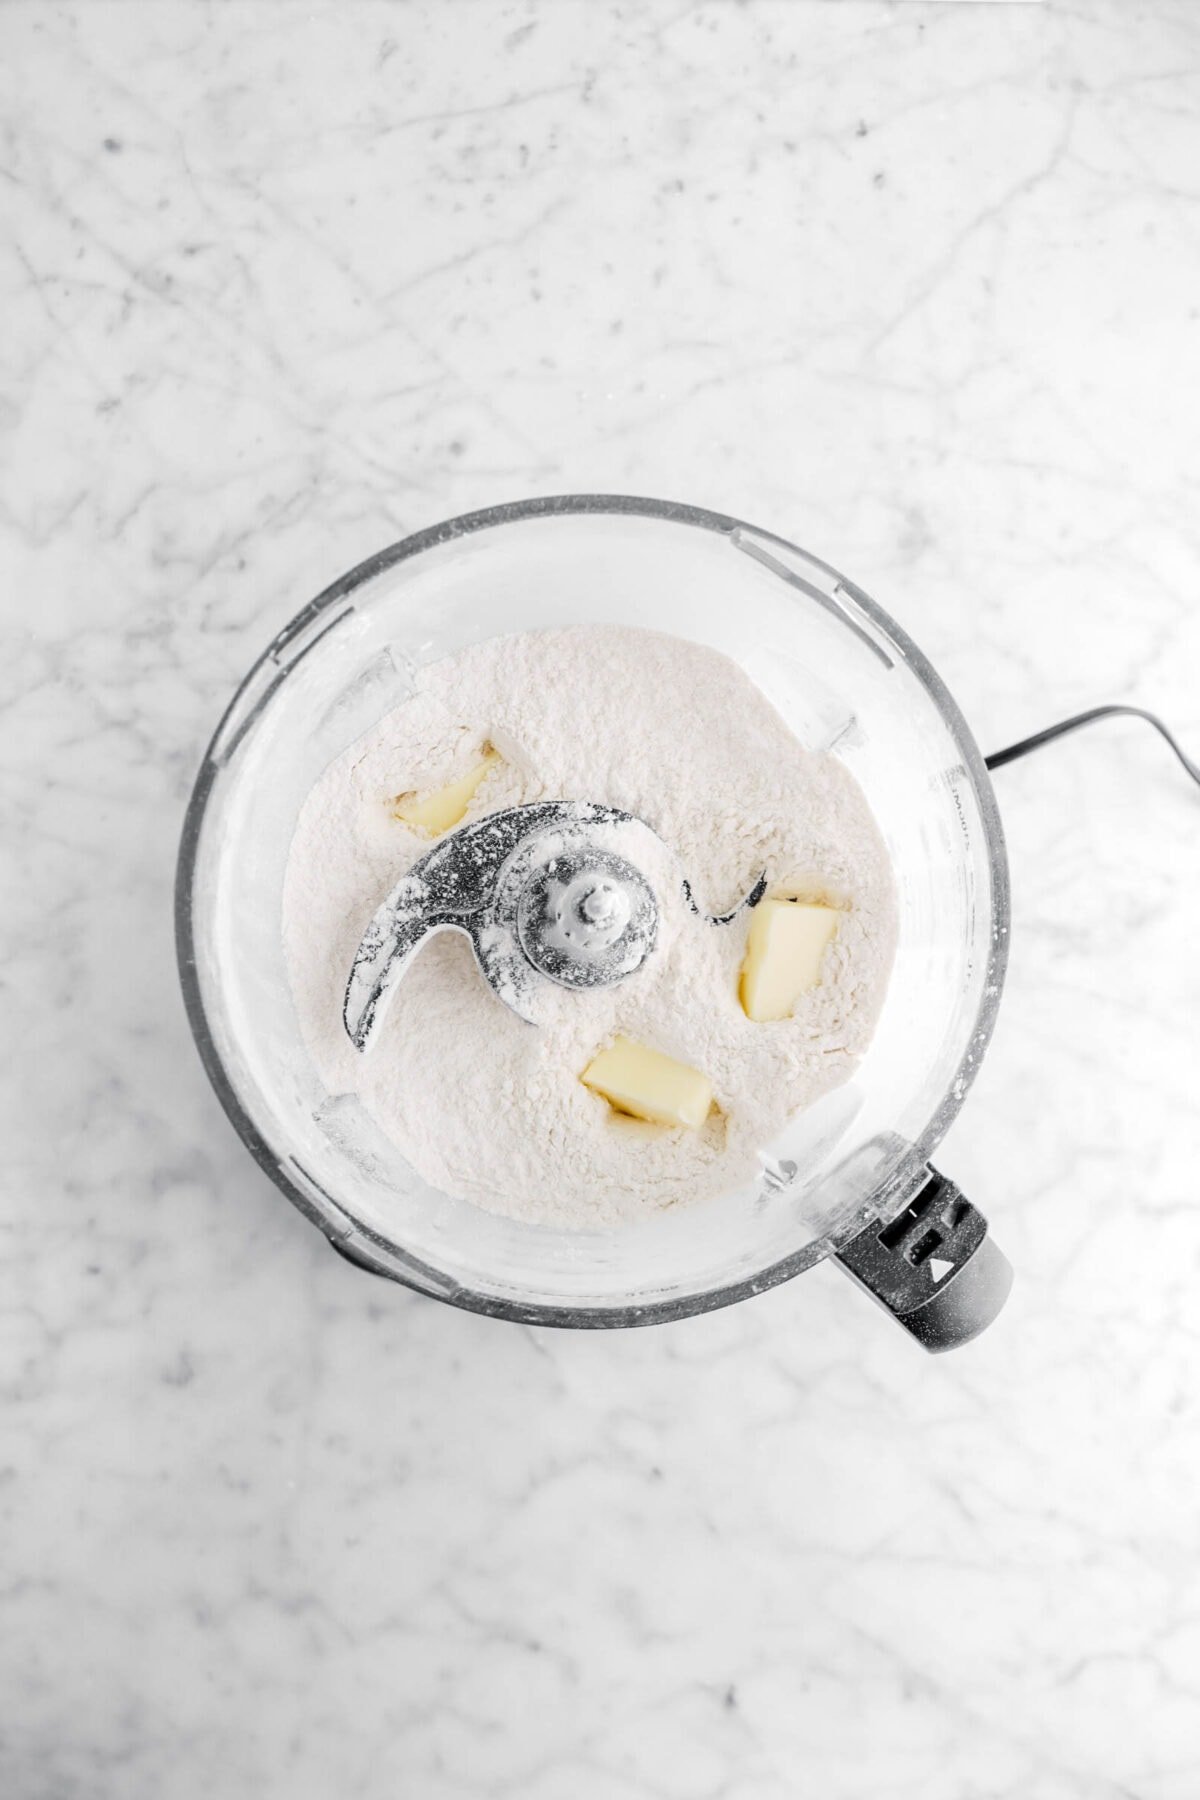
Add butter, a few slices at a time, pulsing after each addition.
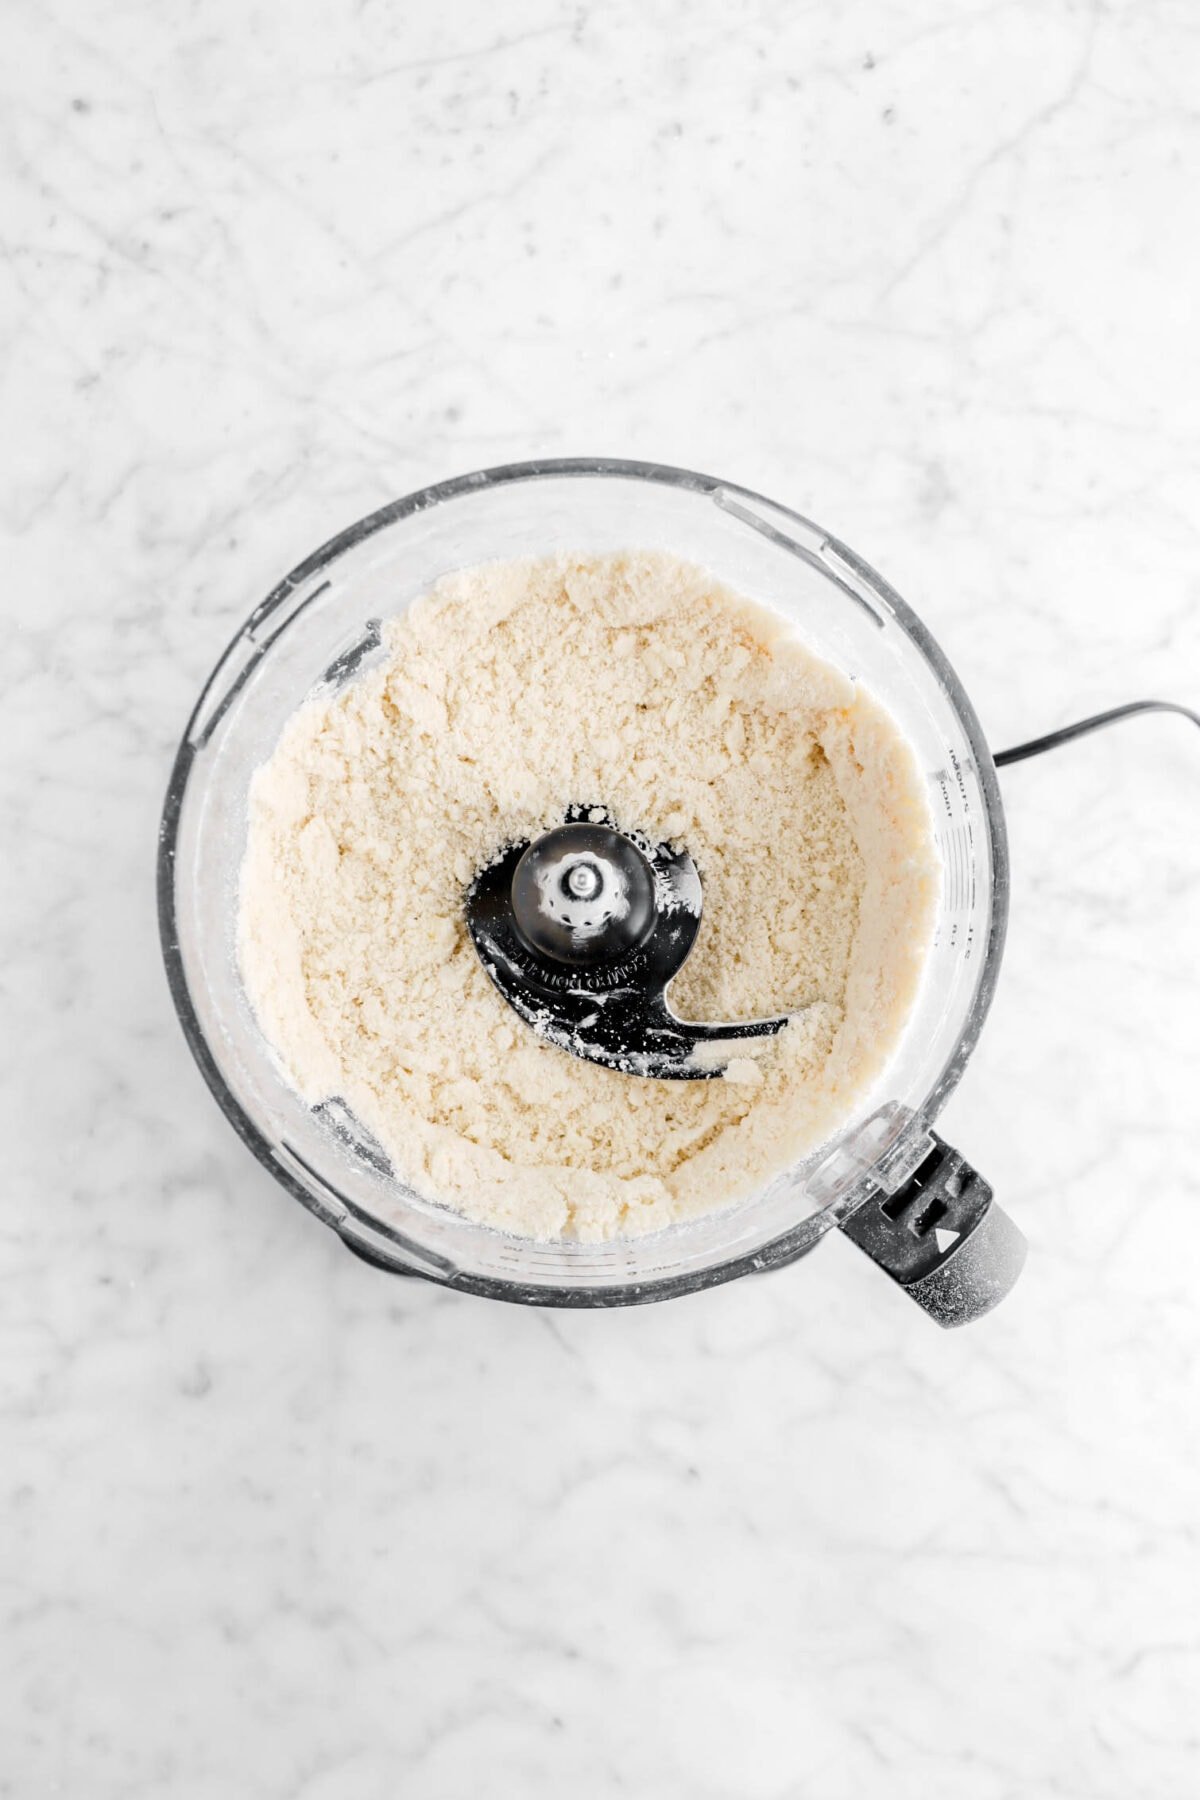
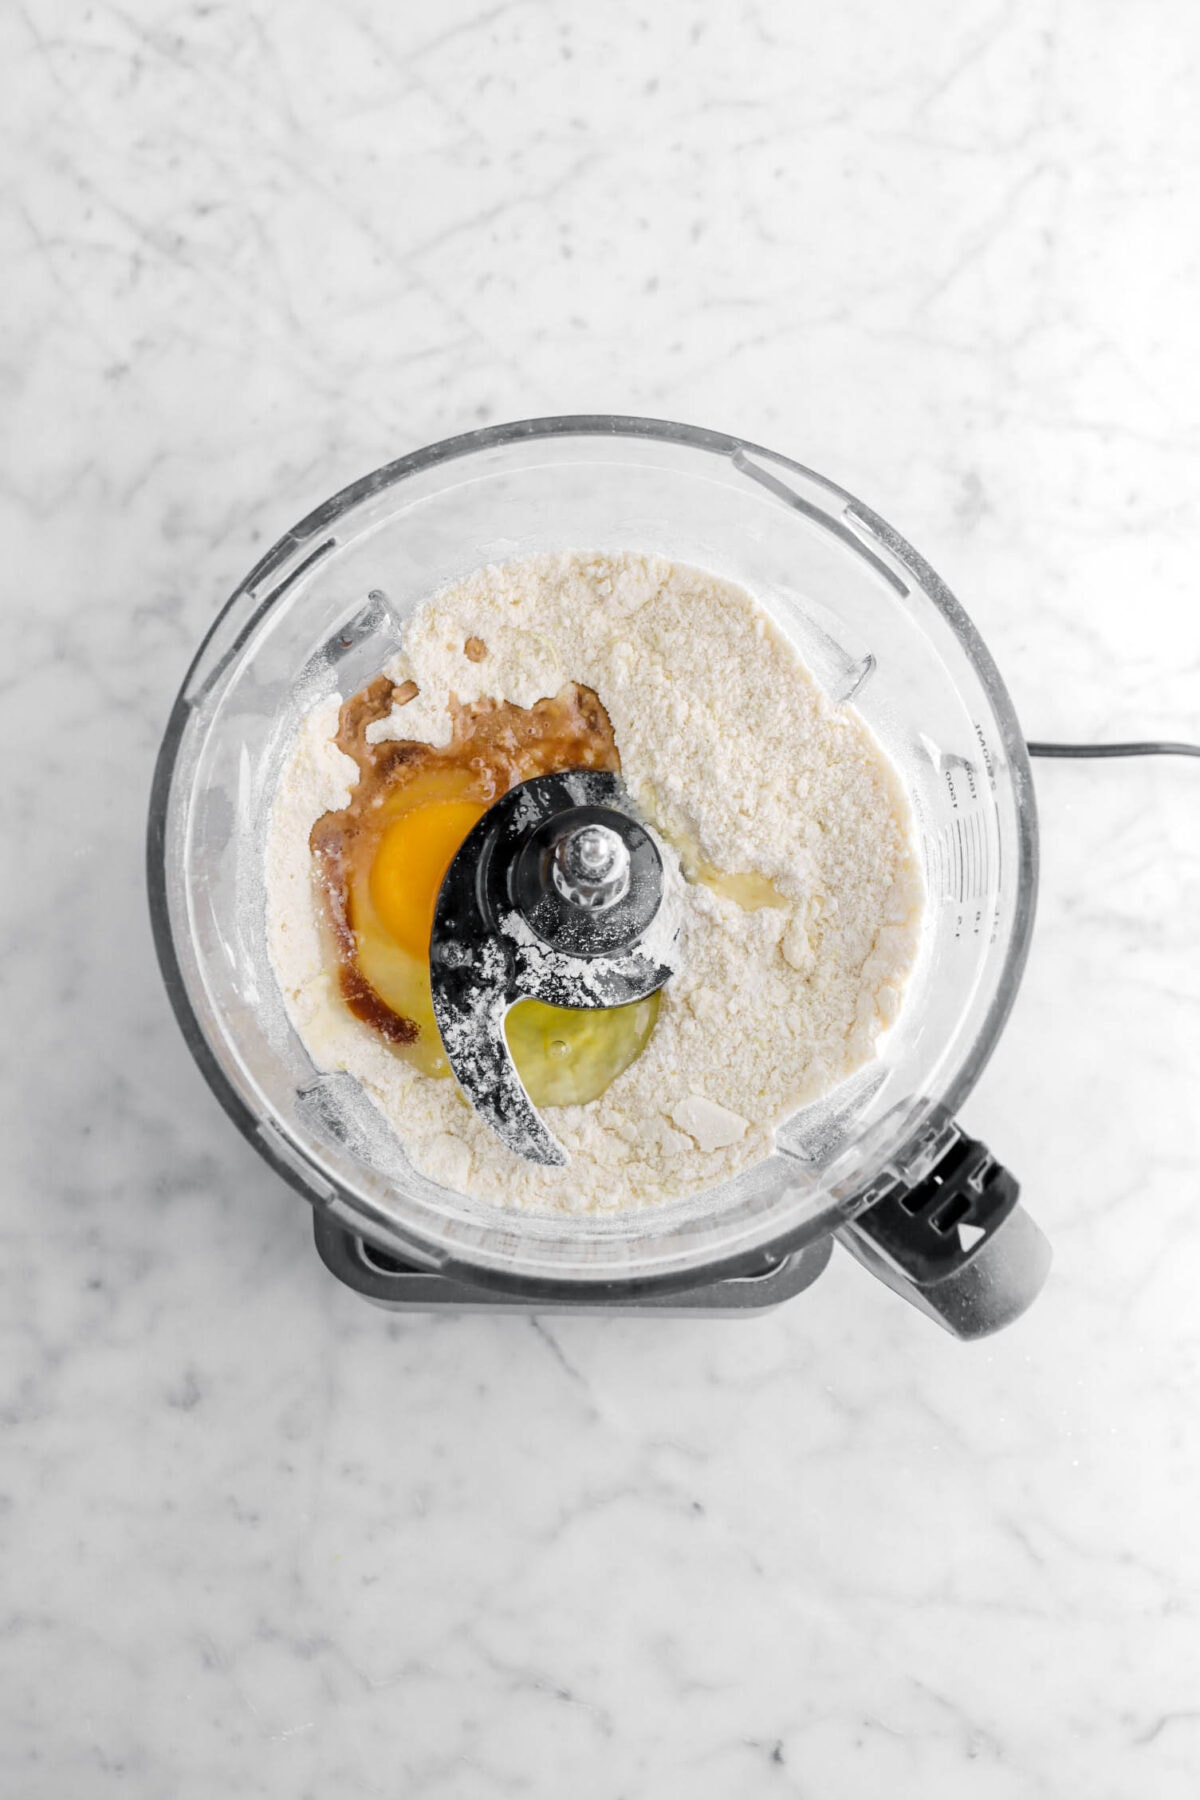
Add egg and vanilla. Pulse until it forms a smooth dough.
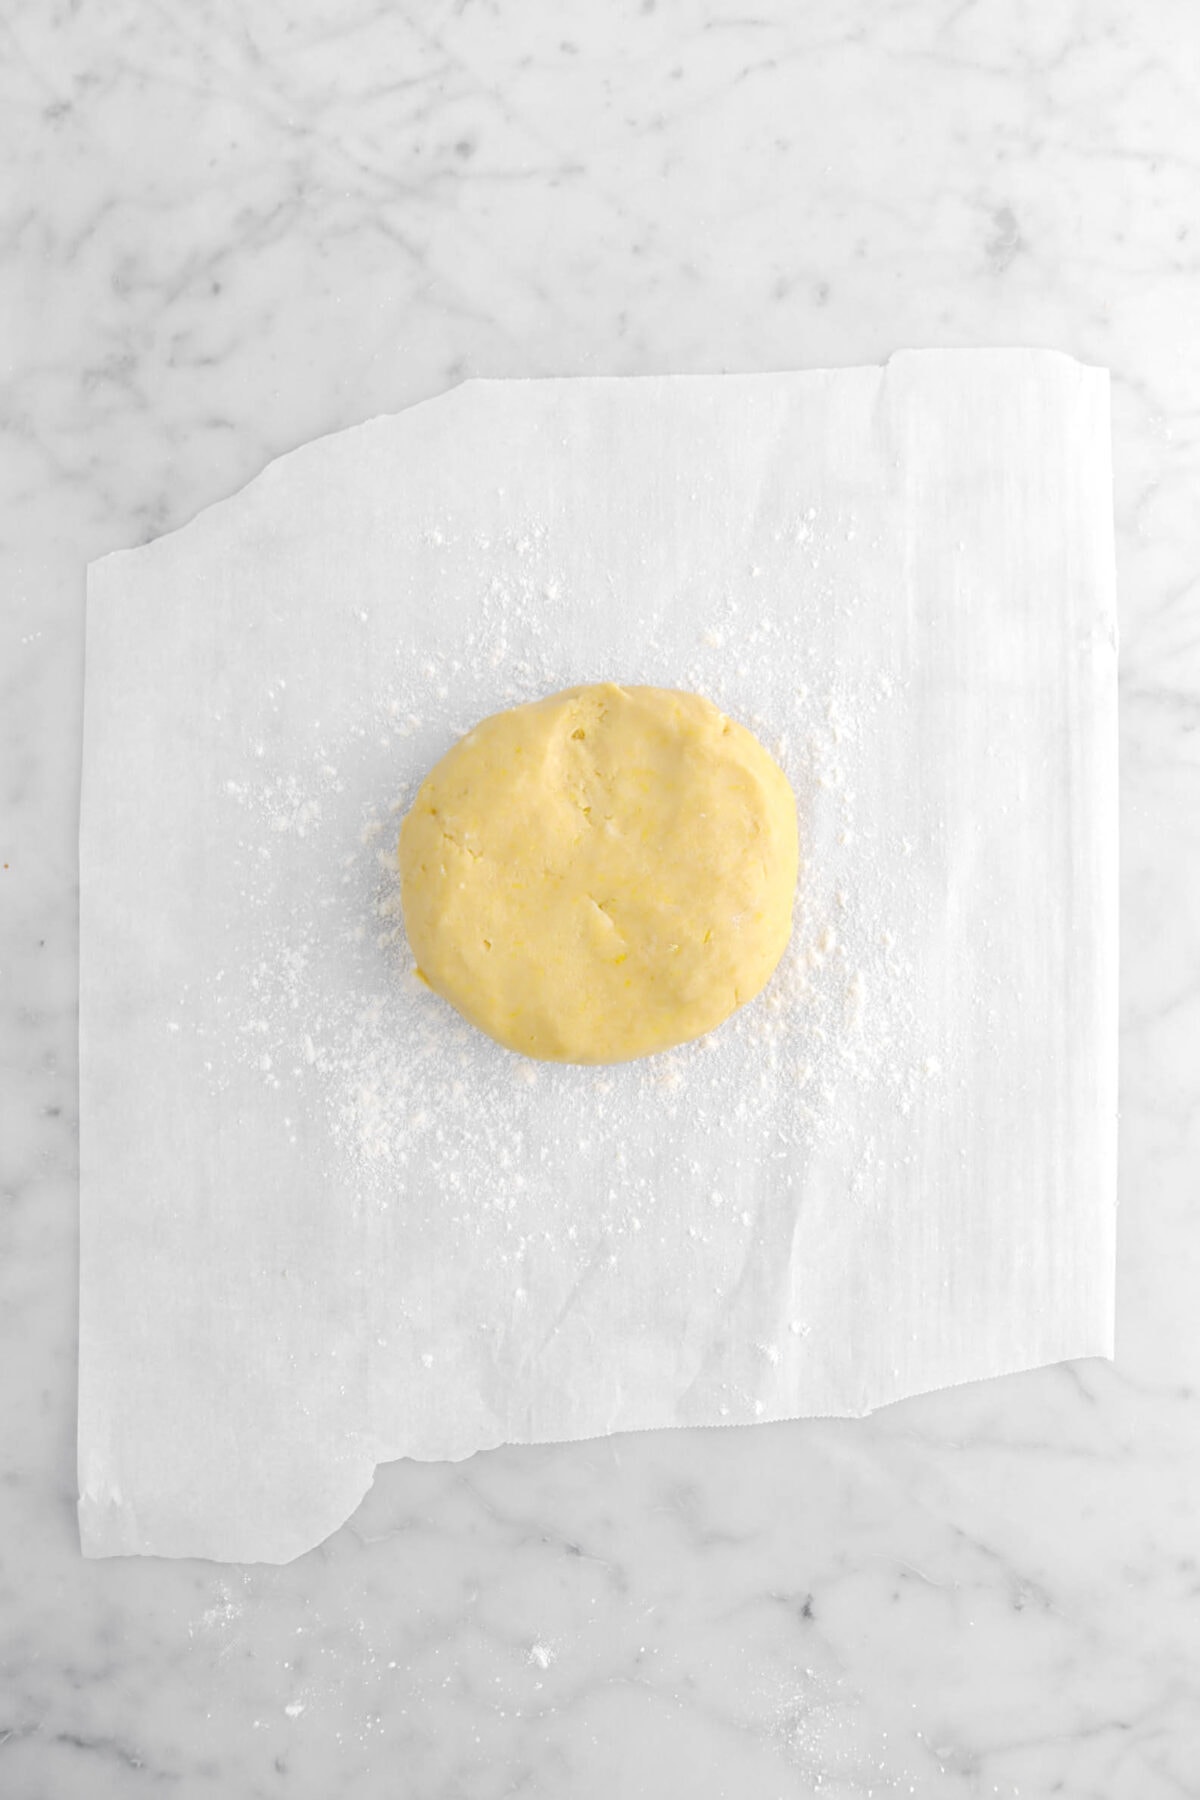
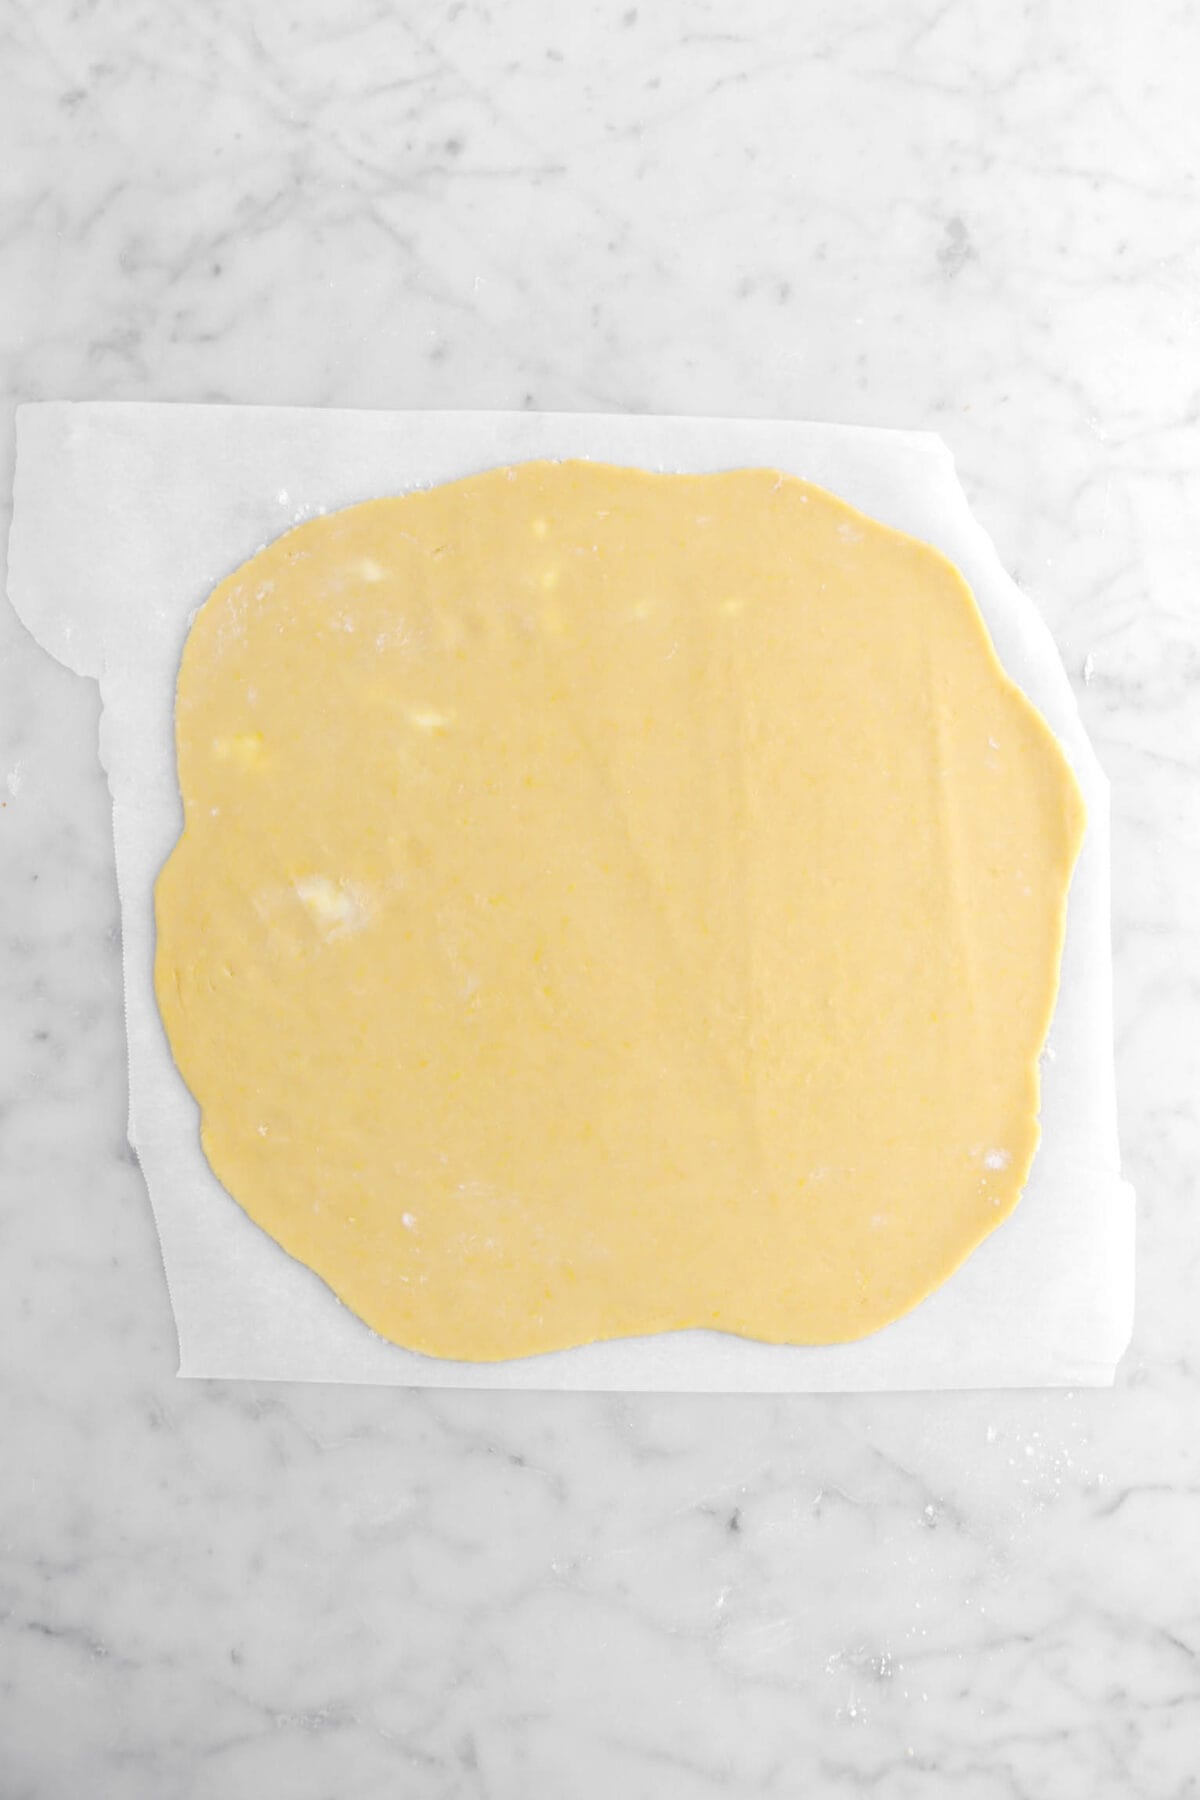
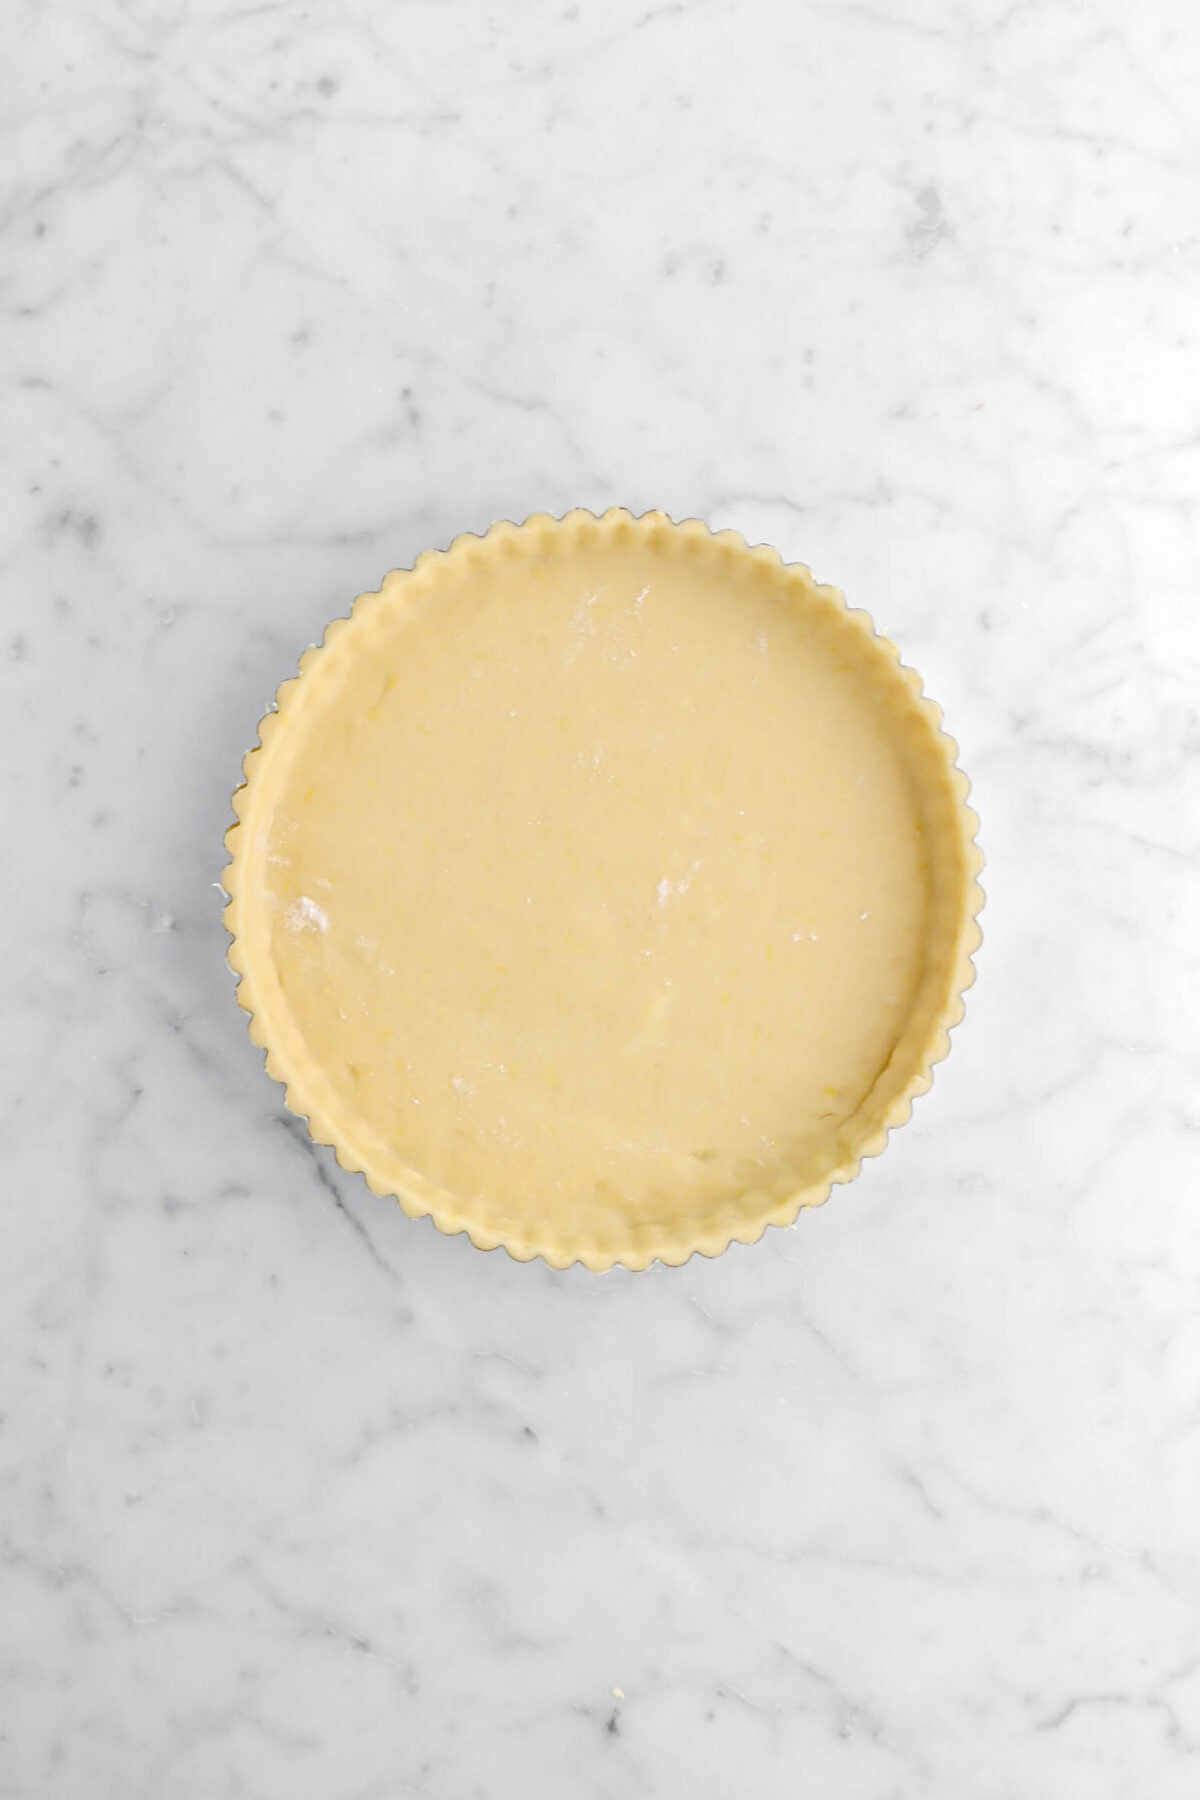
Step 2: Roll out and fit into pan
Turn out onto lightly floured parchment paper. Roll into a round that is ¼-inch thick.
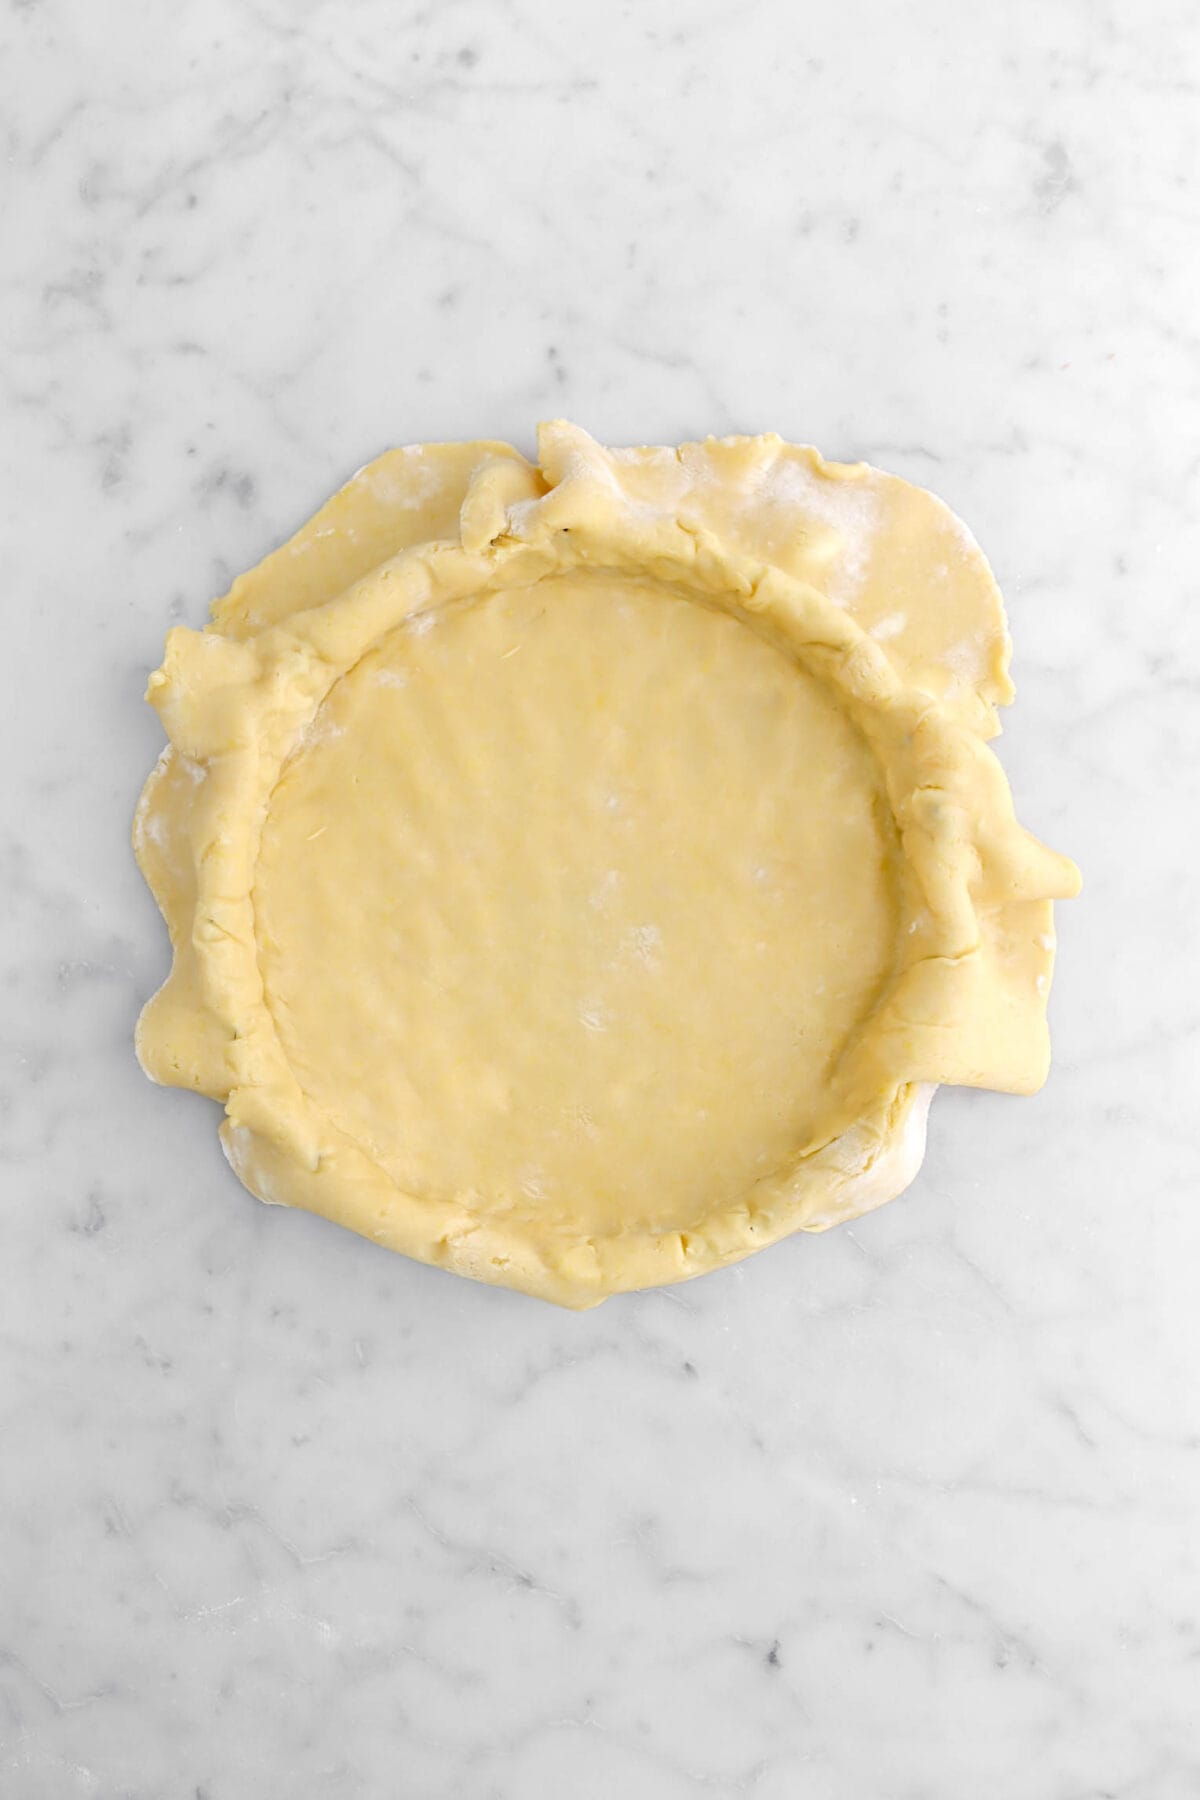
Transfer dough to prepared pan. Press to remove air bubbles and to ensure dough is fitted all the way to the edges. Cut excess dough away from top.
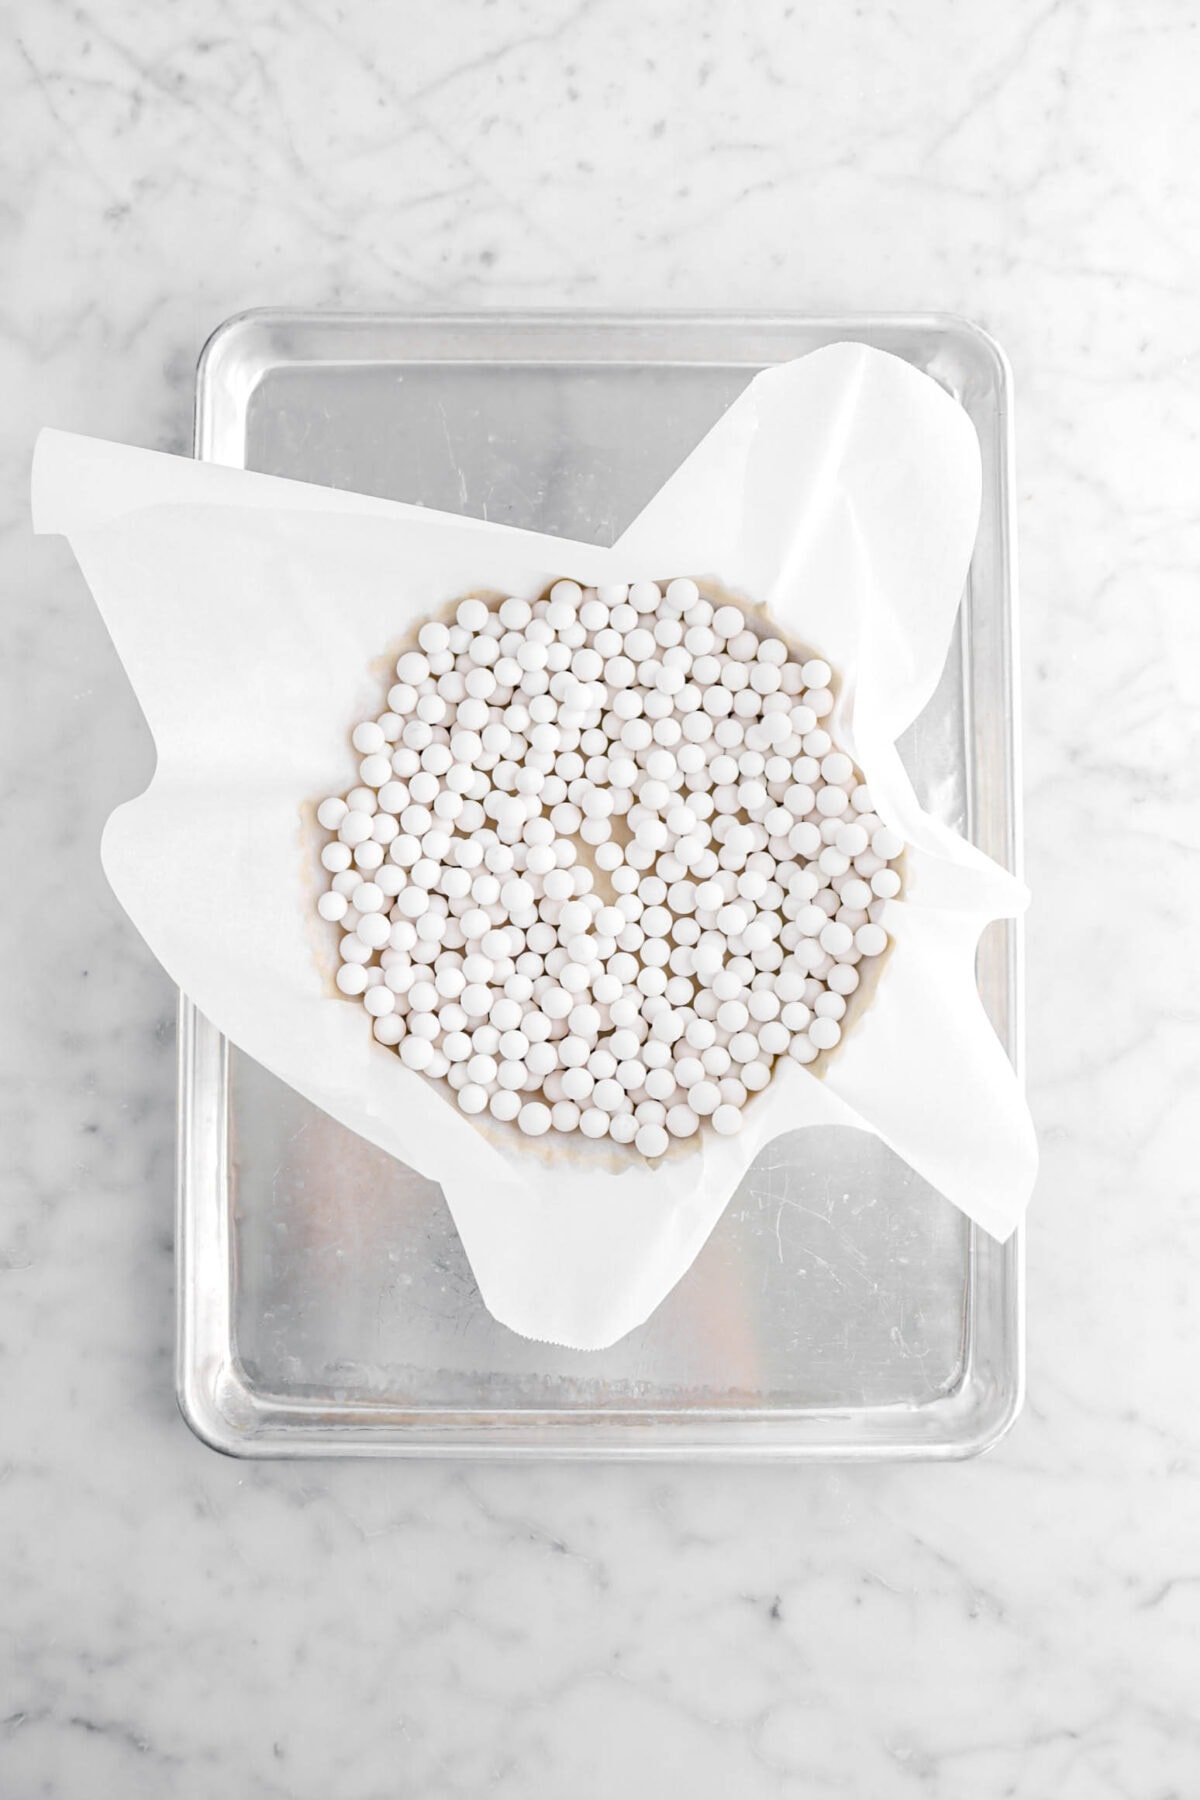
Step 3: Bake
Place a sheet of parchment paper in crust. Fill with pie weights, making sure they are spread evenly. Bake for 20 minutes. Remove from oven and carefully remove the pie weights.
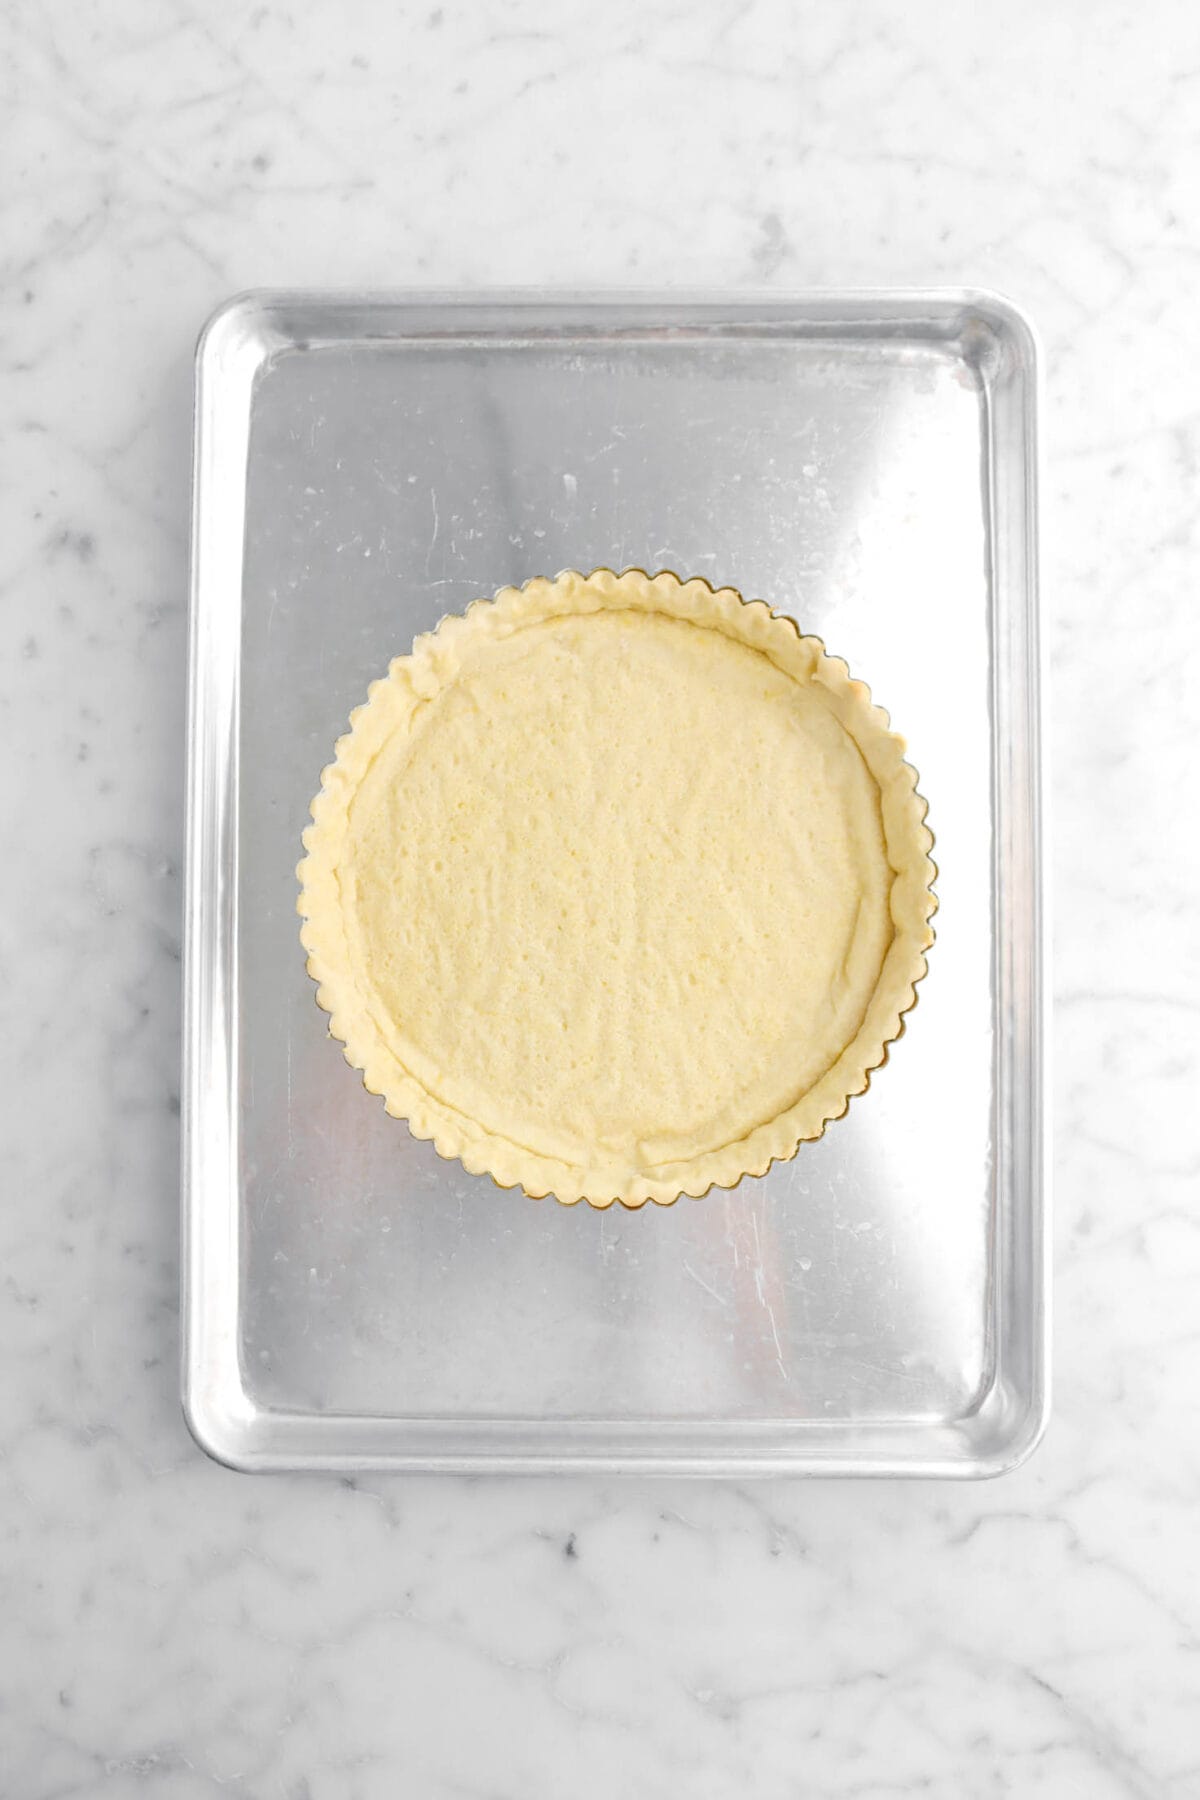
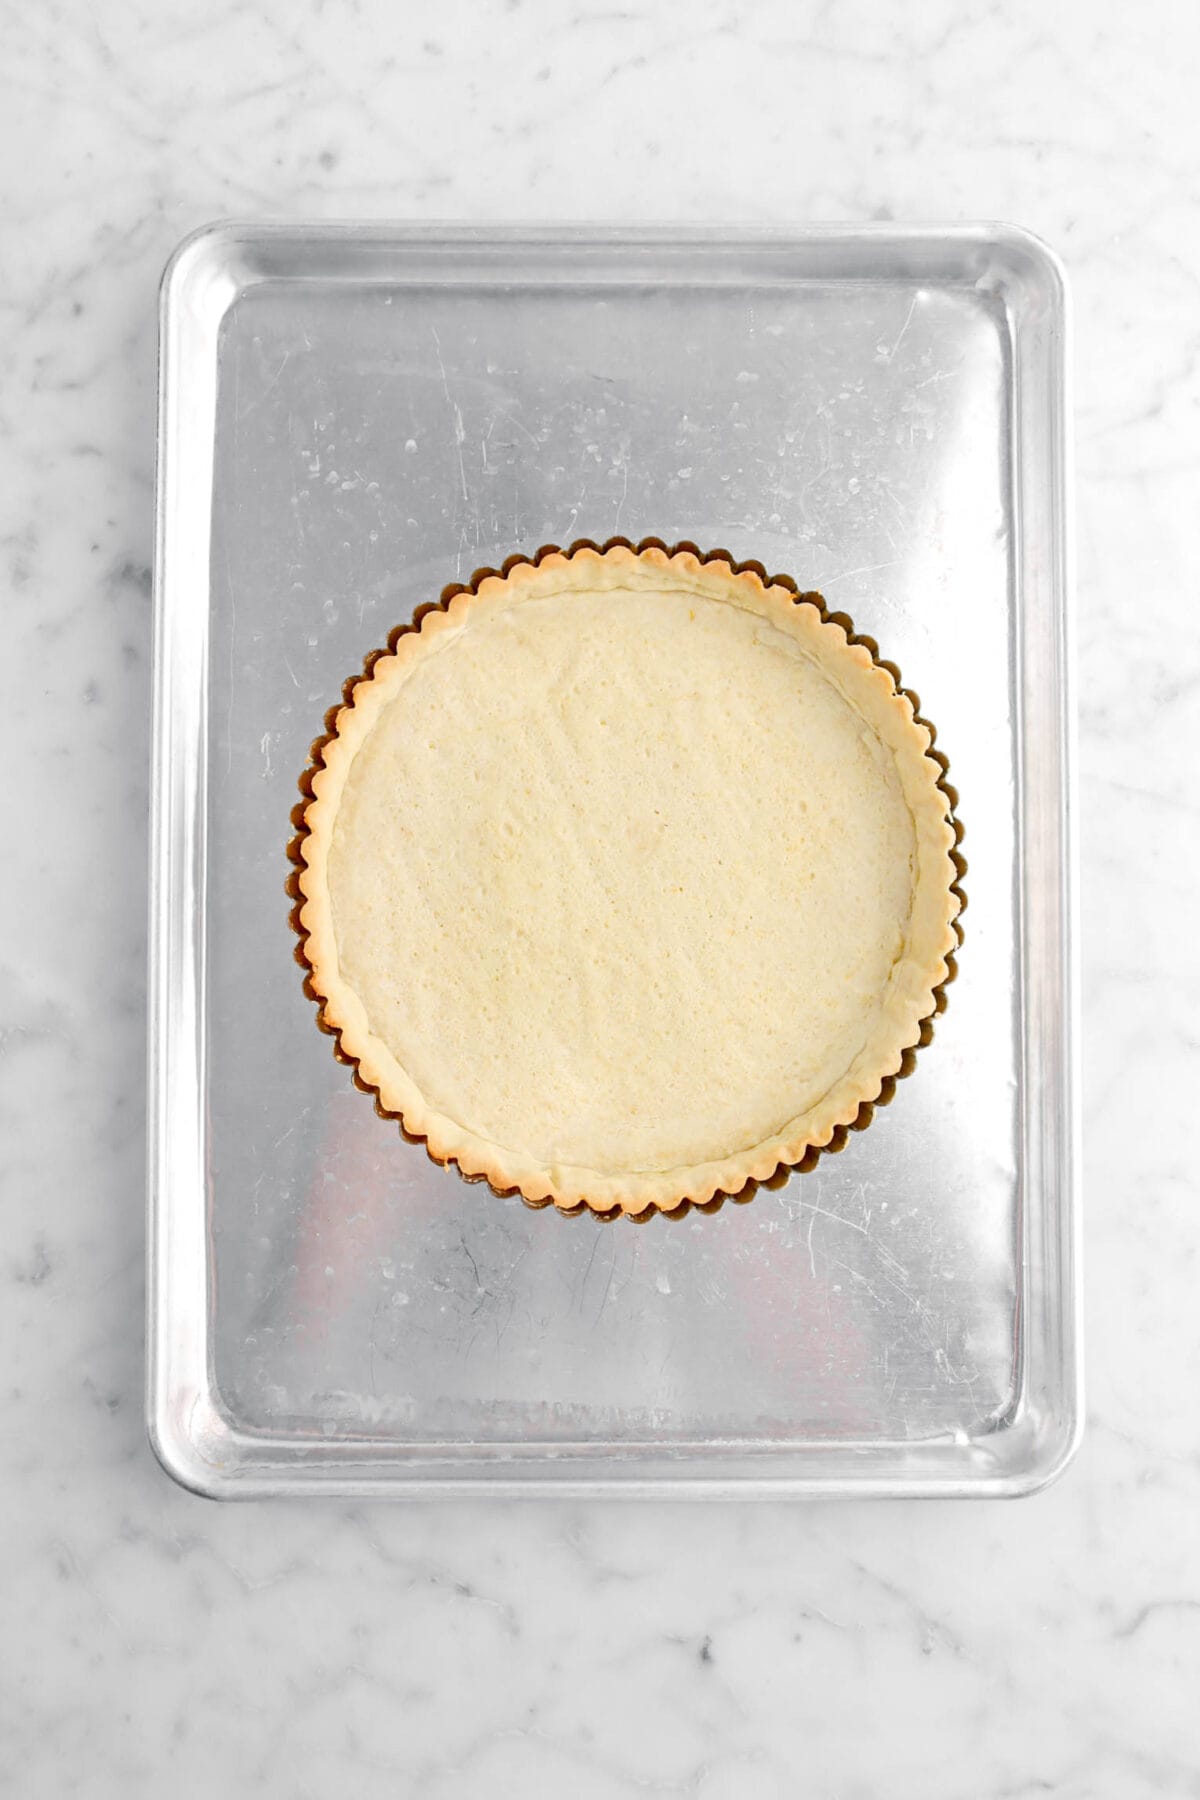
Return to oven. Bake an additional 10-15 minutes, until crust is lightly browned. Set aside to cool.
Step 4: Make pastry cream
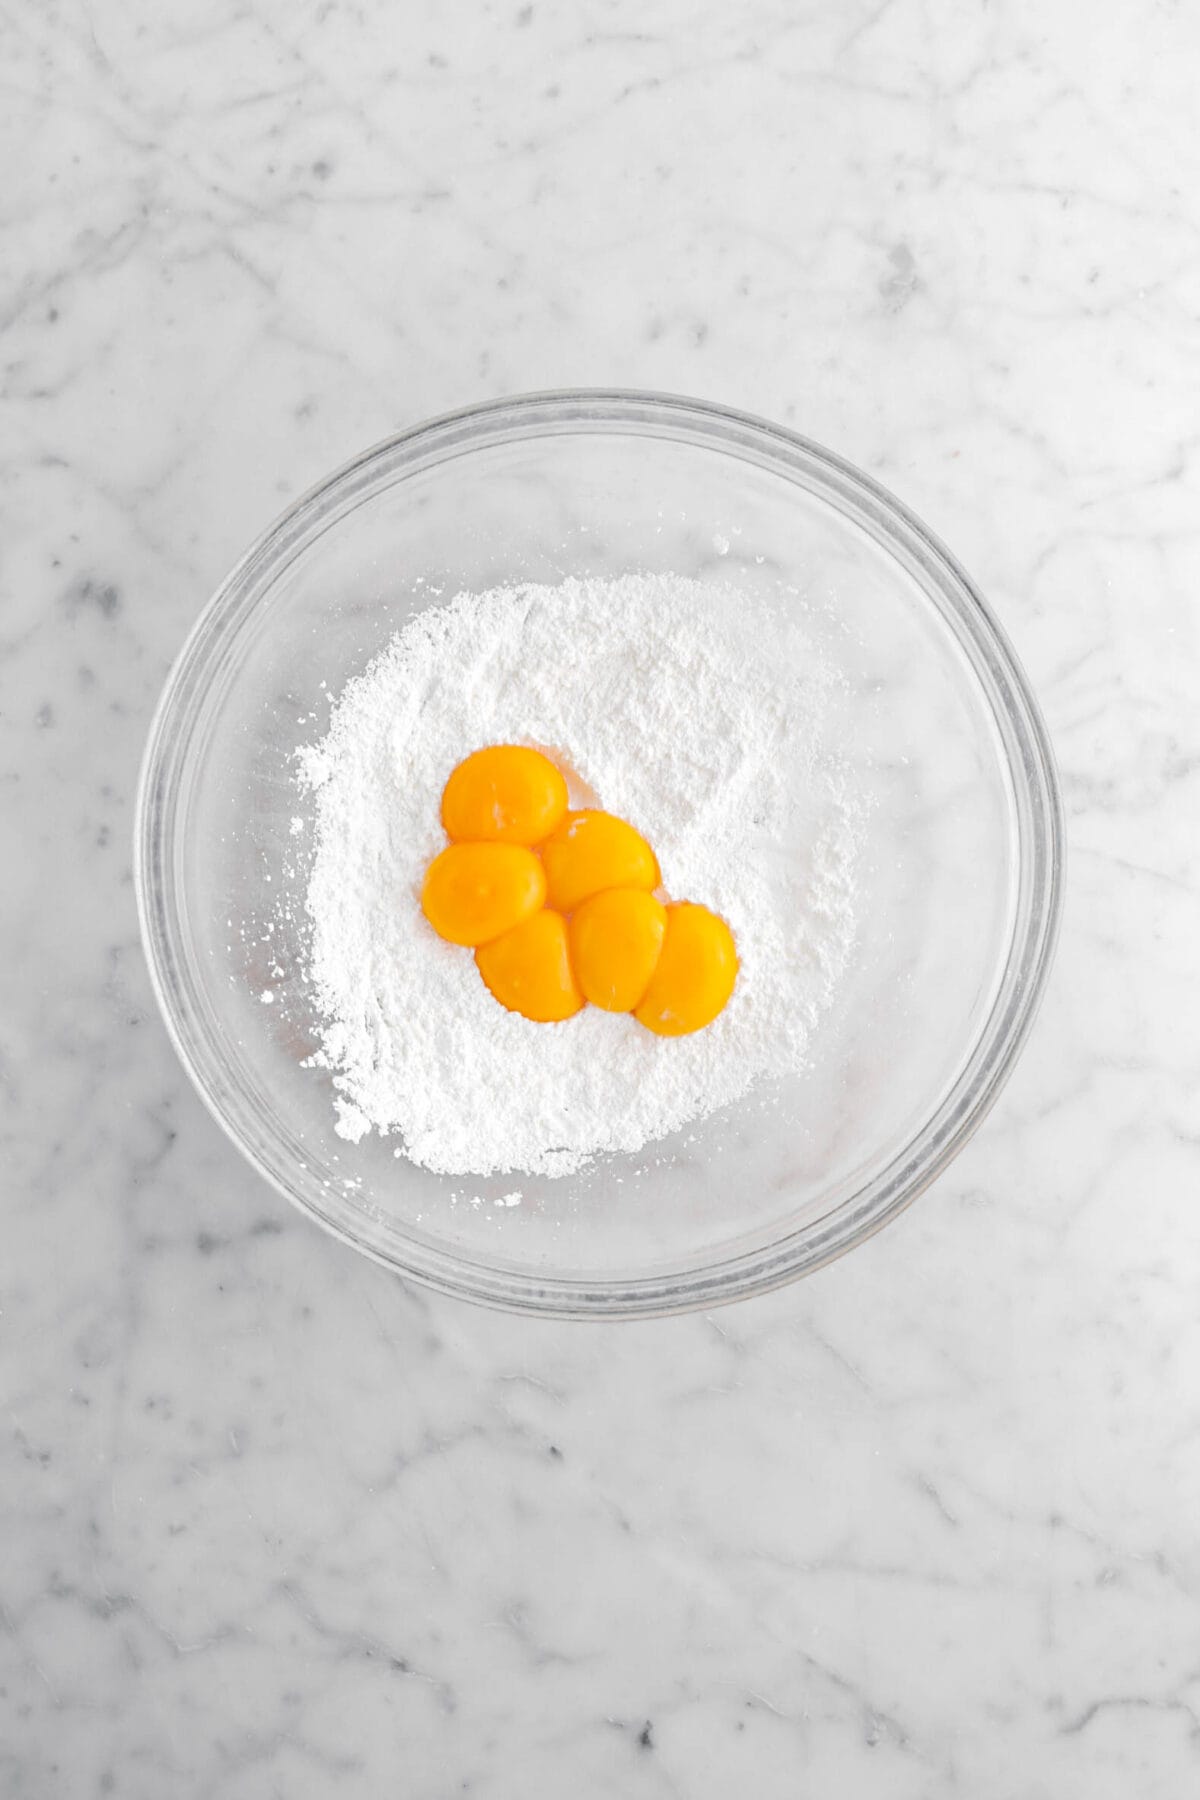
In a medium bowl, whisk together cornstarch and 6 Tablespoons sugar.


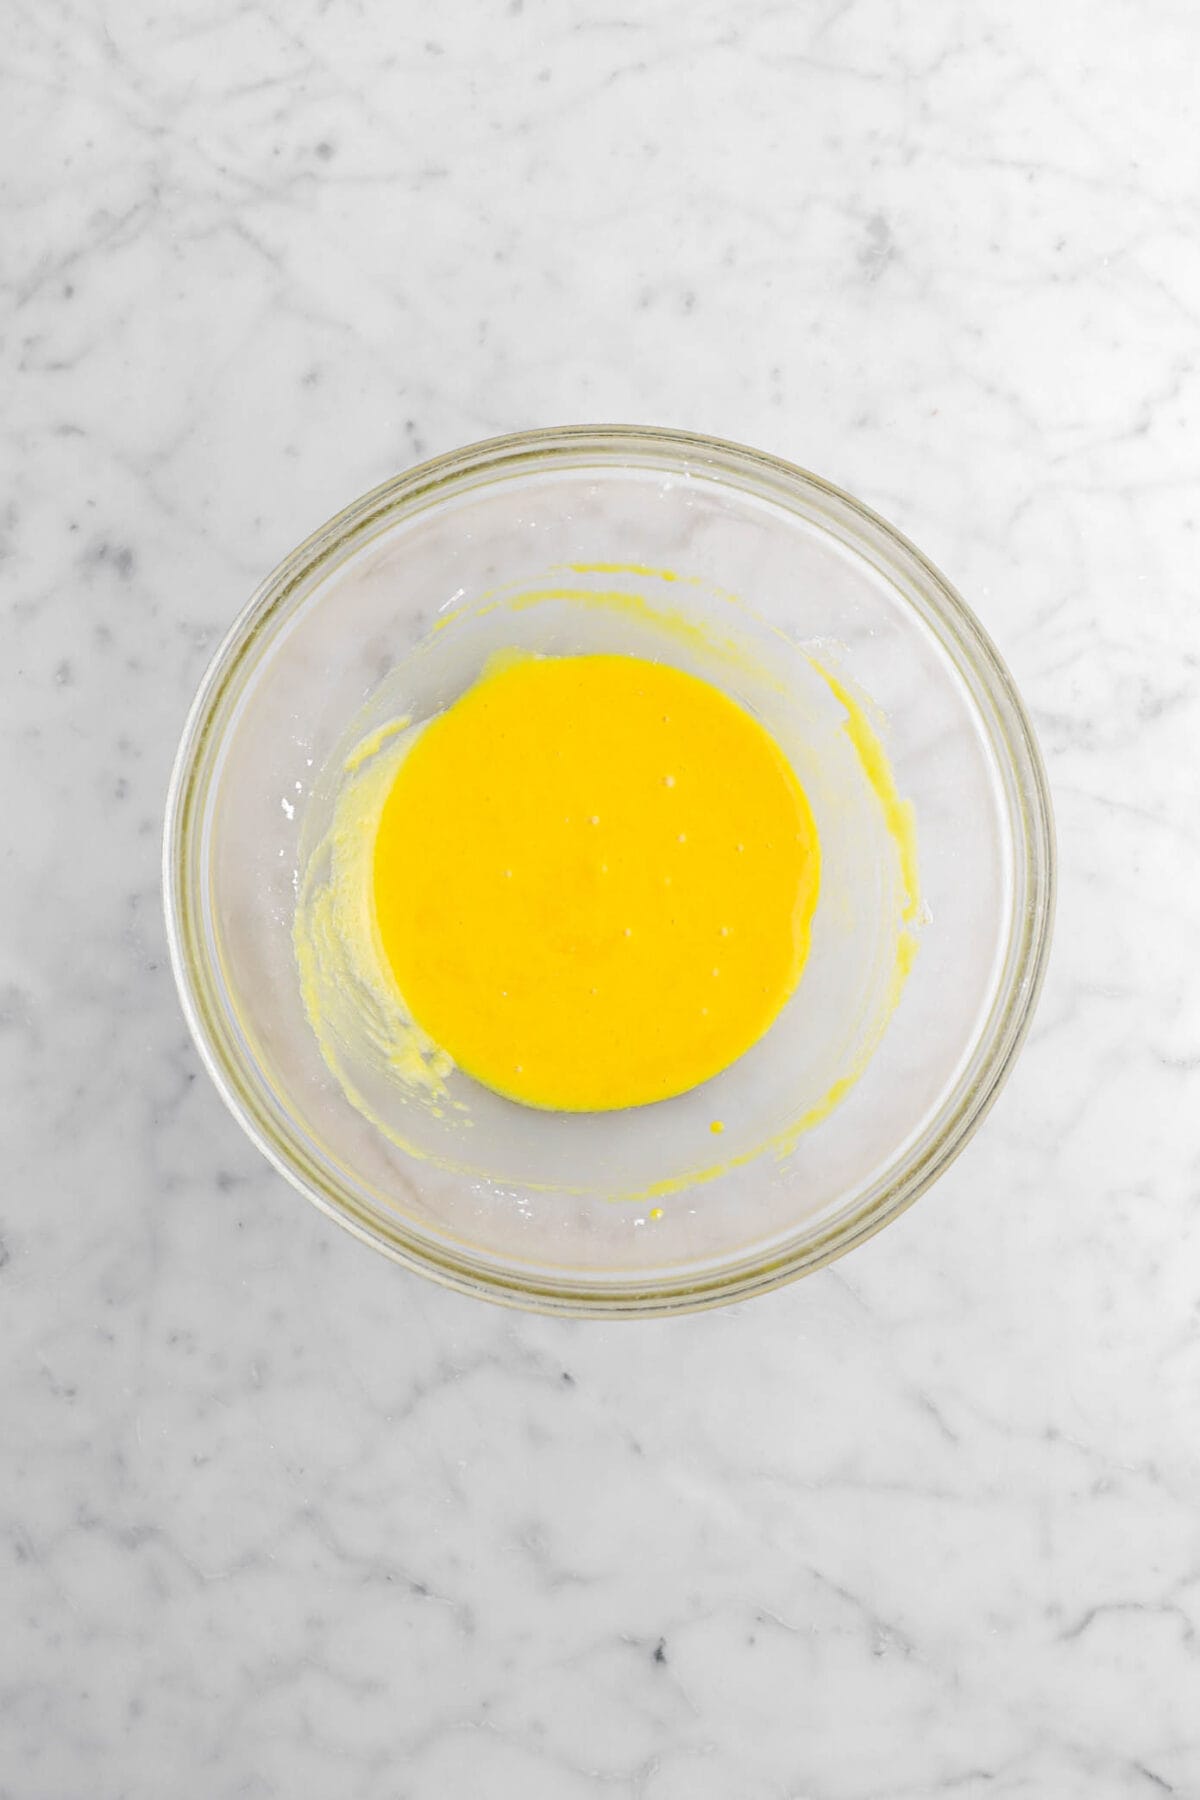
Add the egg yolks. Whisk until smooth. Set aside.
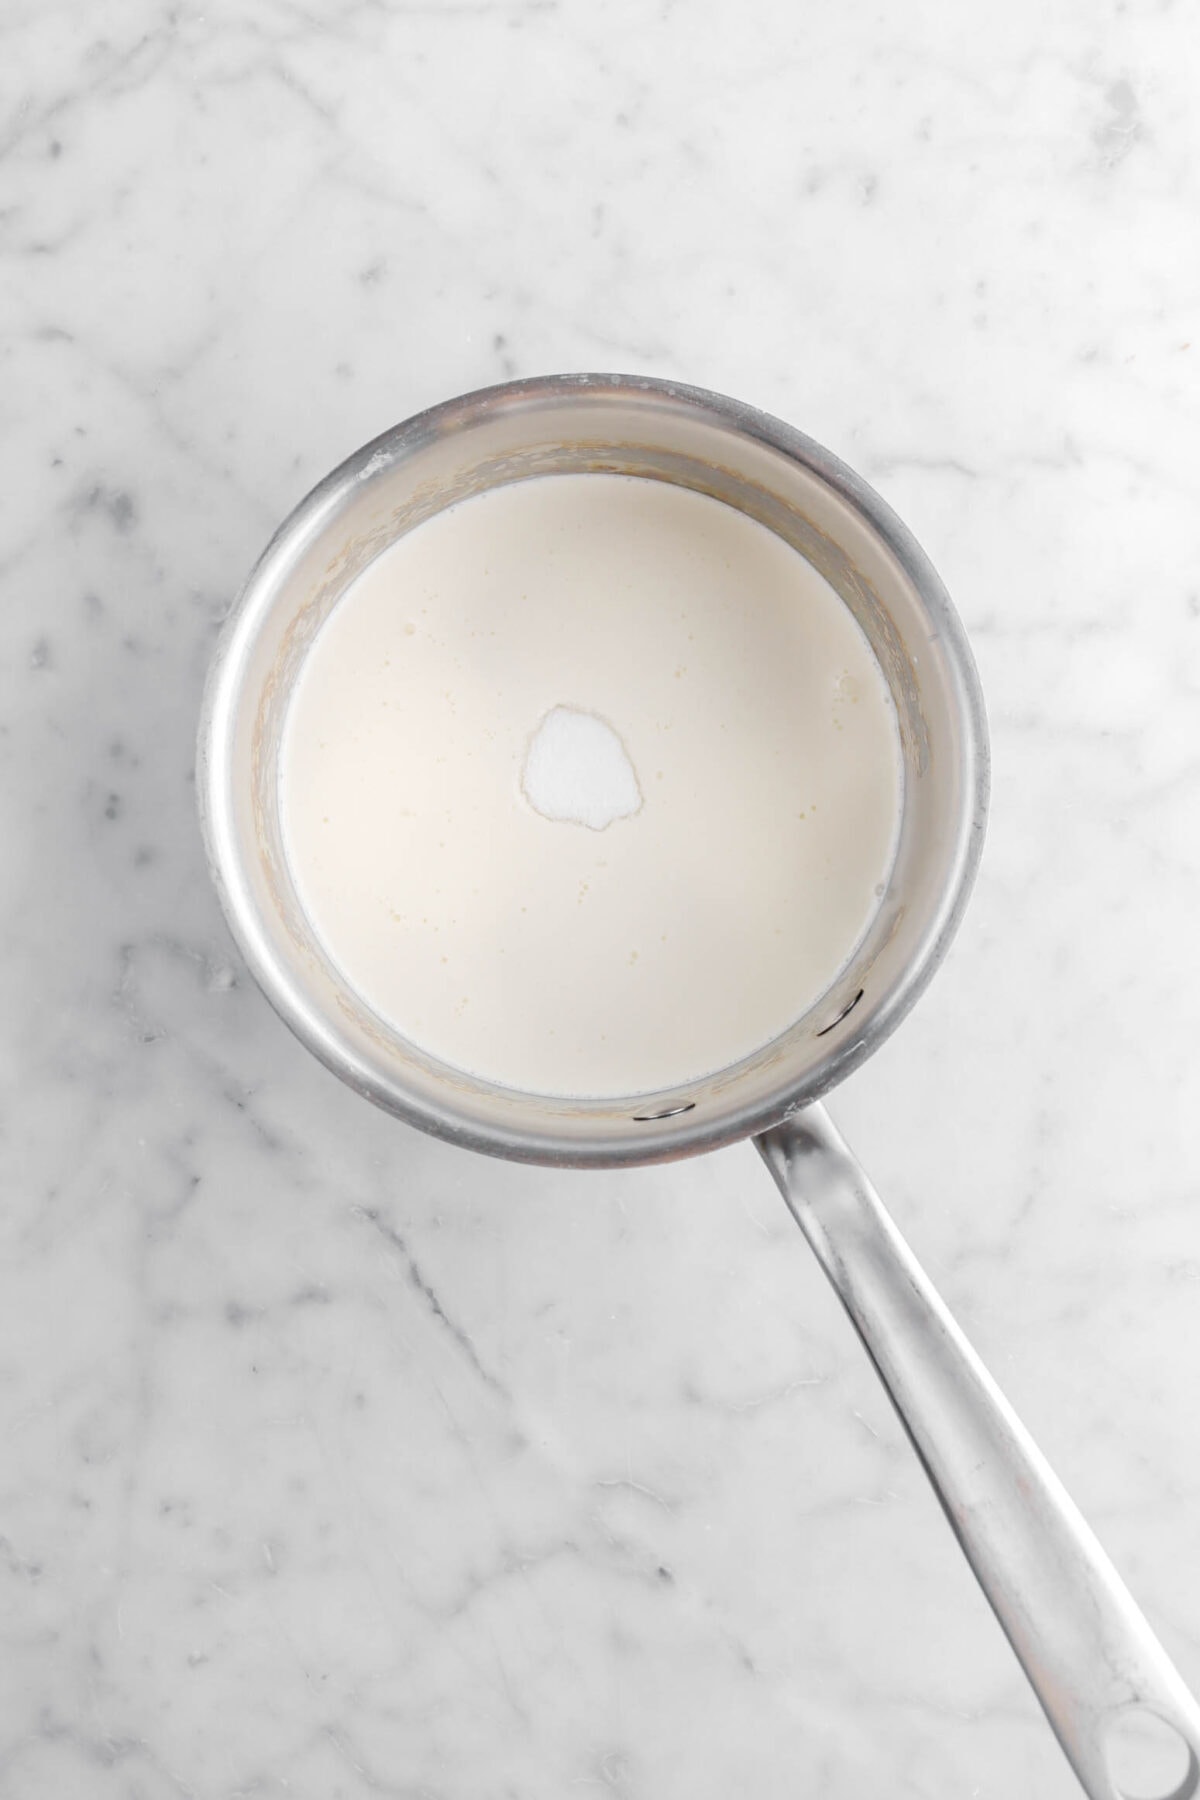
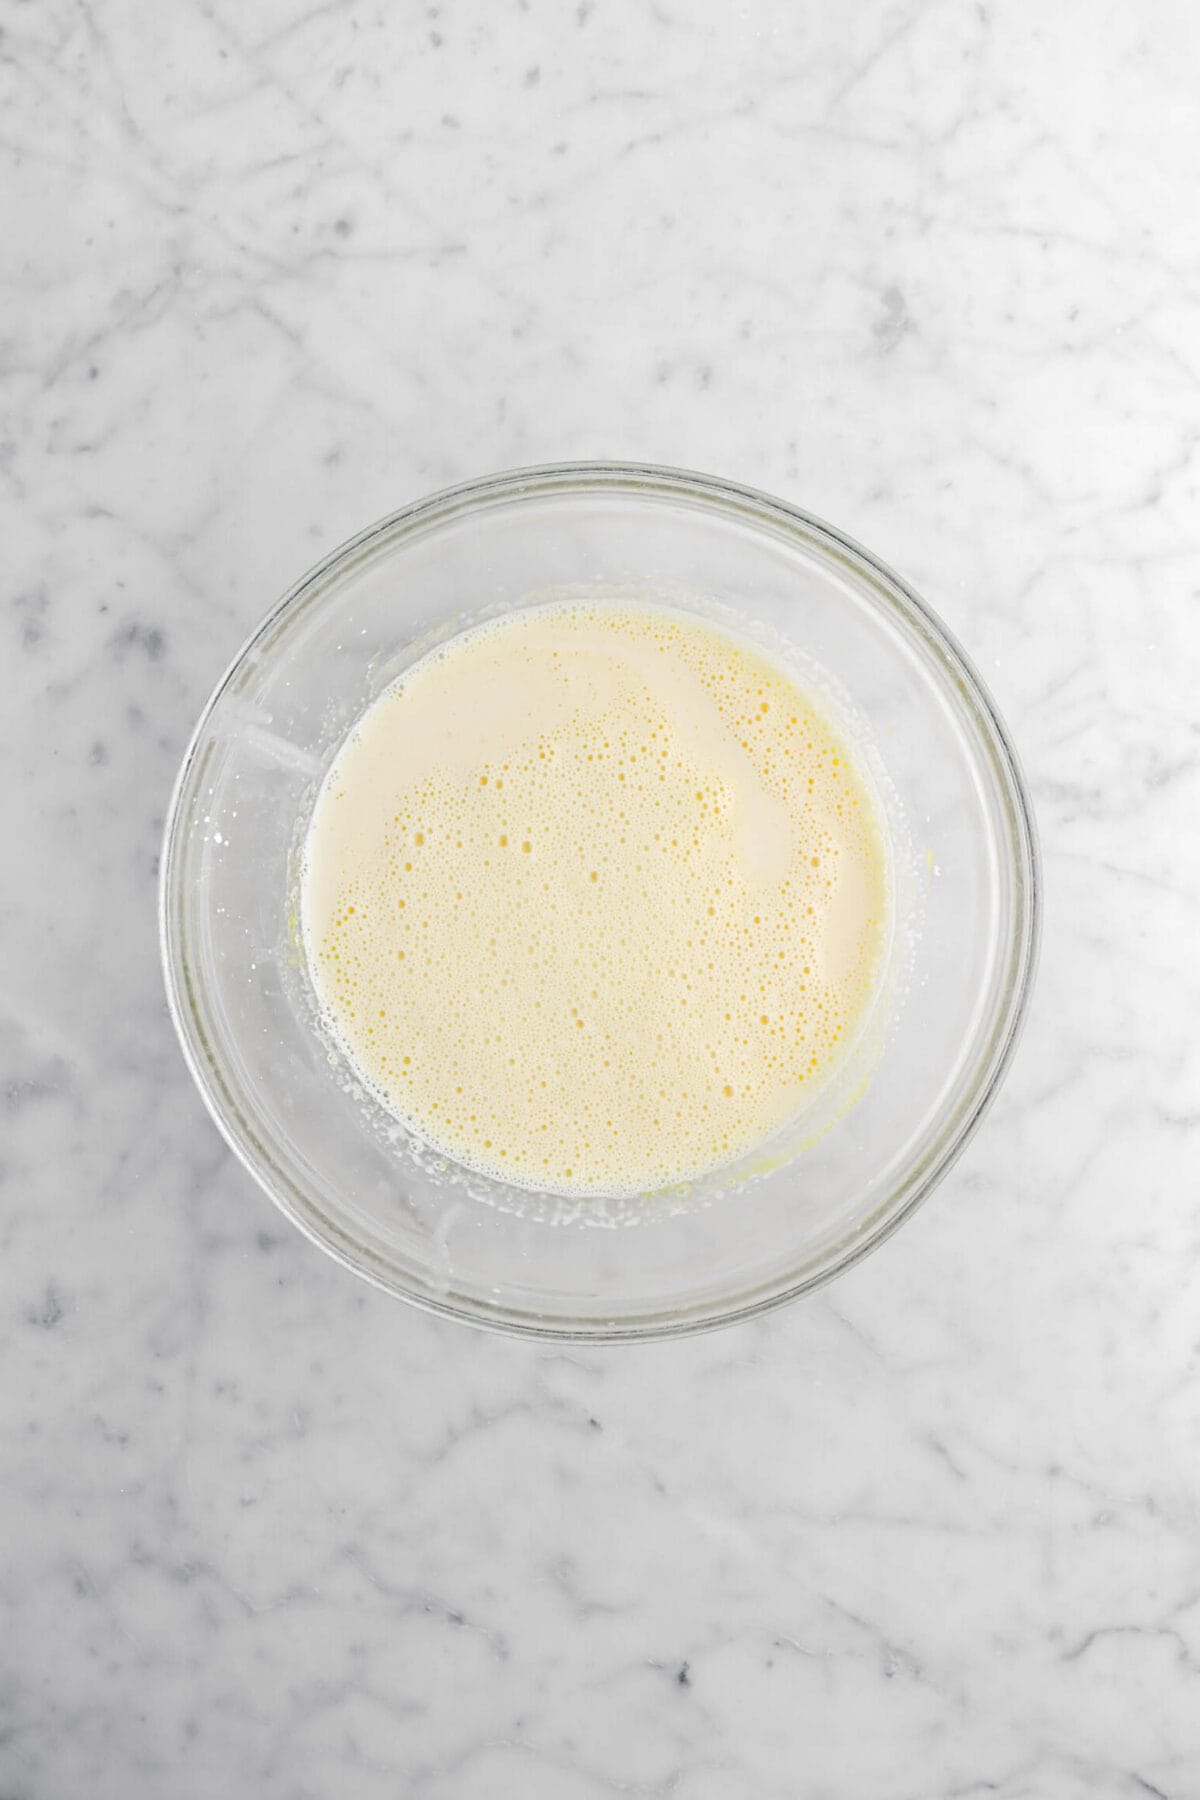
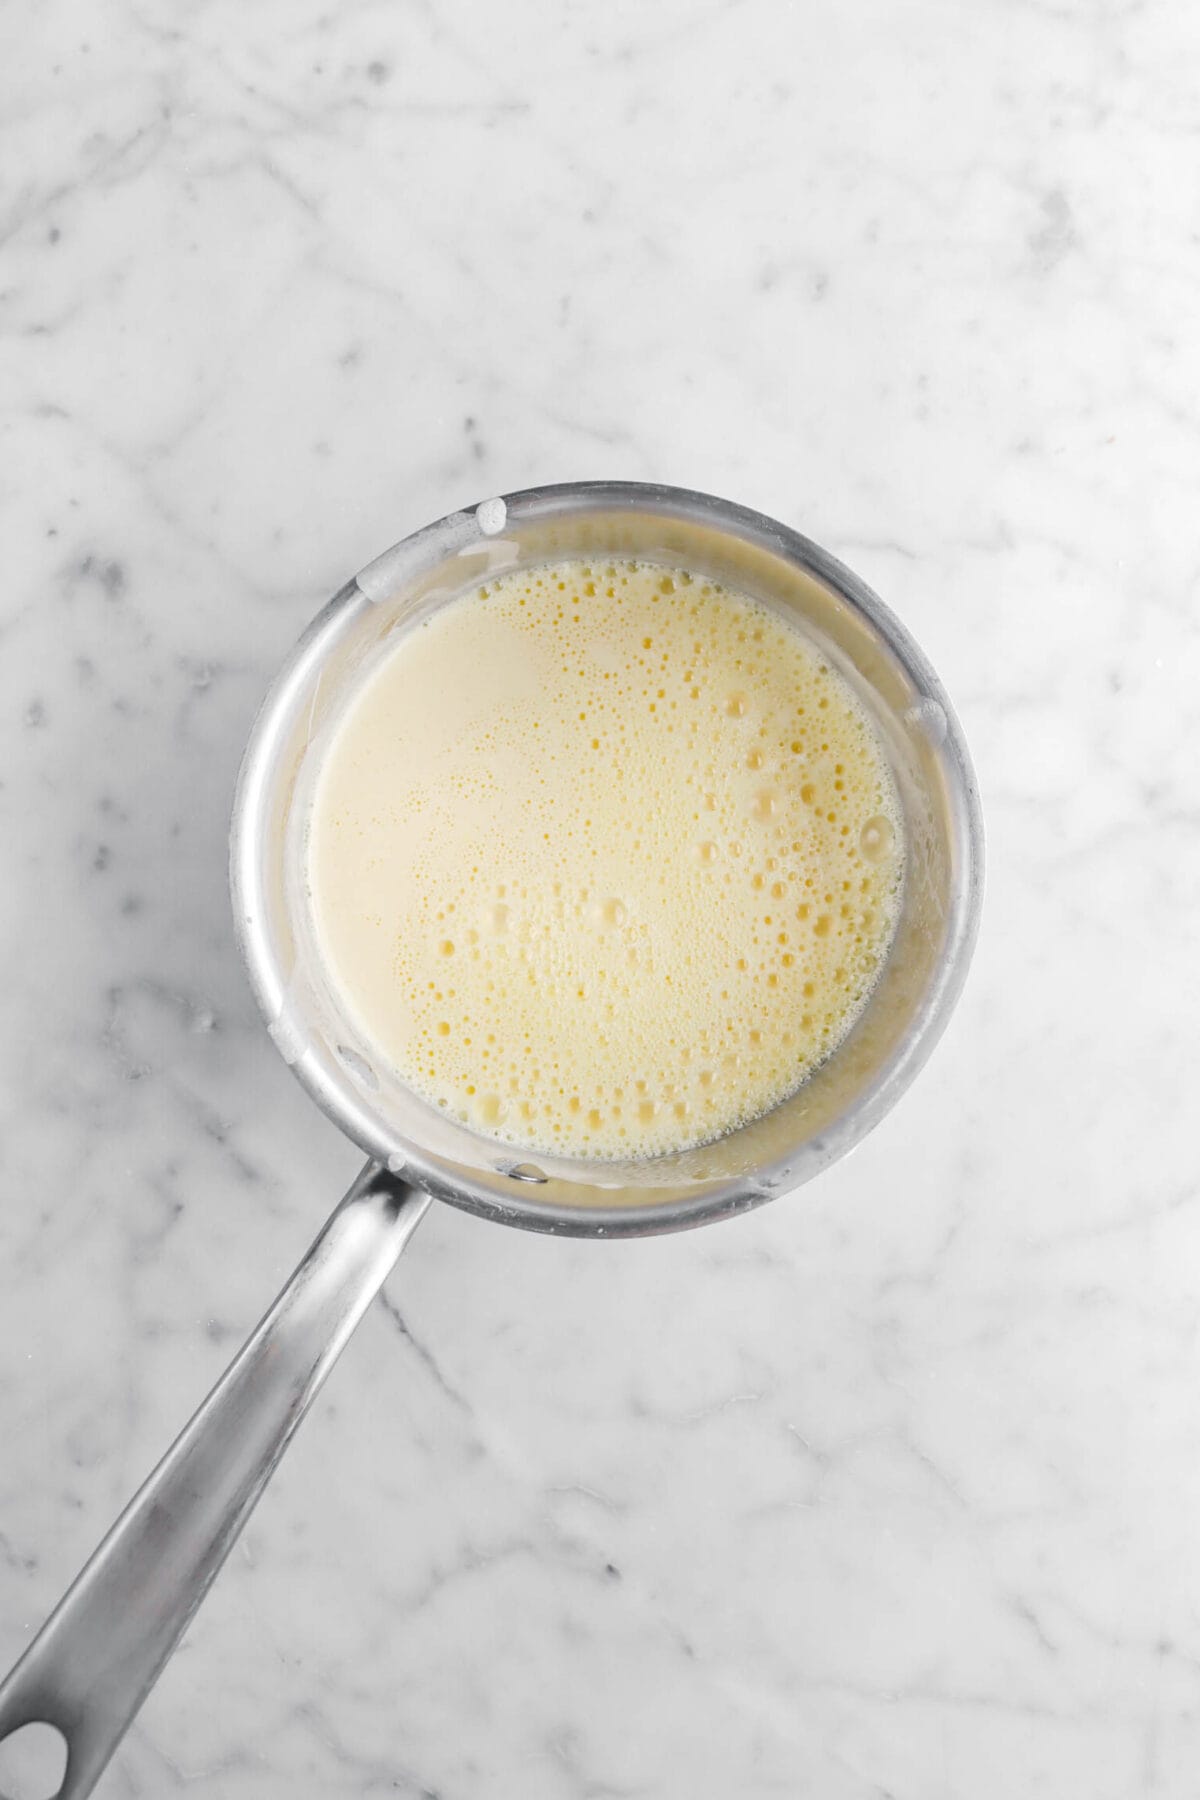
In a medium saucepan, combine milk, cream, and 2 Tablespoons sugar. Heat and stir over medium heat until mixture starts to bubble around the edges.

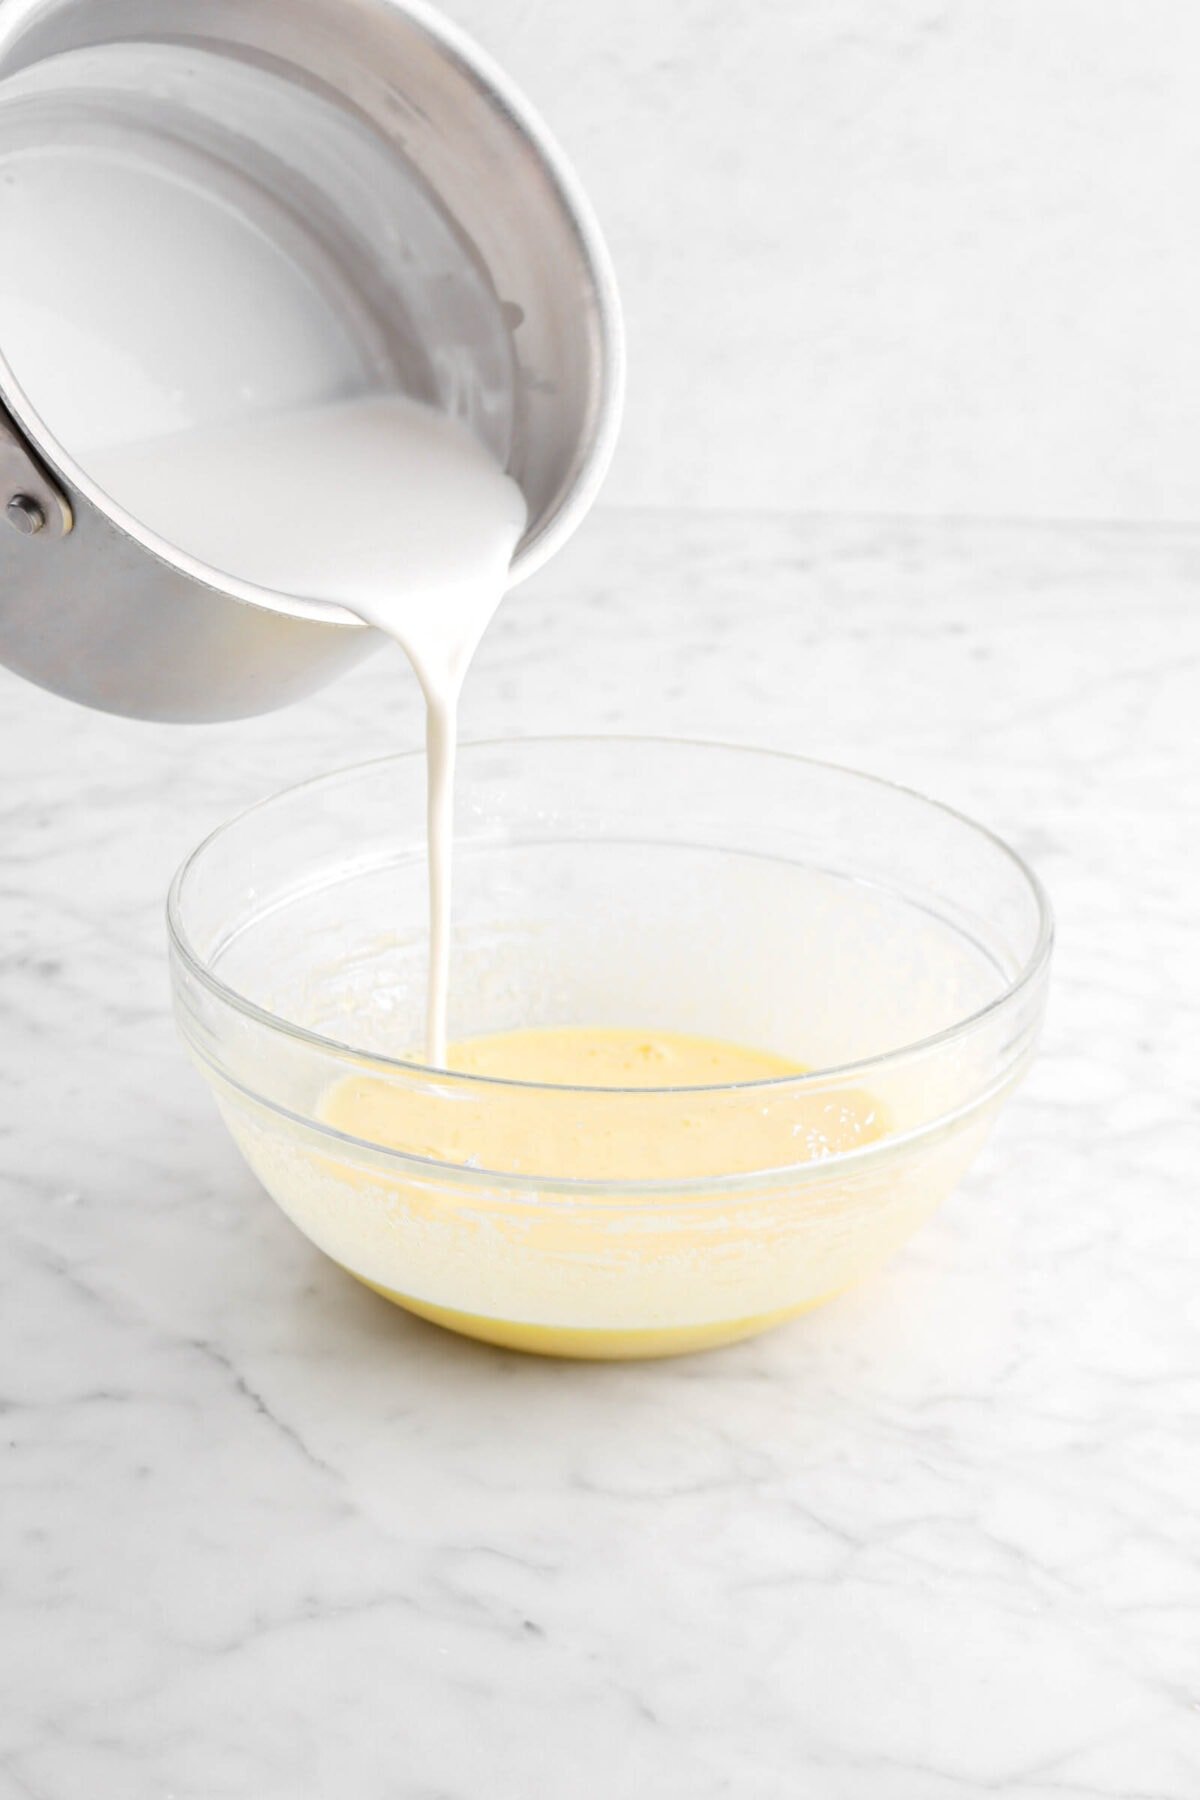
Whisk hot milk mixture into egg yolk mixture, a little at a time.
Return custard to saucepan. Cook and stir over medium low heat until thickened and holding its shape.
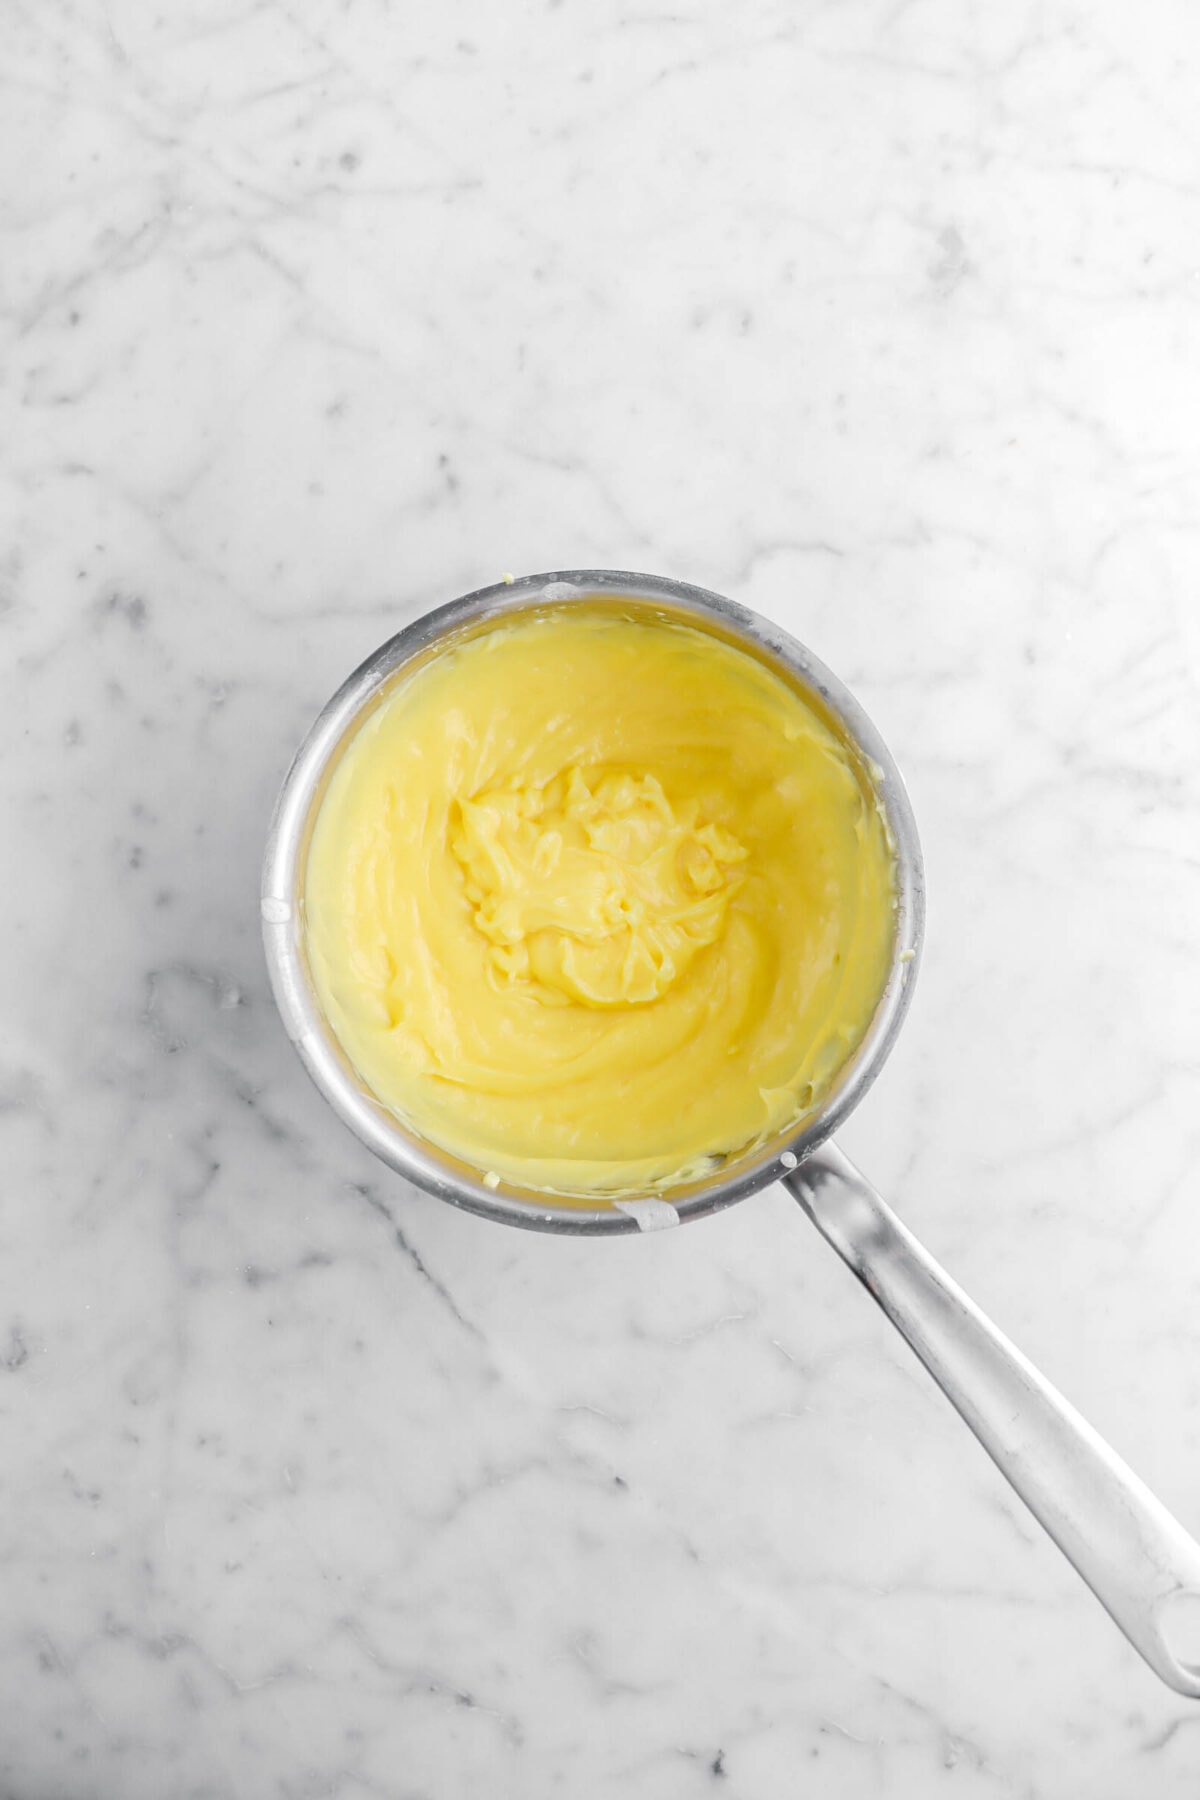
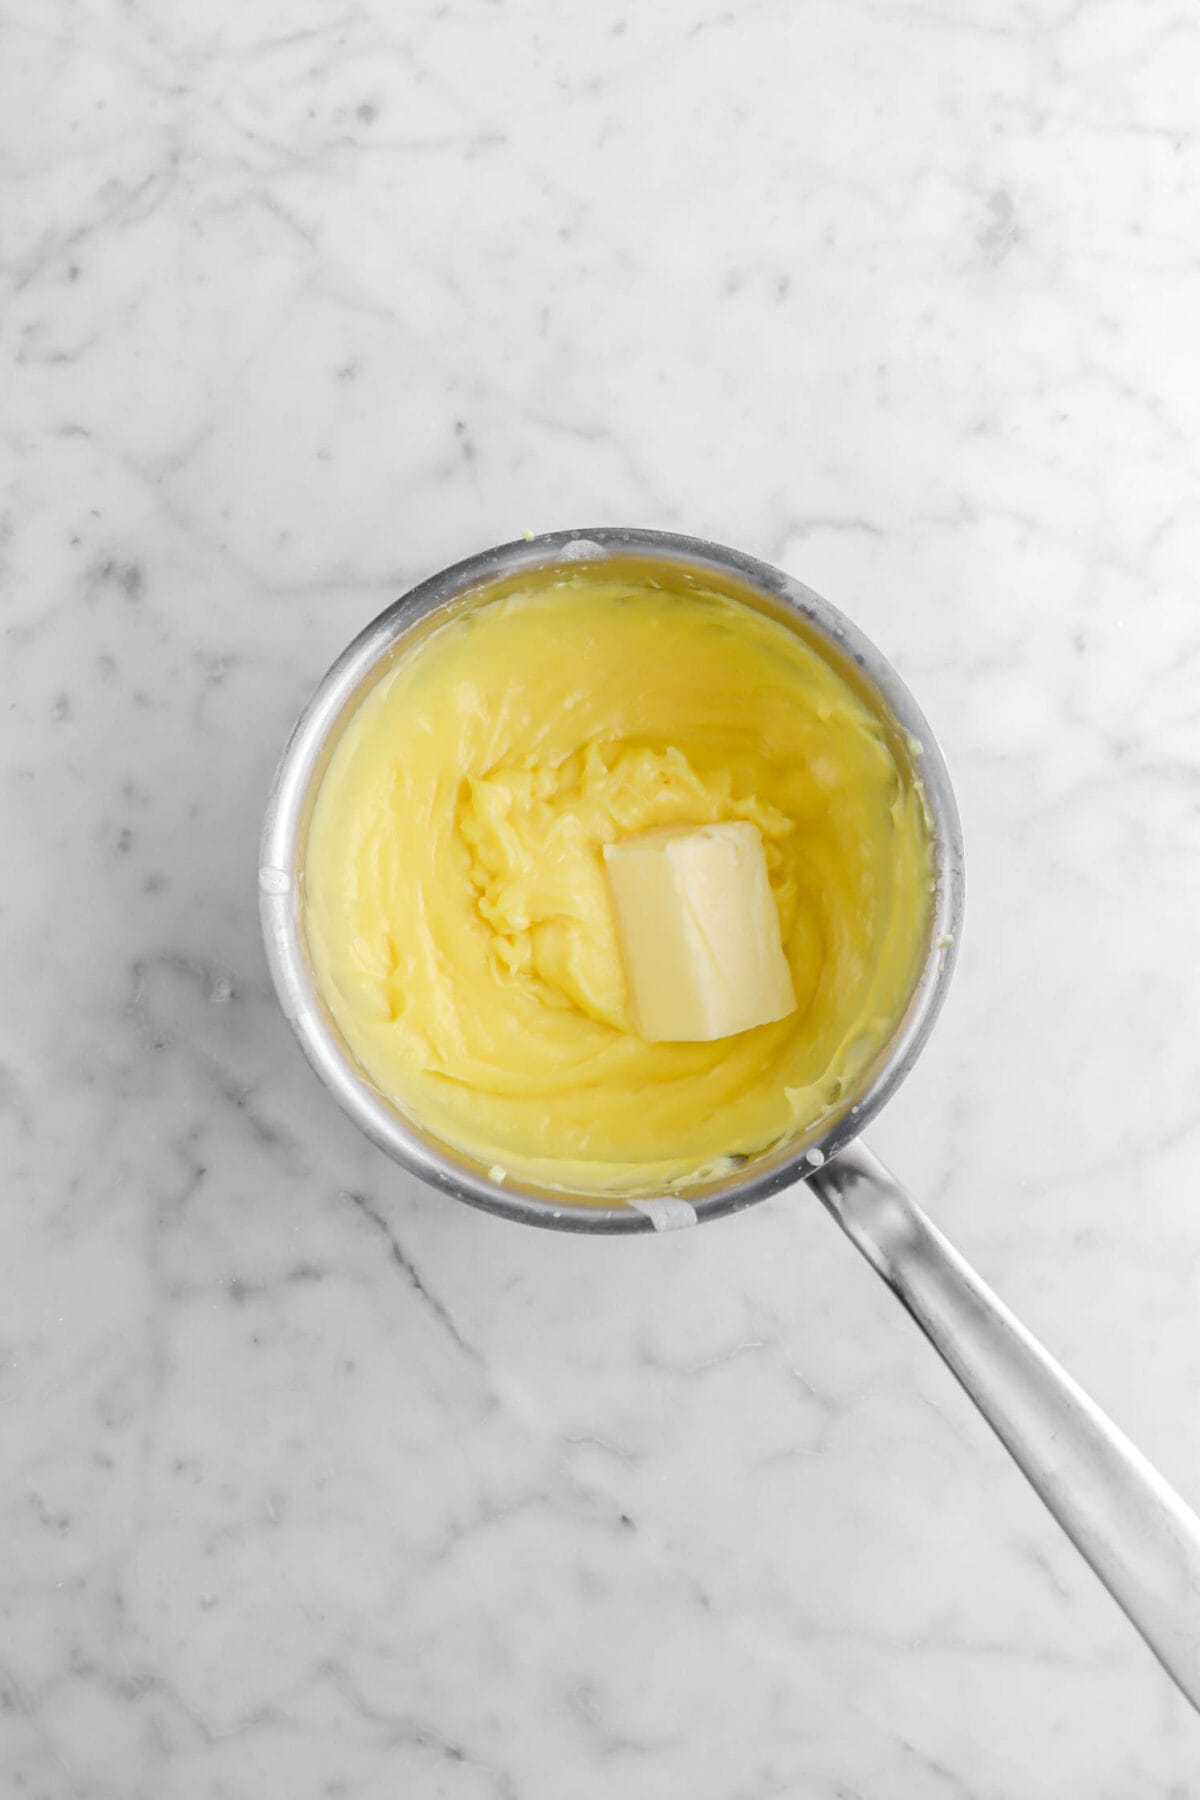
Remove from heat and whisk in butter.
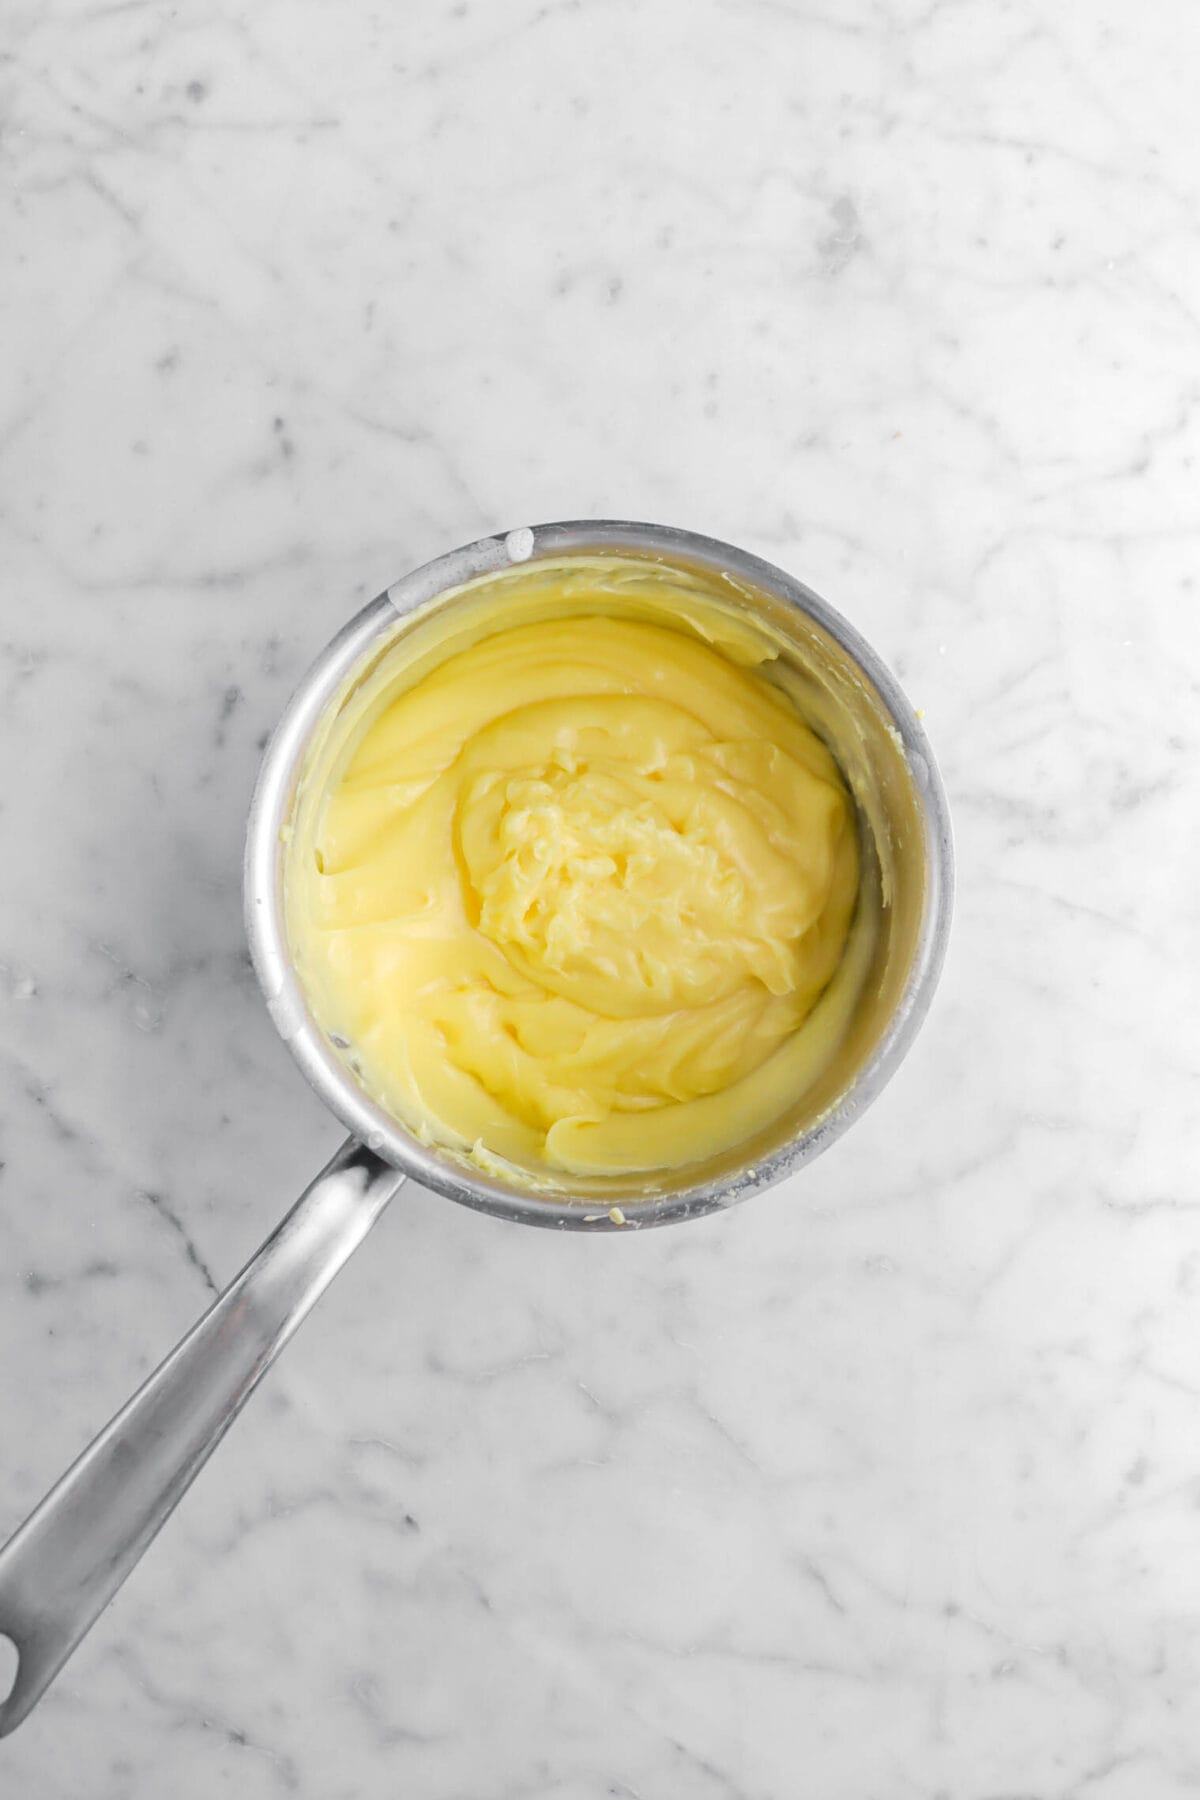
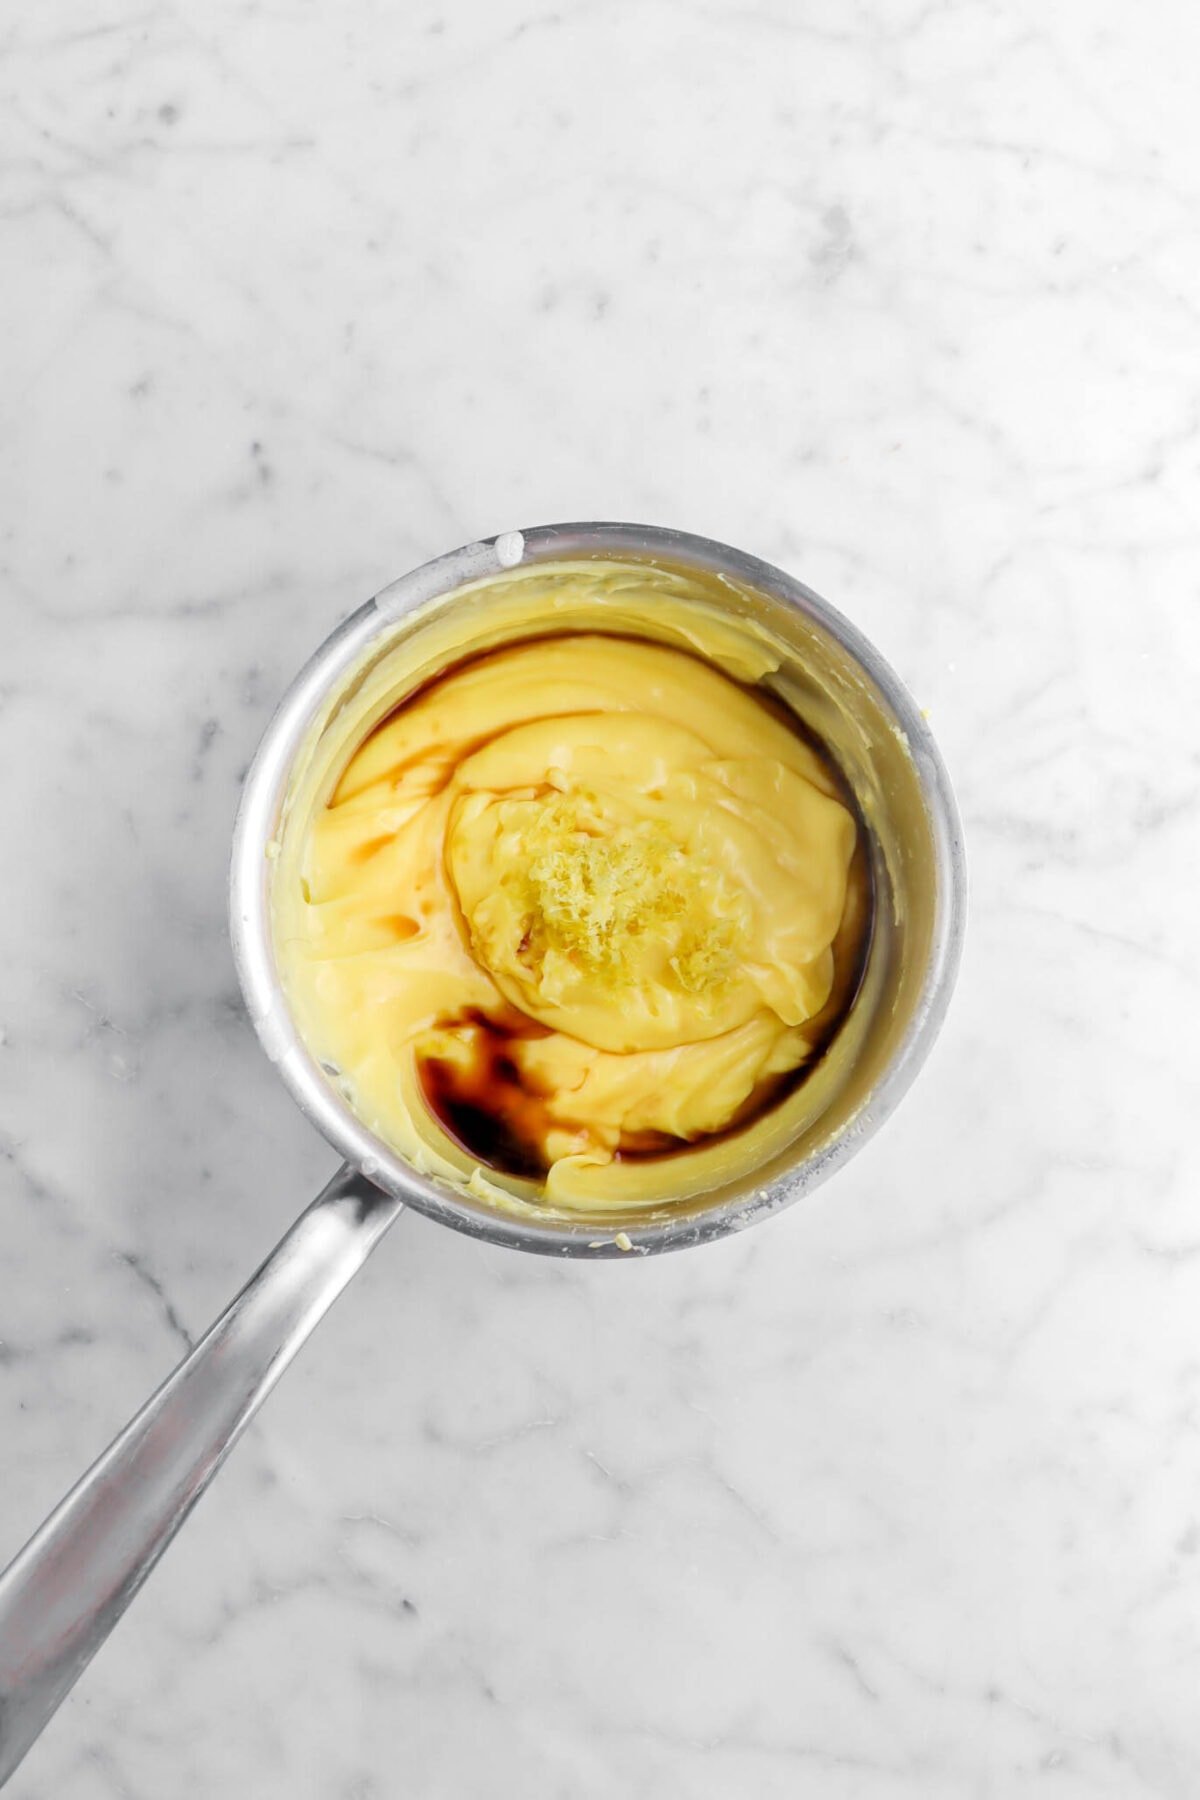
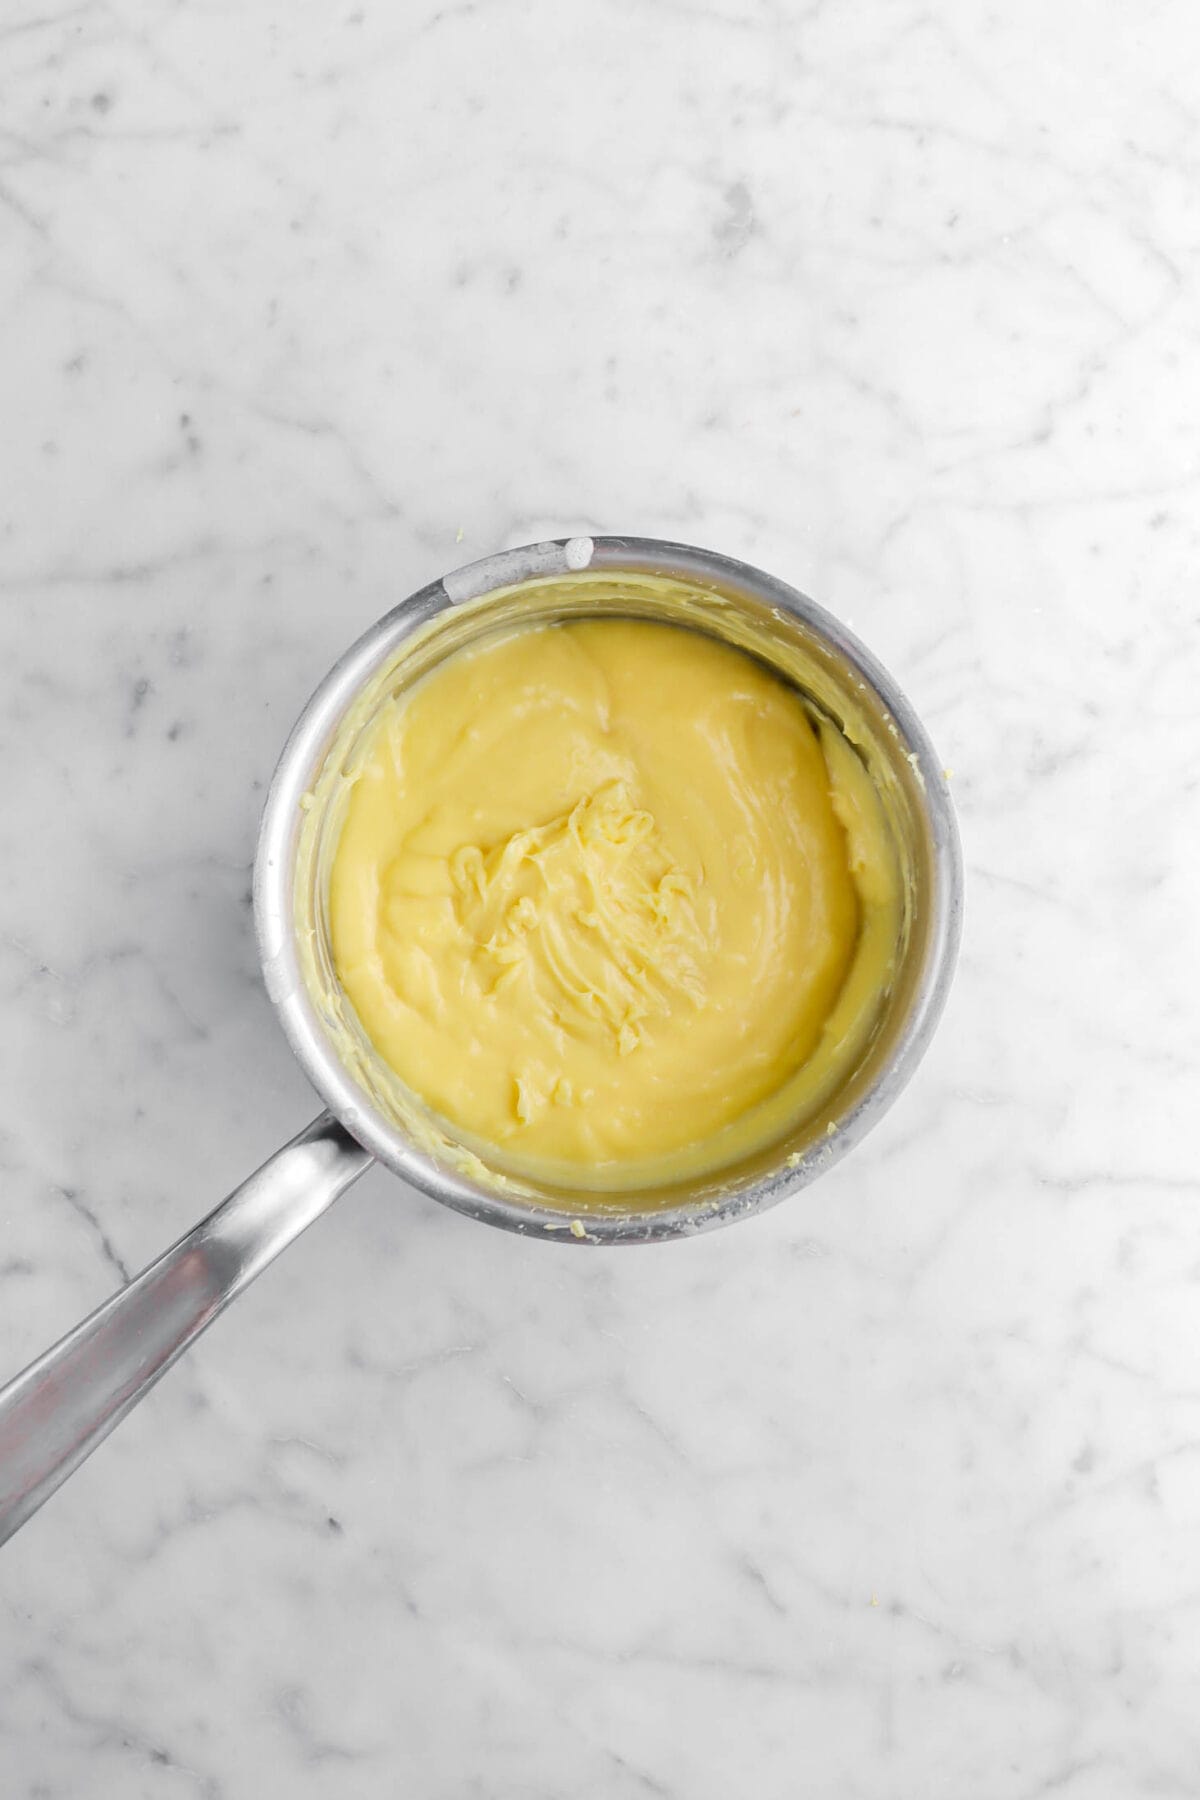
Stir in vanilla and zest.
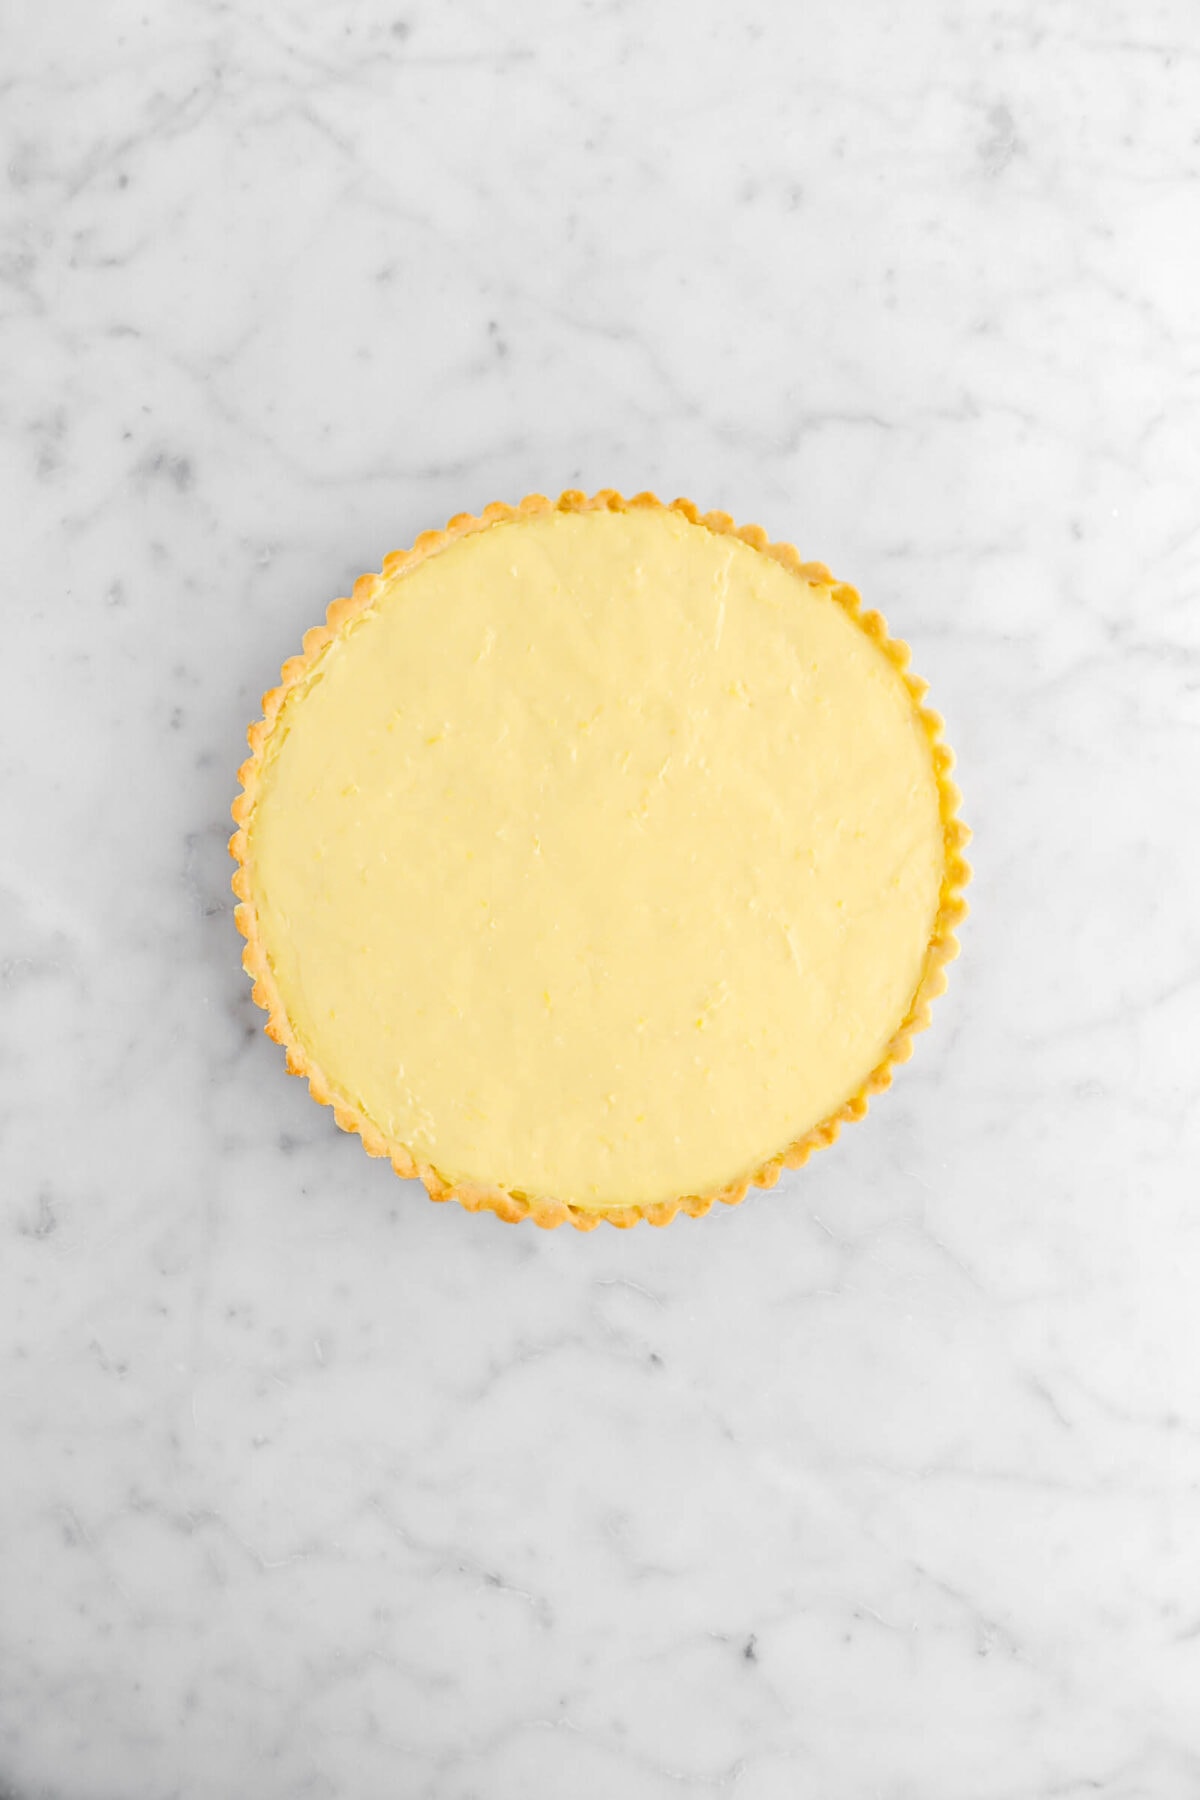
Step 5: Spoon into crust and refrigerate
Spoon into cooled crust and level filling with an offset spatula. Refrigerate 2-3 hours, or until set.
Frequently Asked Questions
Are there raw eggs in this lemon tart?
There are egg yolks in this recipe, but they are tempered with hot milk and then cooked again. The eggs in this recipe are 100% safe to eat!
Why is my crust tough?
If the pastry crust came out tough, that means the dough was overworked. This can happen sometimes, especially if you’re not used to using a food processor. The tart is still completely edible!
Why are there chunks of egg in my filling?
This can happen if the eggs were not tempered properly (I.E. the hot milk was added too fast). Though, good news, this can be fixed! Run the filling through a fine meshed sieve to get rid of the chunks of eggs. From there, mix in the butter, vanilla, and lemon zest as usual!
Can I skip refrigerating?
Refrigerating is absolutely essential in this recipe, as it’s what allows the tart to properly set.
Can I make this in-advance?
Absolutely! There are a couple different ways you can do this, too. First, you can go ahead and make the crust and the filling and refrigerate them both separately for up to 3 days. You can also go ahead and make the tart completely and refrigerate it for 1-2 days before you wish to serve it.

How To Zest A Lemon
The best way to zest a lemon is with a zester! Though, if you don’t have one, a very fine cheese grater will do, but it’s really worth investing in a zester, as it’s a great tool to have. From there, thoroughly wash your lemon and dry it with a towel.
Now, you’re ready to zest! Hold the zester at an angle over a plate (just in case some falls off!) and push/pull your lemon until you reach the white of the rind. Once you see white, stop zesting and rotate the lemon! Continue as you did before and repeat until the entire lemon has been zested.
Depending on the size of your lemons, you may need more than one lemon.
Decorating Ideas
The wonderful thing about this tart is that there are SO many different ways you can decorate it. Here’s a few to get you started!
- Topped with mini meringue cookies.
- Blueberries, raspberries, or strawberries all add a bright pop of color and perfectly compliment the lemon flavor.
- Freshly whipped cream.
- Adding candied lemon slices, especially if you have whipped cream to place it on!
- Edible flowers (I personally love pansies and chamomile).

What To Serve With This Lemon Tart
While this lemon tart is delicious on it’s own, there are a few things you can serve with it to really jazz up your slice! Here are a few of our favorite things to enjoy with this tart.
- Chantilly Cream or Creme Fraiche
- Blueberry Cheesecake Ice Cream
- Vanilla Ice Cream
- Lavender Ice Cream
How To Store
Once this tart is set, you can easily keep this tart in the fridge for about 3-5 days. Though, just to be honest, the best way to keep this tart is in the freezer!
It will keep for up to 2 months. Though you will need to remember to set it out of the freezer a few hours prior to when you wish to eat it and allow it to come to room temperature.
Looking for more recipes like this? Here are a few you may like: Winter Citrus Tart, Lemon Tiramisu, Lemon Meringue Pie, No-Fail Lemon Bars, Lemon Curd Thumbprint Cookies, Iced Lemon Loaf

When you make this French Lemon Tart with Pâte Sucrée Crust (Tarte au Citron), leave a comment down below! We love hearing from you and answering any questions you might have! Also, be sure to tag us on social media and hashtag it #BakersTable.

French Lemon Tart with Pâte Sucrée Crust (Tarte au Citron)
Ingredients
Tart Shell
- 1½ cups all purpose flour
- ⅔ cup powdered sugar
- ¼ teaspoon baking powder
- 3½ teaspoons lemon zest
- 7½ Tablespoons salted butter, cold, sliced
- 1 large egg, room temperature
- 1¼ teaspoons vanilla extract
Filling
- 4½ Tablespoons corn starch
- 6 Tablespoons granulated sugar
- 6 large egg yolks, room temperature
- 1 cup whole milk
- 1 cup heavy cream
- 2 Tablespoons granulated sugar
- 4 Tablespoons salted butter, sliced, room temperature
- 2 teaspoons vanilla extract
- 1 Tablespoon lemon zest
Instructions
Tart Crust
- Heat oven to 350℉ (175℃).
- Spray a 9-inch tart ring with cooking spray. Set aside.
- In the bowl of a food processor fitted with a dough blade, combine flour, sugar, baking powder, and lemon zest.
- Pulse to mix.
- Add butter, a few slices at a time, pulsing after each addition.
- Add egg and vanilla.
- Pulse until it forms a smooth dough.
- Turn out onto lightly floured parchment paper.
- Roll into a round that is ¼-inch thick.
- Transfer dough to prepared pan.
- Press to remove air bubbles and to ensure dough is fitted all the way to the edges.
- Cut excess dough away from top.
- Place a sheet of parchment paper in crust.
- Fill with pie weights, making sure they are spread evenly.
- Bake for 20 minutes.
- Remove from oven.
- Carefully remove parchment paper and pie weights.
- Return to oven.
- Bake an additional 10-15 minutes, until crust is lightly browned.
- Set aside to cool.
Filling
- In a medium bowl, whisk together cornstarch and 6 Tablespoons sugar.
- Add egg yolks.
- Whisk until smooth. Set aside.
- In a medium saucepan, combine milk, cream, and 2 Tablespoons sugar.
- Heat and stir over medium heat until mixture starts to bubble around the edges.
- Remove from heat.
- Whisk hot milk mixture into egg yolk mixture, a little at a time.
- Return custard to saucepan.
- Cook and stir, using a whisk, over medium low heat until thickened and holding its shape.
- Remove from heat.
- Whisk in butter.
- Stir in vanilla and zest.
- Spoon into cooled crust.
- Level filling with an offset spatula.
- Refrigerate 2-3 hours, or until set.
Notes + Tips!
- Make sure your tart pan has a removable bottom.
- Be careful to not over-work the dough! Pulse until the mixture comes together. Nothing more! The less you work your dough, the more tender it will be.
- Don’t skip lining your tart with parchment before adding the pie weights! This is essential, as you need to be able to remove the pie weights.
- Make sure the pie weights are completely level and covering the bottom of the tart. This helps ensure nothing rises more than it needs to.
- The crust doesn’t need to be overly browned. Just lightly browned. Keep an eye on it!
- When making the filling and it begins to thicken, don’t panic! Let it keep cooking for 2 minutes afterwards. It should be very thick before stirring in the butter.
- Make sure you get all the butter incorporated before adding the lemon zest and vanilla!
- If desired, any citrus can be used for this recipe.
Tools You May Need (affiliate links)
– Still Hungry? –
Here are a few recipes may like!


