Homemade Twinkies
This post may contain affiliate links, please visit our privacy policy for details.
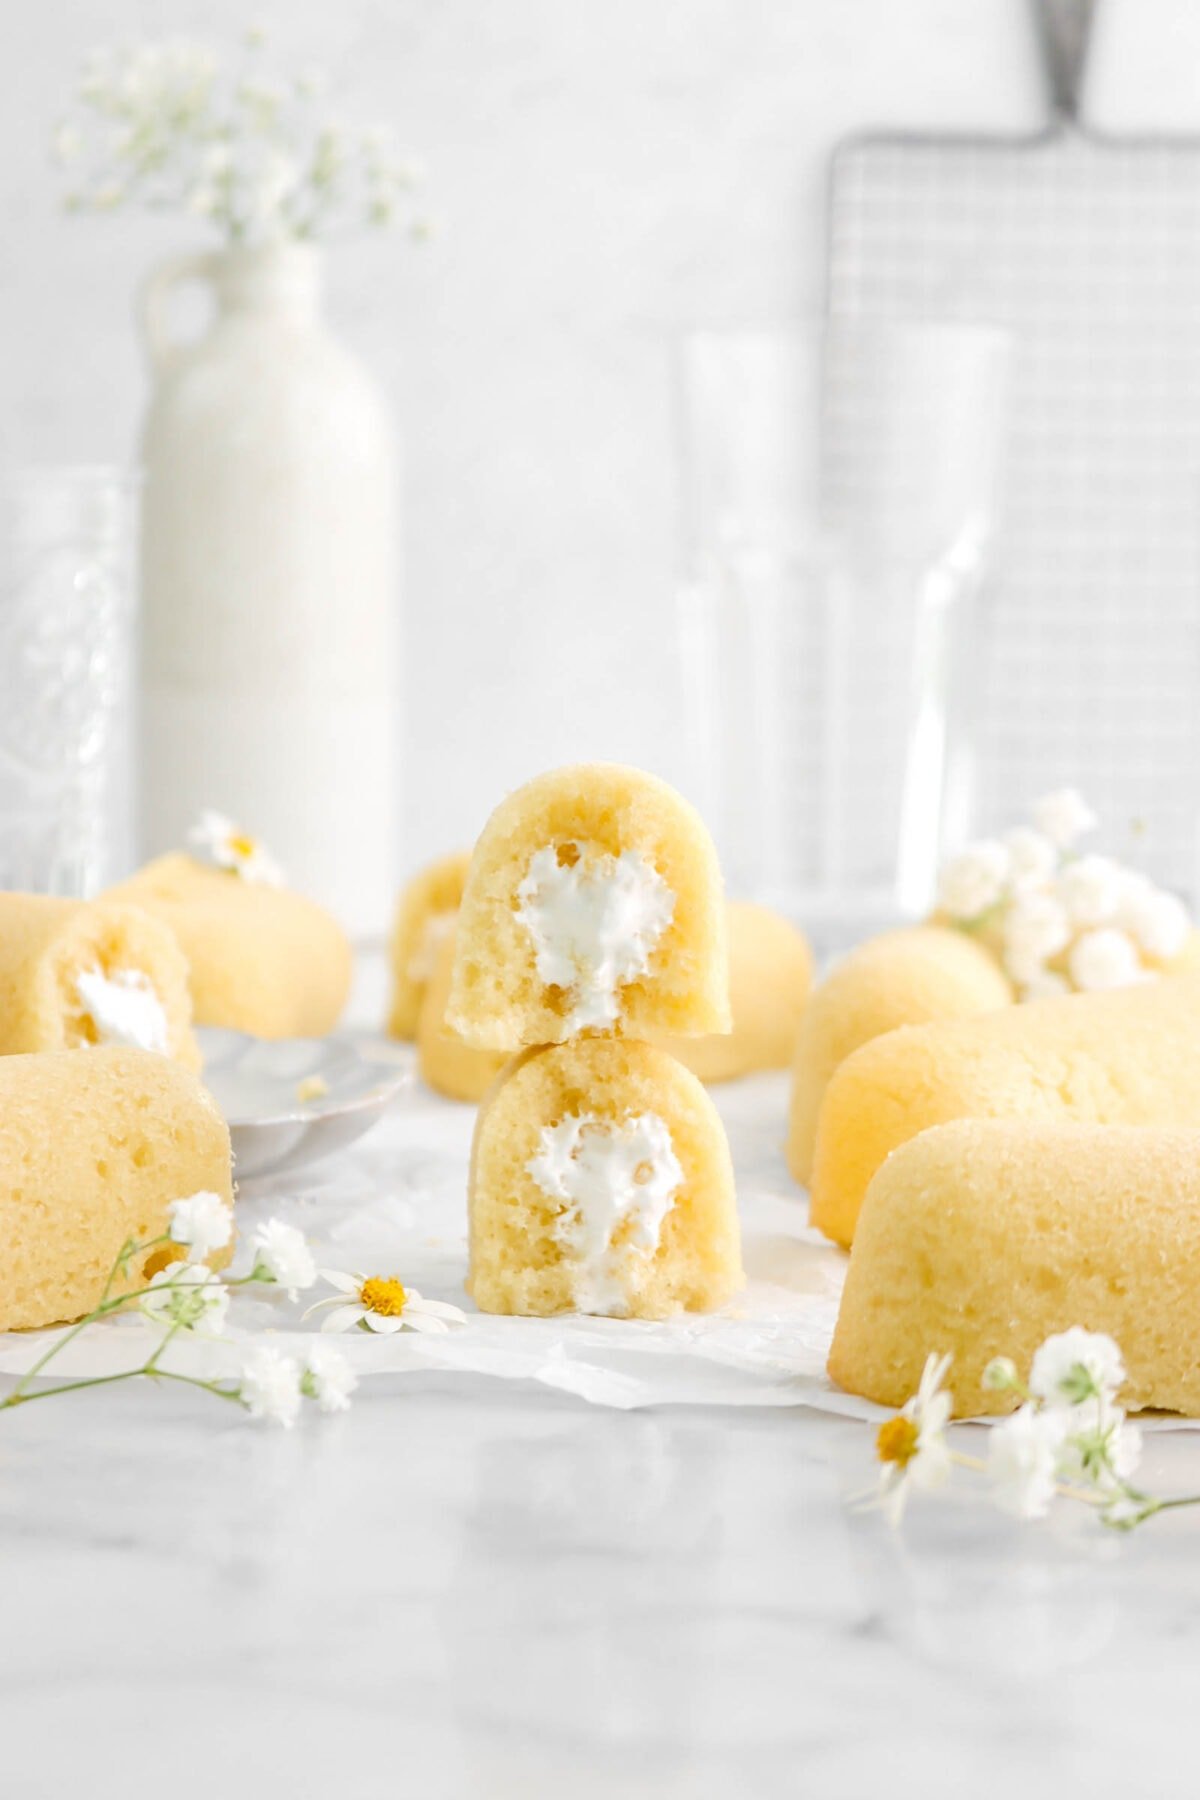
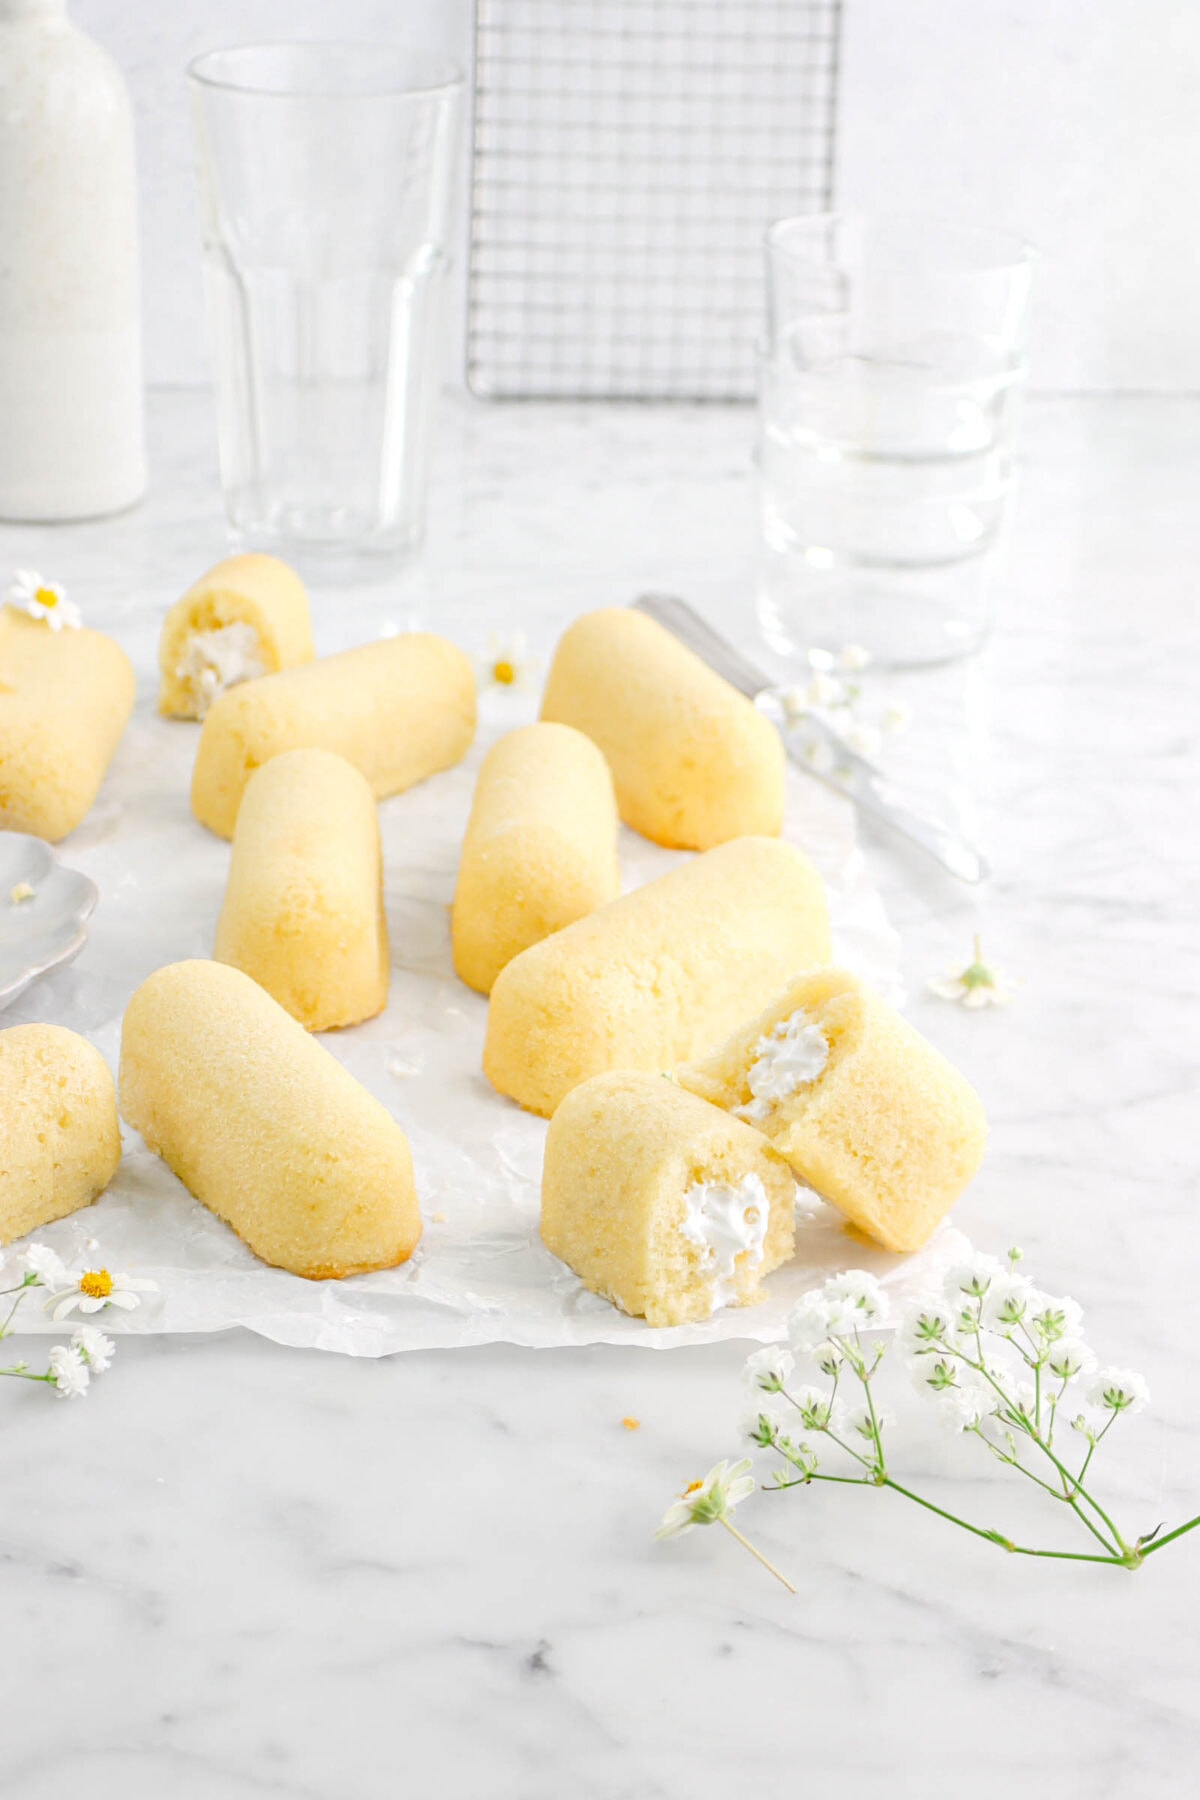
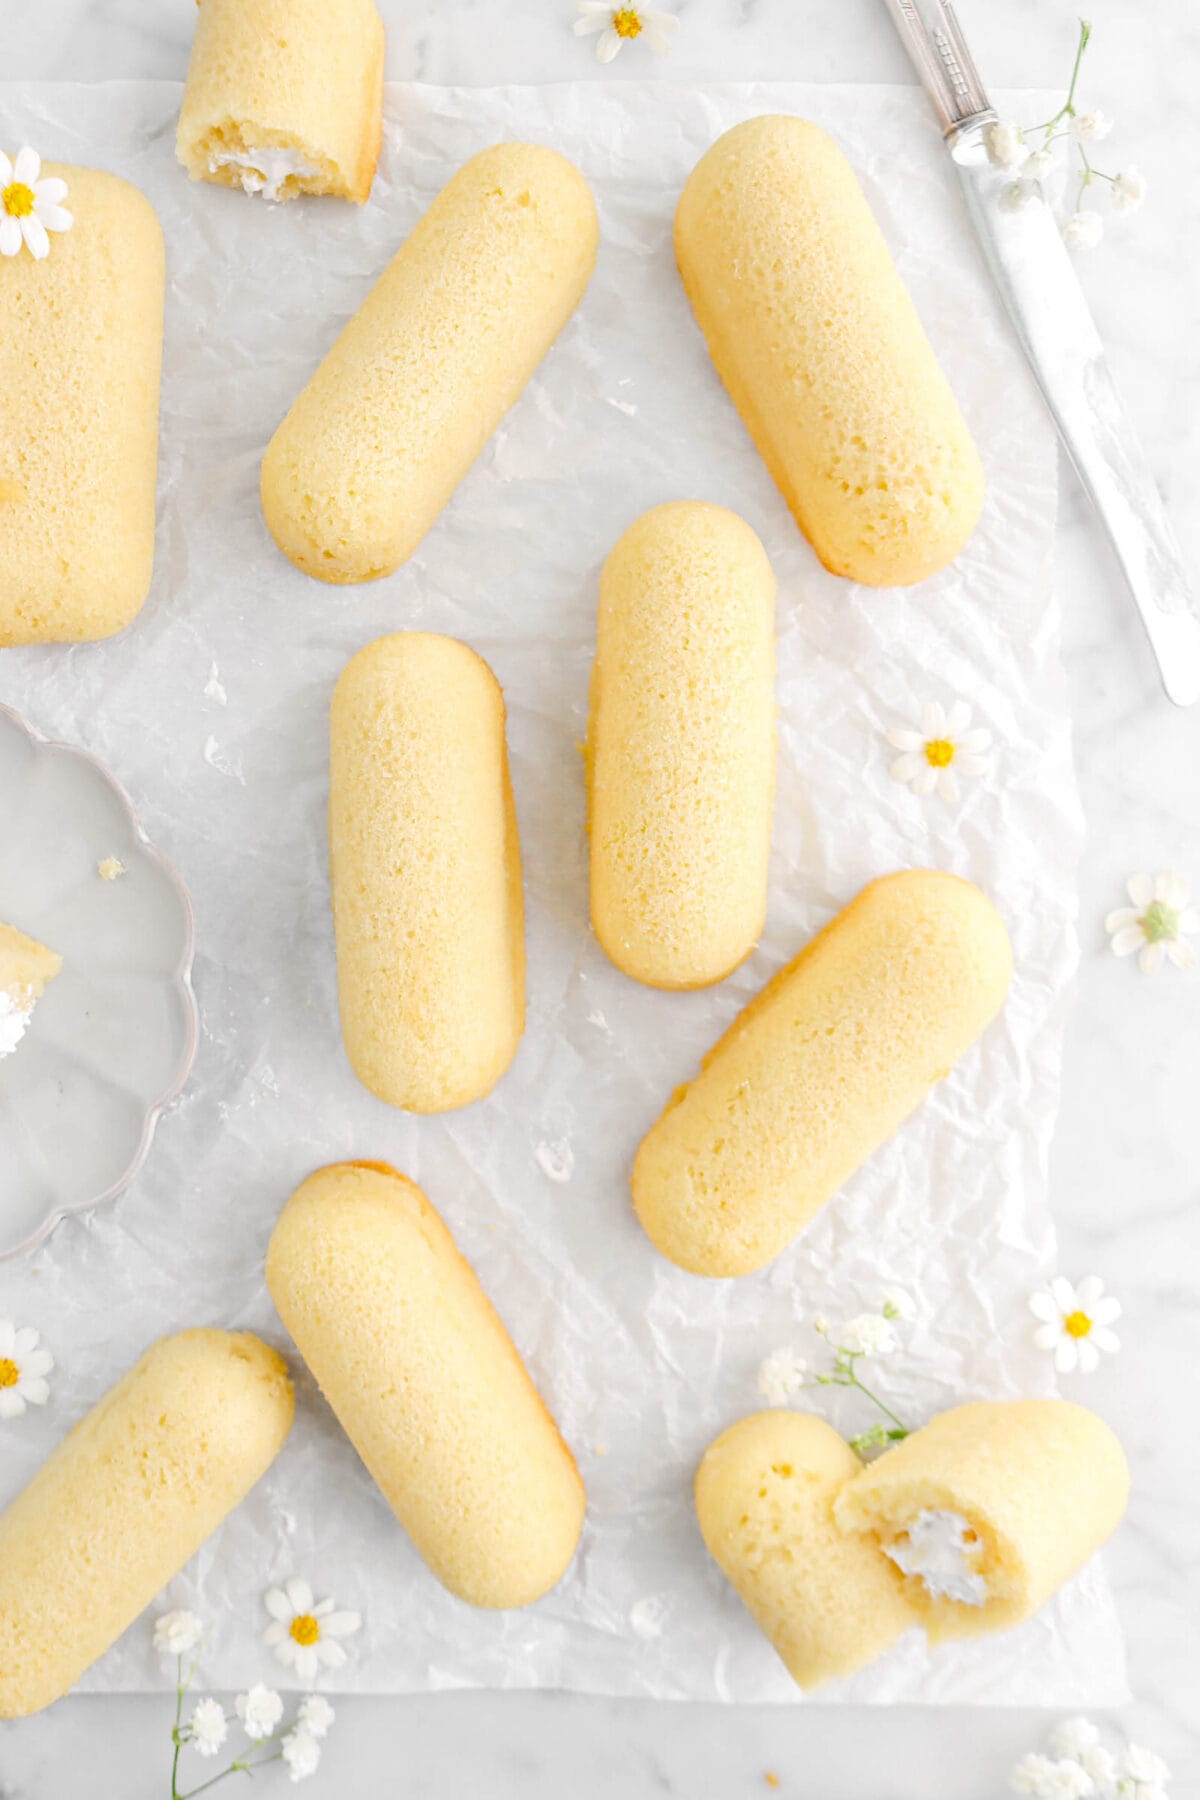
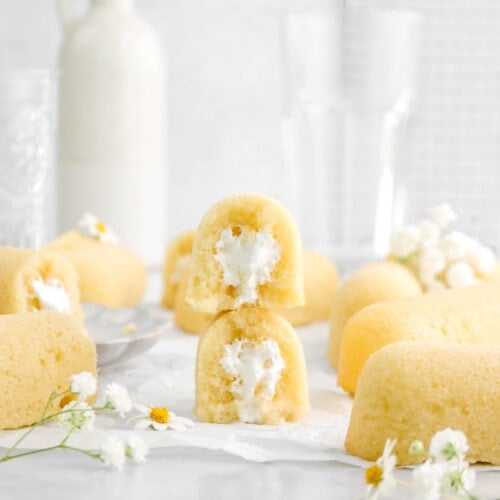
Taking it back to childhood today with these better than store-bought Homemade Twinkies. Oh yes, you can actually make Twinkies at home. It’s also much easier to make than you might think, and it tastes so much better than the stuff you buy in a box. A simple yellow cake filled perfectly with a lightly sweetened creme filling. This little cake is soft, fluffy, moist, perfectly sweet, and truly so much better than the stuff you buy at the store. Every bite is roll your eyes back good. It’s best enjoyed any time of day, any time of year! It’s the perfect bite of sweet vanilla cake without having to bake a whole layer cake.
About The Recipe
Is there anything better than a nostalgic throwback treat? I mean, honestly. There is just something so satisfying (and delicious!) about making your favorite treats from childhood from scratch.
Which is why we’re sharing our Homemade Twinkies!
Growing up, my mom raised me and my brother on 80’s movies. I mean, we had a healthy dose of other films (Disney, mostly), but 80’s movies are something we talk about and pretty much watch everyday. One of our absolute favorites? Ghostbusters.
But, I can hear you asking, what on earth does this have to do with a Twinkie? In truth, this is the inspiration behind this post!
If you missed it, a new Ghostbusters film was released earlier this year. One of Egon’s favorite treats from the first film? A Twinkie!
Originally, this recipe was meant to go up the day they released the film. To our surprise, they dropped the film a few days early! It was great, as we got to see the new movie early, but it also kind of foiled our plans with posting this recipe. So, we decided to set it aside for a few months.
So, with summer here, we couldn’t think of a better time to share!

They’re such a delicious and nostalgic treat that everyone is guaranteed to LOVE! Honestly, can it really get better than a simple yellow cake filled with homemade marshmallow fluff?
Every bite is perfectly soft, full of vanilla flavor, sticky, kinda messy, and oh so delicious.
What is a Twinkie?
If you aren’t from the US, you might be wondering what this actually is. It’s simply a super sugary snack cake! Our version is a yellow cake that’s piped full of homemade meringue (marshmallow fluff).
Reasons You Will Love These Homemade Twinkies
- Super simple to make!
- Tastes even BETTER than the store-bought versions.
- Perfect for summer or a back to school treat!
- Ready in 1 hour or LESS.
- A serious crowd pleaser.

Equipment Needed
- Mixing Bowls
- Whisk
- Twinkie Pan
- Cake Tester
- Cooling Rack
- Stand Mixer
- Small Pot
- Thermometer
- Pastry Brush
- Piping Bags
- Piping Tips
Ingredients
(Full ingredient amounts and instructions can be found in the recipe card at the bottom of the post)
For The Twinkies:
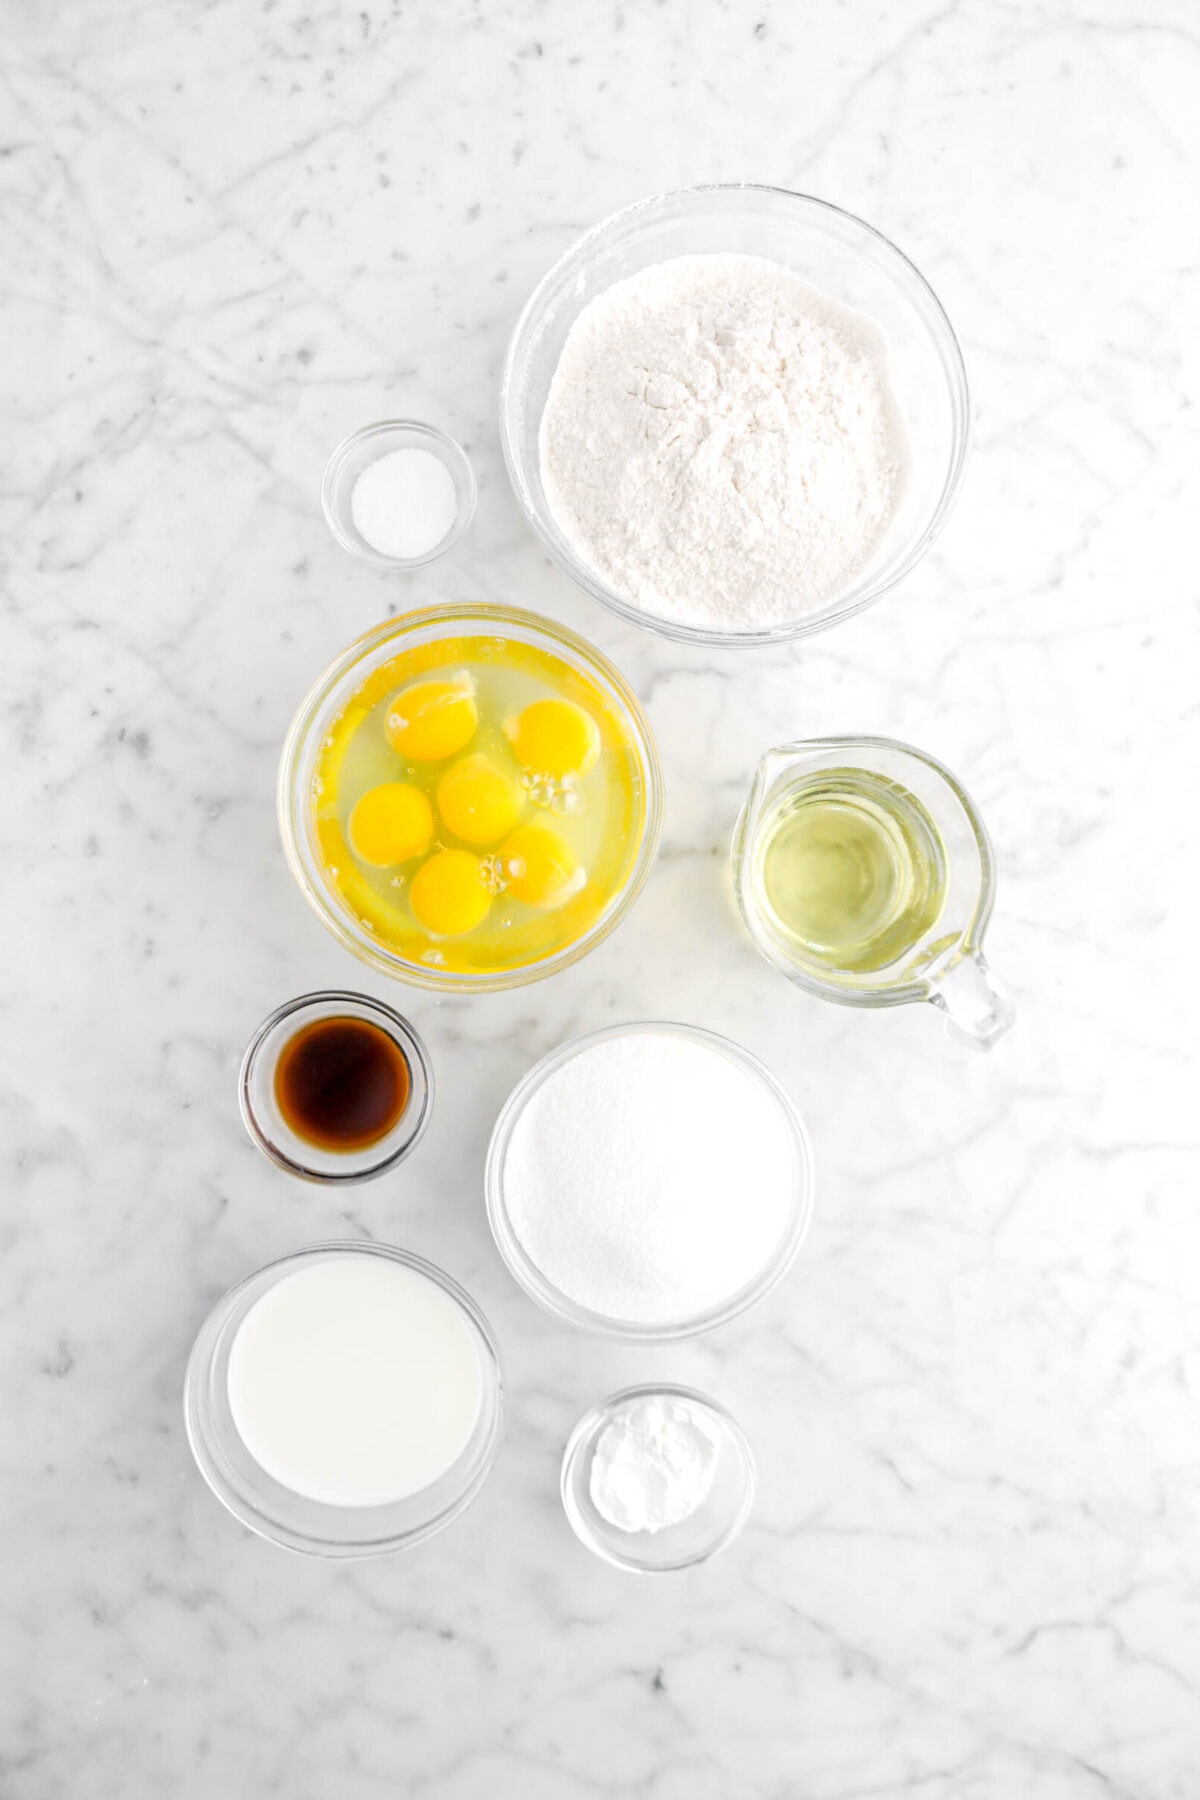
- Cake Flour – is bleached and has a low protein content that gives these little cakes their irresistible texture!
- Granulated Sugar – makes these Twinkies perfectly sweet!
- Baking Powder – provides lift.
- Salt – enhances the flavor as well as cutting the sweetness back slightly.
- Large Eggs – are the binder that hold these cakes together.
- Whole Milk – has a higher fat content which helps create a softer crumb.
- Vegetable Oil – is the main source of fat in these cakes. It helps keep them moist.
For The Filling:
- Large Egg Whites – provide the lift and structure for the meringue.
- Granulated Sugar – When combined with water and cooked into a syrup, it not only stabilizes the meringue, it makes it safe to eat without cooking.
- Water – is the liquid element essential in making the sugar syrup.
How To Make Twinkies
Step 1: Make the cake batter
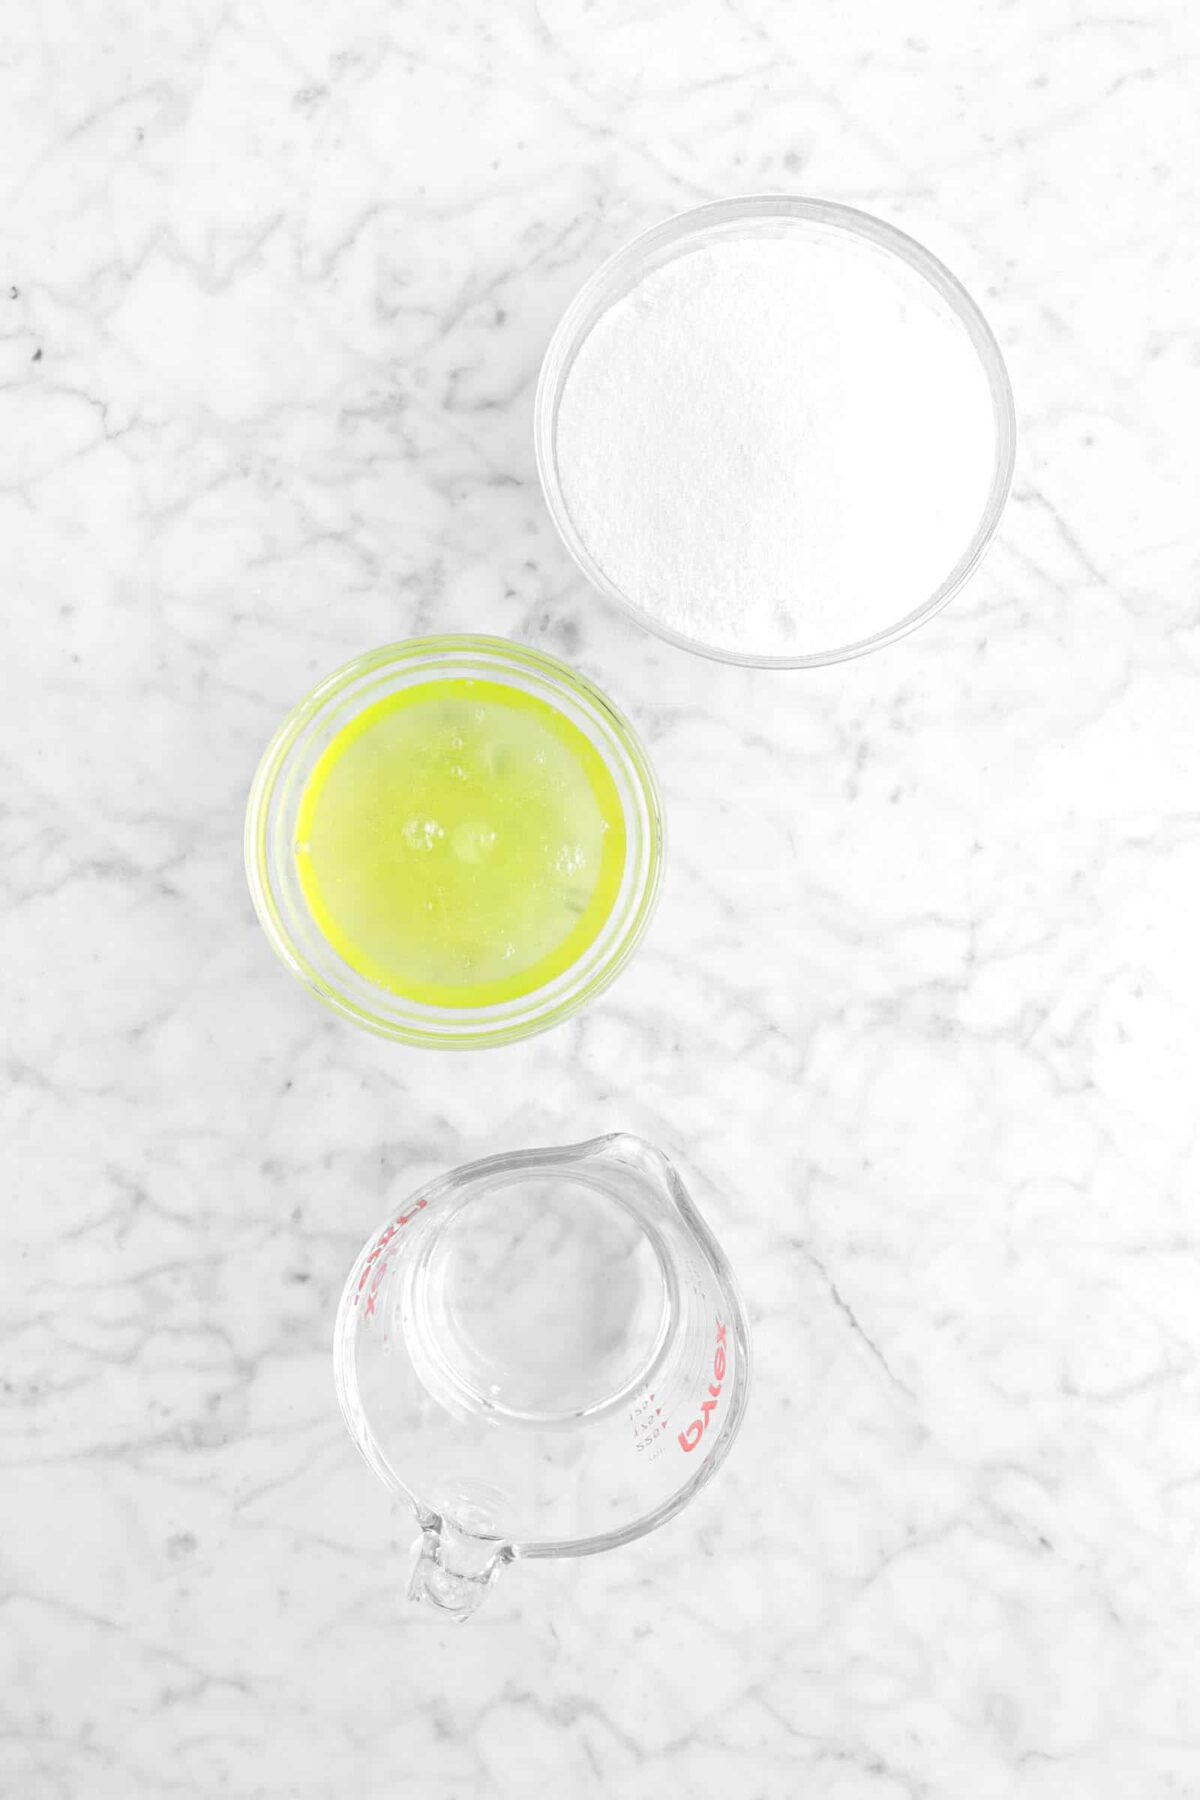
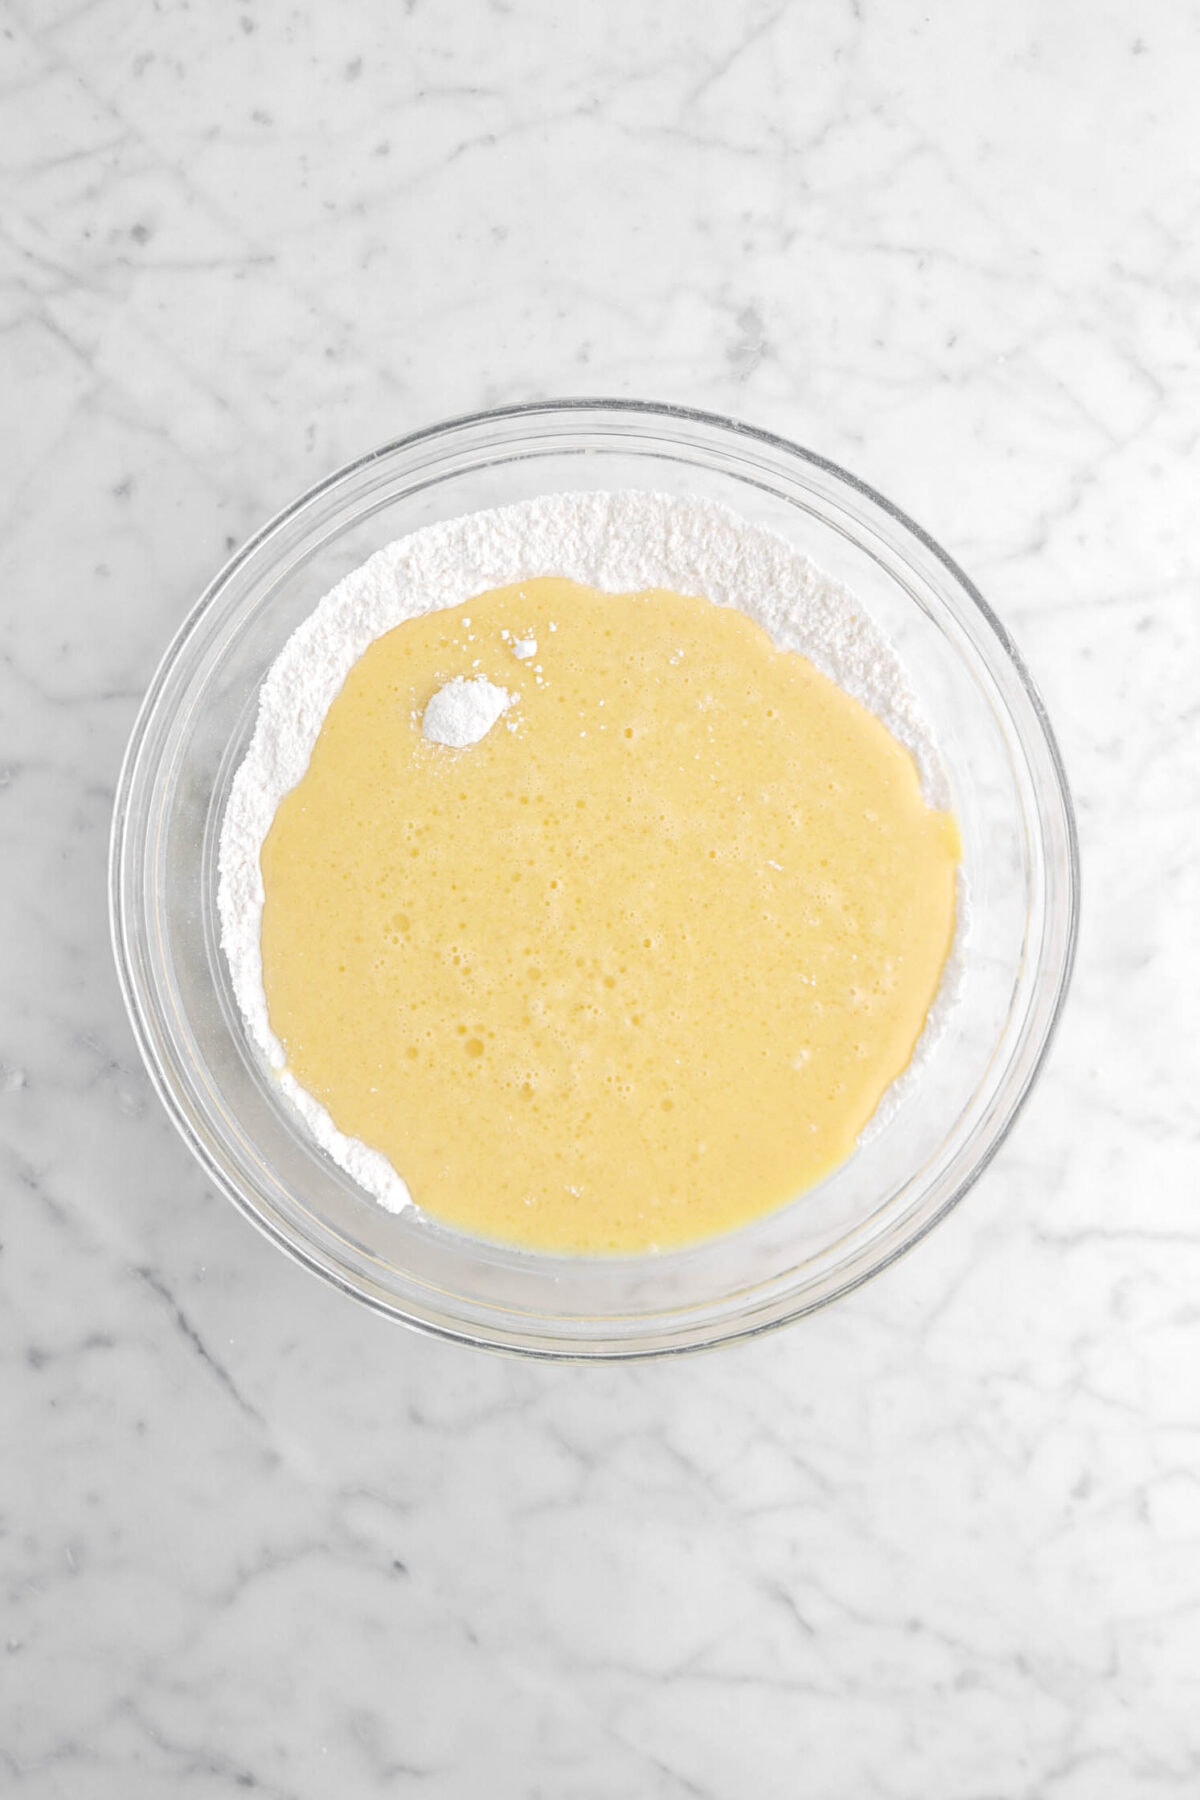
In a large bowl, combine flour, sugar, baking powder, and salt. Set aside.


In a medium bowl, whisk together the eggs, milk, oil, and vanilla.

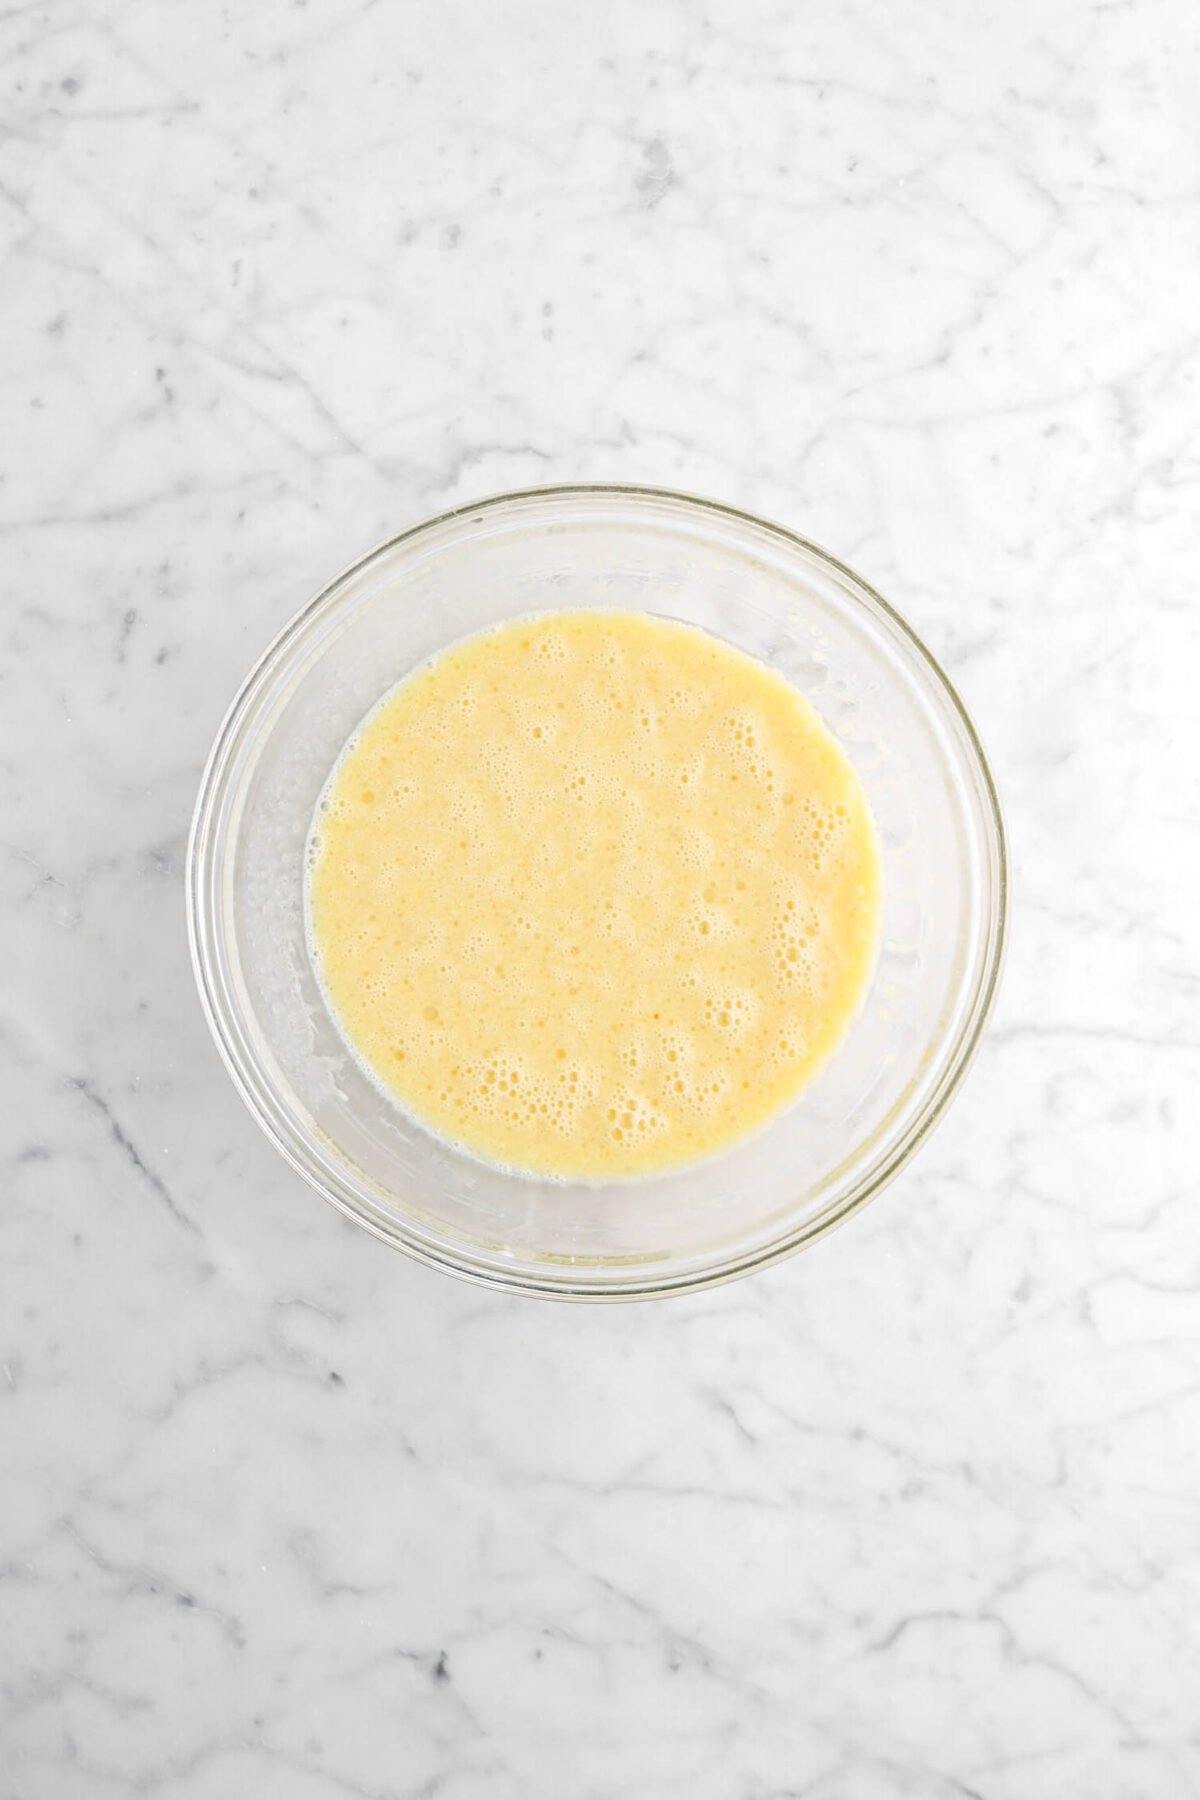
Pour the wet ingredients over dry ingredients and whisk until smooth.

Step 2: Pour into pan and bake
Spoon the batter into prepared pan, filling each cavity ⅔ full. Bake for 15-20 minutes, or until done.


Let cool in pan before turning out. Trim bottoms if necessary.

Step 3: Make the filling
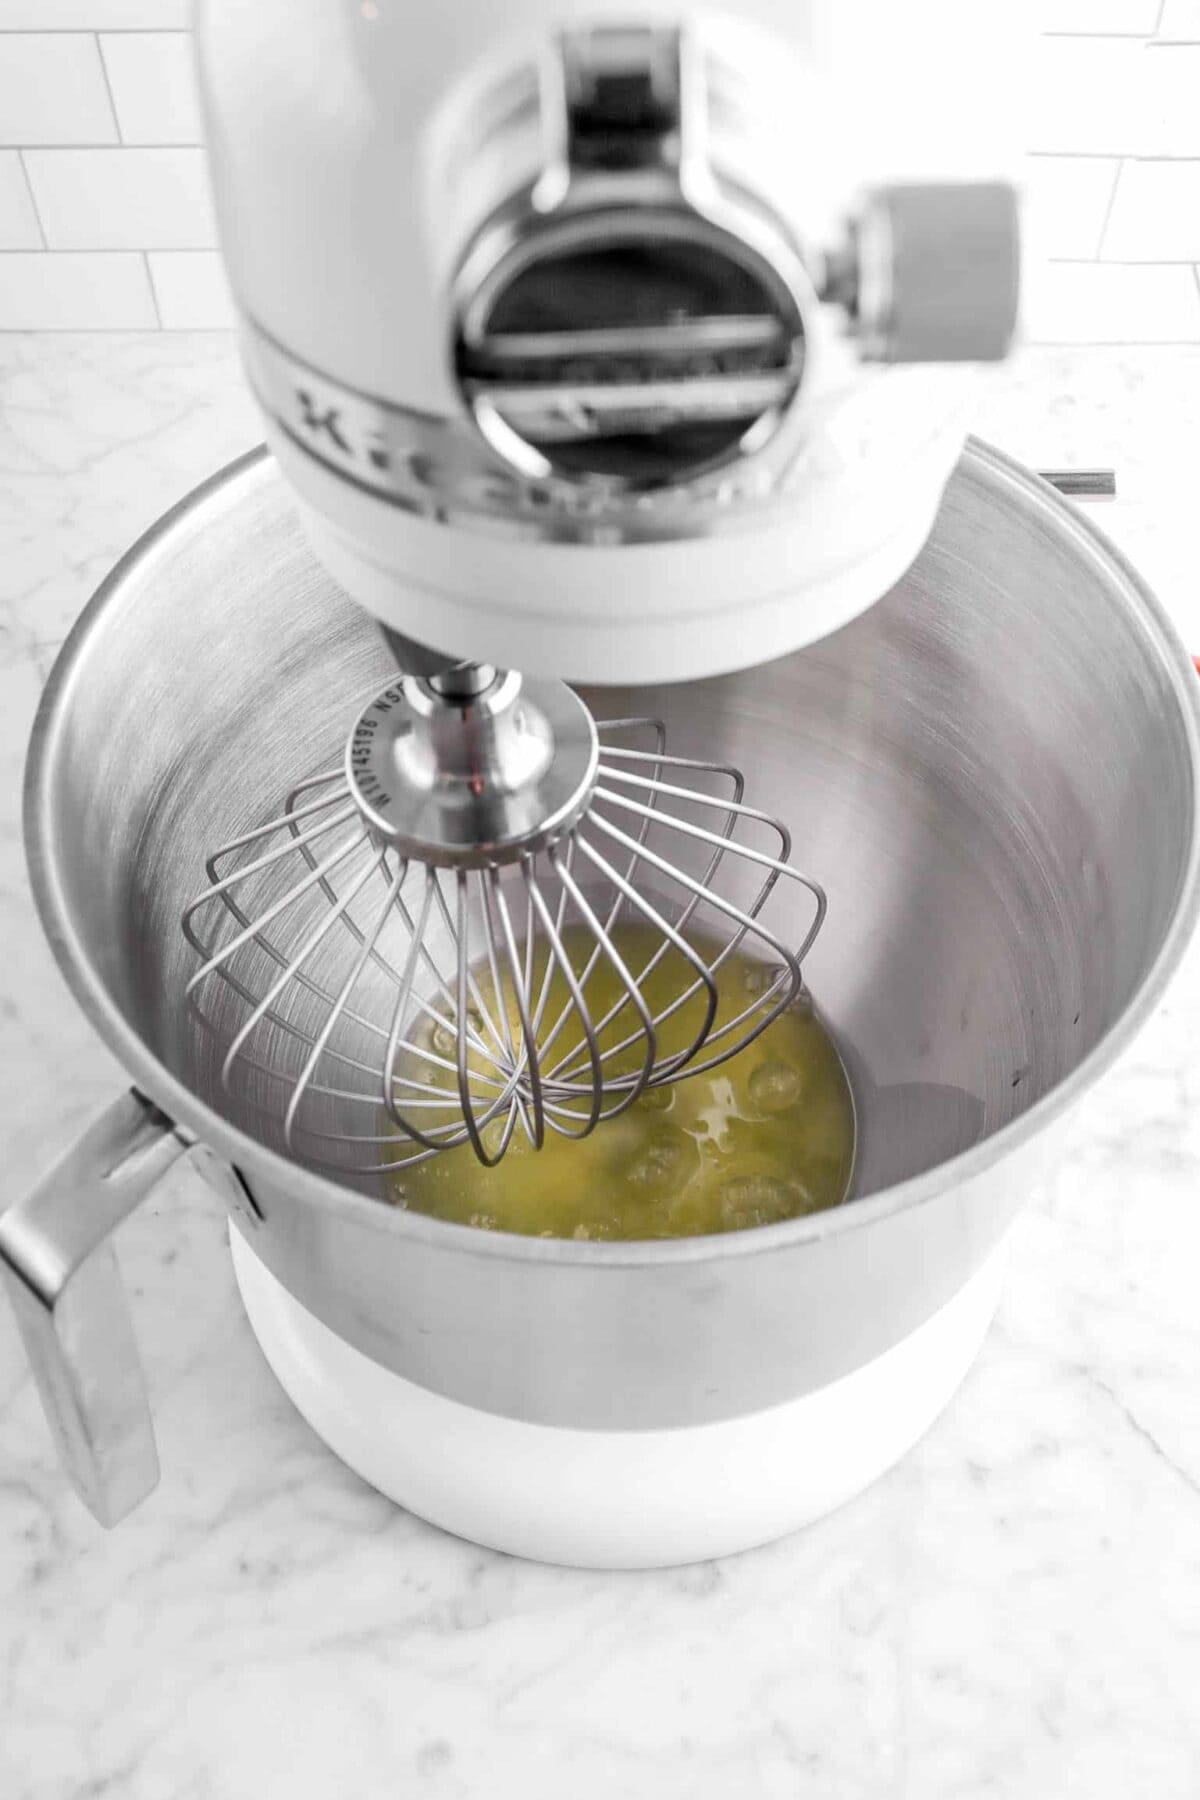
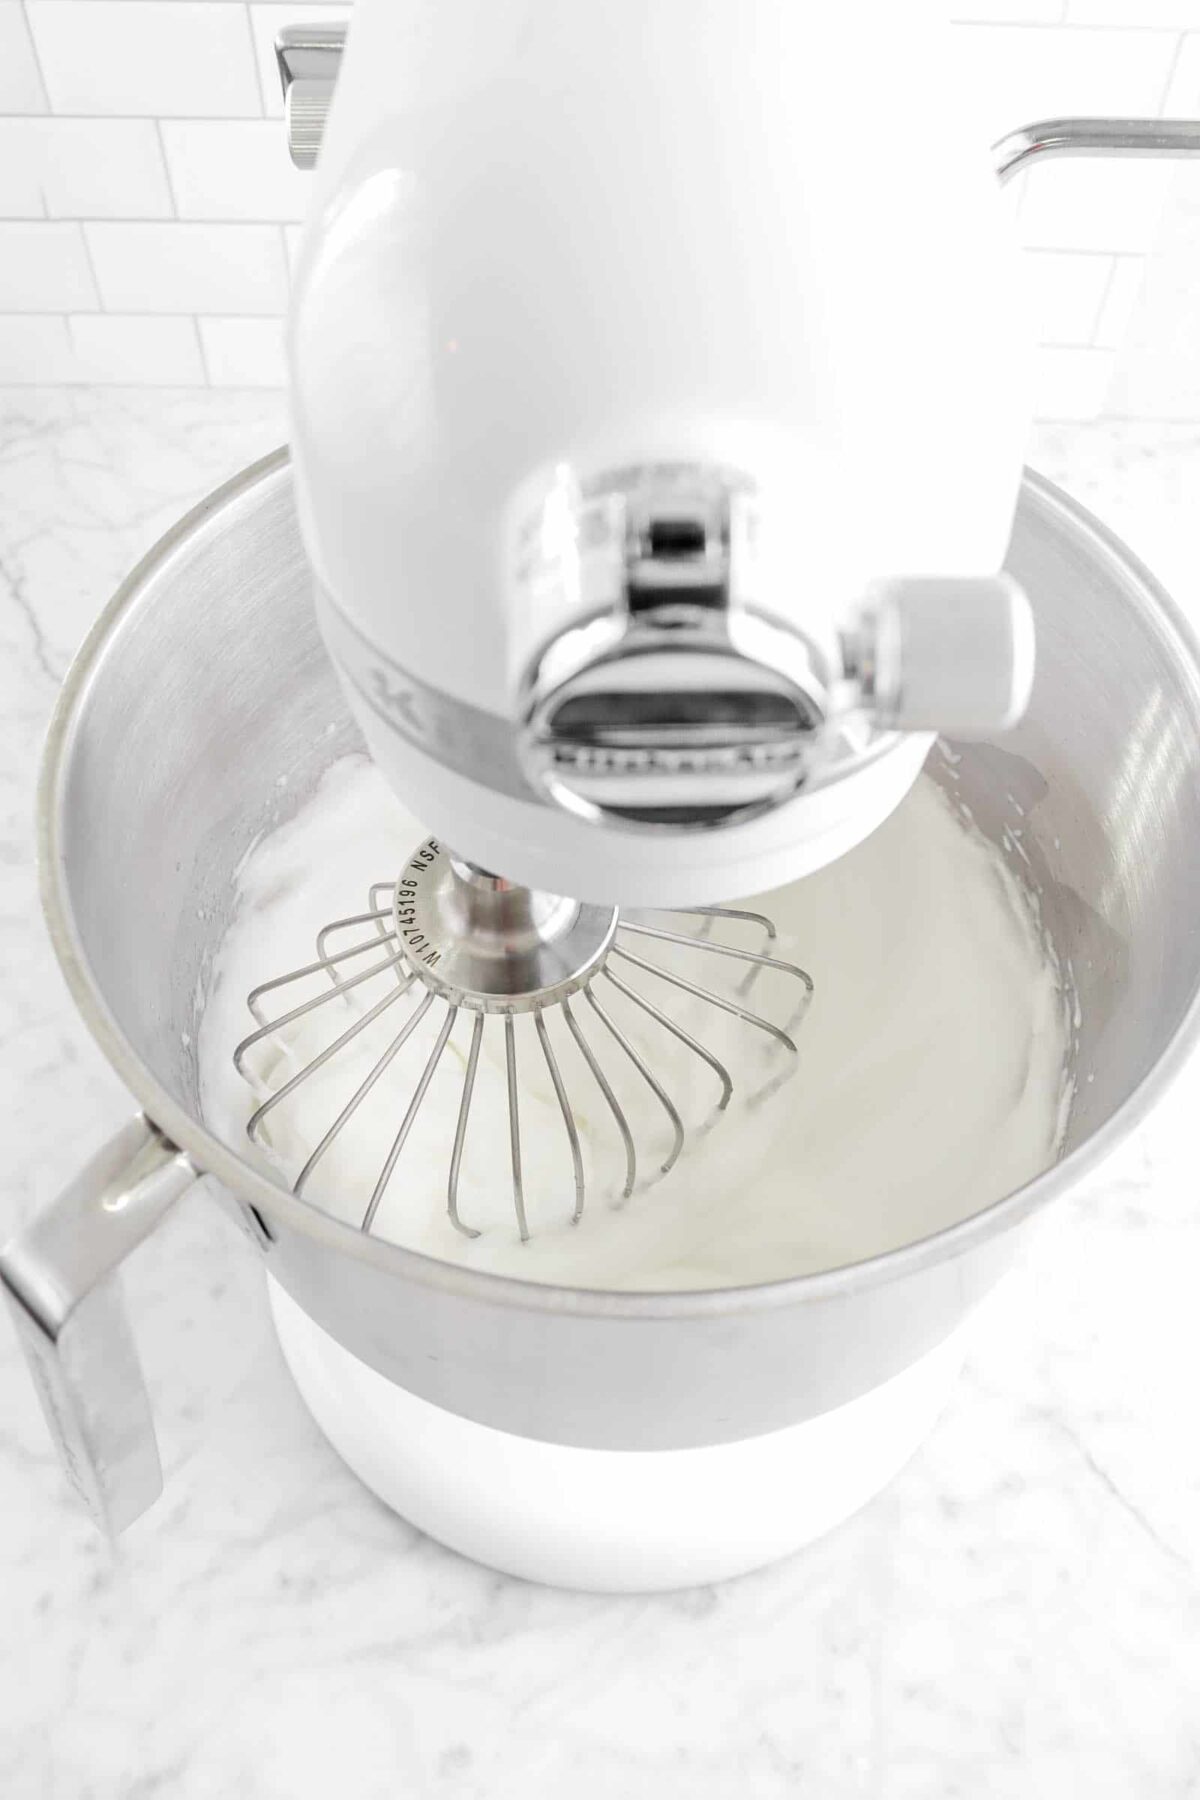
With an electric mixer fitted with a whisk attachment, beat egg whites to stiff peaks.
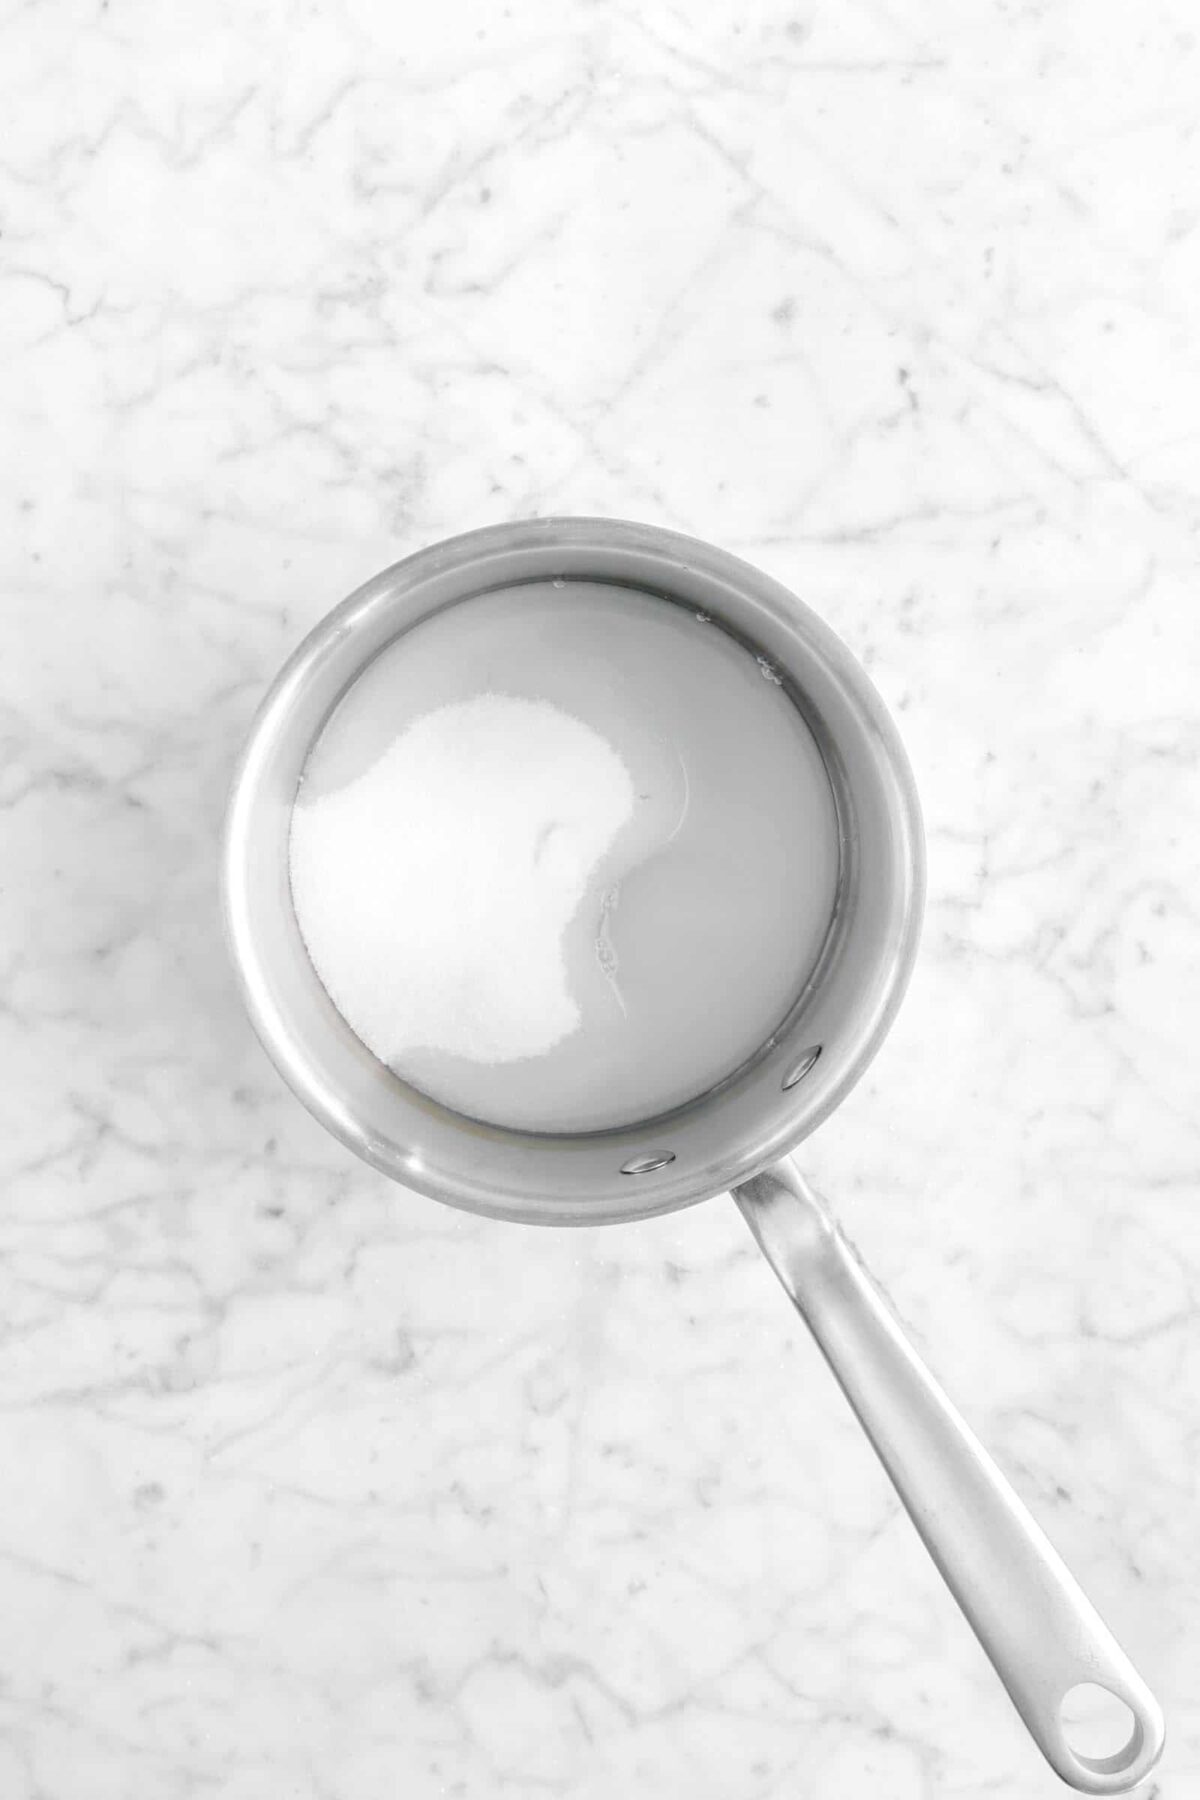
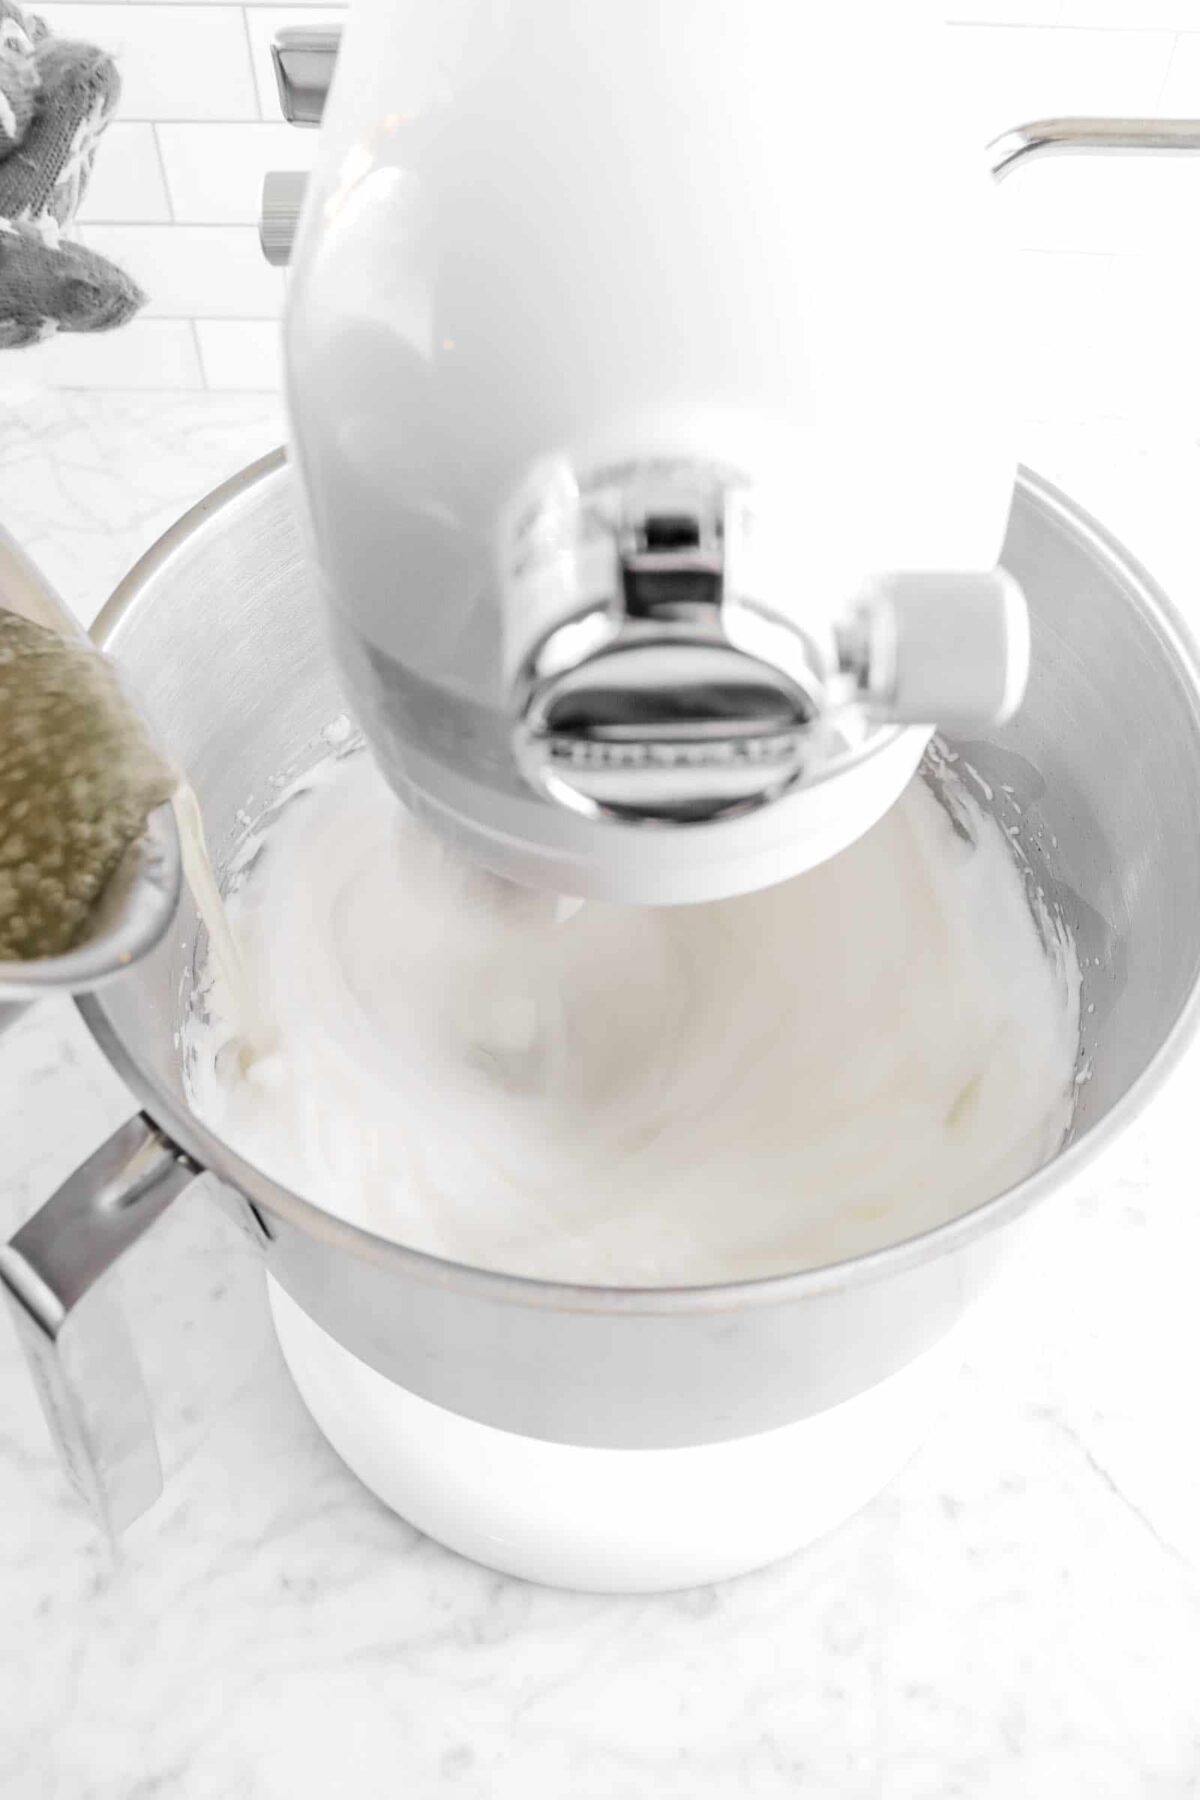
In a small saucepan, heat sugar and water, stirring continually until sugar melts. Cook over medium heat to 246°-250° F, brushing down the sides with water twice. Turn the mixer back on and slowly stream the syrup into the egg whites. Beat until cool.
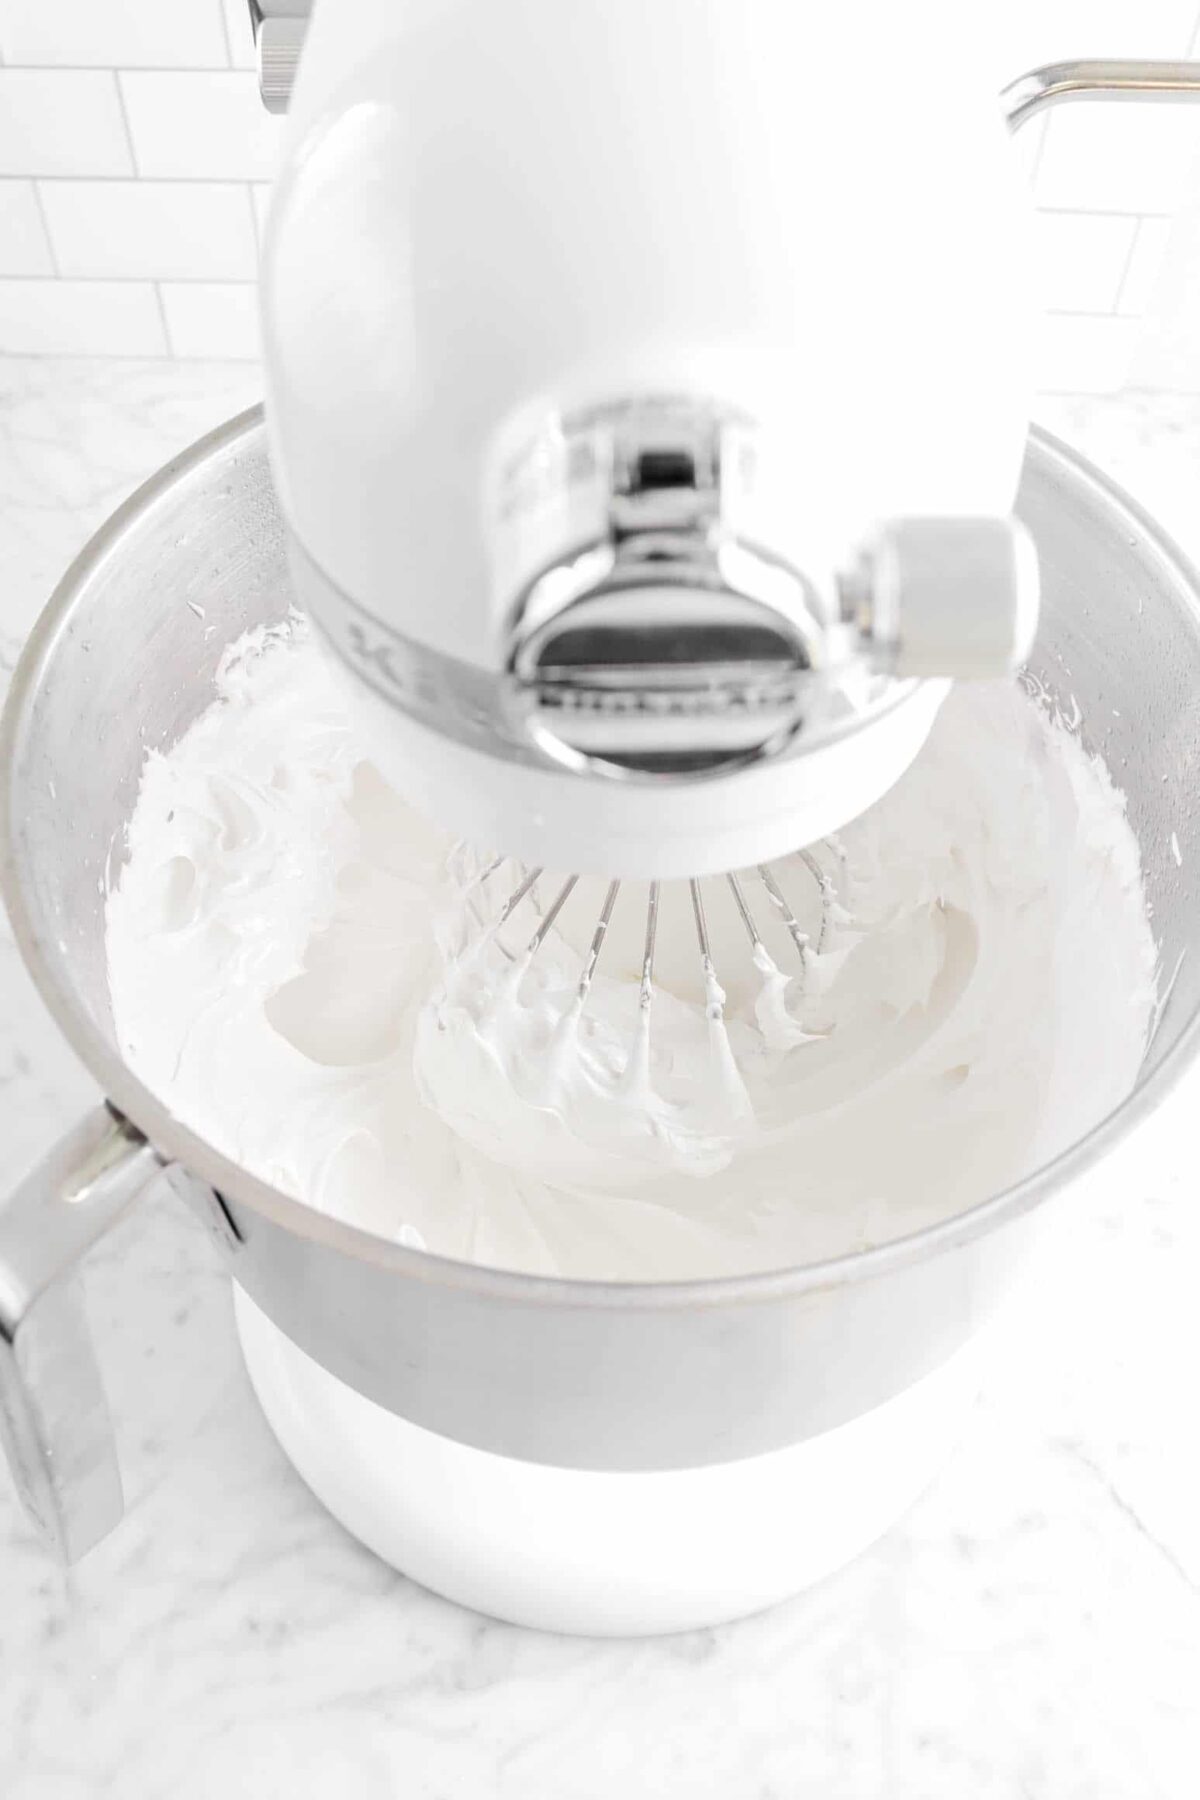
Fit a piping bag with a #10 round tip and spoon in meringue.

Step 4: Fill Twinkies
Turn cooled cakes over and pipe the filling into the bottom of each cake, in the middle and on both ends.


How To Store
Once these cakes are filled, the best way to store them is in the freezer! They will freeze for 1-2 months if kept in a zip top freezer safe bag.
Substitutions:
- If you don’t have cake flour, you can mix all purpose flour with cornstarch. Measure out 2 cups of all purpose flour, and then remove 4 Tablespoons. Add 4 Tablespoons of cornstarch.
- You can use store-bought marshmallow fluff to fill the cakes.
Looking for more recipes like this? Here are a few you may like: Ding Dongs, Funnel Cakes, Triple Chocolate Pop Tarts, S’mores Cookies

Expert Tips
- The cake flour NEEDS to be sifted.
- When making the cake batter, be sure the batter is smooth! You don’t want any lumps.
- You may need to cut the bottoms of the cakes after baking and cooling. This helps them lay flat!
- Be careful when cracking the eggs and separating the yolk from the white. If there is any yolk in the whites, they won’t whip!
- The egg whites for the filling need to be whipped to about stiff peaks. Turn off the mixer and make the syrup. Once the syrup is at temperature, turn the mixer on high and slowly stream the syrup in.
- Do NOT stir the syrup once the sugar is dissolved.
- Keep a bowl of water and pastry brush nearby. You will need to brush the sides of the pan down to keep the sugar from crystalizing.
- Beat the meringue until it’s completely cool. This takes about 5-10 minutes. You can feel the temperature of your mixing bowl to gage if the meringue is cool.
- If you don’t have a piping bag, you can use a zip top plastic bag to pipe in the filling.
- Your Twinkie should be quite heavy when properly filled! Be careful about adding too much filling. If you add too much meringue, it will spill out!
- If you don’t have a piping tip, use a skewer or a knife to poke three holes in the middle of each cake. Then, snip the end off a zip top or piping bag and carefully fill each cake.
When you make these Homemade Twinkies, leave a comment down below! We love hearing from you and answering any questions you might have! Also, be sure to tag us on social media and hashtag it #BakersTable.
Homemade Twinkies
Ingredients
Cake
- 2 cups cake flour, sifted
- 1⅛ cups granulated sugar
- 2 teaspoons baking powder
- 1 teaspoon salt
- 6 large eggs, room temperature
- ½ cup whole milk
- ⅔ cup vegetable oil
- 1 Tablespoon vanilla extract
Filling
- 2 large egg whites, room temperature
- ⅔ cup granulated sugar
- 2⅔ Tablespoons water
Instructions
Cake
- Heat oven to 350°F/177℃.
- Spray cake pans with baking spray. Set aside.
- In a large bowl, combine flour, sugar, baking powder, and salt. Set aside.
- In a medium bowl, whisk together eggs, milk, oil, and vanilla.
- Pour over dry ingredients.
- Whisk until smooth.
- Spoon into prepared pan, filling each cavity ⅔ full.
- Bake for 15-20 minutes, or until done.
Filling
- With an electric mixer fitted with a whisk attachment, beat egg whites to stiff peaks.
- In a small saucepan, combine sugar and water.
- Heat over medium low heat, stirring constantly, until sugar is melted.
- Raise heat to medium.
- Continue to cook until sugar reaches 246℉-250° F/119℃-121℃.
- With mixer running, slowly stream hot syrup into egg whites.
- Beat until cool.
Assembly
- Fit a piping bag with a #10 round tip.
- Spoon meringue into a piping bag.
- Turn cooled cakes over.
- Pipe filling into the bottom of each cake, in the middle and on both ends.
Notes + Tips!
- If you don’t have cake flour, you can mix all purpose flour with cornstarch. Measure out 2 cups of all-purpose flour and then remove 4 Tablespoons, then add 4 Tablespoons of cornstarch.
- You can use store bought marshmallow fluff to fill the cakes.
- The cake flour NEEDS to be sifted.
- When making the cake batter, be sure the batter is smooth! You don’t want any lumps.
- You may need to cut the bottoms of the cakes after baking and cooling. This helps them lay flat!
- Be careful when cracking the eggs and separating the yolk from the white. If there is any yolk in the whites, they won’t whip!
- The egg whites for the filing need to be whipped to about stiff-peaks. Turn off the mixer and make your syrup. Once the syrup is at temperature, turn the mixer on high and slowly stream the syrup in.
- Do NOT stir the syrup once the sugar is dissolved.
- Keep a bowl of water and pastry brush nearby. You will need to brush the sides of the pan down to keep the sugar from crystalizing.
- Beat the meringue until it’s completely cool. This takes about 5-10 minutes. You can feel the temperature of your mixing bowl to gage if the meringue is cool.
- If you don’t have a piping bag, you can use a zip top plastic bag to pipe in the filling.
- Your Twinkie should be quite heavy when properly filled! Be careful about adding too much filling. If you add too much meringue, it will spill out!
- If you don’t have a piping tip, use a skewer or a knife to poke three holes evenly across the bottom of each cake; then, snip the end off a zip top bag or piping bag and carefully fill each cake.
Tools You May Need (affiliate links)
– Still Hungry? –
Here are a few recipes may like!


Have you ever made this as a layer cake?
Hi Tanya! While you can theoretically do this, we haven’t personally tested this. The recipe will need to be adjusted to accommodate making enough for a layer cake, but since we’ve never tried it, I couldn’t tell you what the measurements would be. If you decide to give it a go, be sure to let us know! If you’re looking for just a vanilla layer cake, I recommend checking out our classic vanilla cake! It is a regular cake and not a chiffon-style. If you’d like a more chiffon-esque cake, check out our Strawberry Shortcake Cake (which is a thoroughly tested layer cake recipe) and feel free to fill it with our homemade marshmallow filling. Hope this helps! Let us know if you decide to give it a try 😊 x, Cay.ie