Homemade Twix Bars
This post may contain affiliate links, please visit our privacy policy for details.
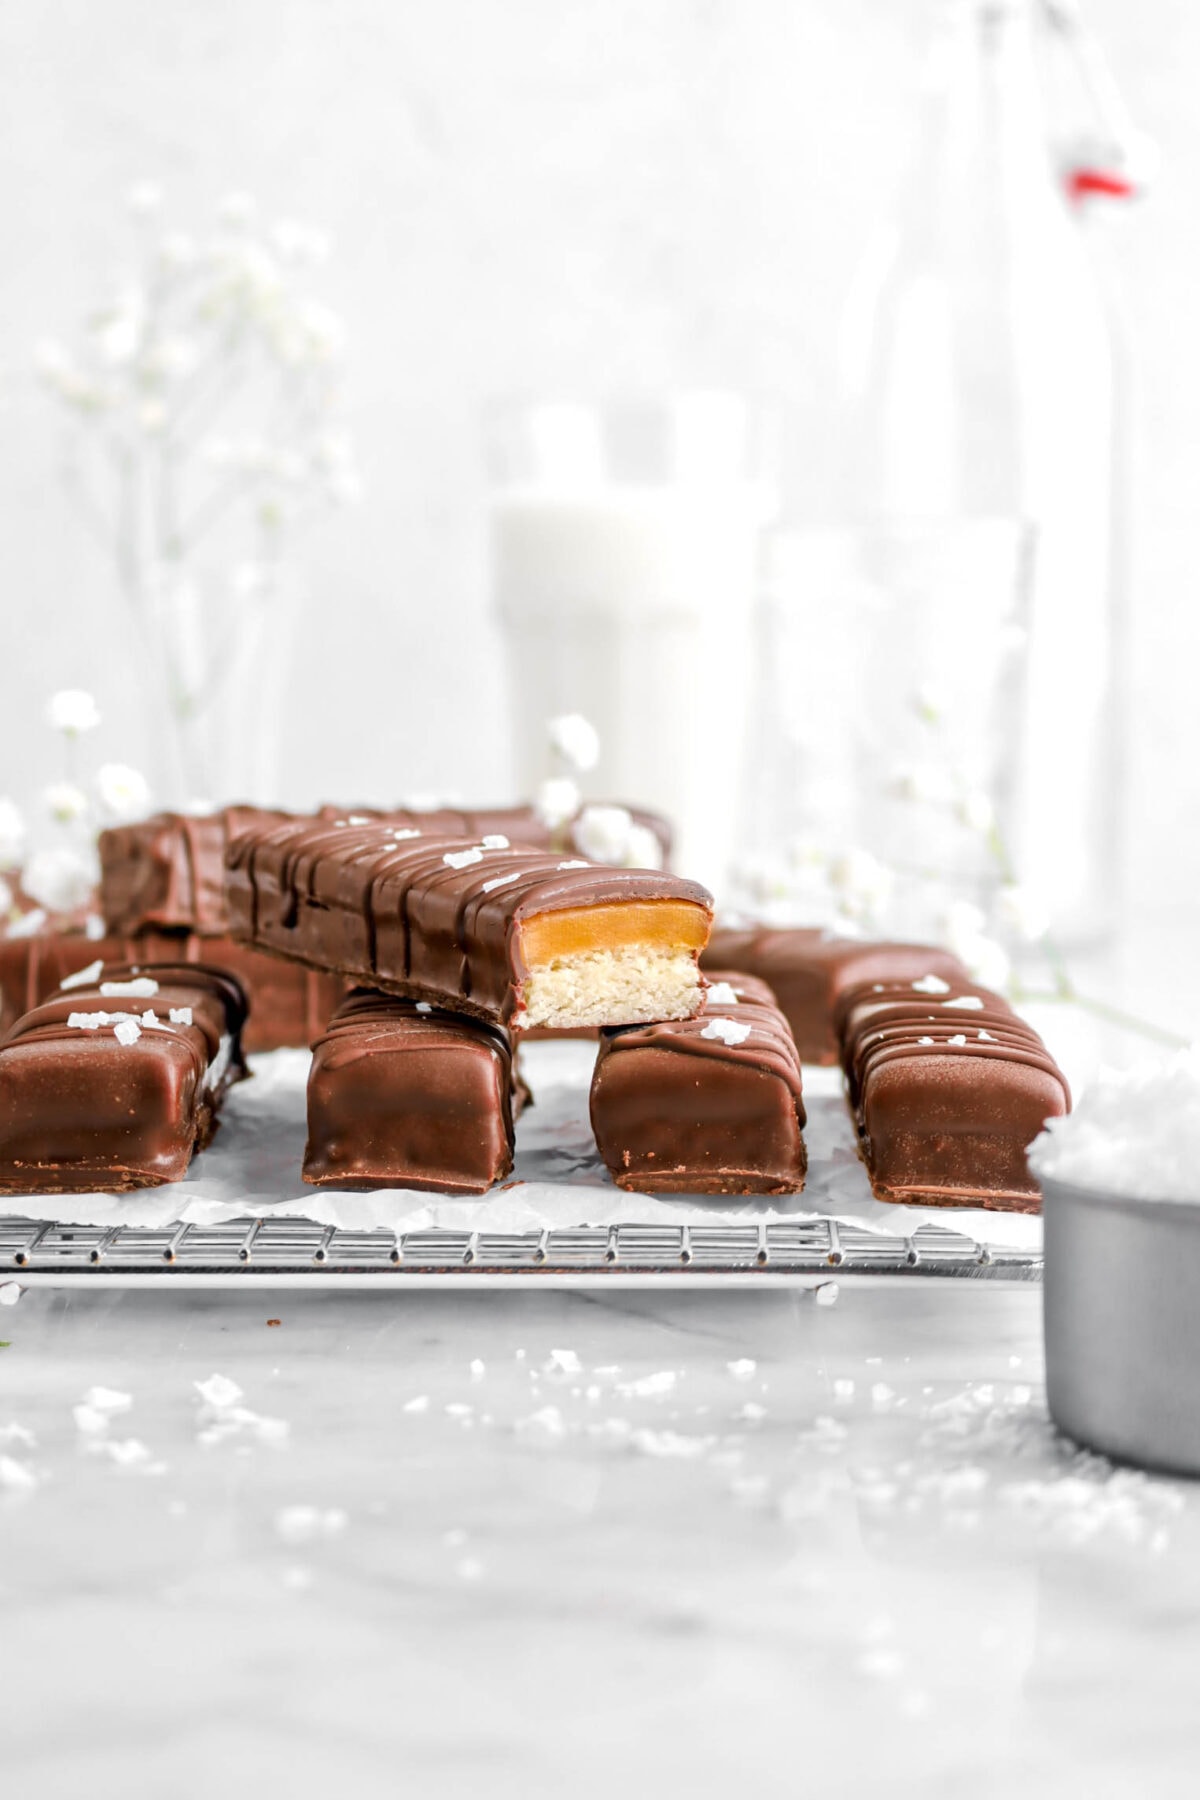
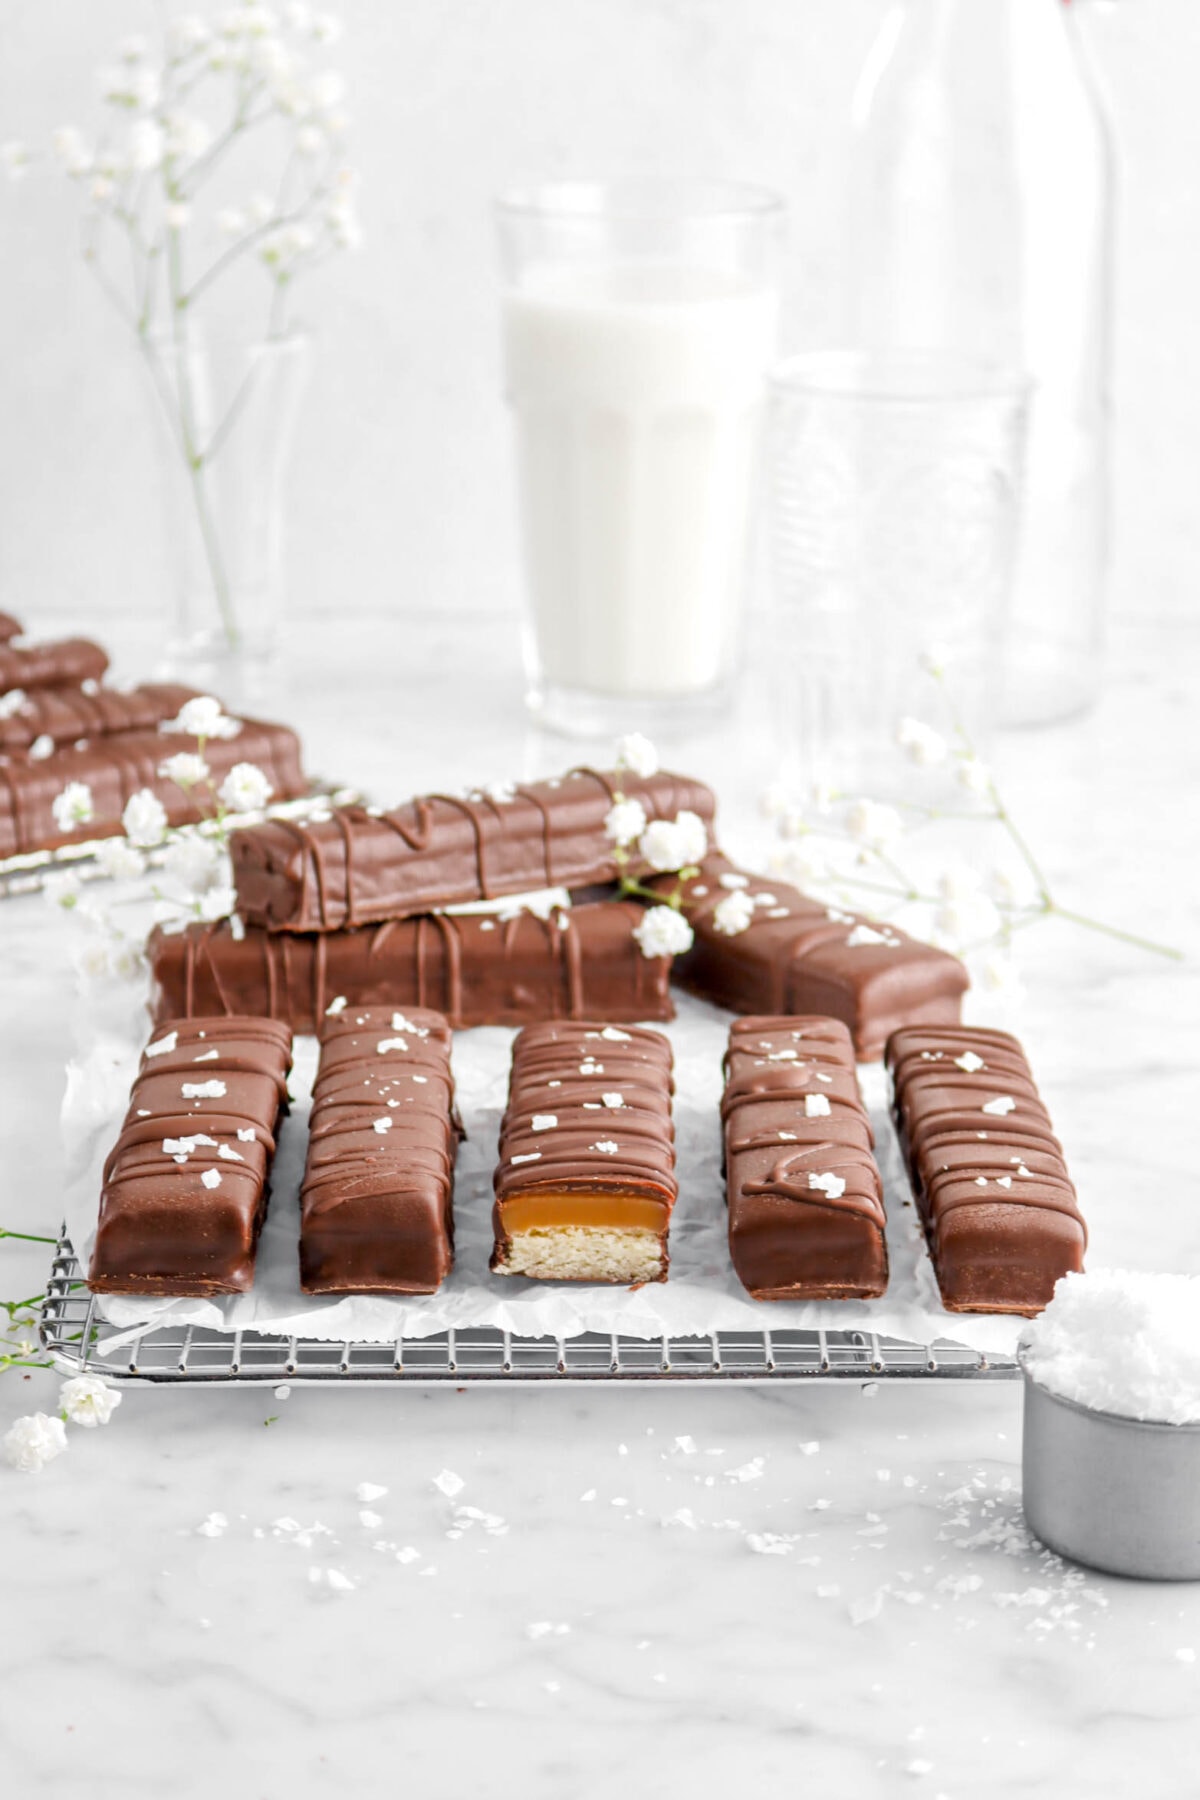
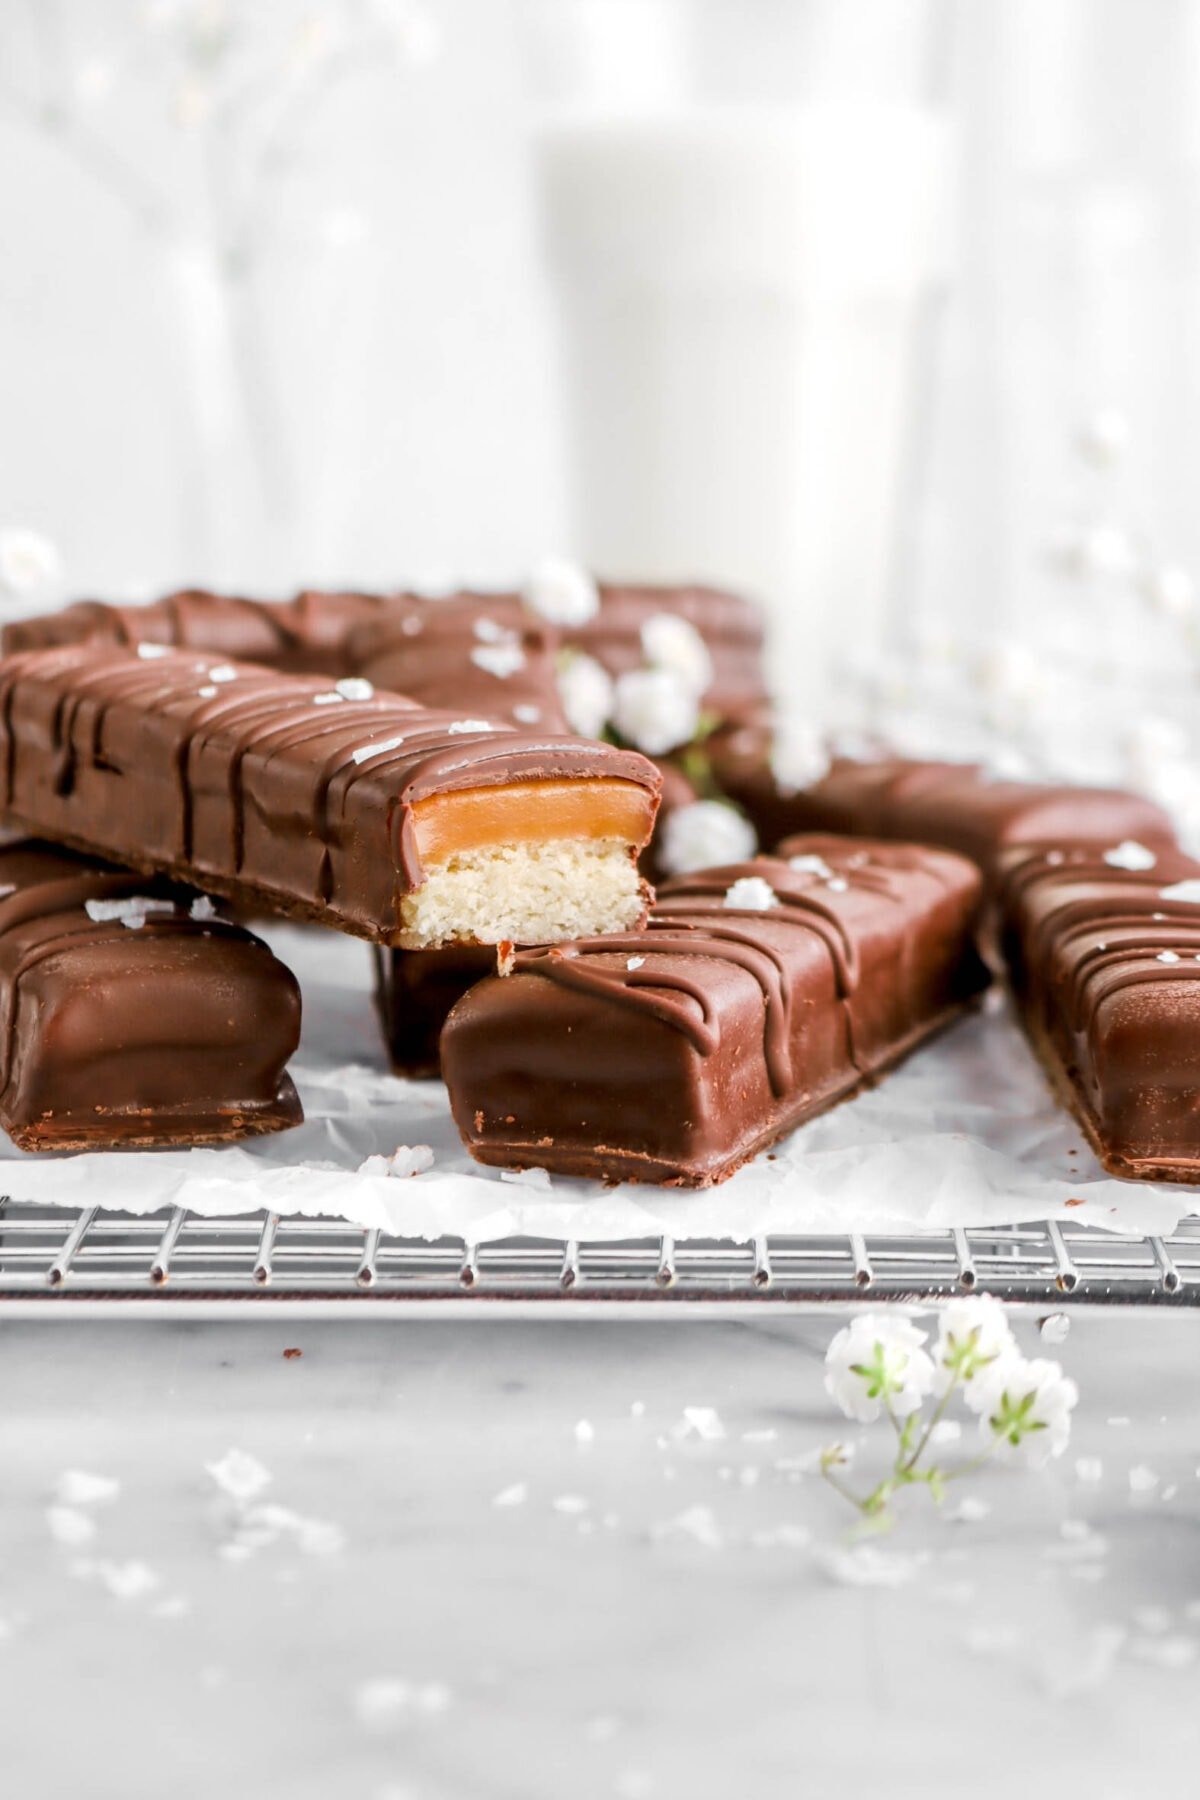
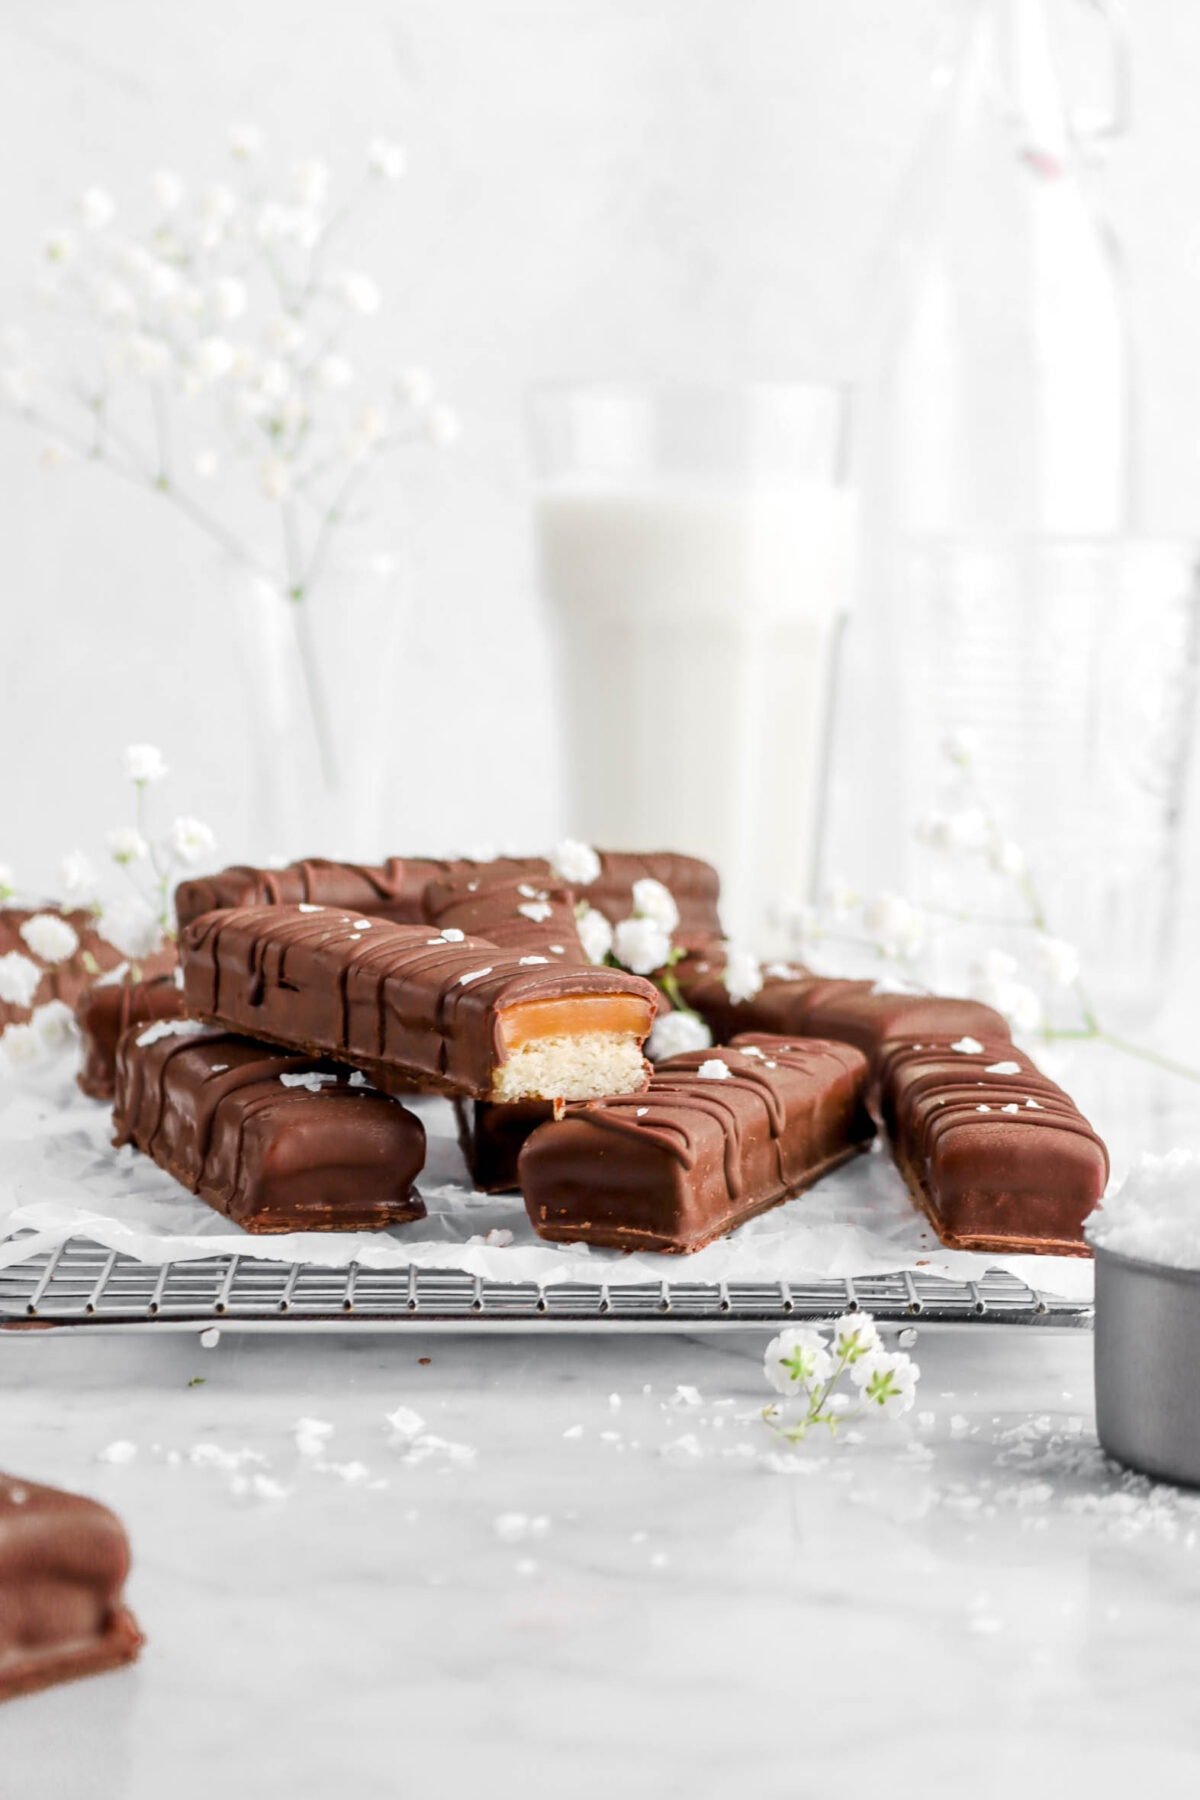
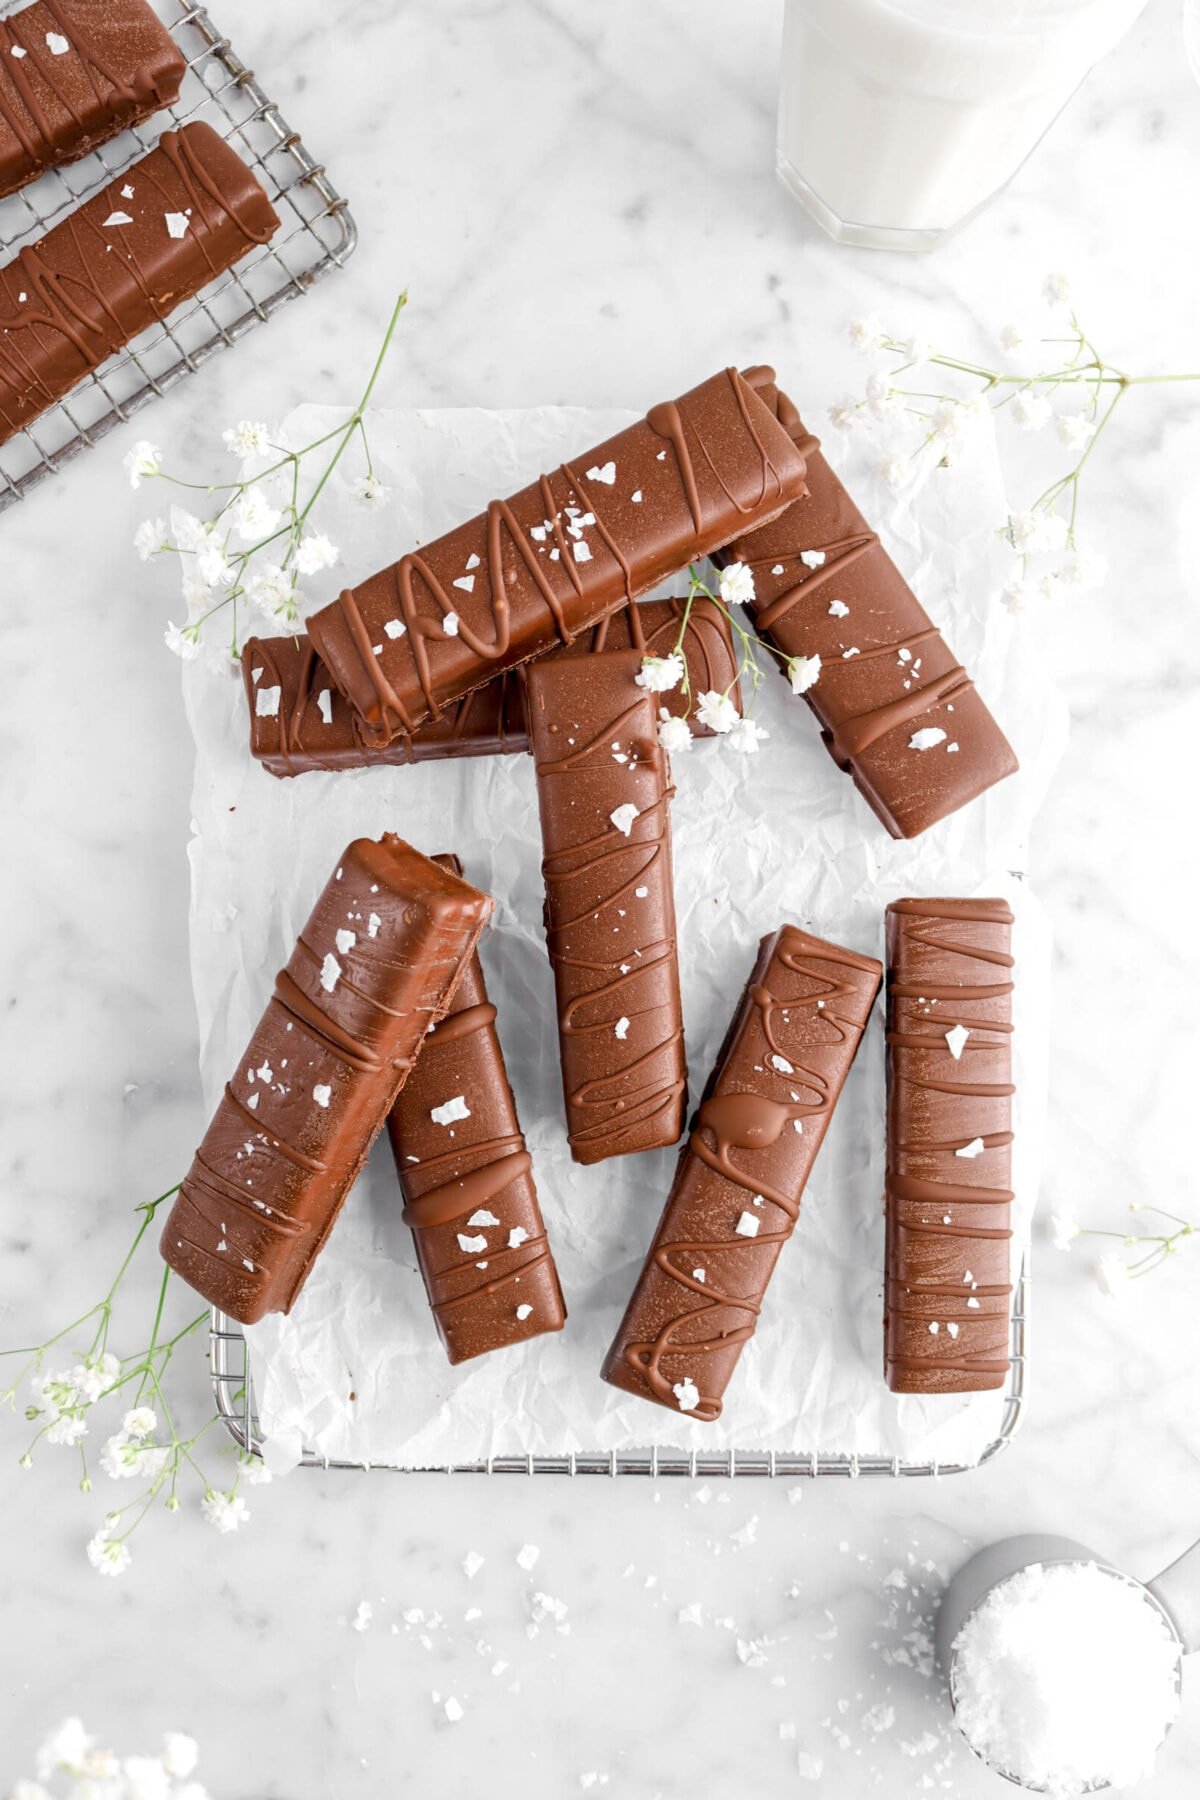
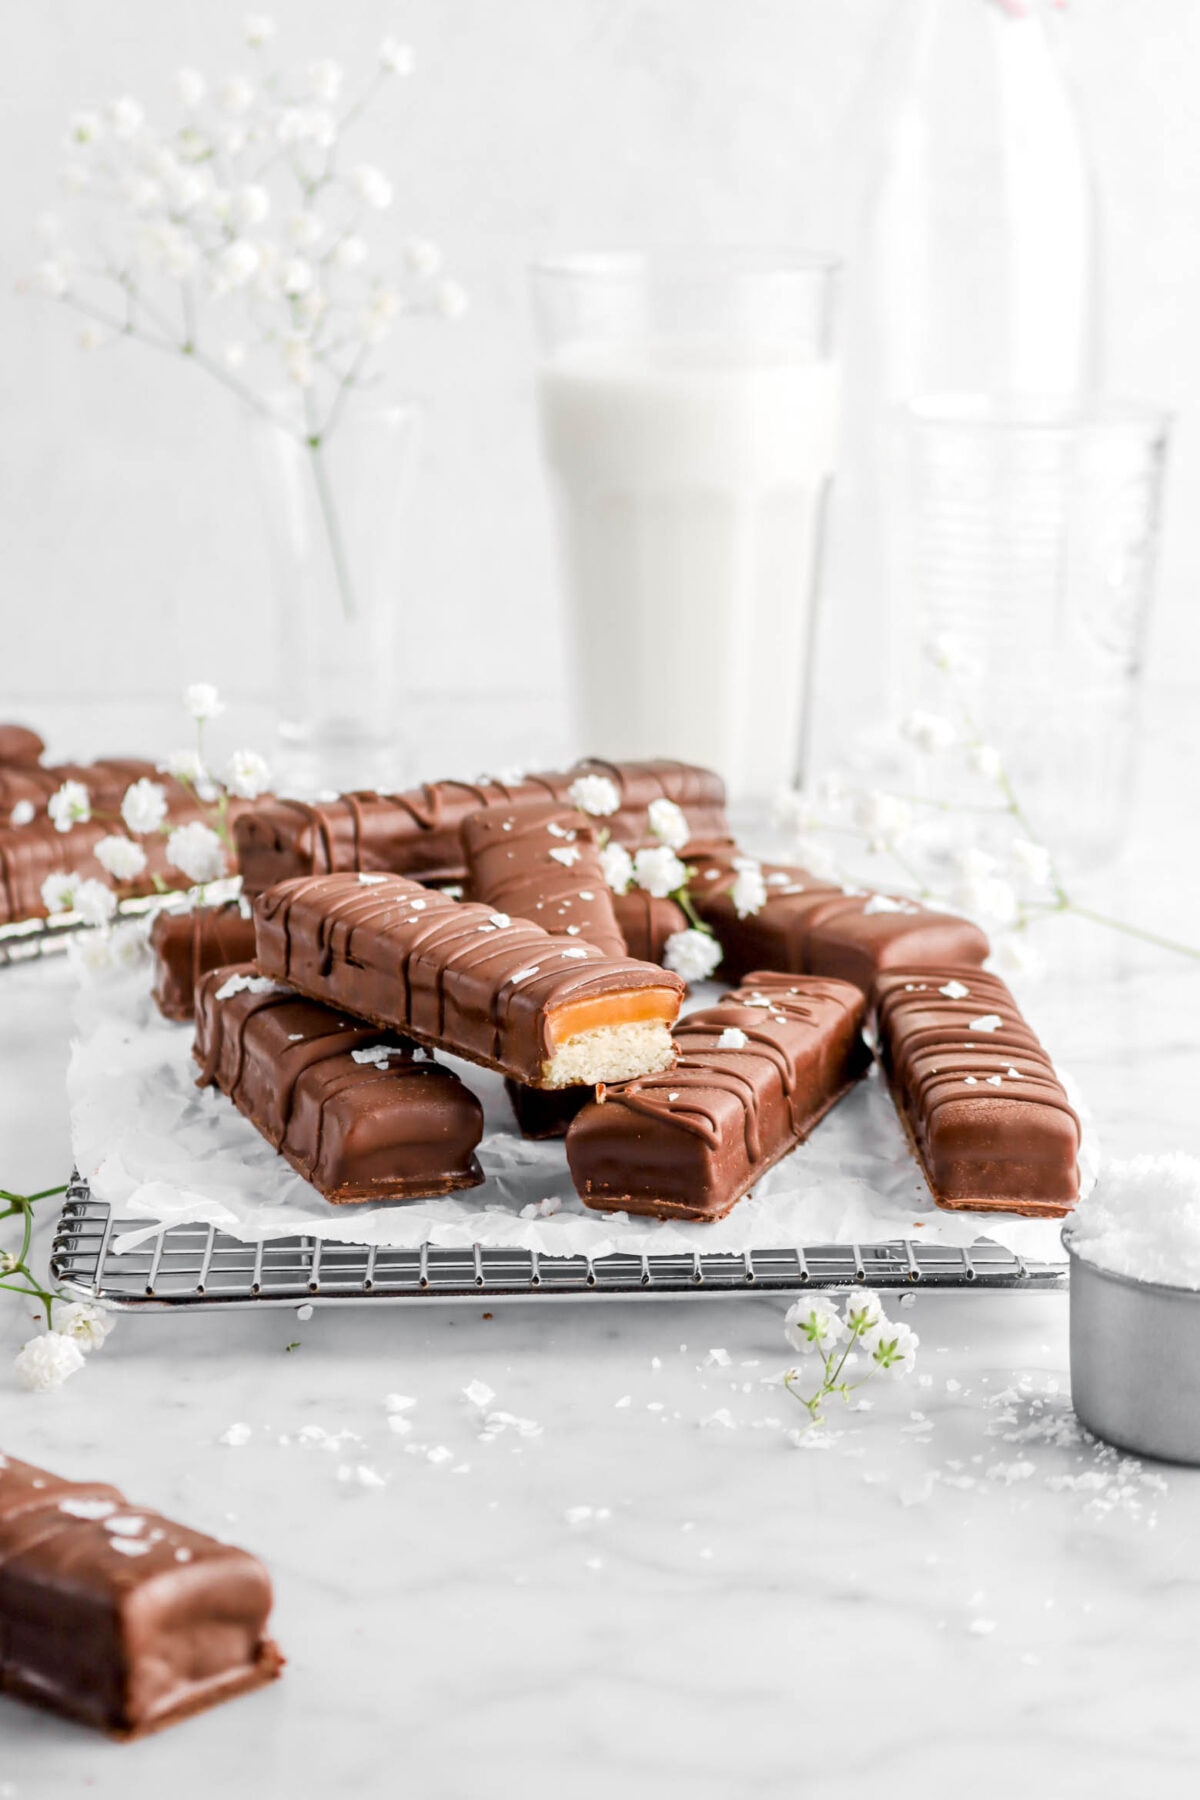
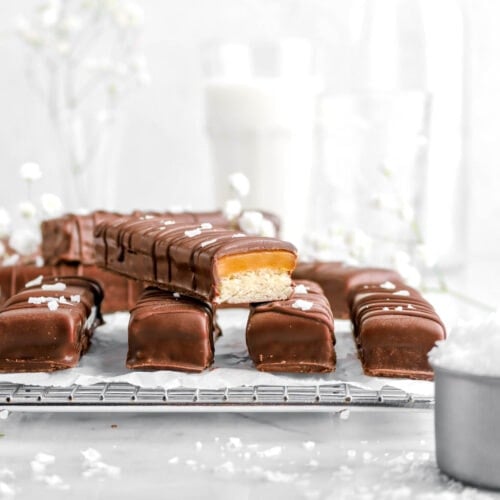
So much better than store-bought Homemade Twix Bars! Two decadent layers, coated with a shiny dark chocolate, and finished with flaked sea salt. It doesn’t get better than this! The inside contains a simple shortbread cookie that is crumbly, but oh so buttery. The real show stopper? The homemade soft caramel! Oh, yes. A simple salted caramel sauce that never hardens and remains gooey, delicious, and perfect to eat. Every bite of these Twix bars is chewy, with a little bit of crunch, sweet but not too sweet, buttery, extra caramel-y and chocolate-y, and just absolutely DELICIOUS! There is nothing better than a homemade childhood favorite candy bar. The best part? These Twix bars are actually easier to make than you might think, taste 10x better than the store-bought versions, and make a great gift/treat any time of year! These sweet candies are really SO GOOD!
About The Recipe
Friday’s are made for sweets and who doesn’t love a good twix bar? I mean, it’s a buttery shortbread cookie with caramel and just coated with the perfect amount of chocolate. There’s just something so simple, but compelling about this candy bar…especially when they’re homemade!

We are FINALLY back with another homemade candy bar and I couldn’t be more excited. After posting our Homemade Snickers Bars last year, we knew we wanted to share yet another childhood favorite treat.
So, the moment you all have been waiting for…Homemade Twix Bars! Which, are actually waaay easier to make than you might think. All they really are is a shortbread cookie (easy + yummy), soft caramel (not too hard if you follow our directions!), and then coated in bittersweet chocolate (YUM!).
It couldn’t get better than this and, after a bit of a rough week here, there doesn’t seem like there’s a better time to enjoy some comforting childhood treats.
When my mom was first writing and developing this recipe, we discussed doing it a few different ways, but ultimately, we decided to keep things classic and as straight forward as possible! And, even though making a homemade caramel can seem intimidating, I promise it’s actually not all that difficult. The important thing is being able to work quickly and having a good thermometer.
On the plus side, a homemade caramel not only provides a better flavor in these bars, but it also makes these that much more special. Truly the perfect gift to give during any time of the year or just whenever you want a candy bar!
Reasons You Will Love These Twix Bars
- Can be made with dark chocolate or milk chocolate.
- The shortbread is SUPER simple to make!
- Uses minimal specialty equipment to try and keep this recipe simple and achievable.
- The homemade caramel remains soft inside the bar. Perfectly gooey!
- Makes for the perfect gift or homemade treat.
- Tastes SO MUCH better than store-bought!
Ingredients
(Full ingredient amounts and instructions can be found in the recipe card at the bottom of the post)
For The Cookie:
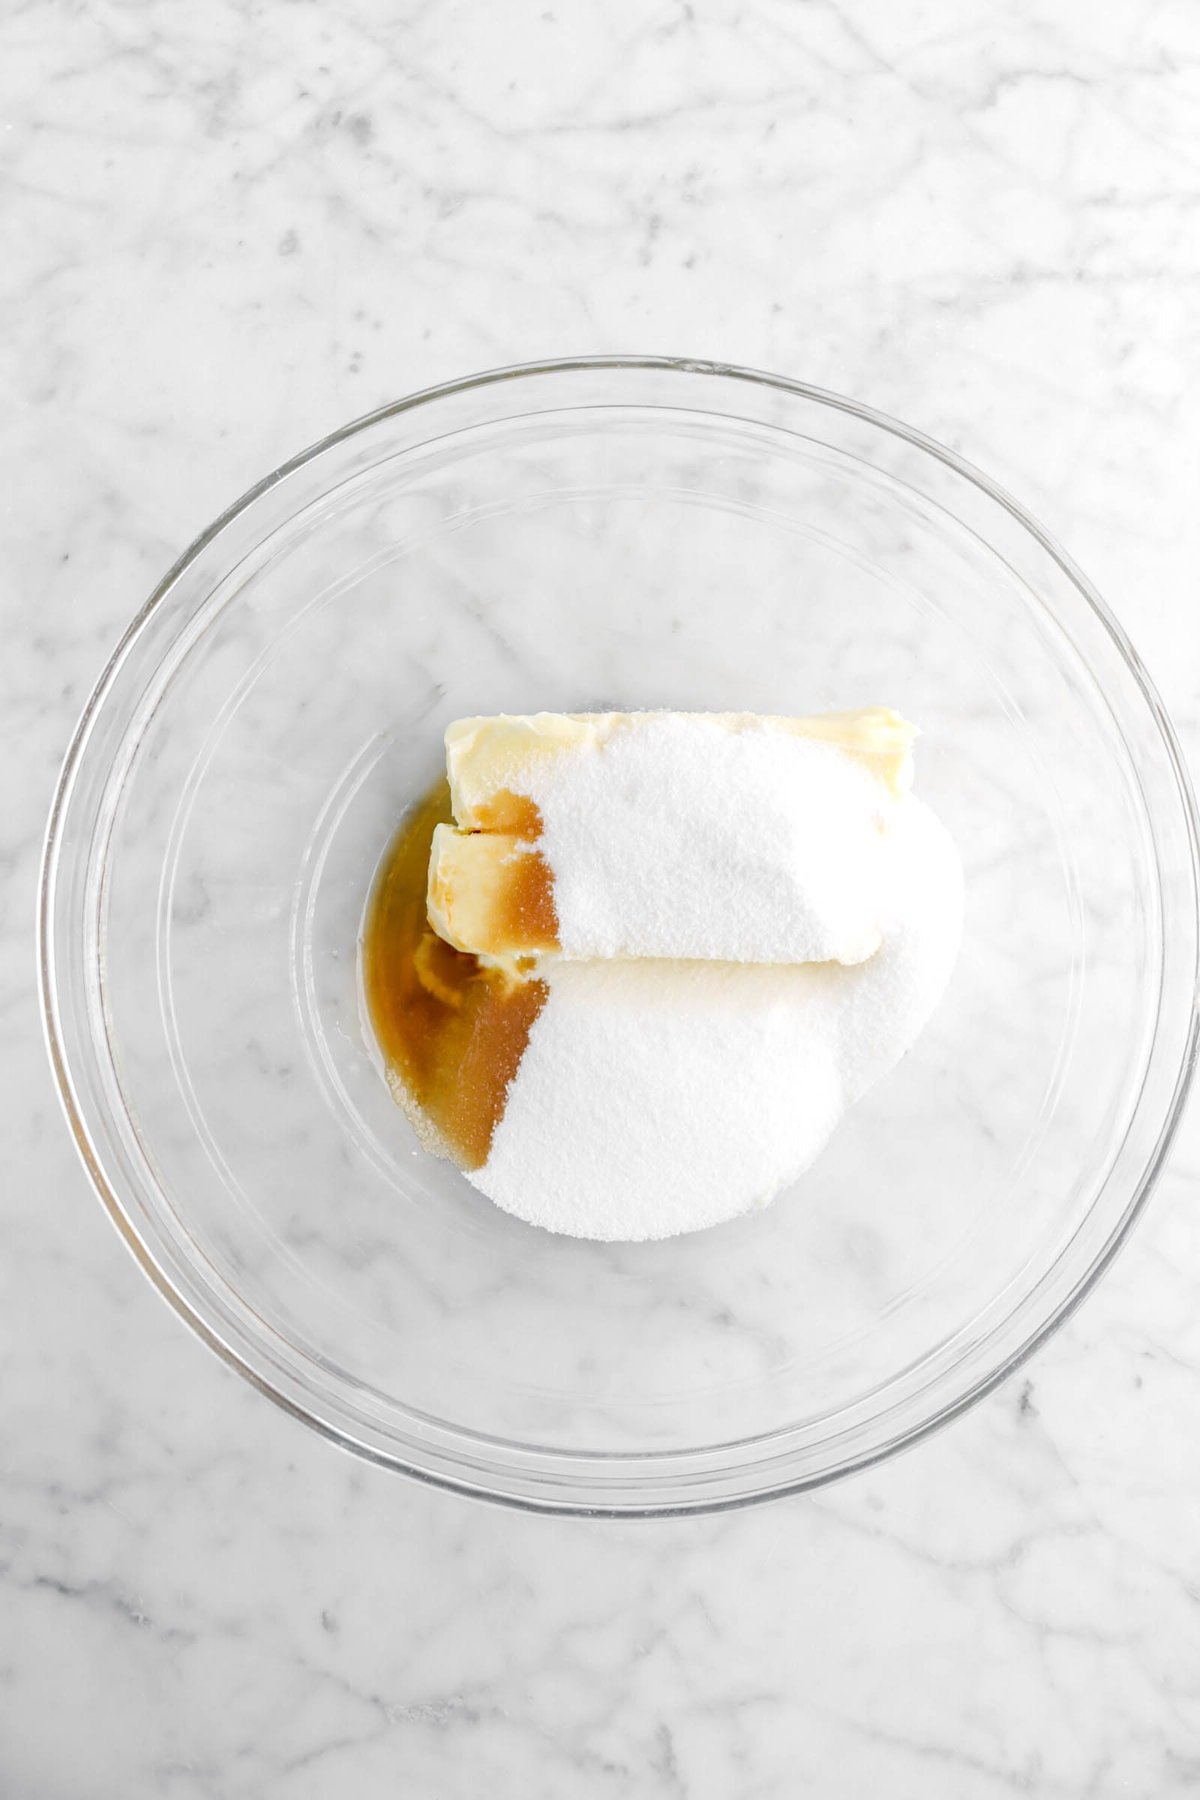
- Salted Butter
- Granulated Sugar
- Vanilla Extract
- All-Purpose Flour

For The Caramel:
- Granulated Sugar
- Corn Syrup
- Heavy Cream
- Salted Butter
- Vanilla Extract

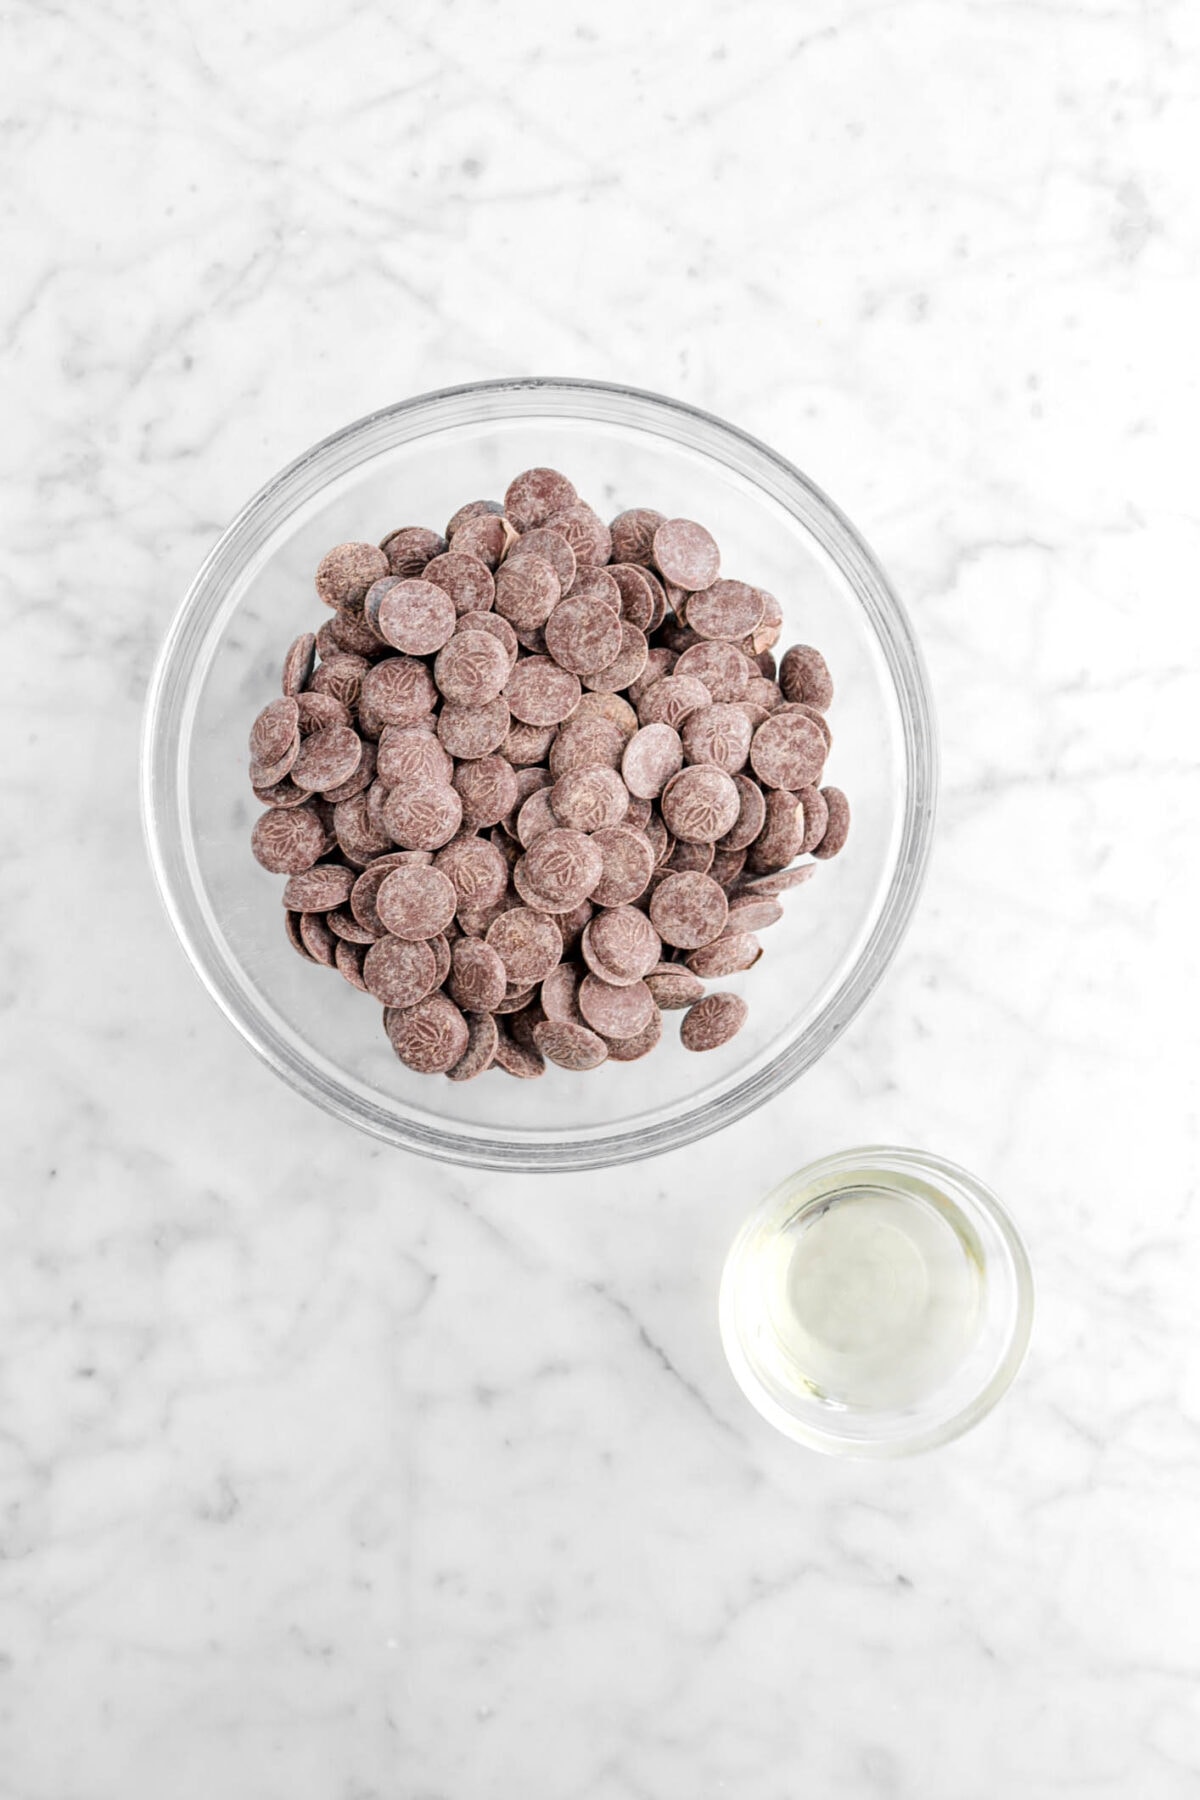
For The Chocolate Coating:
- Dark Chocolate
- Vegetable Oil
How To Make Homemade Twix Bars
Step 1: Make the shortbread and bake
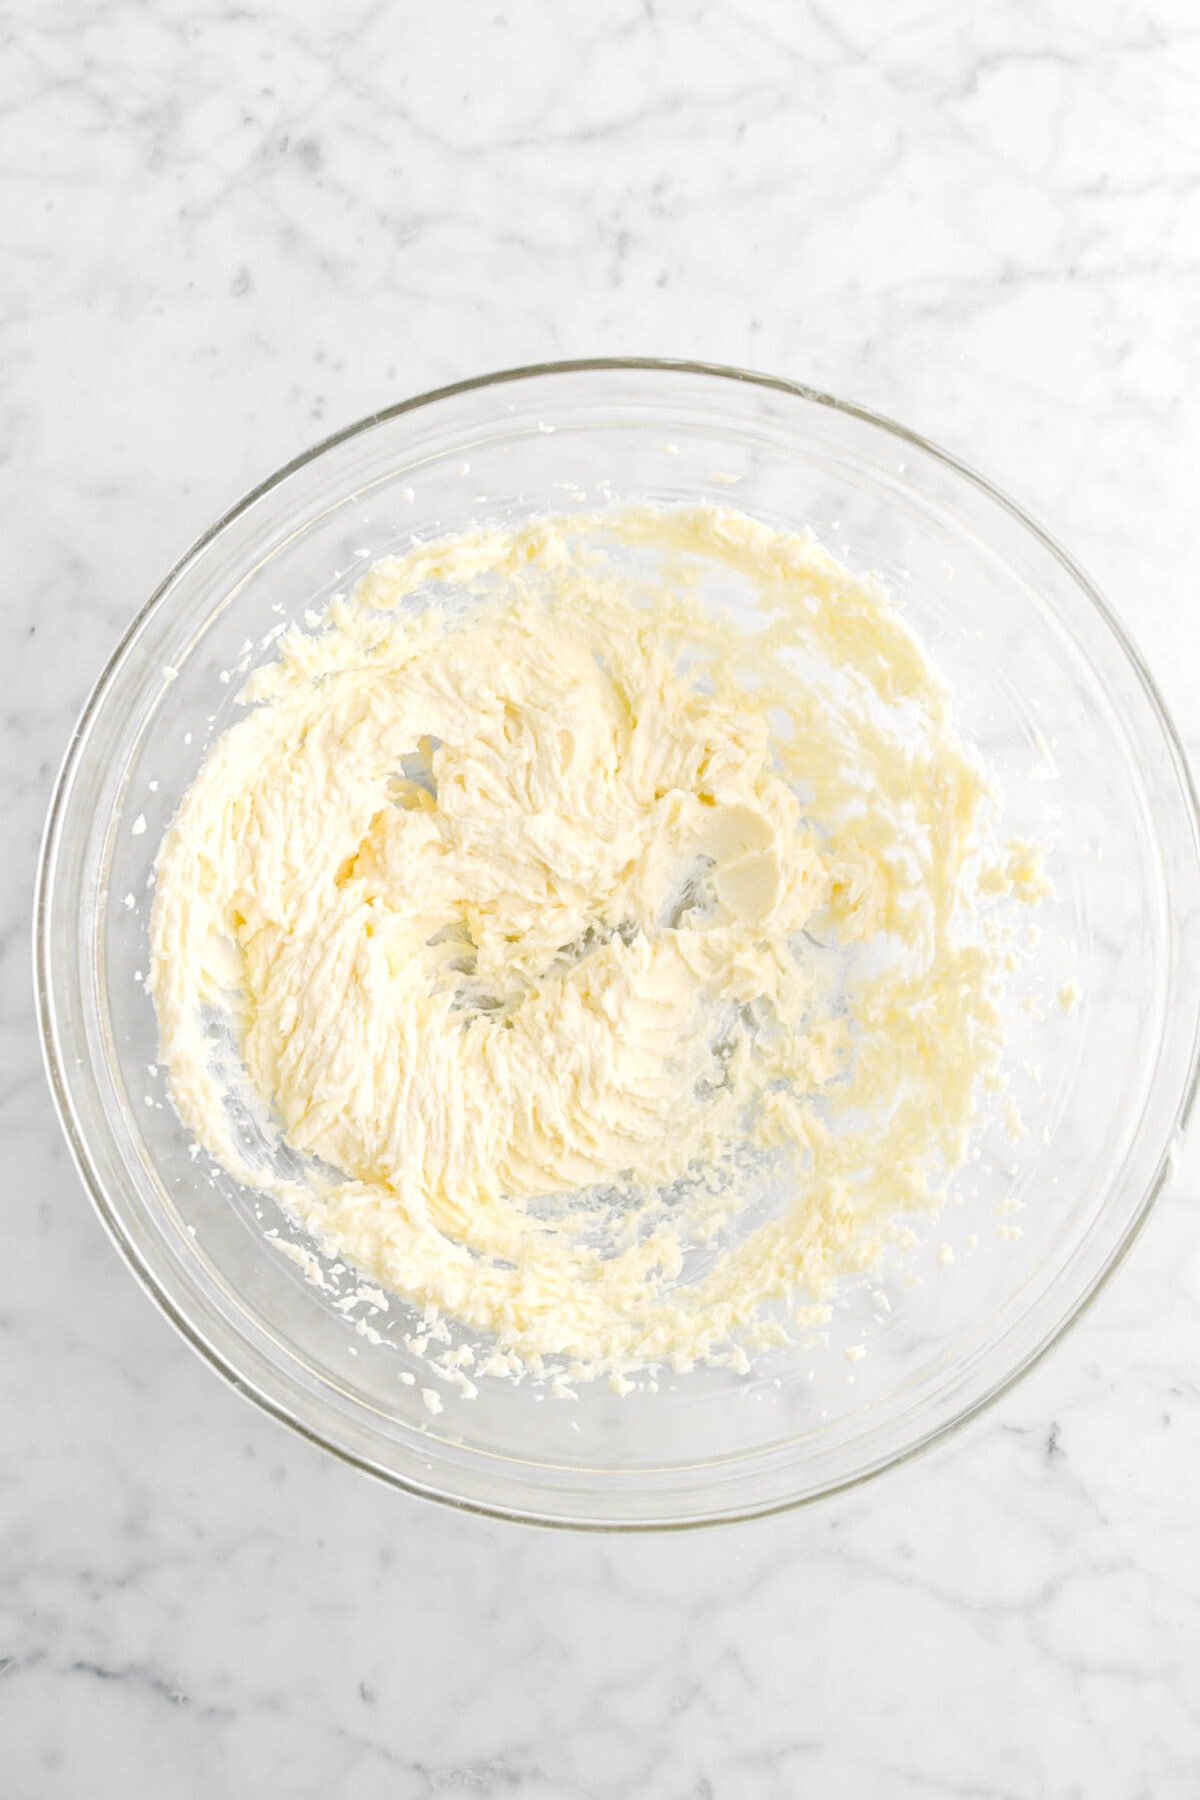
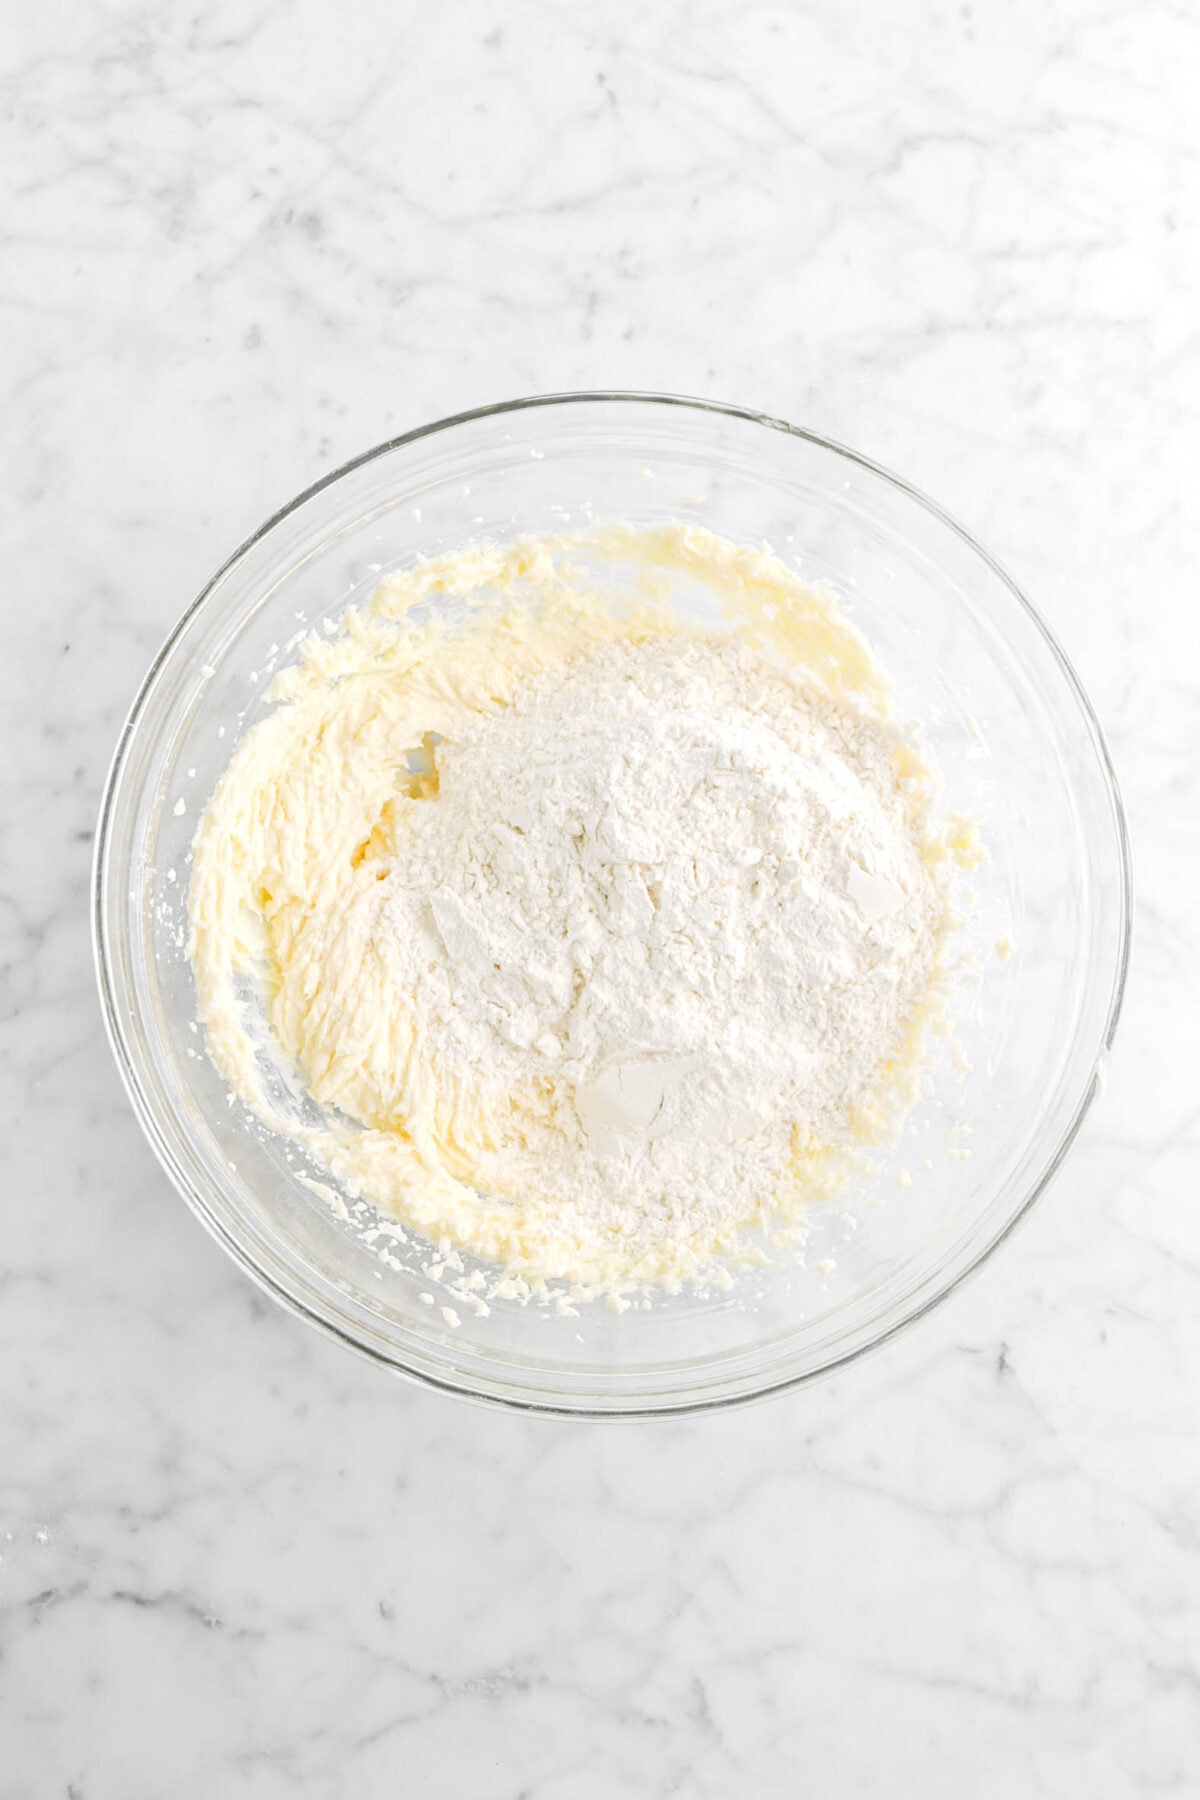
Beat butter, sugar, and vanilla with an electric mixer until light and fluffy, about 2-3 minutes.
Stir in the flour.
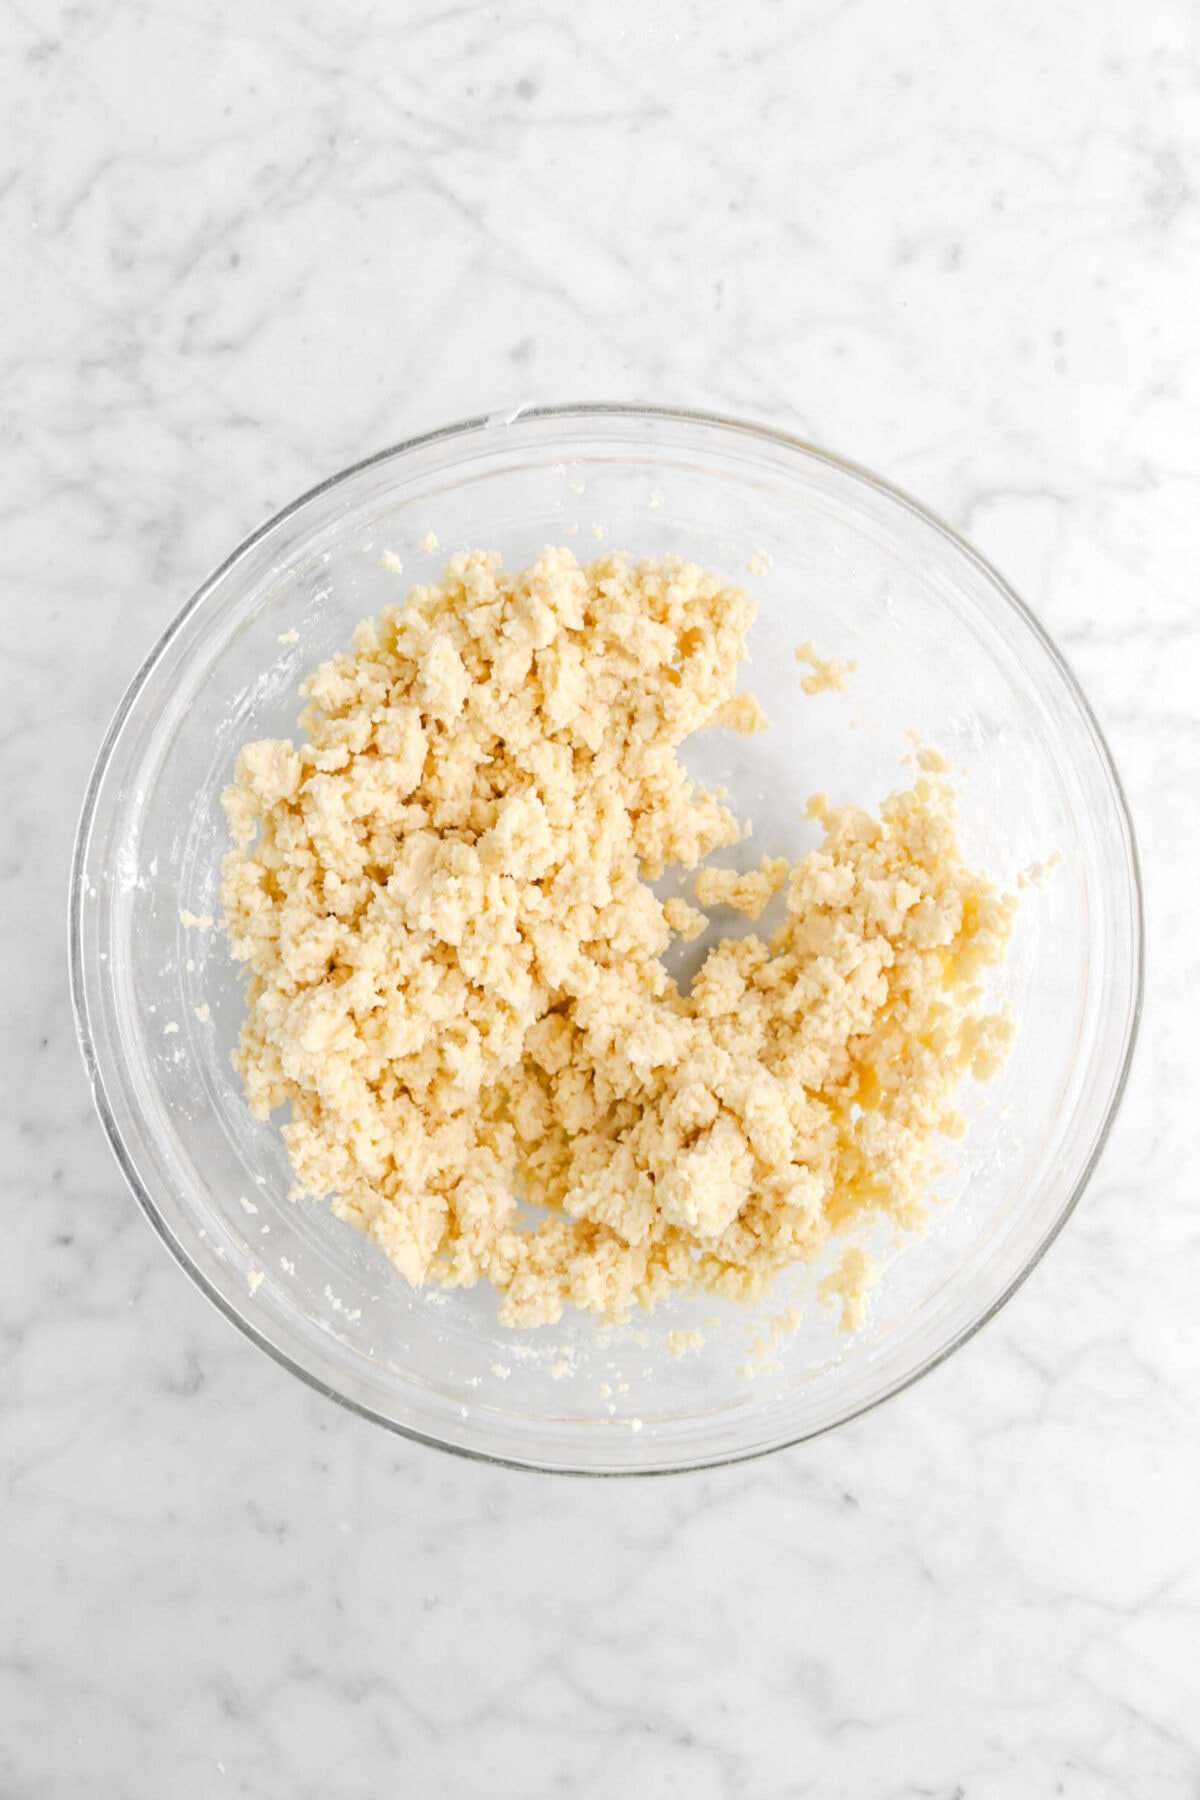
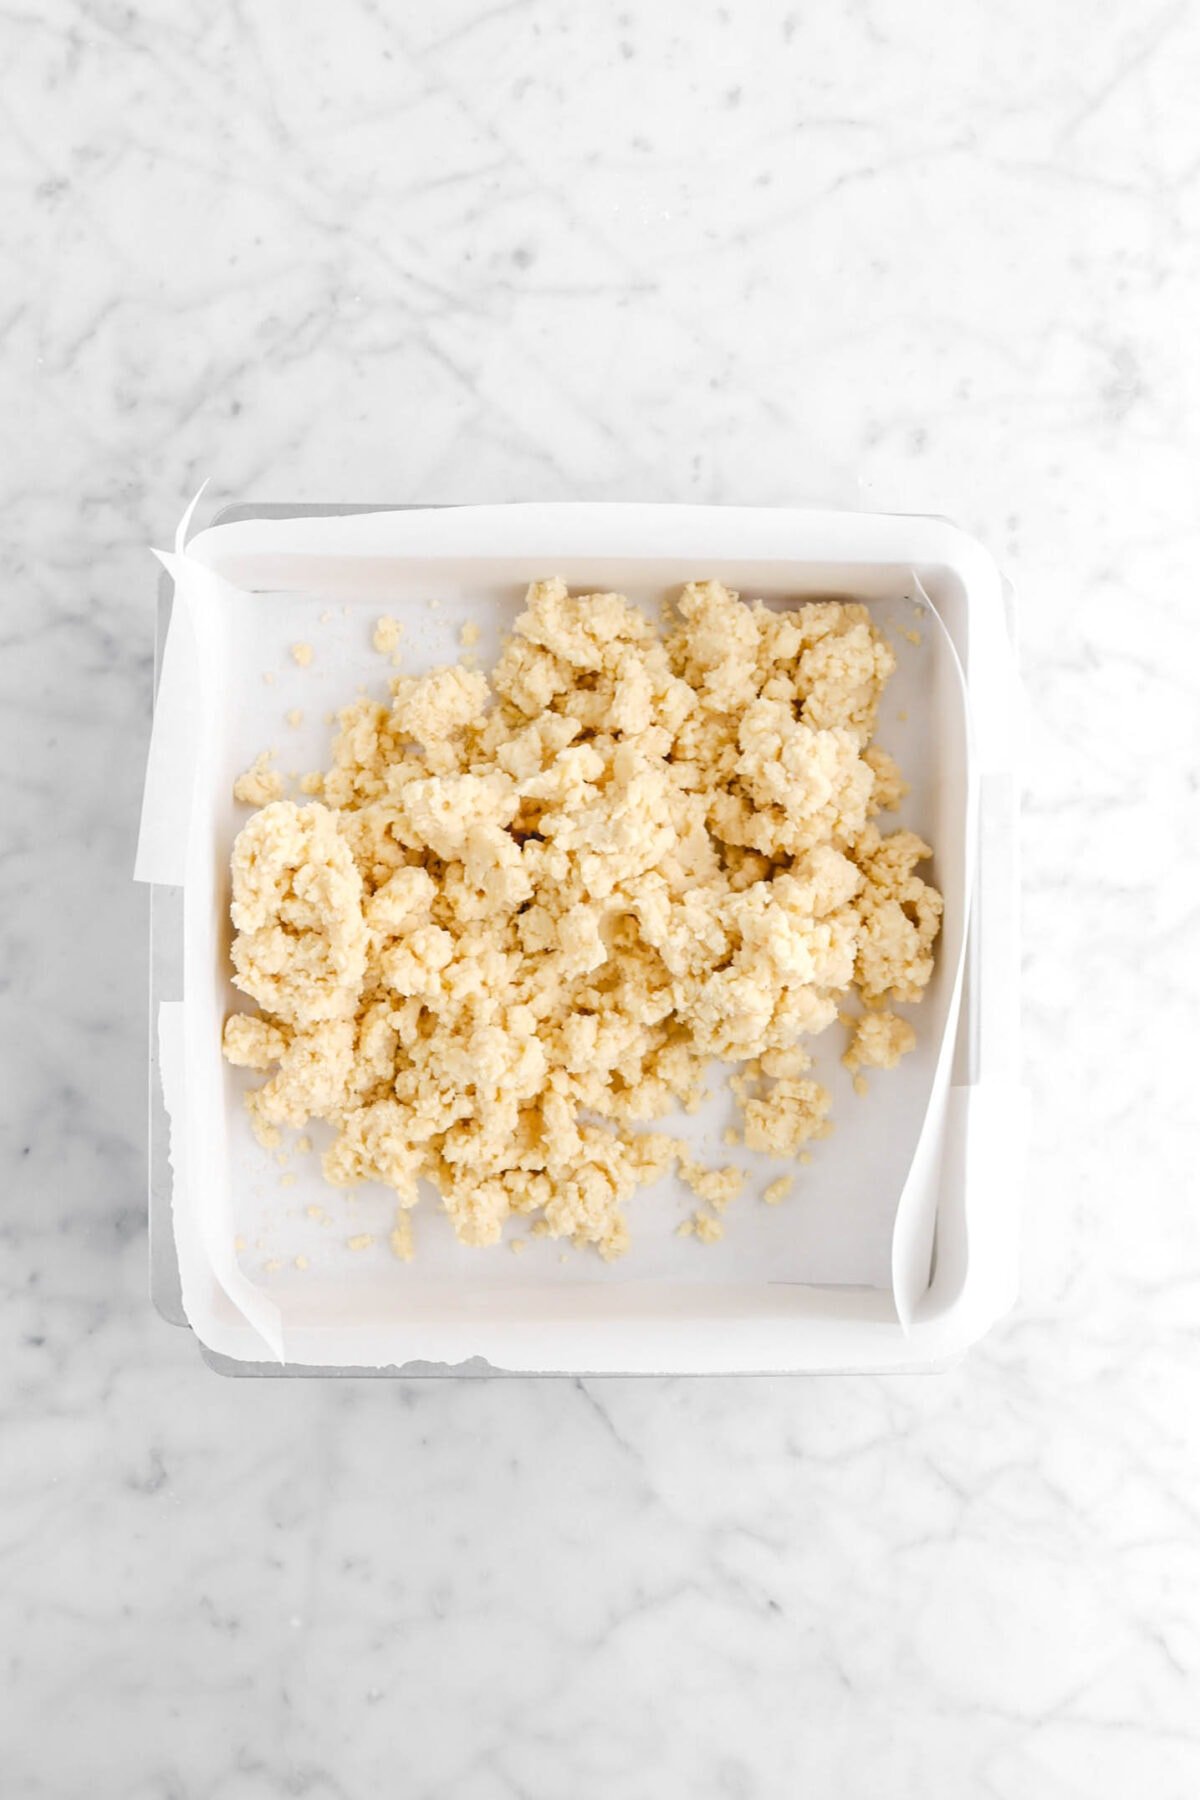
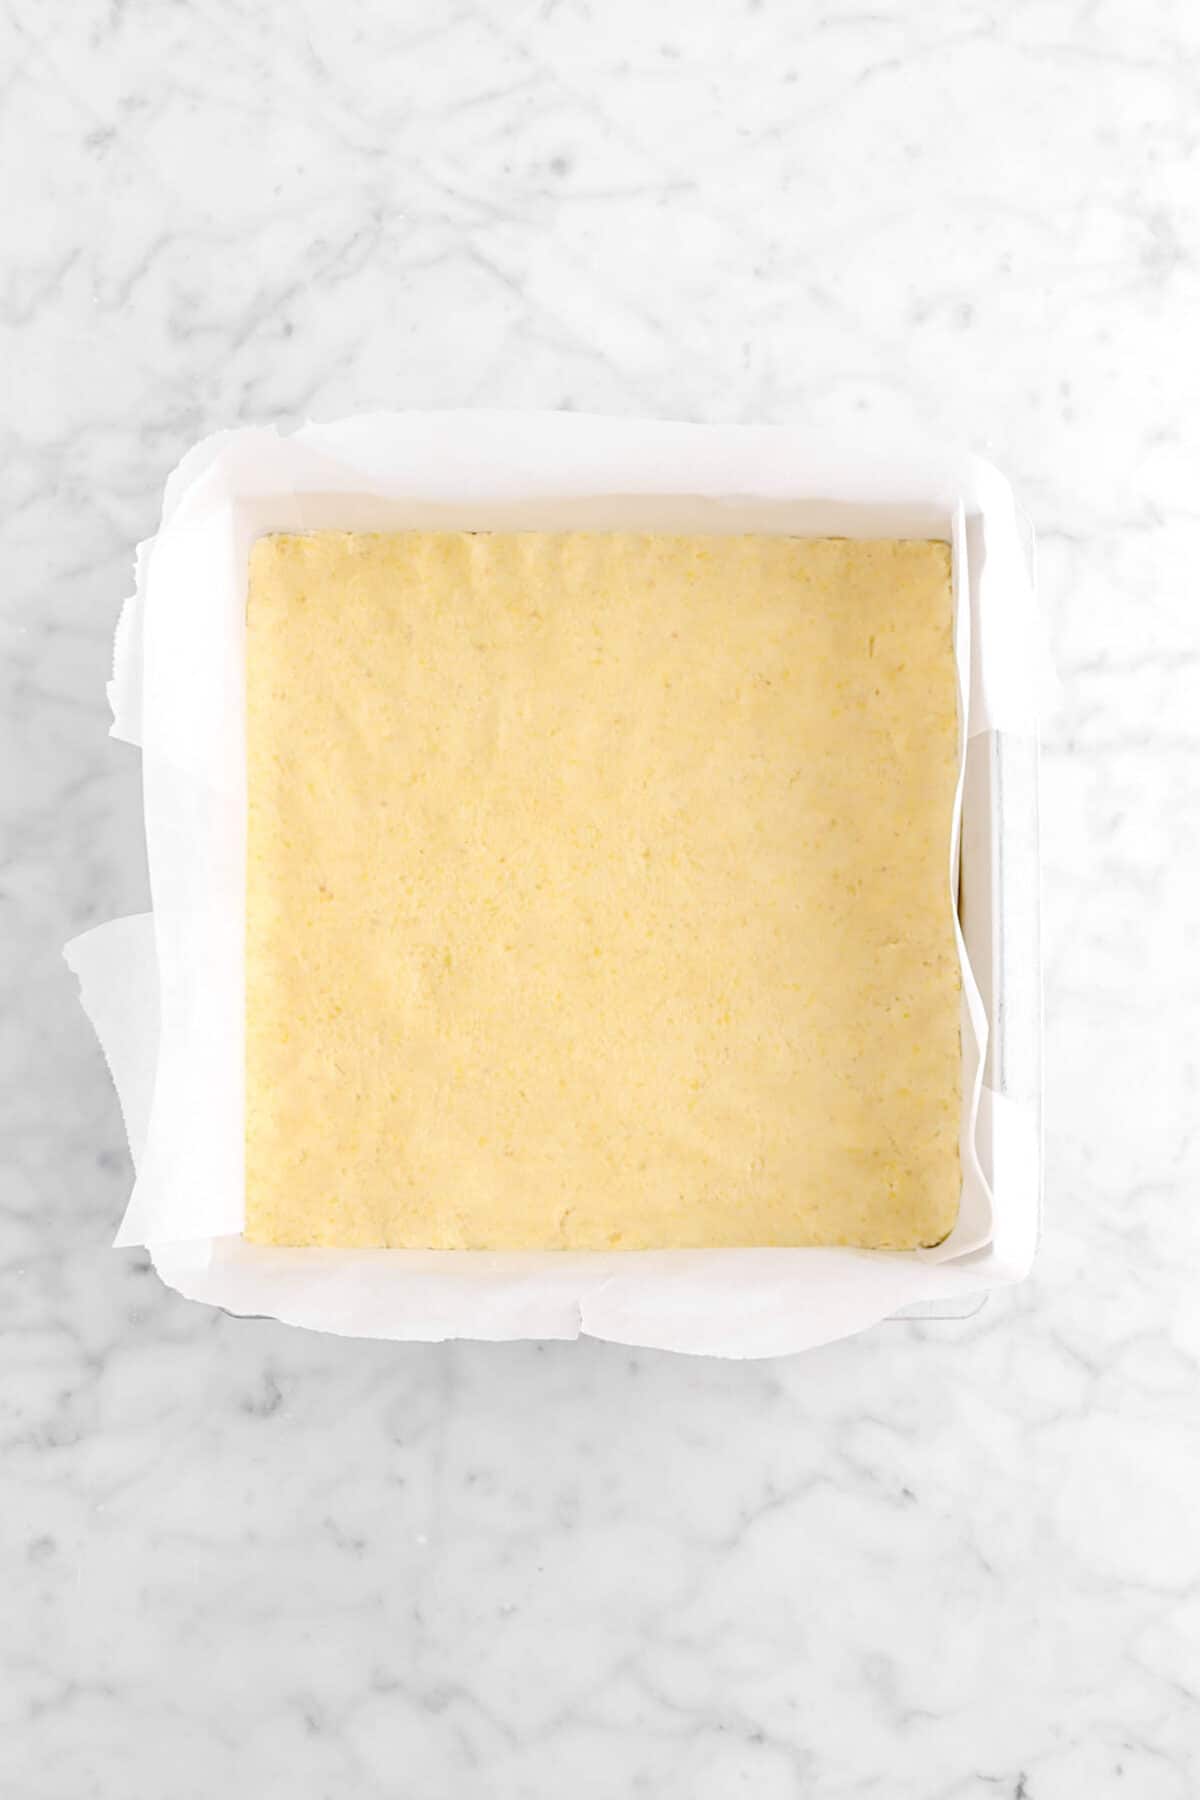
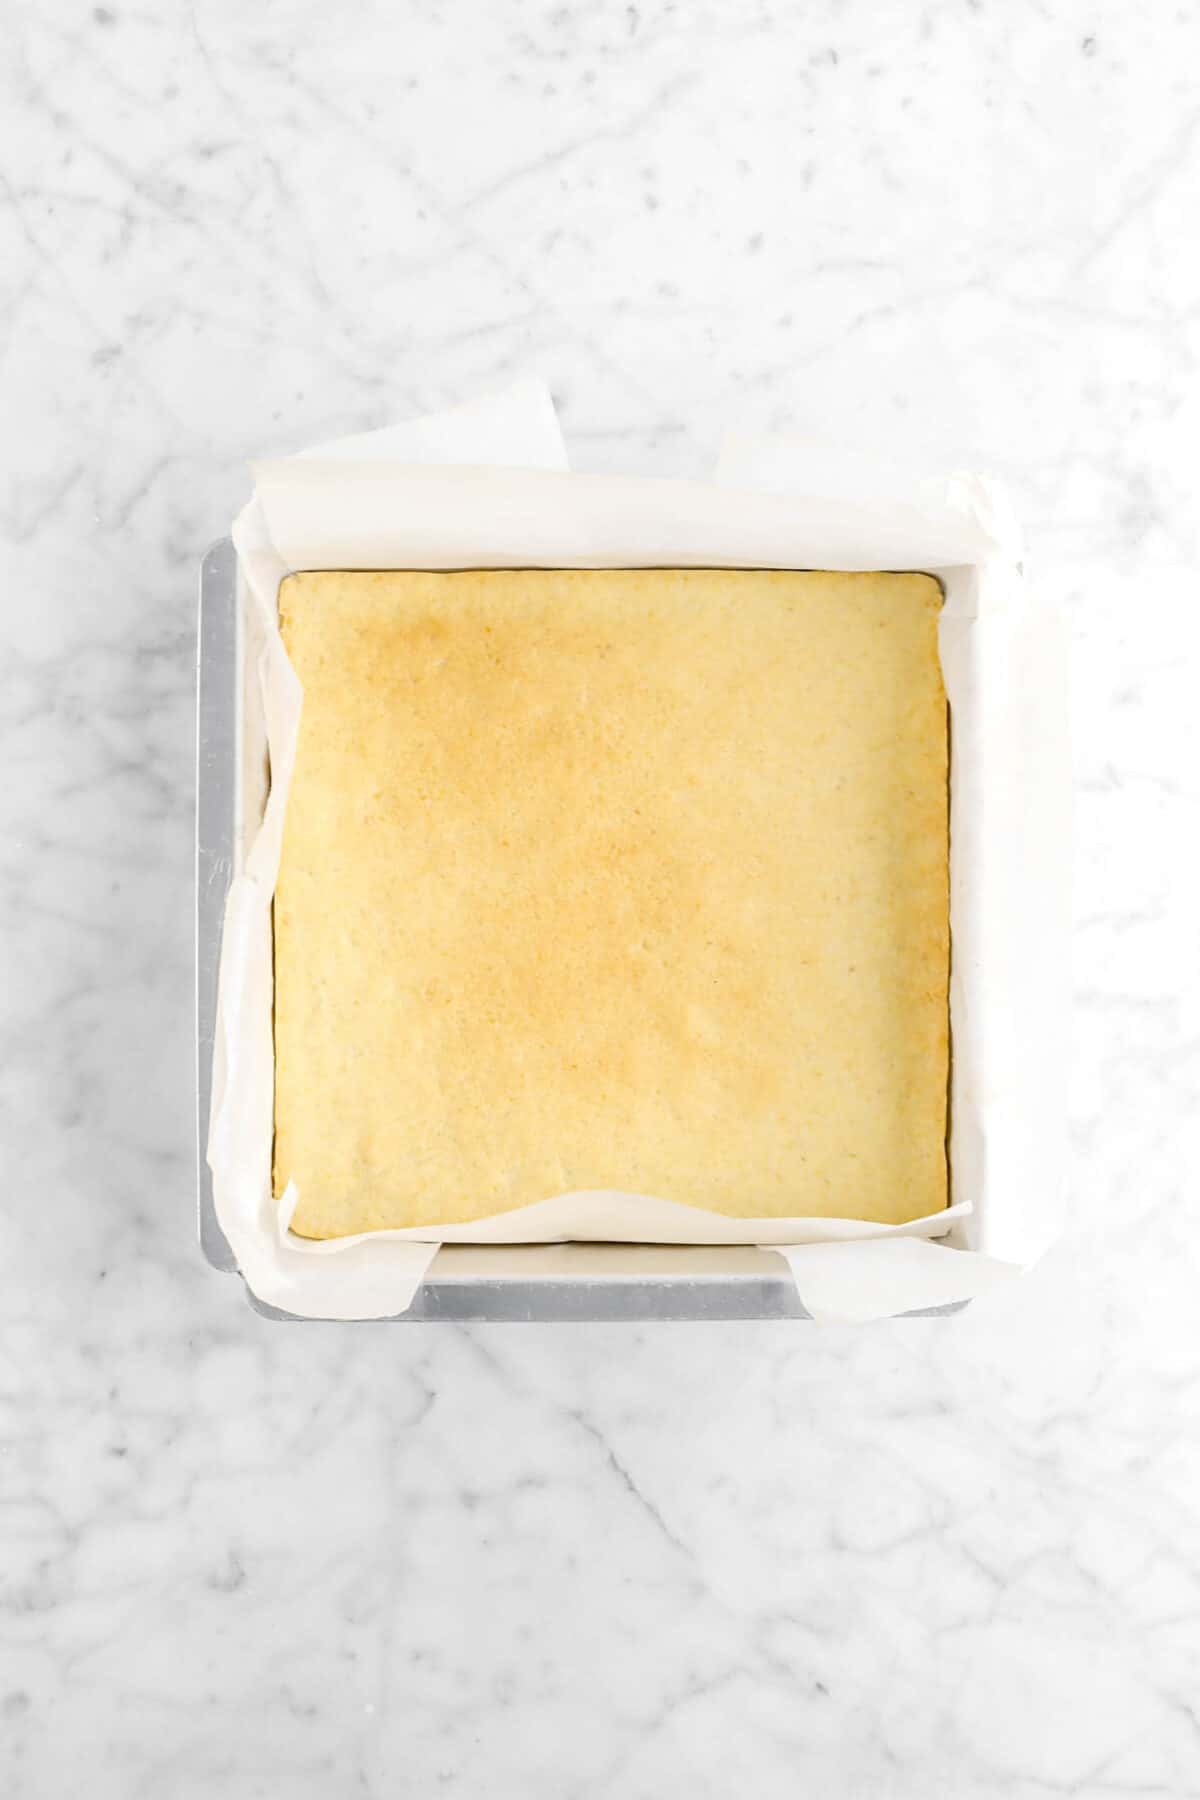
Turn dough into lined pan and press down evenly. Bake for 20 minutes, or until just starting to color.
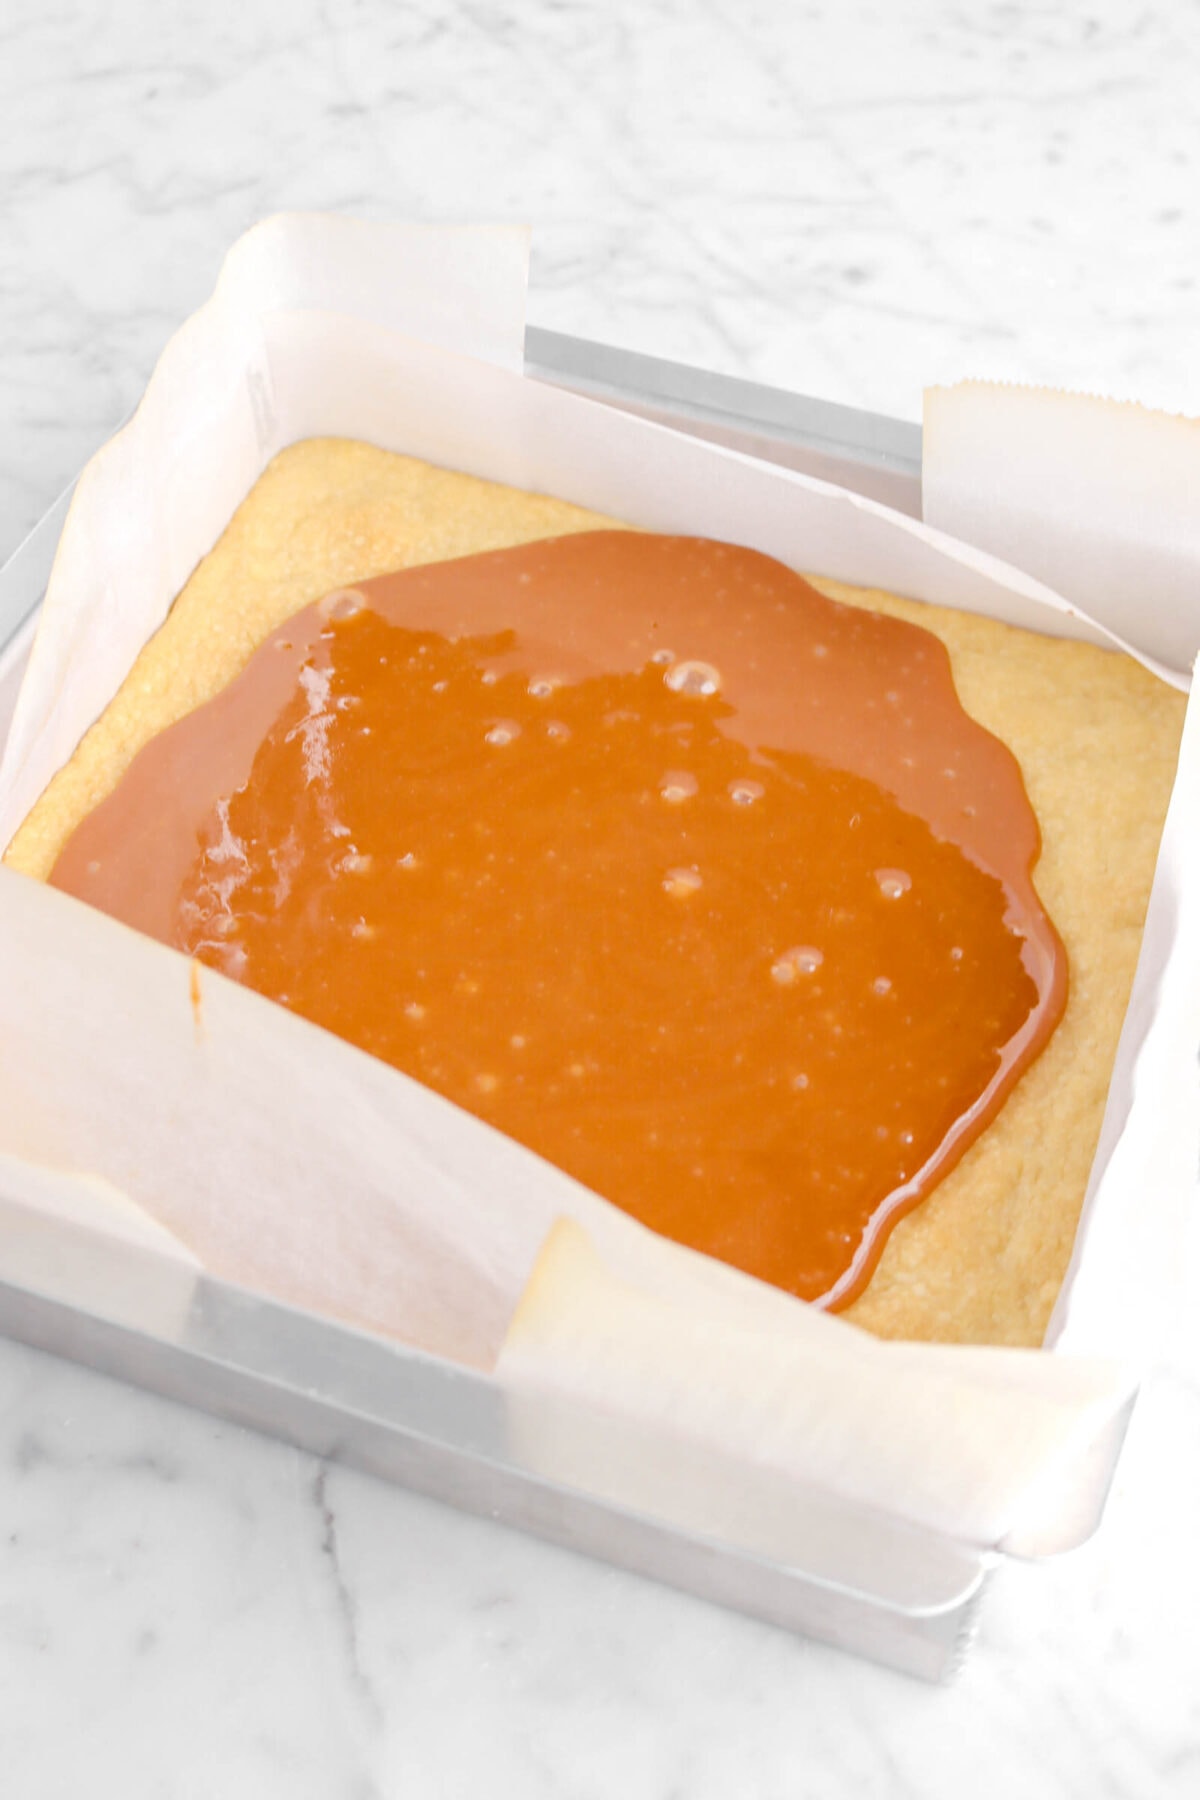
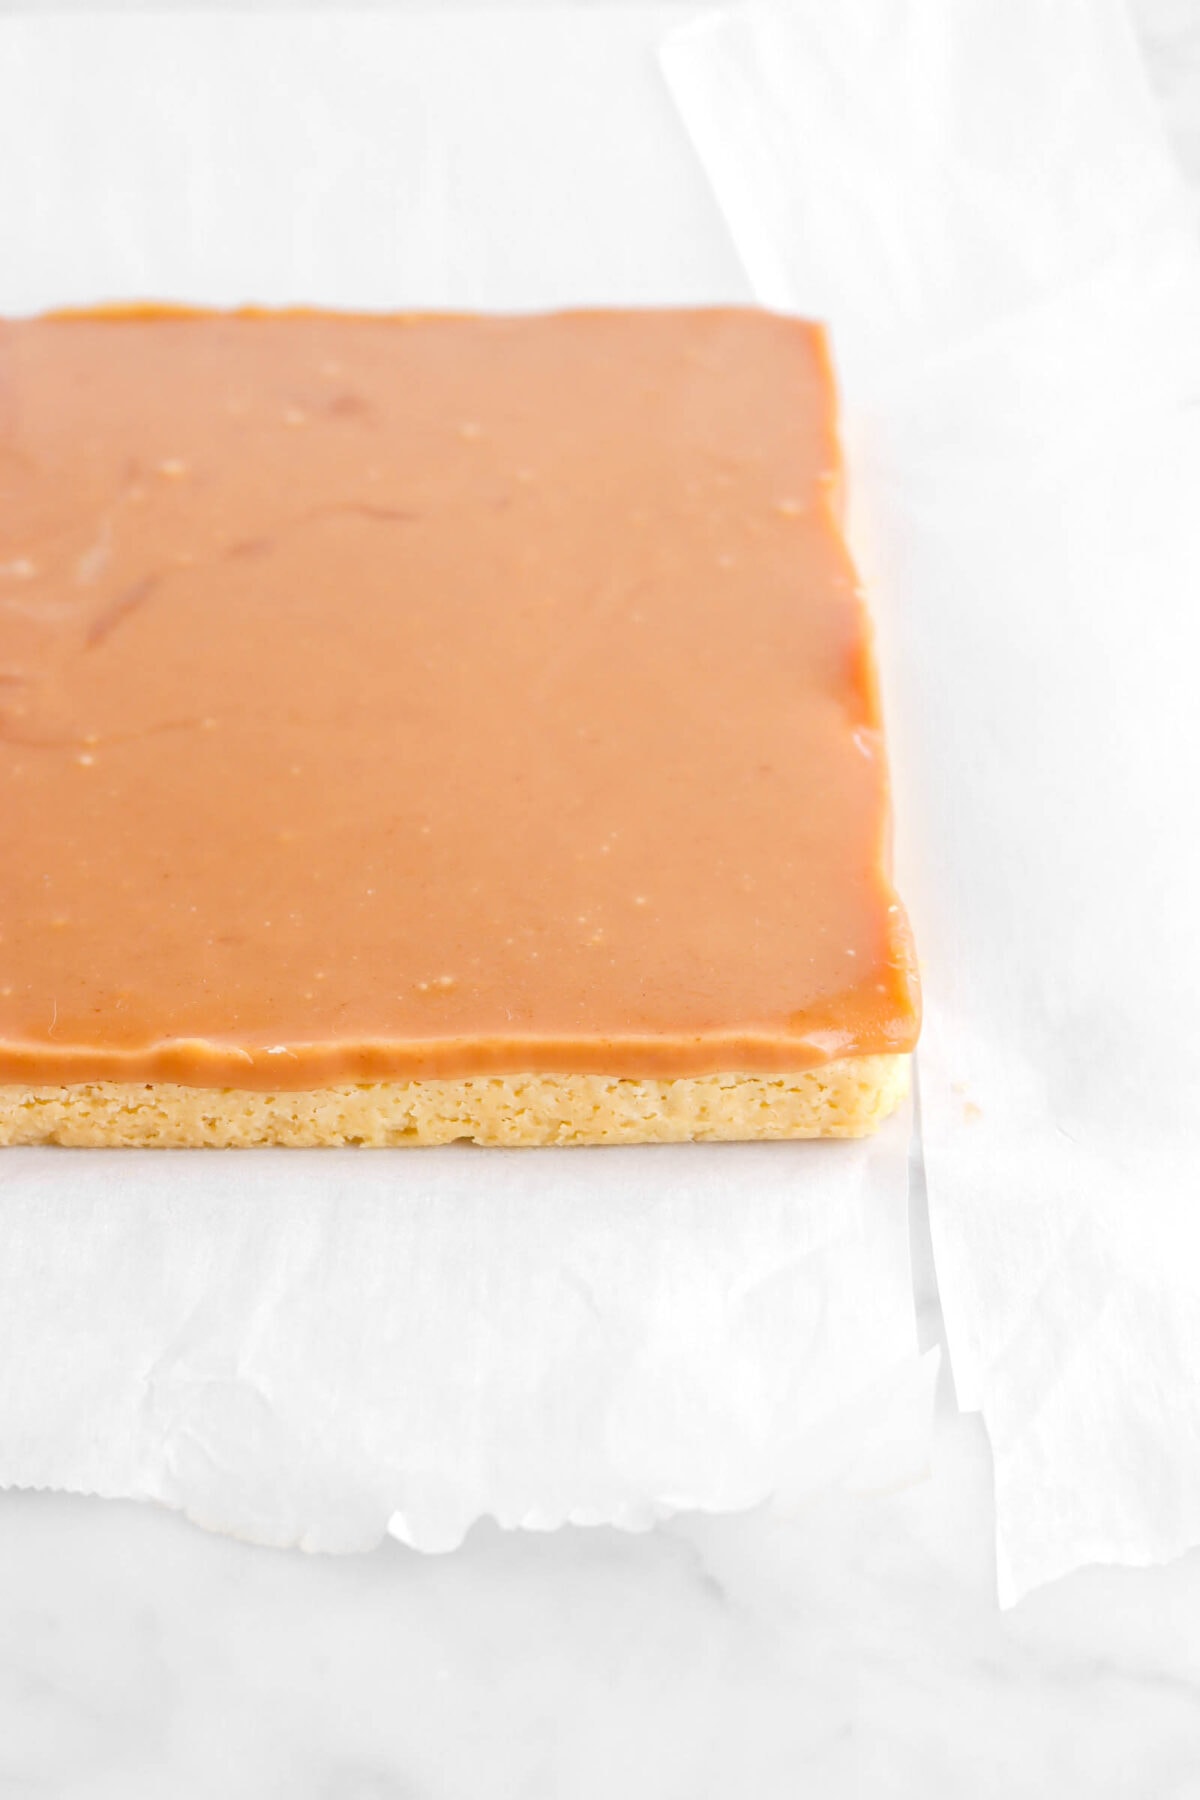
Step 2: Make the caramel
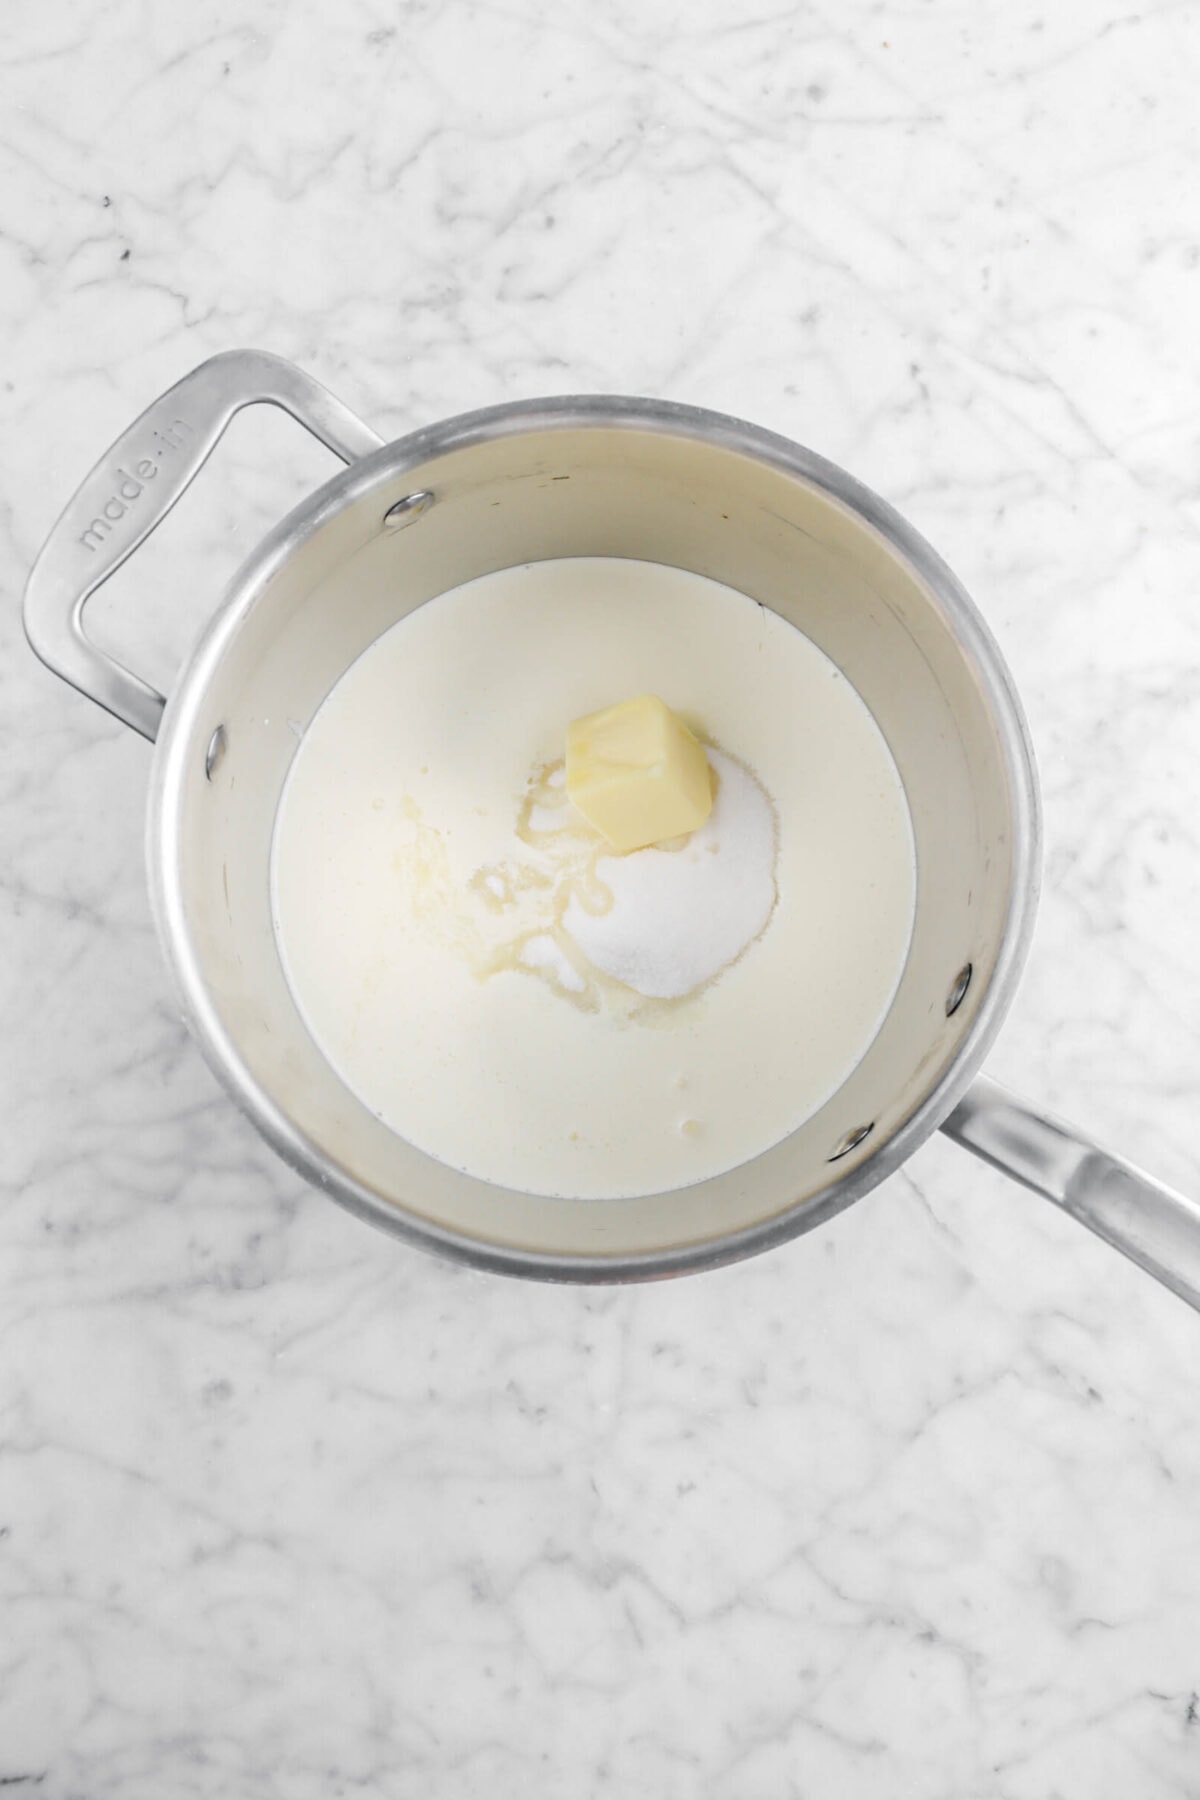
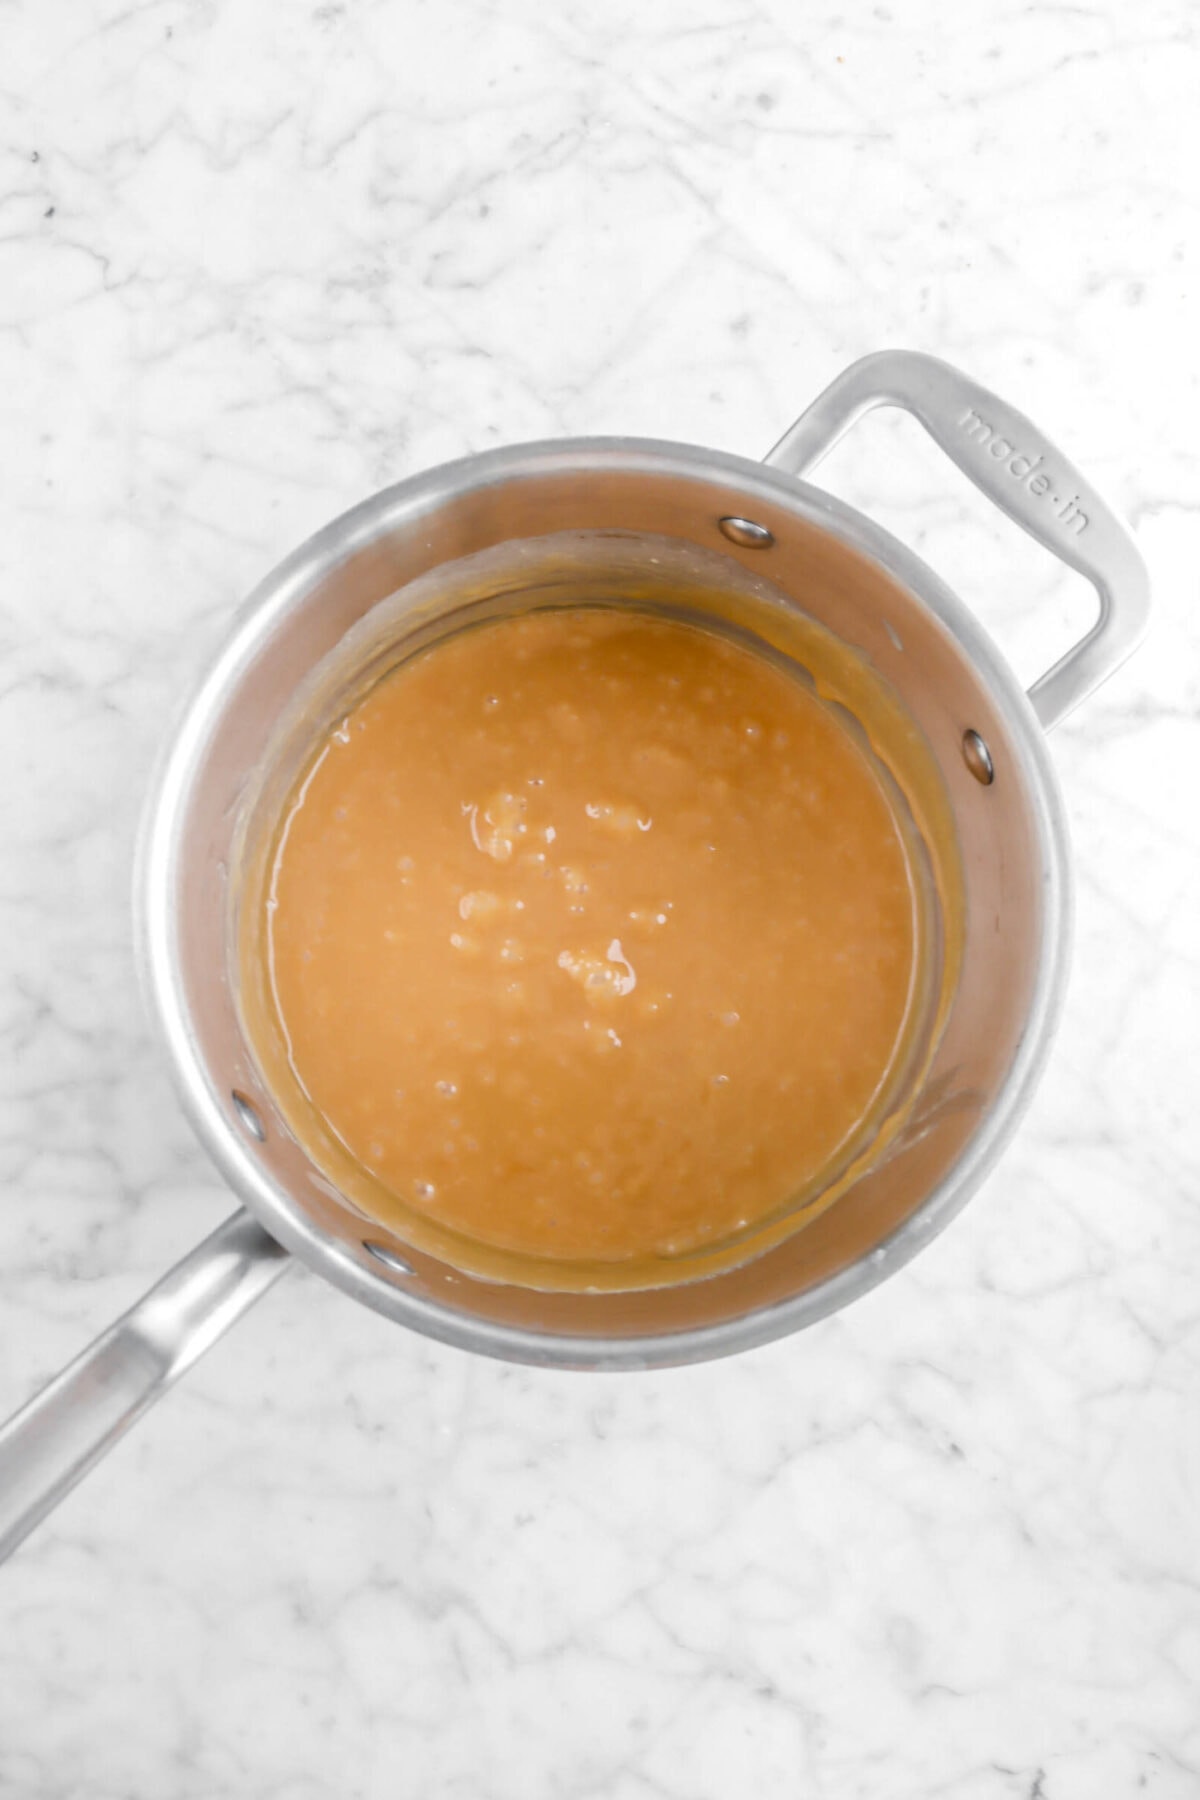
Place sugar, corn syrup, cream, and butter in a heavy 4 quart pot. Cook and stir over medium heat until sugar has melted. Increase heat to medium high. Continue cooking, occasionally brushing down sides of pan with pastry brush dipped in water to 245 degrees, about 20-30 minutes. Remove from heat.
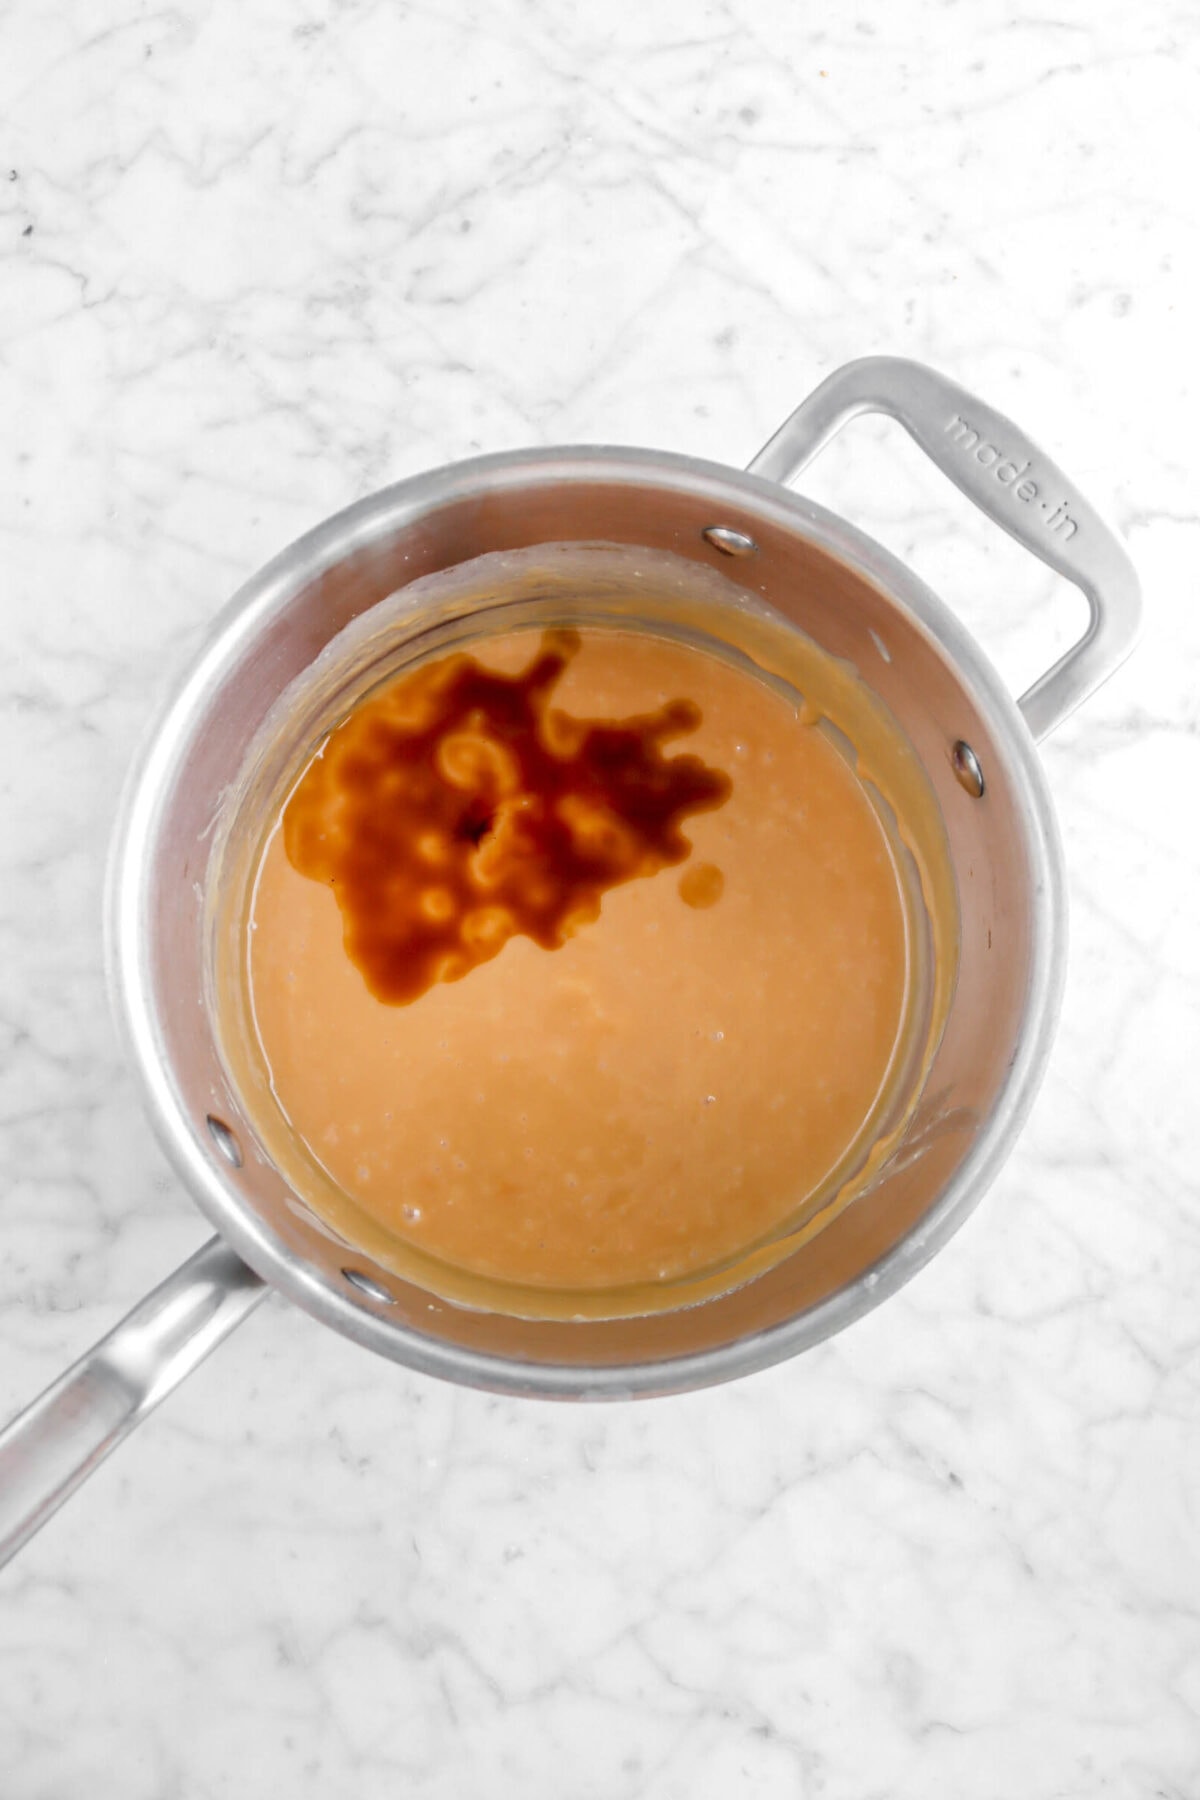
Stir in vanilla.
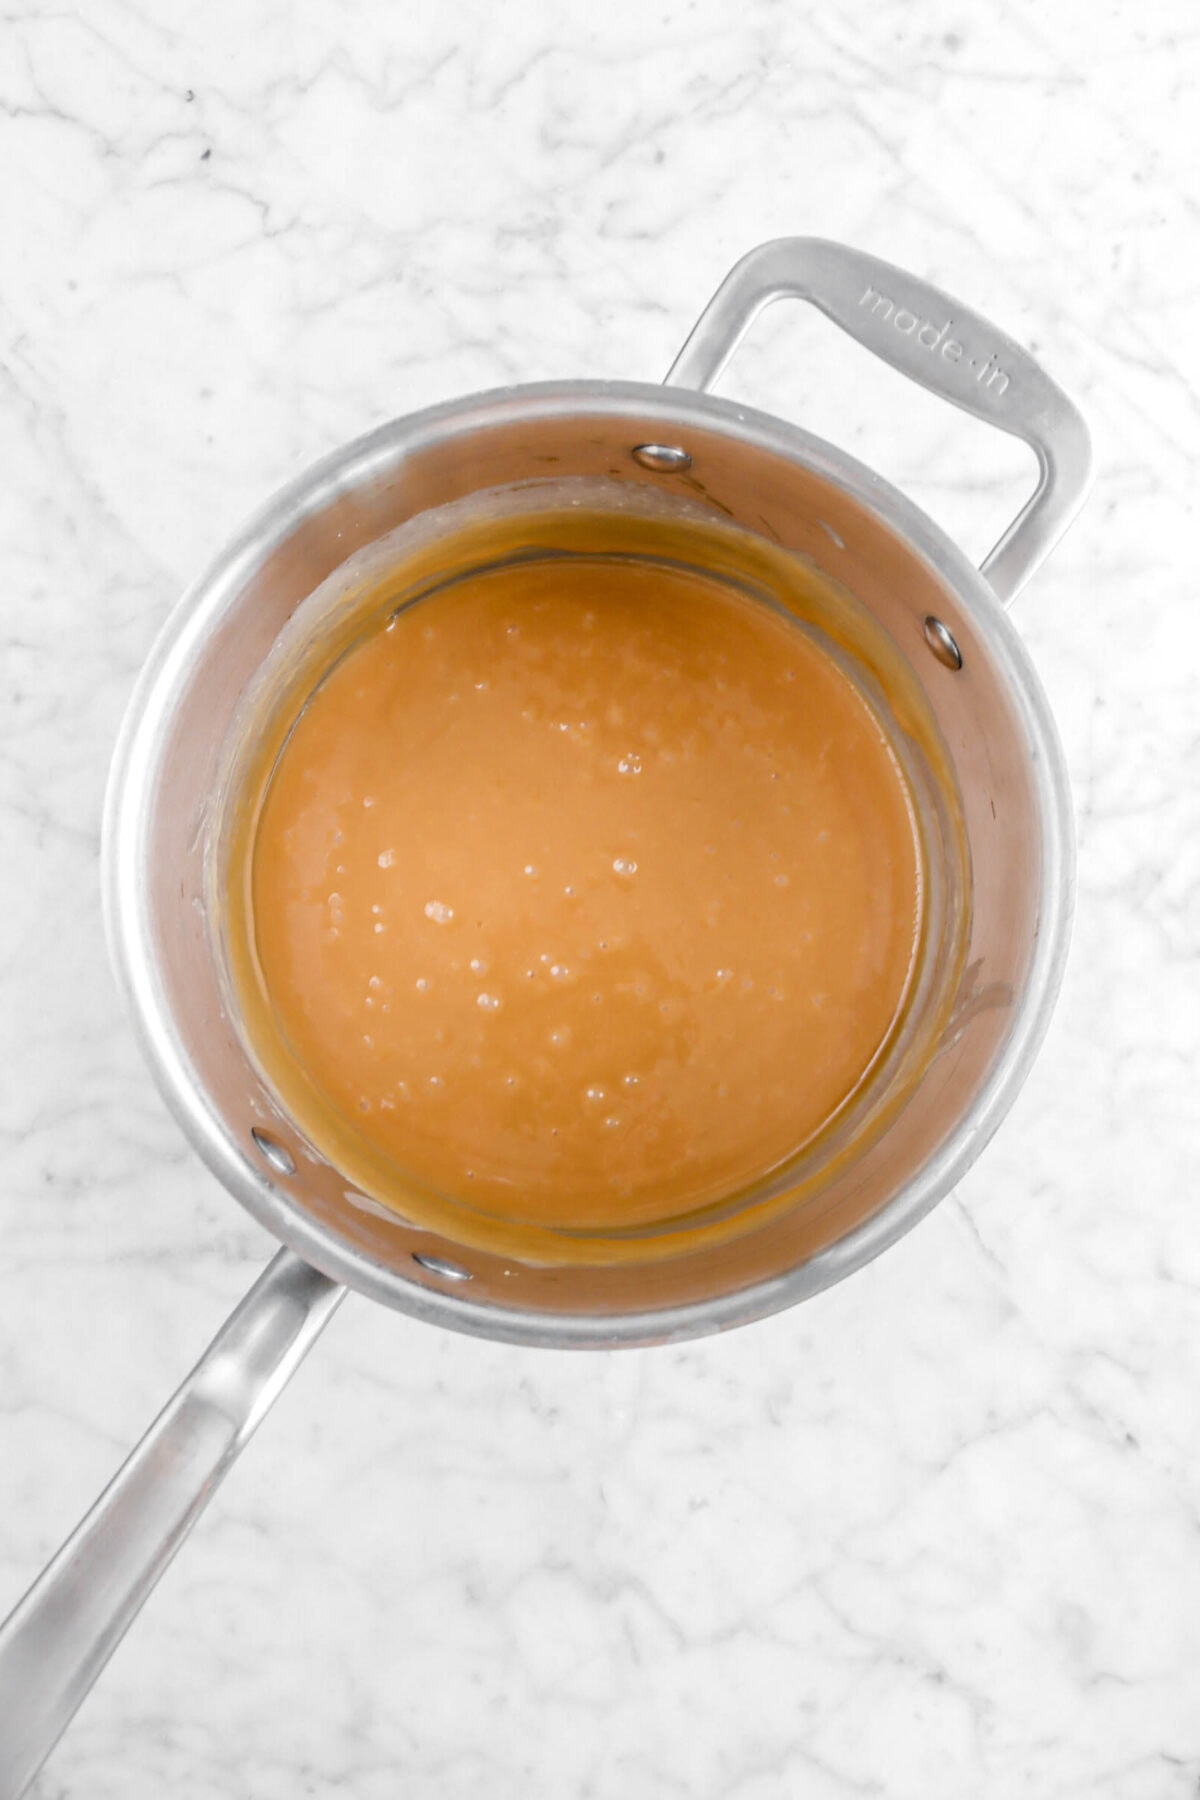
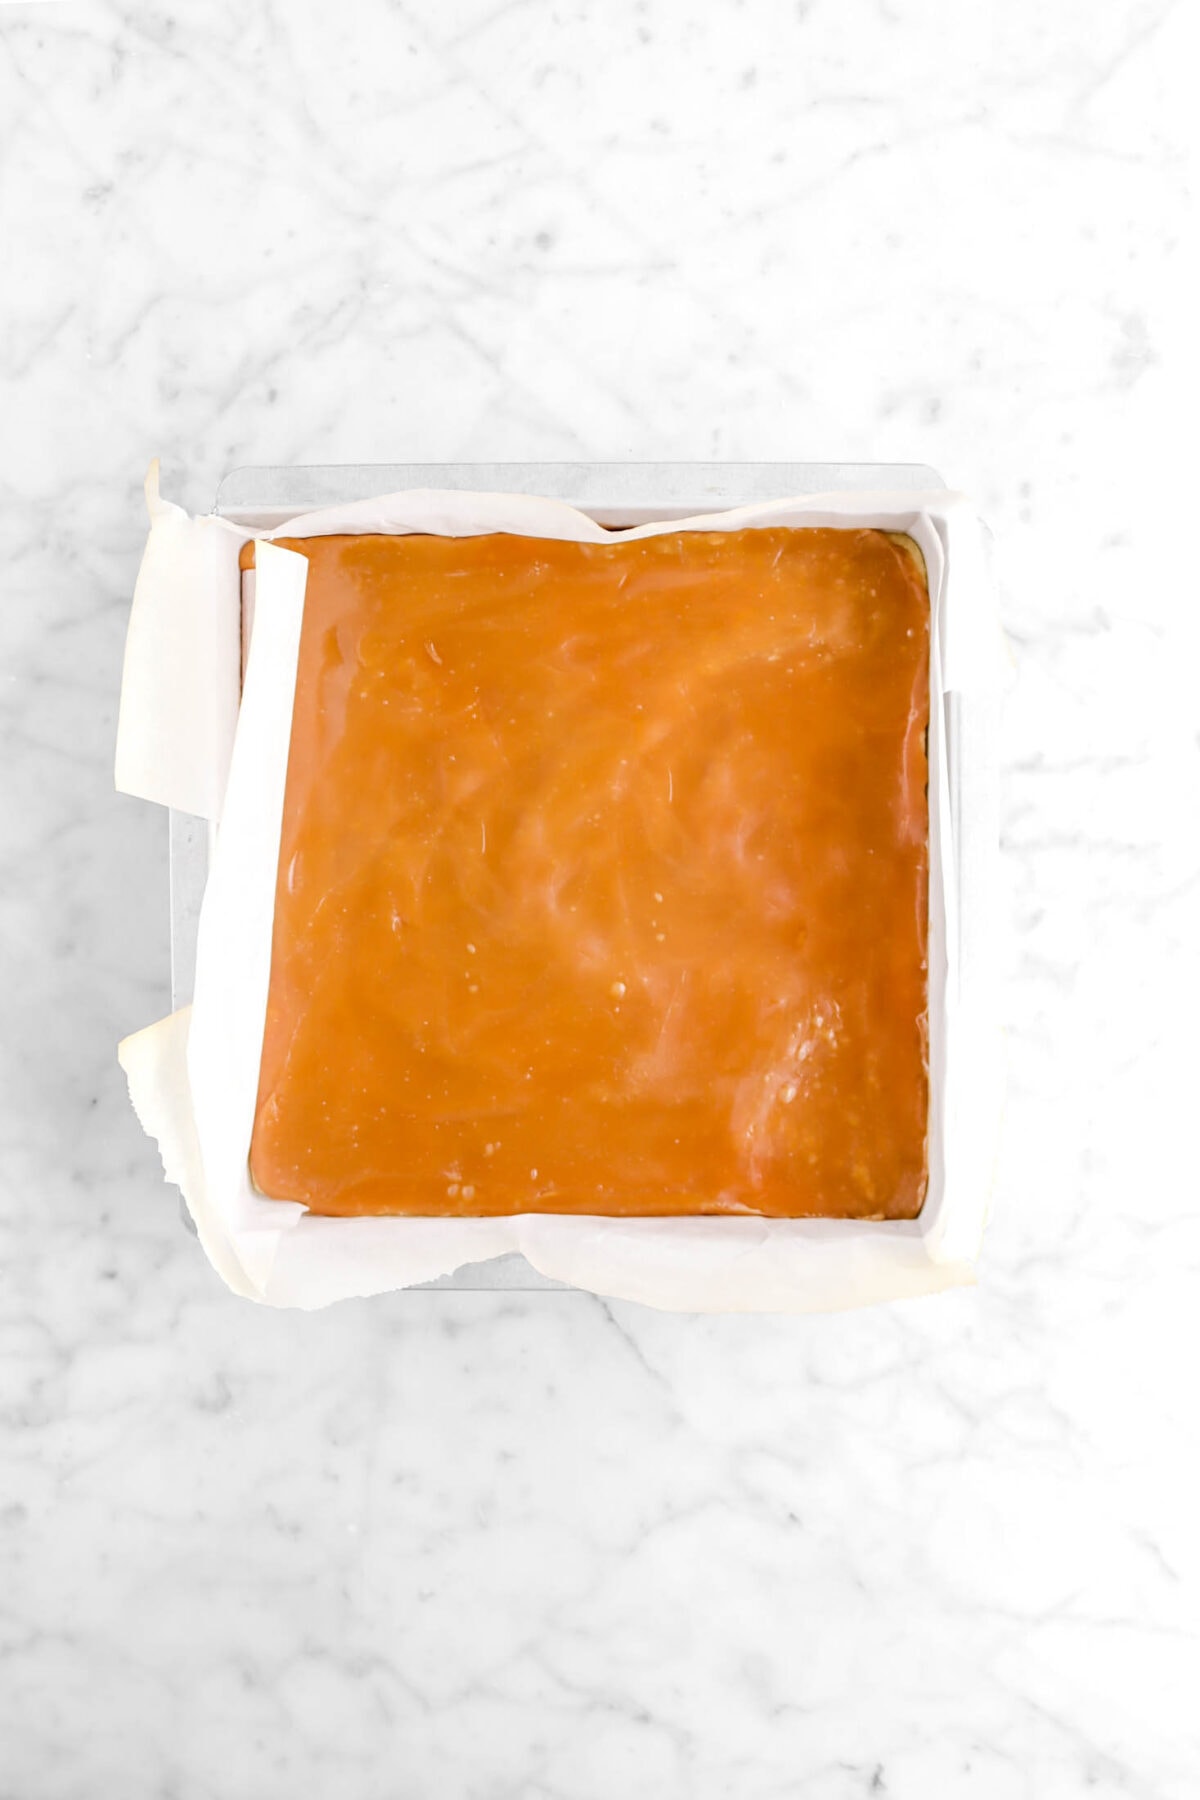
Immediately pour over cooled shortbread. Allow to cool completely.
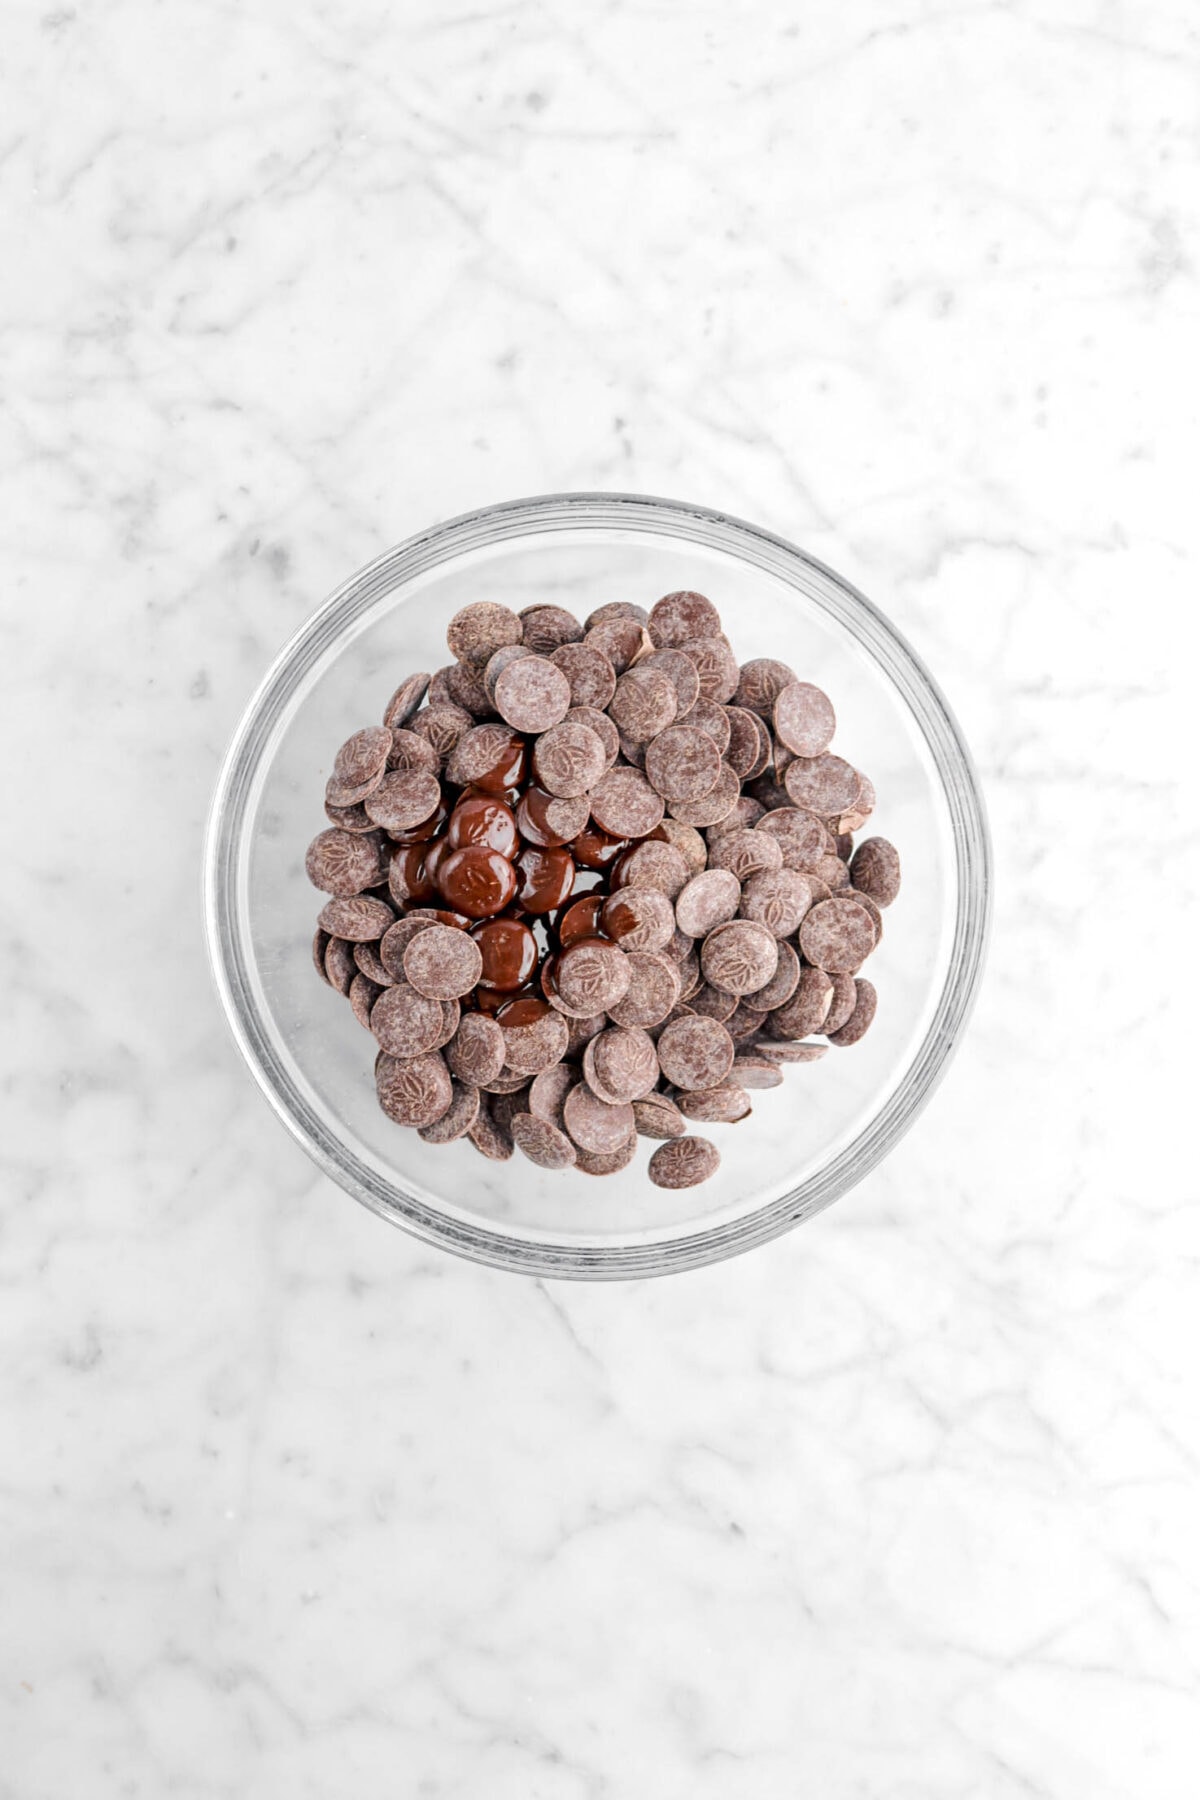
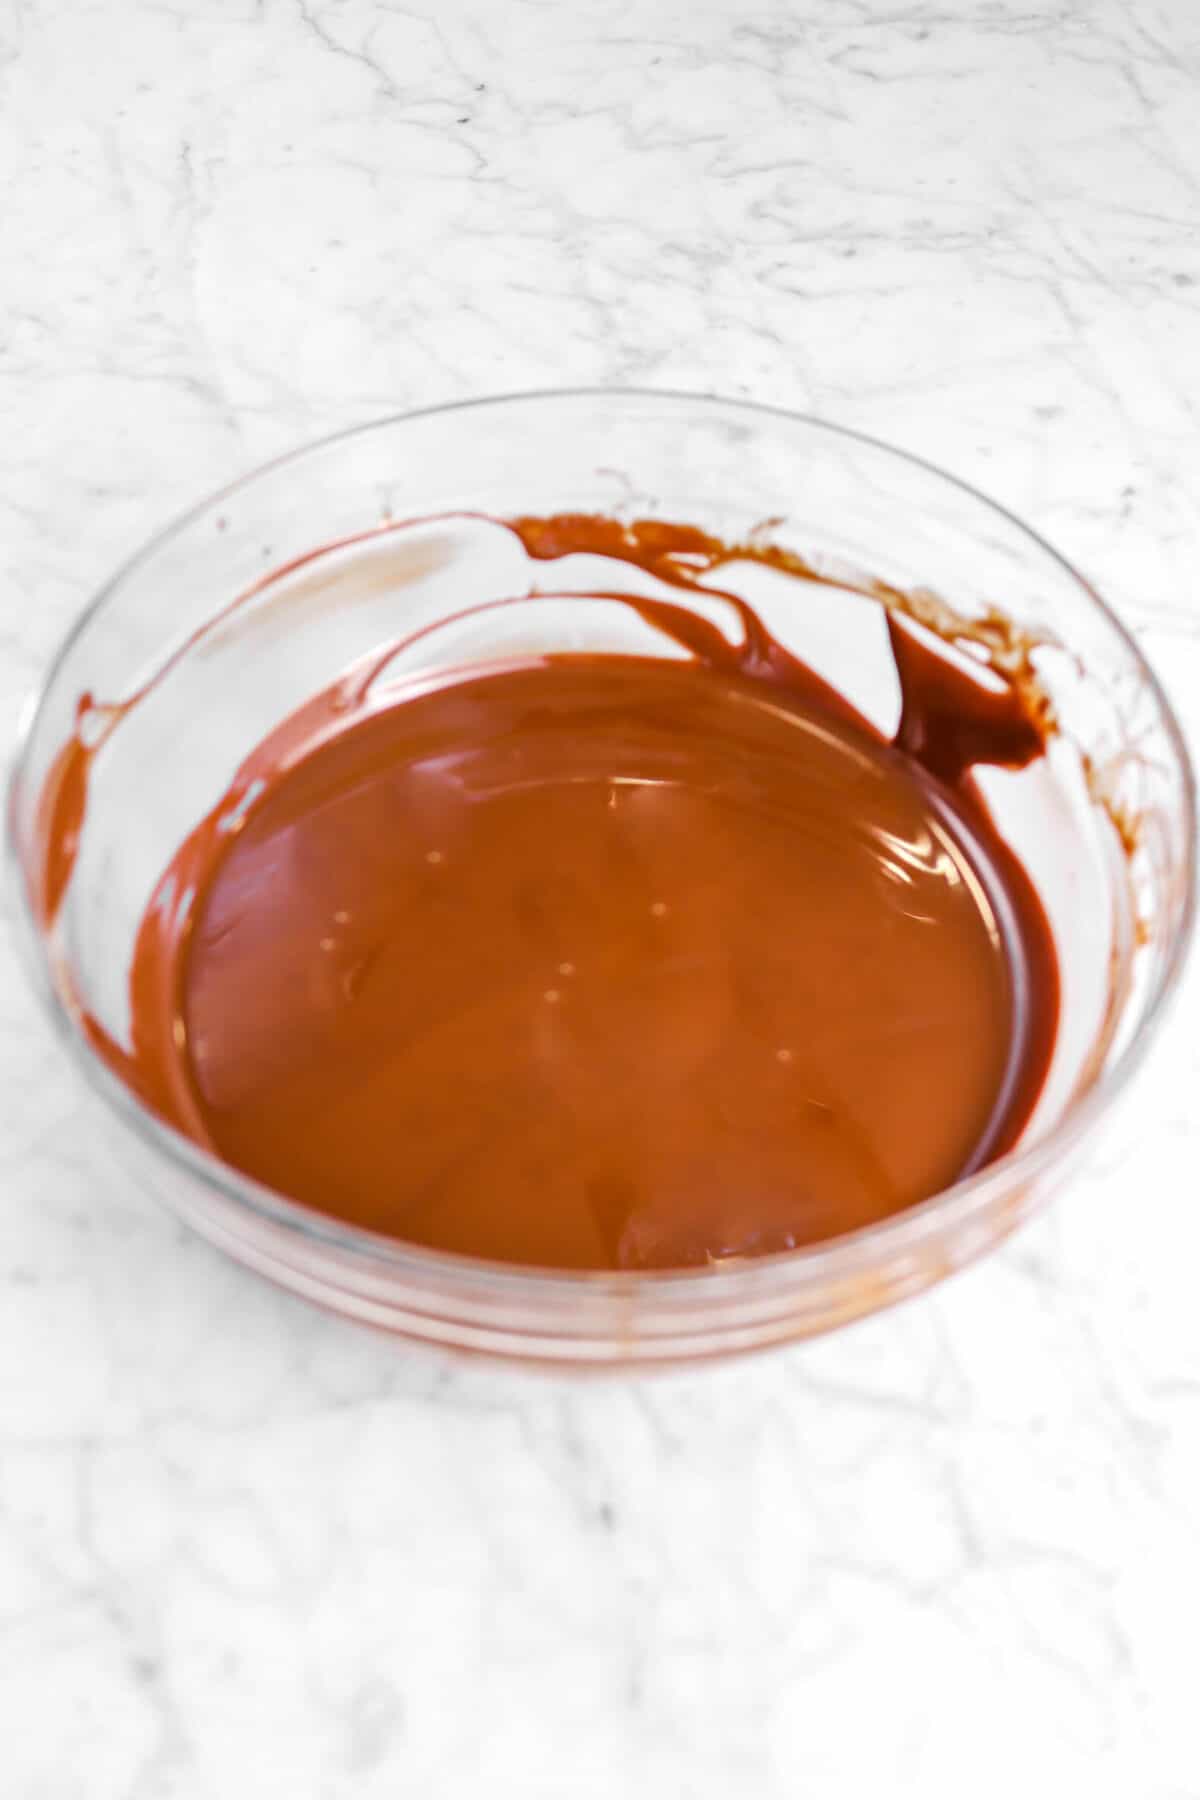
Step 3: Melt chocolate
Place chocolate and vegetable oil in a microwave safe bowl. Microwave on high in 15 second intervals, stirring after each, until chocolate is melted and smooth.
Step 4: Putting it Together
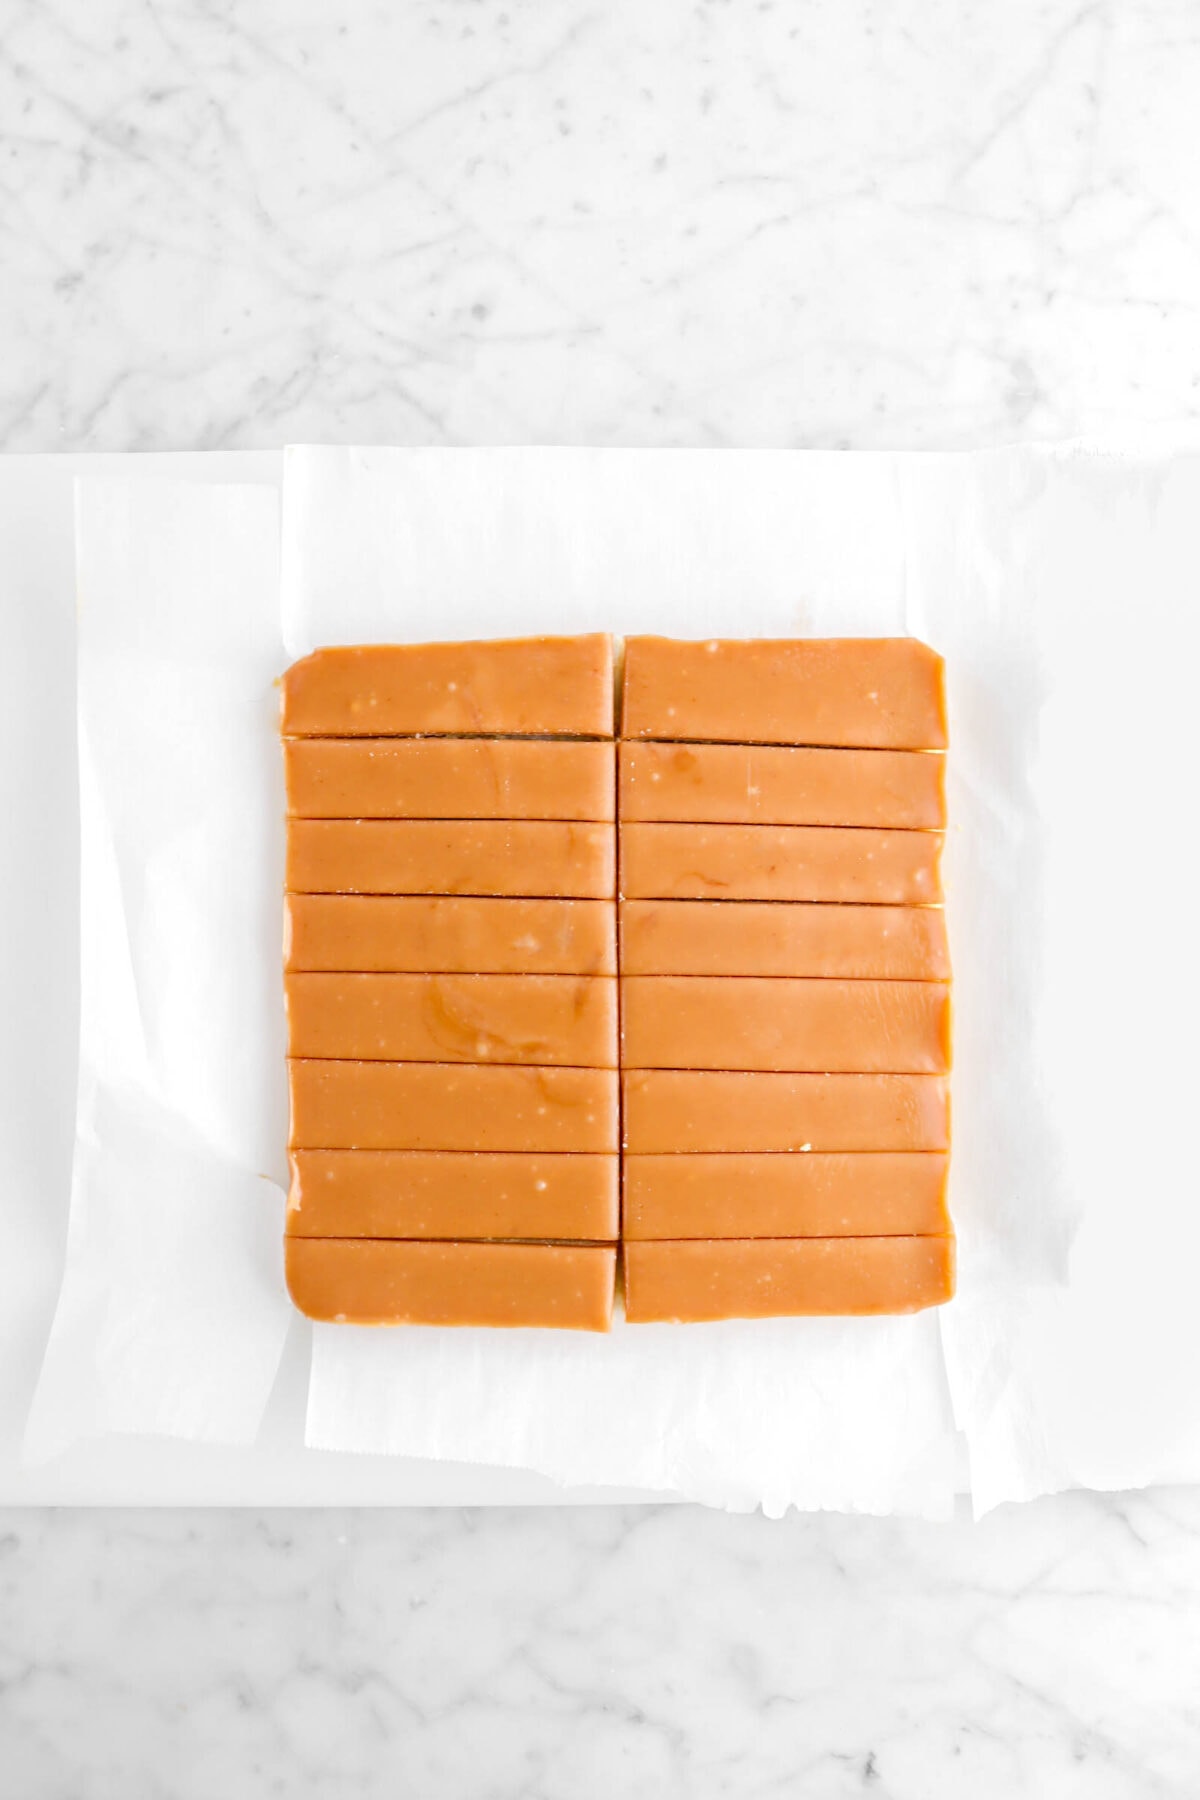
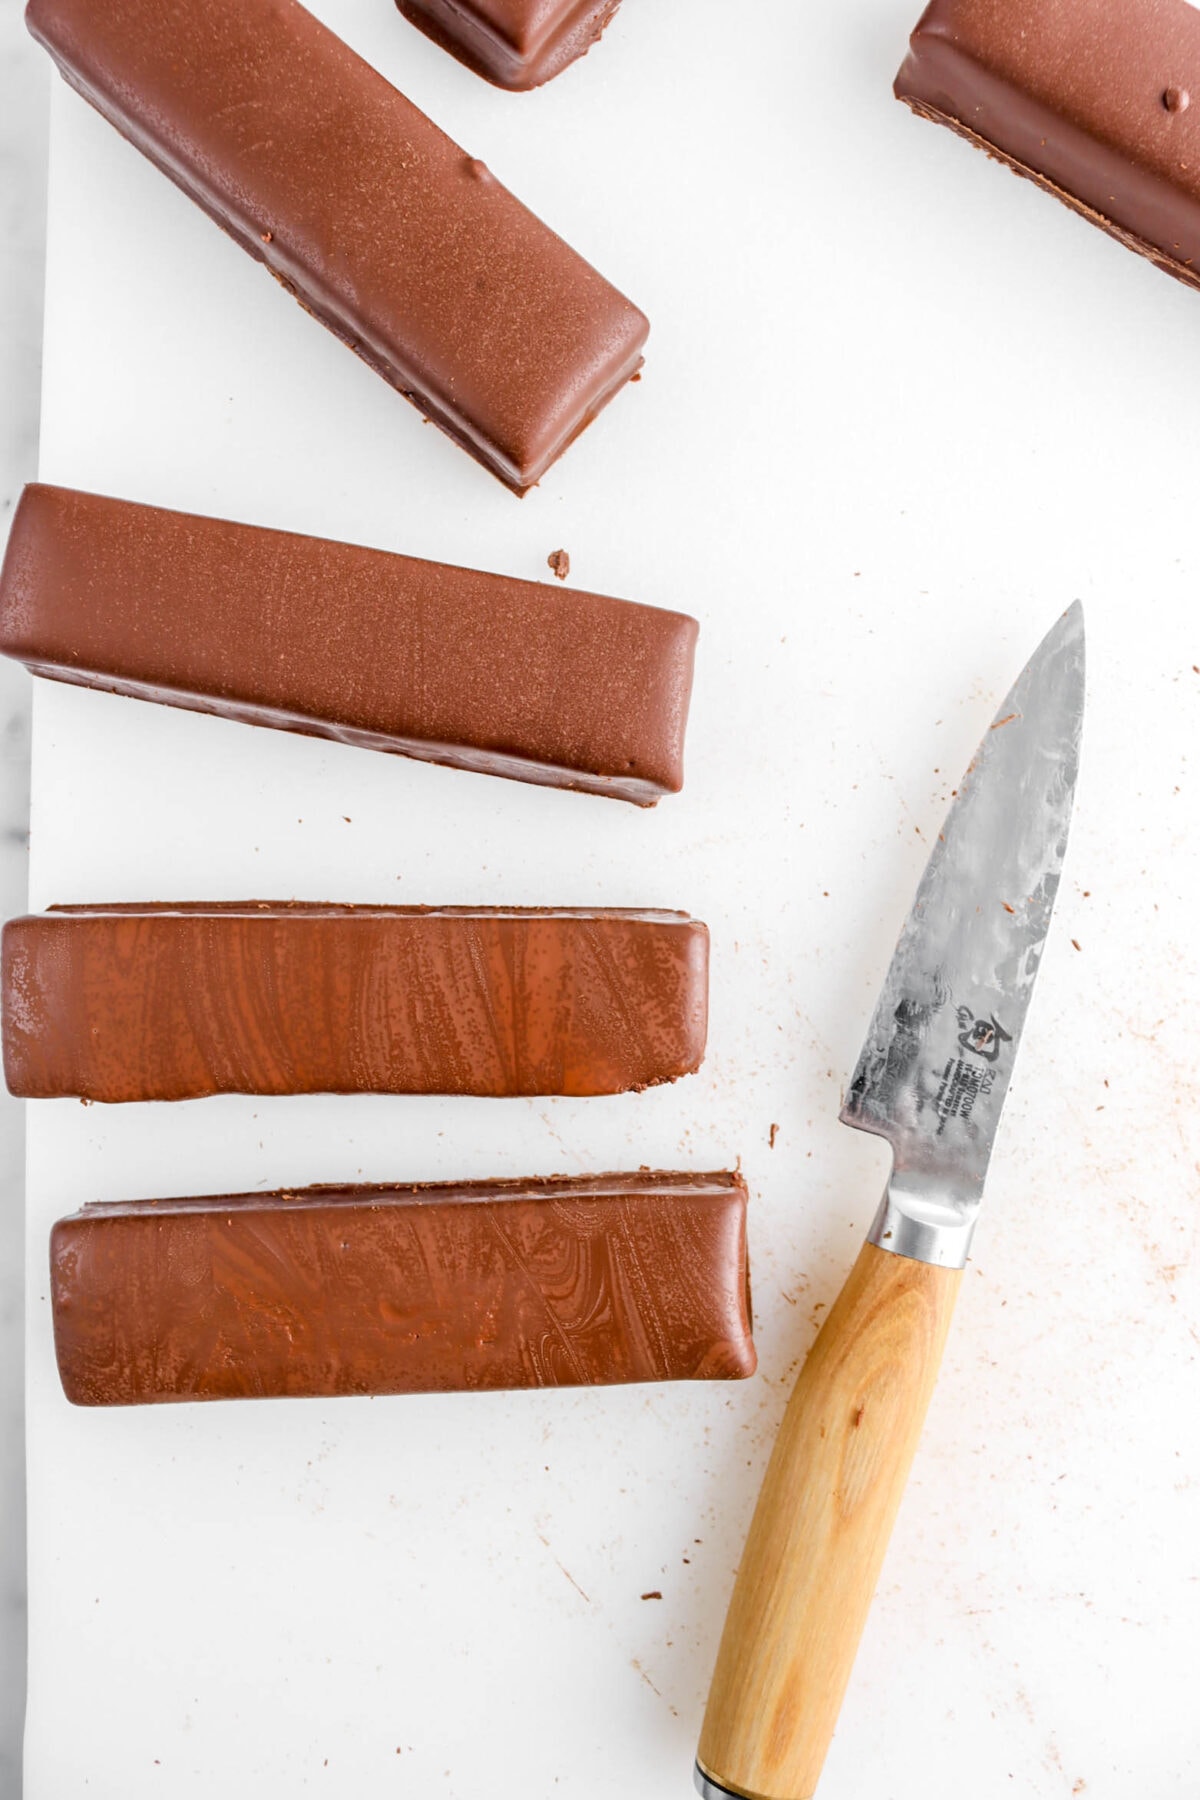
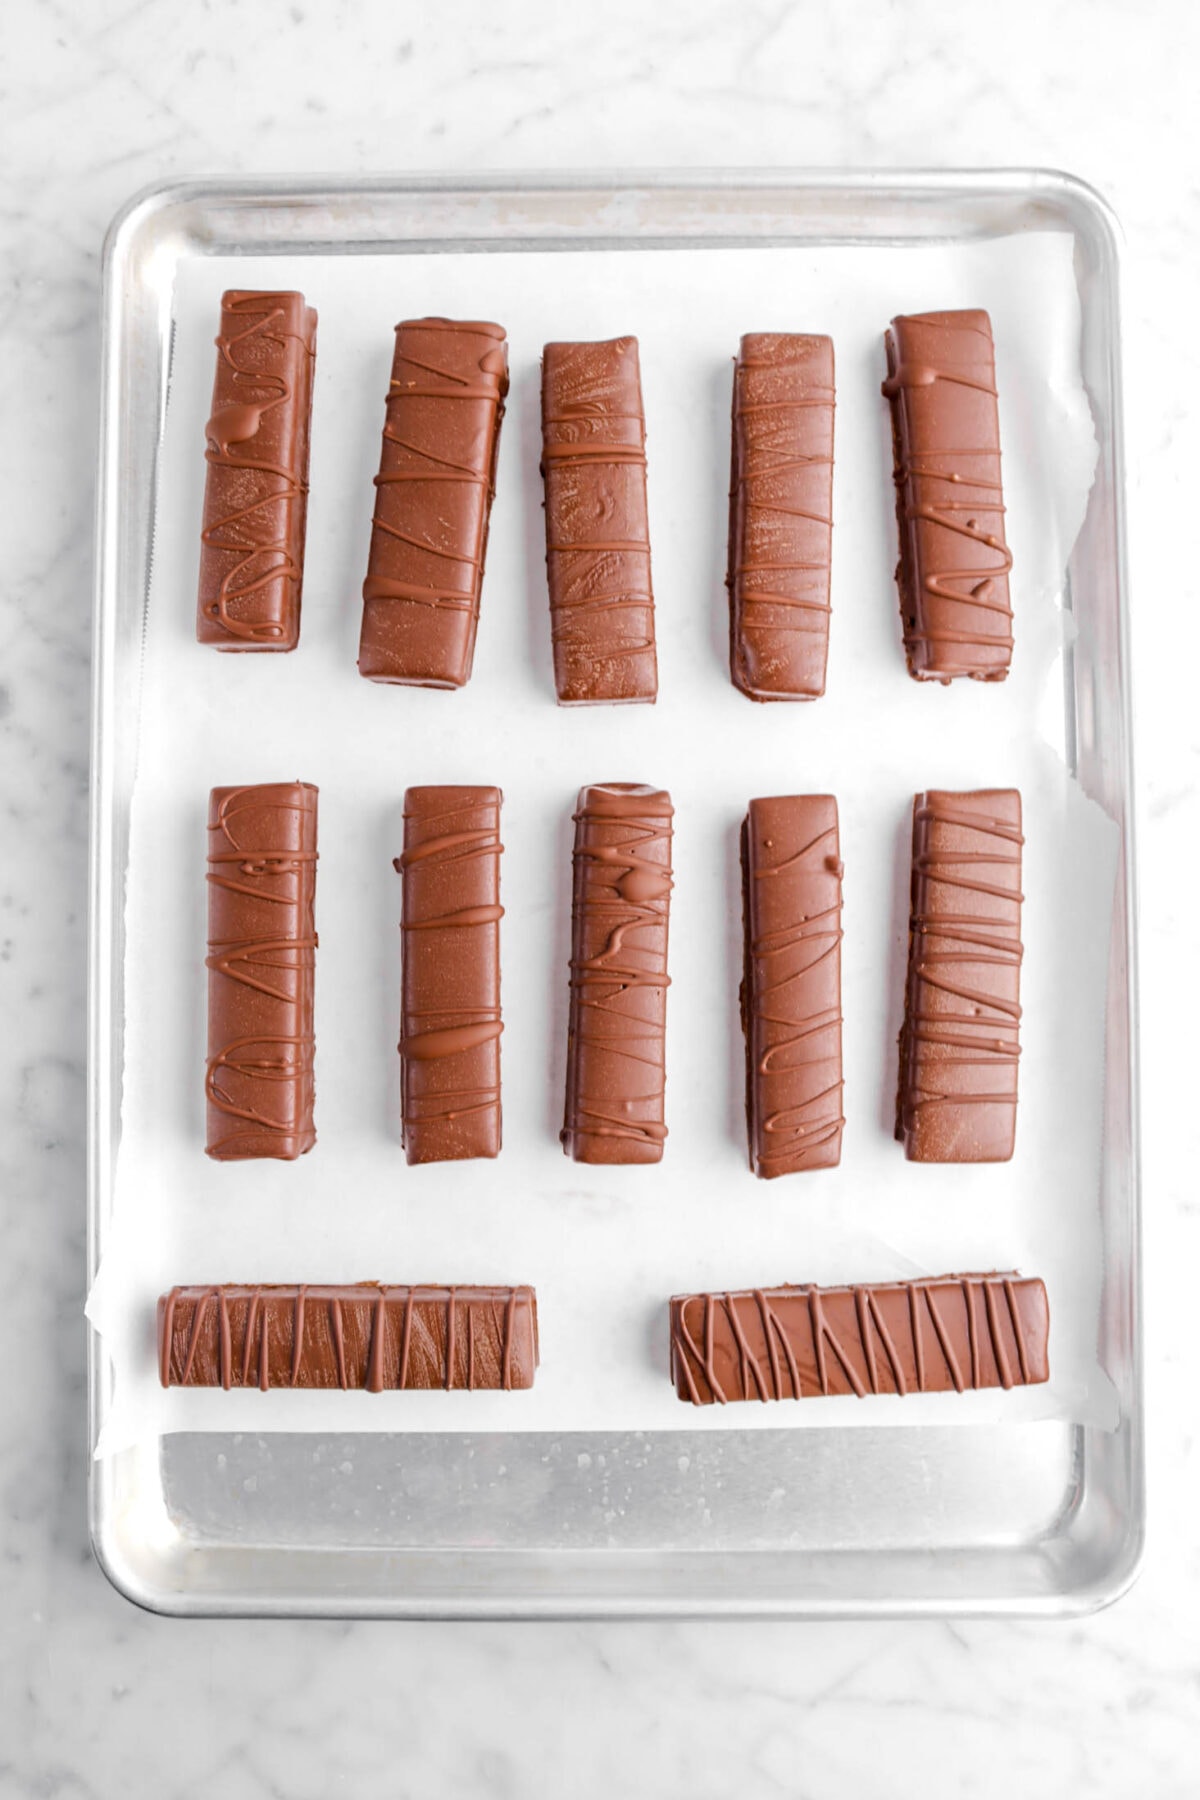
Lift candy out of pan and cut into 16 bars.
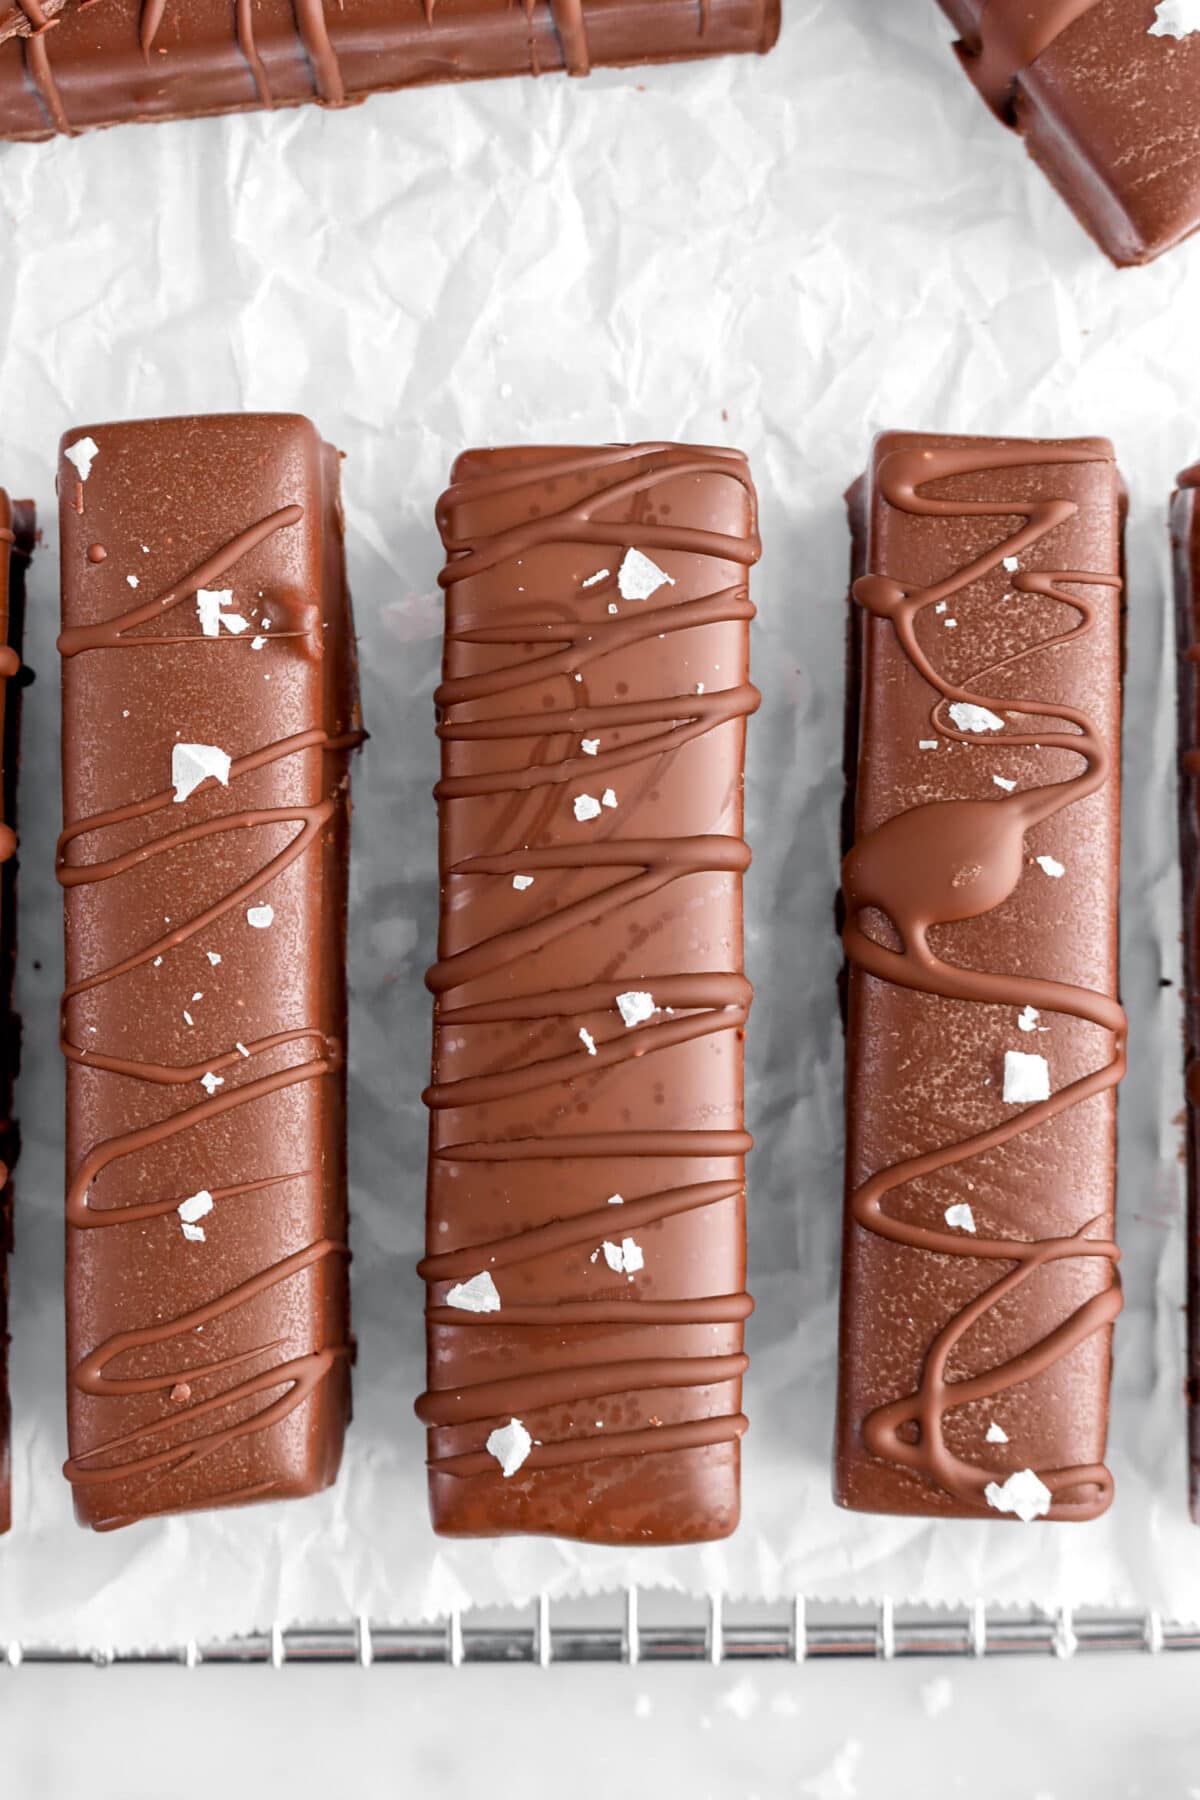
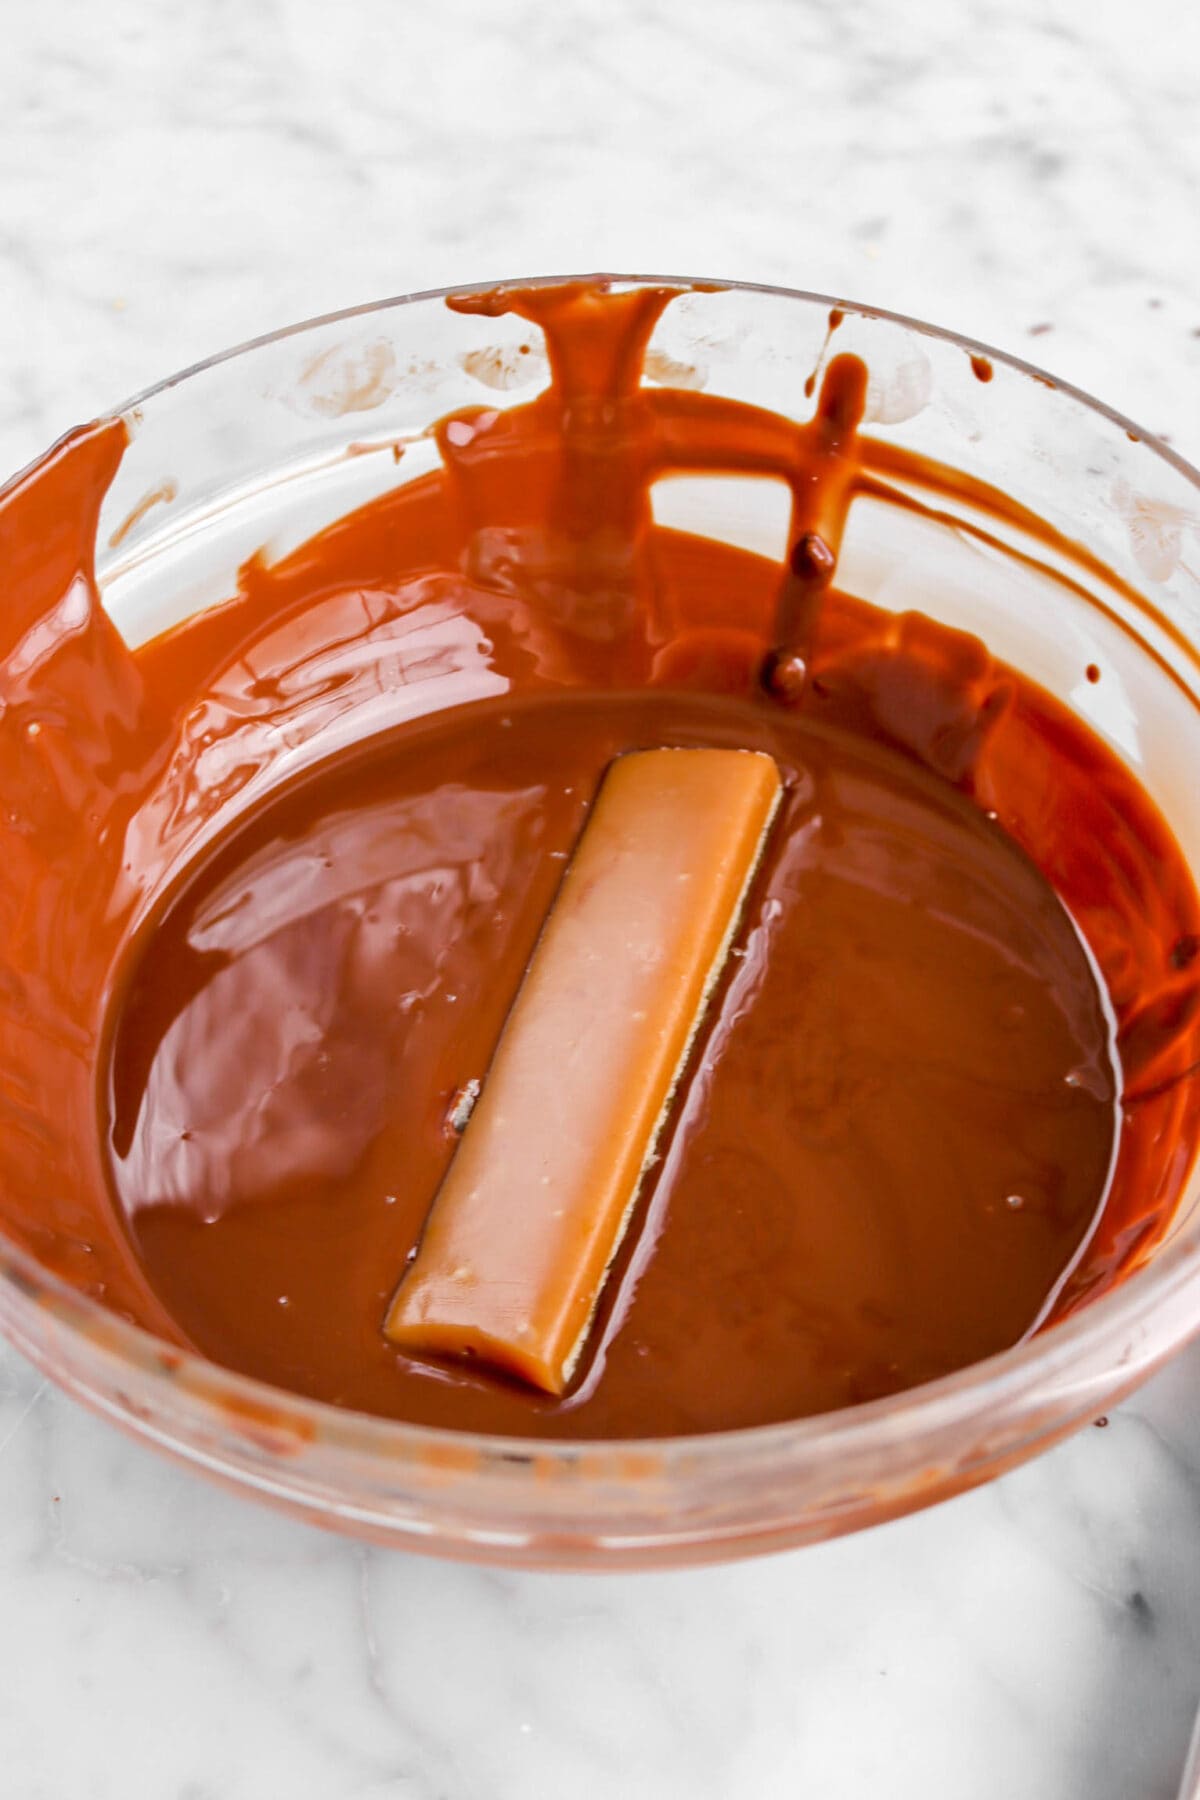
Using a fork, dip each candy bar into chocolate. Allow to drain and place on lined sheet pan. Cut away excess chocolate, if needed.
What Kind of Chocolate To Use
Twix Bars are traditionally coated in a milk chocolate, but we personally found that if semi-sweet chocolate (about 60%) is used for the coating, the candy is richer in flavor and perfectly sweet! So, while we highly recommend using a high quality semi-sweet chocolate, you can use milk chocolate or a bittersweet chocolate.
Just remember, if you are tempering your chocolate, the temperatures may be different than the ones we have listed below.
What To Make With Twix Bars
The wonderful thing about these Twix bars is that you can stir them into vanilla ice cream, a brownie batter, or even a candy-filled cookie! The possibilities are pretty much endless. We even stir them into our milkshakes!
Tempered Chocolate or Melted Chocolate?
For this recipe, we found that using melted chocolate with a little bit of vegetable oil works best. Working with tempered chocolate was a bit difficult for us, personally, but it’s definitely something that can be done! If you would like to temper your own chocolate, follow the directions below.
How To Temper Chocolate
- Place the dark chocolate in a glass bowl and place over a pot of simmering water (this technique is called a baine-marie). Stir until the chocolate melts and temperature is around 124 degrees F, but no higher 130 degrees F.
- Remove from heat and cool, stirring constantly, to between 82 degrees F and 84 degrees F.
- Place back over warm water and raise temperature to between 88 degrees F and 90 degrees F. Hold at this temperature.
How To Store
These bars are best kept at room temperature in individual bags. They will keep for about a week or so. If you are not using tempered chocolate, the chocolate may become soft and start to bloom. It’s still completely edible, but won’t be as pretty!
When you make these Homemade Twix Bars, leave a comment down below! We love hearing from you and answering any questions you might have! Also, be sure to tag us on social media and hashtag it #BakersTable.
Homemade Twix Bars
Ingredients
Shortbread
- 1 cup salted butter, room temperature
- ½ cup granulated sugar
- 1 teaspoon vanilla extract
- 2 cups all purpose flour
Caramel
- 1 cup granulated sugar
- ⅓ cup corn syrup
- 1¼ cups heavy cream
- 2 Tablespoons salted butter
- 1½ teaspoons vanilla extract
Chocolate Coating
- 3 cups semi-sweet chocolate pieces
- 3 Tablespoons vegetable oil
Instructions
Shortbread
- Heat oven to 350℉/177℃.
- Line a 9-inch square pan with parchment paper. Set aside.
- Beat butter, sugar, and vanilla with an electric mixer until light and fluffy, about 2-3 minutes.
- Stir in flour.
- Turn dough into prepared pan.
- Press evenly across bottom of pan.
- Bake for 20 minutes, until just starting to color.
Caramel
- Place sugar, corn syrup, cream, and butter in a heavy 4 quart pot.
- Cook and stir over medium heat until sugar has melted.
- Increase heat to medium high.
- Continue cooking, occasionally brushing down sides of pan with pastry brush dipped in water to 245℉/118℃, about 20-30 minutes.
- Remove from heat.
- Stir in vanilla.
- Immediately pour over cooled shortbread.
- Allow to cool completely.
Assembly
- Line sheet pan with parchment paper. Set aside.
- Place chocolate and vegetable oil in a microwave safe bowl.
- Microwave on high in 15 second intervals, stirring after each, until chocolate is melted and smooth.
- Lift candy out of pan.
- Using a sharp knife, cut into 16 bars.
- Using a fork, dip each candy bar into chocolate.
- Allow to drain.
- Place on prepared pan.
- Allow to set.
- Trim off any excess chocolate.
Notes + Tips!
- Room temperature is about 70℉/21℃.
- To substitute unsalted butter in the shortbread, add ⅜ teaspoon salt. In the caramel, just add a pinch of salt in with the sugar.
- Do NOT over-bake the shortbread, as it will be too dry and crumbly for these twix bars. The shortbread needs to just begin to brown when it’s ready.
- You will need to test your thermometer before using it for the candy. The best way to do this is boil a pot of water with your thermometer in it. A pot of boiling water should read 212 degrees Fahrenheit.
- Don’t let the thermometer sit at the bottom of the pot when you are cooking.
- Use a bigger pot than you think you need! The caramel bubbles up very high when you’re cooking.
- The shortbread needs to be room temperature before you pour the caramel on top. It does not need to be hot!
- We prefer semi-sweet chocolate with this recipe, but you can easily use milk chocolate or bittersweet!
- For this recipe, you can use either tempered chocolate or melted chocolate for the coating. We found using melted chocolate was much easier for us to handle.
- Use the excess chocolate after dipping to drizzle some over the top.
- You may want to trim off any excess chocolate after the coating set.
- If the bars are taking too long to set, you can place them in the refrigerator for a few minutes.
Tools You May Need (affiliate links)
– Still Hungry? –
Here are a few recipes may like!


Made this recipe today and was very excited about it as I bake all the time. Shortbread came out fine, but the caramel despite being exactly at temp once it cooled it is more like a toffee and very hard.
I double checked my candy thermometer and it is accurate. I even used a brand new one. I do make candy a lot so I am surprised it is so hard.
Any suggestions?
Hi Amanda. I’ve never had a problem at 245℉; but if you are, reduce the temperature by a couple of degrees. I wouldn’t go any lower than 240℉. Let me know if you have any other questions.
I was so excited about this recipe but it didn’t work out for me on the first try. I underbaked the shortbread doing it at 350 for 20 minutes, I even added three minutes but it wasn’t enough. I then began the caramel and followed the recipe to the t it was coming along beautifully. I allowed it to cook for twenty minutes but after I poured it onto the cooled shortbread and let it cool completely it was so hard to cut and that’s when I gave up. I want to try again but for tonight I am done.
Hi AJ! I’m so sorry that this recipe didn’t work out for you. I would love to help you troubleshoot!
When it comes to the shortbread, was it baked in a 9-inch square pan? If not, this would cause the baking time to be longer. If you did bake it in the proper pan, it sounds like you need to get an oven thermometer! Your oven may be running colder than what you set it to. It’s always a good idea to checking how accurate your oven’s are.
With the caramel, you needed to cook it to 245 degrees F. It takes our stove 20-30 minutes on low to reach this temperature . Some may reach it in 10 minutes, some may reach it in an hour. With candy, we add times to give an estimate to how long it may take someone based on our testing. You shouldn’t cook candy based on time, but on temperature! We recommend investing in a candy thermometer. Every stove (and oven) cooks differently!
We hope you try this recipe again and please let us know if you have any other problems. We are always here to help!
x, Caylie
Thank you! I did check the oven temp which was on point and I used the correct pan, I will do it for a few minutes extra next time, maybe five or seven. I do not have a candy thermometer though so I will have to purchase one. I have a question when making the caramel after the sugar dissolves, the temp should be set to low or medium-high heat? Also, if it cooks correctly and until it reaches the correct temperature, the caramel should not be so hard that you can’t cut it, correct? Thank you so much! I will definitely try it again! Twix are my favorite so I would love to nail the recipe! Yours look delicious! Thank you for replying!
Hi AJ! As my daughter said, every oven bakes differently. Try baking the shortbread until it is lightly colored. It will just start to pull away from the sides of the pan slightly when done. (There is a picture in the post.) Don’t let it go too far. It there’s too much of a gap, the caramel will run under the cookie instead of staying on top.
The caramel should be turned to medium to medium high once the sugar has melted. We use a professional grade gas range with a pretty high BTU, so we rarely cook anything past medium low on it. Most traditional home ranges or cooktops don’t get as hot or cook as fast. You have to learn how yours cooks. Again, a good candy thermometer is essential! There’s a link to one at the bottom of the recipe card under equipment. Make sure you calibrate it! The instructions are in the post, if you don’t know how to do that. The caramel should be soft enough for you to cut.
Let me know if you have any more questions.
Hello! Can we use any caramel recipe for this? Or we do have to use this recipe only?
The recipe I follow is:
50 grams Castor Sugar
1 tbsp Water
15 grams Unsalted Butter
50 grams Warm Cream
1/4 tsp Salt
Thanks!
Hi Disha! While you can use another caramel recipe, we cannot guarantee its outcome or how it will set up. We recommend using our caramel, as it was developed specifically for this recipe! Hope this helps. x, Caylie