Mini Apple Pies
This post may contain affiliate links, please visit our privacy policy for details.
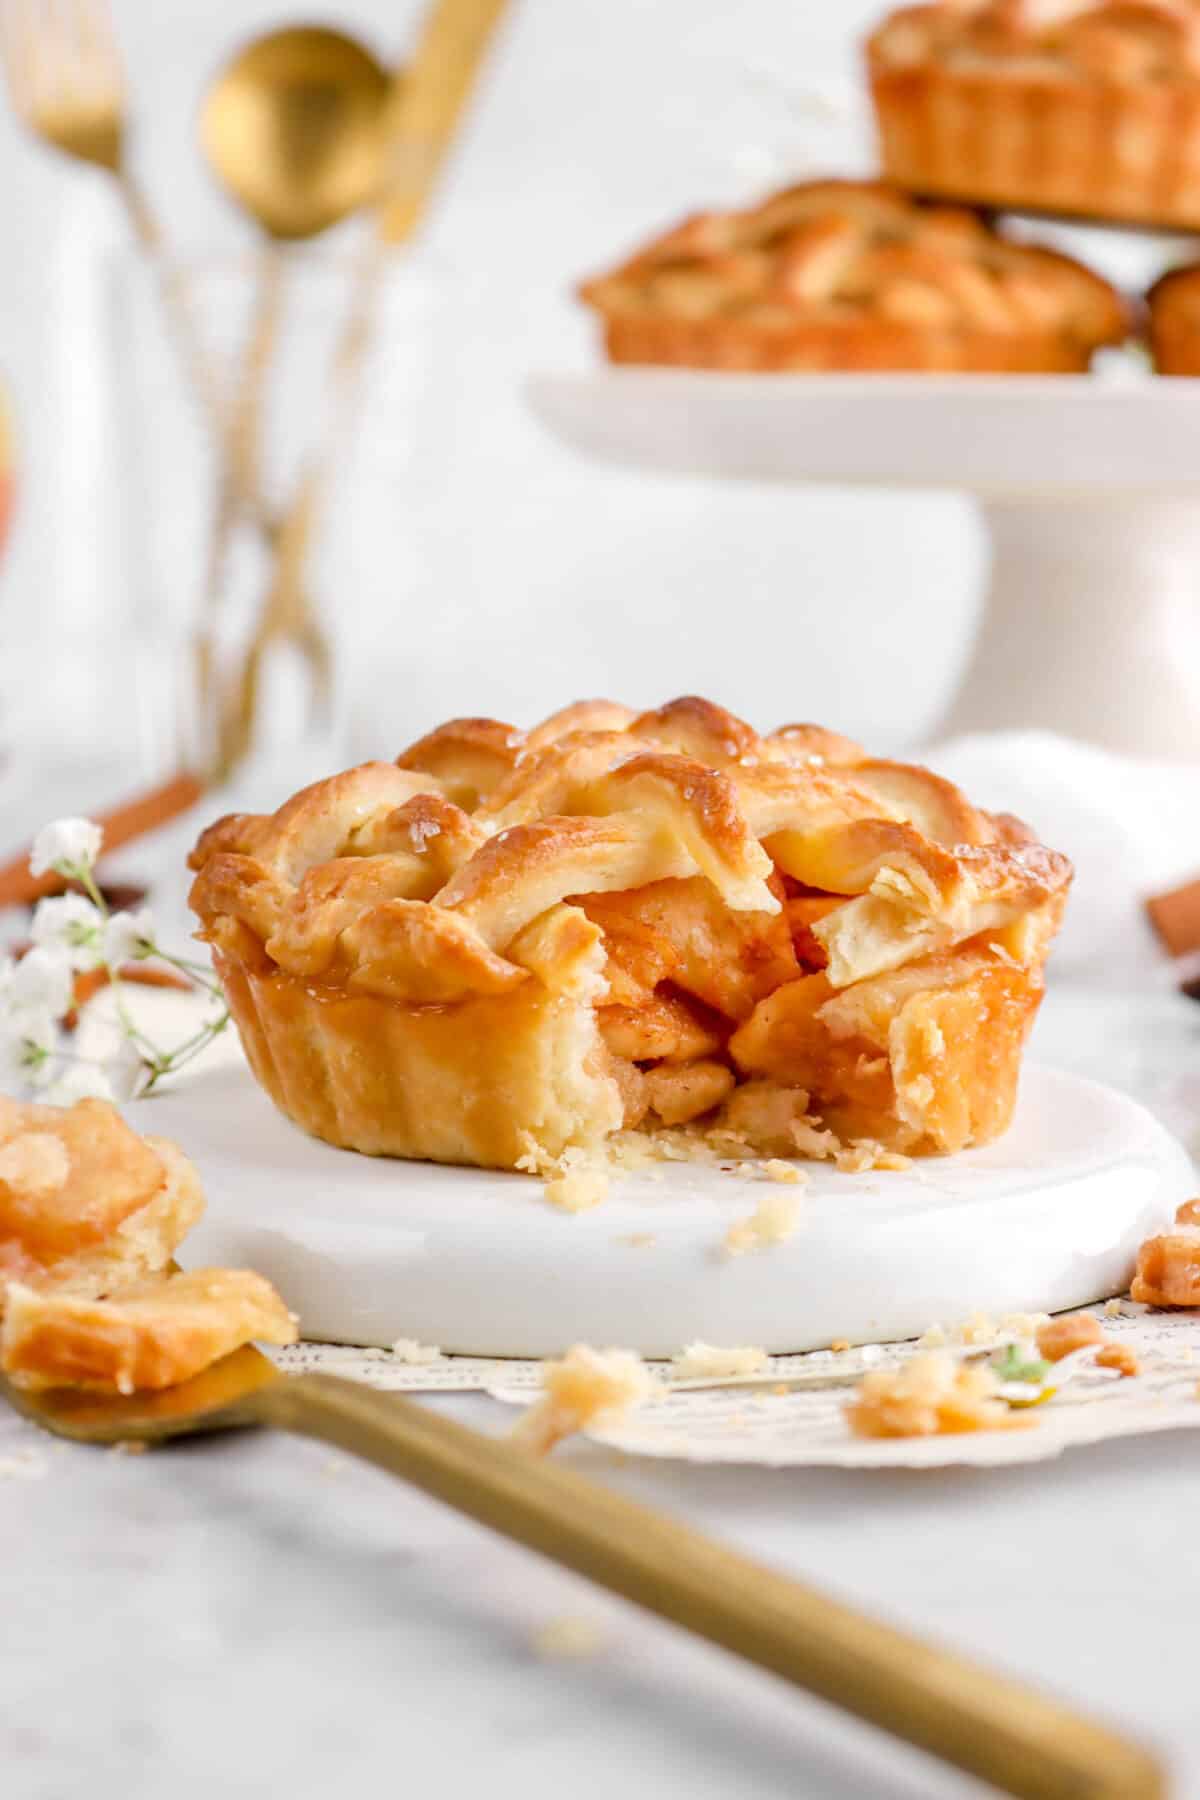
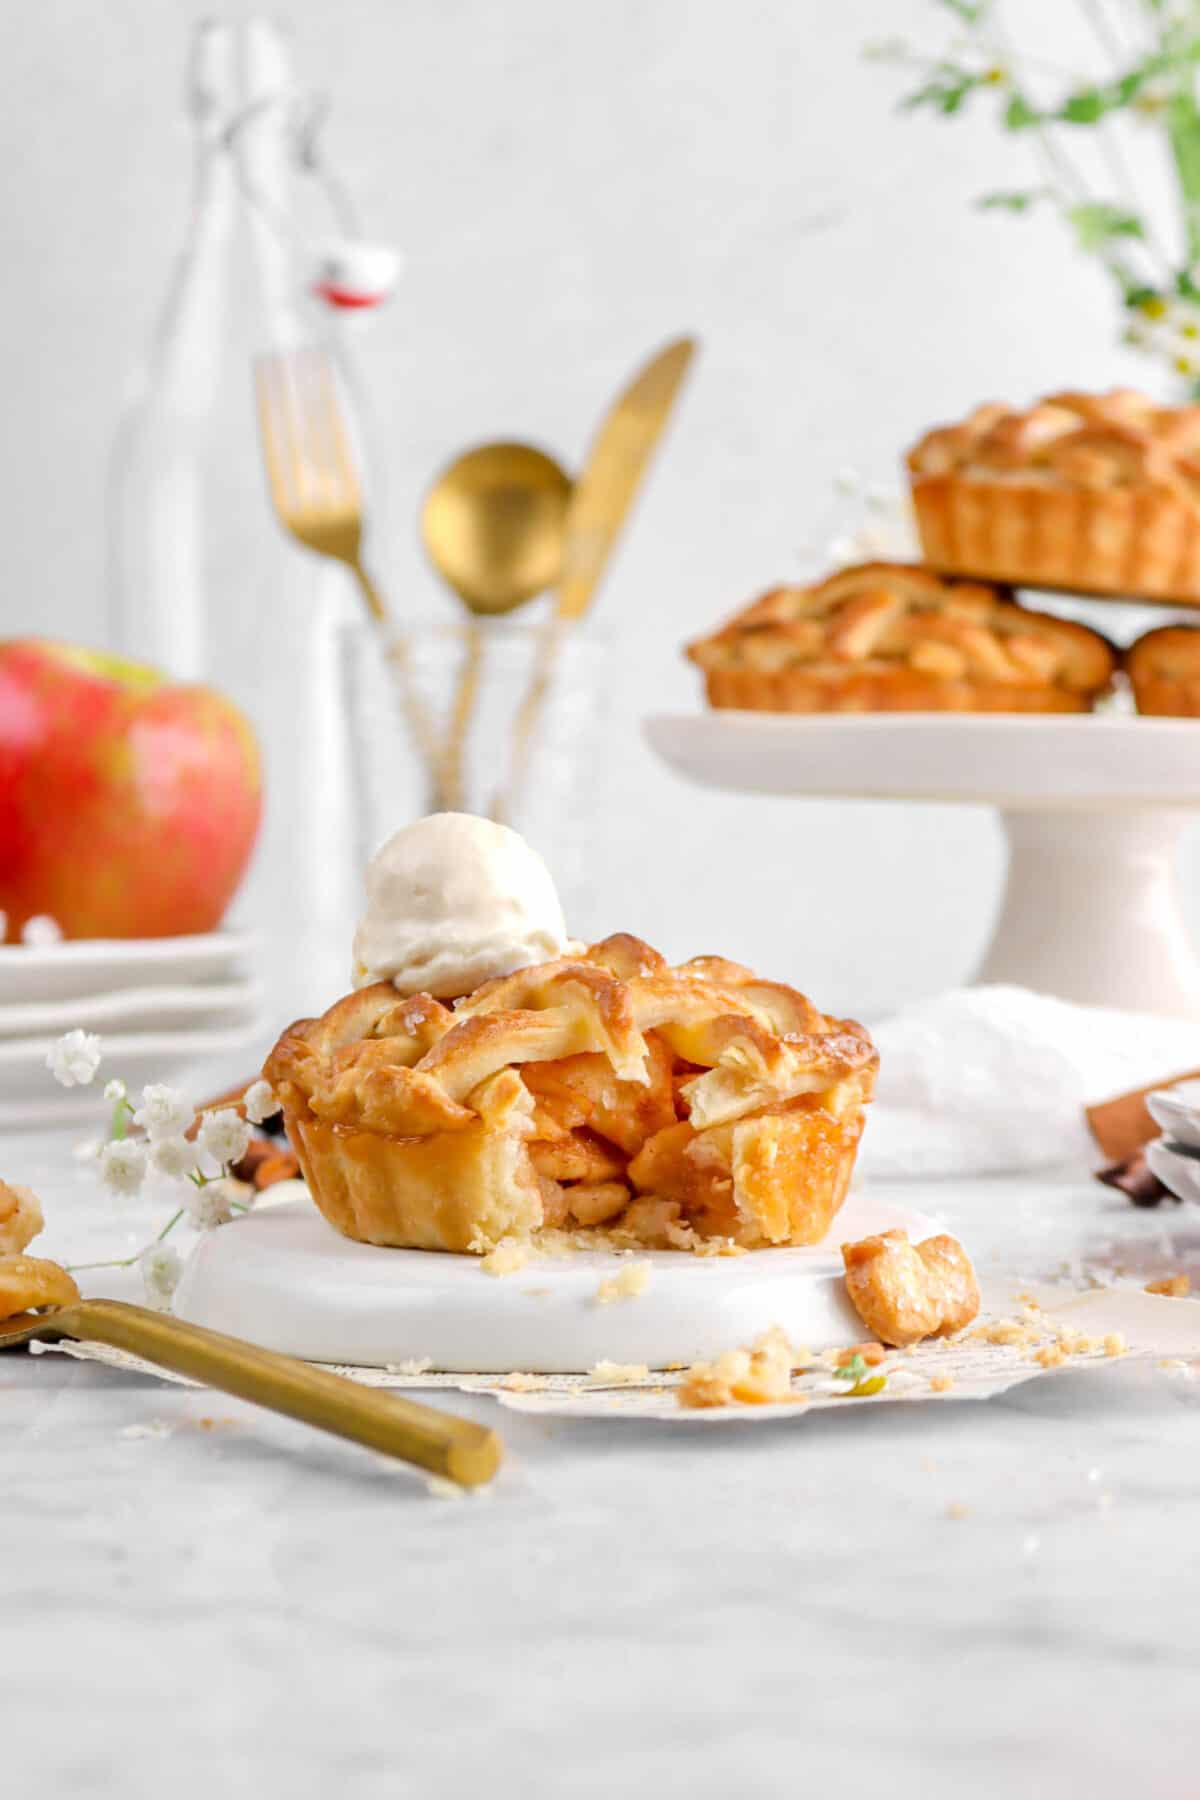
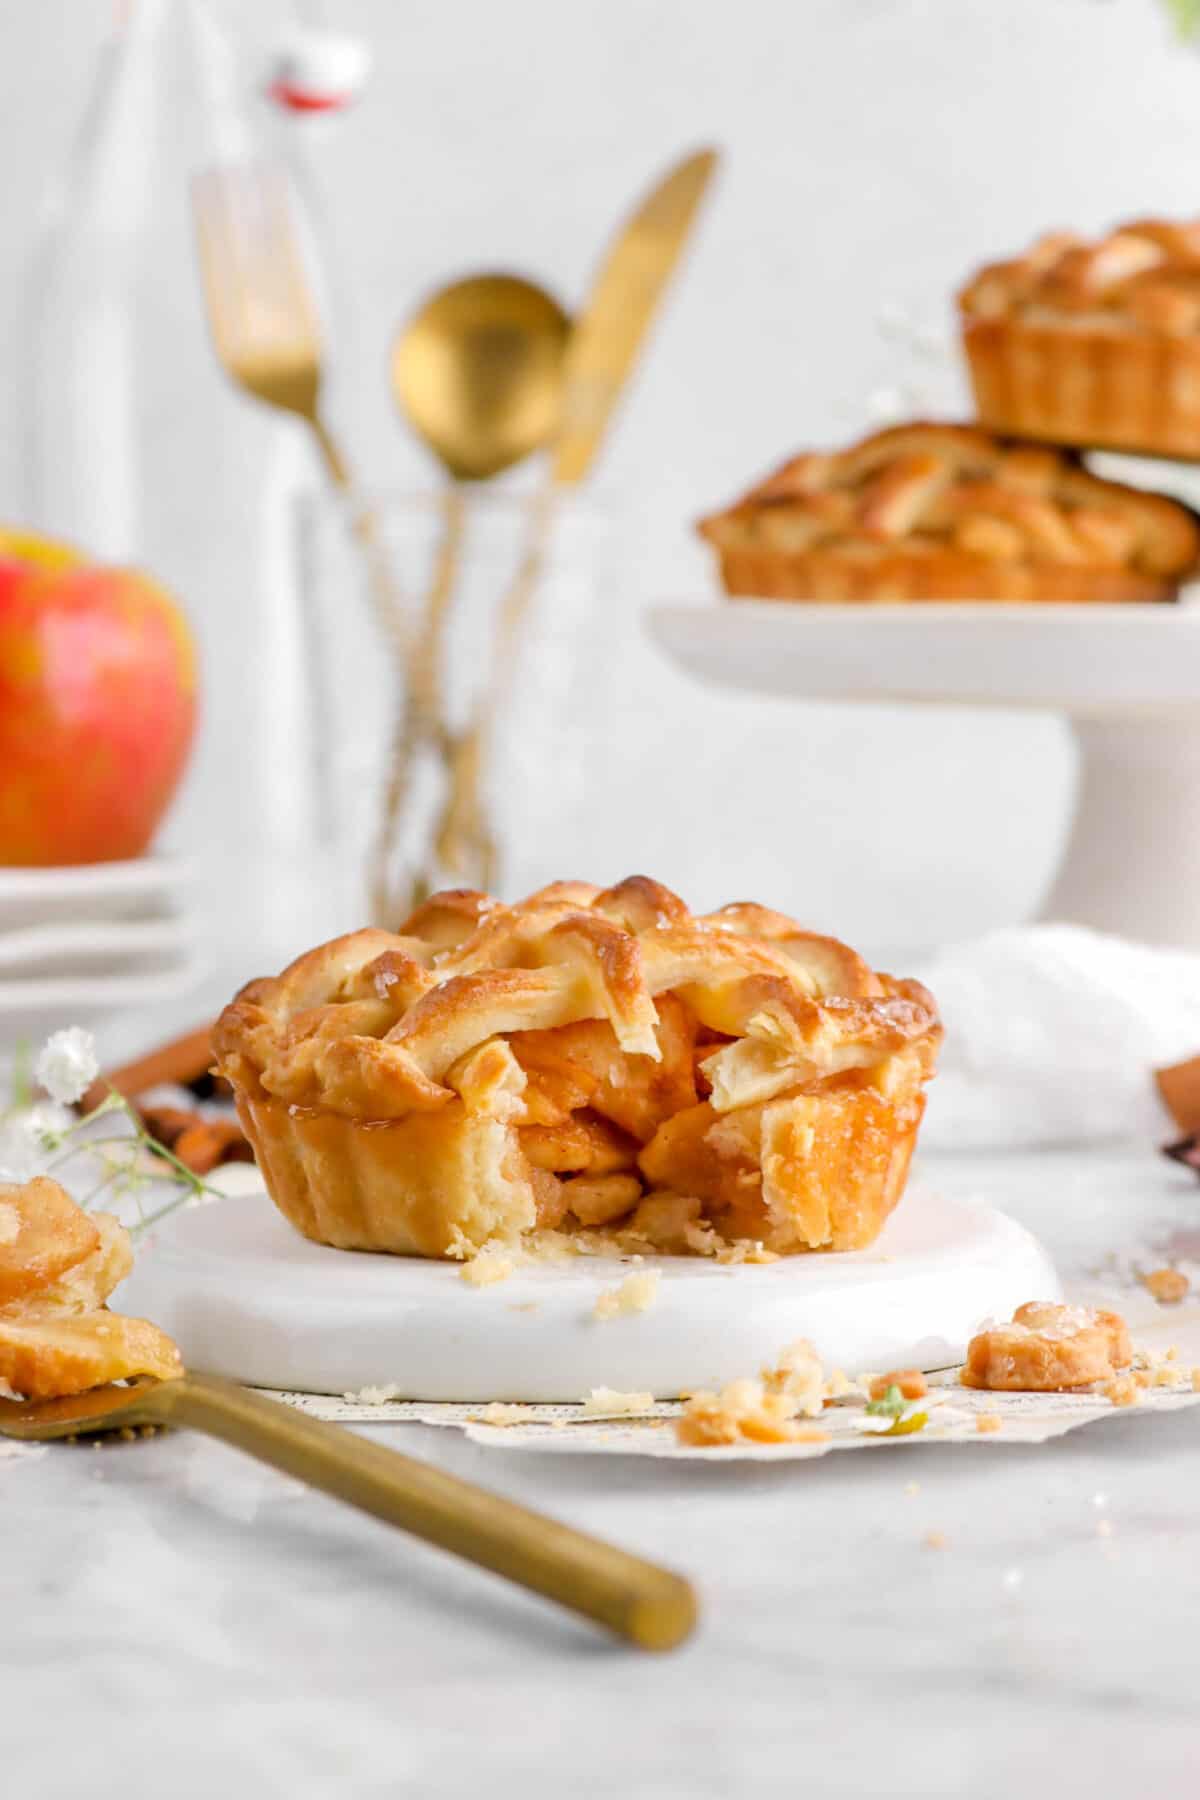
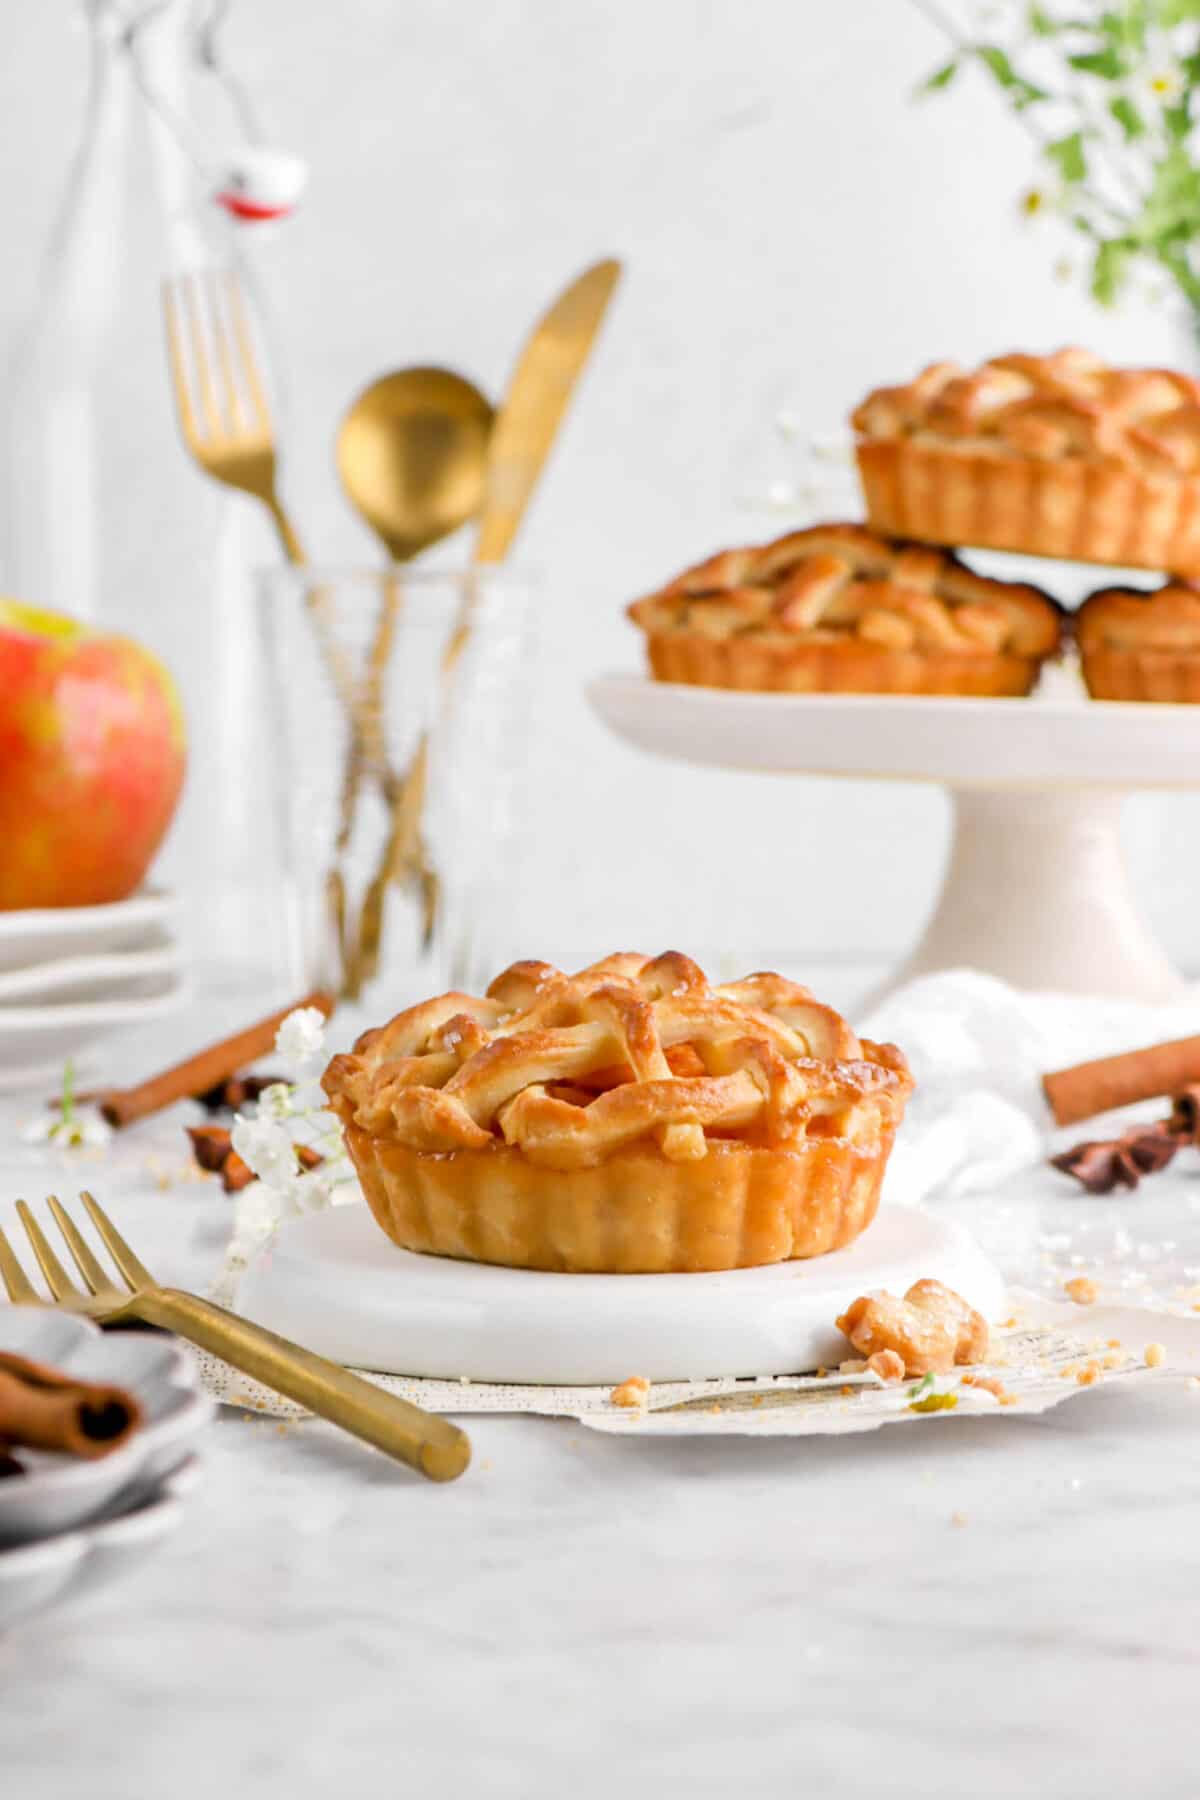
These Mini Apple Pies are a must-have dessert during Thanksgiving! They’re loaded with apples, juicy without having a soggy crust, and full of flavor. The pie crust is actually super simple to make! All you need is your mixer (no food processor!), some butter, flour, sugar, and ice cold water. Mix and refrigerate. It’s that easy! But, the filling is the real star here. Every bite has perfectly baked apples with hints of cinnamon, cloves, and nutmeg, while being perfectly sweet. It’s the ultimate apple pie…but made smaller! Just before baking, the pies are topped with a gorgeous basket weave lattice, then sprinkled with course sugar, creating the ultimate sweet treat for the holidays. These mini pies are absolutely delicious and are sure to become a new Fall favorite! It’s the classic we all know and love, but made with a slight twist to make it even more special. SO. GOOD.
About The Recipe
It’s official! Thanksgiving is tomorrow and I could not be more excited to share this recipe with all of you! If you’ve been following our blog, you’ll know there’s nothing that I love more than a homey Apple Pie. It was actually something I requested for my birthday when I was about 15 or so. It’s such a delicious dessert, and it’s a serious crowd-pleaser.
We actually already have a classic apple pie recipe on our blog; but this year, we wanted to do something a little different.
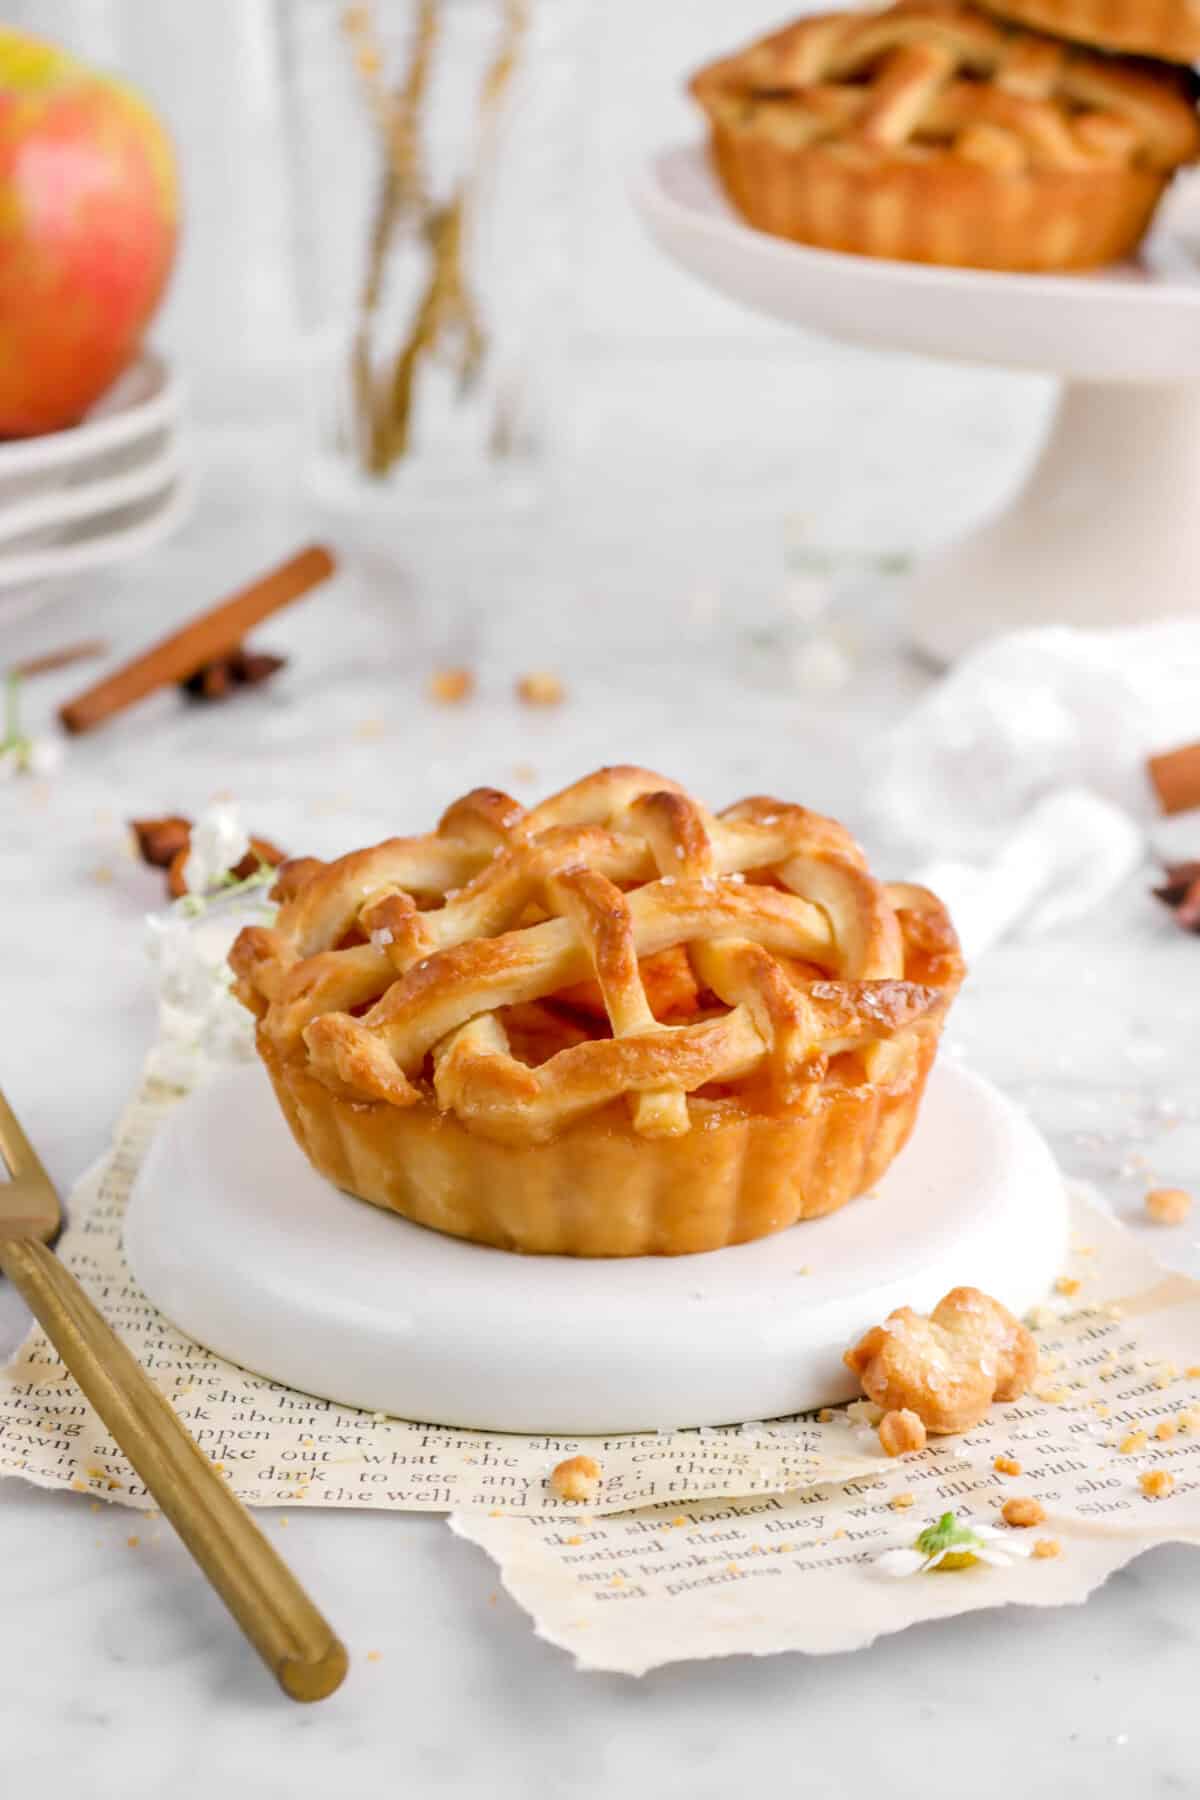
So, say “hello!” to these cute mini apple pies!
This whole recipe was reimagined from our classic pie. While it was fun to do something totally different, it caused us some real challenges when developing and testing this recipe.
The first test bake definitely didn’t go to plan. We totally got the proportions wrong. It was my brother’s birthday and our attention was, admittedly, elsewhere. The pies still tasted good, but they didn’t brown and the crust was crispy, not flaky, kind of like a cookie. We had too much sugar and too little butter.
So, we waited a few days before trying again. This time, it worked beautifully! We kept the same mixing method, as we fell in love with making pie crust in the mixer. It’s just so much easier, especially since our food processor doesn’t have a big enough bowl to make extra pie crust. Because let’s be real, the holidays are here and we need enough to share!

Oh, and if it looks like we have a bit more dough than we should in one of the photos, don’t worry. The recipe makes exactly what it is supposed to. We just doubled the recipe because we needed extras for tomorrow and forgot to remove them from the shot!
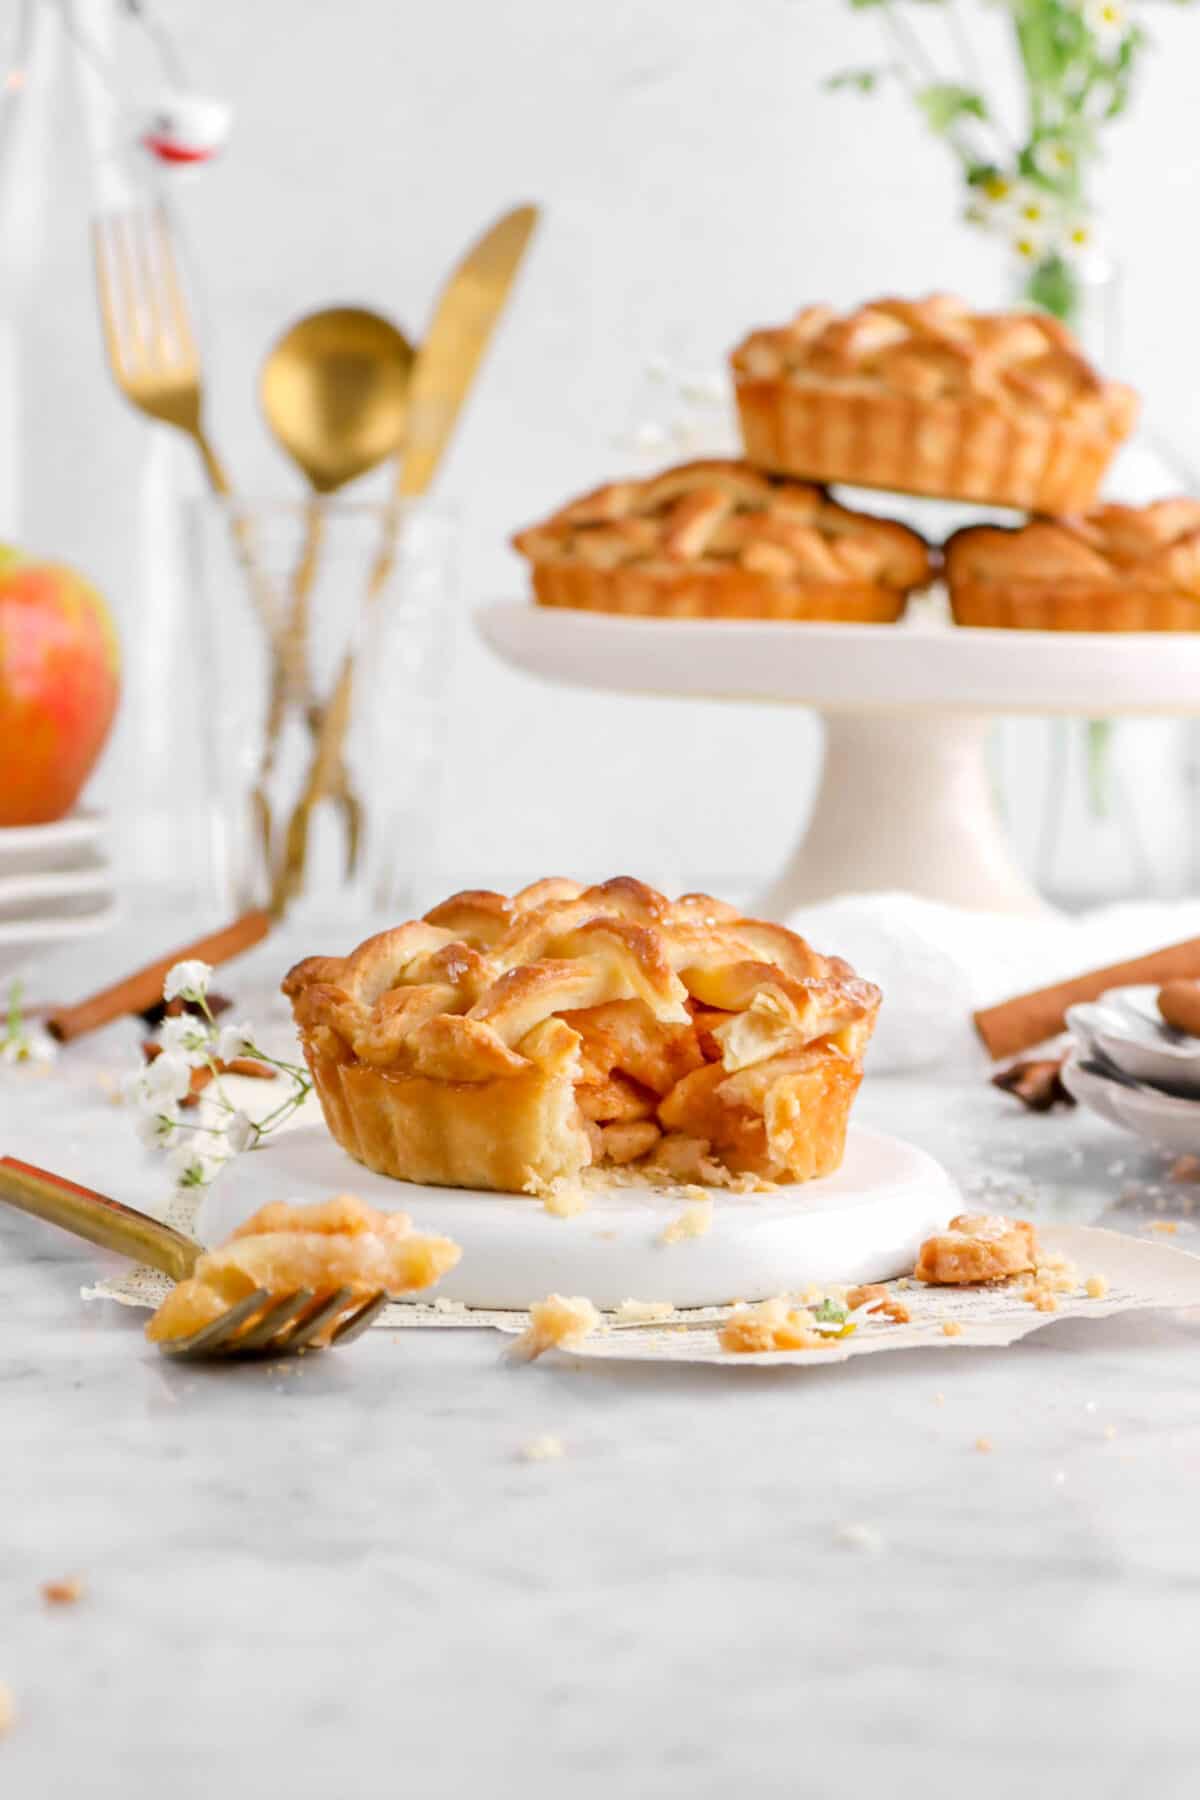
There’s no real crowd pleaser like a classic apple pie! Every bite of this yummy treat is sweet without being too sweet, perfectly spiced, apple-y, and buttery with the flakiest crust EVER.
Equipment Needed
- Stand-Mixer
- Parchment Paper
- Rolling Pin
- Plastic Wrap
- 6 Inch Ring Mold
- 5 Inch Ring Mold
- Mini Tart Pan
Ingredients
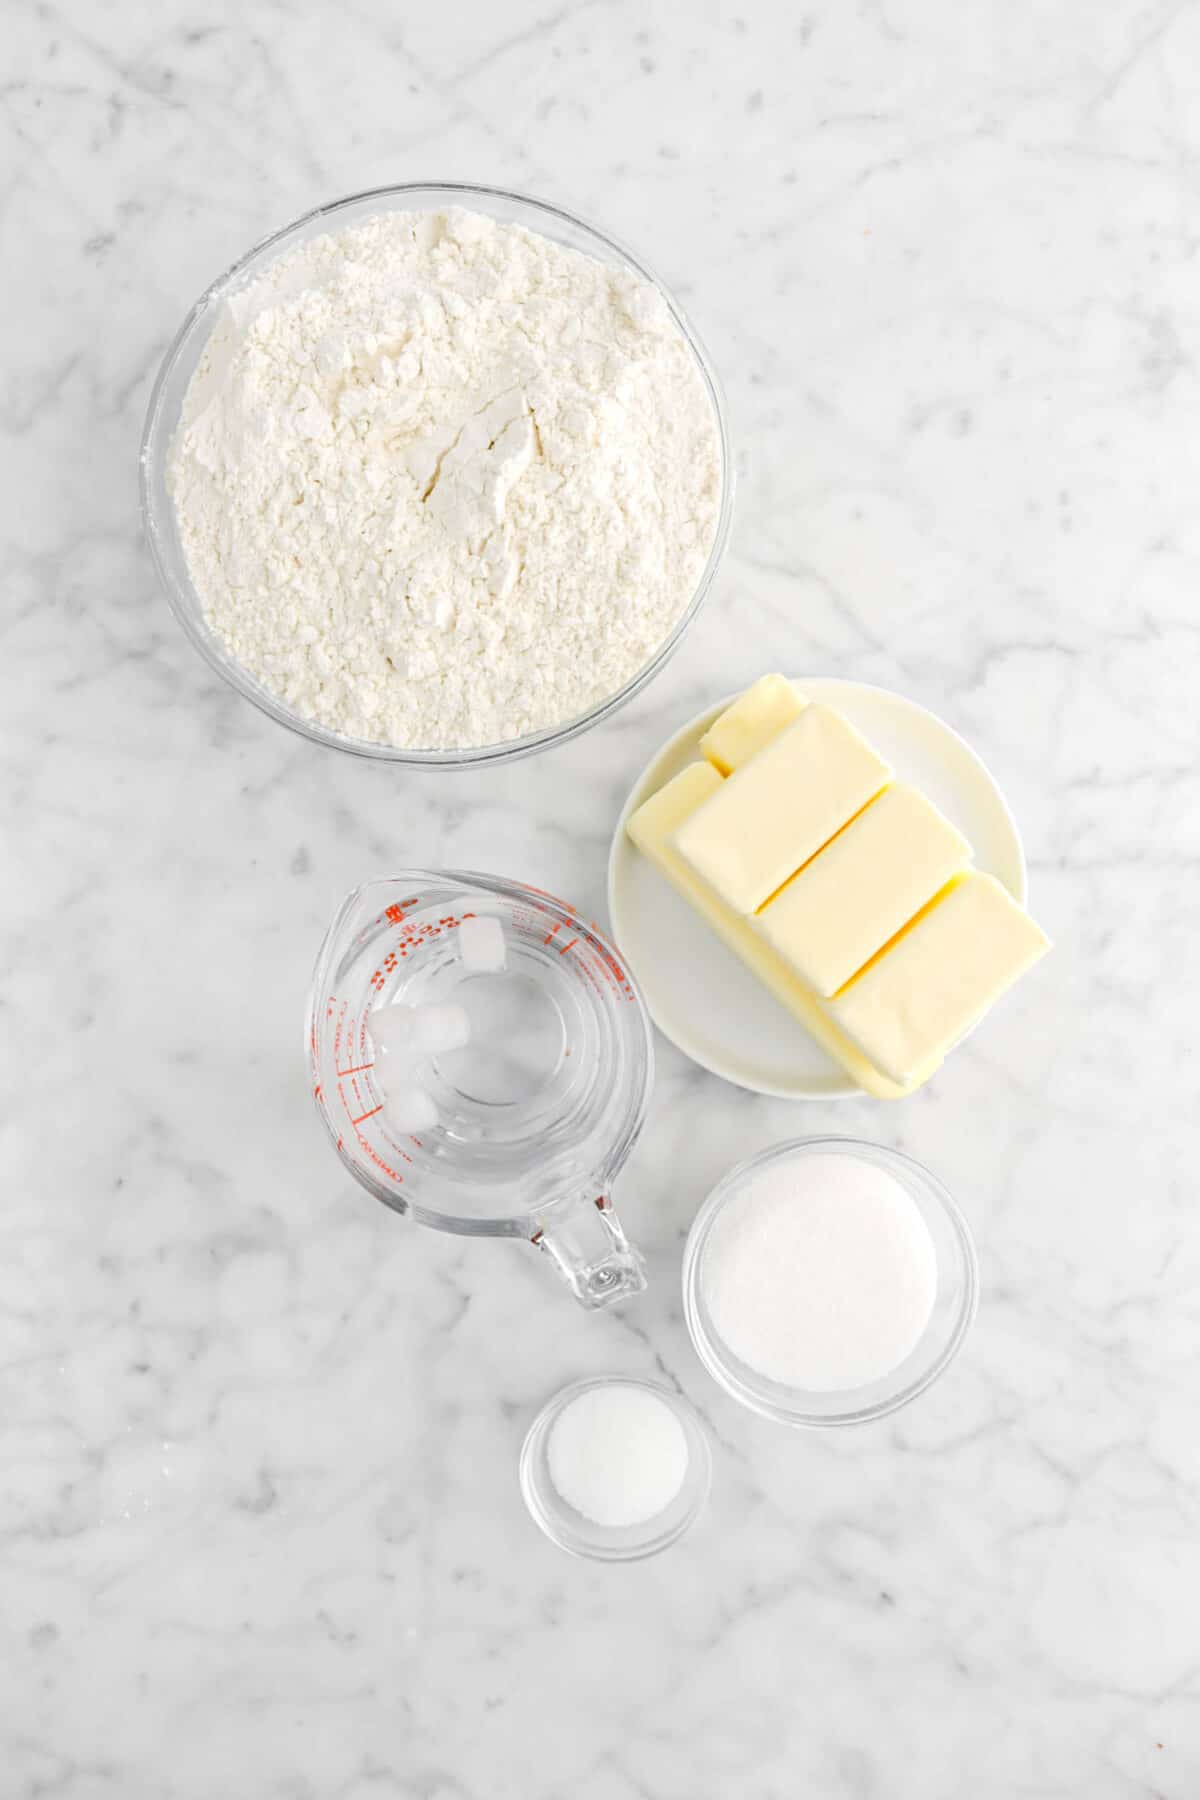
For The Pie Crust:
- All-Purpose Flour – Using plain all purpose flour is the way to go here. The protein content gives the pie dough the structure it needs.
- Granulated Sugar – Just a touch of sugar helps promote browning and adds the slightest bit of sweetness, as well as helping to keep the crust tender.
- Salt – Just a little salt enhances the flavor.
- Unsalted Butter – Responsible for the flaky layers, the butter also adds richness and flavor.
- Ice Water – The water has to be ice cold to keep the butter firm and to help slow down the formation of gluten.
For The Filling:
- Chopped Apples – You can use any type of baking apple that you like, or a mix of your favorites. Some great baking apples are Granny Smith, Jonathan, Jonagold, Newton, Pippin, Rome, Macoun, Pink Lady, Stayman-Winesap, Haralson, and Golden Delicious.
- Granulated Sugar – The perfect choice for sweetening this filling, it pulls the juices from the apples.
- Apple Pie Spice – What could be better than the blend of spices that make up apple pie spice?! It enhances the flavor of the apples and brings out that great Fall flavor.
- Cornstarch – Starches are wonderful thickeners, and cornstarch is the perfect choice to thicken all of that luscious juice from the apples.
- Unsalted Butter – We all know that butter adds flavor, but here it also gives the filling a rich, luxurious mouthfeel.

Instructions
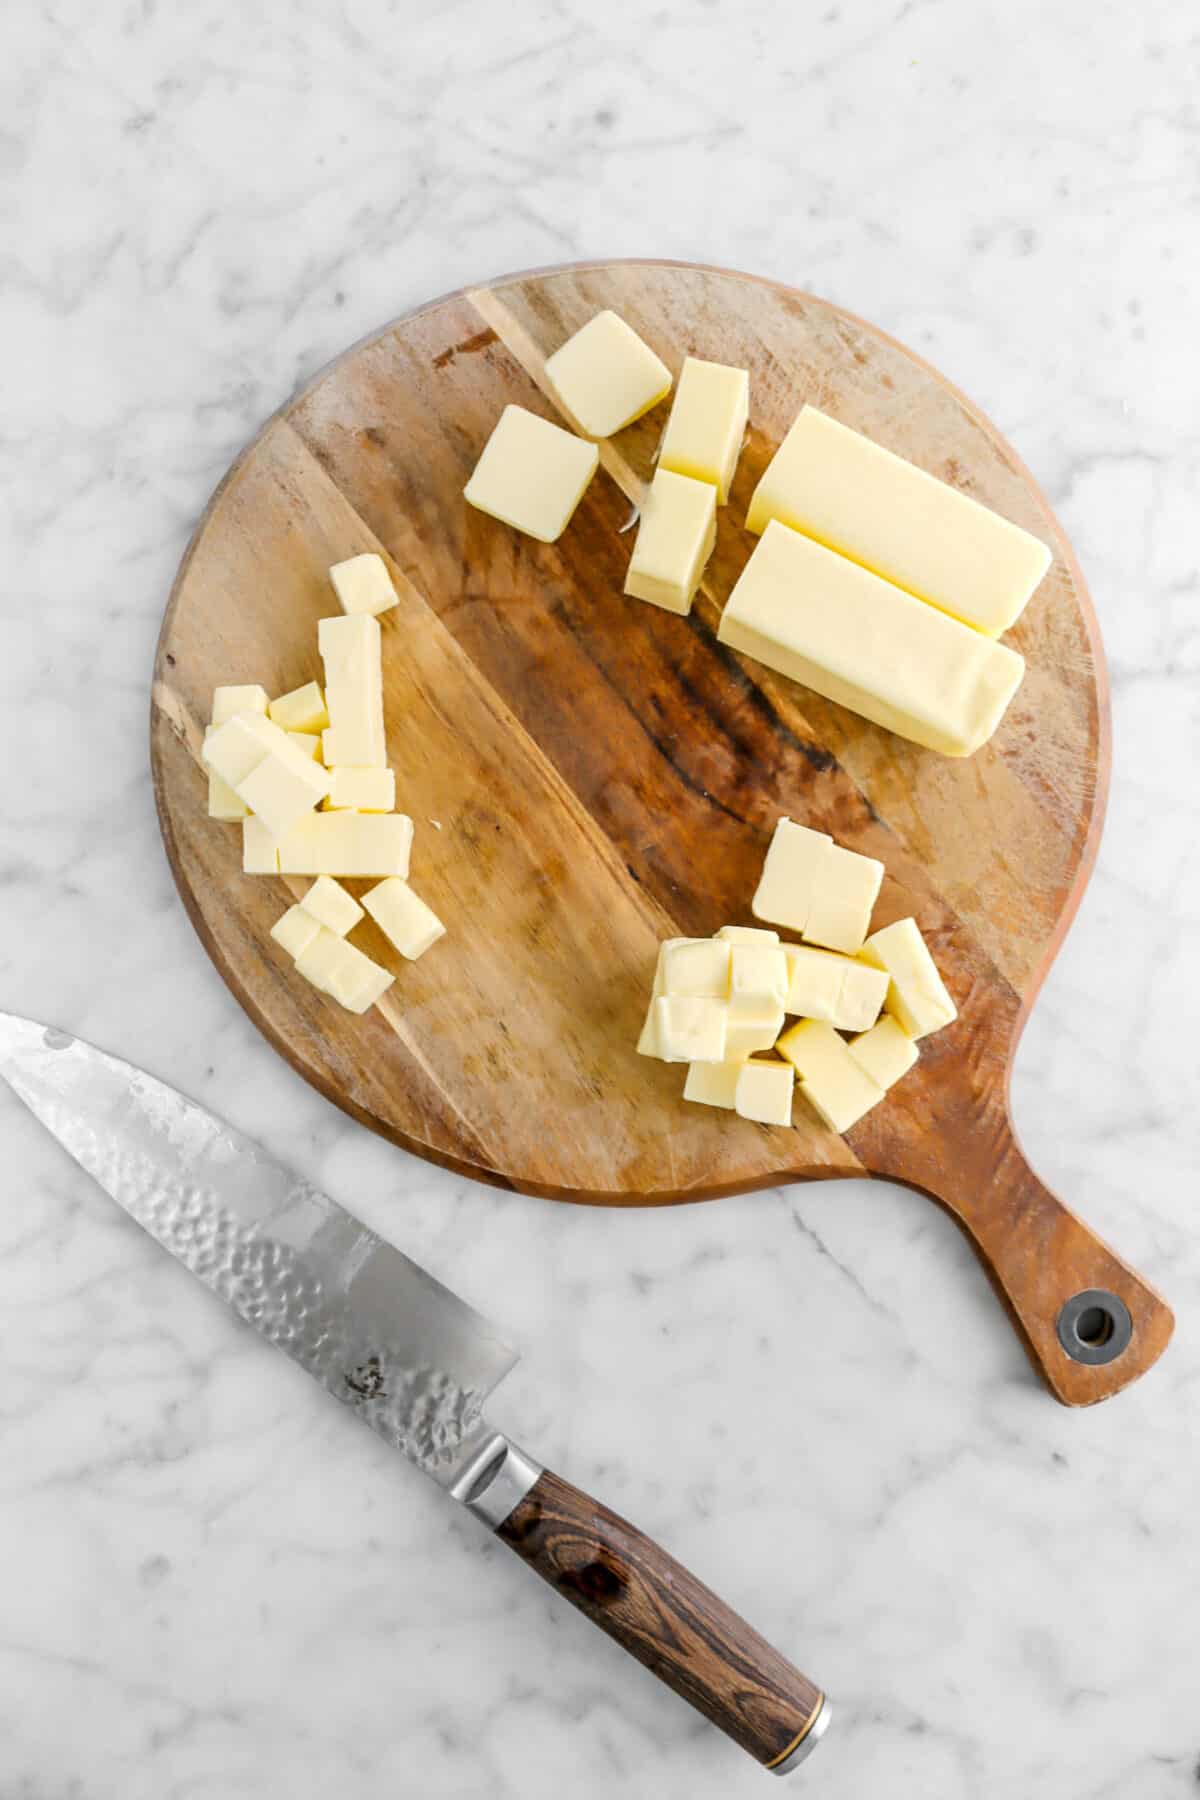
Chop the butter for the crust into small pieces. Remove 1/4 cup butter and return the rest to the refrigerator.
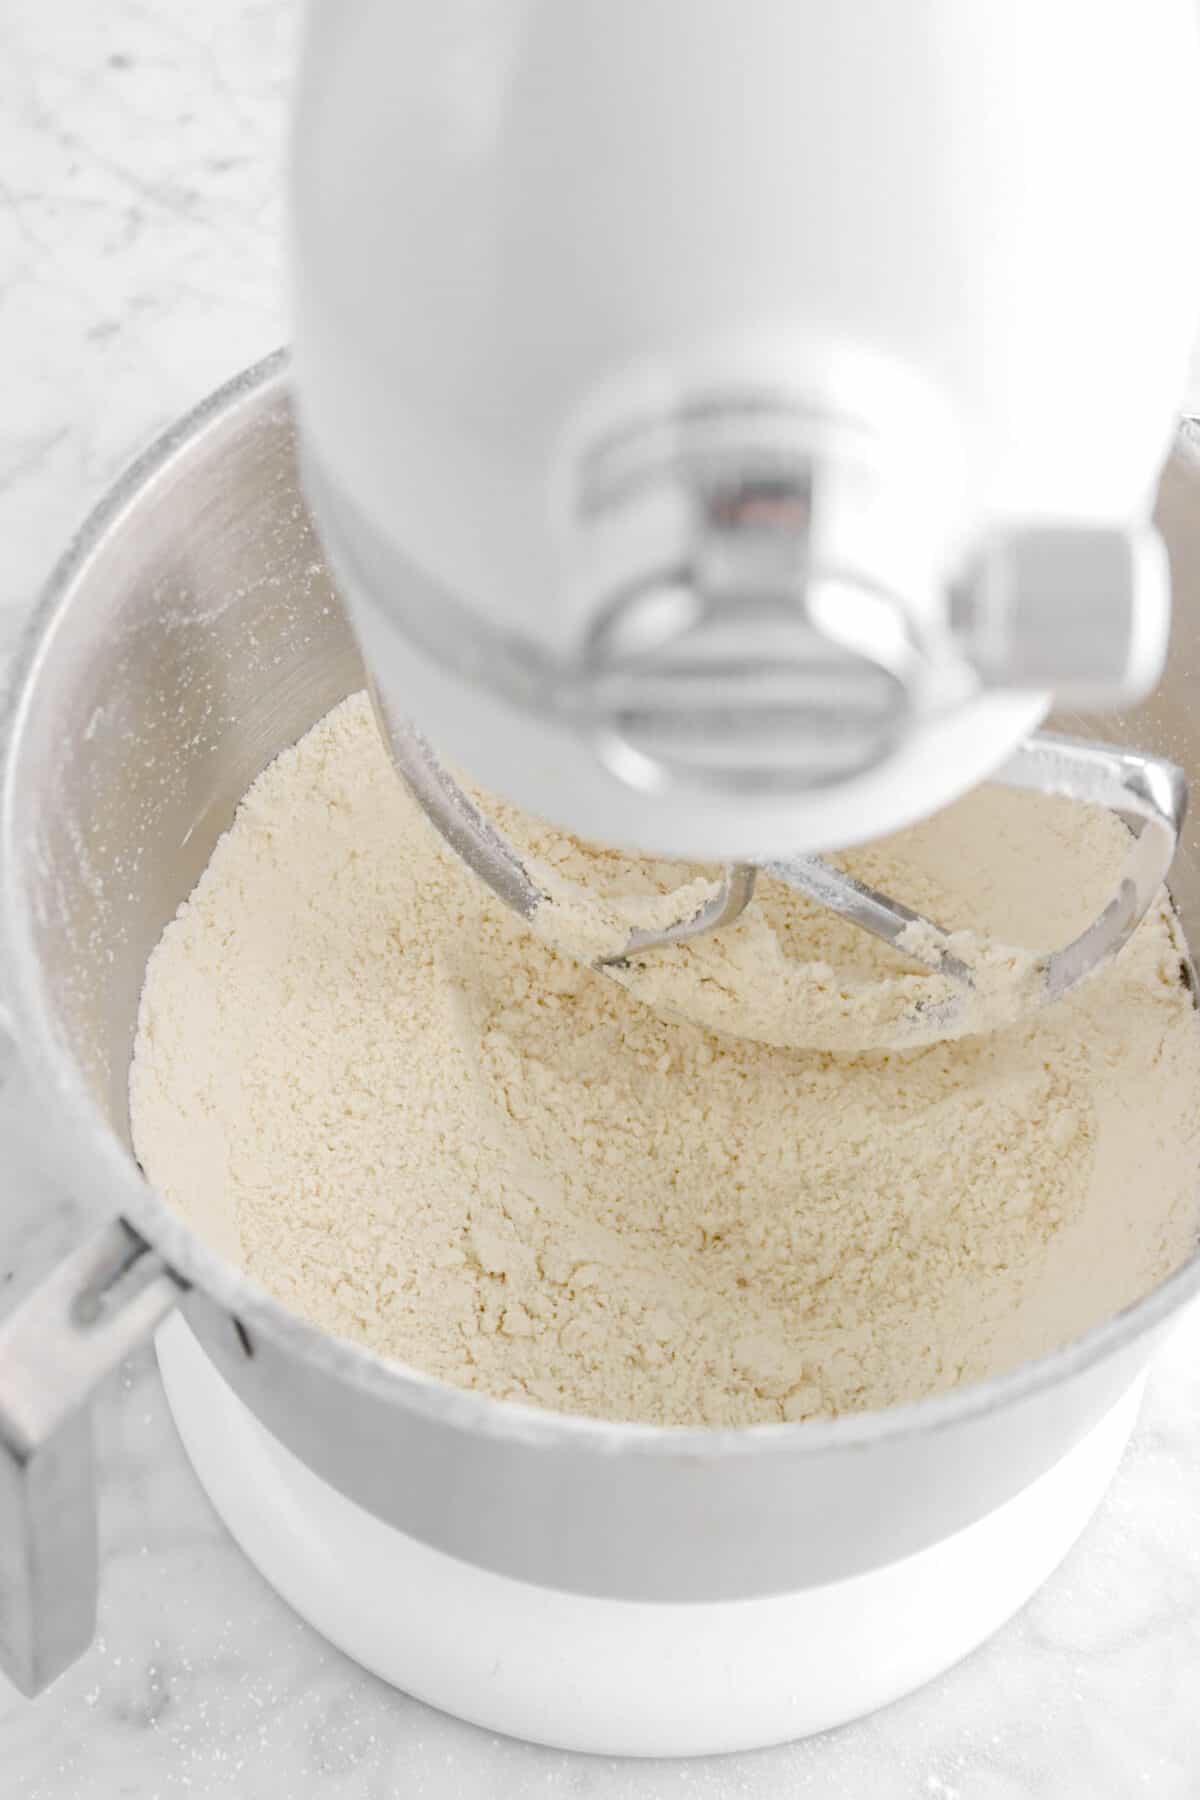
Combine the flour, sugar, salt, and 1/4 cup butter in the bowl of a stand mixer. Turn the mixer on a low speed and mix until mixture is about the texture of corn meal, anywhere between 3-4 minutes.

Add the rest of the butter and mix on medium low speed until just combined. You should still have pretty decent sized chunks of butter left in mixture.


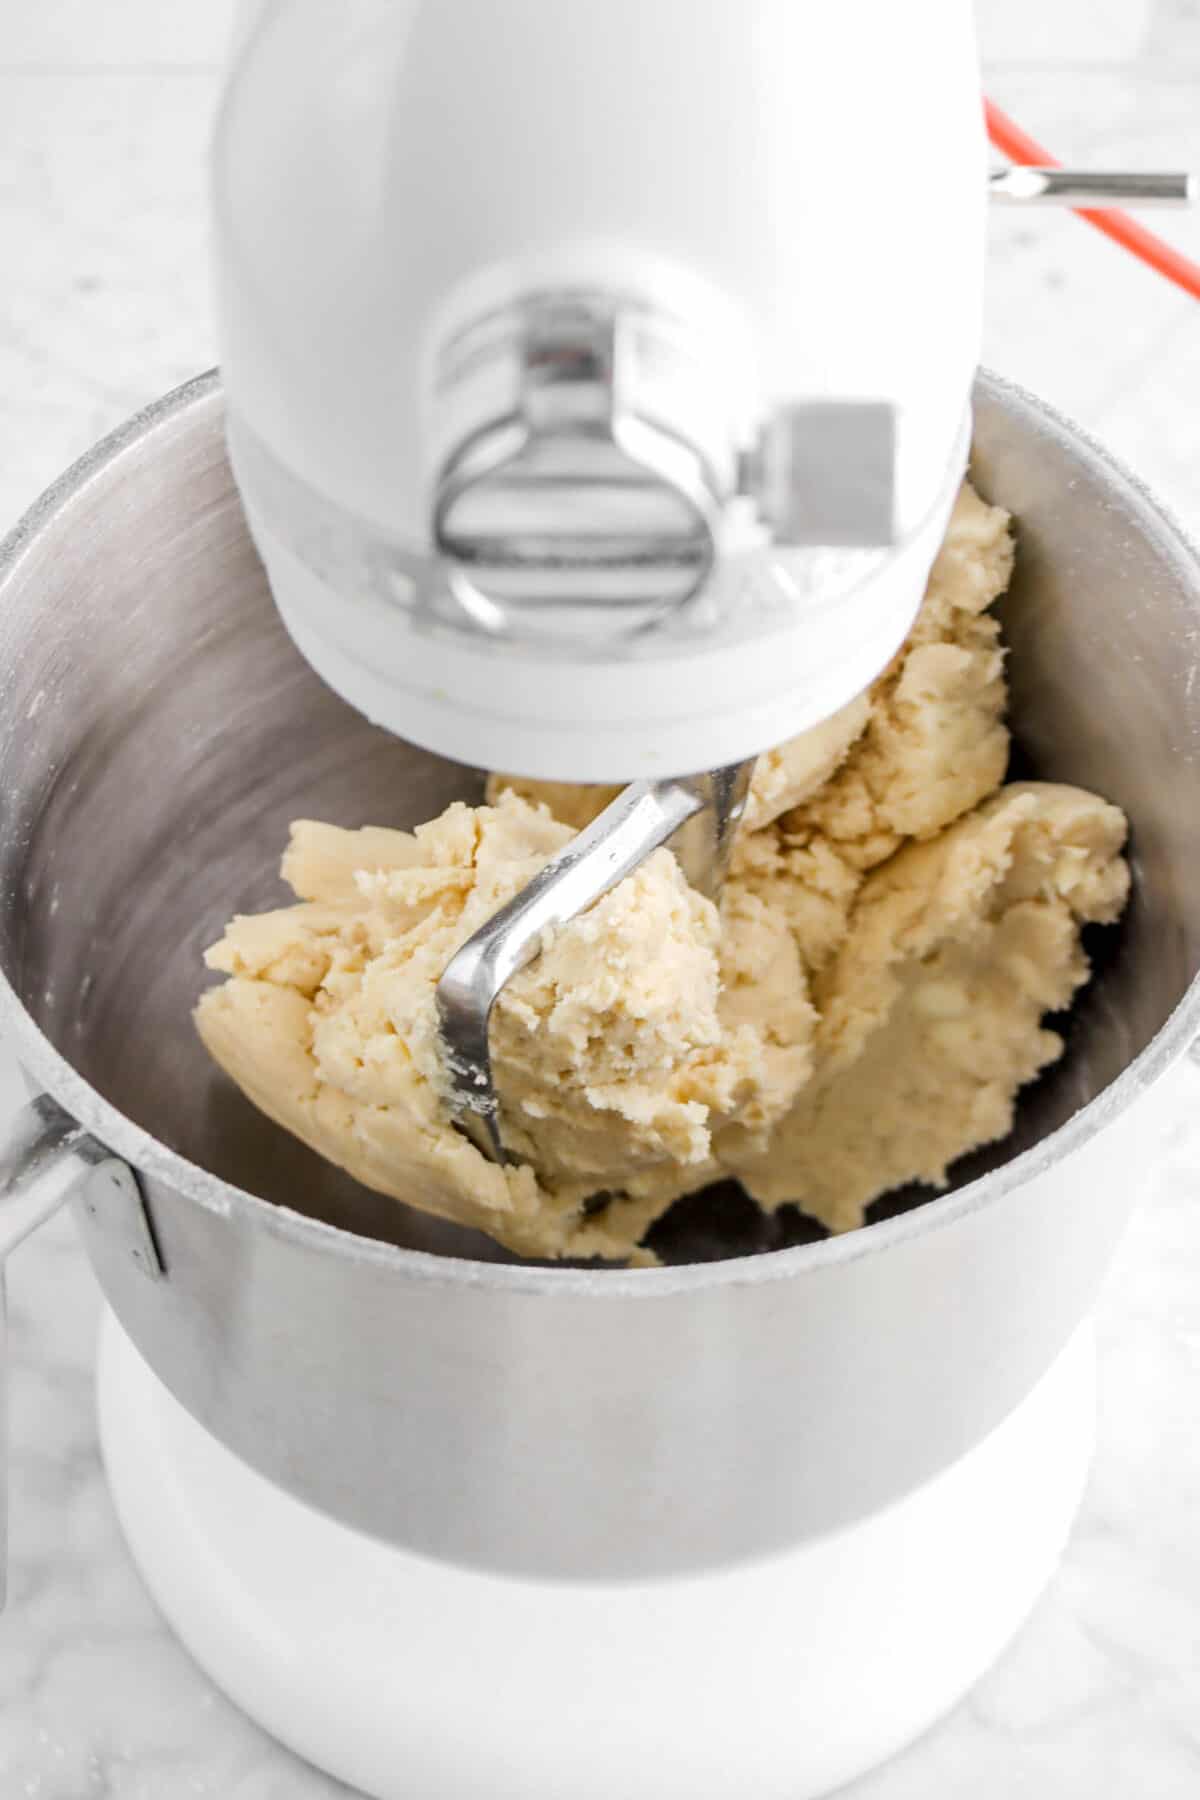
Reduce the speed on the mixer to low. Add the ice water one Tablespoon at a time until the mixture just comes together.

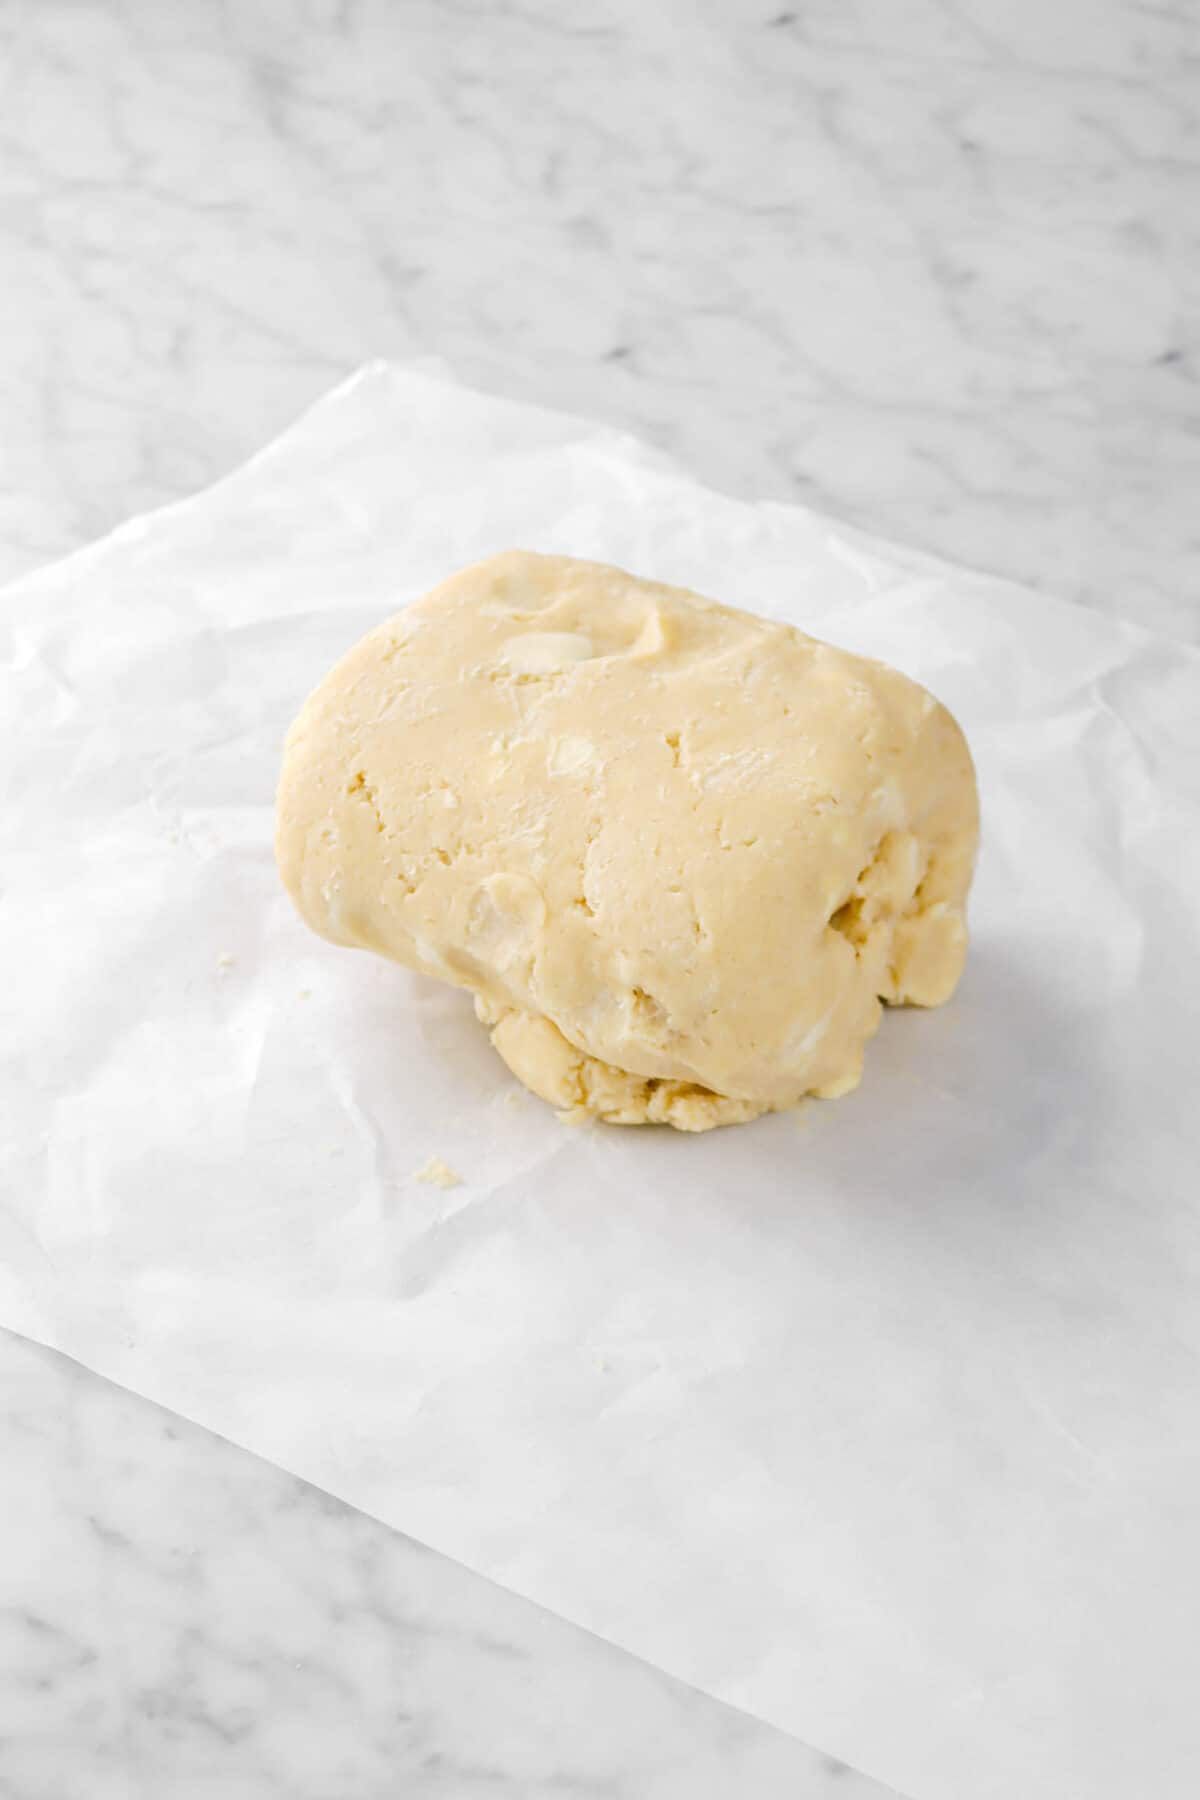
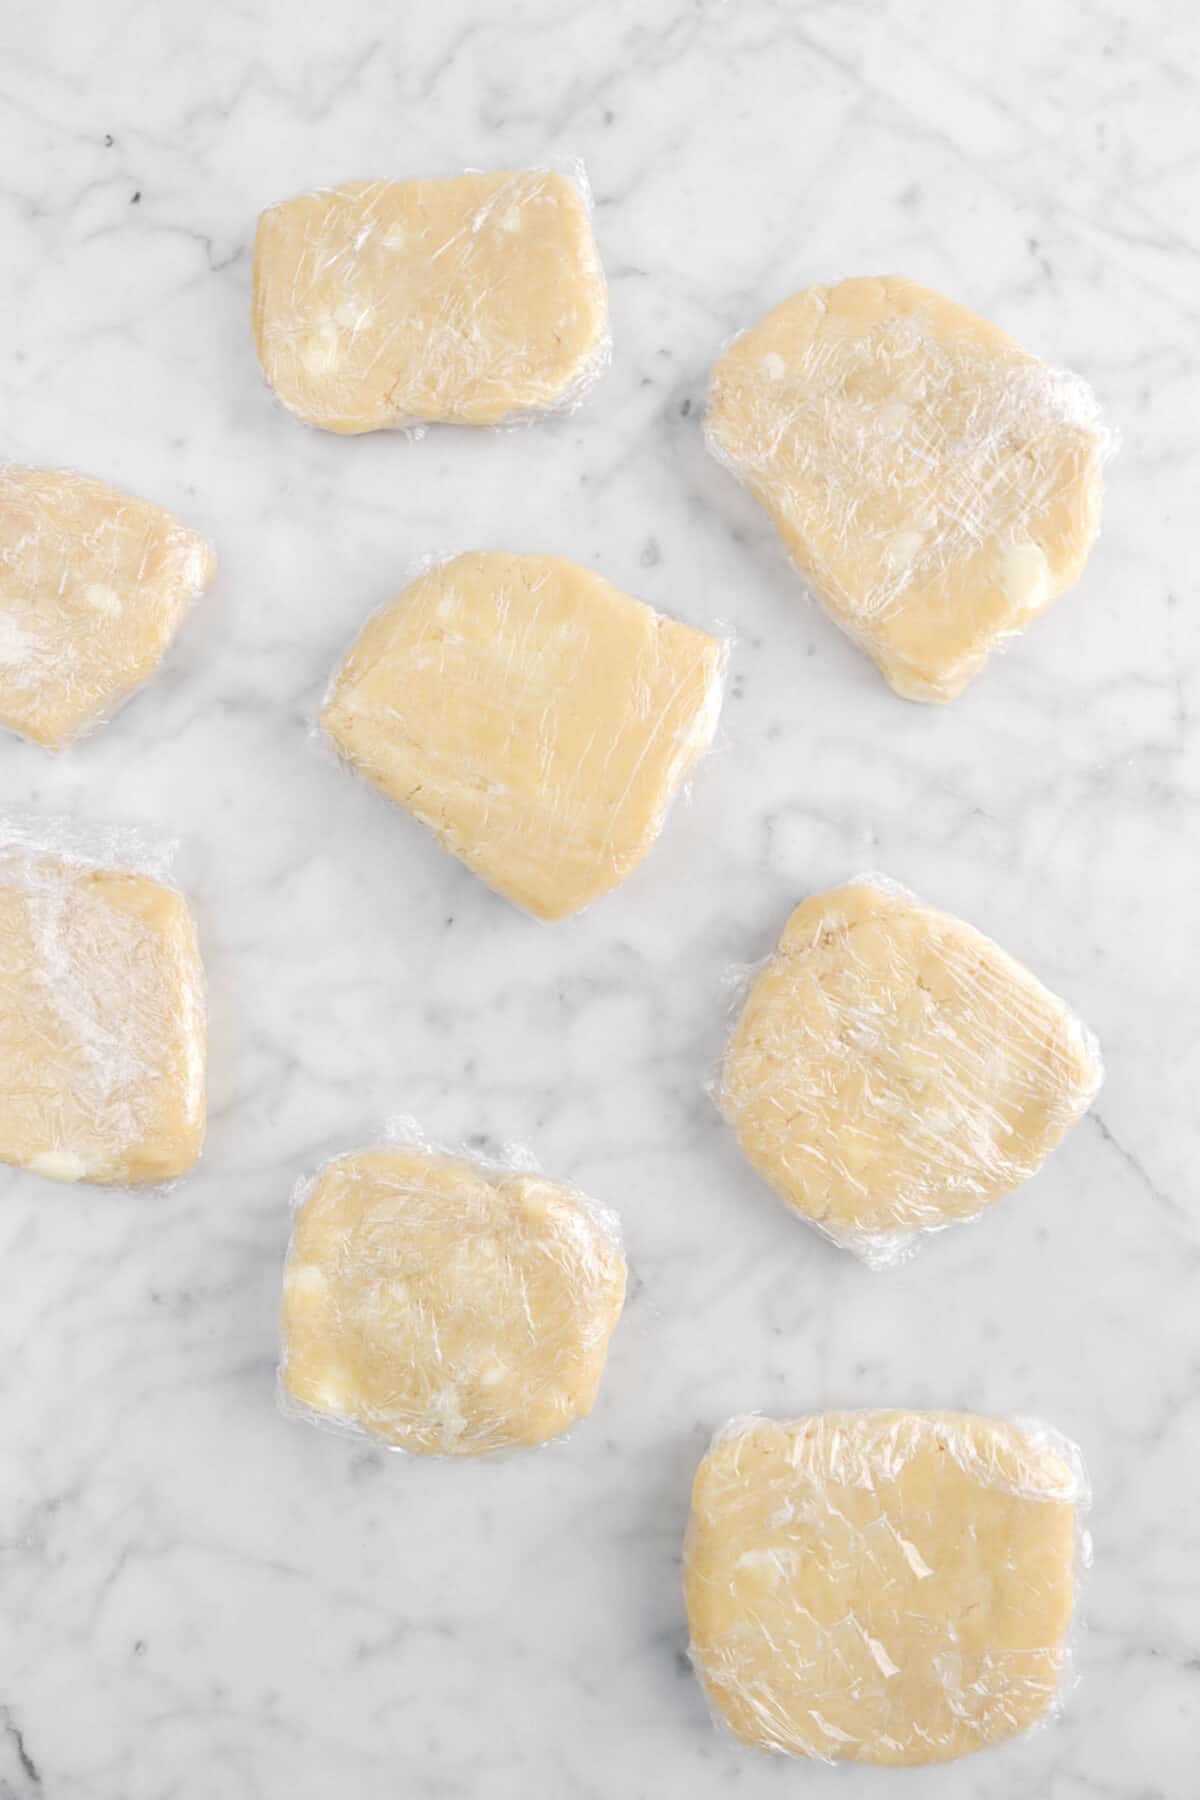
Turn out onto parchment paper and divide the dough into fourths. Form each 1/4 into a round. Wrap in plastic wrap and refrigerate for at least 4 hours.

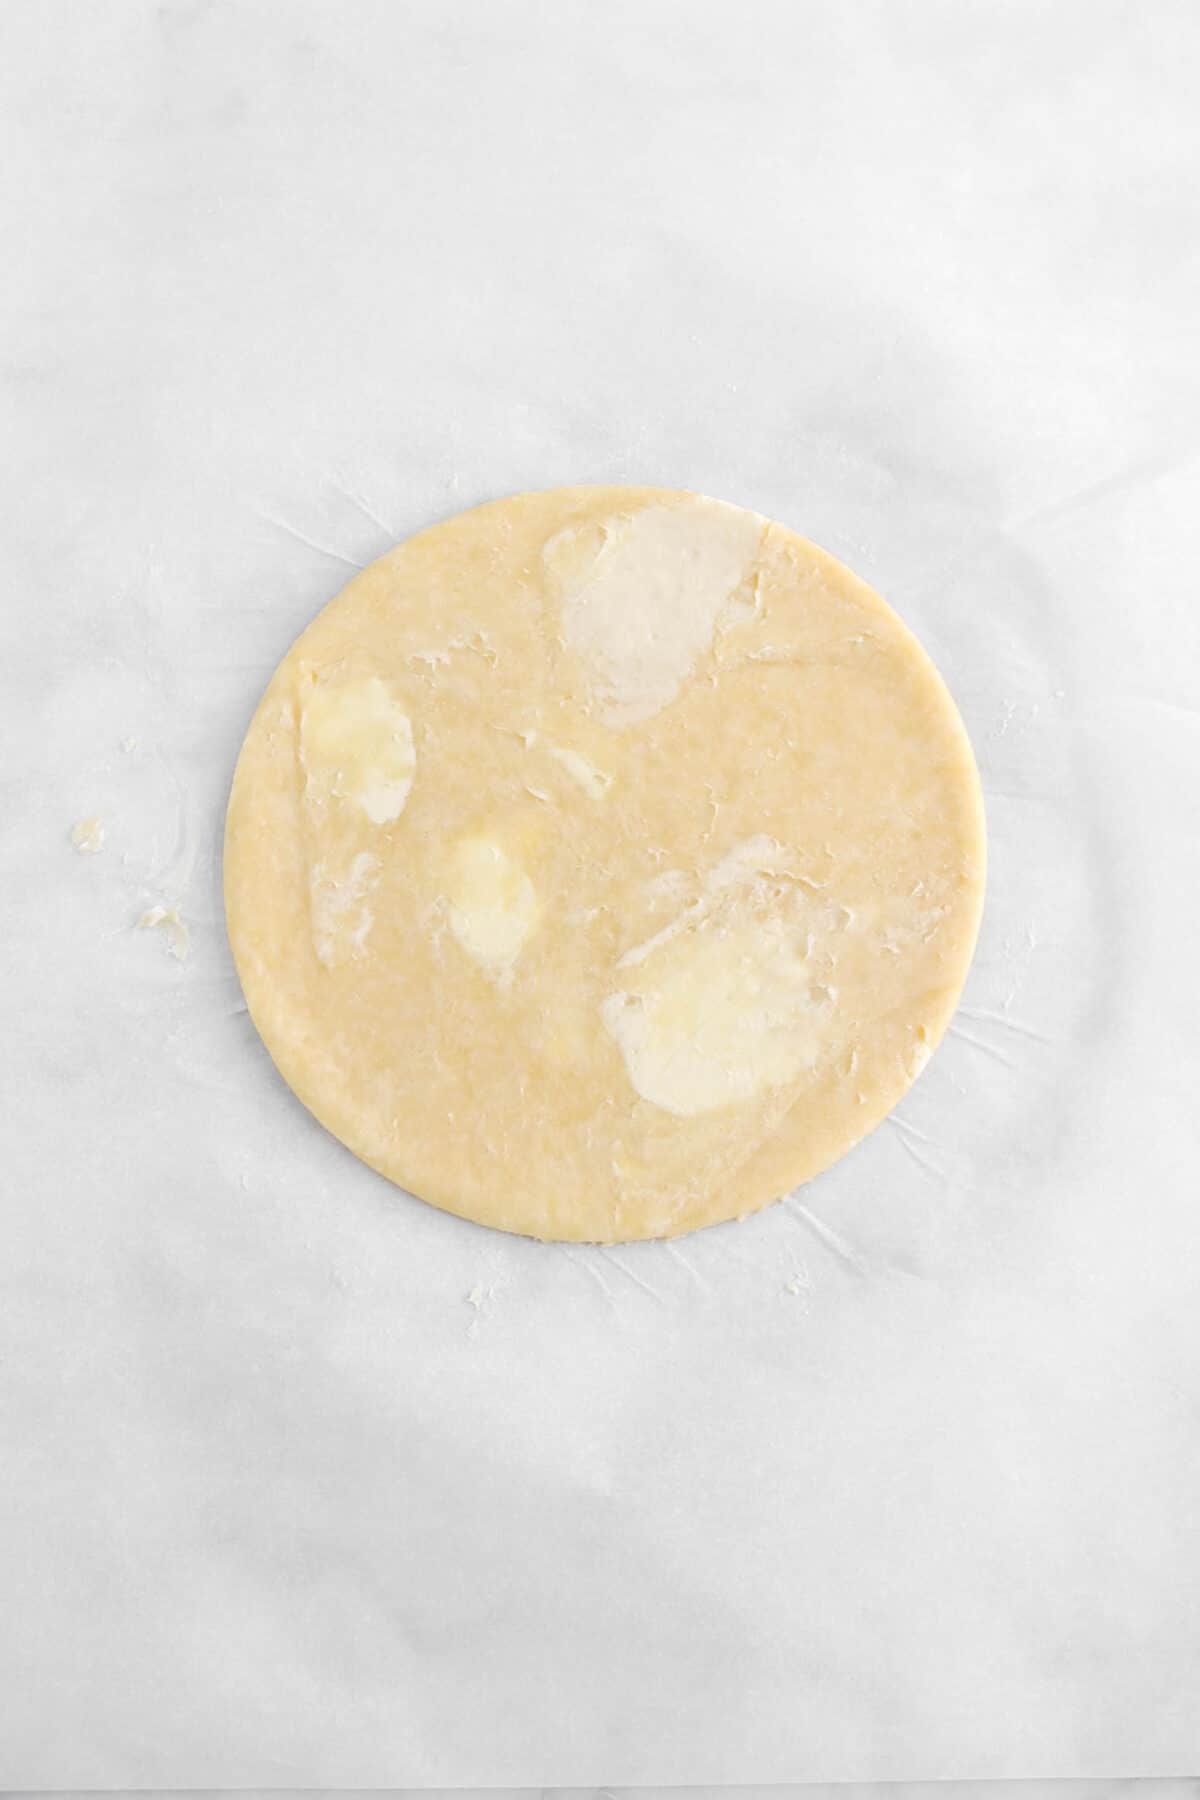
Working with one disc at a time, remove from the fridge. Roll out on a non-stick surface (marble, parchment paper, silicone mat) into a circle that is 3/16 inch thick.


Cut out a 6-1/2 inch circle and fit it into the tart pan. Reserve the scraps. Repeat with the 3 other pieces of dough. Place pie crusts in refrigerator until needed. If dough is getting warm, place scraps in the fridge for a few minutes too.


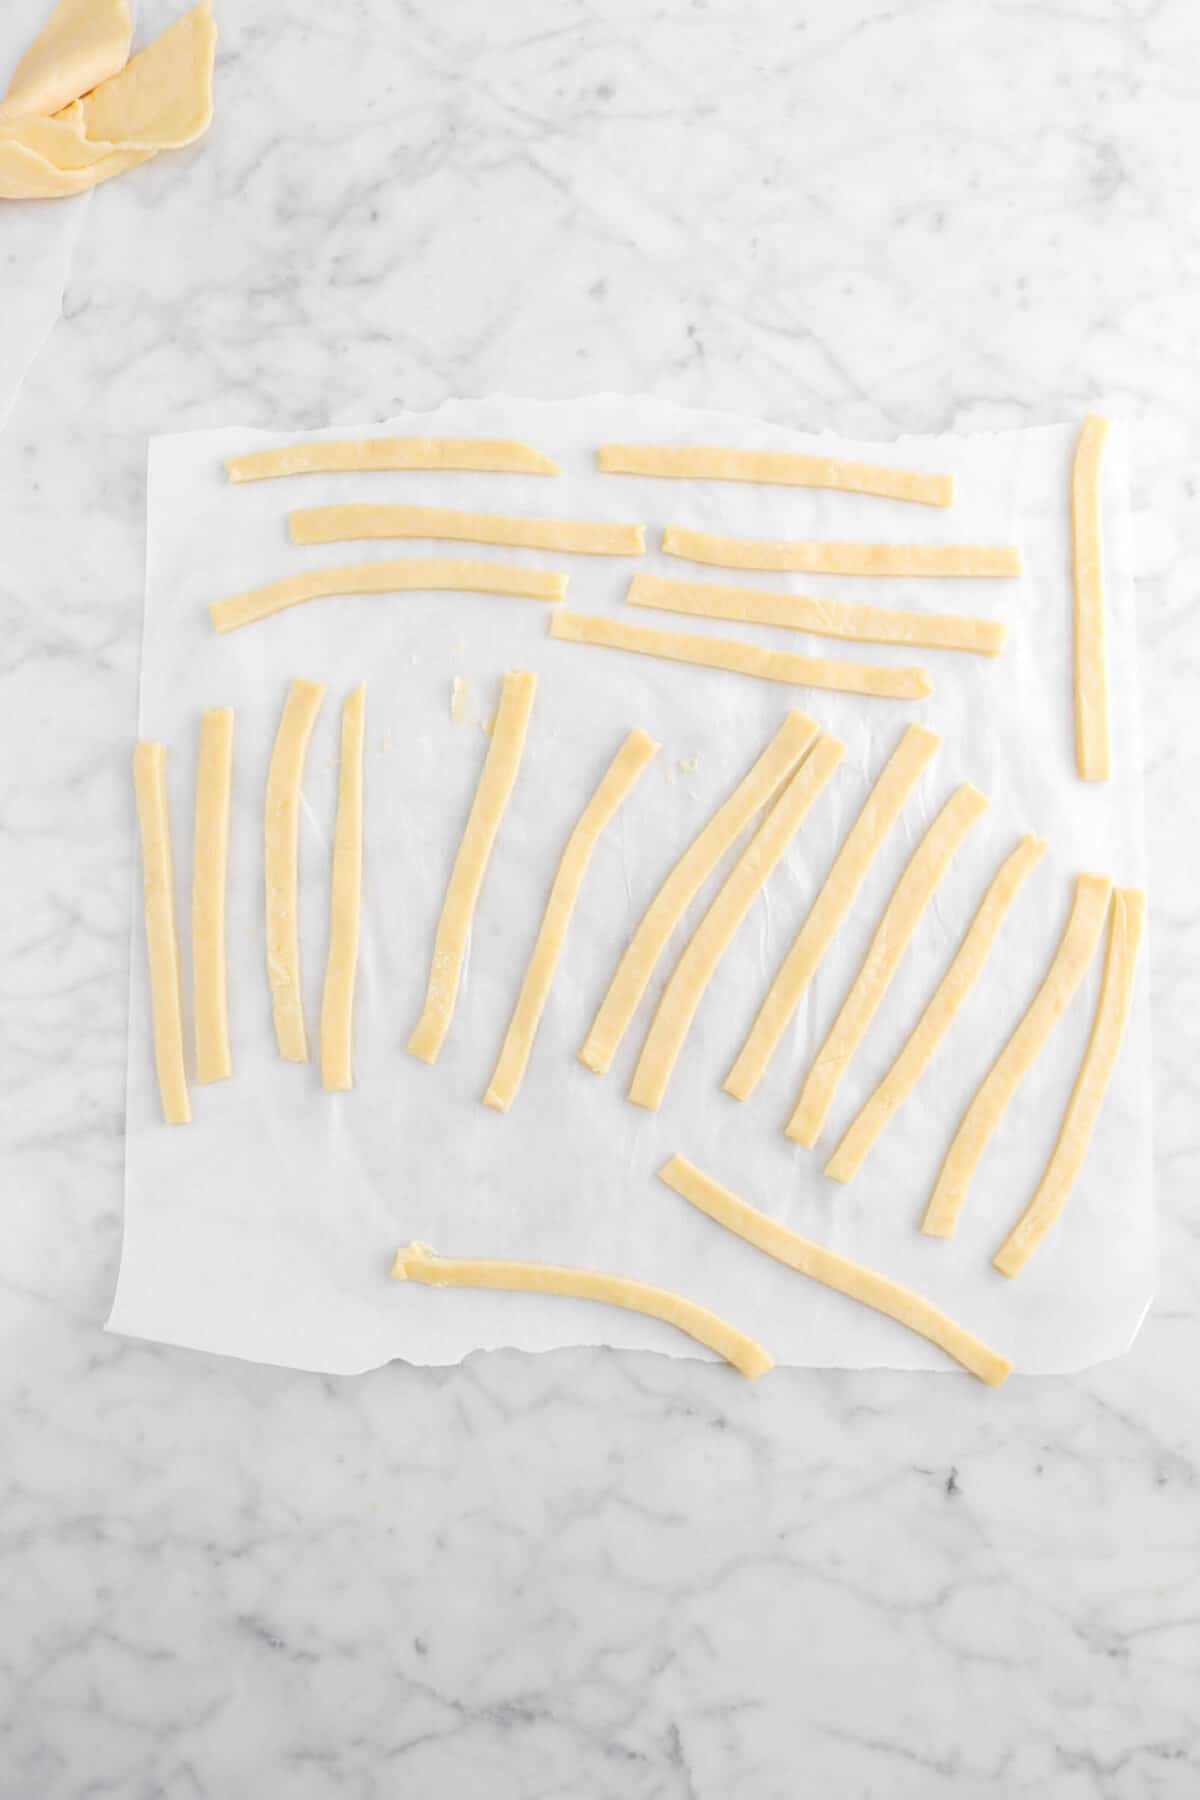
Re-roll pie crust scraps and cut into a rectangle. From there, cut 1/4-1/2 inch strands.


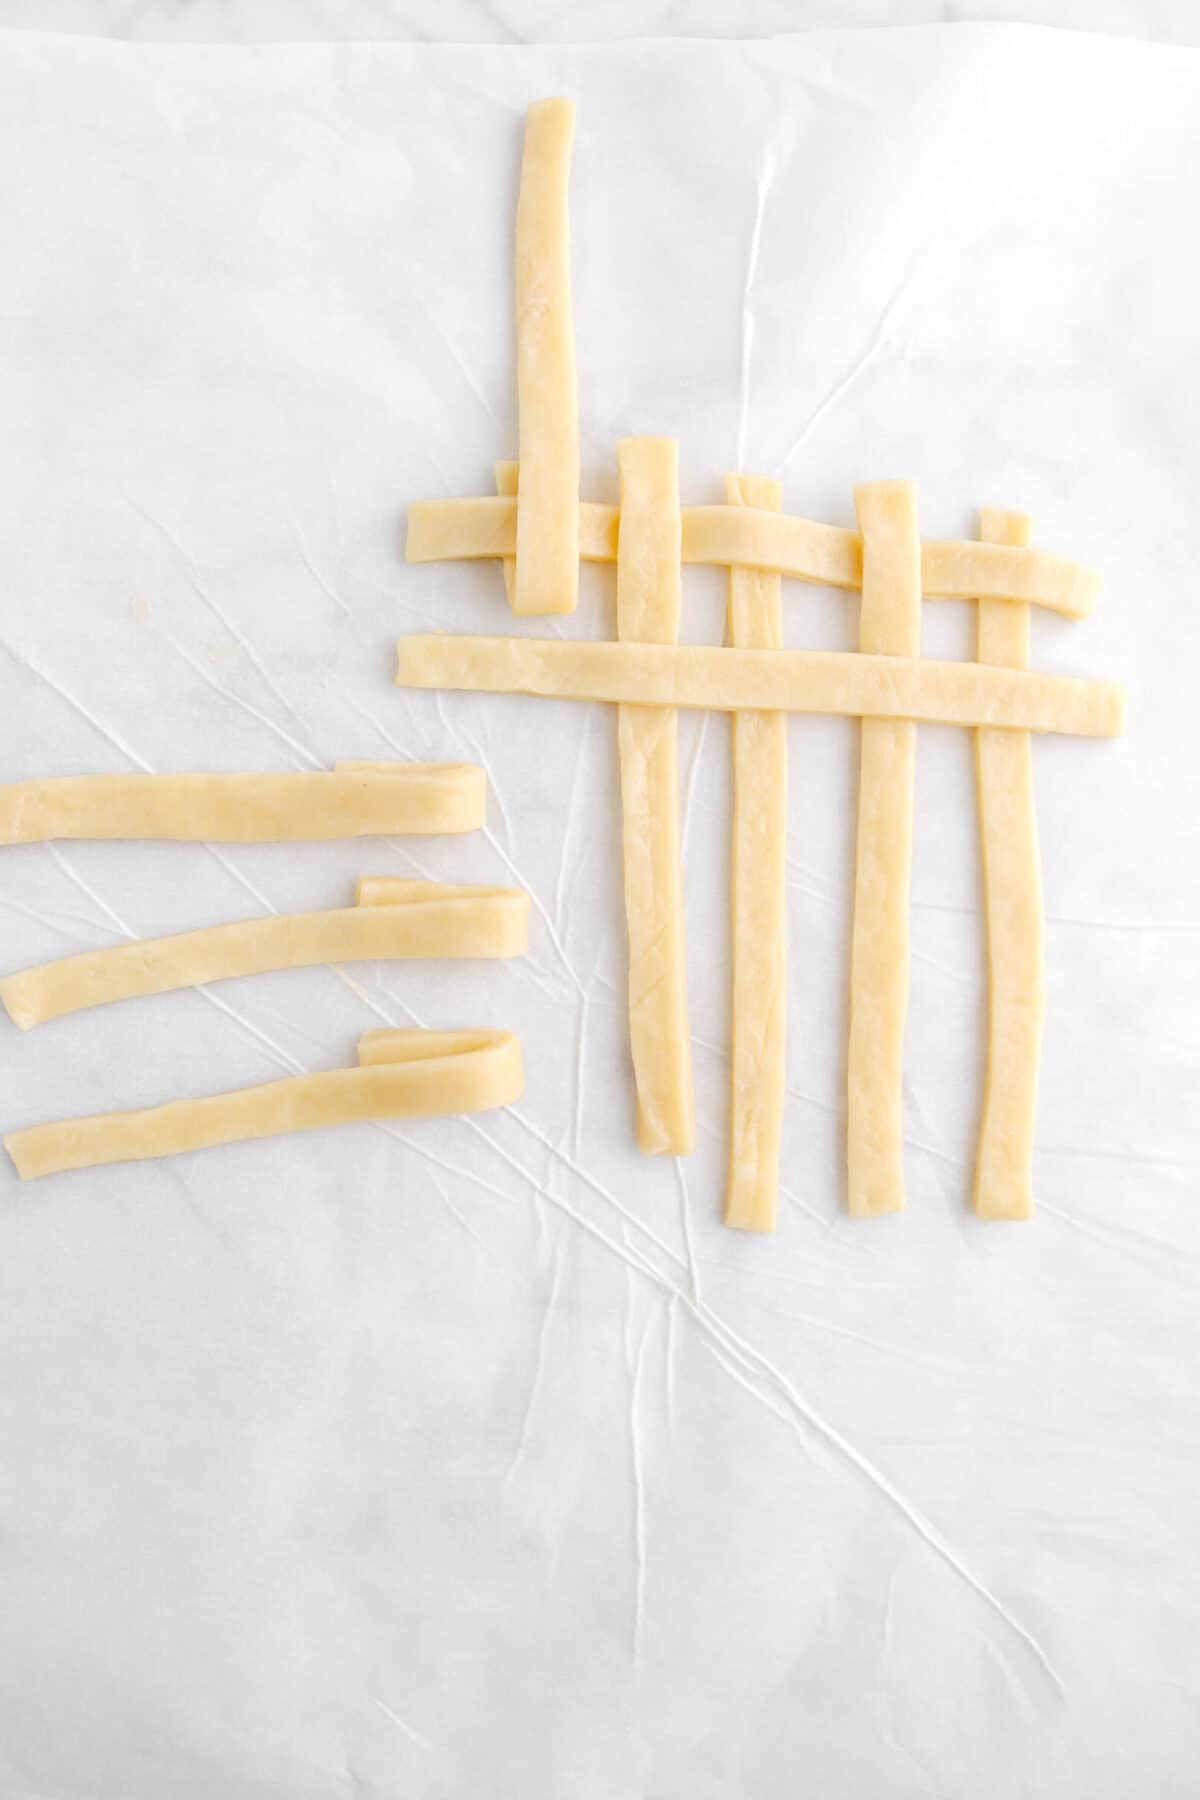
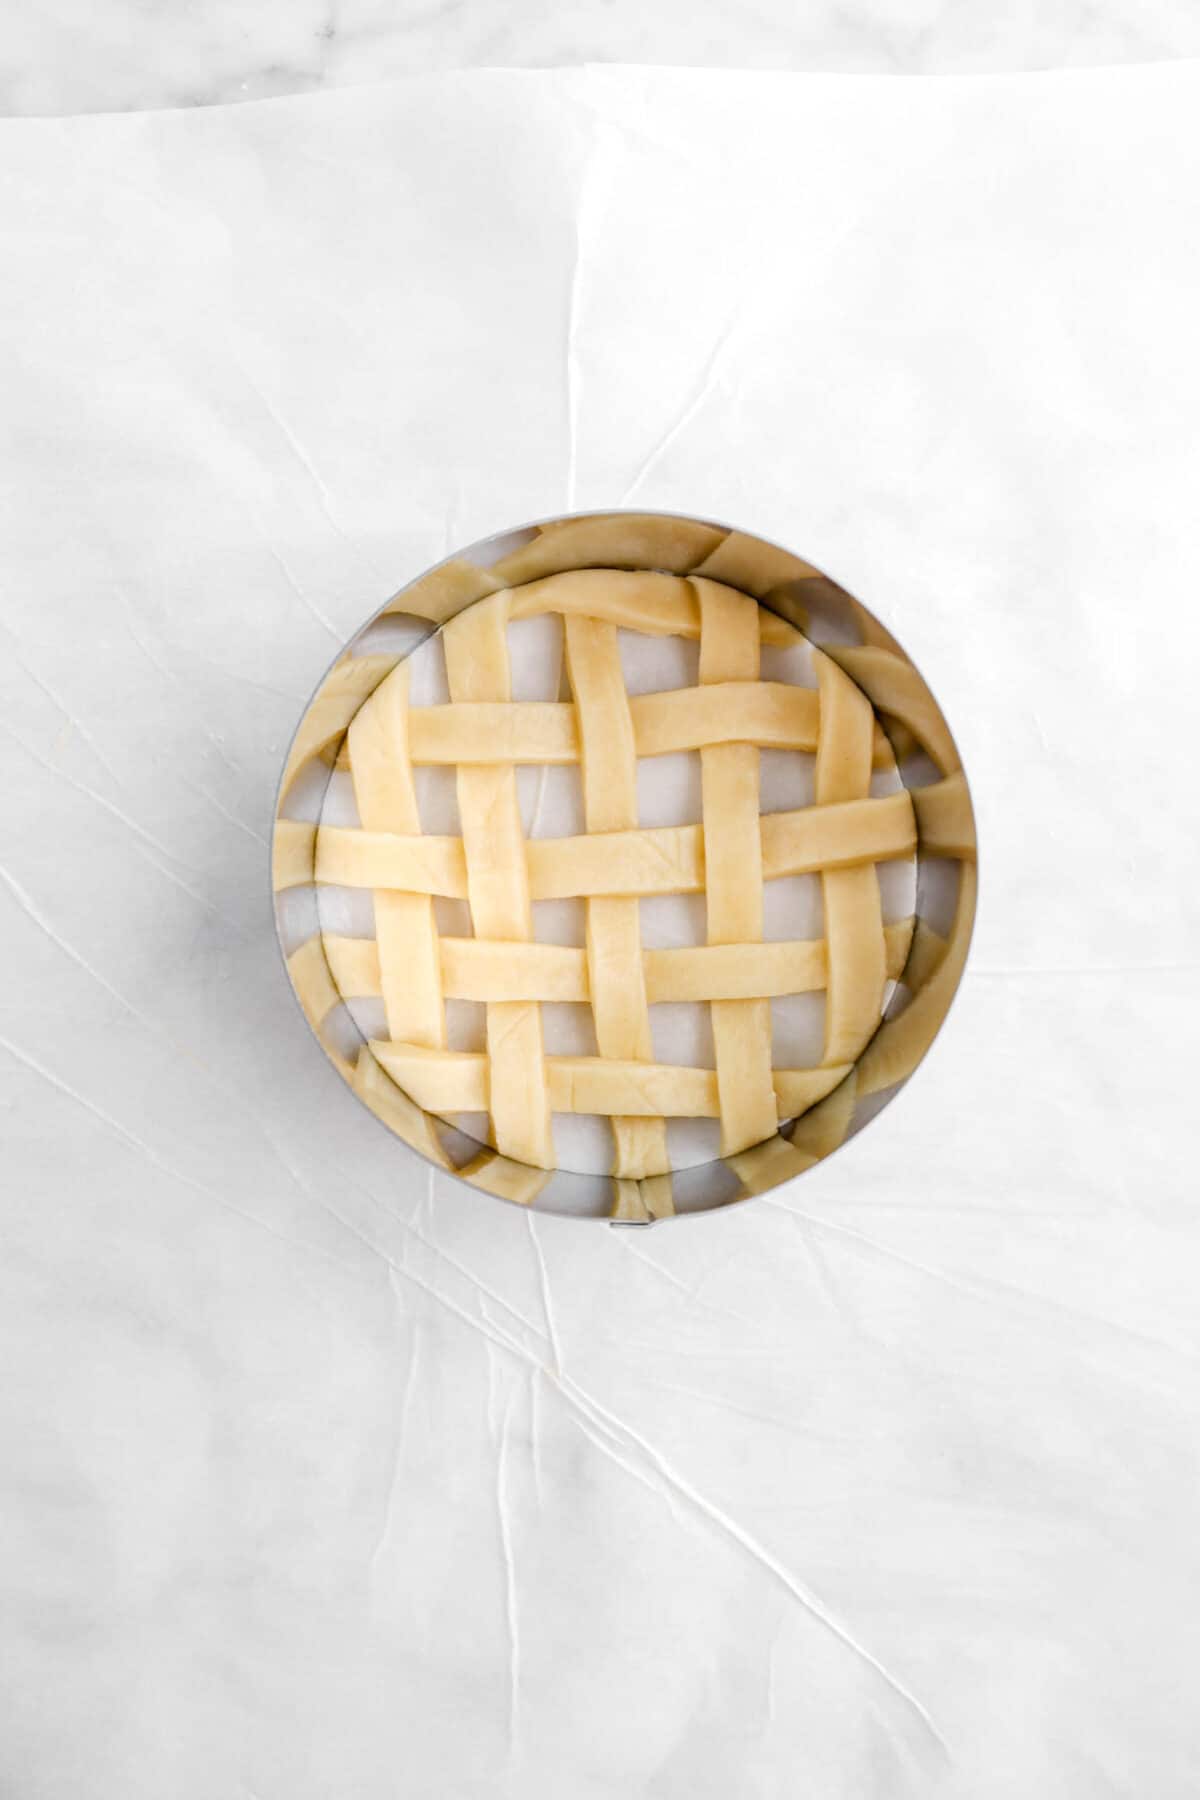
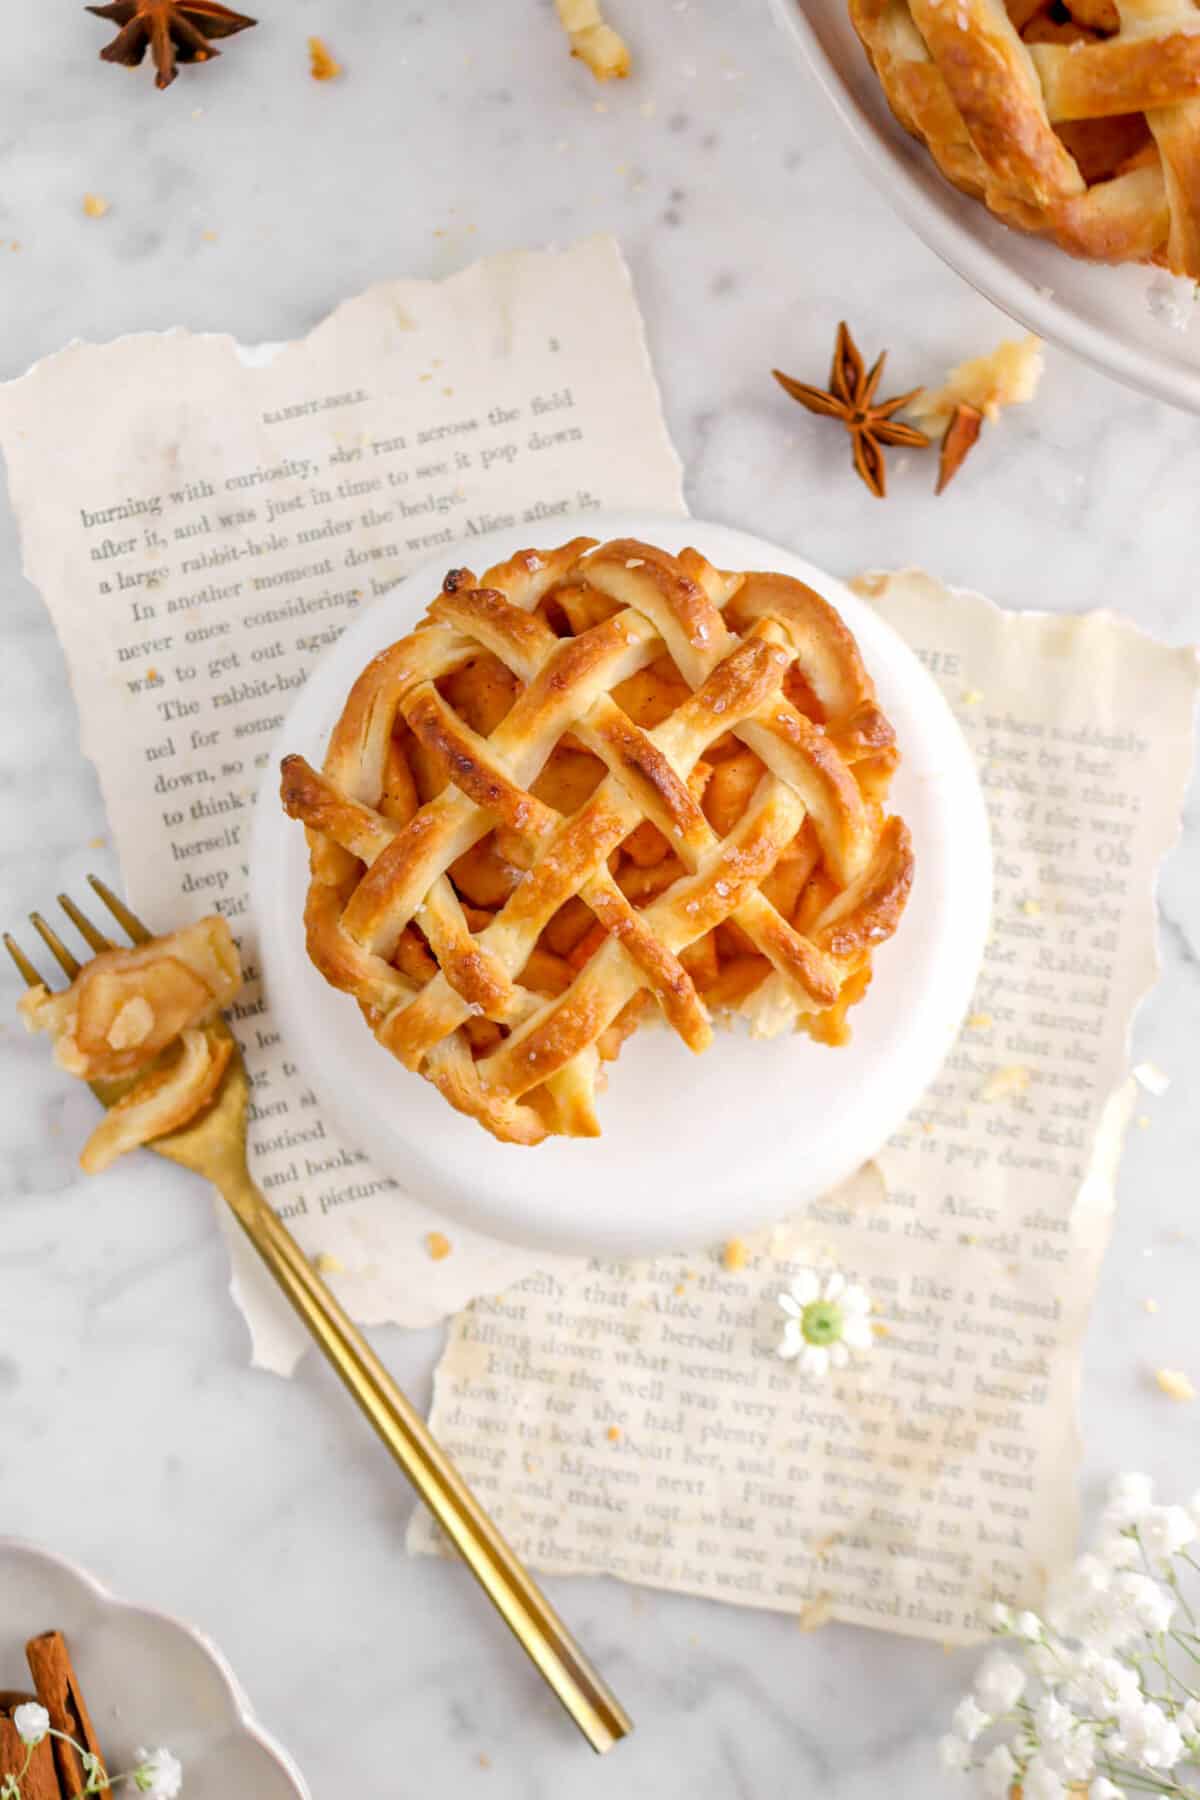
How To Lattice
Here’s where you need to take a deep breath and remember that there’s no need to worry! Latticing is actually pretty easy.
First, lay out ten strands of pie dough. Five going vertically (up and down) and five going horizontally (side to side). When placing the horizontal strands, fold them over themselves so a small amount of the strand is under itself. This will make latticing an easier and cleaner task.
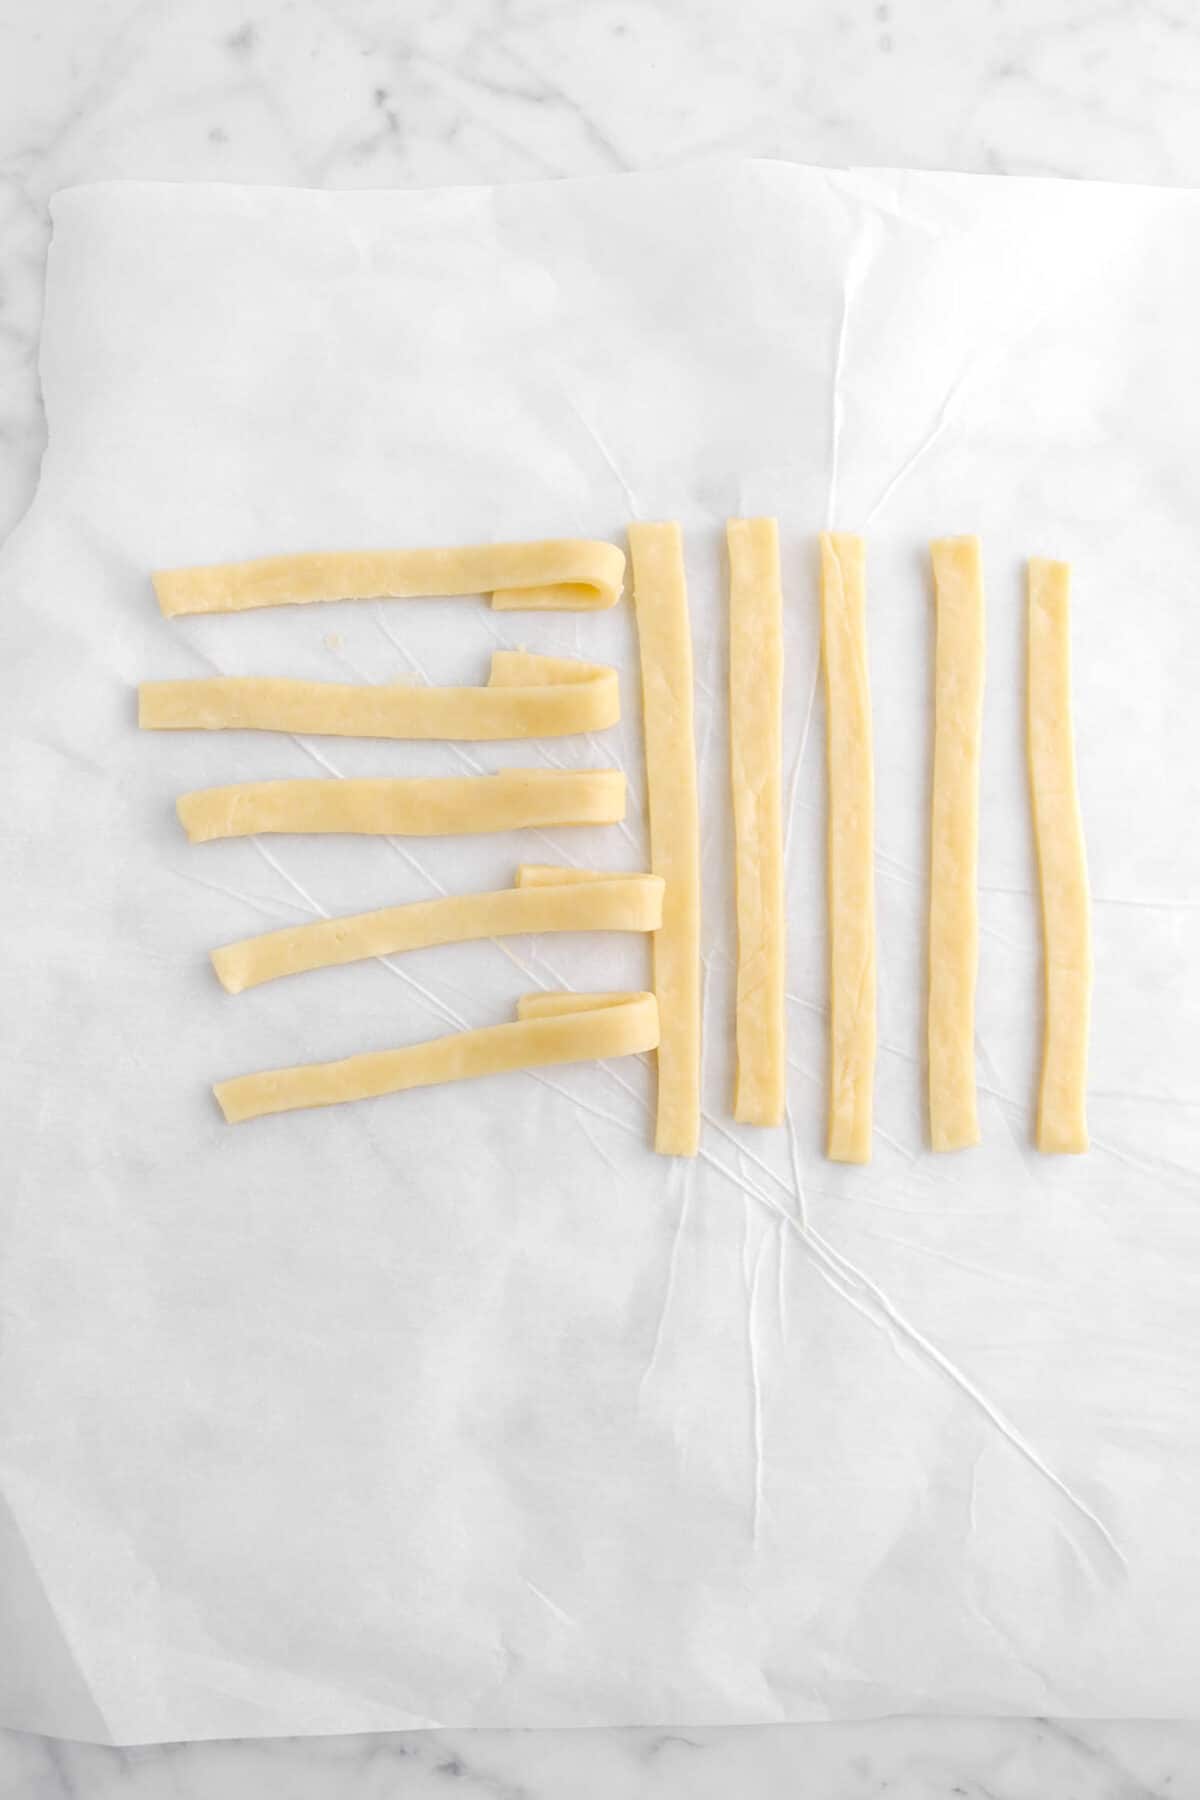
From here, it’s actually pretty simple. As you can see, I already did the top lattice. I started it with the first horizontal strand over the first vertical strand.
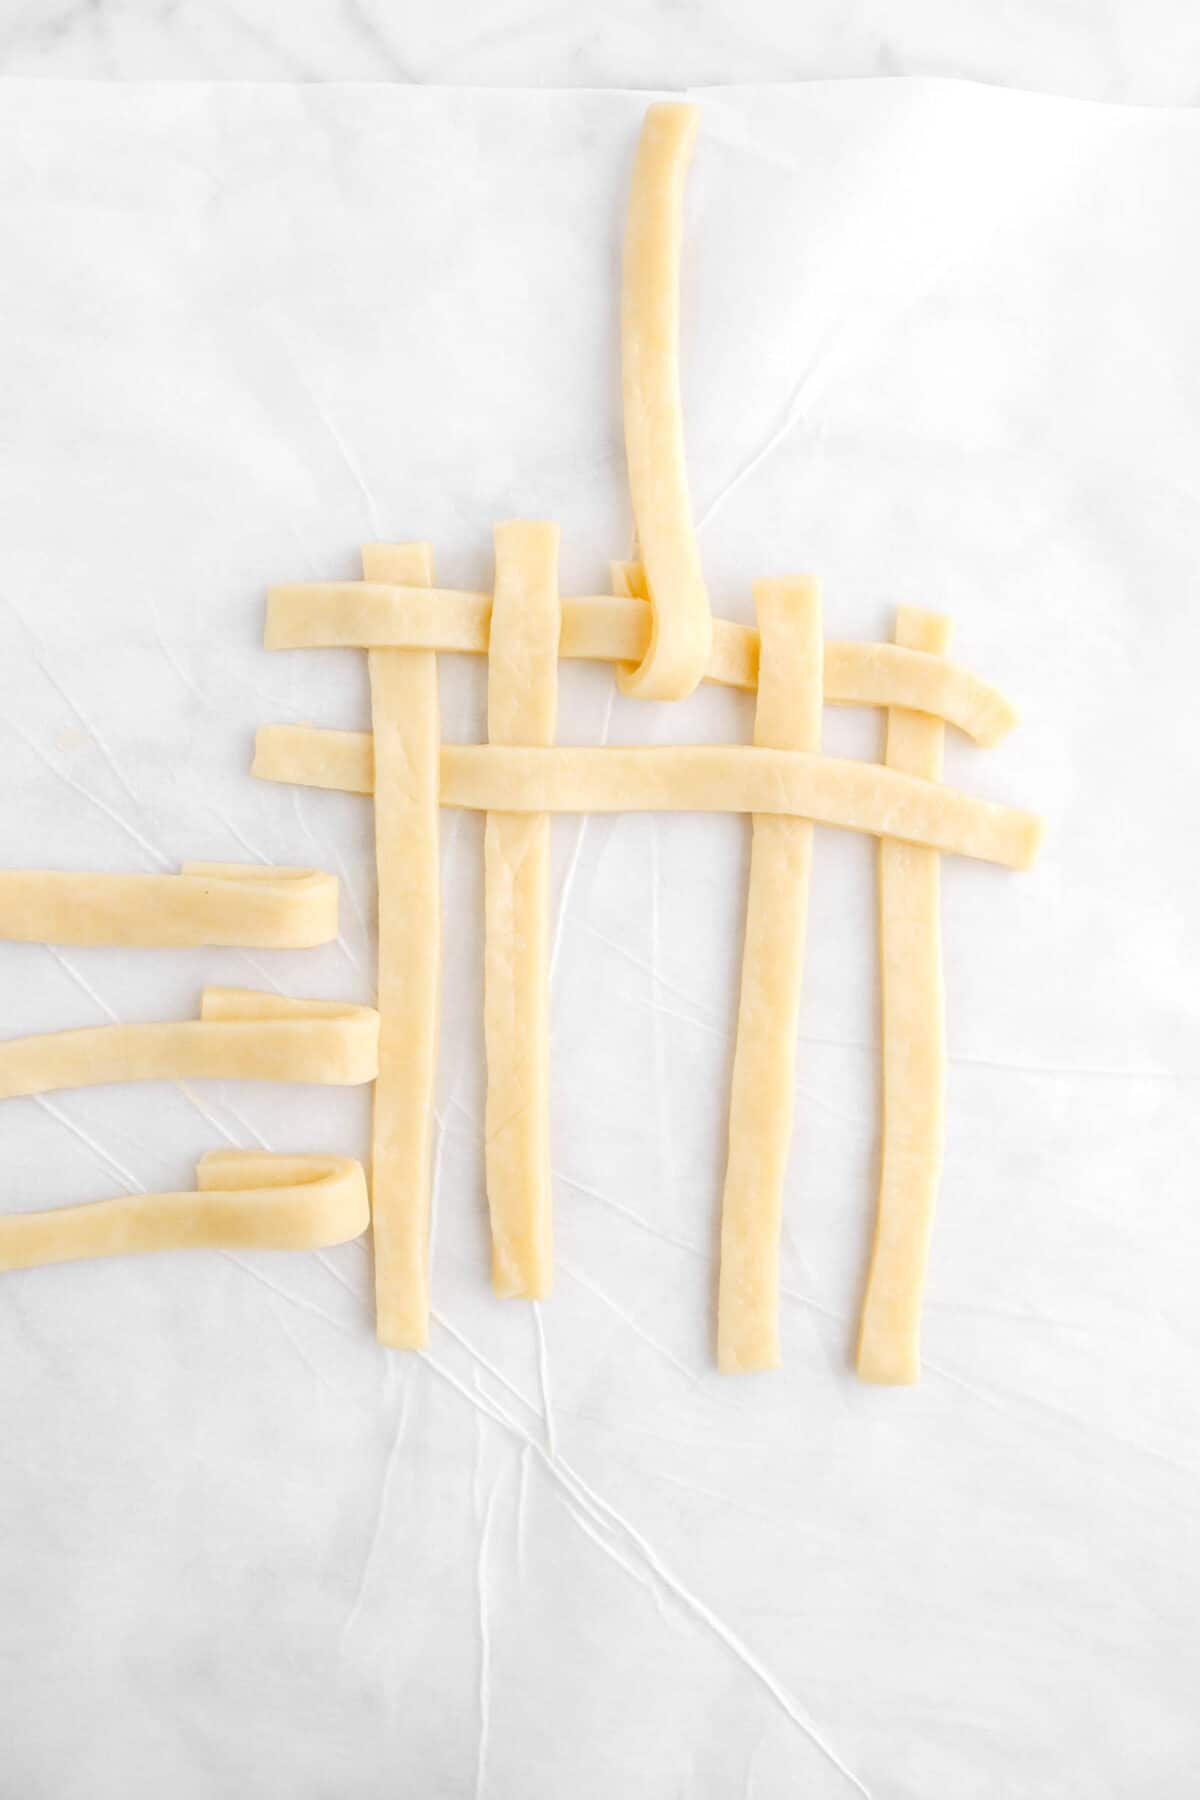
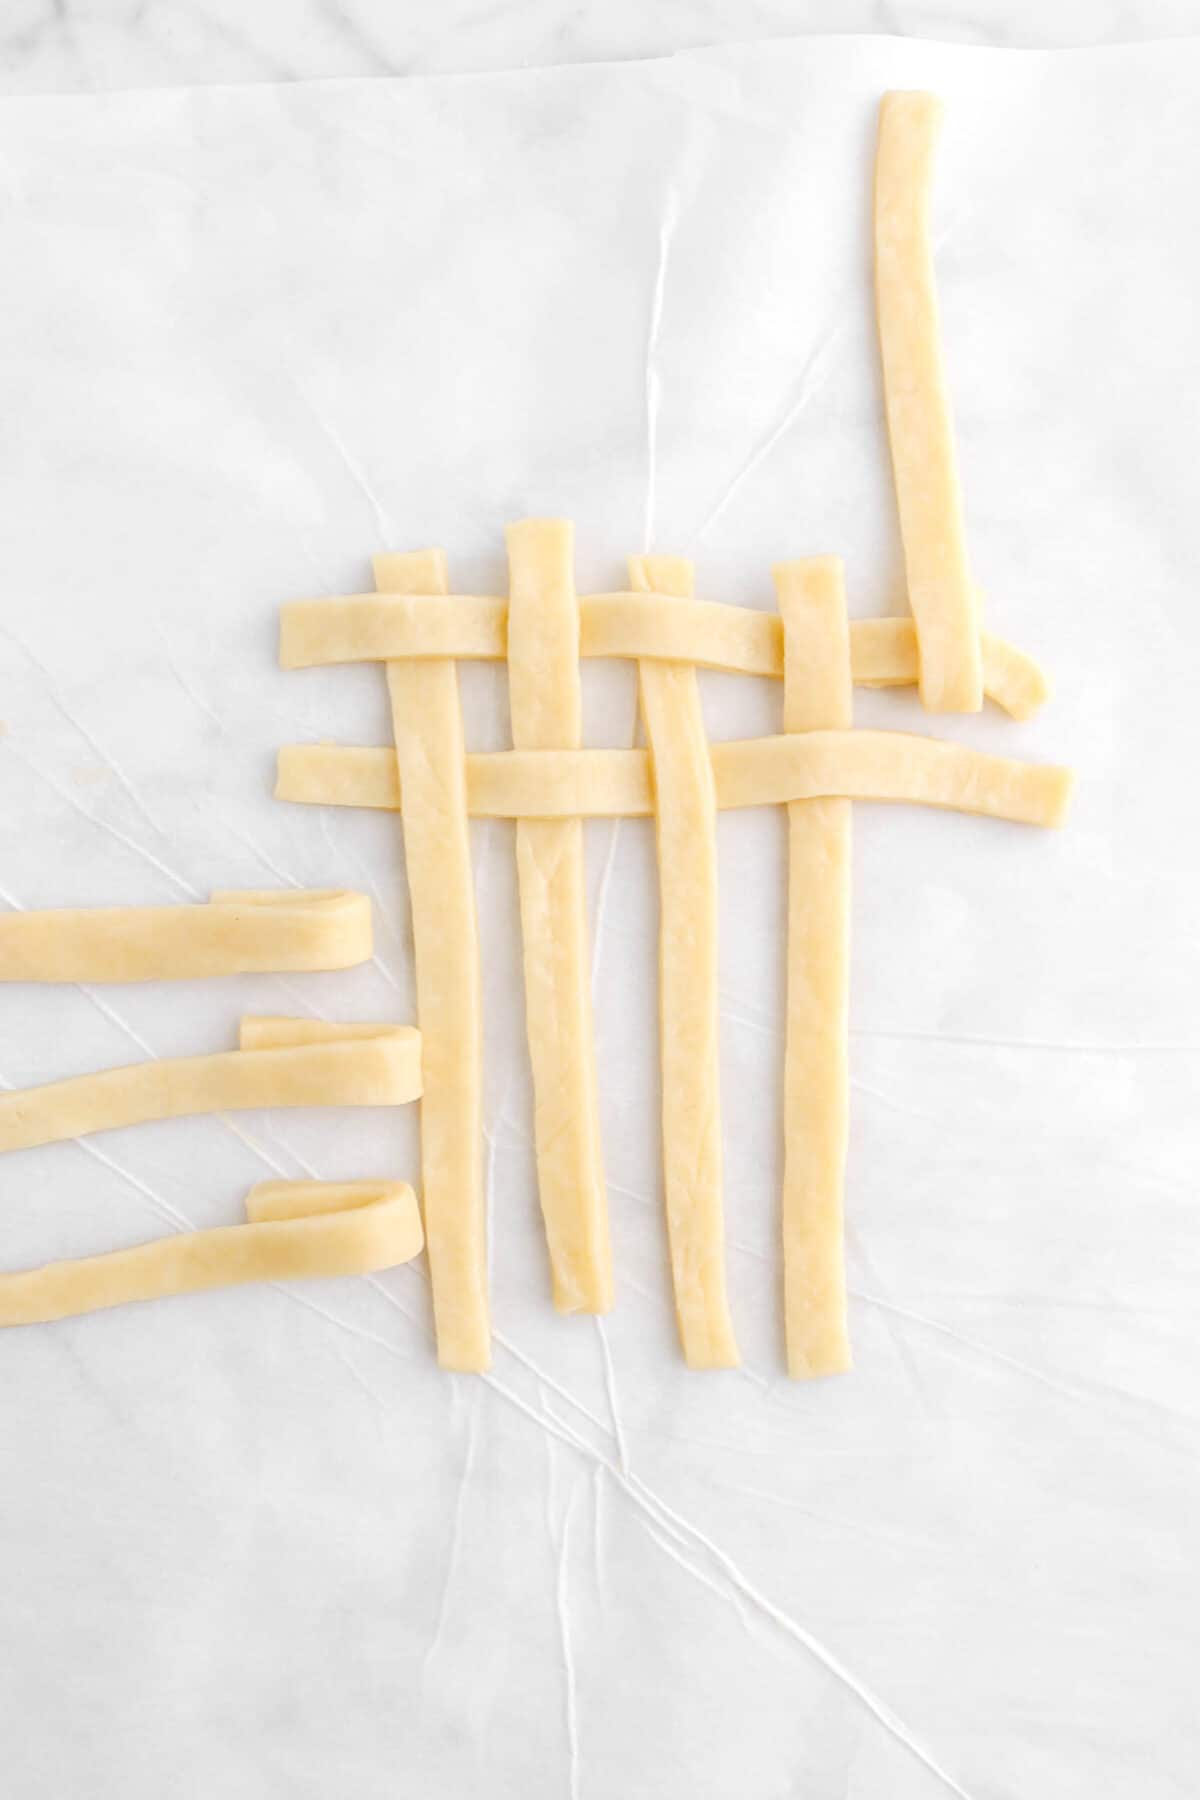
So, the second horizontal strand will start under the first vertical strand. Now, still working with the second horizontal strand, we are going to lay it over the second vertical strand. Pick up the third vertical strand and lay it out of the way. Lay the second horizontal strand across. Unfold the third vertical strand and lay it over the second horizontal strand. Lay the second horizontal strand across the fourth vertical strand. Pick up the fifth vertical strand and lay the second horizontal strand across. Place the fifth vertical strand over the second vertical strand and now you have the row of lattice complete! Repeat these steps all the way down, alternating between starting with the horizontal strand over the first vertical and under the first vertical.


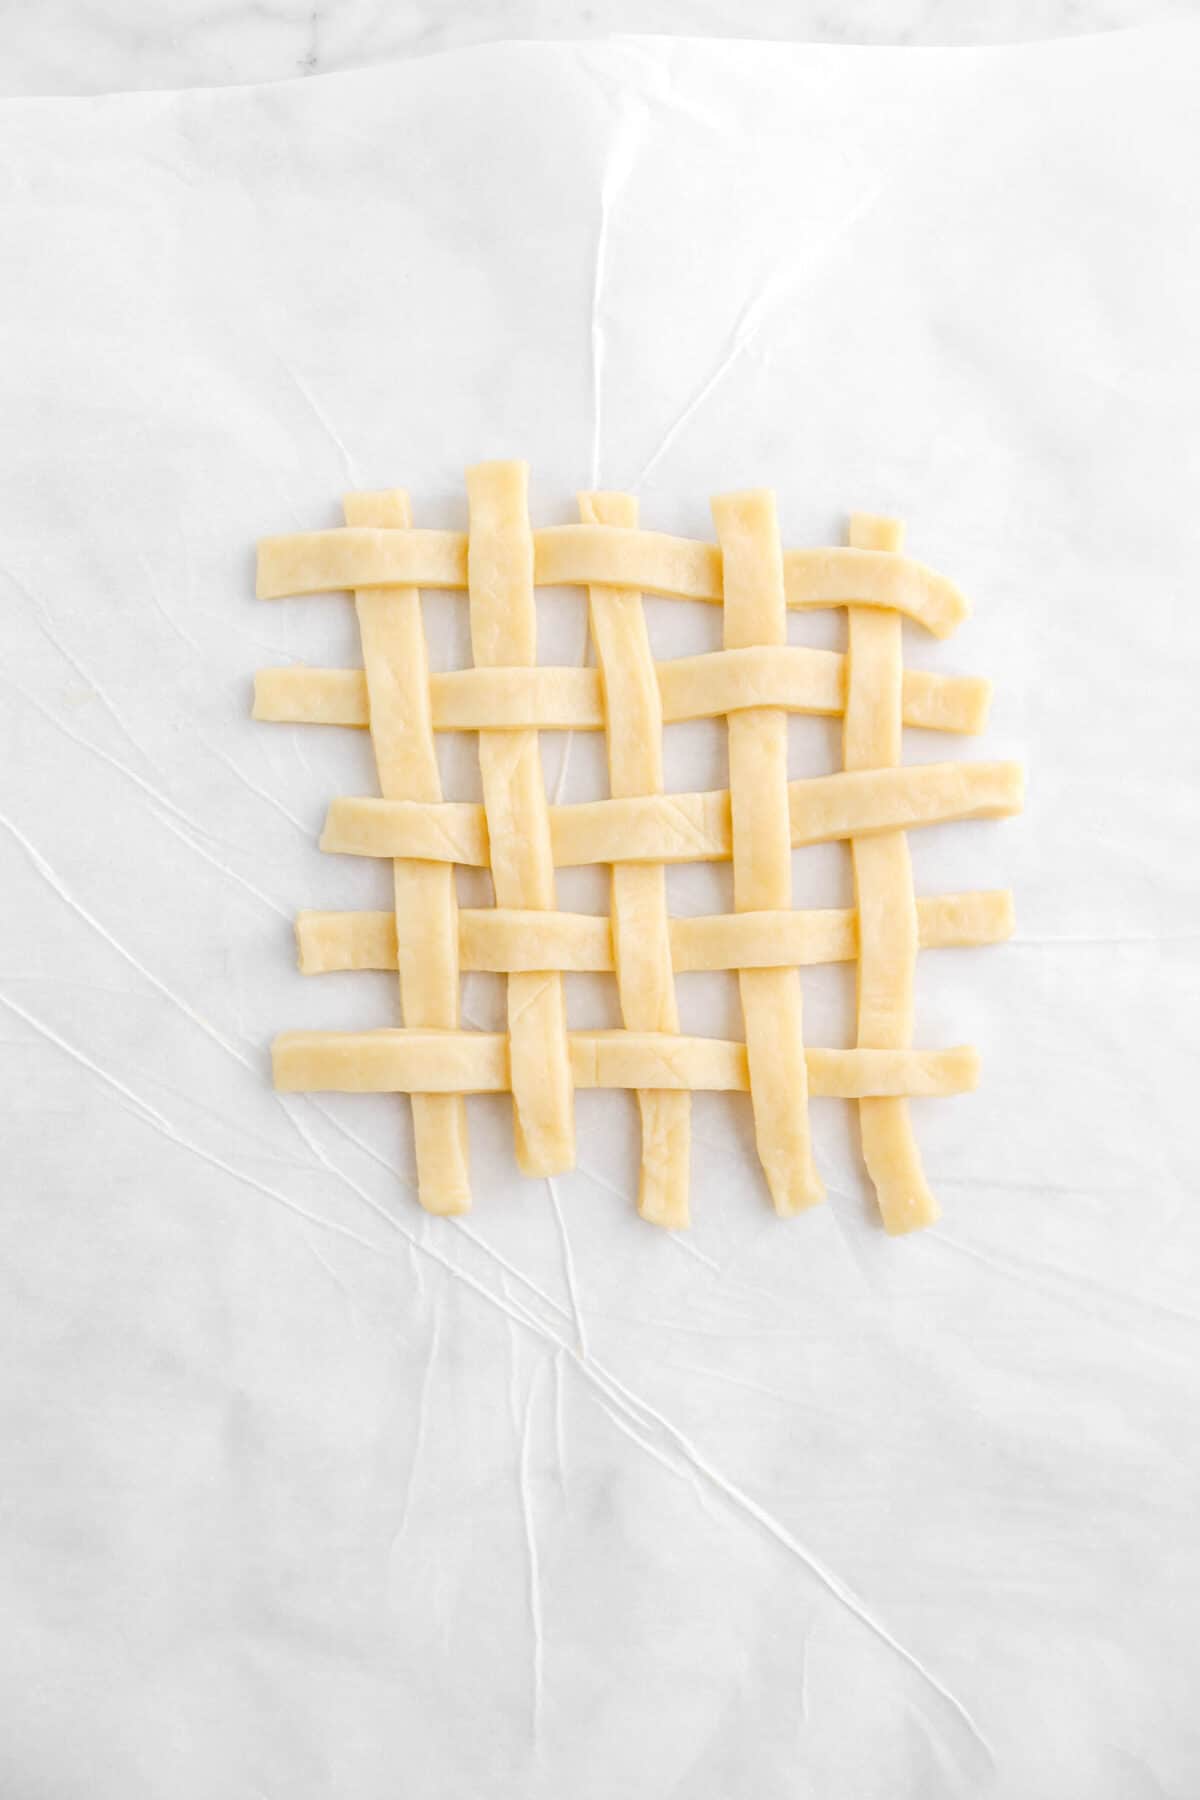
Place the completed lattice in the fridge and repeat three more times, placing each in the fridge after completing.
Finishing The Pies
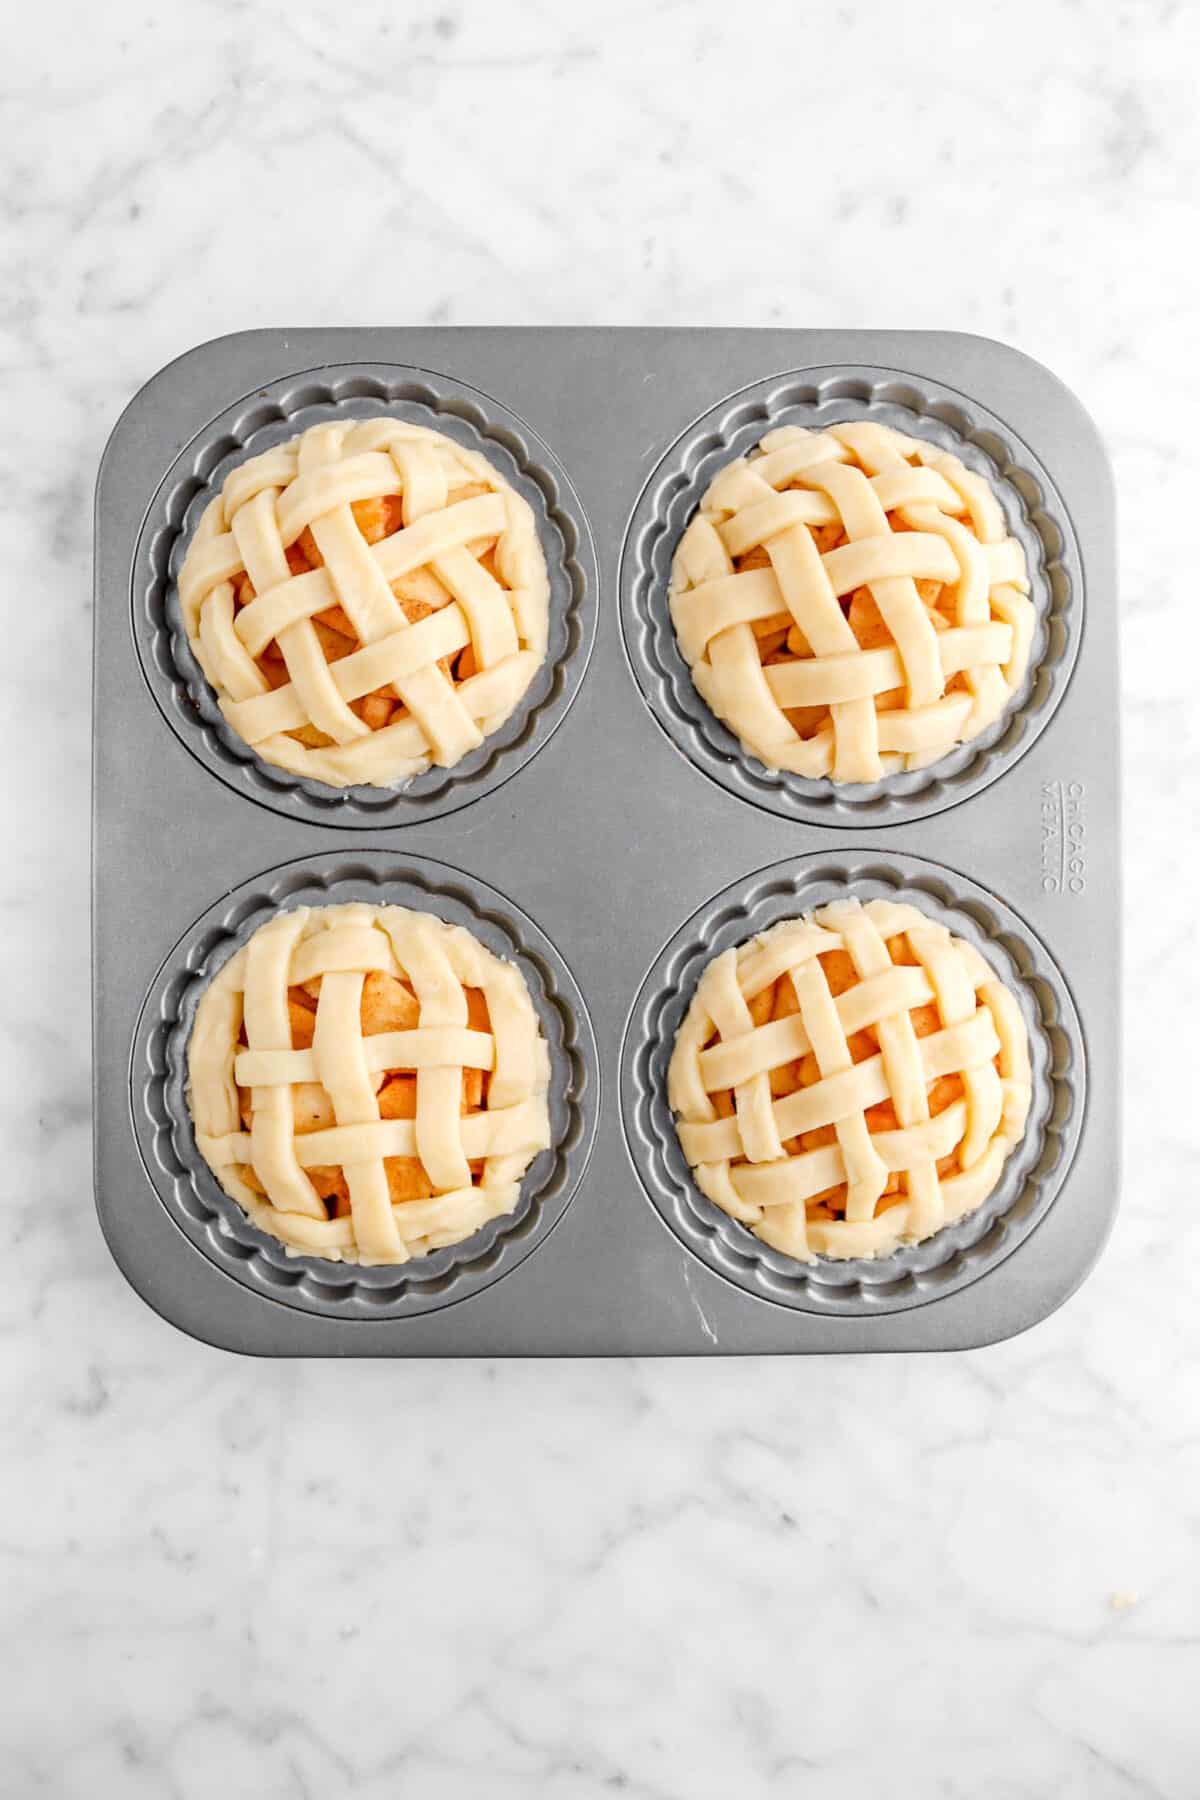
Using a sharp knife or a ring mold, cut the lattices into 5 inch circles. Remove excess and refrigerate.

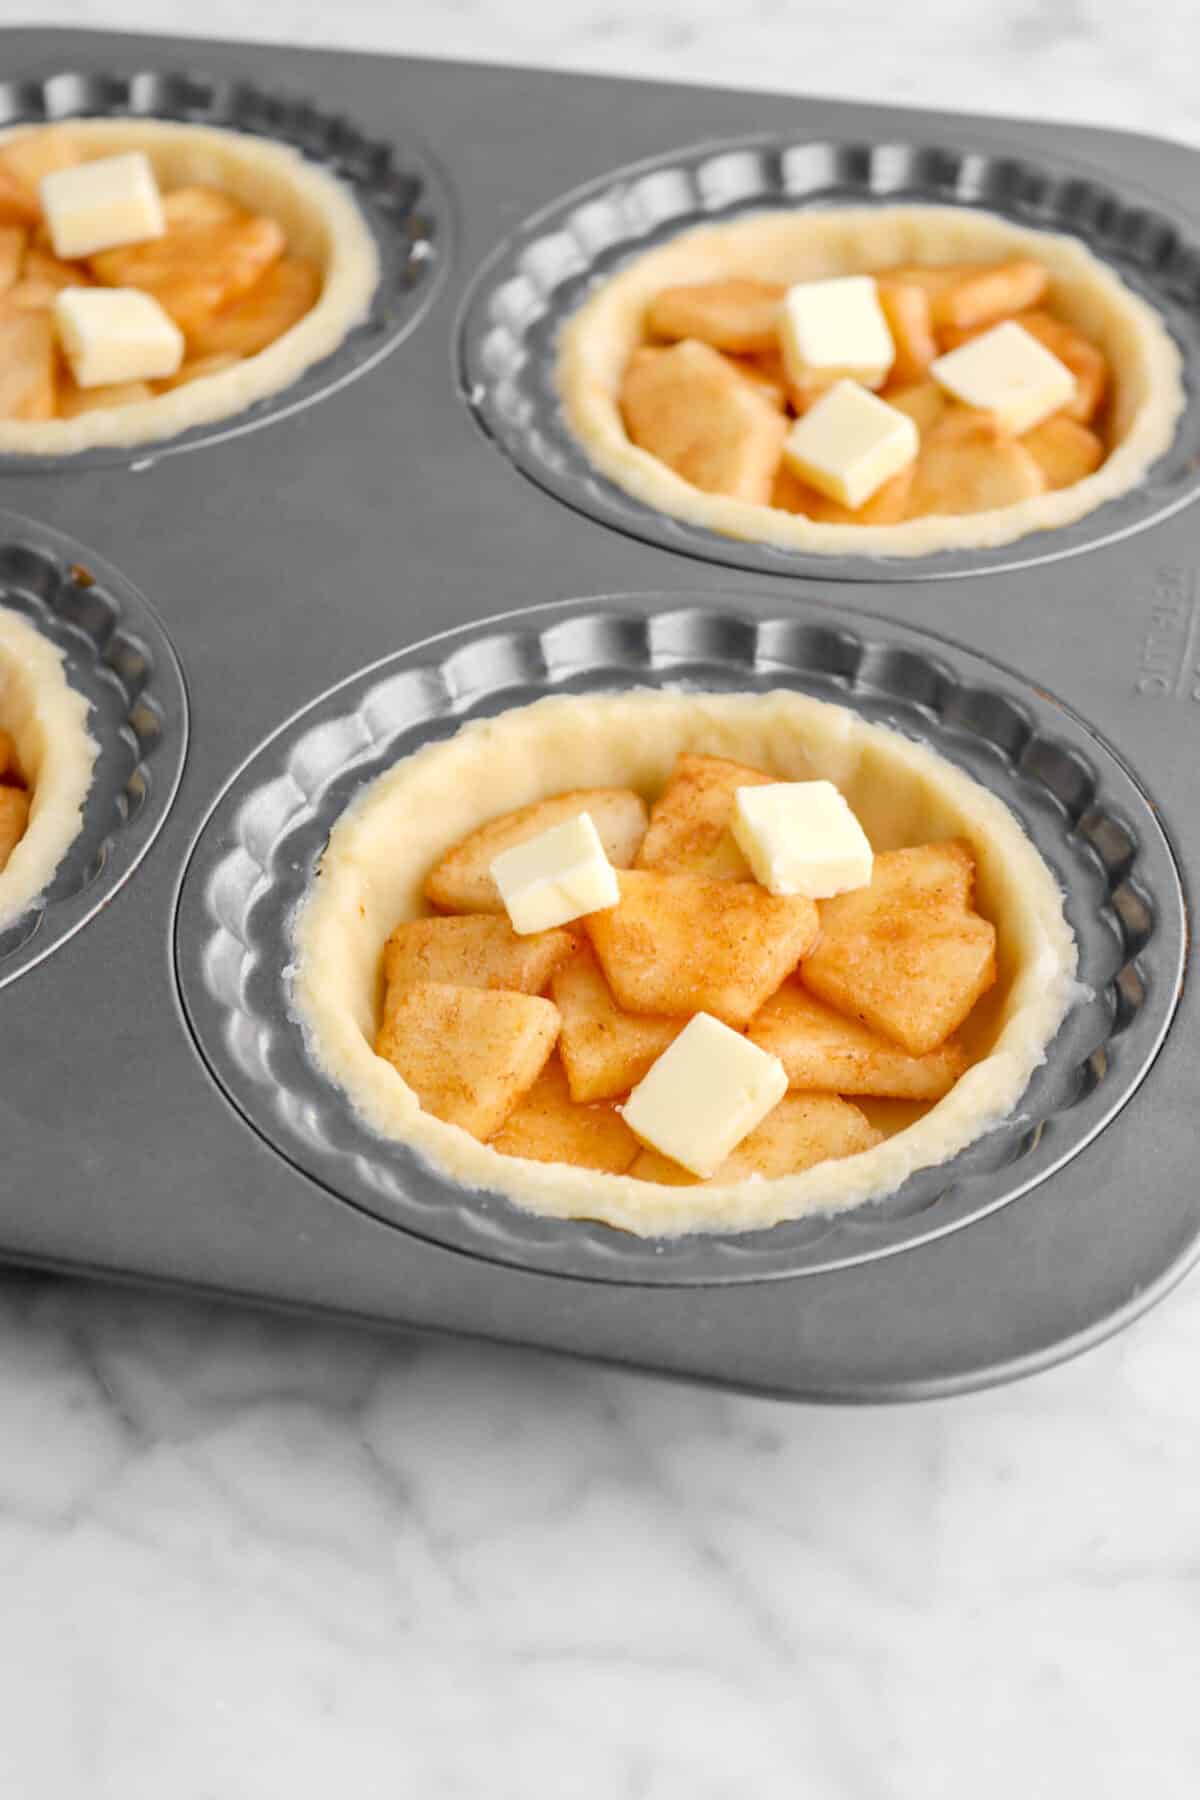
In a large bowl, combine the chopped apples, sugar, apple pie spice, and cornstarch.


Cut 4 Tablespoons butter into 4 pieces (1 Tablespoon each). Cut each piece into thirds. Set aside. Remove the pie crusts from the fridge and place 1/2 cup apple mixture in each of the pie molds. Add 3 pieces of butter to each. Top with 1/2 cup apple mixture, being sure to press filling down into molds.


Top each pie with lattice and seal edges. Trim edges, if needed.
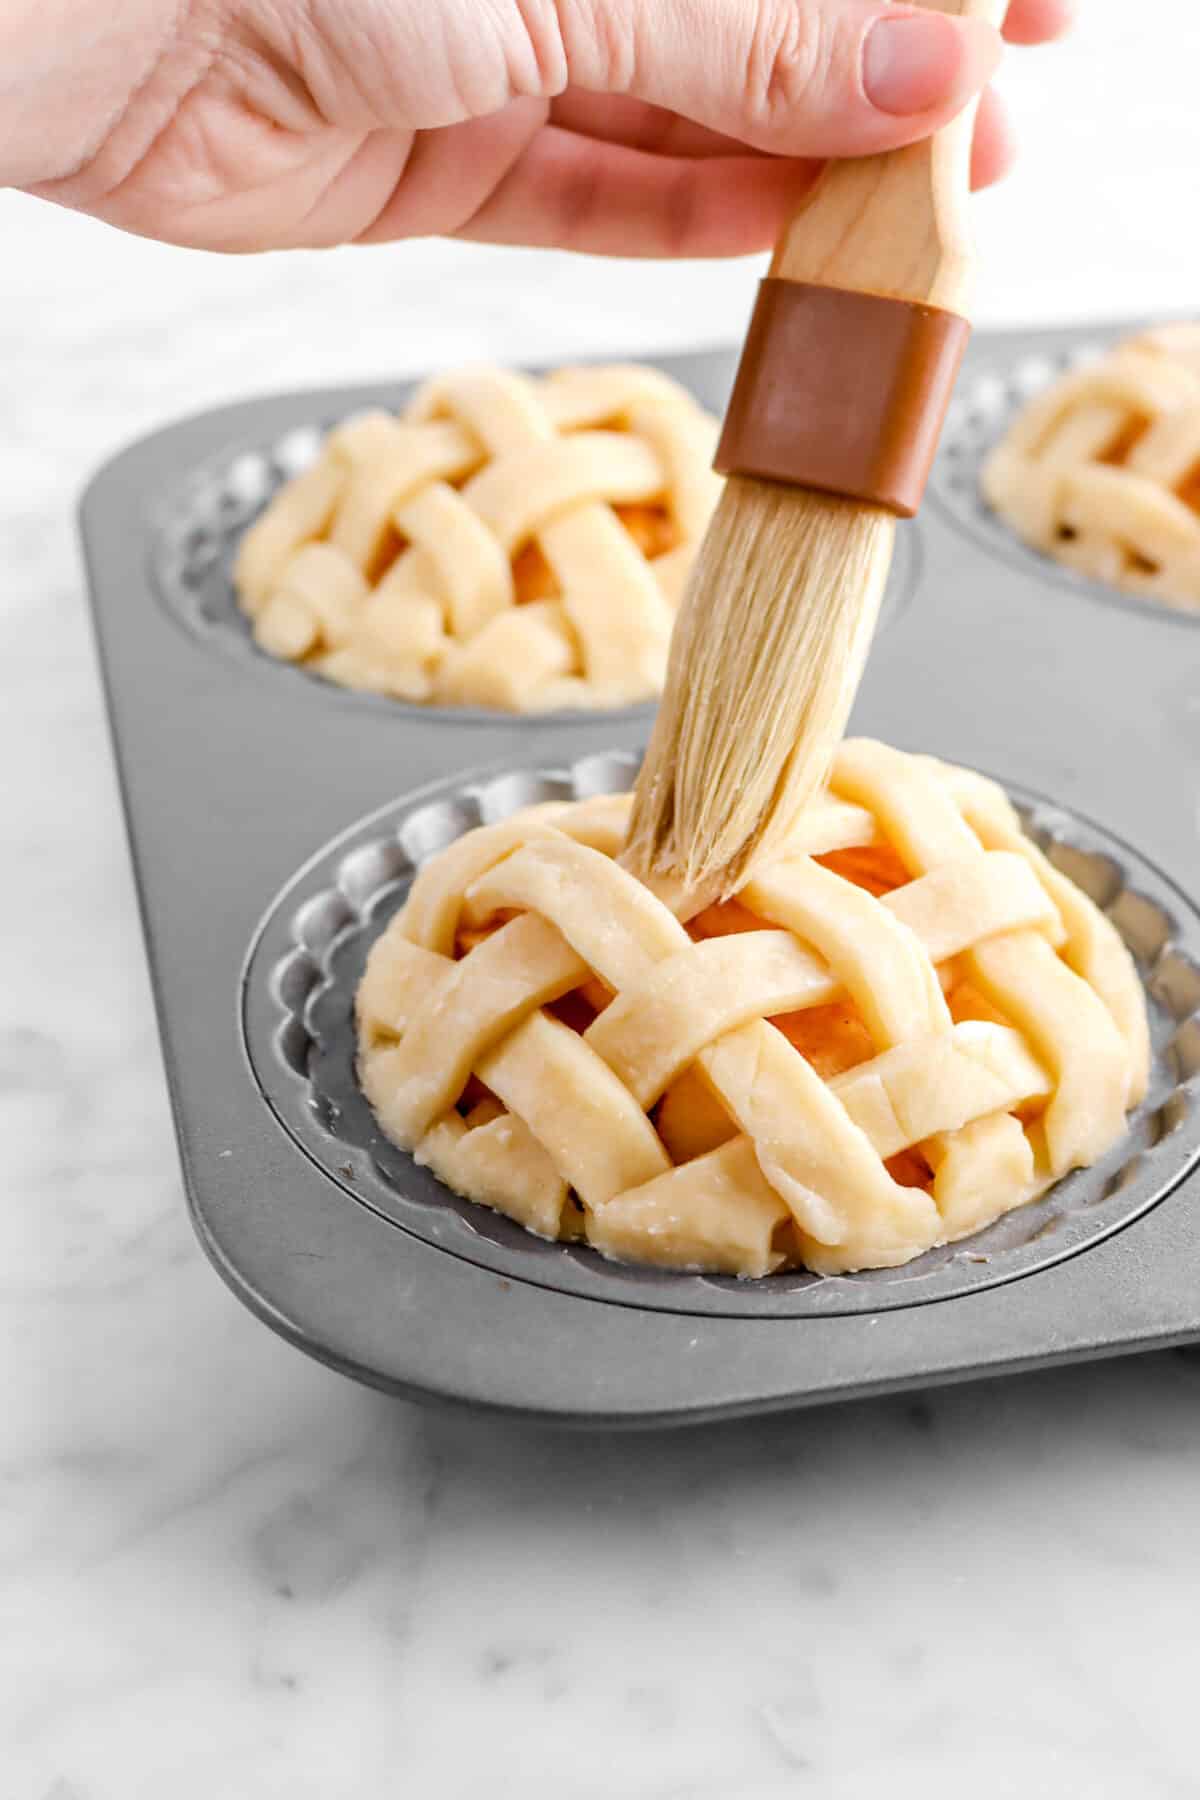
Brush the top of each pie with heavy cream and sprinkle with coarse sugar.

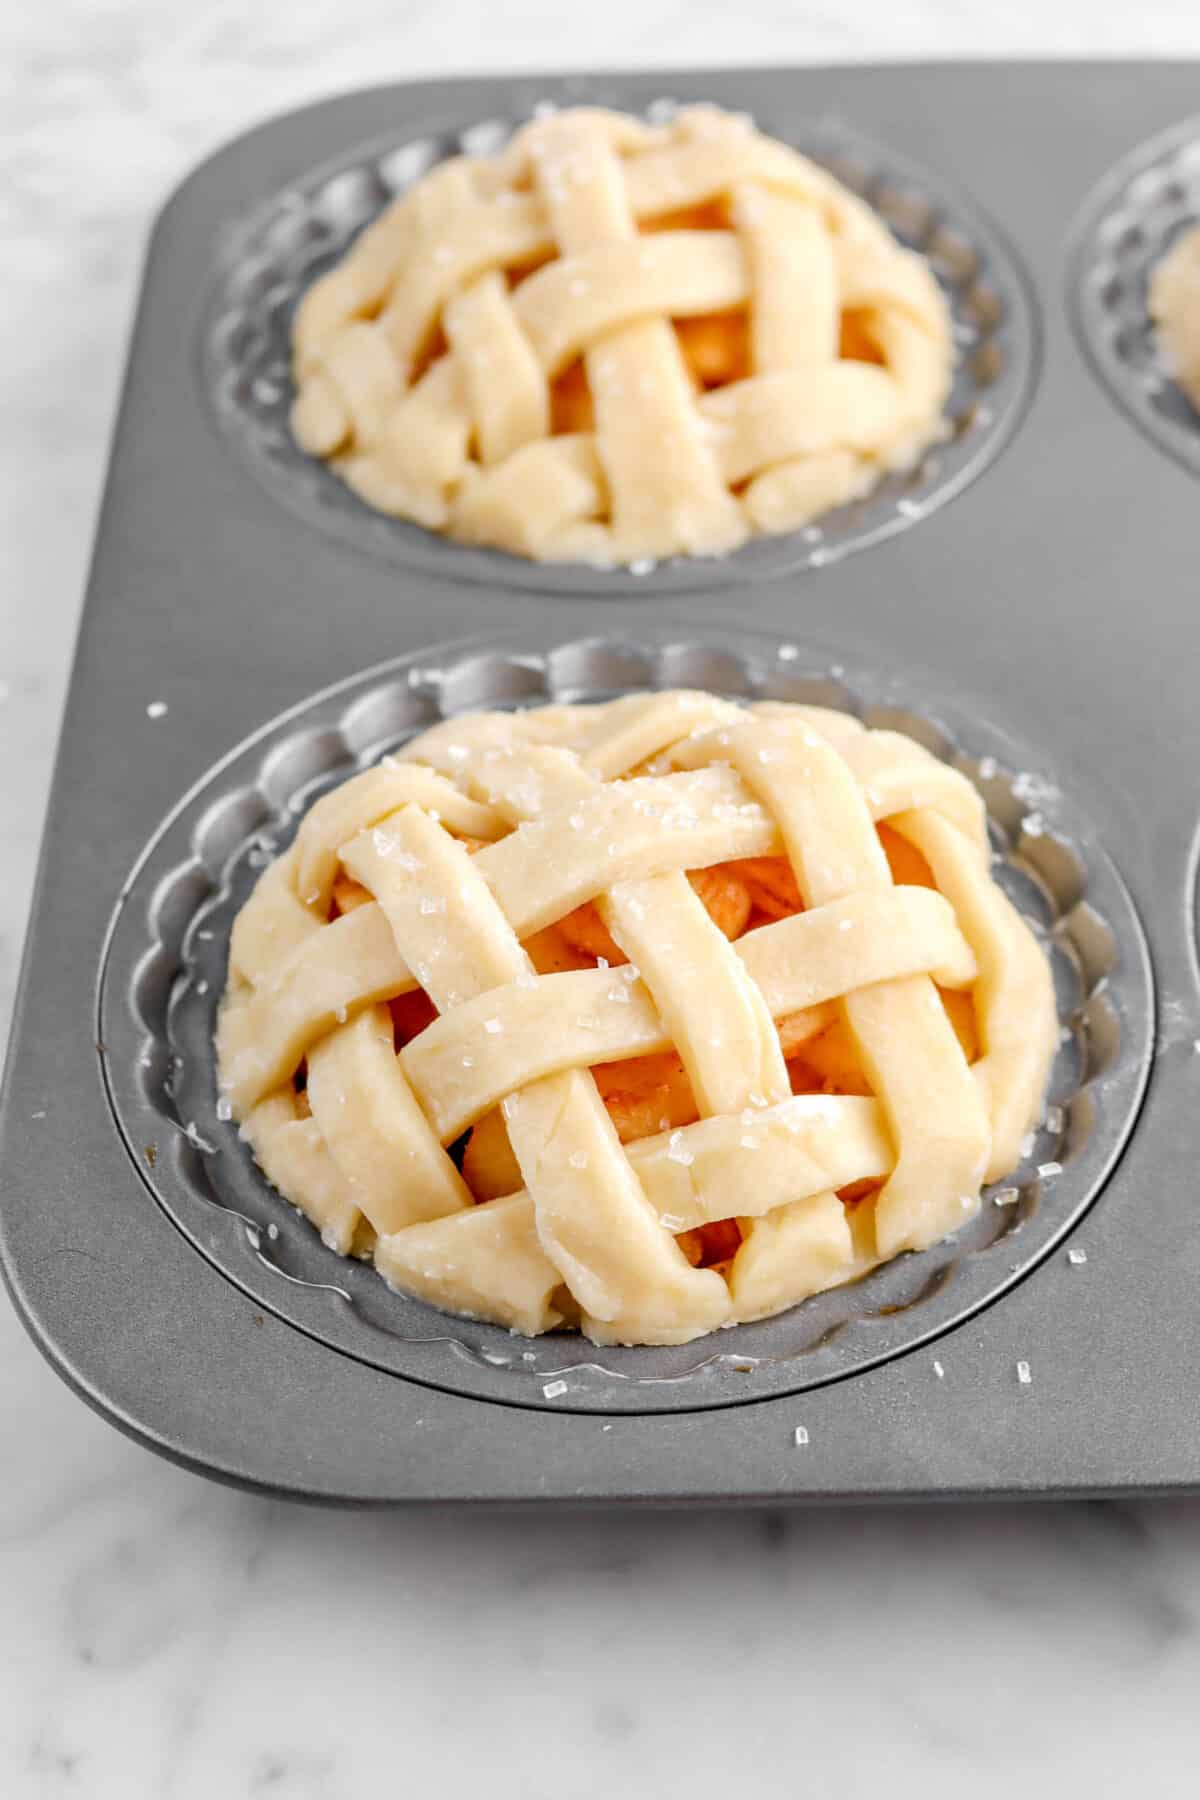
Place the pies in oven and bake at 375℉ for 25-30 minutes, or until golden brown. Take out of the oven and let the pan cool. Once the pan is cool enough to handle (it can still be warm, just not hot!), take the pies out of the molds and remove the bottom plate. Place on wire cooling rack and let finish cooling.


Making Pie Crust in Mixer vs Food Processor
I know the sound of making a pie crust in the mixer is a little scary and kinda weird, but it genuinely works! A lot of food processors just don’t have the cup capacity for large amounts. When my mom owned her restaurants, she almost always used a mixer during the holidays to bake pies! She could double or even triple a pie crust recipe and have it come out just as flakey and tender as one made by hand or in a food processor.
So, as unconventional as a mixer may seem, it’s actually a great tool for making pie dough! Just follow the instructions and refer to the step-by-step photos above to ensure the perfect crust.
Which Variety of Apple To Use For This Recipe and How To Pick Them
With so many varietals, it can be hard to find the perfect apple for pie…well, worry no more! We did some testing to find the absolute best apple to bake in this pie.
We tried five varietals, all easy to find at your local grocery store. While they can all be used, there were definite favorites. Let’s get into it, shall we?
- Granny Smith: The forever classic! The one has a lot of upsides, and it was our second favorite to bake with. It held up well and had a good flavor, but there was something missing. Still, it’s a great contender and one of our absolute favorites!
- Golden Delicious: Delicious is definitely the perfect description of this apple! It’s a little more mild in flavor than the other apples we tried and also a bit sweeter. It held it’s shape well, but I would personally say to combine it with the Granny Smith to give it a little oomph.
- Pink Lady: This apple also holds up well when baked; but like the granny smith, it was a little more tart than we were looking for.
- Gala: Great in flavor, but it seemed to break down a bit more when baked and after storing. If you like a bit softer apple, this might be the best one for you!
- Honeycrisp: This is our number one apple! The honeycrisp took us by complete surprise. Not only did it hold it’s own against the strong flavors of the apple pie spice, it baked just as well as the granny smith! It was crisp and full of flavor. This is our choice for the best apple to use!
Now that we know Honeycrisp is the best apple to go with, let’s go get them! I recommend buying apples that are firm to the touch without any bruising or dings, the fresher the better! But, if you have older apples in the fridge, that’s okay, too, so long as they’re not mealy! Just cut away any bruises.
The reason we prefer fresher apples is that it gives a bit more bite to the apple pie. There’s no mealy or grainy texture. It’s a crisp, clean, and easy texture to enjoy alongside a flakey crust!
Can I Make This Into One Large Pie?
While you can, I don’t really recommend it. We have a delicious Homemade Apple Pie recipe that is for one large pie! It’s a little bit of a different and more traditional recipe, but equally delicious.
Should I Use Store-Bought Filling or Homemade
For this recipe, we highly recommend using the super easy filling stated in the recipe card. It’s fresher and has a bit more of a bite than cooked filling! If you prefer a softer filling in your pies, you can use our Homemade Apple Pie Filling for a more delicious pie that will be everyone’s favorite!

3 Tips For The Perfect Pie Crust
- Remember, the fridge is a pie dough’s best friend! You really need to keep it cold to ensure the best experience.
- Preheat the oven! I know this sounds simple, but when you put cold dough into a hot oven, it creates steam. Therefore, you get a flakier crust!
- Keep the butter chunks bigger and, when you’re rolling, if you see a chunk of butter on the edge, cut it off and place it back in the middle. Butter is what makes a pie crust!
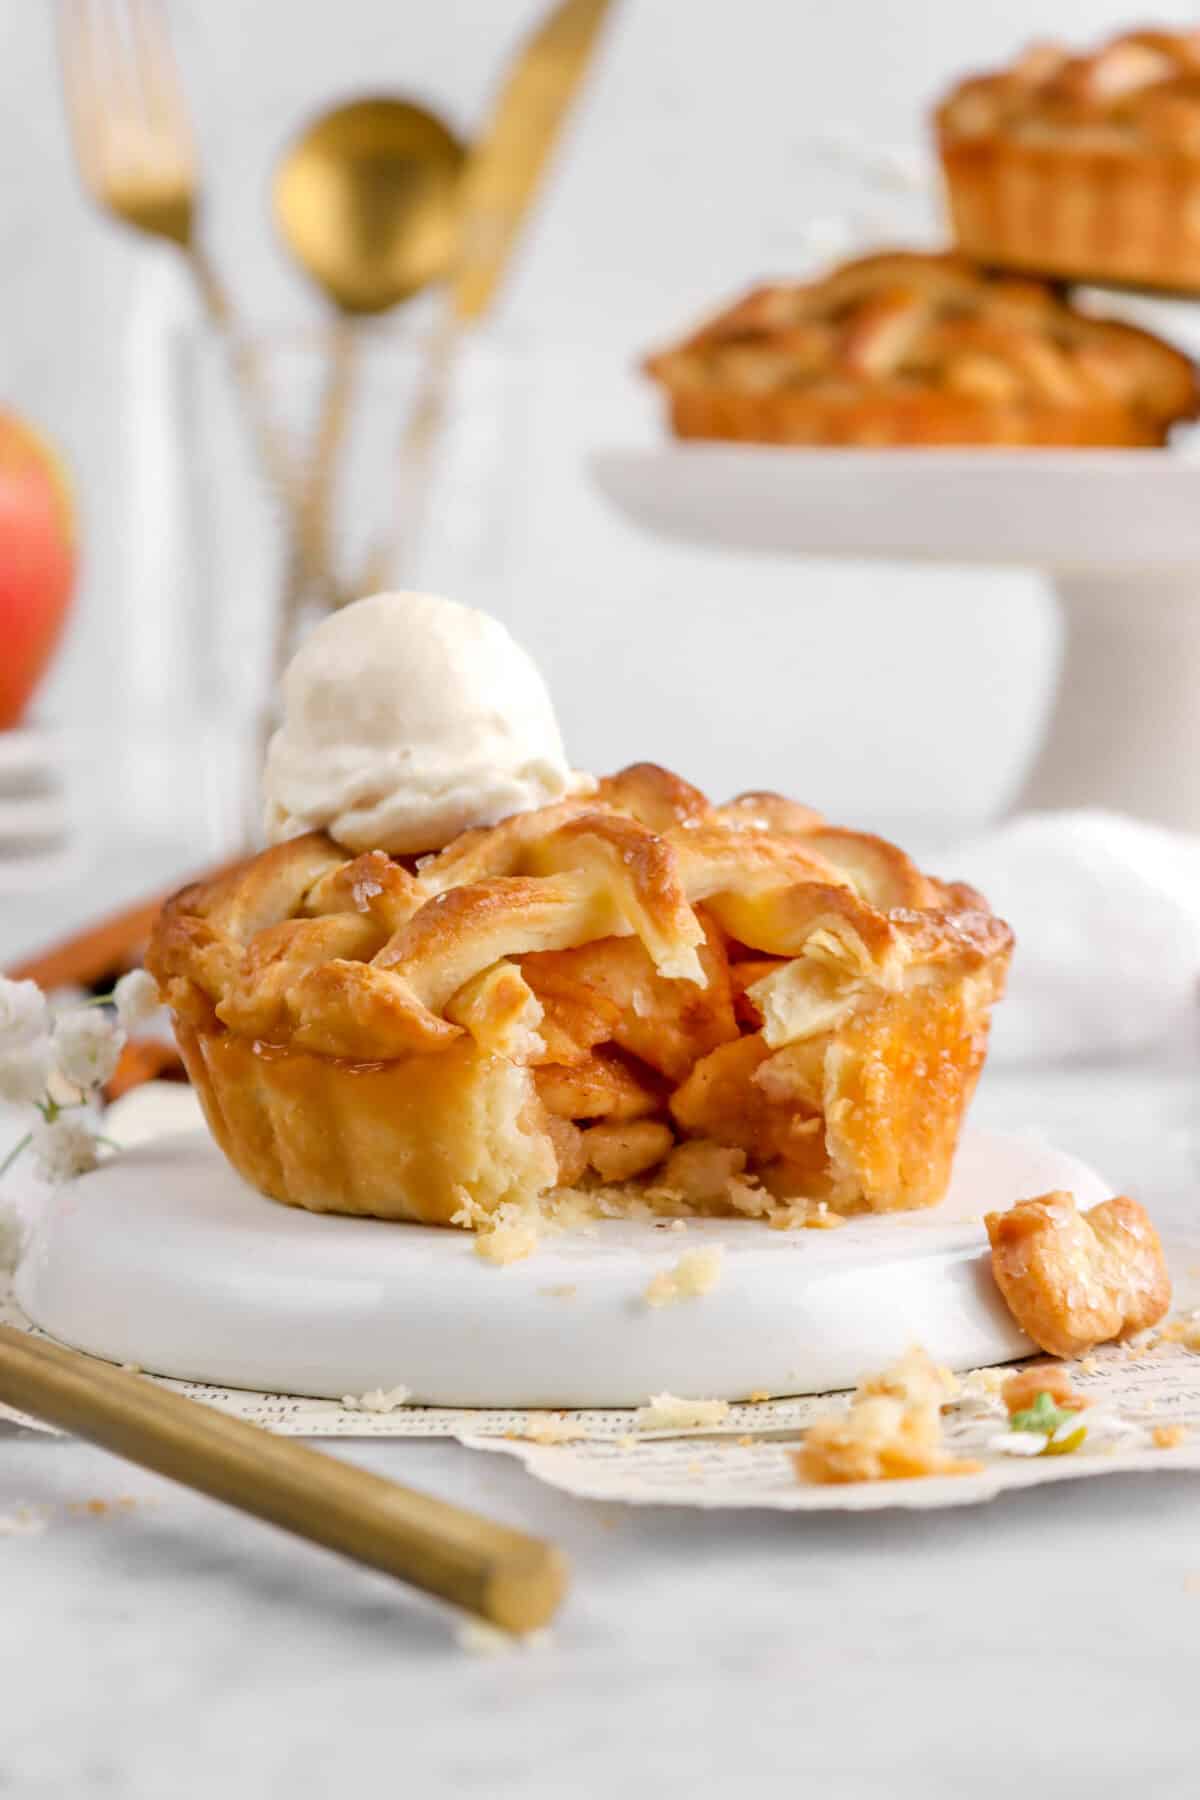
What To Serve with Apple Pie
Whether you’re planning out a holiday dinner or just looking for some topping ideas, here are a few of our favorite things to serve alongside these delicious pies!
- Homemade Vanilla Ice Cream
- Caramel Apple Ice Cream
- Homemade Caramel Sauce
- Chantilly Cream
- Caramel Apple Layer Cake
- Homemade Pumpkin Pie
- Southern Pecan Pie
- Pumpkin Pie Bars
Expert Tips
- When making the pie crust, remember to keep the second addition of butter in larger chunks.
- The fridge is your best friend! With the high butter content, the dough can become soft quickly…especially on hot days!
- Don’t overwork the dough in the mixer. Follow the instructions for best results.
- Use fresh apples for the filling for the best flavor and texture.
- Don’t skip pressing the filling down! This helps ensure lots and lots of apple in each mini pie.
- Sealing the lattice is important! Use your fingers to press it down or use a butter knife. You may also need to cut off excess dough. Trim as needed.
- Be sure to lightly brush each pie with heavy cream! It helps the lattice evenly brown.
- 1 – 3/16 cups = 1 cup + 3 Tablespoons!
- 4 cups of apple is about 2 1/2 large apples.
When you make these Mini Apple Pies, leave a comment down below! We love hearing from you and answering any questions you might have! Also, be sure to tag us on social media and hashtag it #BakersTable.
Mini Apple Pies
Ingredients
Pastry
- 2⅔ cups all purpose flour
- 2⅔ Tablespoons granulated sugar
- 1⅓ teaspoons salt
- 1 3/16 cups unsalted butter, cold
- ½ cup ice water
Filling
- 4 cups chopped apple
- ½ cup granulated sugar
- 1 Tablespoon apple pie spice
- 1½ Tablespoons cornstarch
- 2 Tablespoons unsalted butter
Assembly
- heavy cream
- coarse sugar
Instructions
Pastry
- Chop butter into small pieces.
- Remove ¼ cup butter and return rest to refrigerator.
- Combine flour, sugar, salt, and ¼ cup butter in bowl of stand mixer.
- Turn mixer on low speed and mix until mixture is the texture of corn meal, 3-4 minutes.
- Add rest of butter.
- Mix on medium low speed until combined. (You should still have chunks of butter in mixture.)
- Reduce speed to low.
- Add ice water 1 Tablespoon at a time until dough comes together.
- Turn out onto parchment paper.
- Divide into fourths.
- Form each ¼ into a round.
- Wrap in plastic wrap.
- Refrigerate for at least 4 hours.
- Working with one disc at a time, remove from refrigerator.
- Roll out on a non-stick surface (marble, parchment paper, silicone mat) into a circle that is 3/16 inch thick.
- Cut out a 6" circle and fit it into pan. Reserve scraps.
- Repeat with the 3 other pieces of dough.
- Place pie crusts in refrigerator.
- Re-roll pie crust scraps.
- Cut into a rectangle.
- Cut into ½" wide strips.
- Braid strips to form 4 lattice tops. (See step by step photos above.)
- Place lattice in refrigerator.
Filling
- Peel, core, and slice apples.
- In a large bowl, combine apples, sugar, apple pie spice, and cornstarch.
- Divide butter into 4 pieces.
- Cut each piece into thirds. Set aside.
Assembly
- Heat oven to 375℉.
- Remove crusts from refrigerator.
- Place ½ cup apple mixture in each of the pie molds.
- Add 3 pieces of butter to each.
- Top with ½ cup apple mixture, being sure to press filling down into molds.
- Top each pie with lattice and seal edges.
- Brush the top of each pie with heavy cream and sprinkle with coarse sugar.
- Place pies in oven and bake for 25-30 minutes, until golden brown.
Notes + Tips!
- When making the pie crust, remember to keep the second addition of butter in larger chunks.
- The fridge is your best friend! With the high butter content, the dough can become soft quickly…especially on hot days!
- Don’t overwork the dough in the mixer. Follow the instructions for best results.
- Use fresh apples for the filling for the best flavor and texture.
- Don’t skip pressing the filling down! This helps ensure lots and lots of apple in each mini pie.
- Sealing the lattice is important! Use your fingers to press it down or use a butter knife. You may also need to cut off excess dough. Trim as needed.
- Be sure to lightly brush each pie with heavy cream! It helps the lattice evenly brown.
- 1 – 3/16 cups = 1 cup + 3 Tablespoons!
- 4 cups of apple is about 2 1/2 large apples.
Tools You May Need (affiliate links)
– Still Hungry? –
Here are a few recipes may like!


What about freezing the tarts separately and baking one at a time at a later date?
Hi Claire! That should work just fine. Just remember to add extra bake time.
who makes the 4 compartment 6 inch diameter quiche/tart /pie pan that you used?
Hi Judi! The pan is made by Chicago Metallic, but I don’t think they make it anymore. Let me know if you have any other questions.