How To Temper Chocolate
This post may contain affiliate links, please visit our privacy policy for details.
Tempering chocolate might sound intimidating, but it’s a skill that can elevate your candy to the next level. When tempered properly, chocolate will have a beautiful glossy finish, snap cleanly when broken, and melt smoothly in your mouth!

Understanding Chocolate Types
Before we dive into tempering, let’s briefly discuss the different types of chocolate:
- Dark Chocolate: This chocolate has a higher cocoa content (usually 50% or more) and less milk fat. It’s known for its intense flavor and is the easiest to temper.
- Milk Chocolate: Milk chocolate contains cocoa butter, milk powder, and sugar. It’s generally more forgiving than dark chocolate but still requires careful tempering.
- White Chocolate: This type of chocolate contains cocoa butter, milk powder, and sugar, but no cocoa solids. It’s the most delicate and challenging to temper, as it’s prone to seizing (becoming grainy).
Make sure you are using 100% pure chocolate, not candy melts or chocolate chips.
Why Temper Chocolate?
Tempering is essentially a process of heating and cooling chocolate to create a stable crystal structure. This leads to the desired qualities of tempered chocolate:
- Glossy Finish: Tempered chocolate has a beautiful, shiny appearance.
- Snap: It breaks cleanly with a satisfying snap.
- Smooth Melt: It melts smoothly in your mouth, leaving a luxurious feel.
Save This For Later!
We made a handy-dandy chart for you to use whenever you’re tempering chocolate. Be sure to save it to your device and reference it whenever you need it.

Different Tempering Methods
There are several methods for tempering chocolate, each with its own advantages and disadvantages. Let’s explore the most common ones:
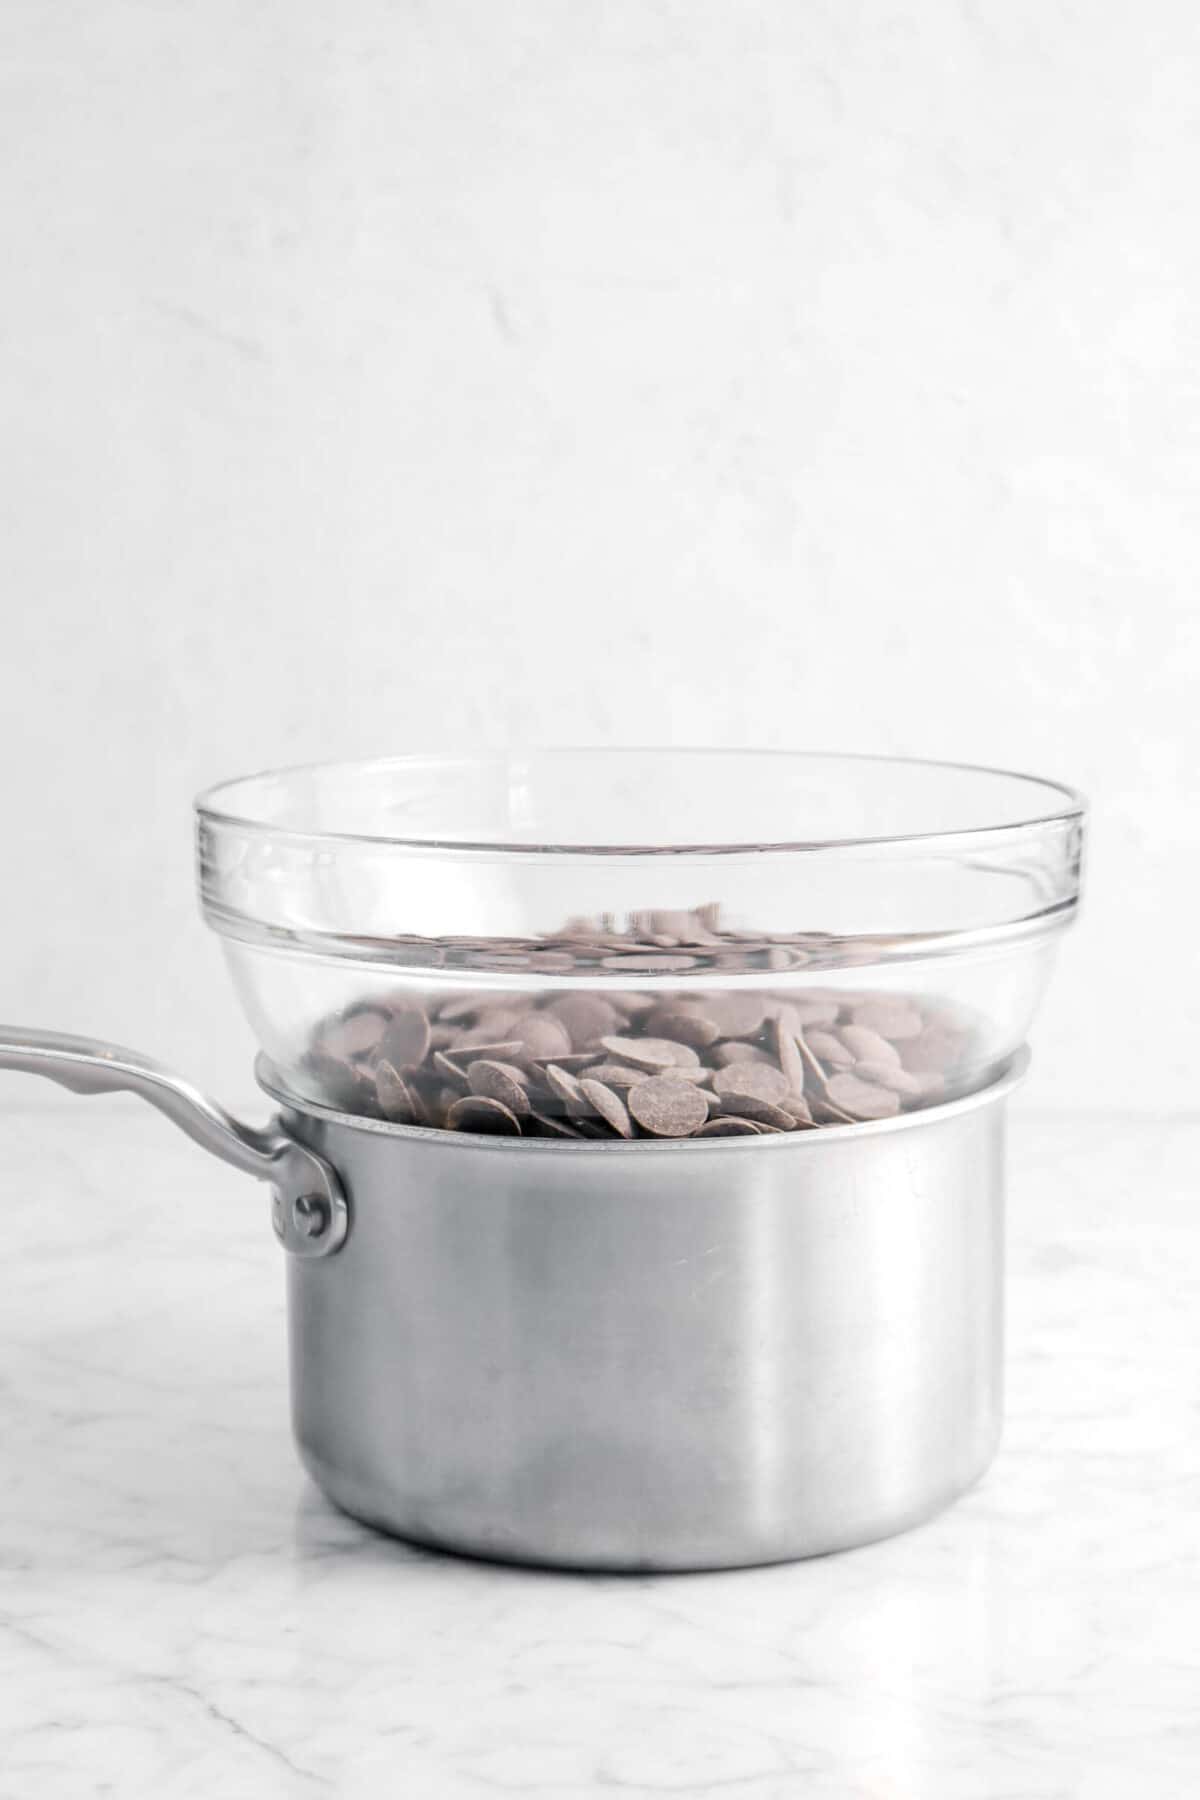
1. Bain-Marie Method (our preferred method)
This method involves using a double boiler to gently heat and cool the chocolate. Here’s how it works:
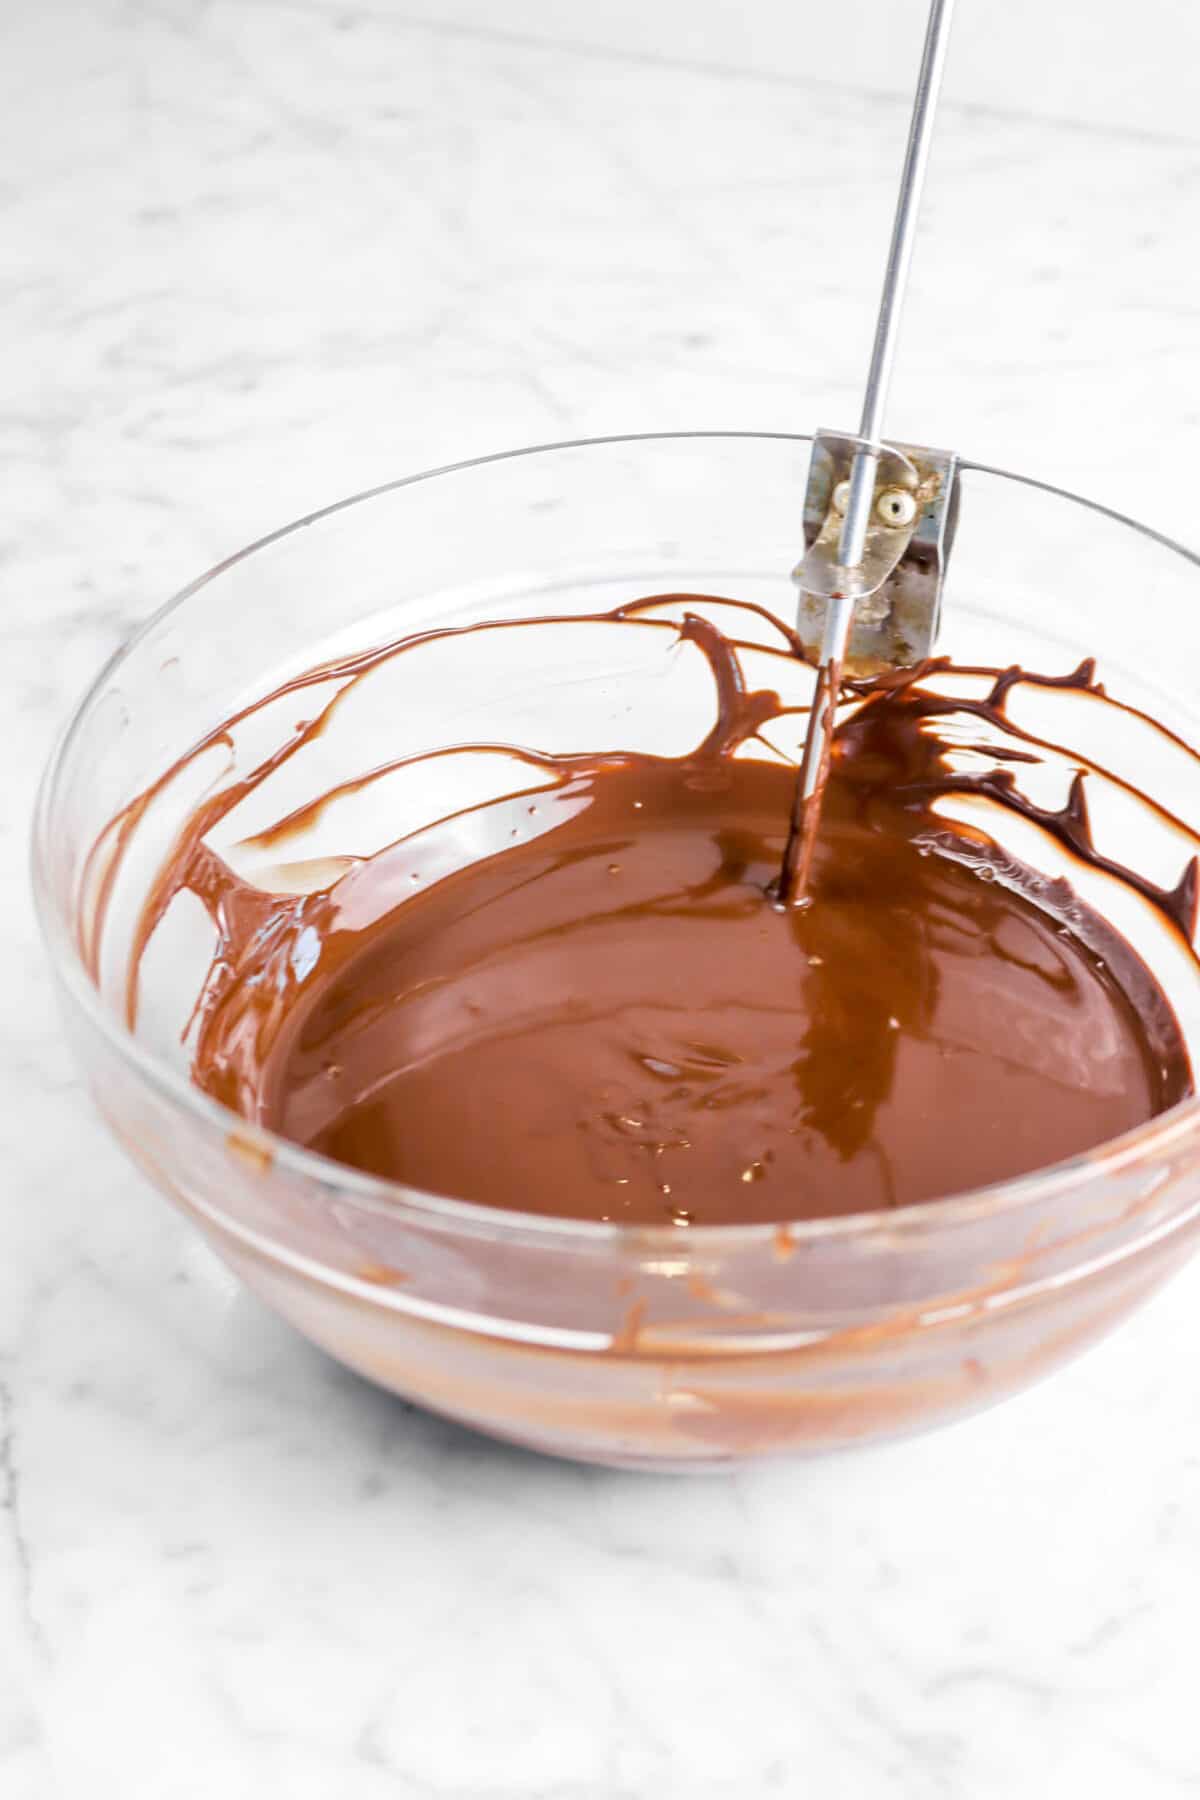
- Melt the chocolate: Place the dark chocolate in a glass bowl and place over a pot of simmering water (this technique is called a bain-marie). Stir until the chocolate melts and temperature meets desired first temperature (see chart above)
- Cool the chocolate: Remove from heat and cool, stirring constantly, until desired second temperature is achieved.
- Reheat the chocolate: Place back over warm water and raise temperature to desired temperature. Hold at this temperature.
2. Seed Chocolate Method
This is a classic method that works well for all types of chocolate. Here’s how it’s done:
- Melt your chocolate: Melt your chocolate over a double boiler or in the microwave, ensuring it doesn’t exceed the recommended temperature.
- Add the seed chocolate: Once your chocolate is melted, add the seed chocolate to the melted chocolate. The amount of seed chocolate you need will vary depending on the quantity of chocolate you’re tempering, but generally, a small amount is sufficient.
- Stir: Stir the mixture vigorously until the seed chocolate is fully incorporated and the temperature drops to the desired tempering range for your specific type of chocolate.
- Reheat to working temperature: Reheat the chocolate slightly to its working temperature.

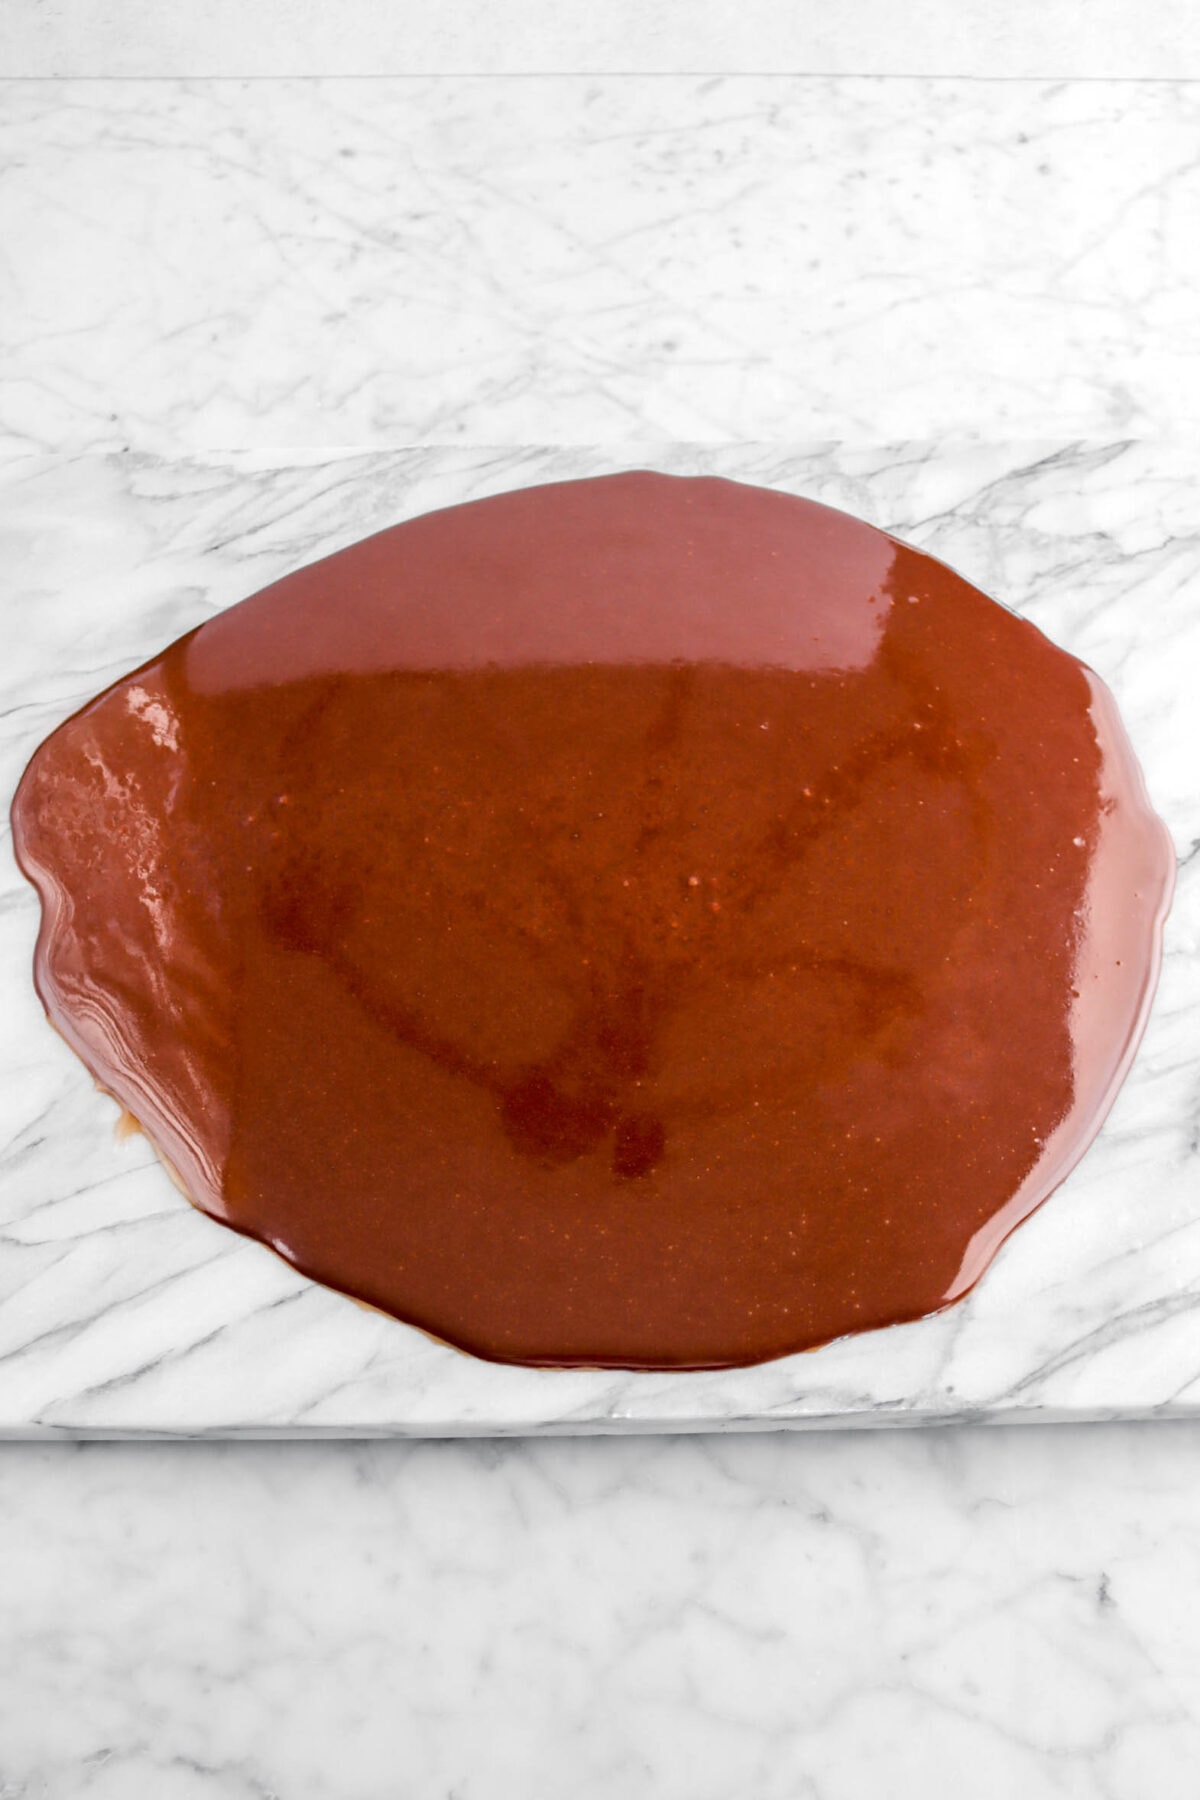
3. Tabling Method
This method is ideal for smaller amounts of chocolate and is particularly popular for dark chocolate. Here’s how it works:
- Melt the chocolate: Melt the chocolate using the microwave or bain-marie method (do not exceed recommended temp).
- Spread on a cool surface: Pour the melted chocolate onto a cool, clean marble slab or similar surface.
- Spread and scrape: Use a metal spatula to spread and scrape the chocolate back and forth until it thickens and reaches the tempering temperature.
- Reheat slightly: Place back into bowl and reheat the chocolate slightly to its working temperature.

Let’s Talk Tempering Machines
For those seeking a more consistent and efficient tempering process, tempering machines offer a fantastic solution. These machines are designed to precisely control the temperature of the chocolate, taking the guesswork out of the process. We have had this Revolution Tempering Machine for almost 30 years and it has never ONCE failed us (this is not sponsored. We genuinely love this machine and think it’s worth the investment).
How Tempering Machines Work
A tempering machine typically consists of a heated tank and a cooling tank. The chocolate is melted in the heated tank and then circulated between the two tanks to control its temperature. Sensors monitor the temperature and adjust the heating and cooling cycles to maintain the optimal temperature range for tempering.
Benefits of Using a Tempering Machine
- Consistent Results: Tempering machines ensure consistent temperature control, leading to consistently tempered chocolate.
- Time-Saving: These machines automate the tempering process, saving you time and effort.
- Reduced Waste: By preventing chocolate from seizing, tempering machines minimize waste.
- Versatility: Many tempering machines can handle various chocolate types, from dark to milk to white.
- User-Friendly: Modern tempering machines are often equipped with intuitive controls and digital displays, making them easy to operate.

Tips for Successful Tempering
- Use a thermometer: A reliable thermometer is essential for accurate temperature control.
- Keep it dry: Ensure all your equipment and work surfaces are completely dry, as moisture can cause the chocolate to seize.
- Work quickly: Once tempered, use the chocolate promptly, as it can lose its temper if left too long.
- Practice makes perfect: Tempering takes practice, so don’t get discouraged if your first attempts aren’t perfect.
What Should I Do With Excess Tempered Chocolate?
If you have extra leftover tempered chocolate that you aren’t sure what to do with, don’t worry! You can actually save it for later use (this is known as seed chocolate). Here’s how to store it properly:
- Cool it Down: Pour your tempered chocolate into a clean, dry air tight container and allow it to cool completely.
- Store in a Cool, Dark Place: Store the chocolate in a cool, dark place, such as a pantry or a cabinet away from direct sunlight and heat.
- Avoid Refrigeration: While refrigeration can help preserve chocolate, it can also cause it to become dry and brittle. It’s best to store tempered chocolate at room temperature.
Using Stored Tempered Chocolate as Seed Chocolate:
When you’re ready to use your stored tempered chocolate, simply break off a piece and add it to your freshly melted chocolate. The tempered chocolate will act as a seed crystal, helping to stabilize the crystal structure of the newly melted chocolate.
Important Note:
- Avoid Reheating Directly: Reheating tempered chocolate directly can disrupt its crystal structure. Instead, use a double boiler or a low heat setting to gently warm it.
- Check for Bloom: Before using stored tempered chocolate, check for signs of bloom (a white, powdery substance on the surface). If you see bloom, it’s best to discard the chocolate.

Ready For More? 10 Favorite Chocolate Candy Recipes:
❶. Snickers Bars
So much better than store-bought! These Homemade Snickers Candy Bars are creamy, perfectly sweet, chewy, nutty, and melt-in-your-mouth delicious.
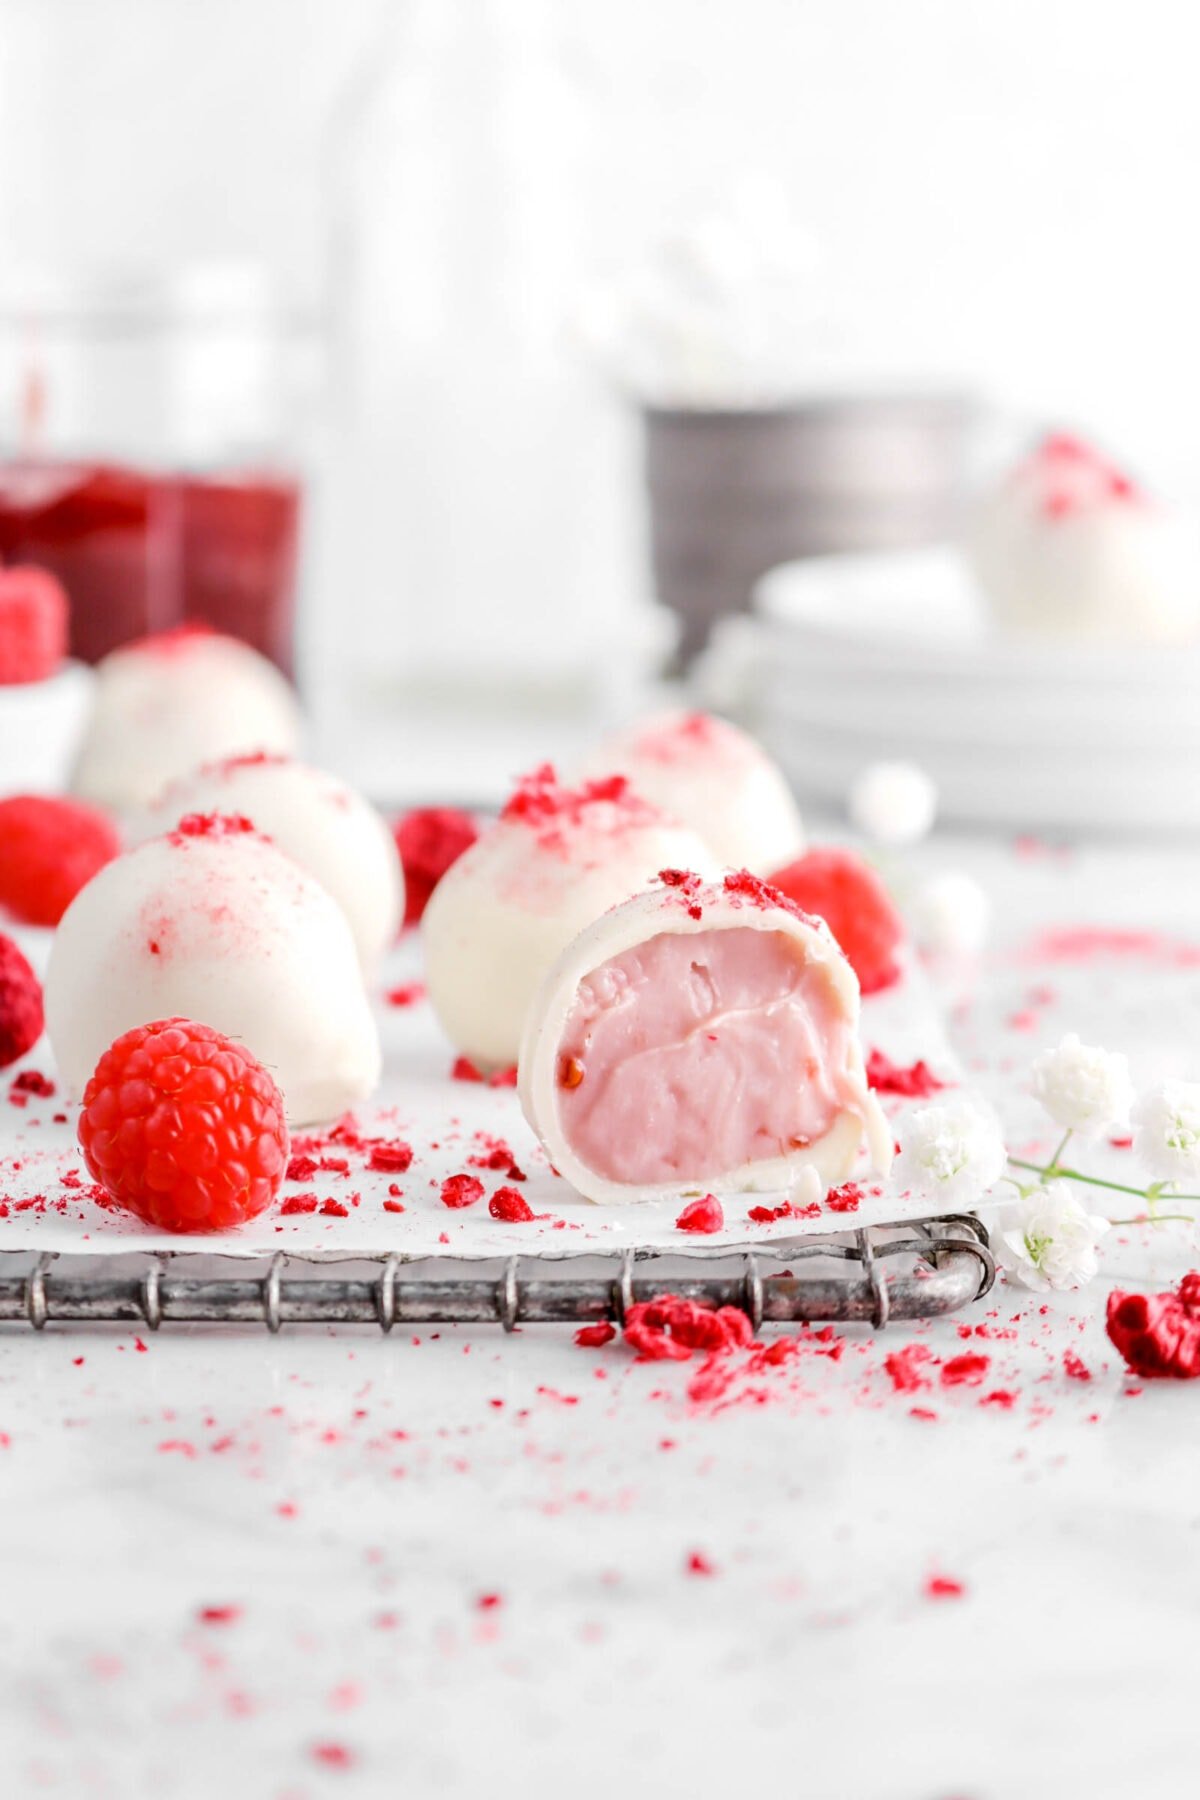
❷. Raspberry Truffles
Sweet, fruity, and so easy to make! These Raspberry White Chocolate Truffles are the perfect treat to make during the holidays. The best part? They’re naturally gluten-free and just melt in your mouth with every bite. SO. GOOD.

❸. Peanut Butter Cups
Rich, perfectly chocolate-y, and loaded with peanut butter filling. These Homemade Dark Chocolate Peanut Butter Cups are so much better than store-bought.
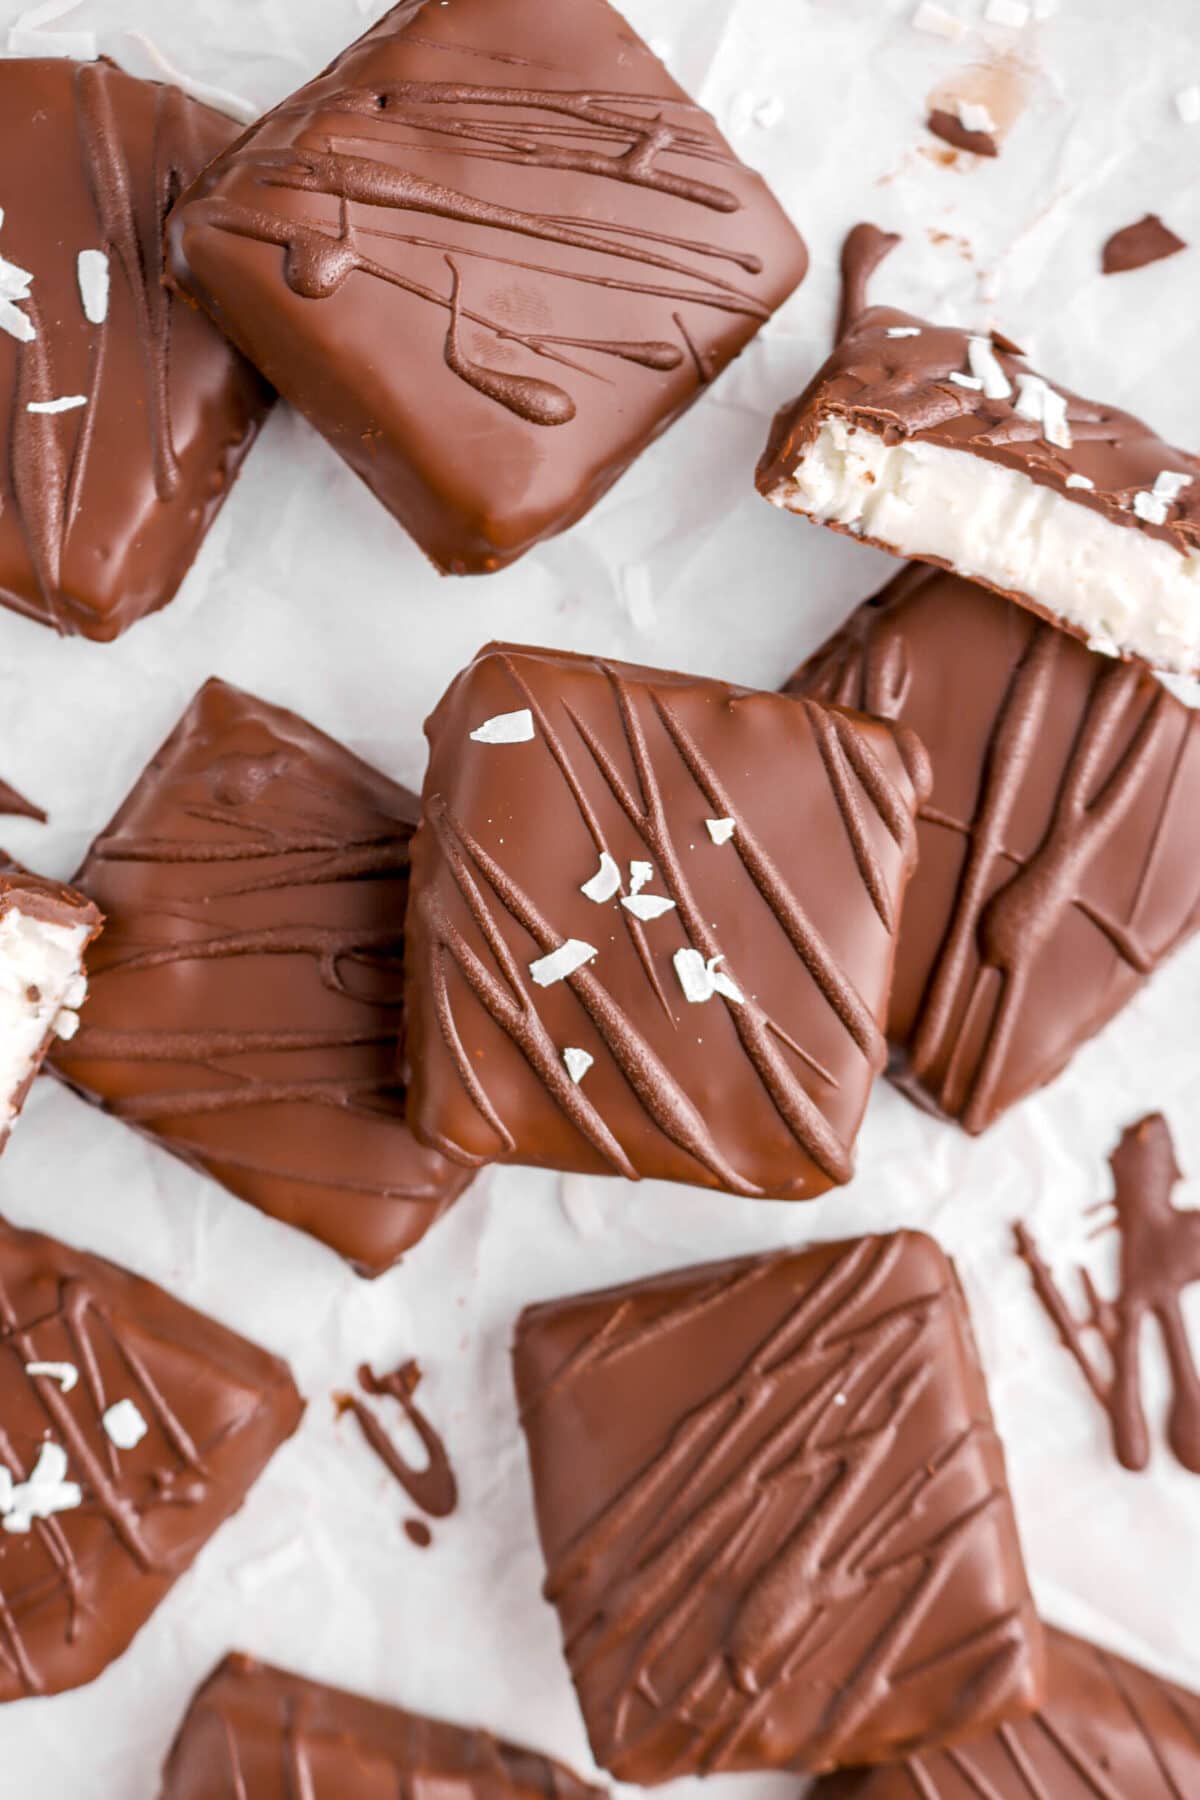
❹. Coconut Filled Chocolates
Soft, coconut-y, and SO delicious! These Coconut Cream Filled Chocolate Candies are the ultimate no cook/bake treat that you’ll be wanting to make all year long.

❺. Chocolate Coffee Truffles
Silky smooth, chocolate-y, rich, and SO. GOOD. These Dark Chocolate Coffee Truffles are the perfect treat for any occasion!
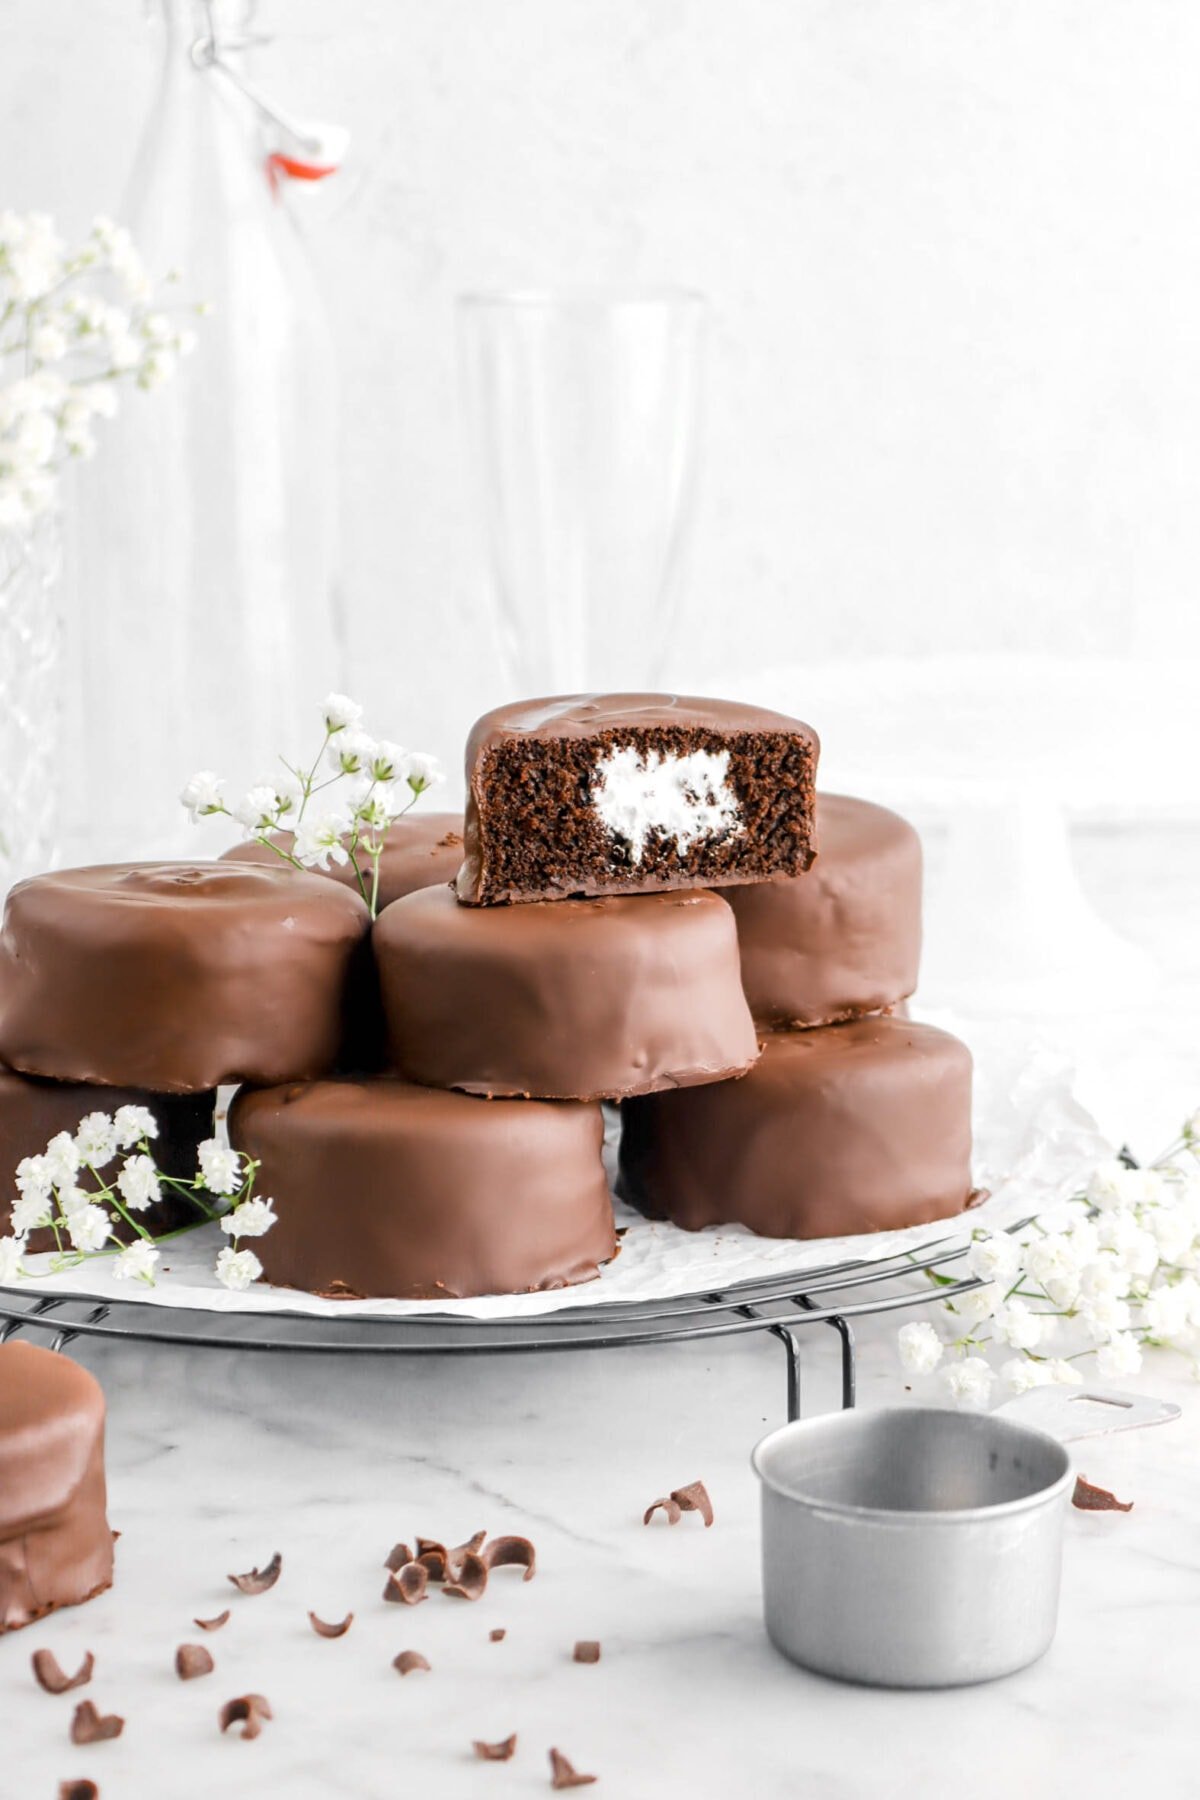
❻. Homemade Ding Dongs
Better than store-bought Mini Chocolate Cakes with Marshmallow Filling and Chocolate Coating…aka Homemade Ding Dongs! Every bite of one of these little cakes is extra chocolate-y, soft, moist, perfectly sweet, and SO. GOOD.
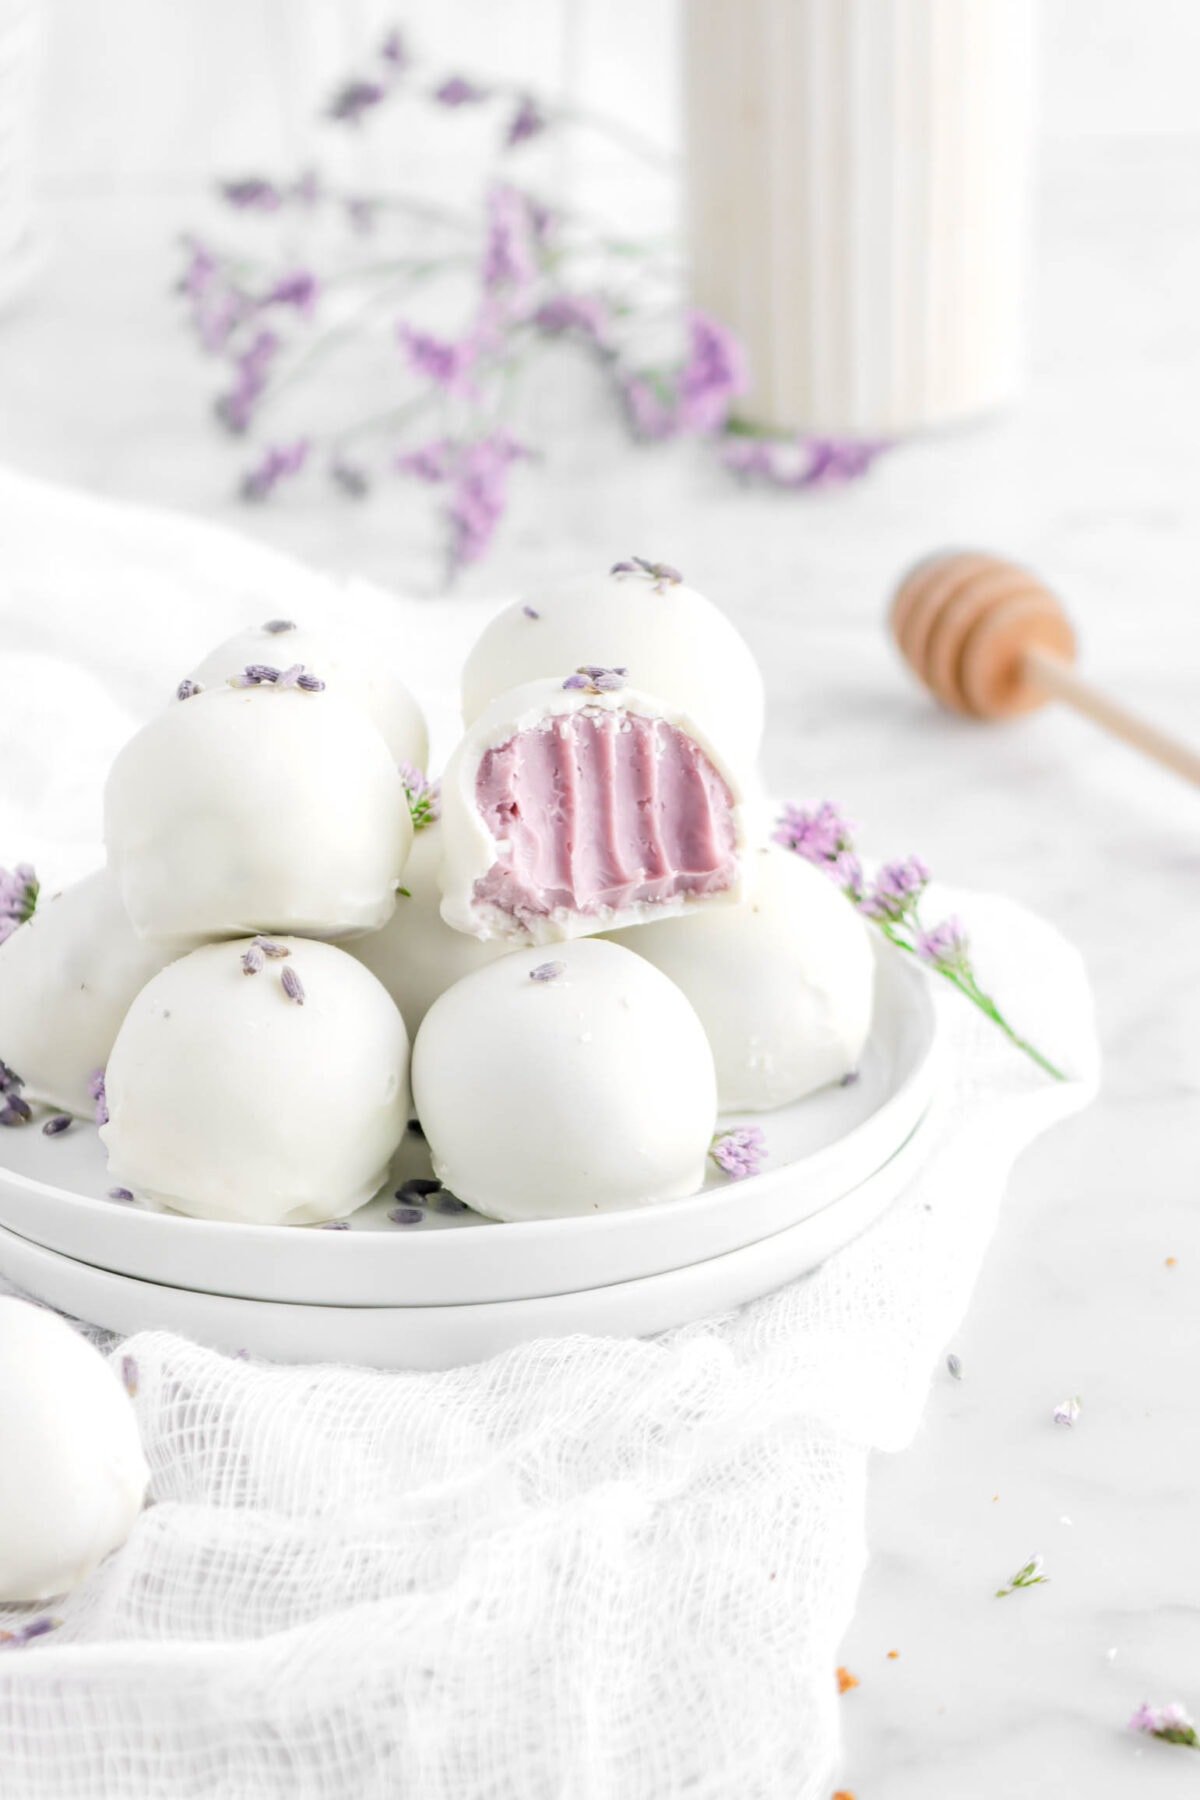
❼. Honey Lavender Truffles
Sweet, floral, and melt in your mouth delicious! These Honey Lavender White Chocolate Truffles are the perfect no-bake treat for summer.
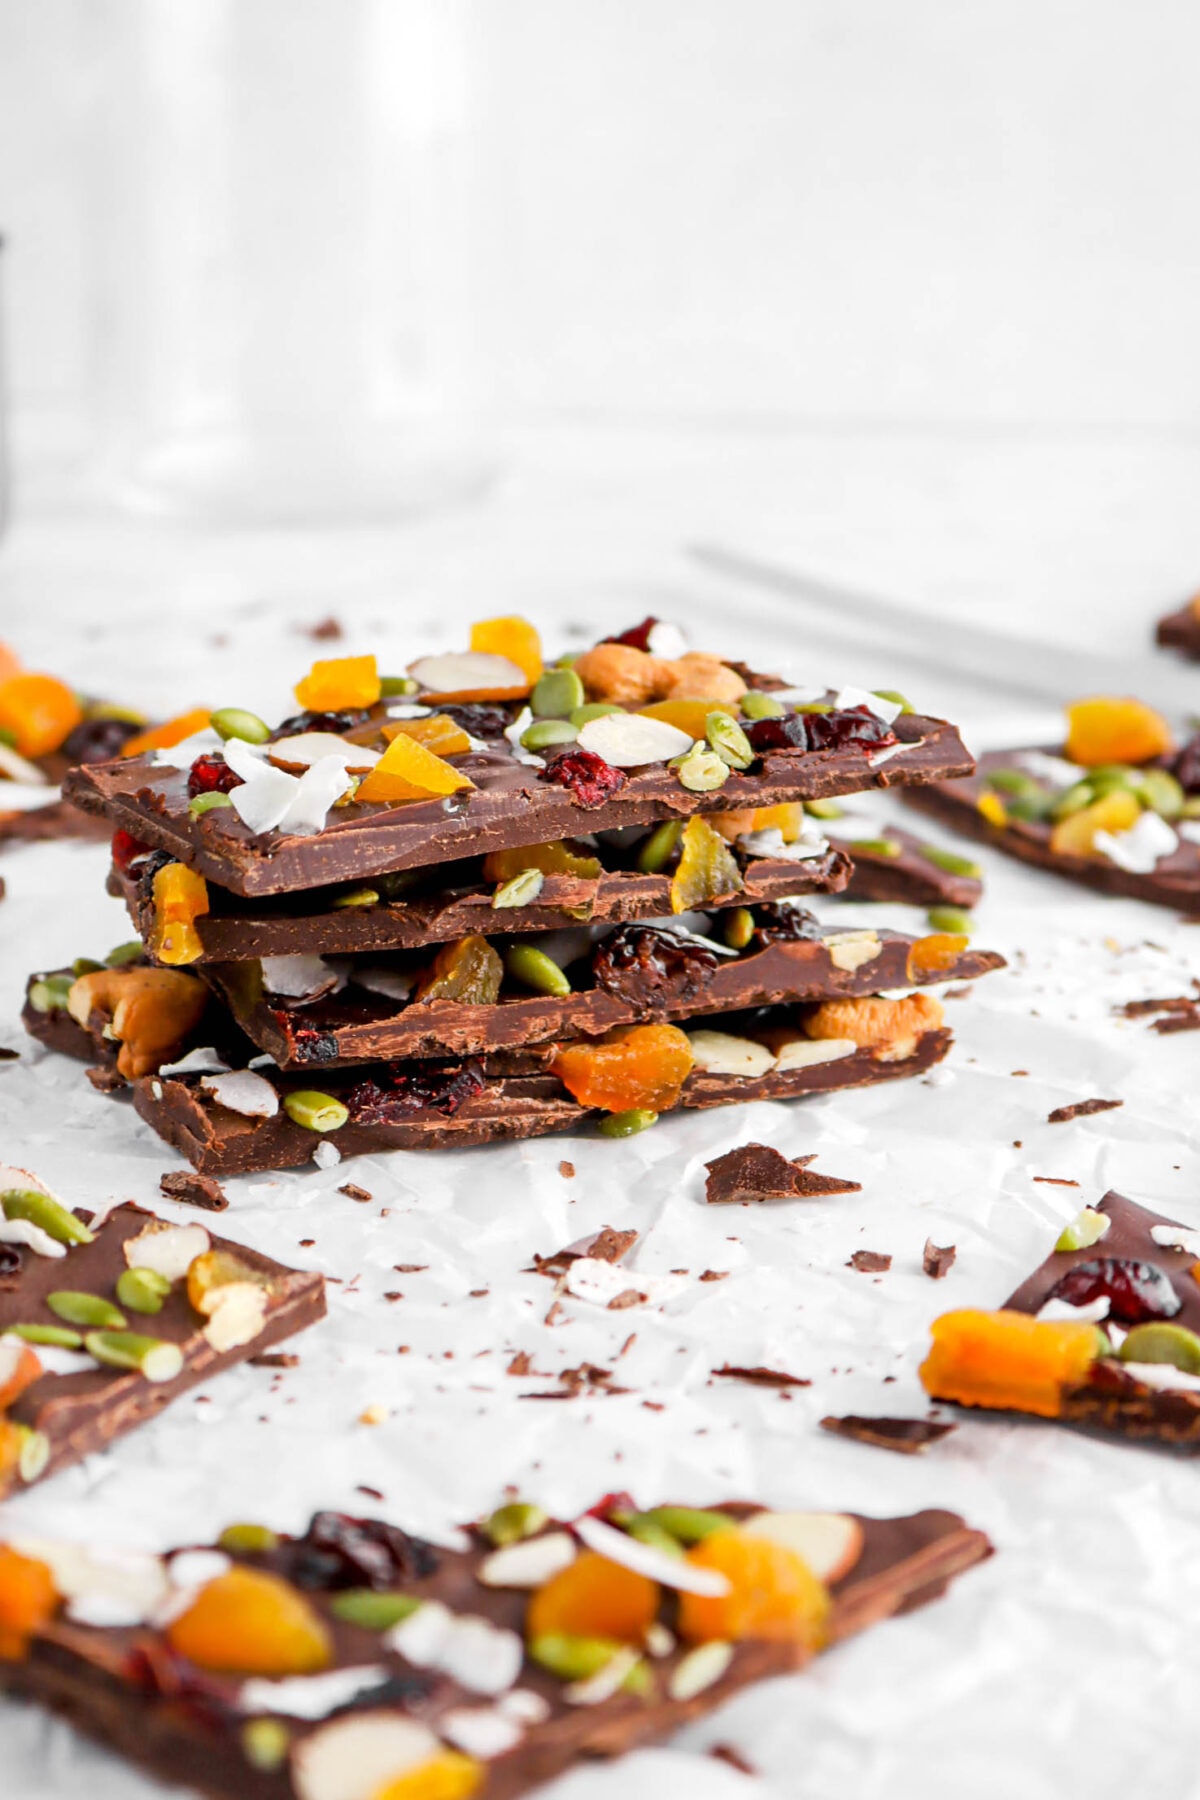
❽. Dried Fruit and Nut Bark
Rich, chocolatey, and packed with flavor! This Dark Chocolate Dried Fruit and Nut Bark is a simple, no-bake treat that’s perfect for any season. Customize it with your favorite dried fruit and nuts for a deliciously satisfying snack.
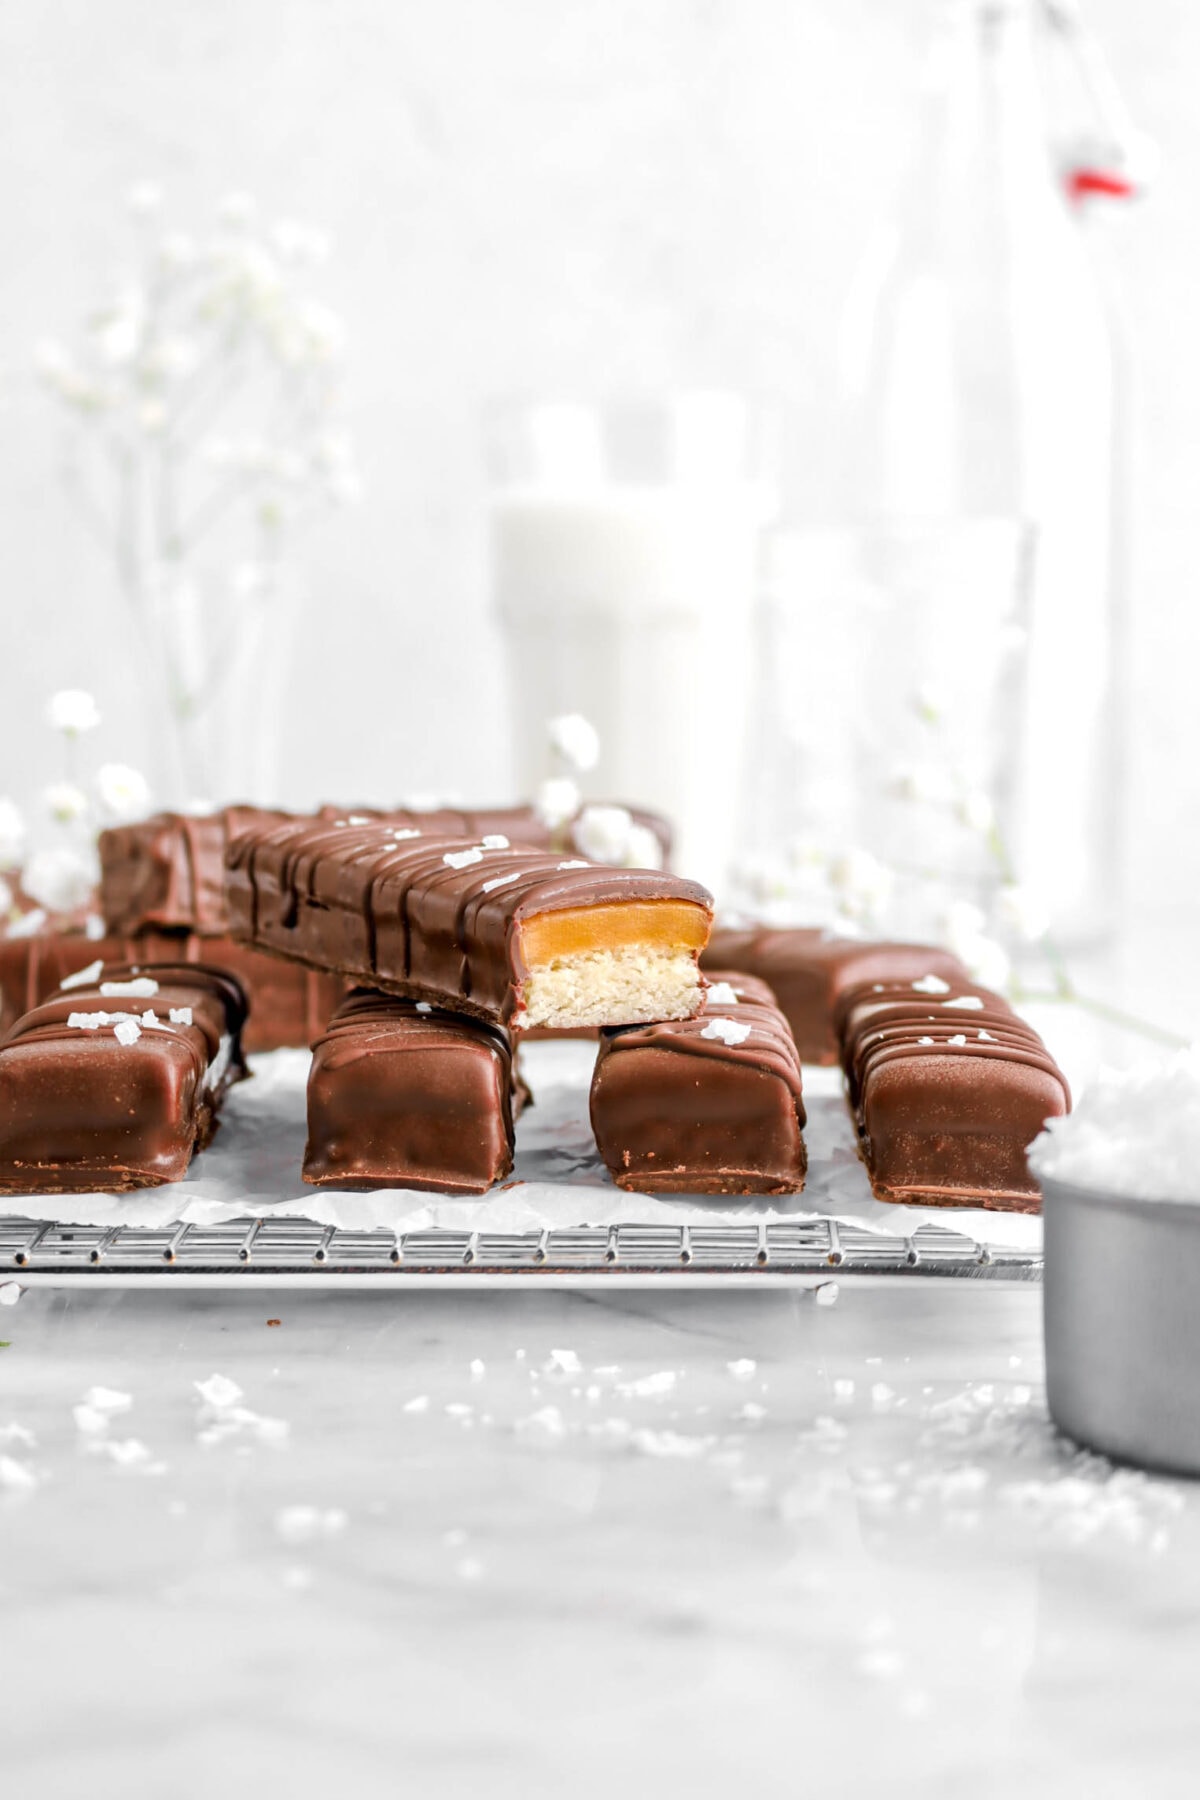
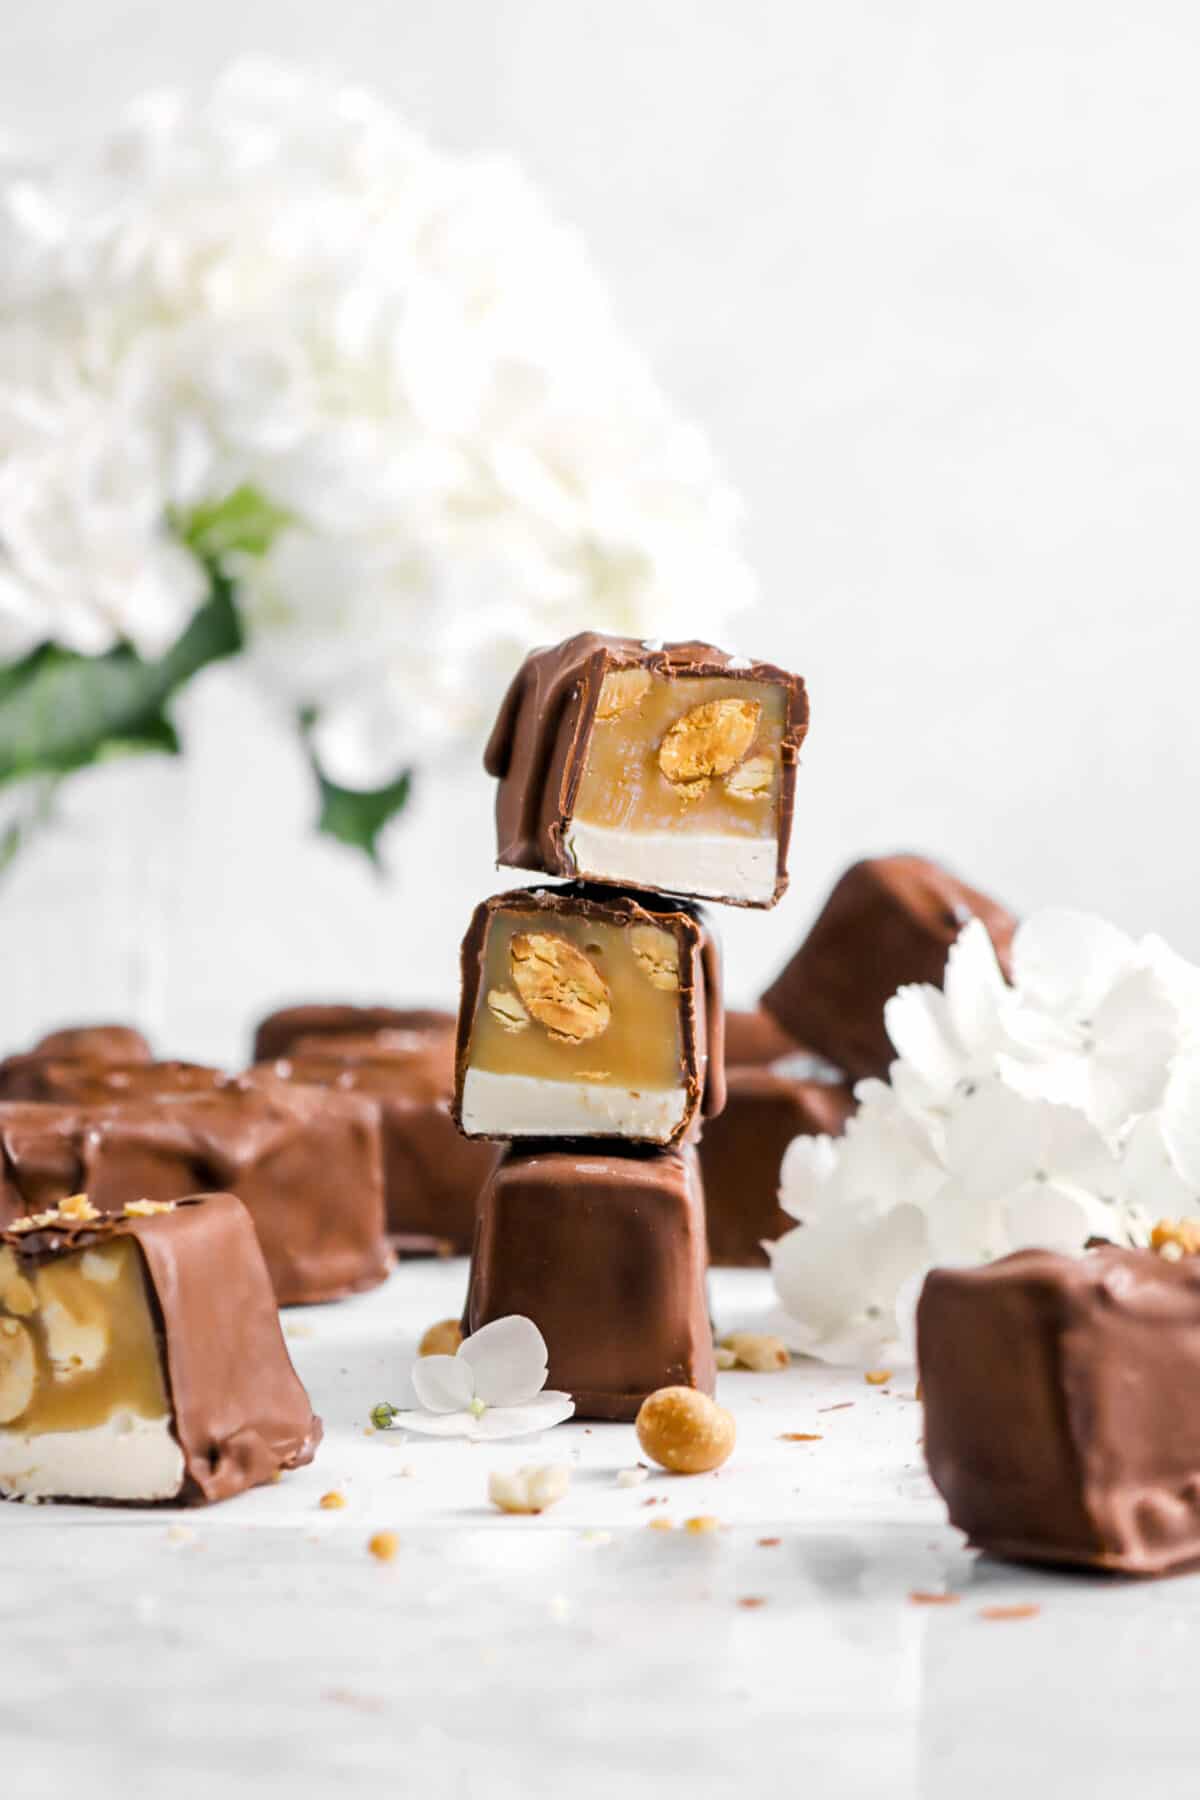
❾. Homemade Twix Bars
A soft and buttery cookie topped with a homemade chewy salted caramel, finished with a semi-sweet chocolate coating. Every bite of one of these Homemade Twix Bars is perfect sweet, chewy, and just SO. GOOD.
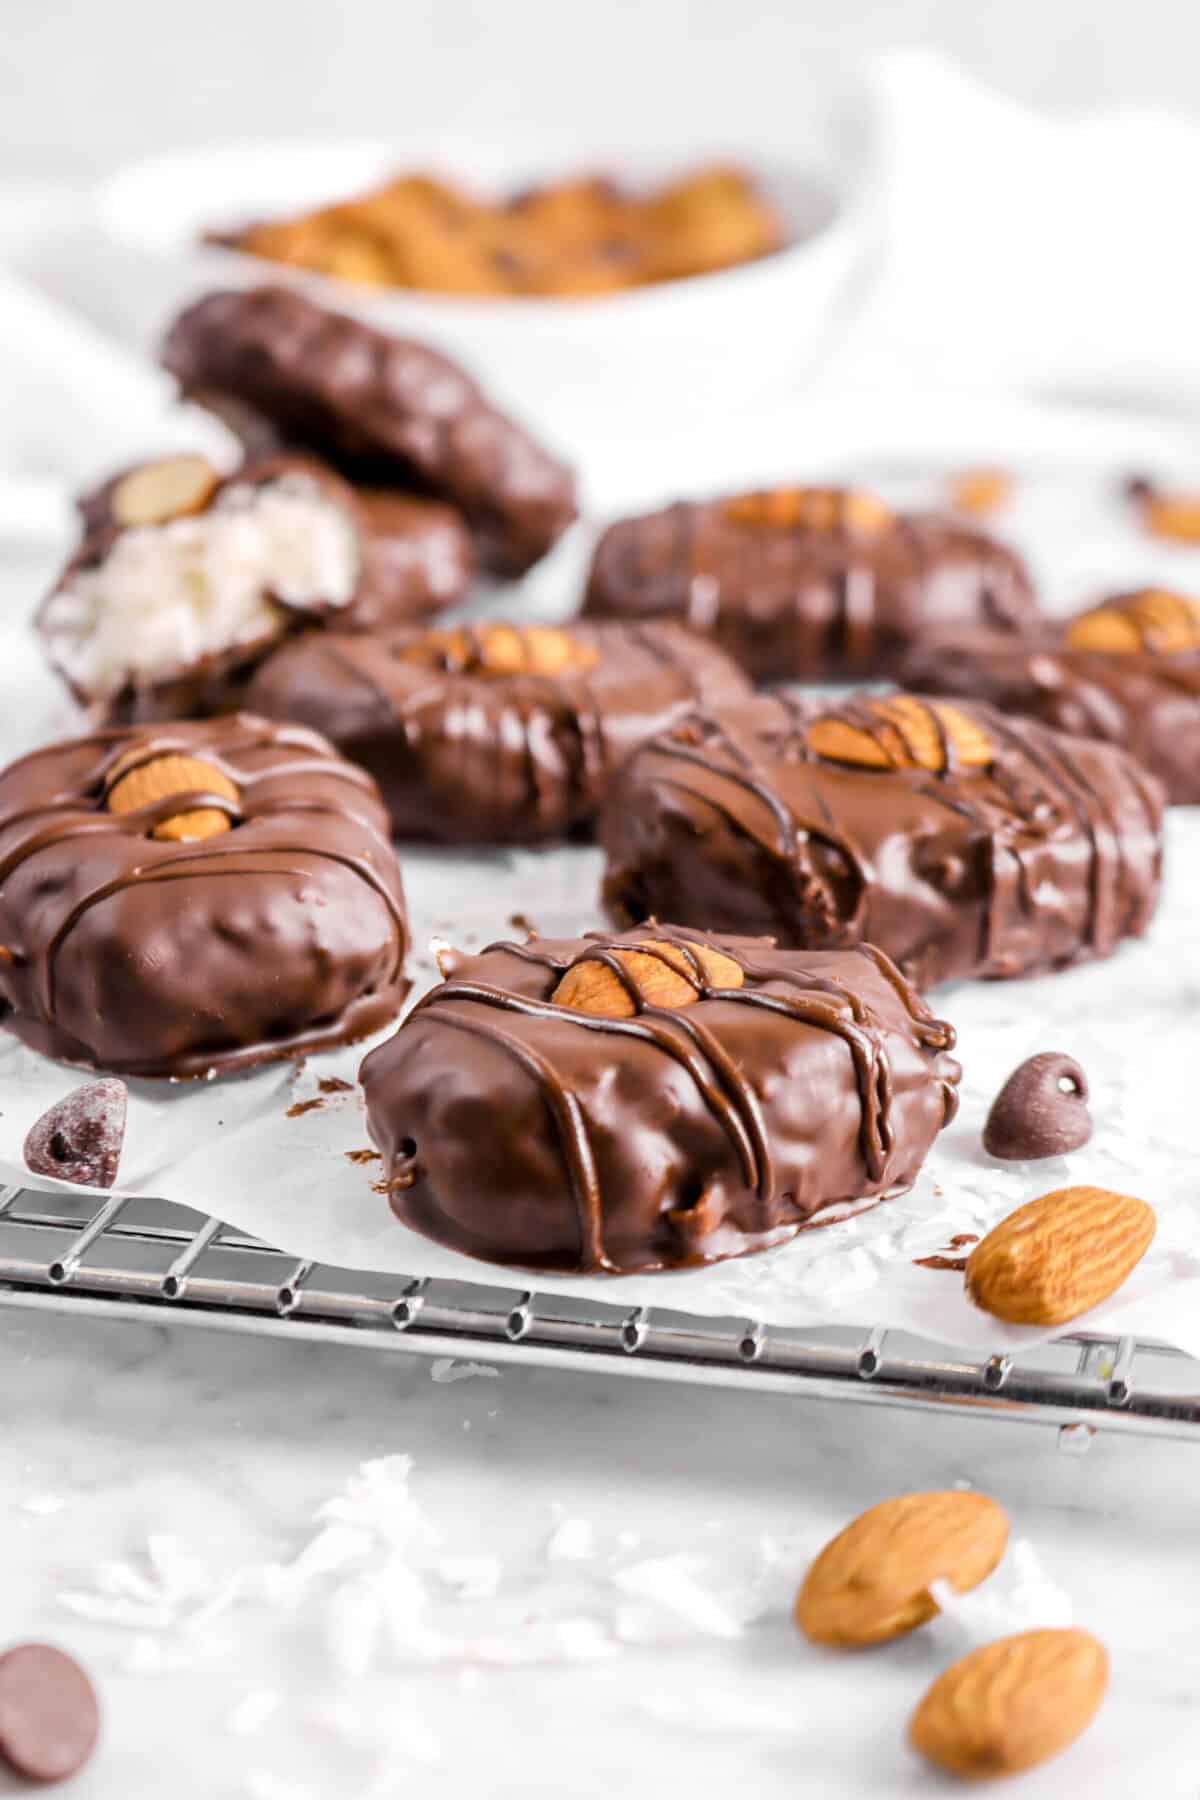
❿. Homemade Almond Joy
Coconut-y, chocolate-y, and melt in your mouth delicious! These Homemade Almond Joys are perfect for any occasion and are so easy to make.