No-Fail Molten Chocolate Lava Cakes
This post may contain affiliate links, please visit our privacy policy for details.
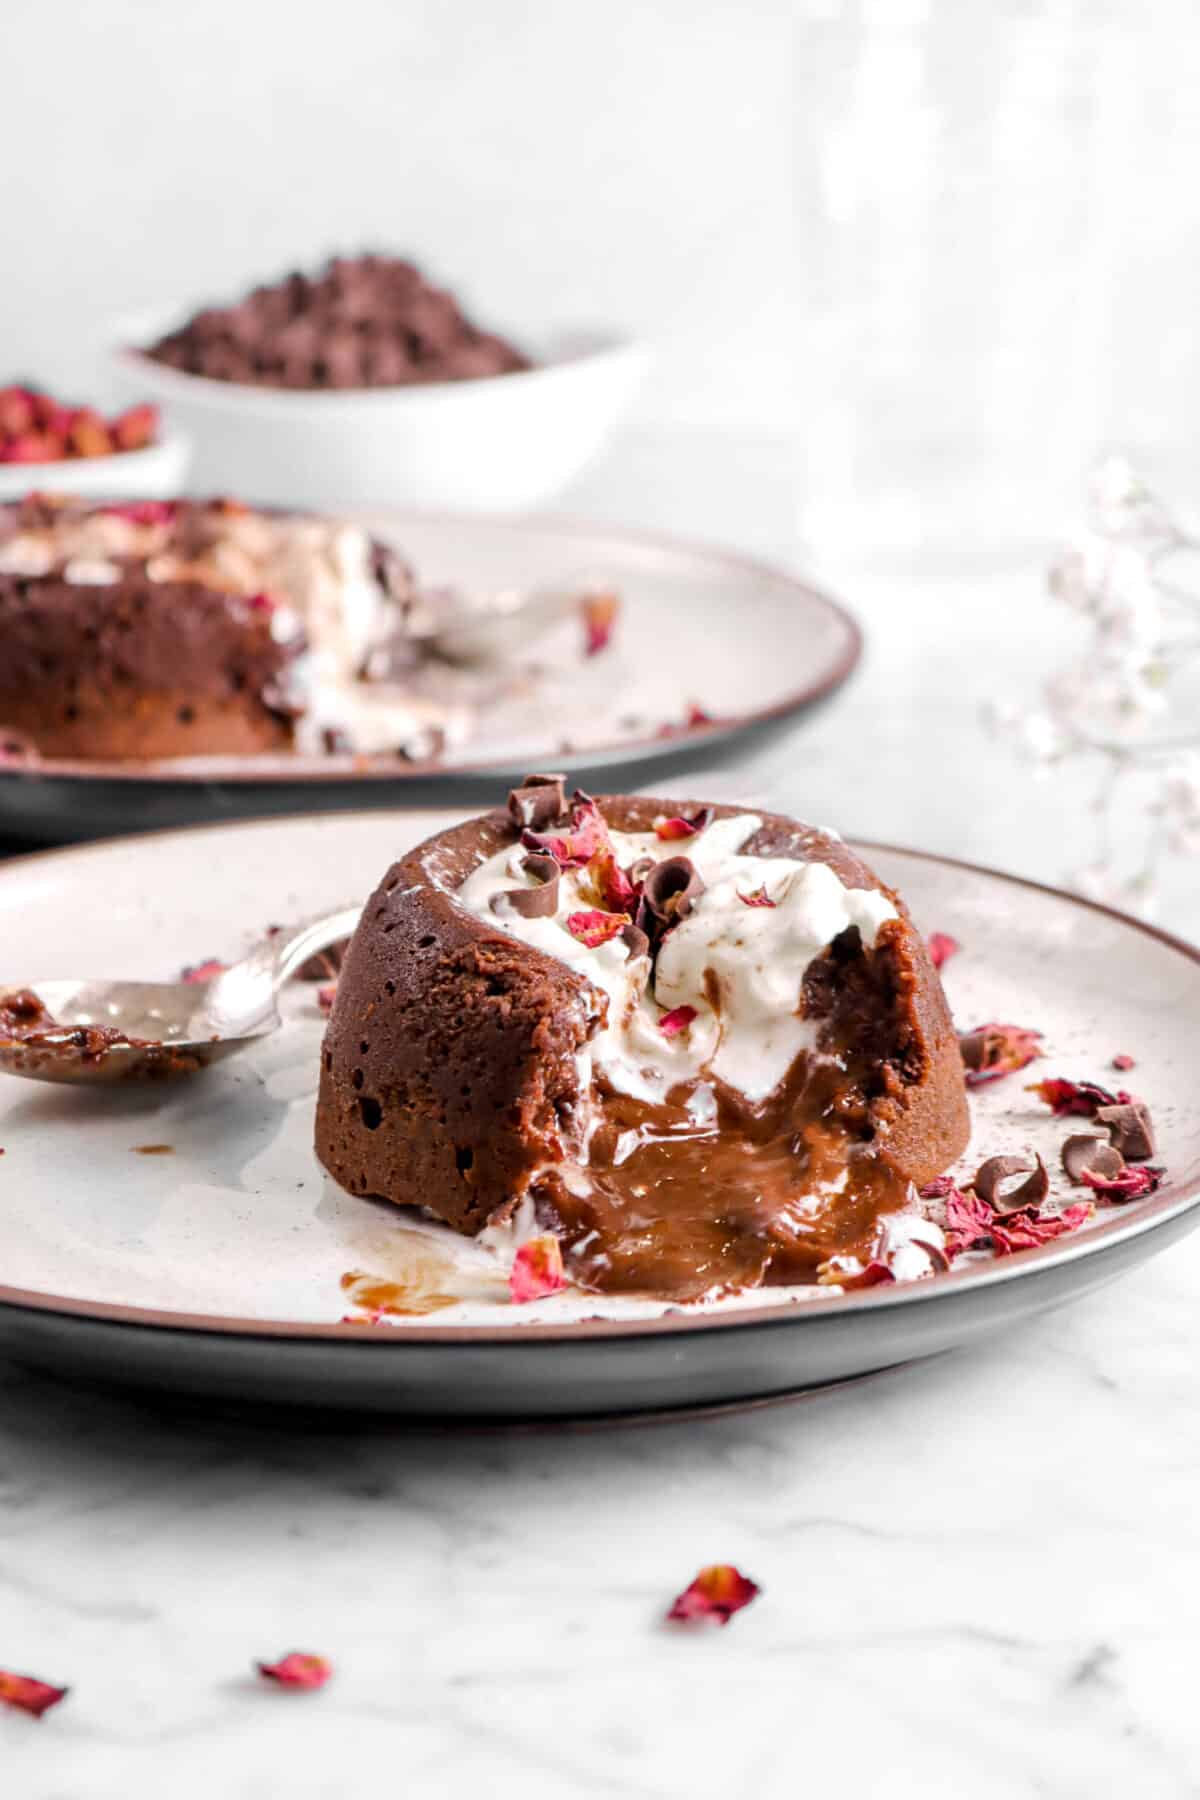
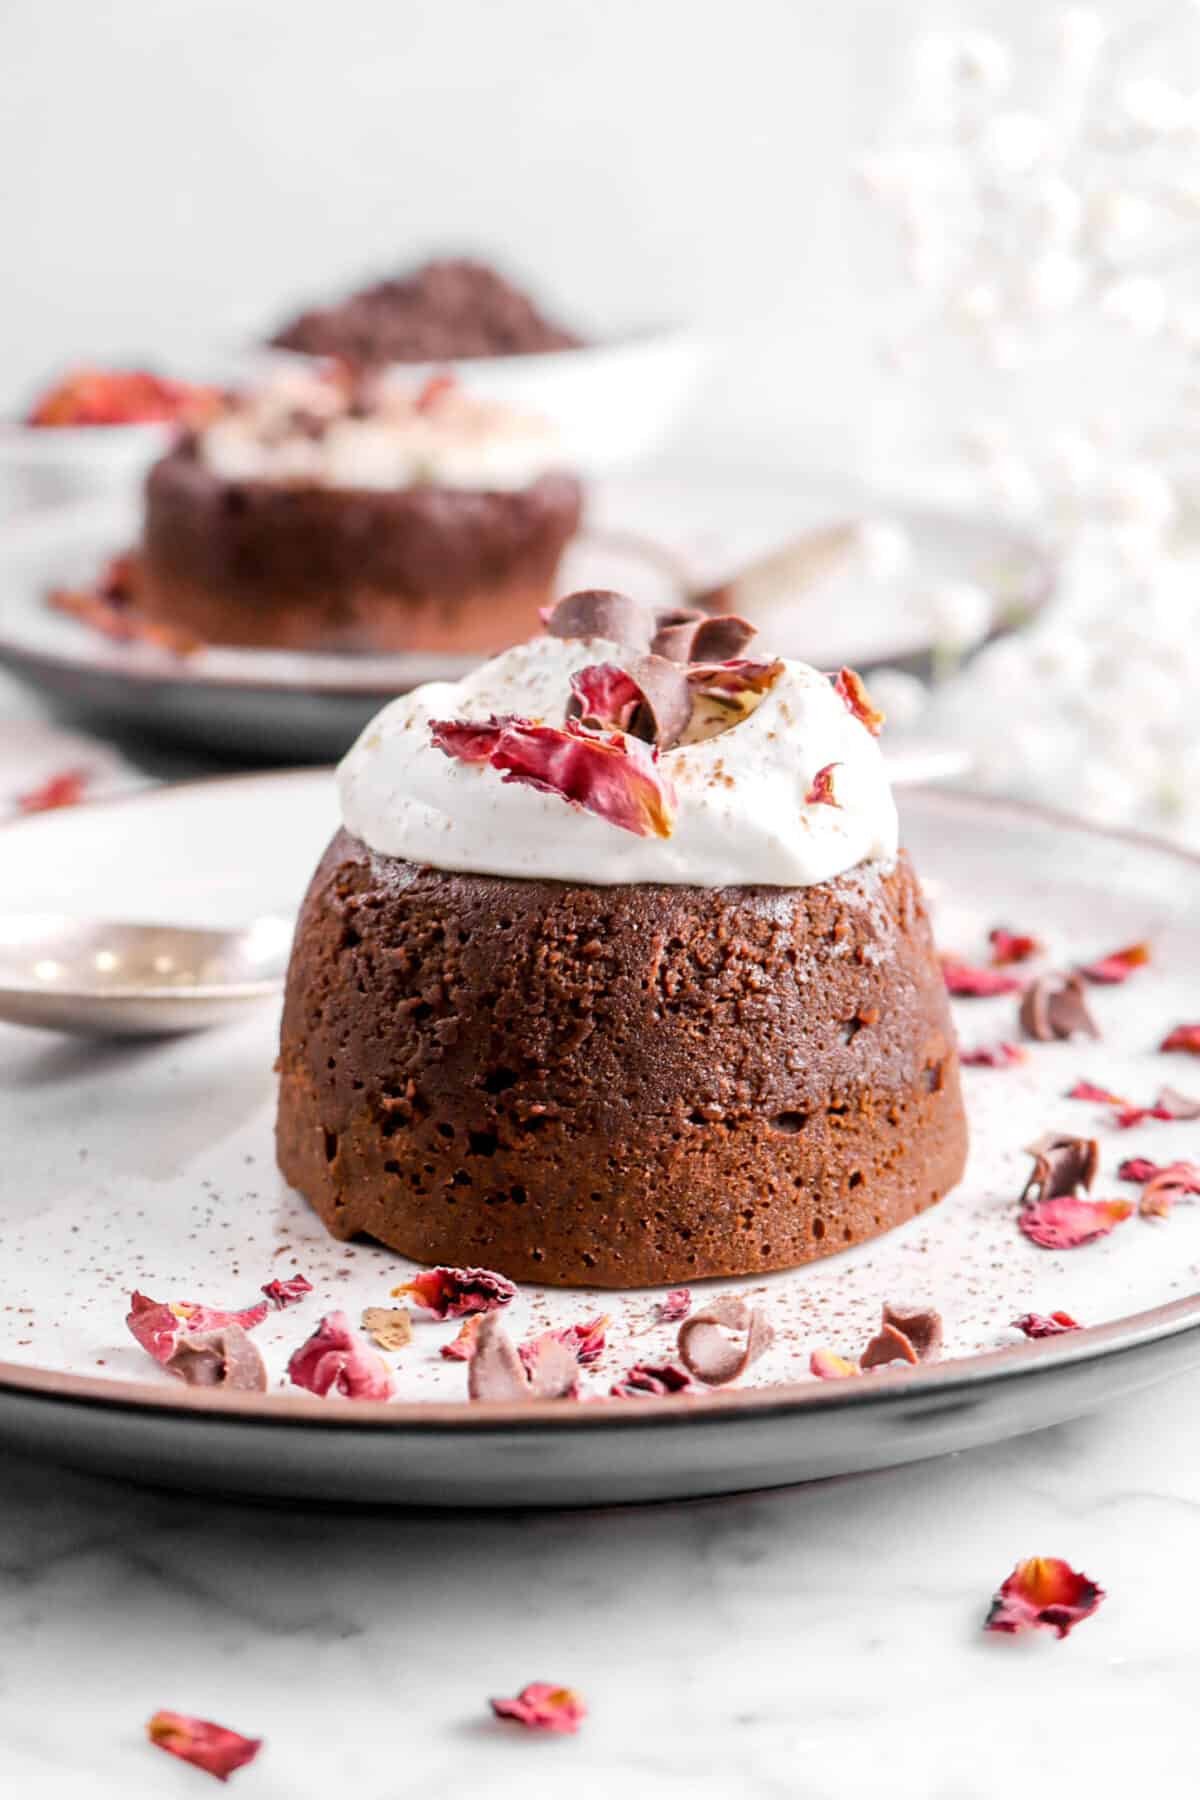
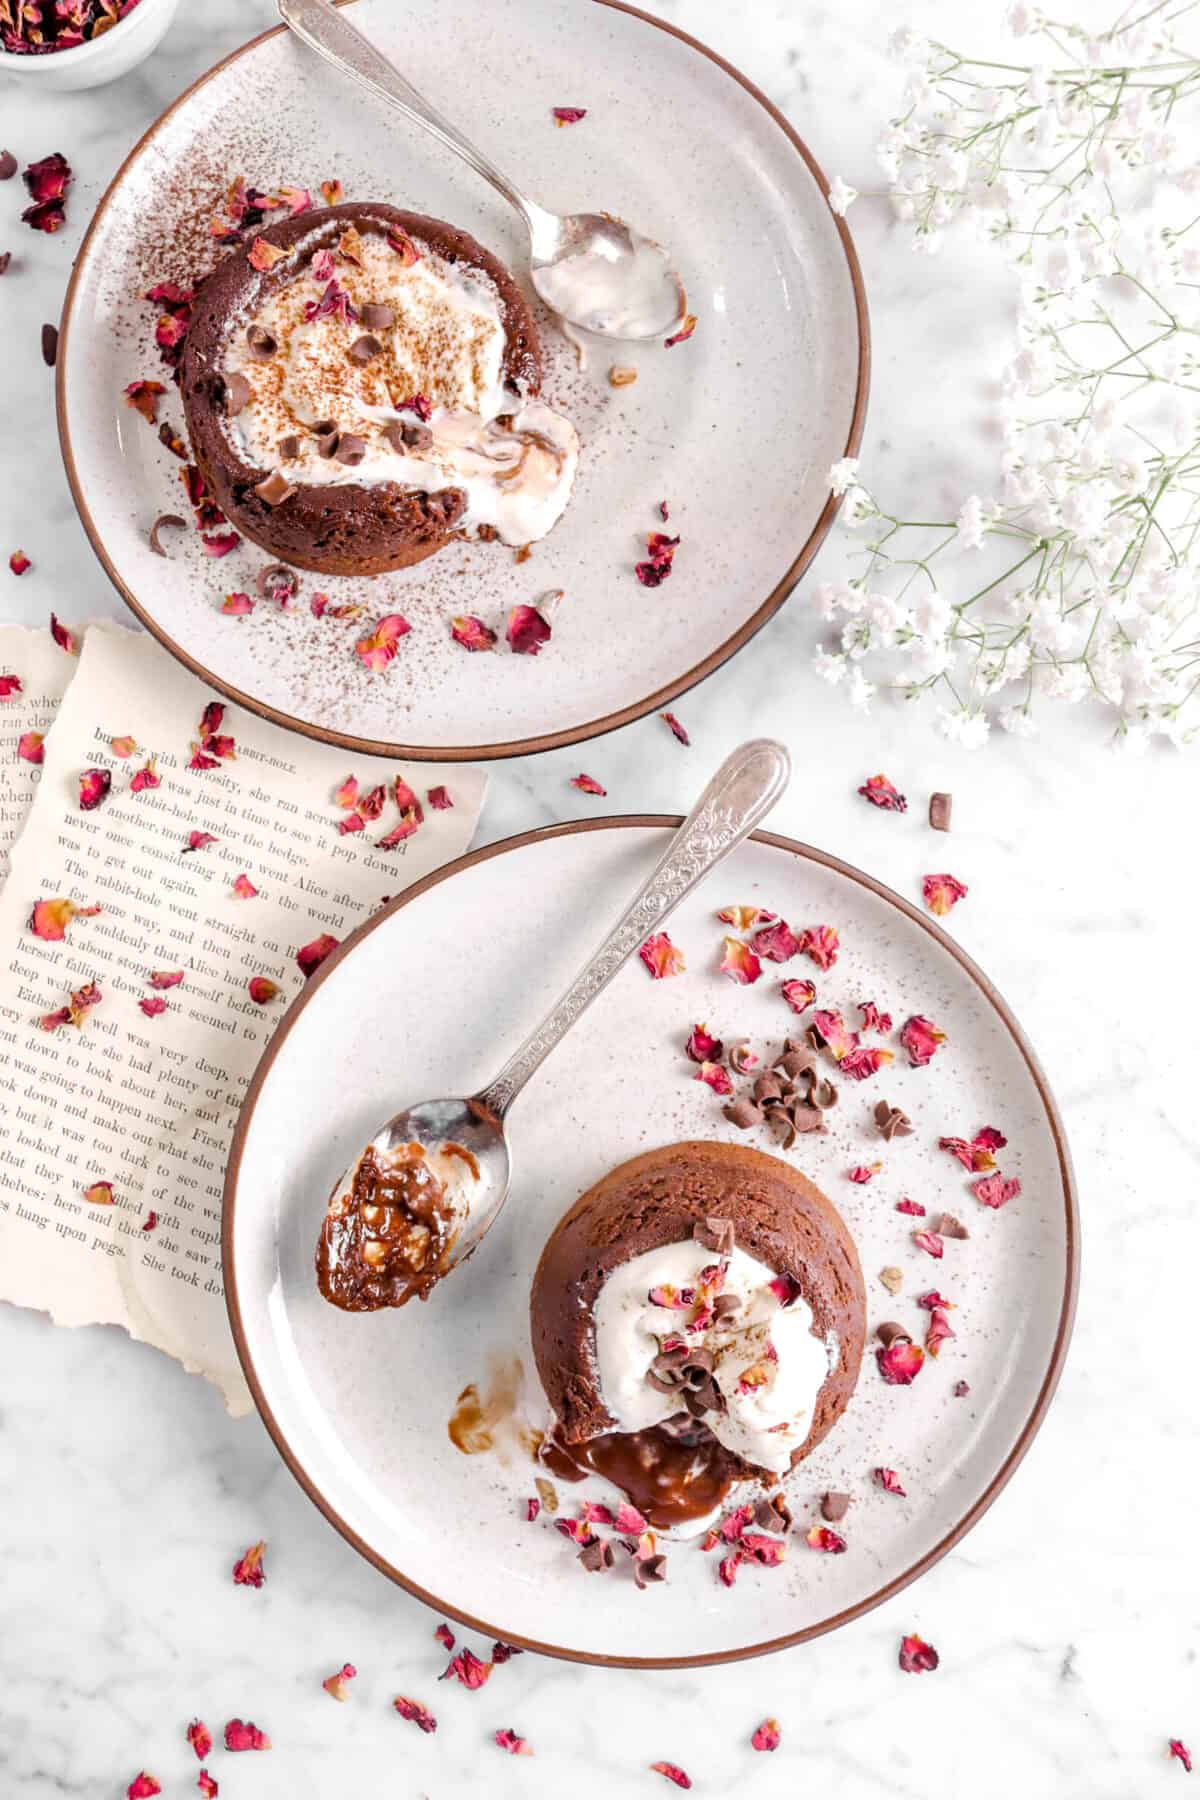
Indulge in everyone’s favorite Molten Chocolate Lava Cakes, a simple and foolproof homemade cake stuffed with a gooey two-ingredient chocolate ganache. Finish with a dollop of Chantilly Cream, Vanilla Ice Cream, or a dusting of powdered sugar. These cakes are sweet, rich, extra chocolate-y, and SO delicious.
Molten Chocolate Lava Cakes
Valentine’s Day is a time to shower everyone we cherish with appreciation. Making a special treat like cookies or candy for your loved ones is the perfect way to show you care! Plus, it’s also a really good excuse to eat lots of chocolate cake. 😉
This year, we decided it would be fun make molten chocolate lava cakes together. But, we wanted a foolproof recipe, so we used a simple chocolate ganache filling to ensure a perfect, gooey center every time! It’s a delicious, approachable dessert that’s perfect for sharing love with friends and family.
What Ingredients Do You Need For Molten Chocolate Lava Cakes?
Making lava cakes only requires 7 (yes, SEVEN!) ingredients. But, don’t think the lack of ingredients means there’s a lack of flavor. With this recipe, you will achieve a tender, moist, rich chocolate cake with a perfectly gooey center every time!
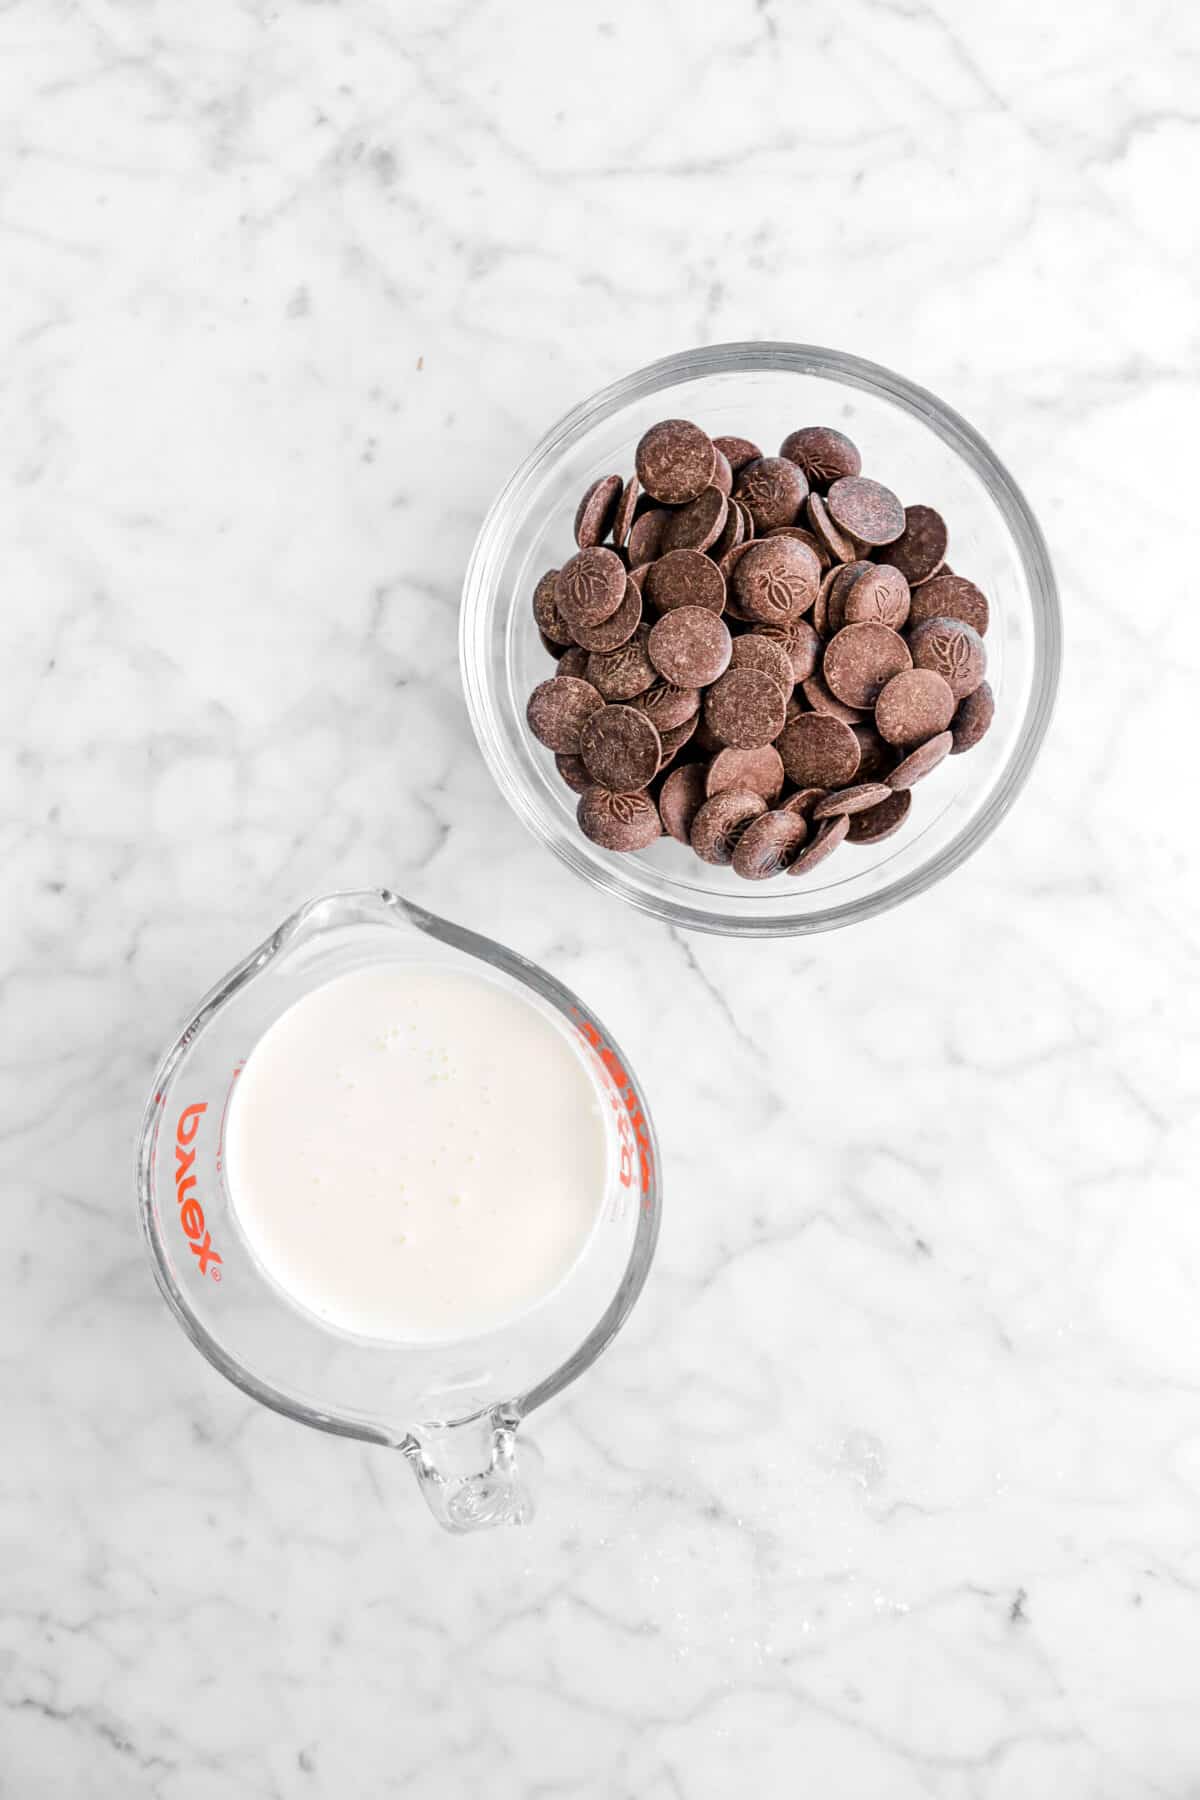
For The Ganache:
- Dark Chocolate – A good quality chocolate is essential for ganache. We chose dark chocolate because we wanted a darker, richer flavor that was less sweet.
- Heavy Whipping Cream – The higher fat content in heavy cream makes it ideal for ganache.
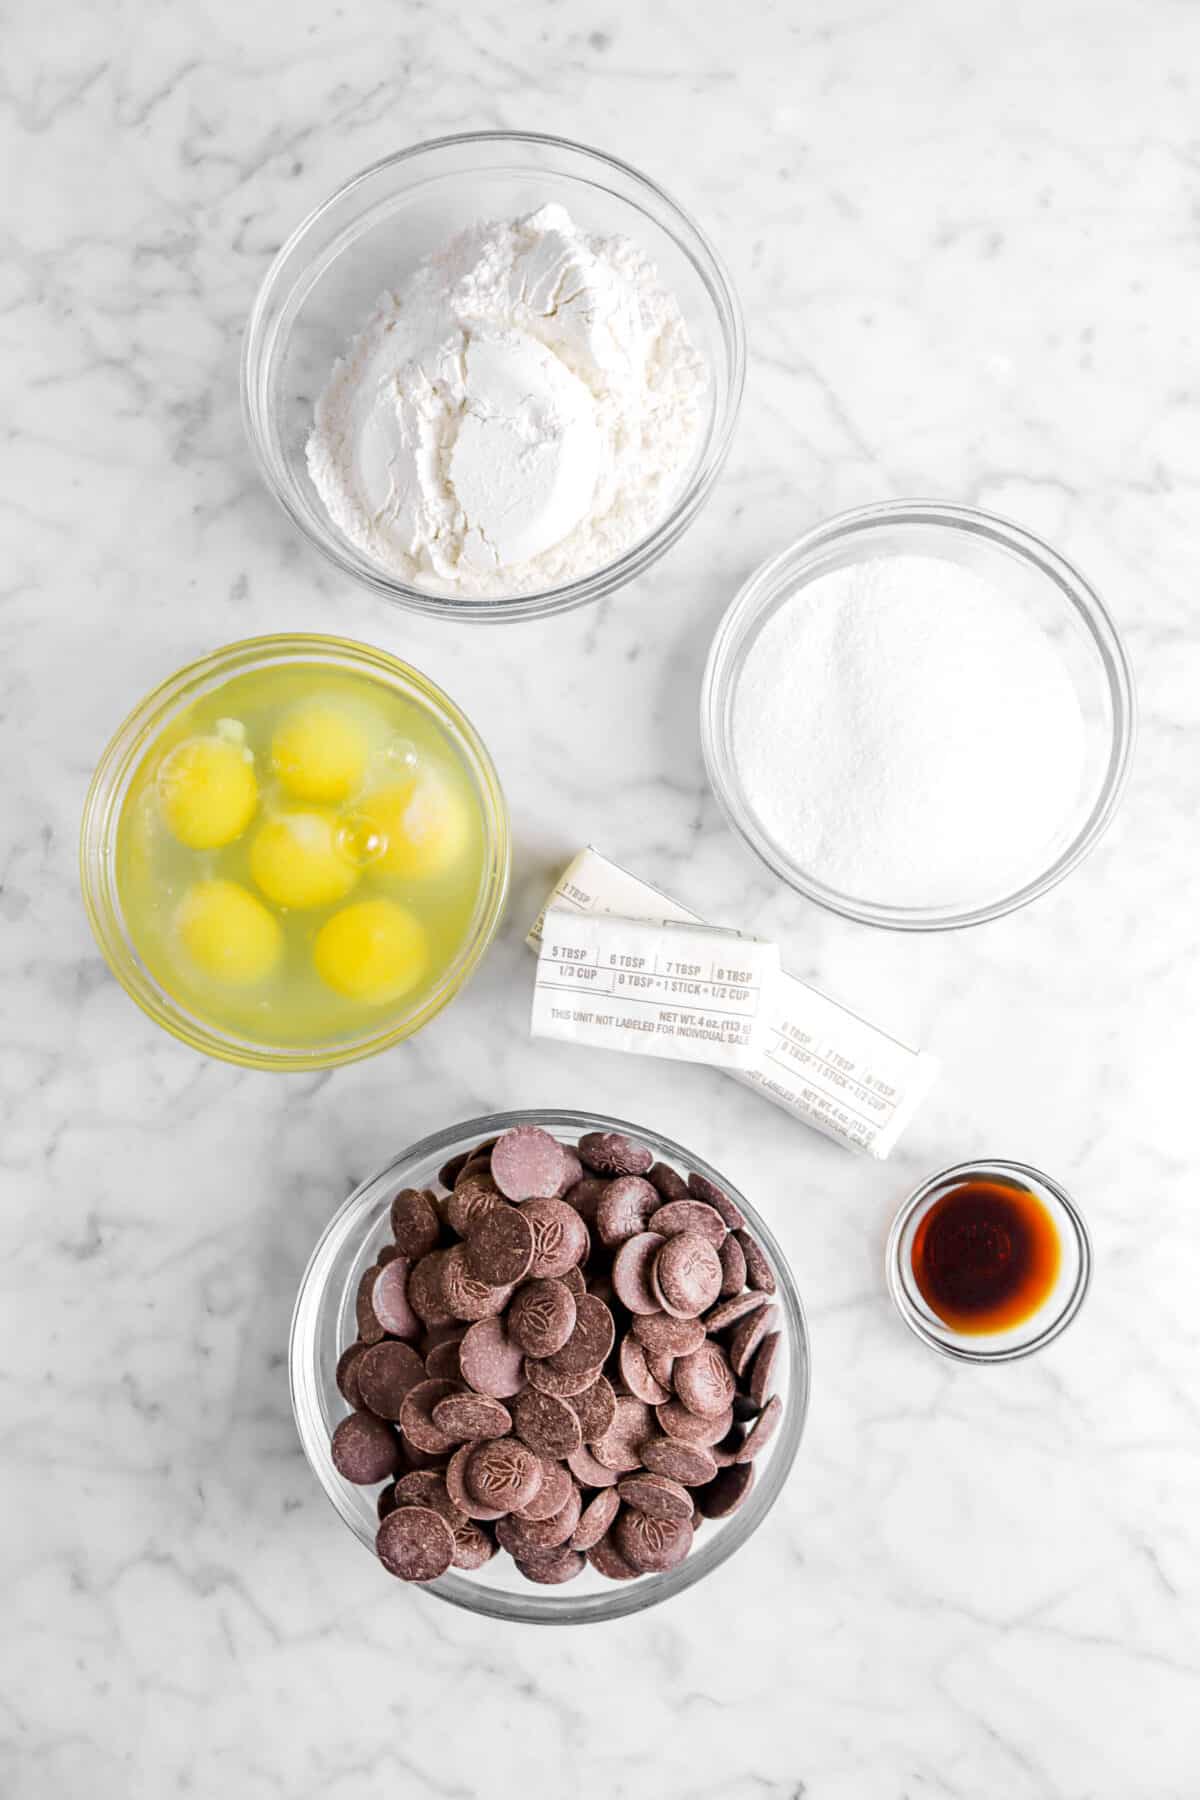
For The Cake:
- Dark Chocolate – A good quality dark or bittersweet chocolate in the 60%-70% range makes all the difference in this cake. It gives you a rich, dark chocolate flavor without being overly sweet.
- Salted Butter – While adding richness, tenderness, flavor, and structure, salted butter eliminates the need for additional salt.
- Granulated Sugar – While adding the perfect amount of sweetness, it also helps with the texture and structure of the cake.
- Eggs – The binder that holds all the ingredients together, eggs also contribute to the rise, structure, stability, moisture, and richness.
- Vanilla Extract – Adding a subtle undertone, vanilla extract enhances the flavor of the chocolate.
- All-Purpose Flour – We wanted a moist, tender cake but one with enough structure to hold its shape without going to pieces. That’s where the all purpose flour comes in. It has the perfect amount of protein to create that structure.
You’ll Never Believe How Easy It Is!
I feel like lava cakes are often thought to be difficult to make. Achieving that perfect gooey center without having the whole cake collapse, having a cake that can hold itself up, but also being tender, light, and fluffy…all of these things can seem difficult, but with our thoroughly tested recipe, we can guarantee that this recipe is completely foolproof! Below we’ve listed each of the steps with photos to help guide you through the process.
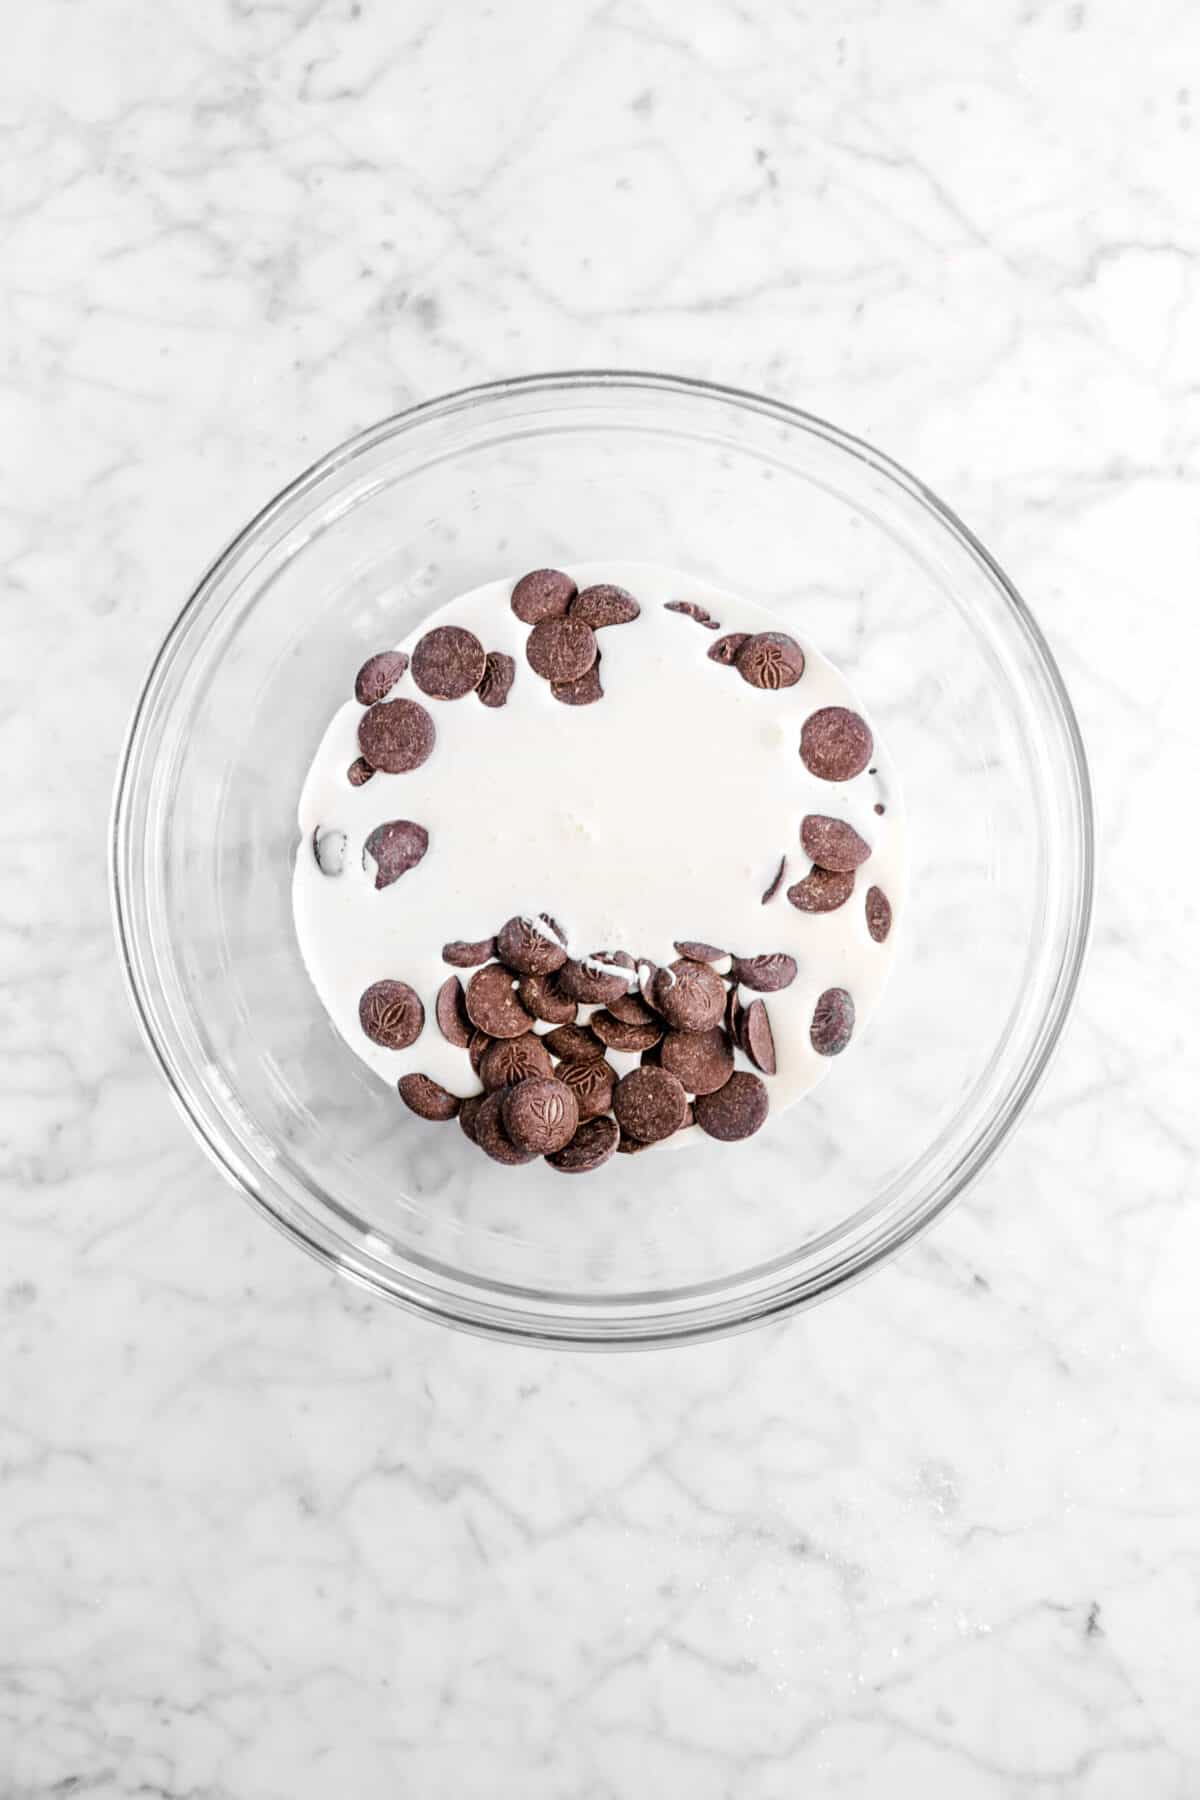
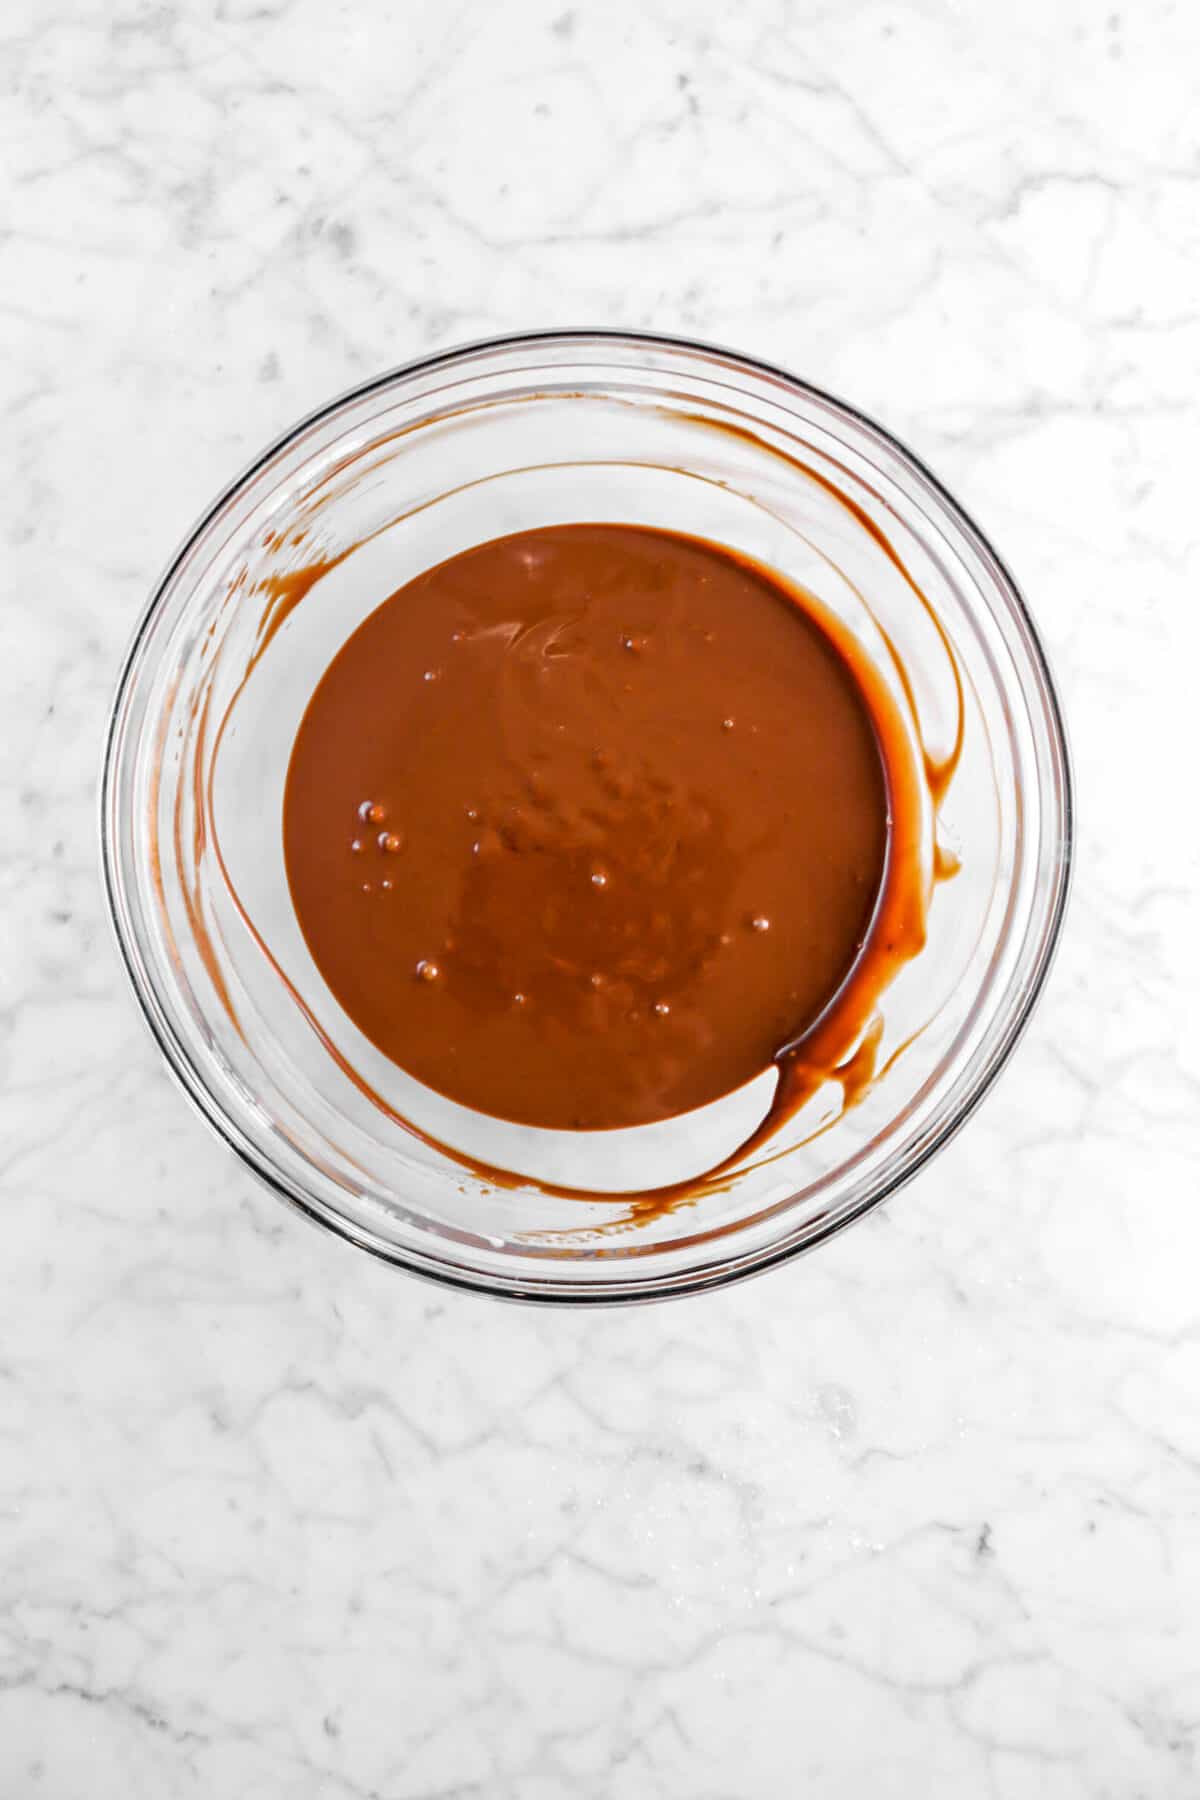
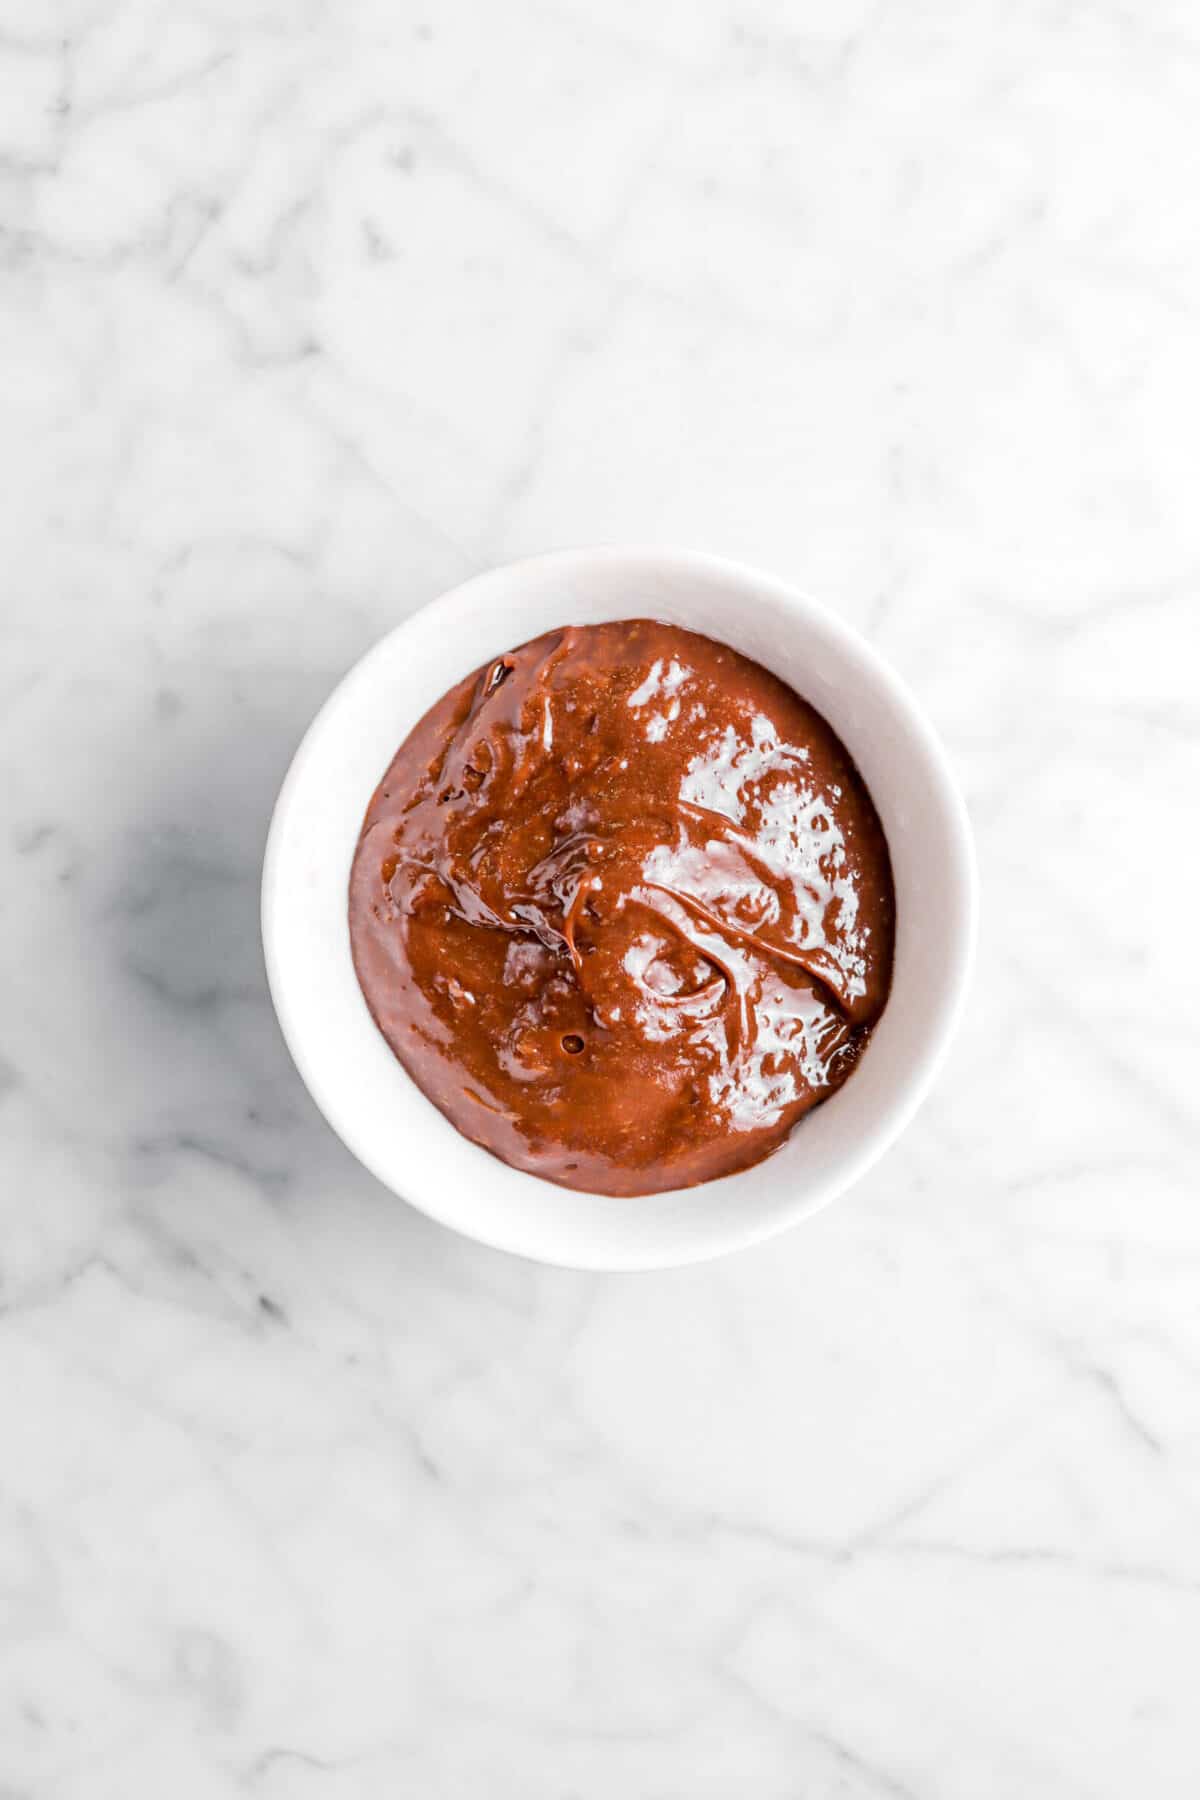
Step 1: Make the ganache
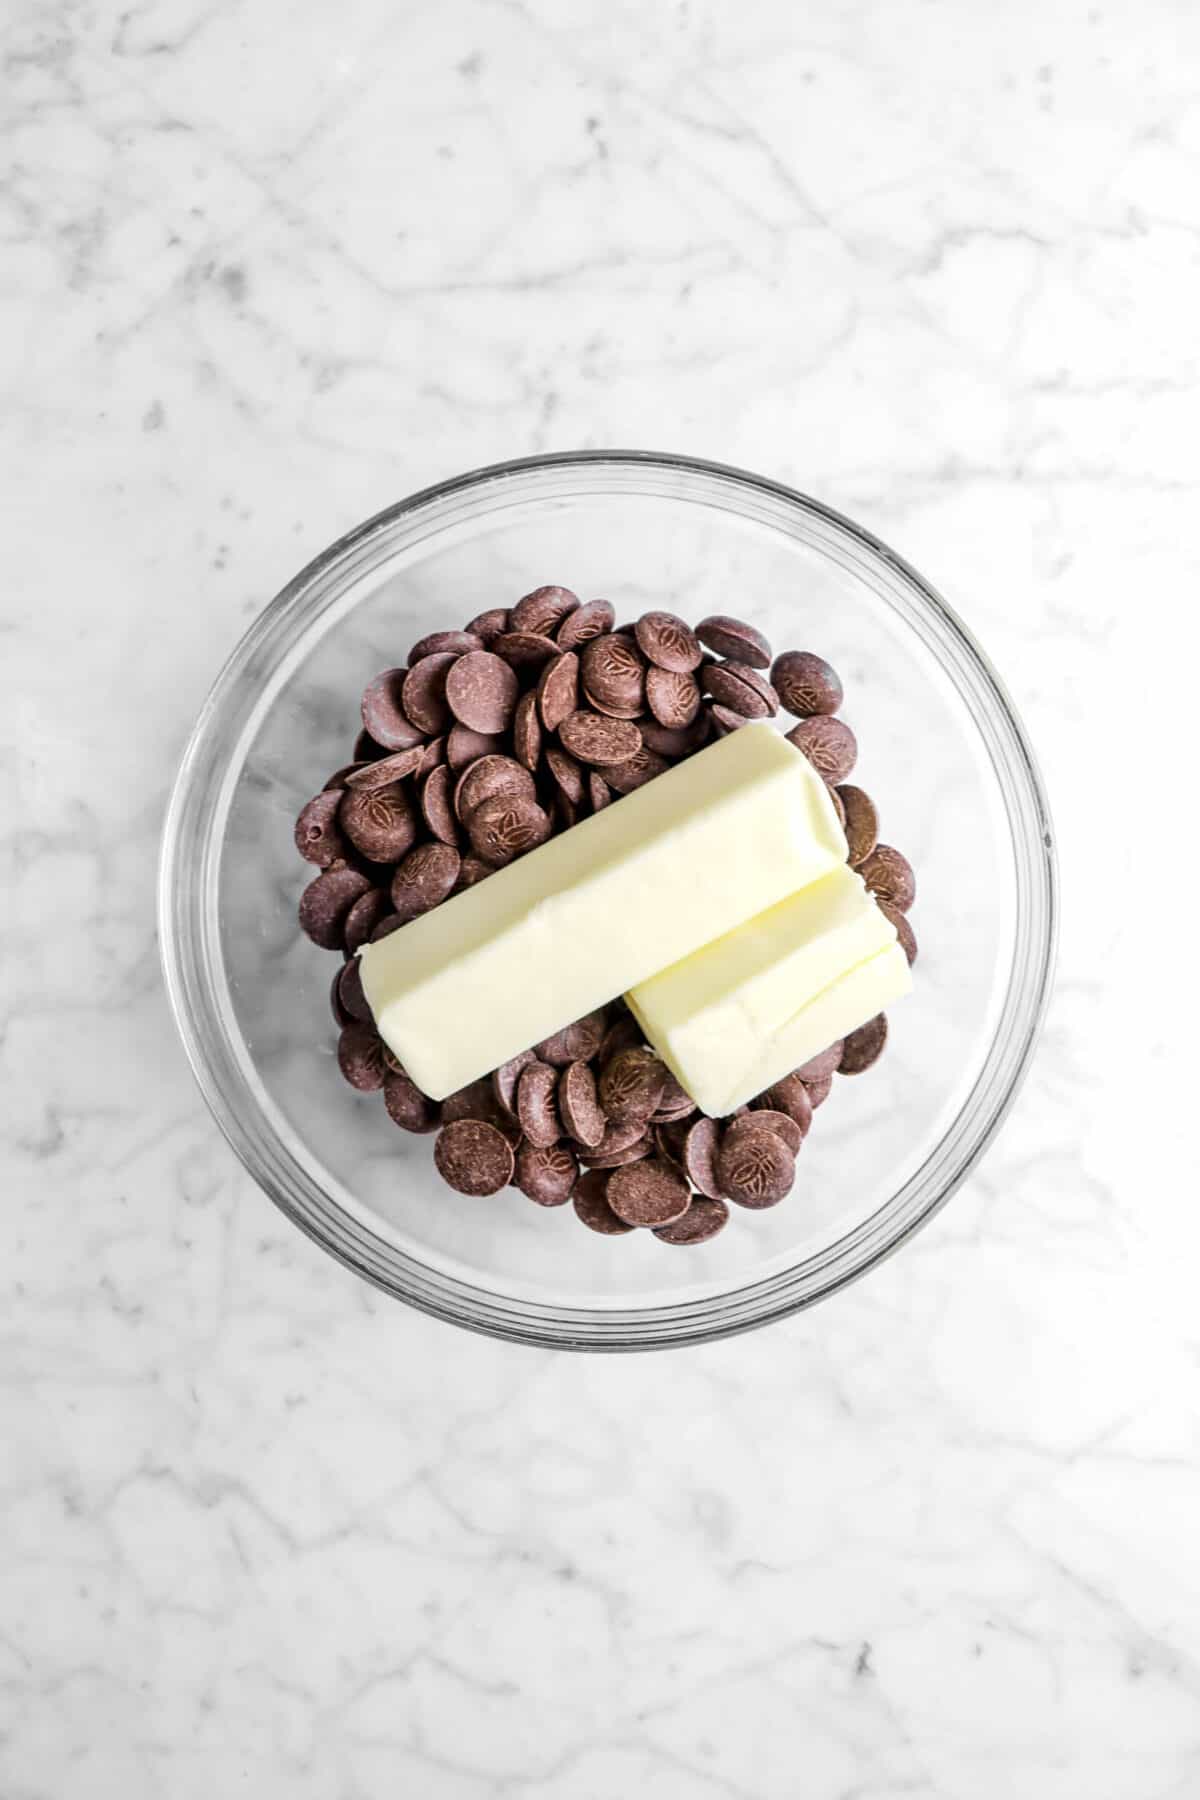
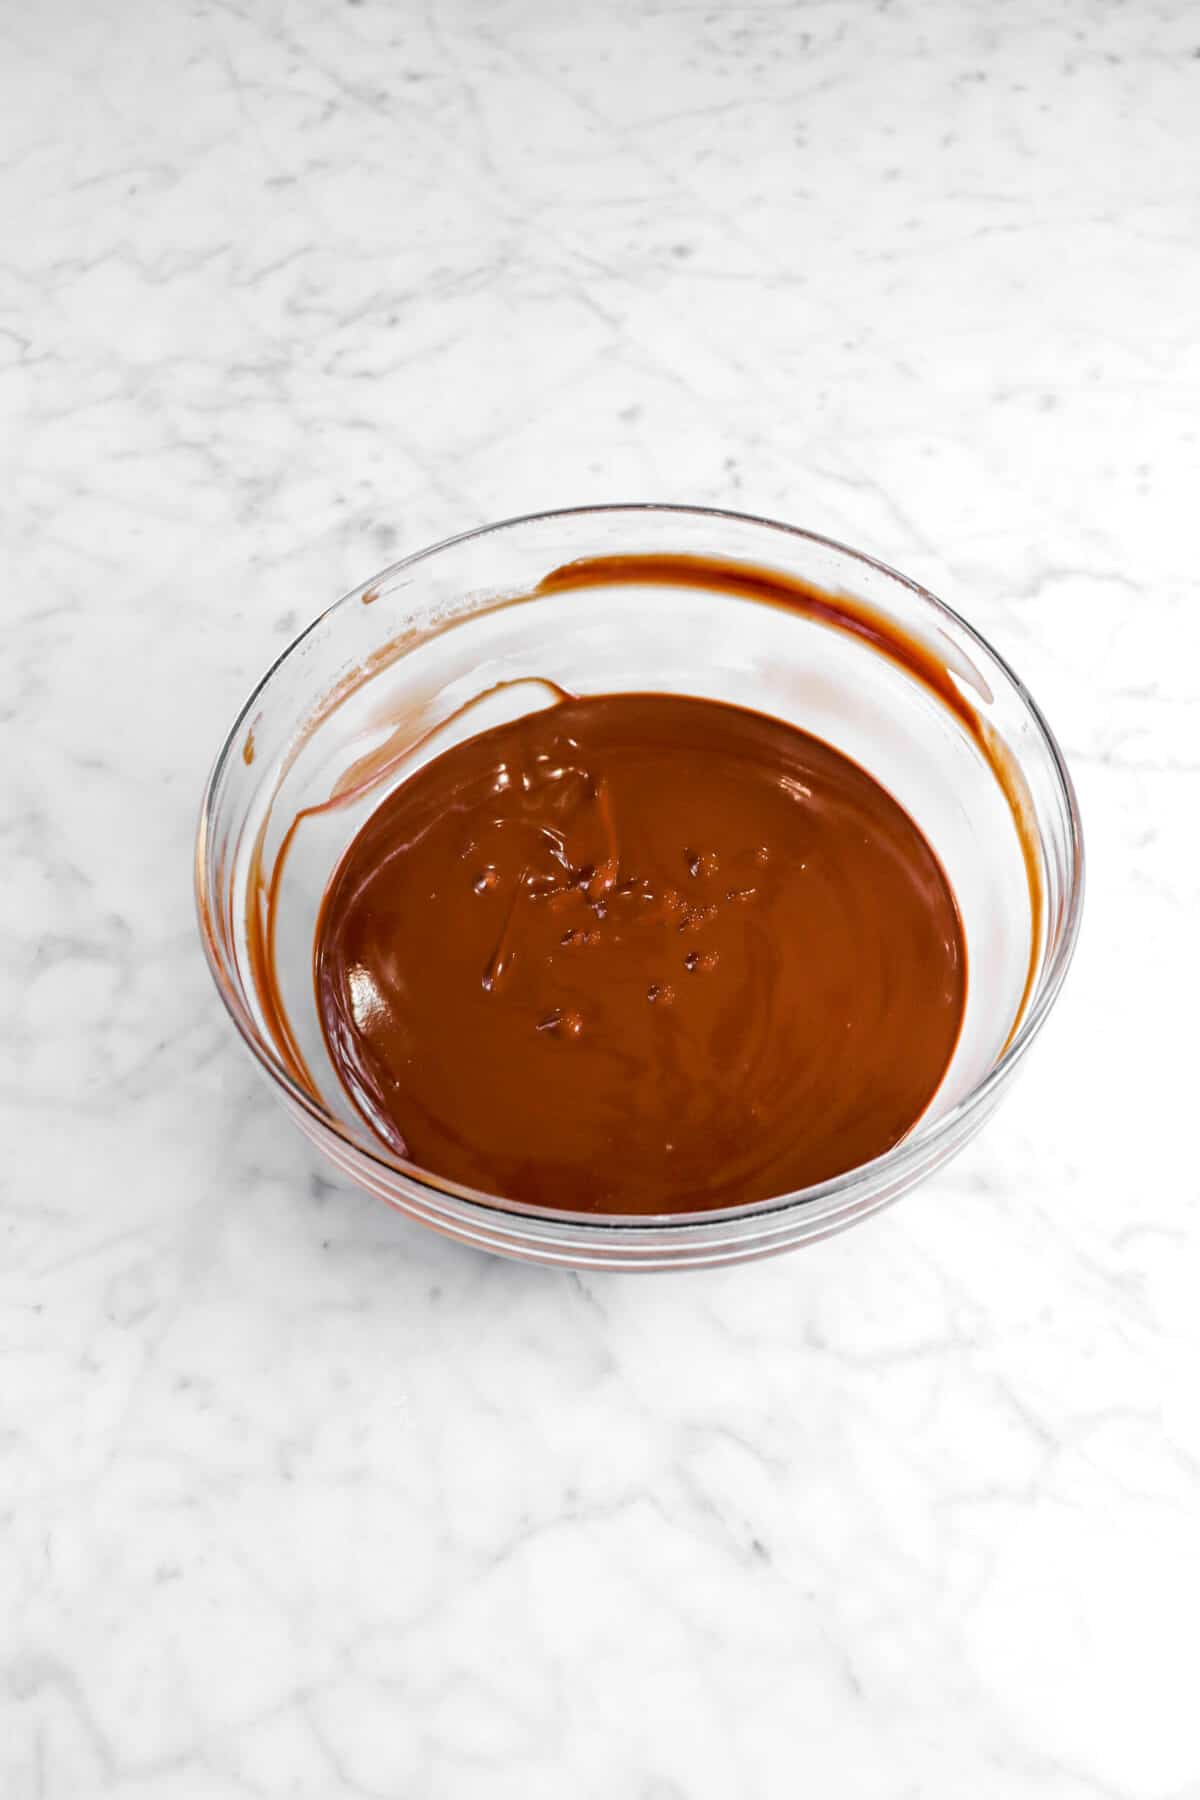
Combine cream and chocolate in a microwave safe bowl. Heat in 15 second increments, stirring after each, until melted and smooth.
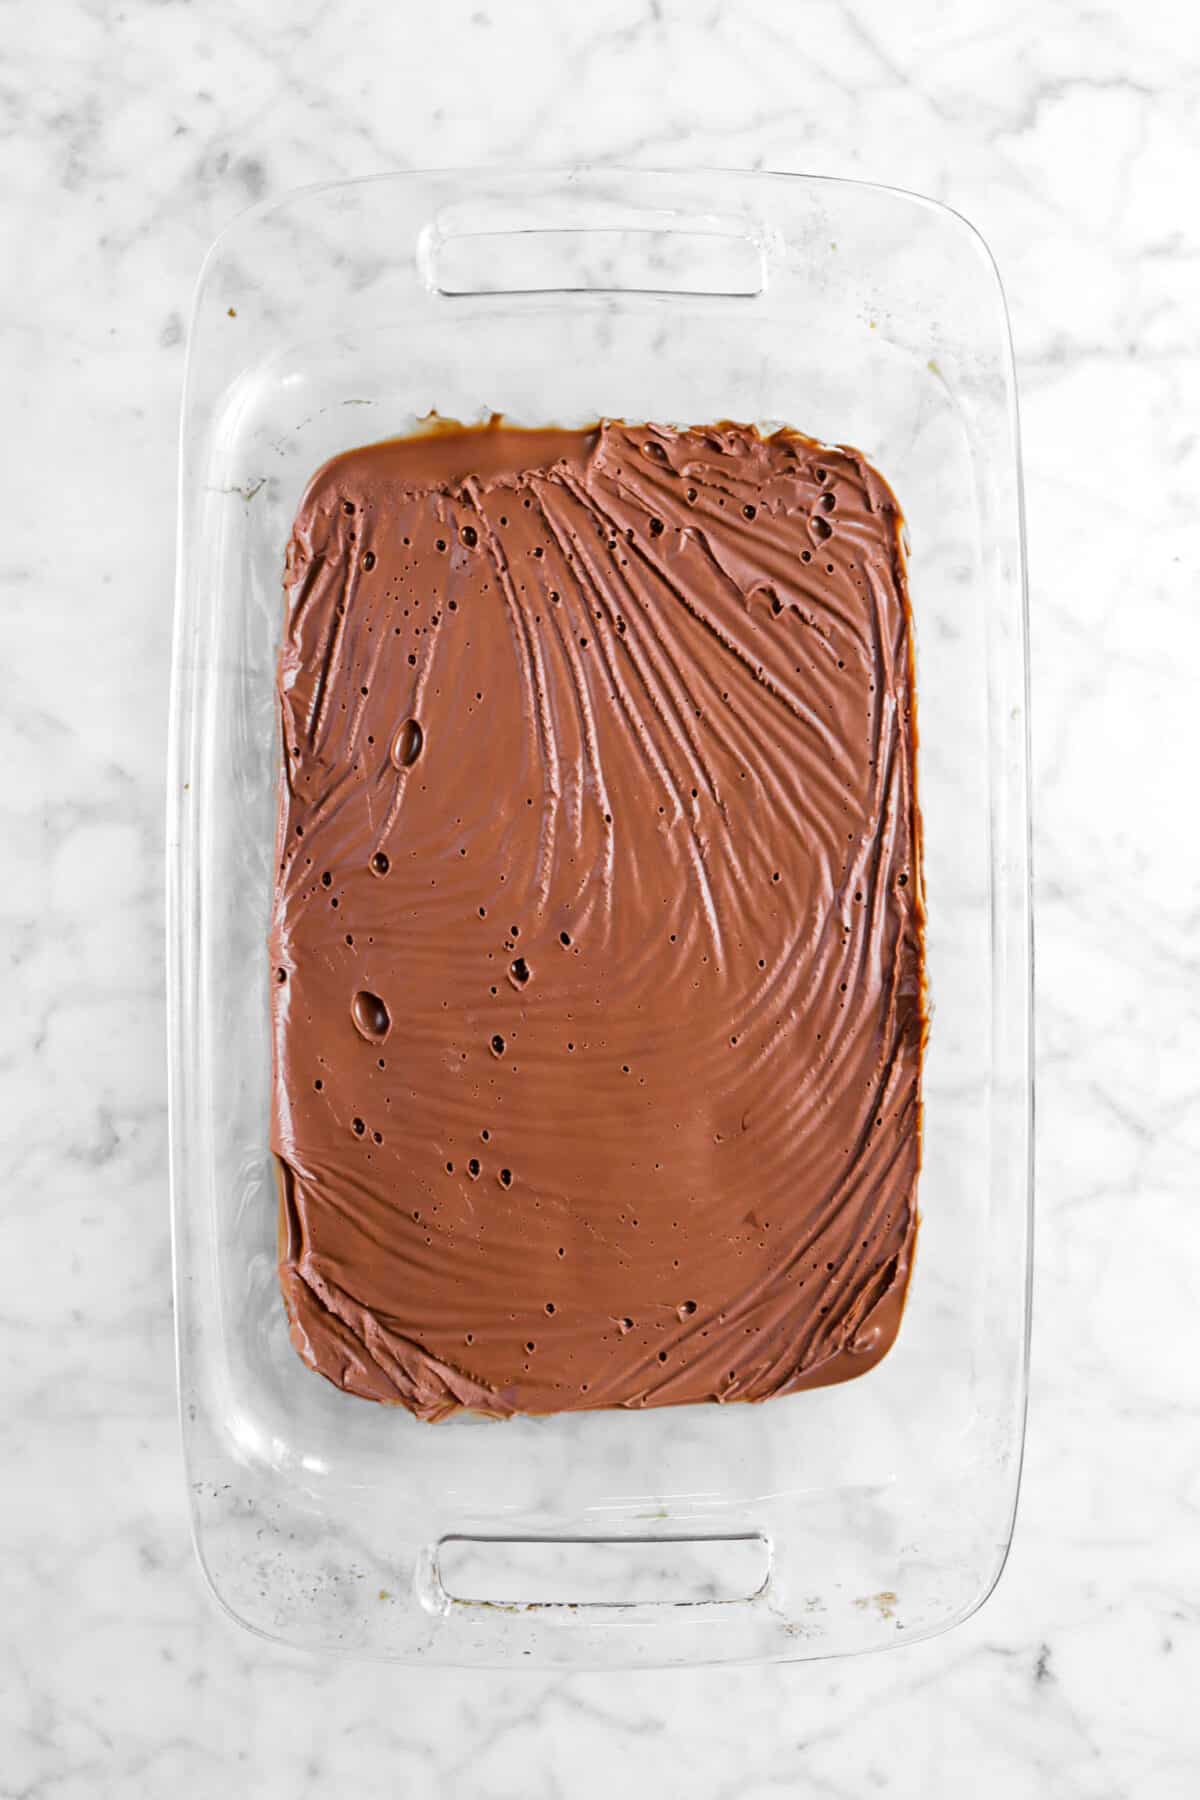
Pour the ganache into a glass baking dish. Cover with plastic wrap and refrigerate until set. About 1-2 hours.

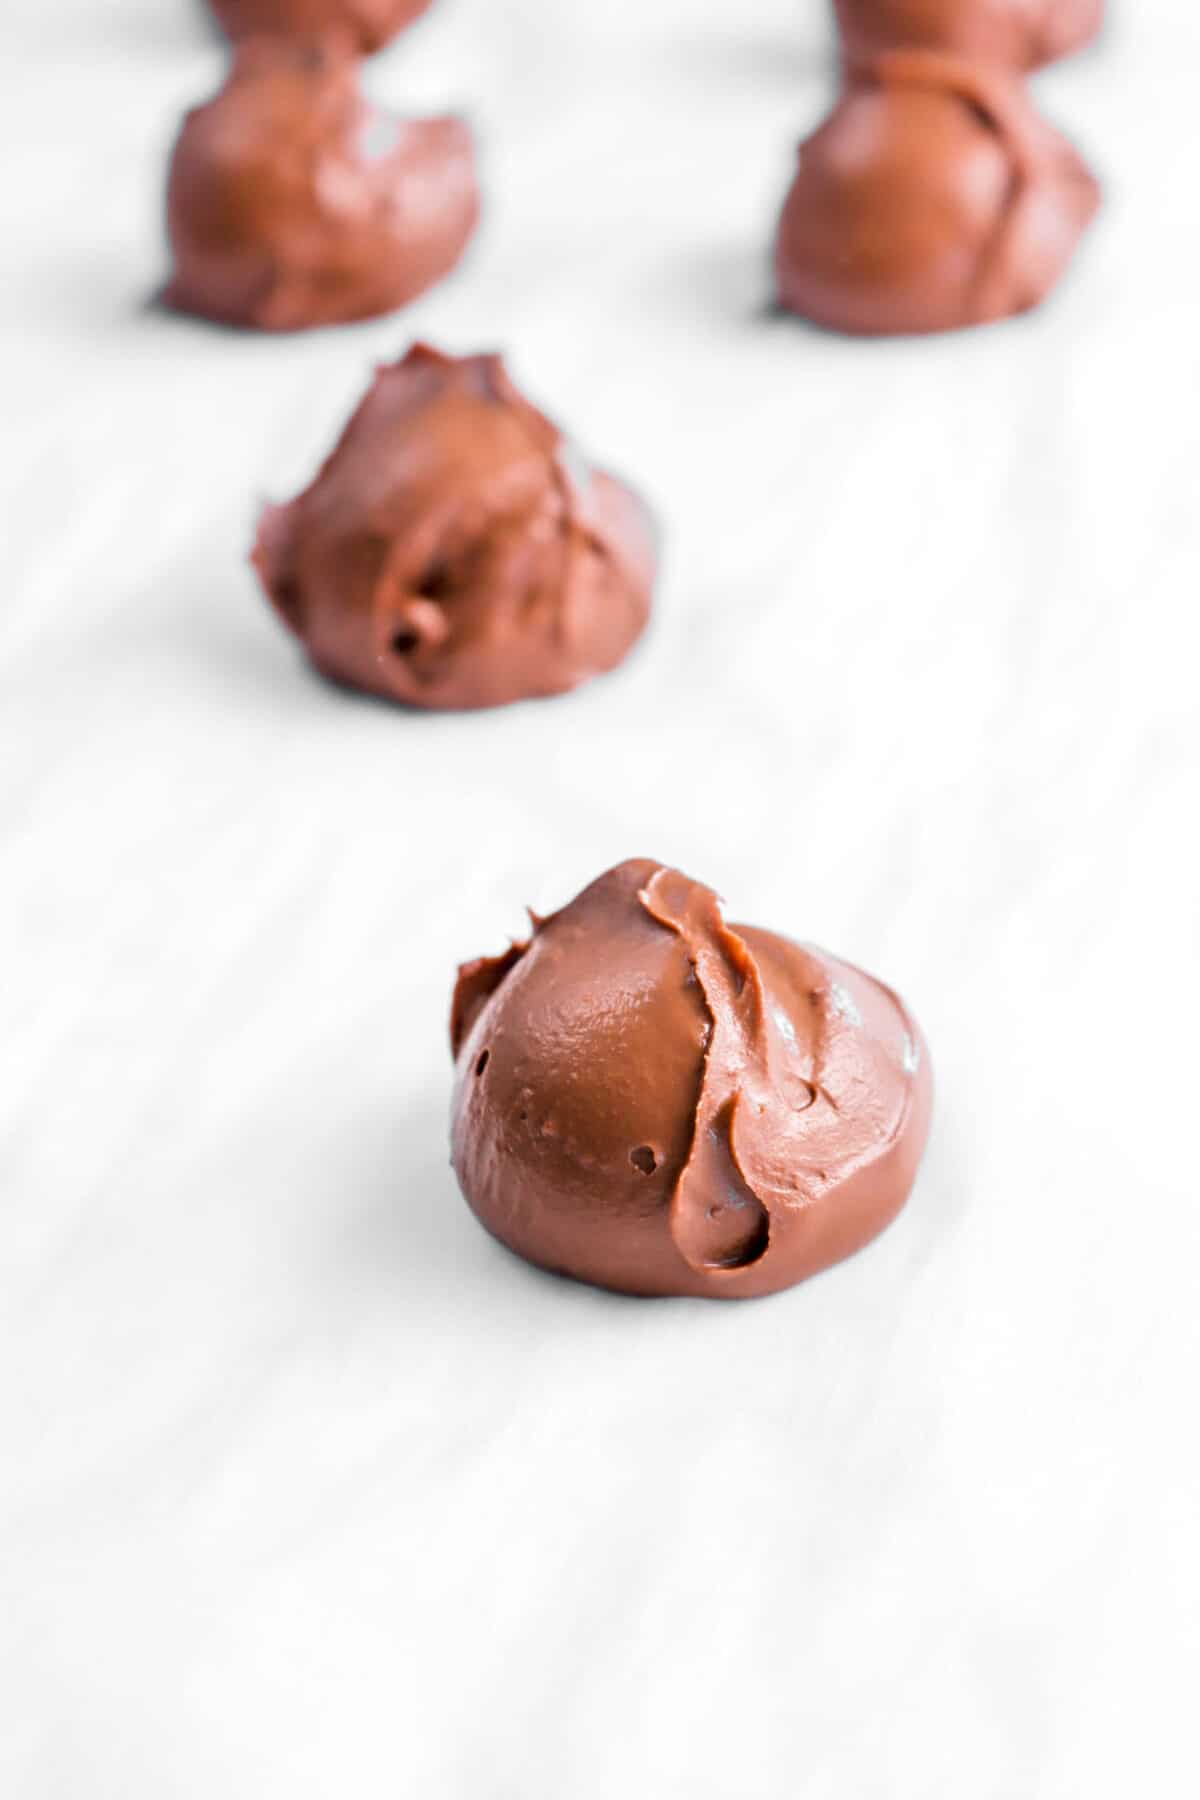
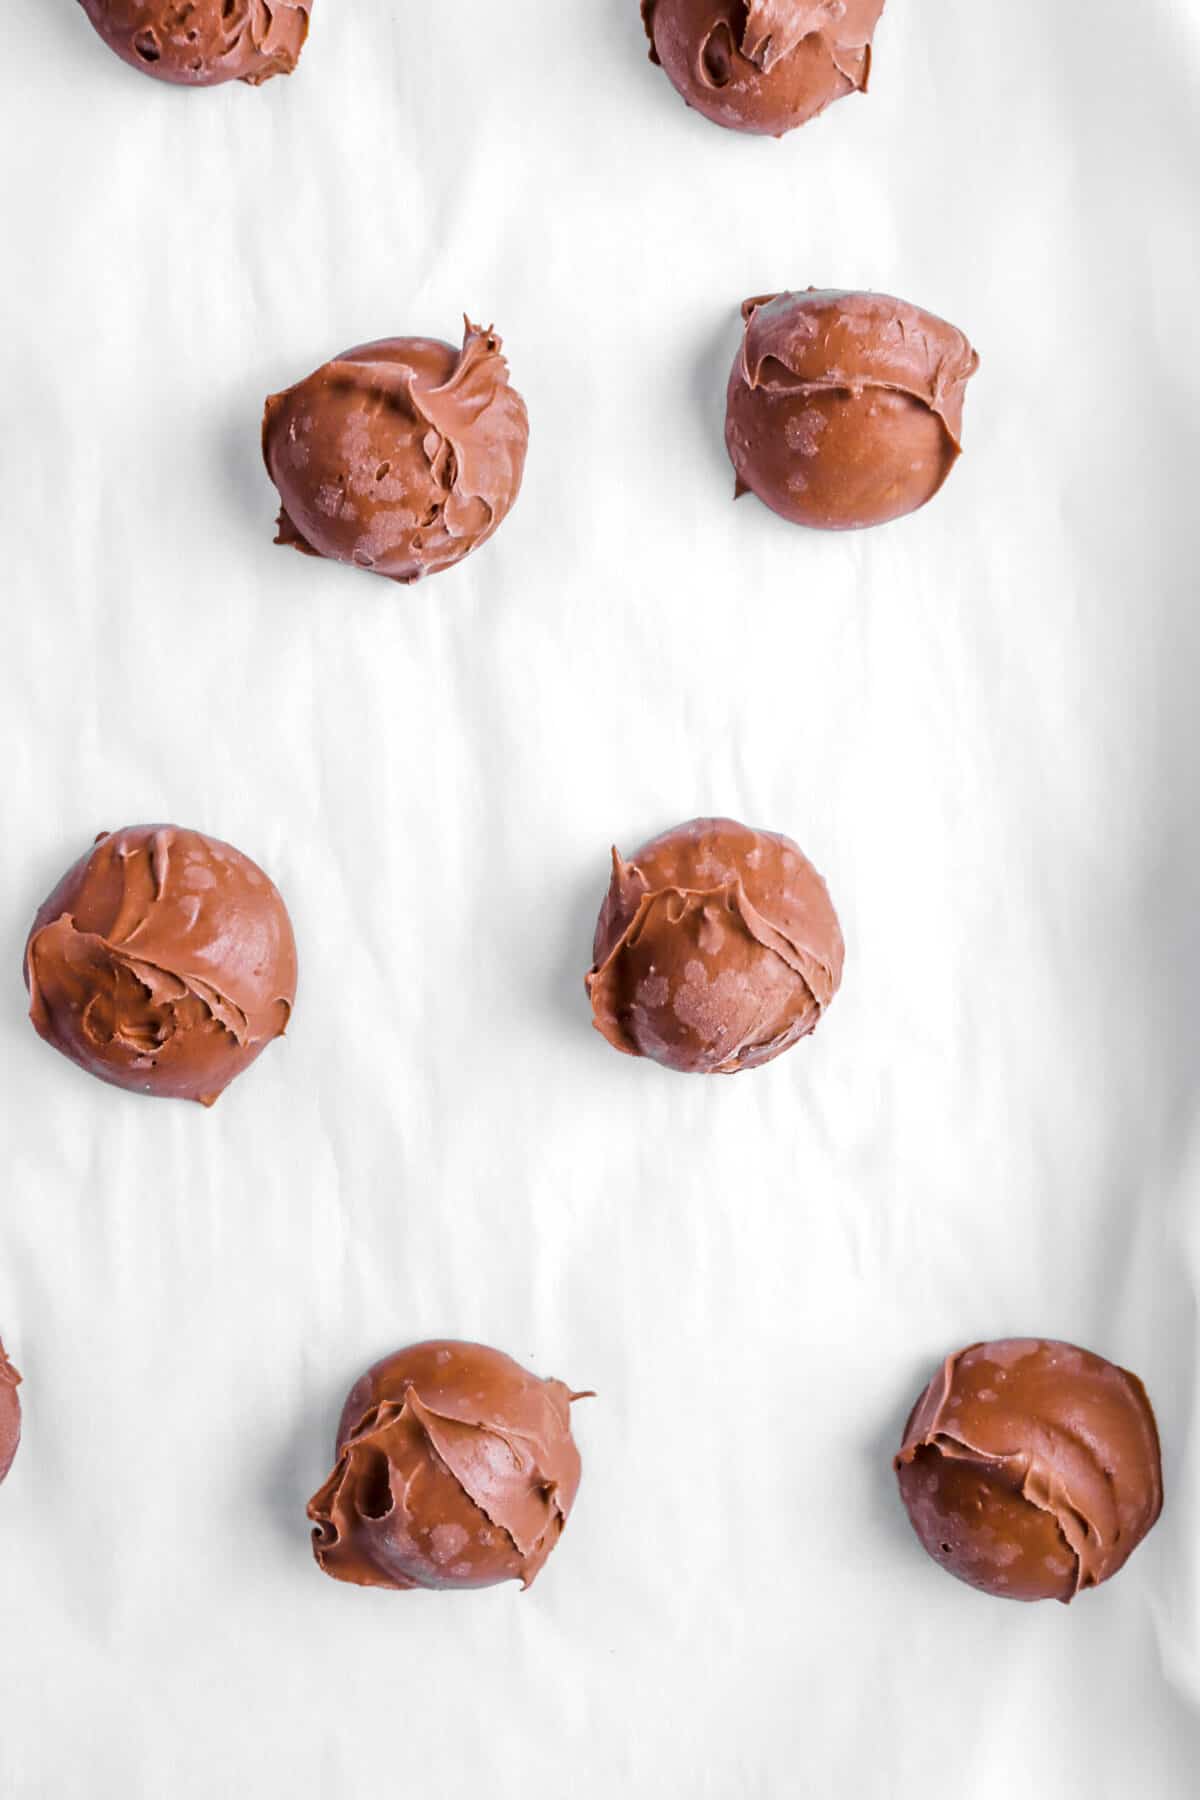
Scoop the ganache with a small cookie scoop or a spoon and place on a line sheet pan. Freeze until firm.
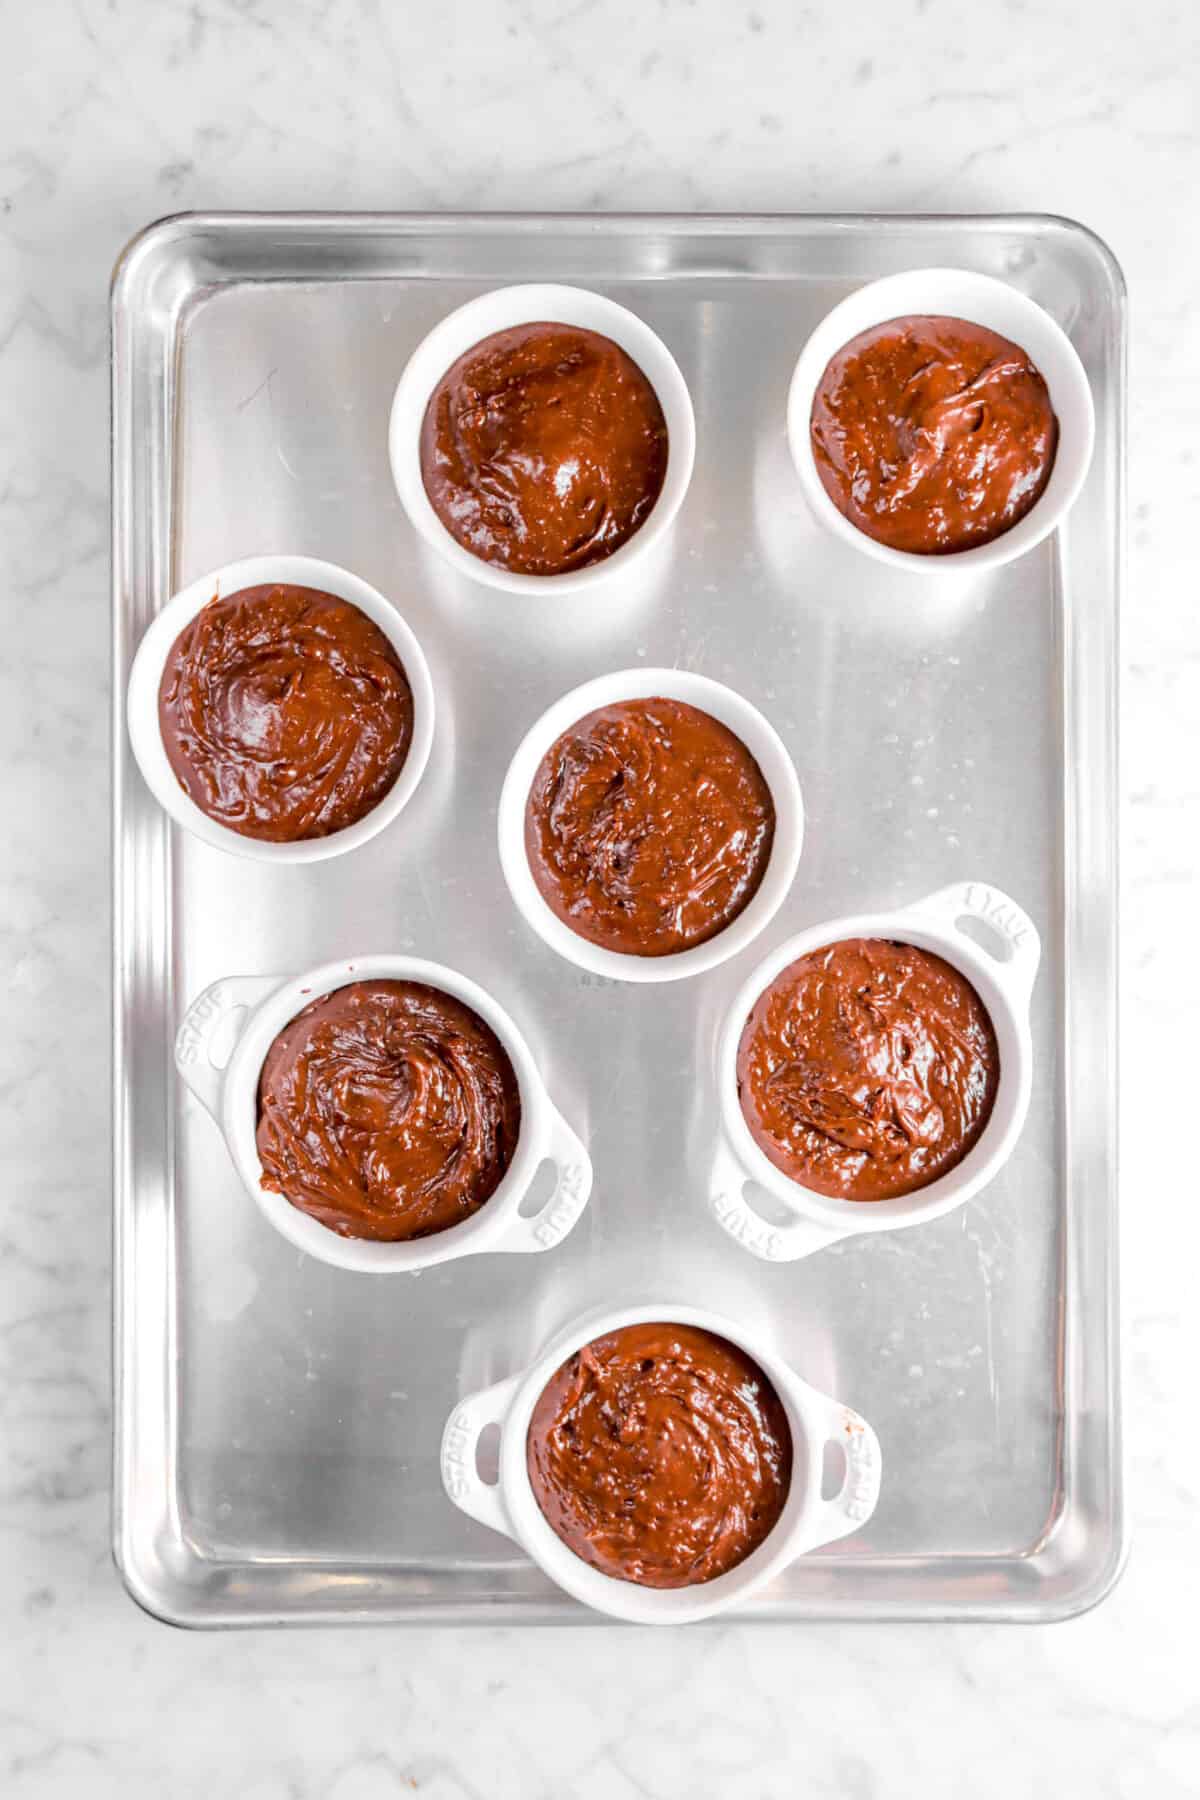
Step 2: Prepare cake batter
In a medium sized microwave safe bowl, combine butter and chocolate for the cake. Place in the microwave and heat at 30 second intervals, stirring well after each. It should take about 1 minute 30 seconds.
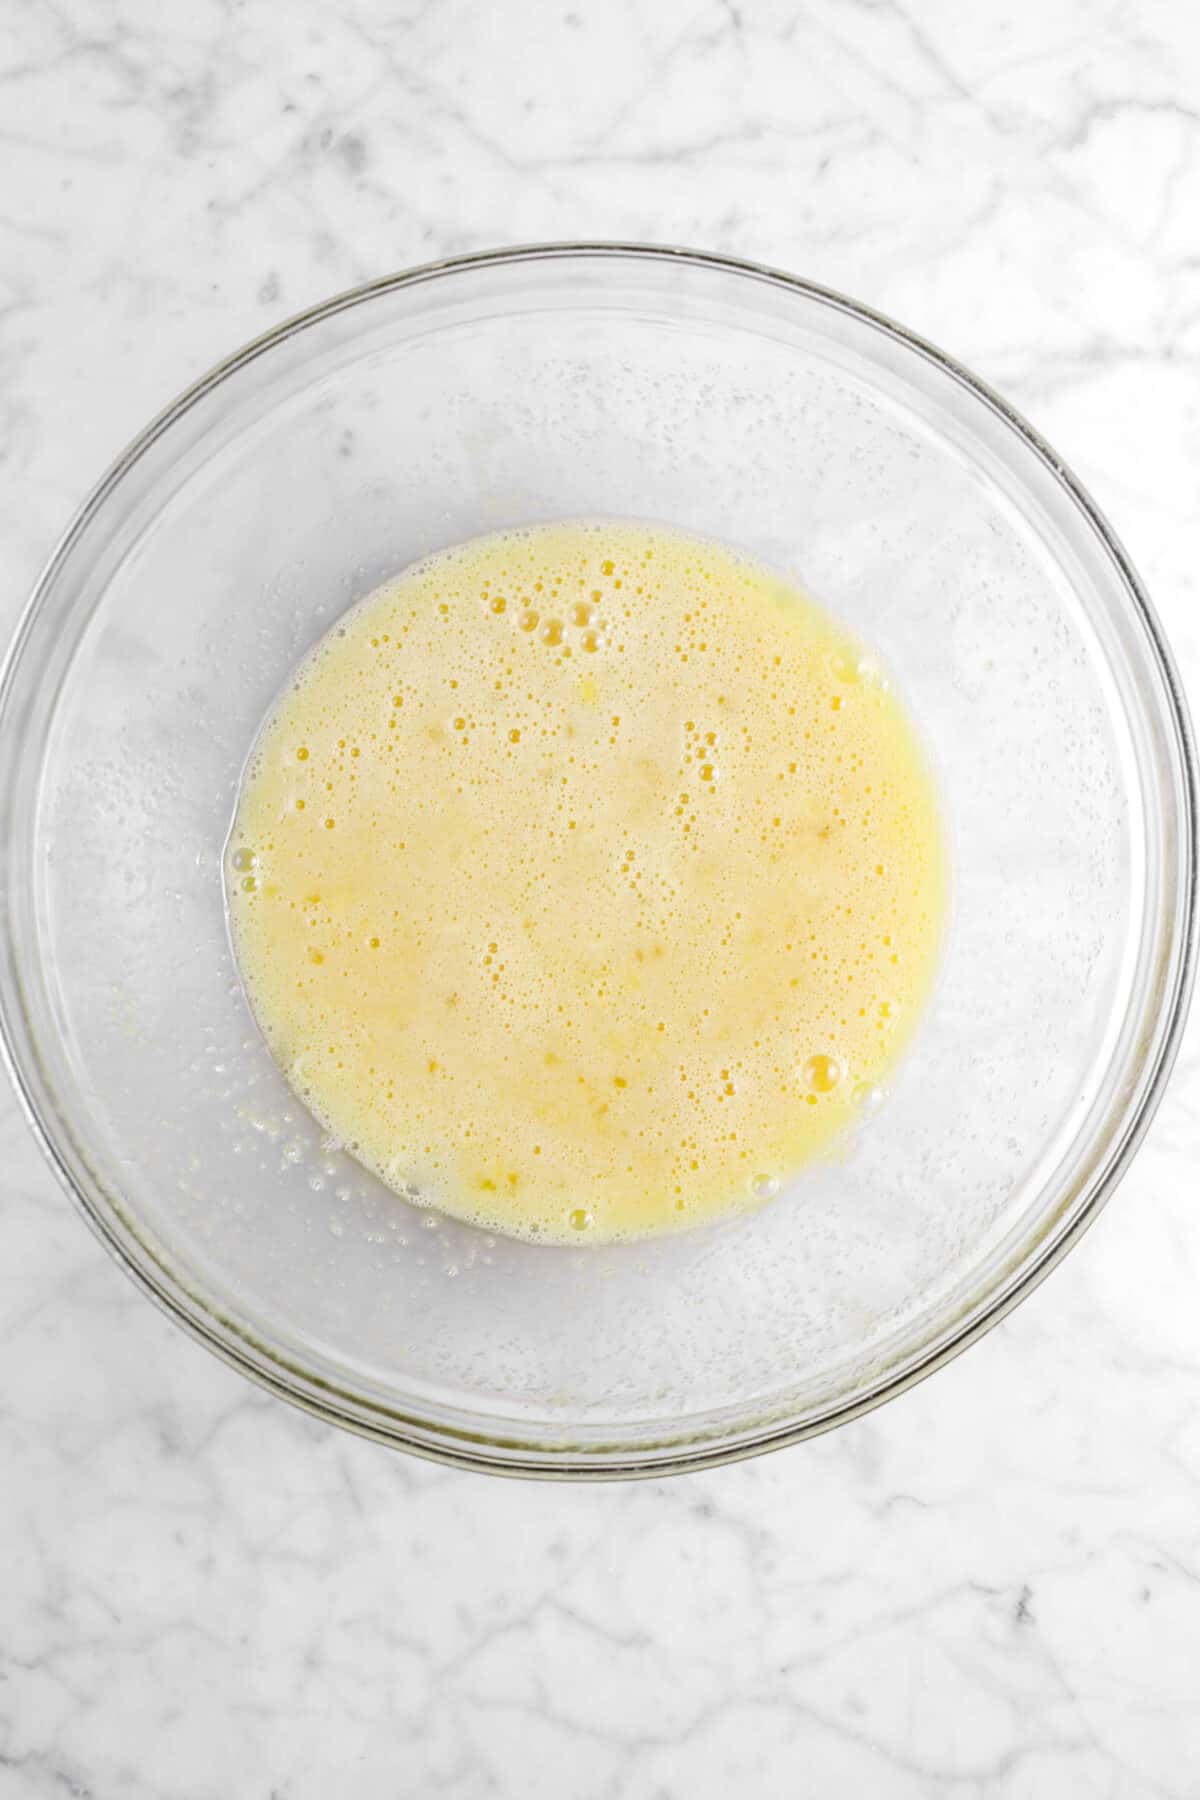
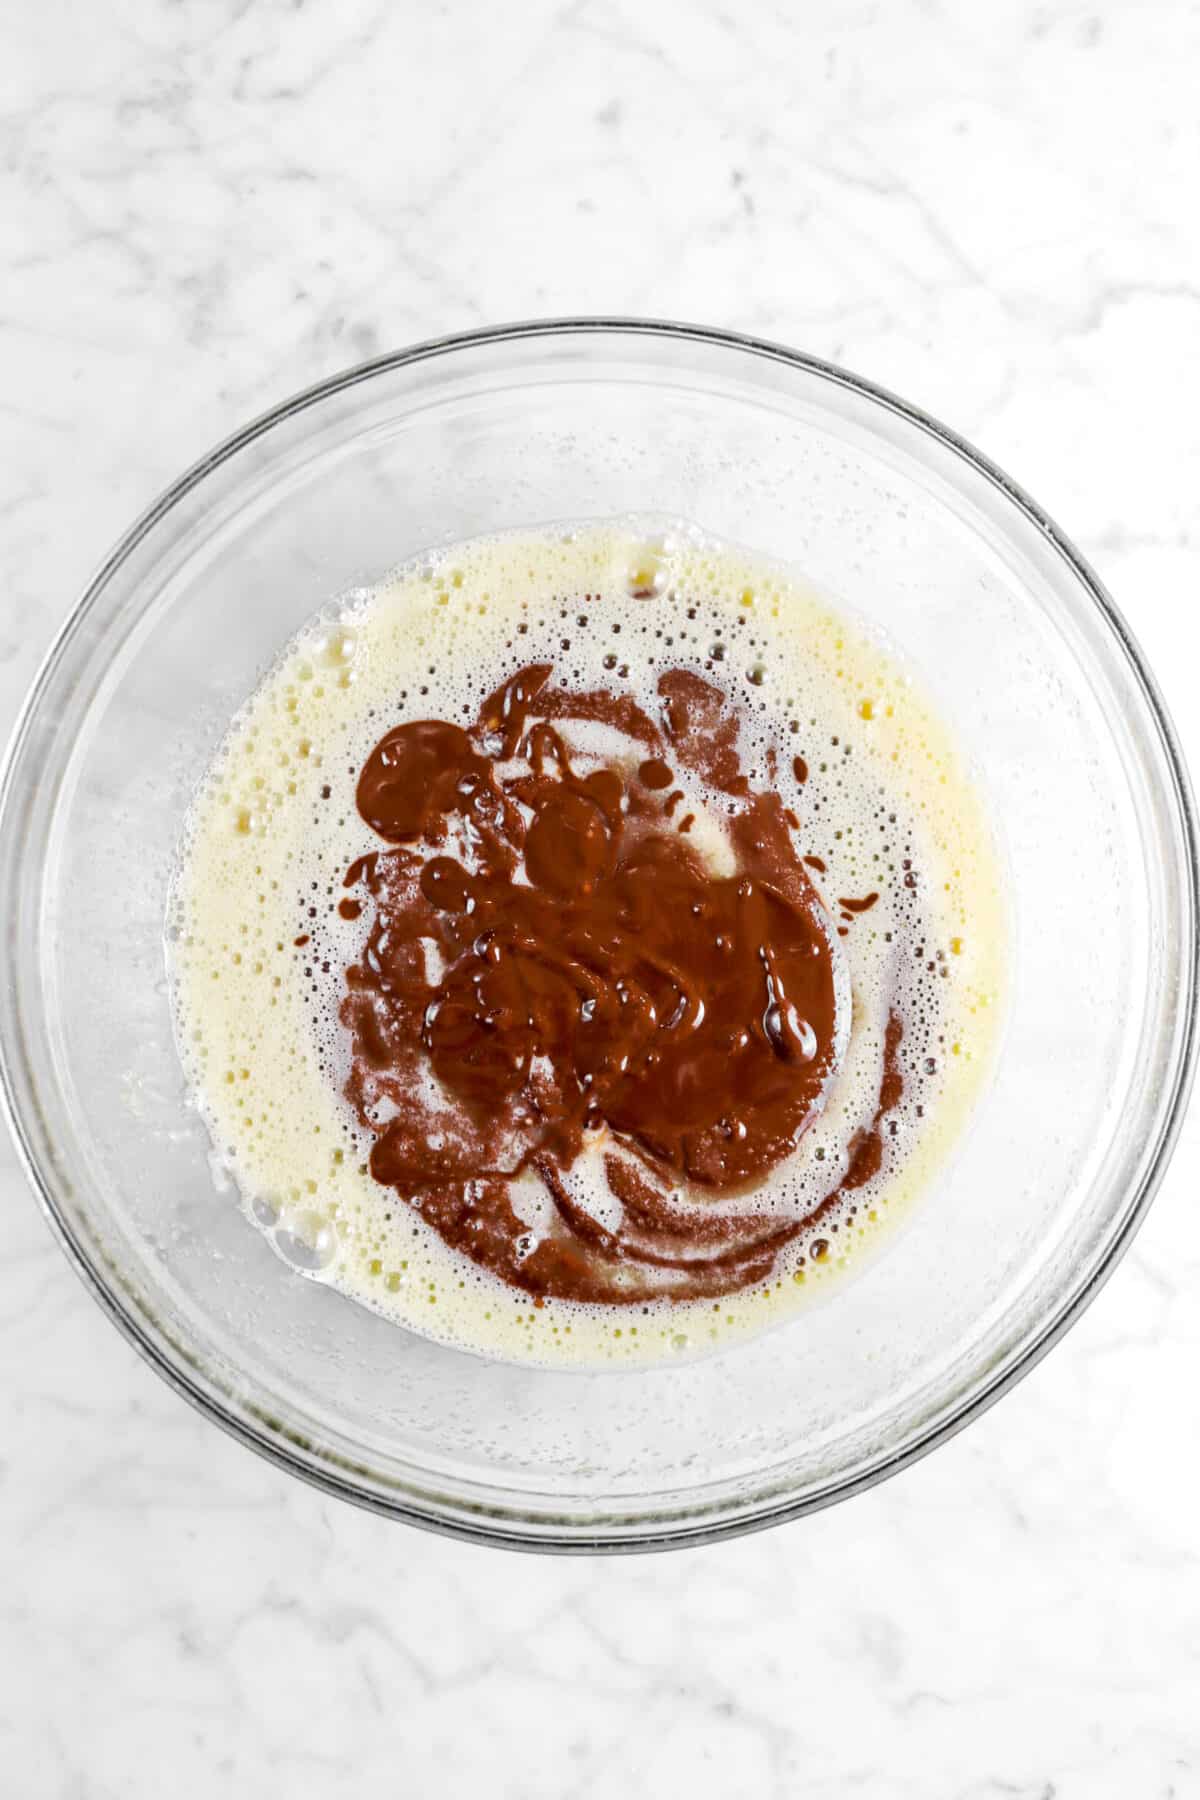
Whisk together the eggs, sugar, and vanilla in a large bowl.

Stir in the melted chocolate.
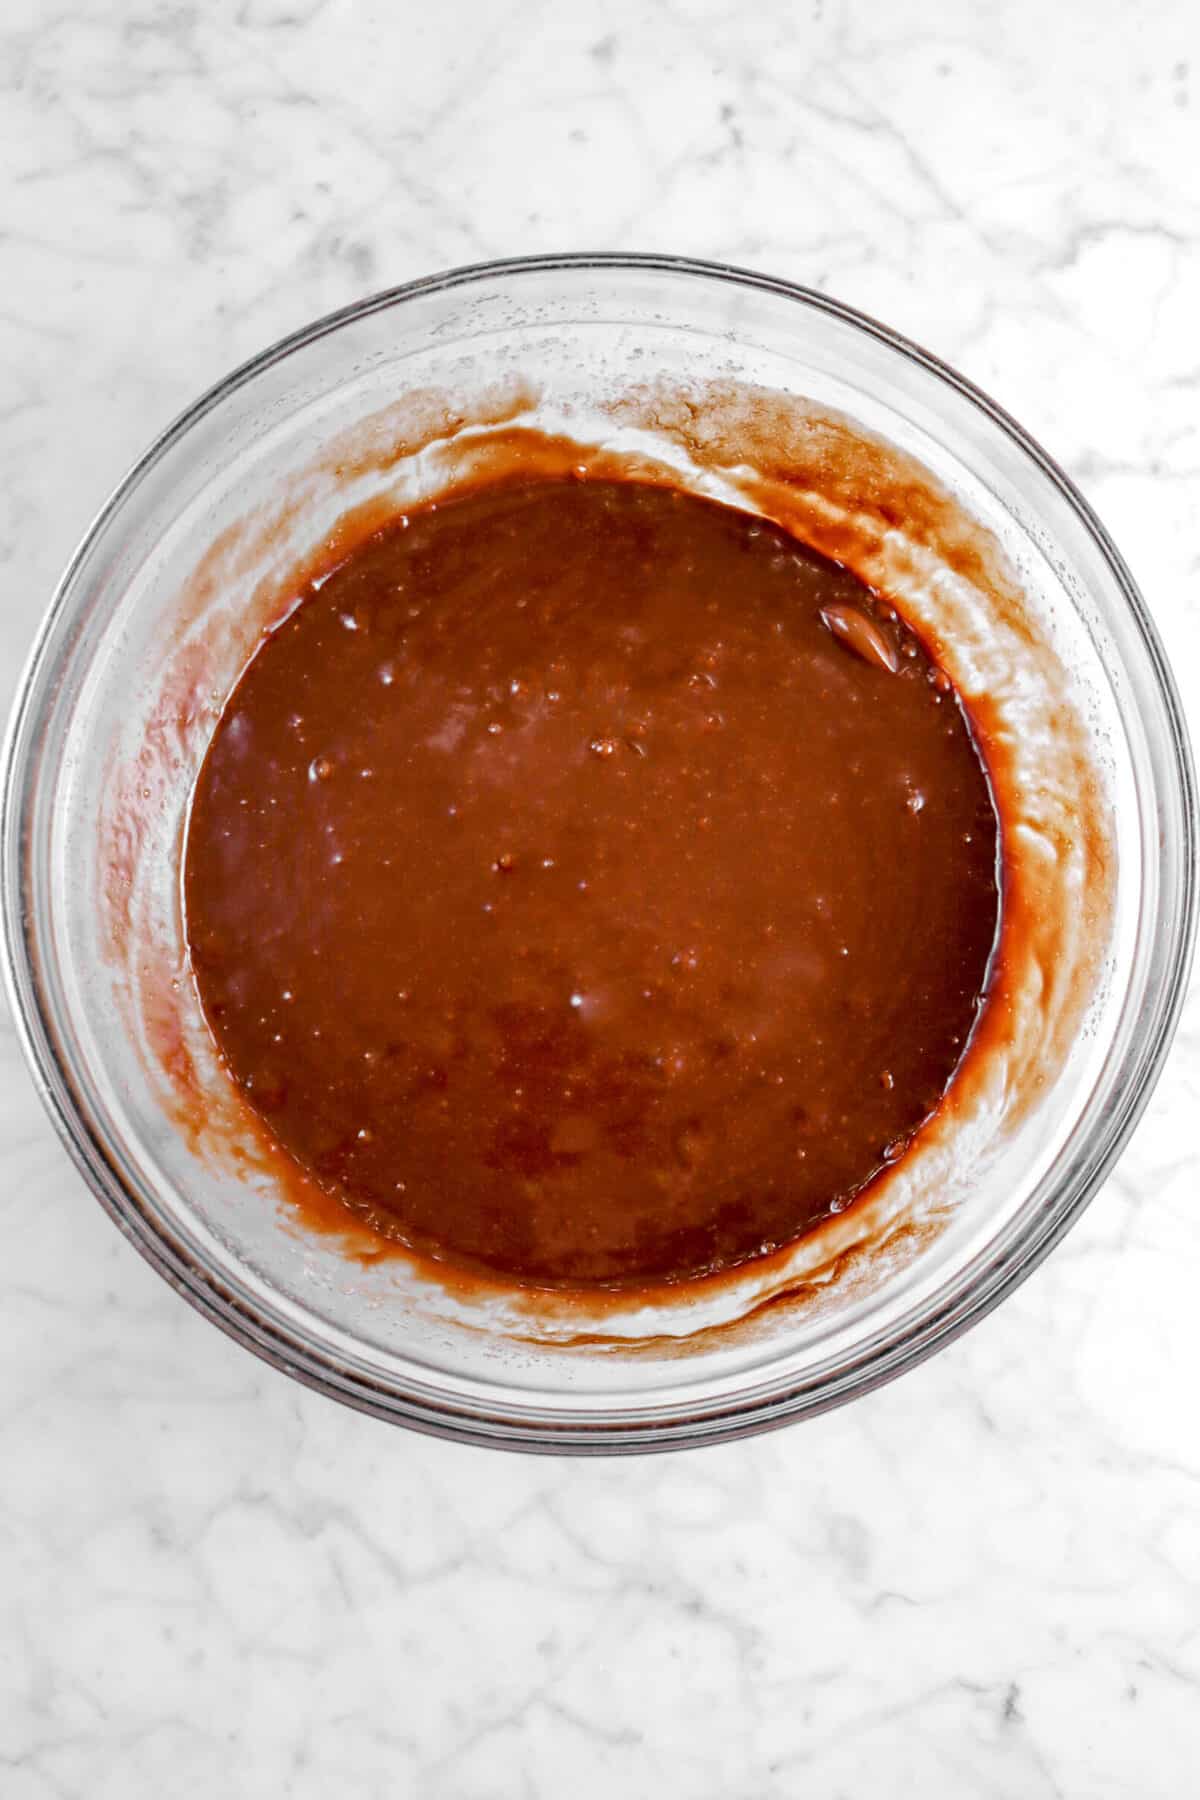
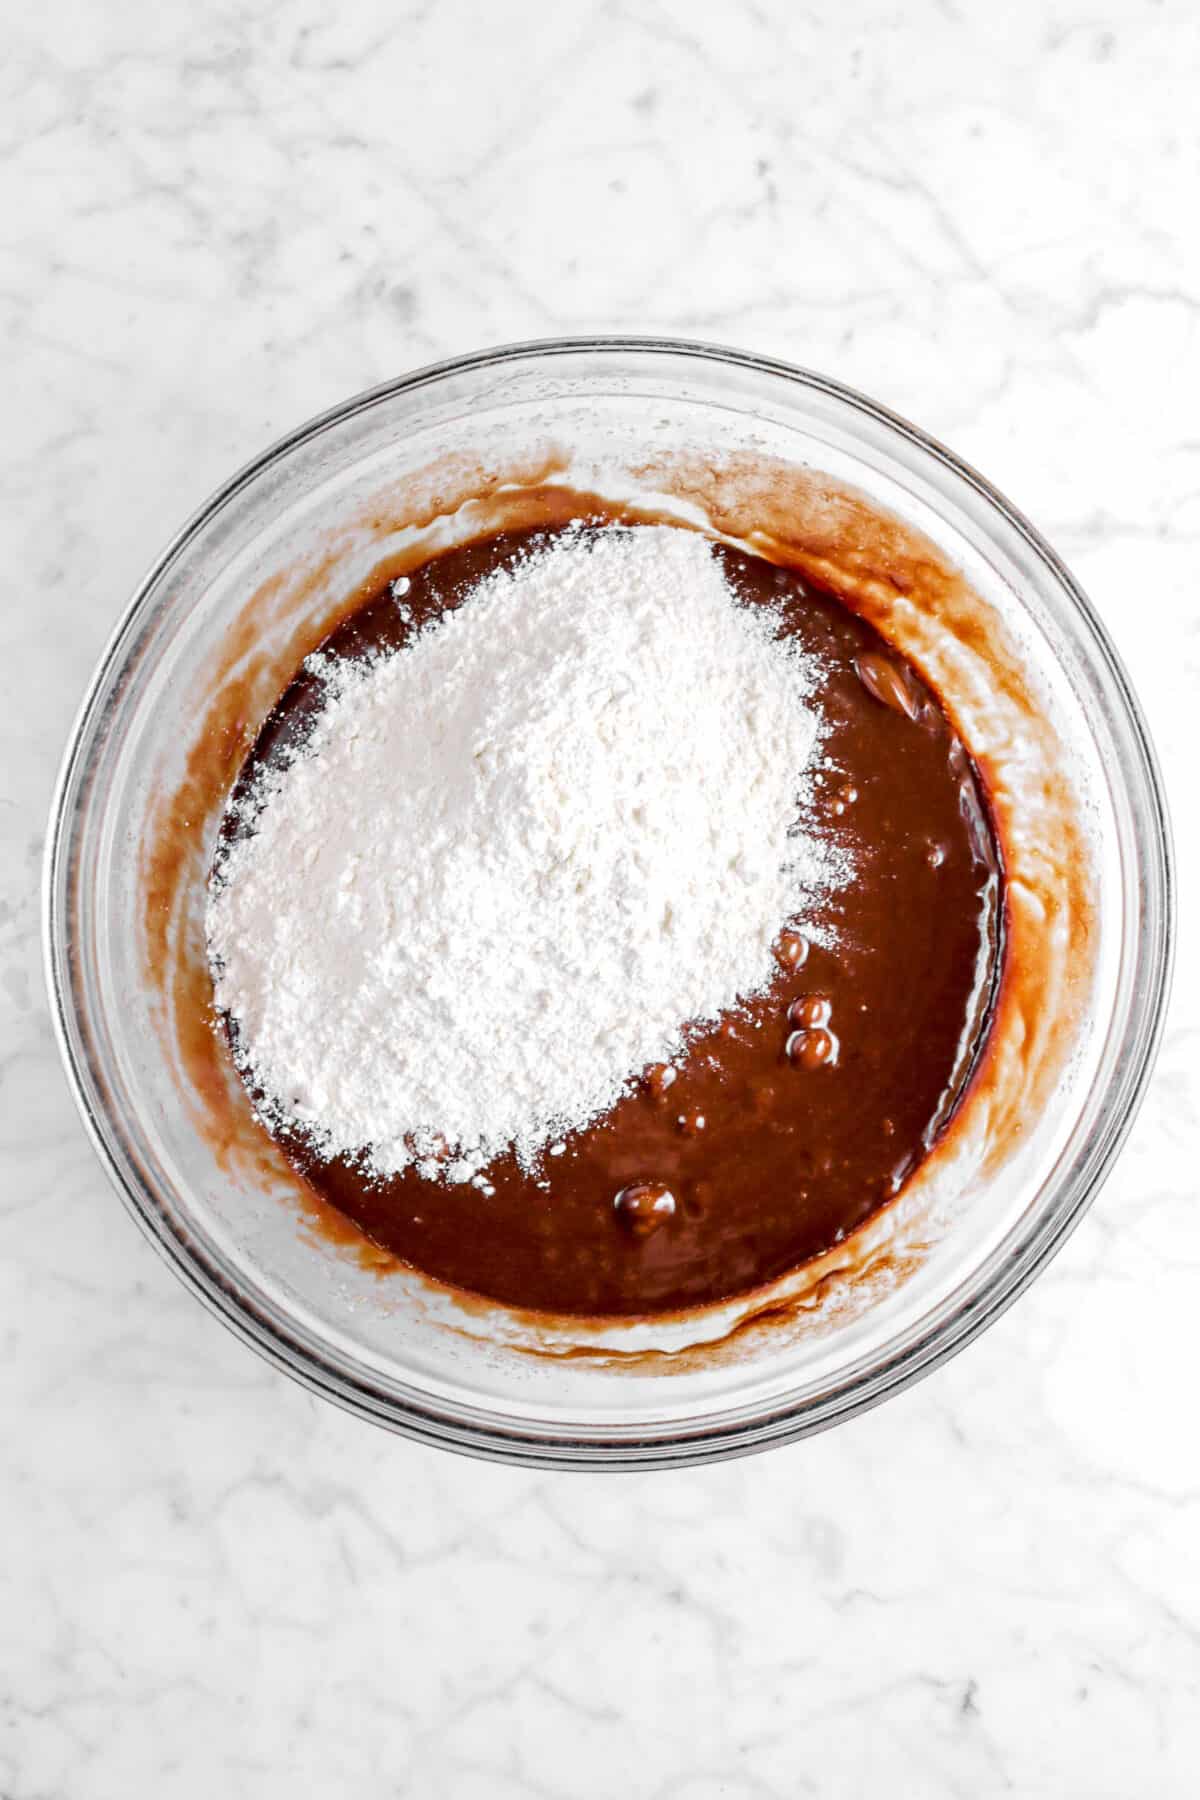
Carefully stir in the flour. Do not beat!
Step 3:Fill ramekins and bake
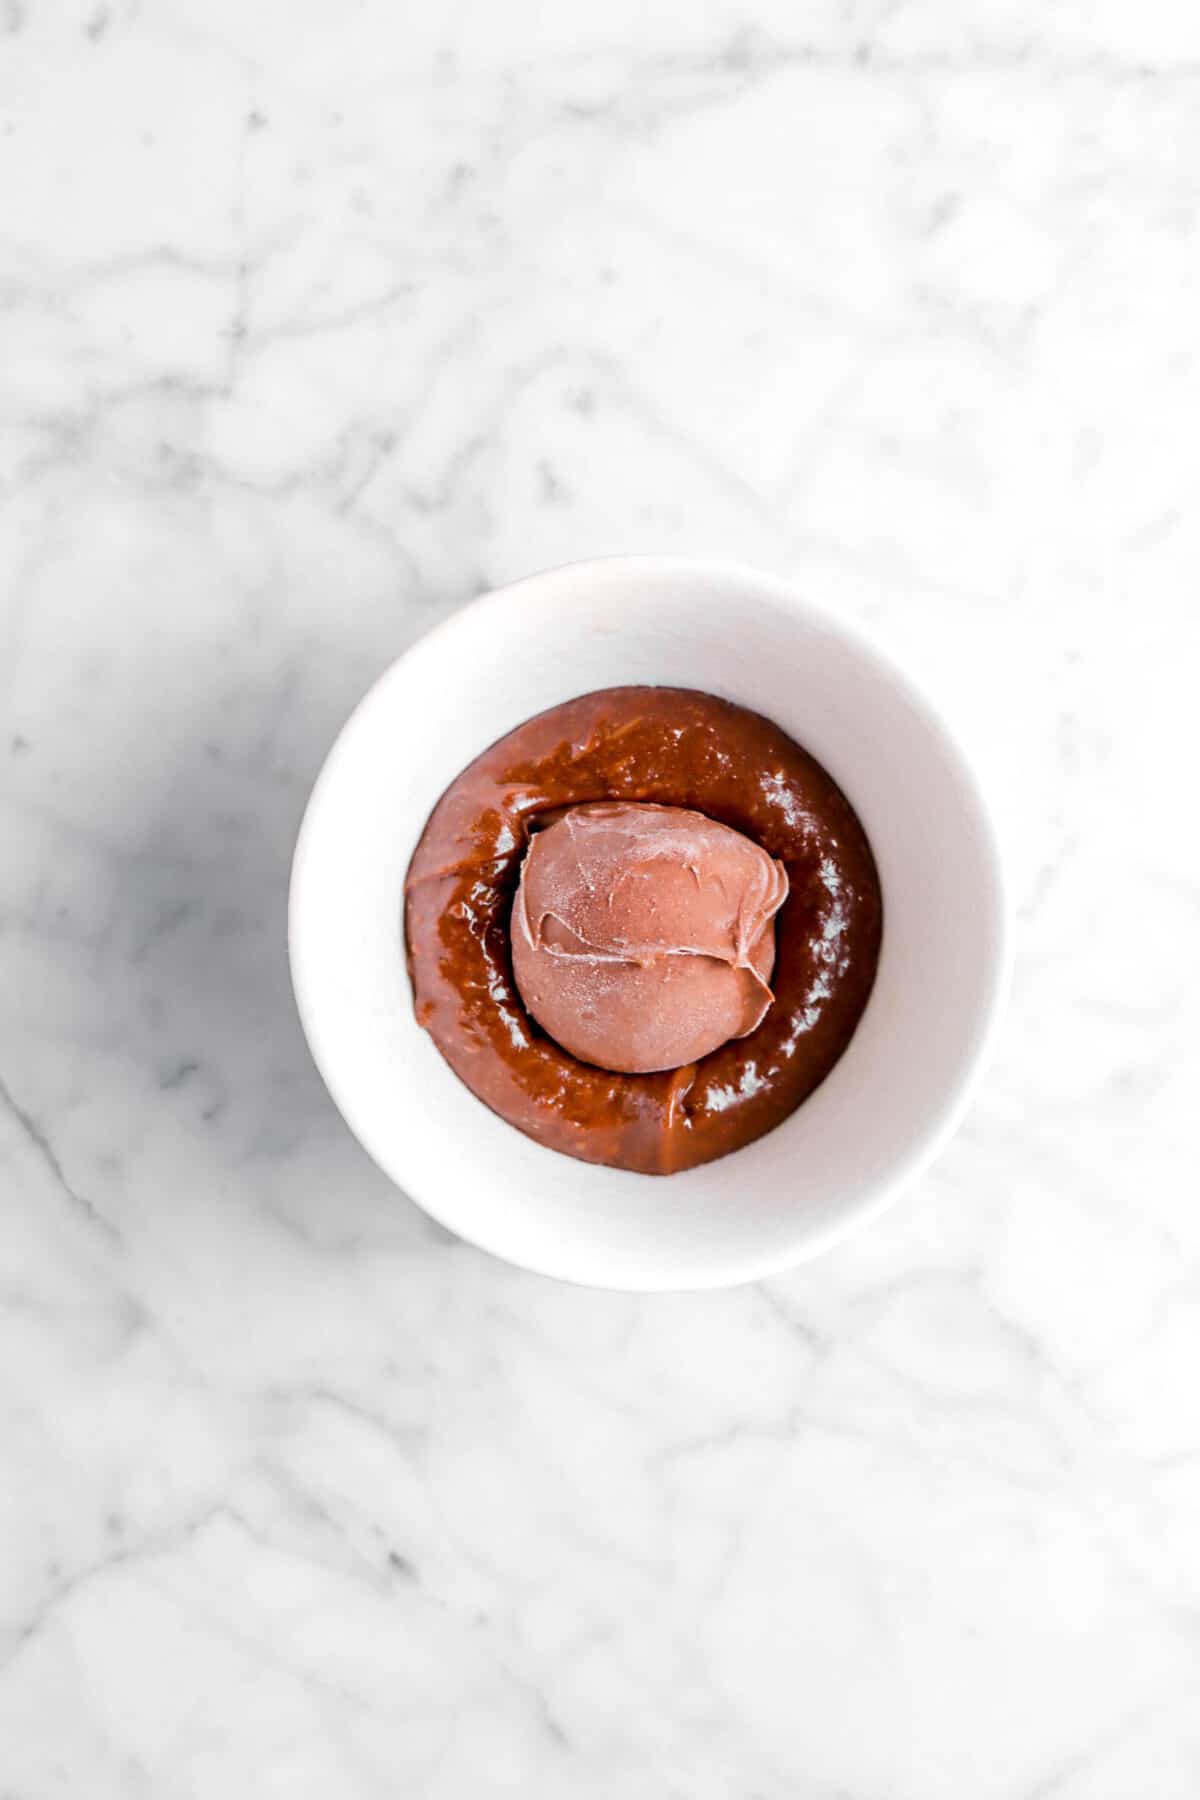
Using a large cookie scoop, scoop the batter into a greased ramekin. Place one chocolate in the center. Cover with another scoop of cake batter. Repeat until no more batter remains.
Bake at 350 for 12 minutes, or until the cakes are pulling away slightly from the ramekins.
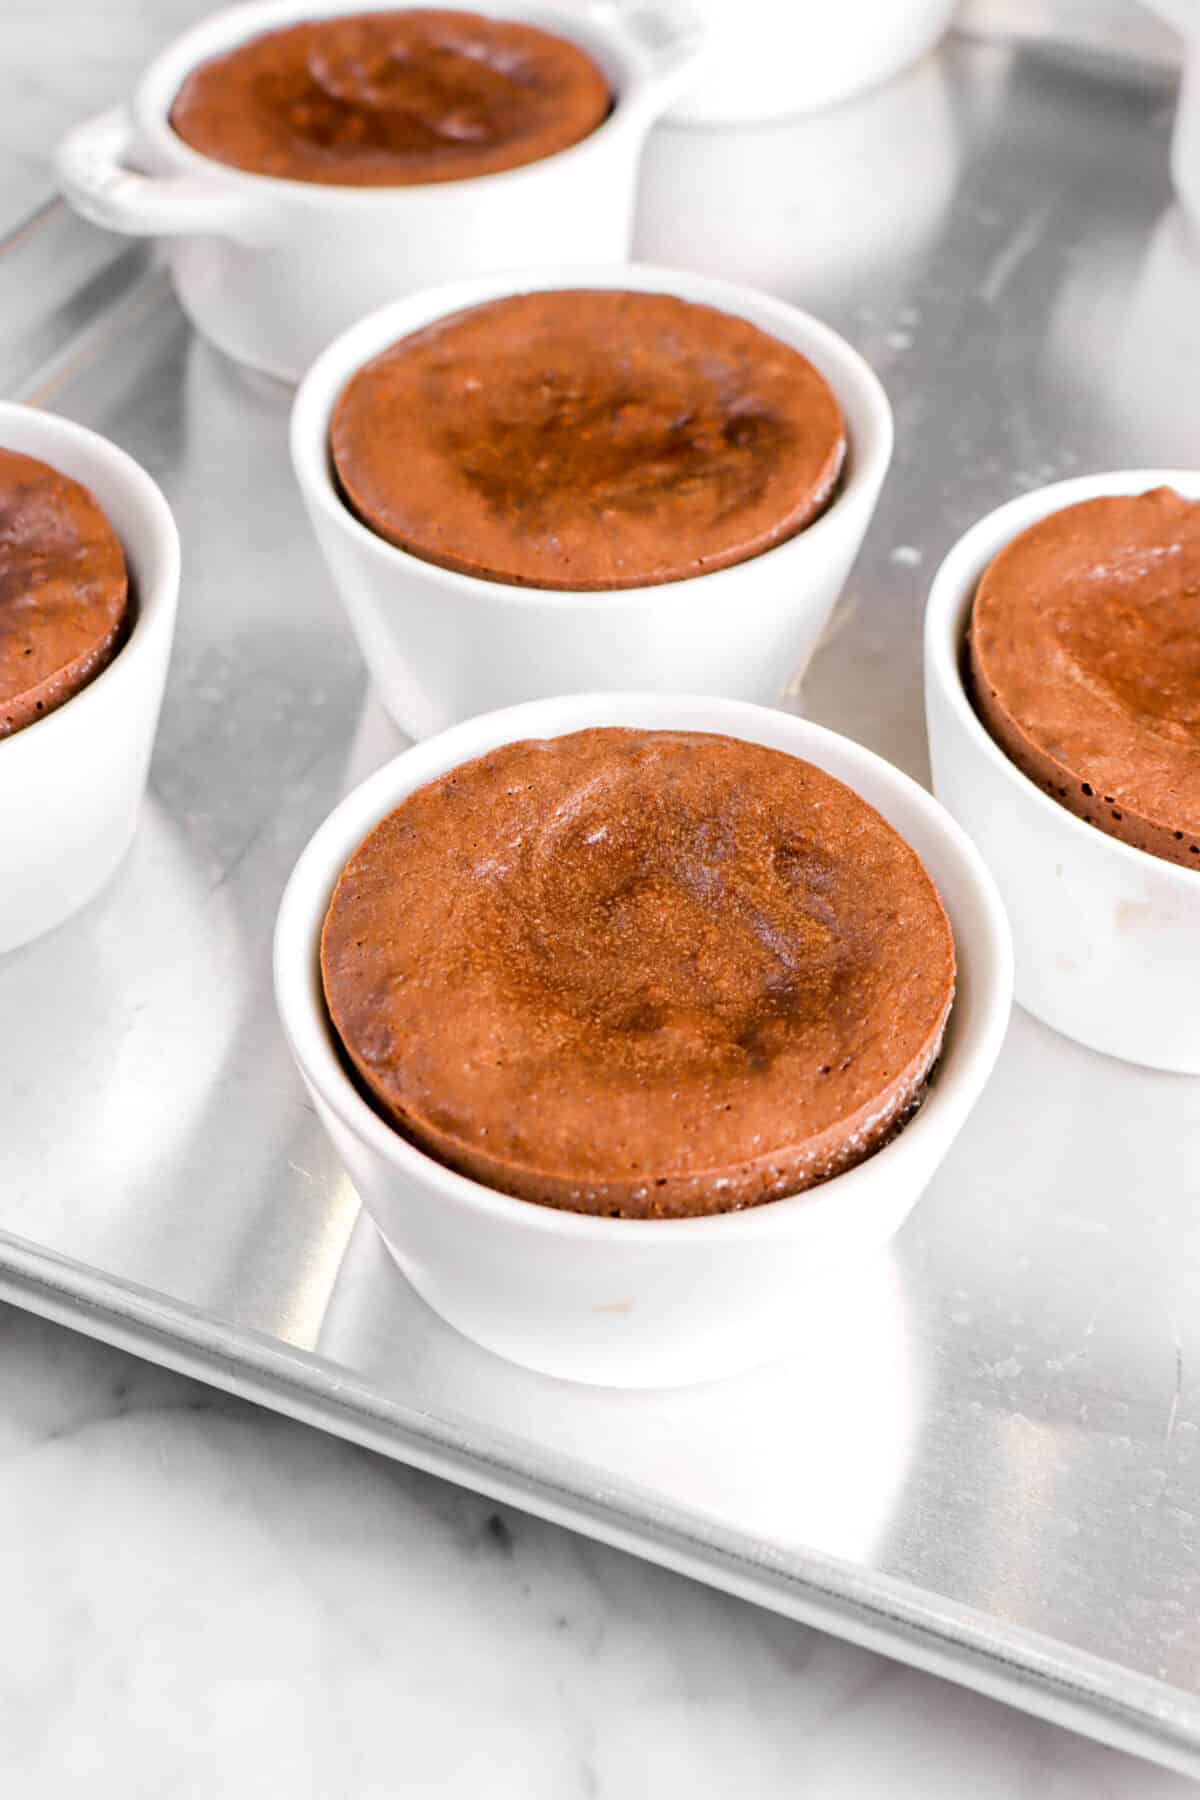
Turn the cakes out immediately and serve!
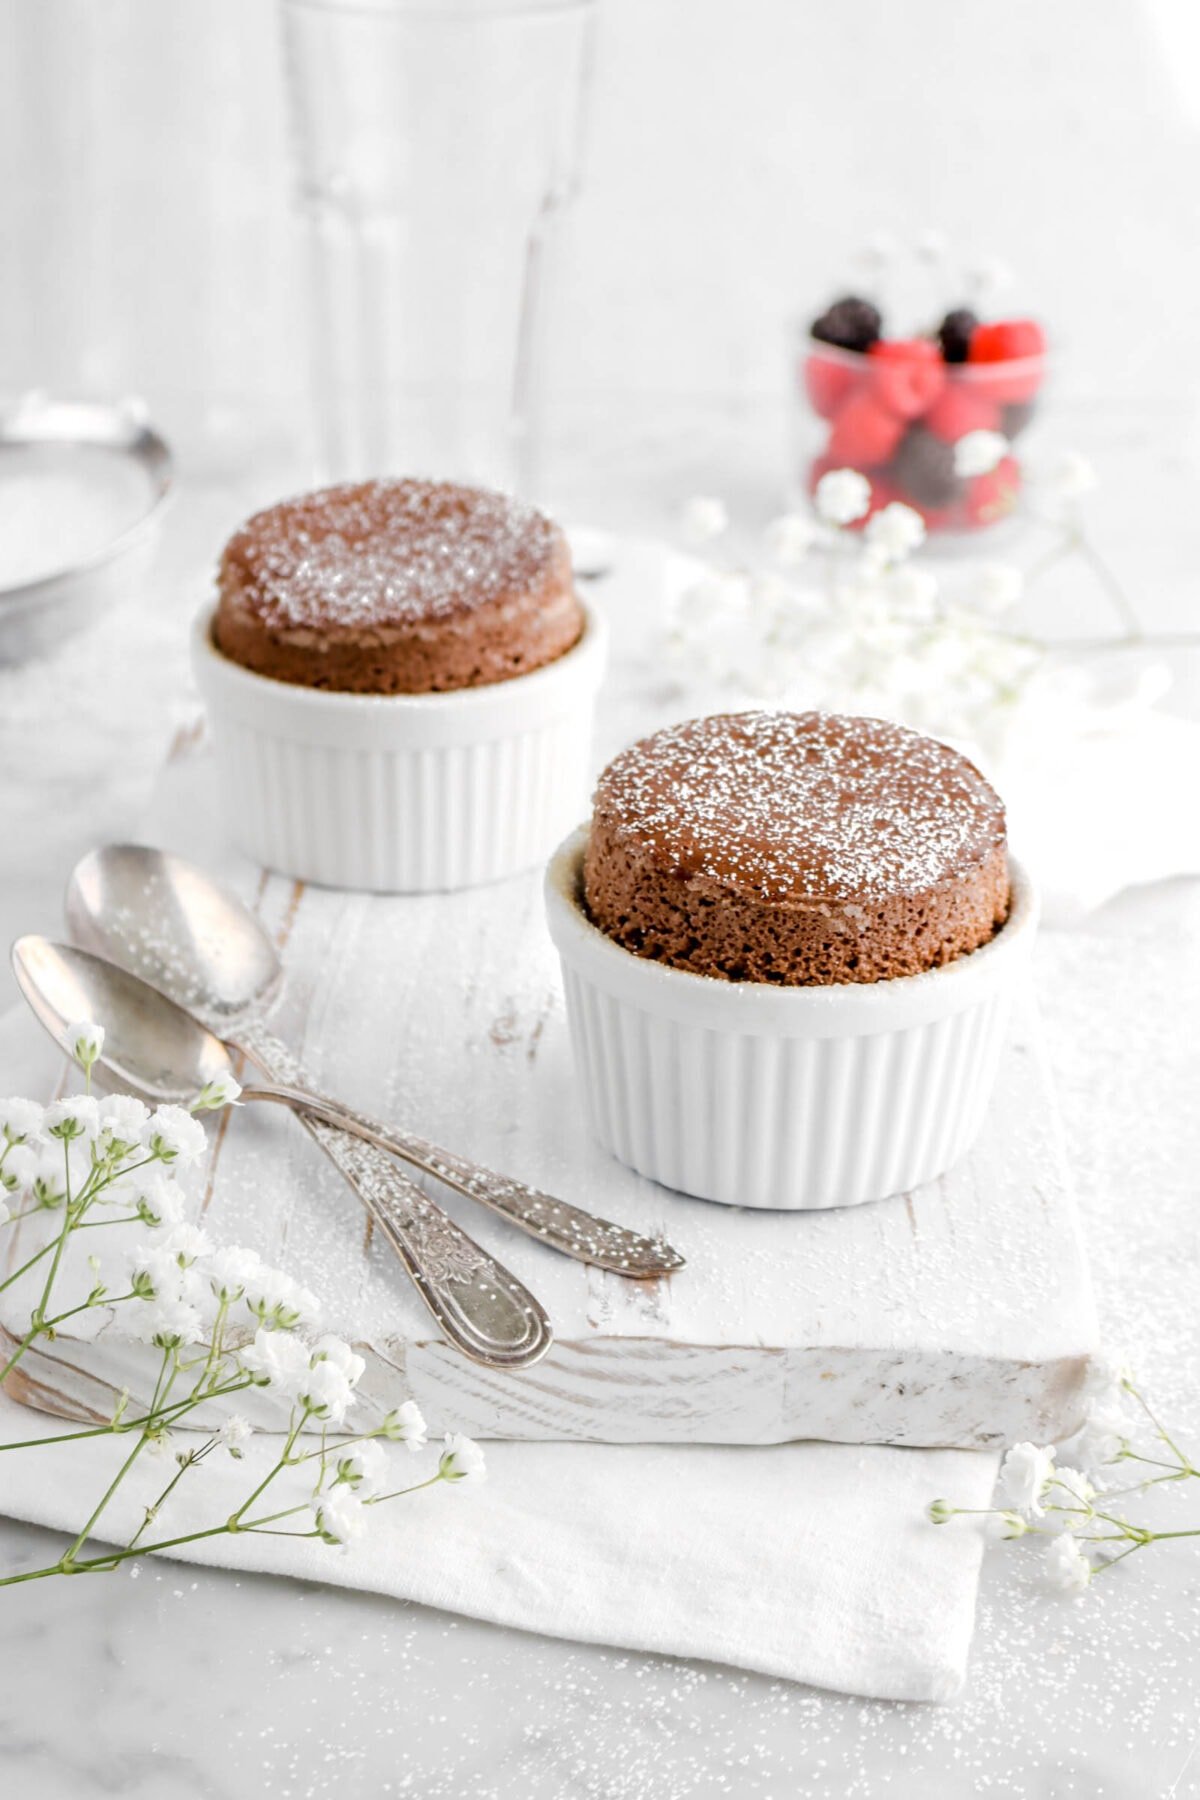
What Should Molten Lava Cakes Be Baked In?
Personally, we love to bake our lava cakes in these 6 oz. ramekins! They always come out the perfect size and shape. However, if you don’t have any, you can easily bake your lava cakes in mini cocottes or oven-safe coffee mugs! If you’re really in a pinch, you can even use a muffin pan.
Quick Tip: Whatever you choose to bake your lava cakes in, make sure you thoroughly grease it with baking spray. If you don’t have baking spray, we recommend thoroughly buttering the ramekins and dusting them with cocoa powder!
How To Serve Molten Chocolate Lava Cakes
Chocolate lava cakes should always be served hot and fresh out of the oven to ensure those centers are perfectly gooey. But, if you turn them out while they’re still TOO hot, you may risk them breaking. To ensure they come out easily, we recommend running a thinly bladed knife around the ramekins before letting the cakes cool for a few minutes, or until they are cool enough to touch to turn them out. Once they’re out, the serving possibilities are endless! Here are a few of our favorites:
- Fresh fruit & berries
- Chantilly Cream
- Vanilla Ice Cream
- Salted Caramel Sauce
- Chocolate Sauce
- Dusting of powdered sugar
- Chocolate curls or shavings
More chocolate recipes to love:
When you make these No-Fail Molten Chocolate Lava Cakes, leave a comment down below! We love hearing from you and answering any questions you might have! Also, be sure to tag us on social media and hashtag it #BakersTable.
Happy baking!
x, Caylie
No-Fail Molten Chocolate Lava Cakes
Ingredients
Ganache
- ½ cup dark chocolate pieces
- ½ cup heavy cream
Cakes
- 2 cups dark chocolate pieces
- ¾ cup salted butter
- 6 large eggs
- ¾ cup granulated sugar
- 1 Tablespoon vanilla extract
- 1¼ cups all purpose flour
Instructions
Ganache
- Place chocolate pieces and cream in a small microwave-safe bowl.
- Microwave in 15 second intervals, stirring after each, until chocolate is melted and smooth.
- Pour chocolate mixture into a 2 quart baking dish.
- Cover with a piece of plastic wrap, making sure it touches the surface of the chocolate.
- Refrigerate until firm, about an hour.
- Remove from refrigerator and, using a small cookie scoop, scoop ganache into balls and place on a parchment-lined sheet pan.
- Freeze.
Cakes
- Heat oven to 350℉/177℃.
- Spray 8 six-ounce ramekins with baking spray. Set aside.
- Combine chocolate pieces and butter in a microwave-safe bowl.
- Microwave in 30 second intervals, stirring after each, until both chocolate and butter are melted and smooth. Set aside.
- In a large bowl, whisk together eggs, sugar, and vanilla.
- Beat in cooled chocolate mixture.
- Gently stir in flour.
- Fill each ramekin half full.
- Place a frozen plug of ganache on each and press down slightly.
- Cover with remaining batter.
- Place on a sheet tray and place in the oven.
- Bake for 12-15 minutes, until cake is just starting to pull away from the edges of the ramekin.
- Remove from oven.
- Invert gently onto plate.
Notes + Tips!
- You can make the ganache up to 5 days in advance. Just remember to keep it covered and in the fridge.
- Use a high quality chocolate for this recipe.
- Be careful not to over mix the batter!
- If the cakes stick to the ramekins, you can use a thinly bladed knife and gently poke the knife around the edges. Try and keep the knife as close to the ramekin as possible because you don’t want to poke the cake! Also, don’t slide the knife around the ramekin. This will cause the cake to tear. Gently poke around the edges until the cake is loose!
Tools You May Need (affiliate links)
– Still Hungry? –
Here are a few recipes may like!