Dark Chocolate Dried Fruit and Nut Bark
This post may contain affiliate links, please visit our privacy policy for details.
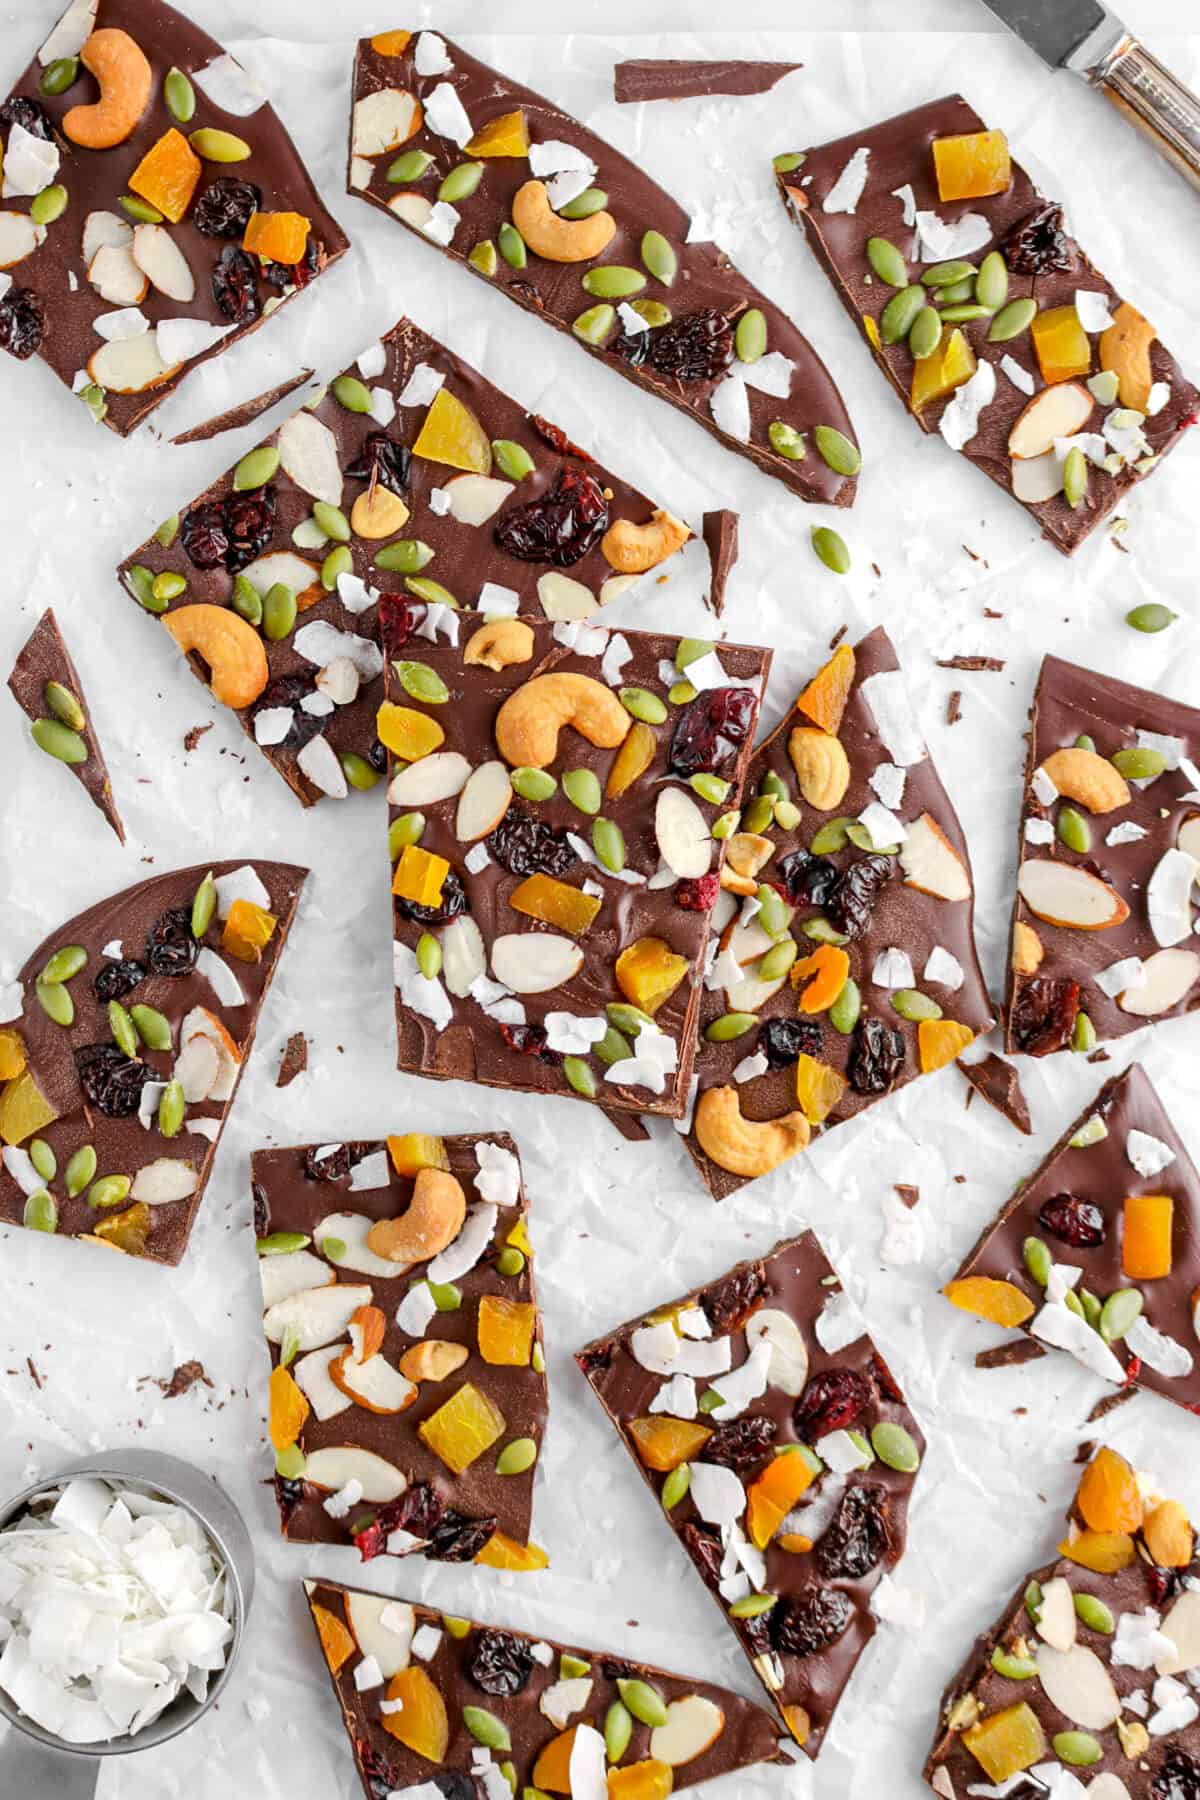
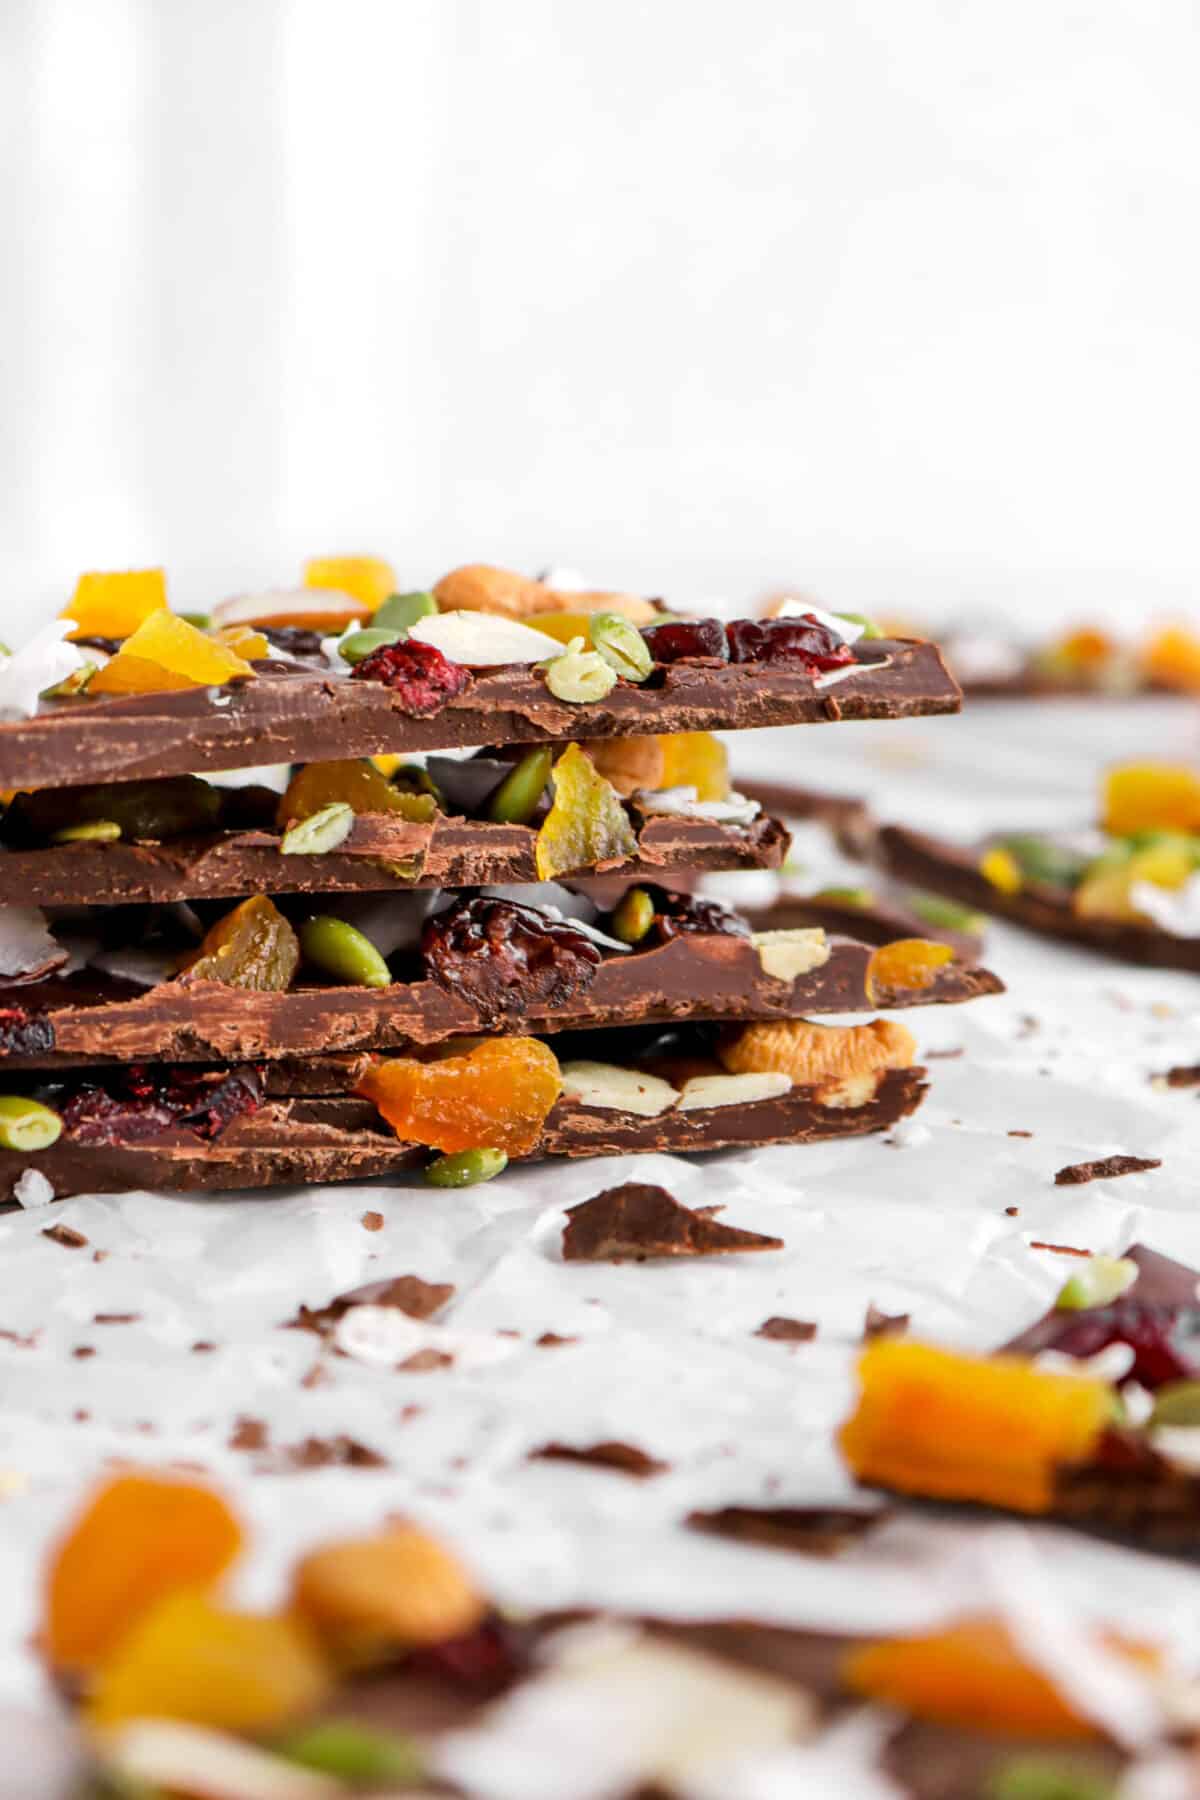
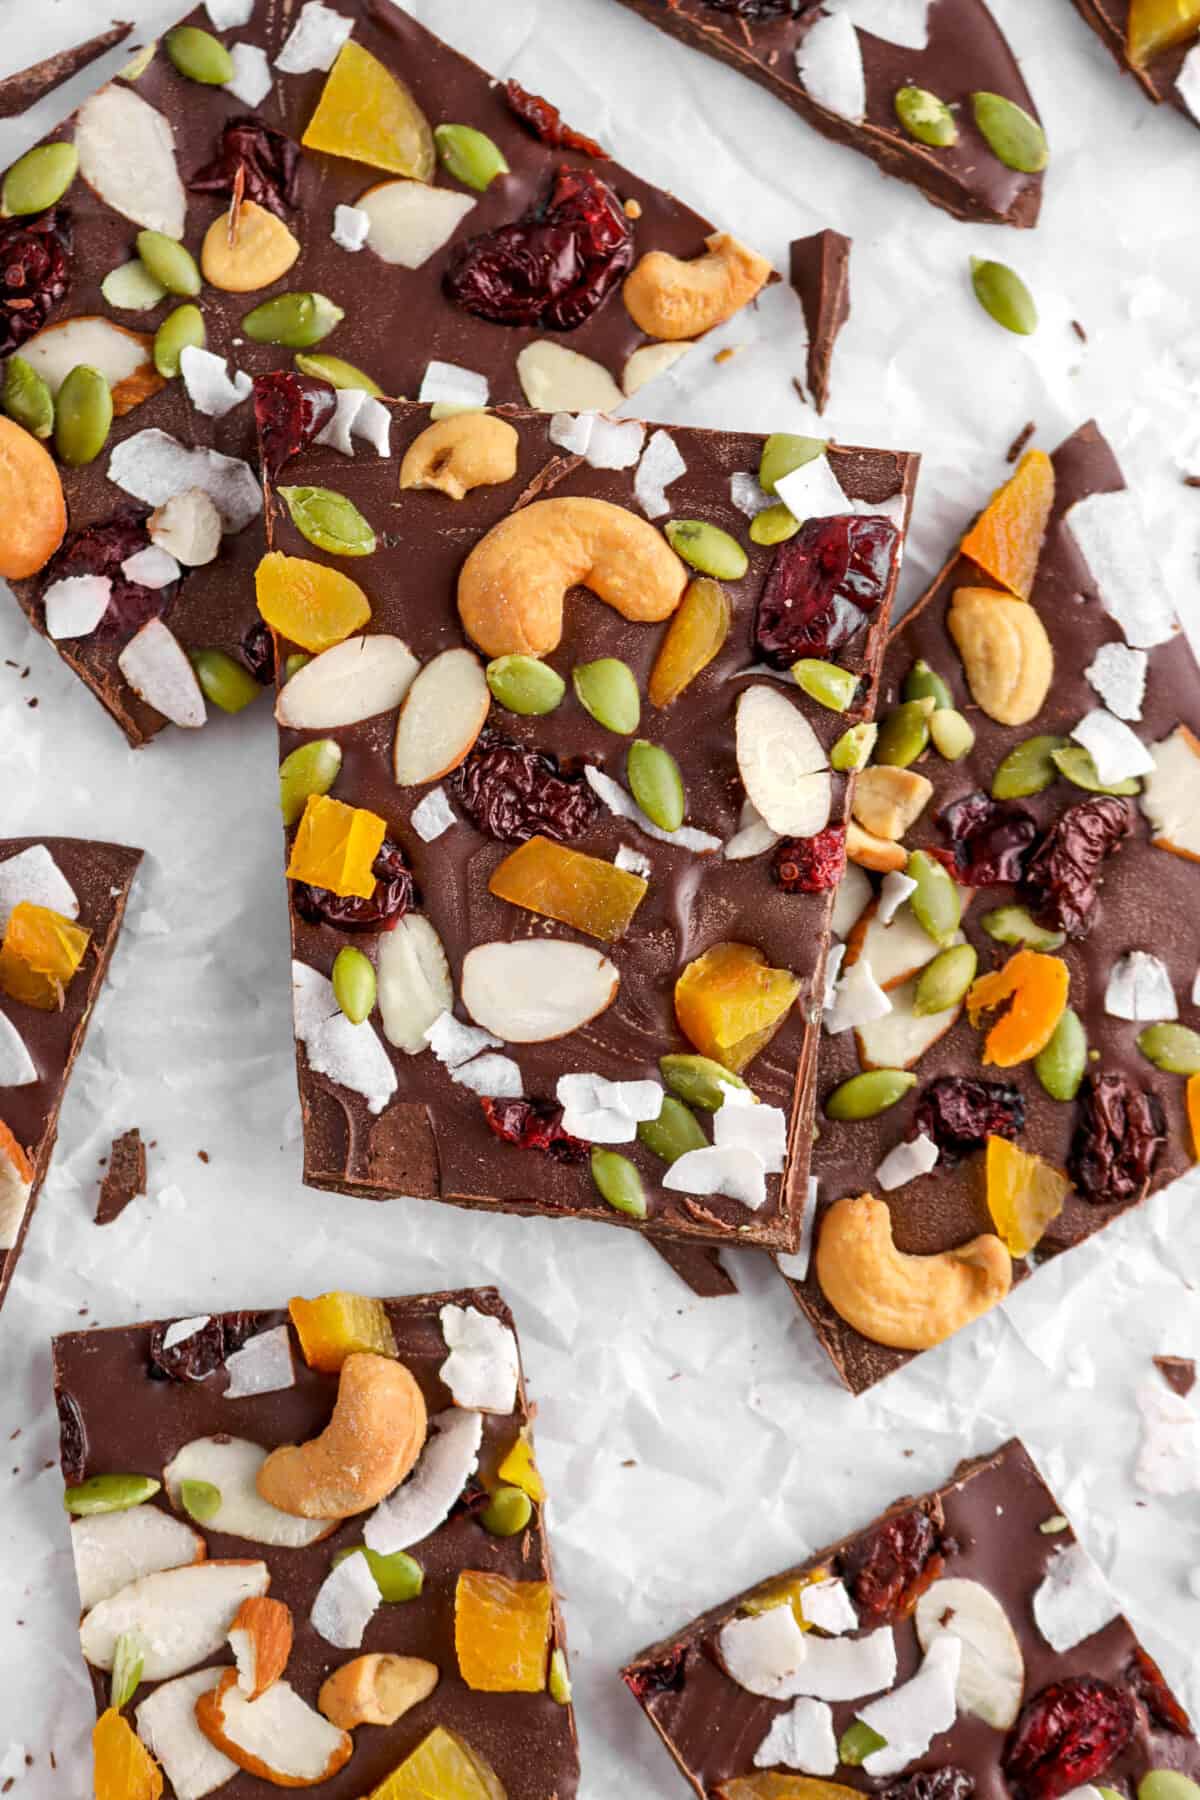
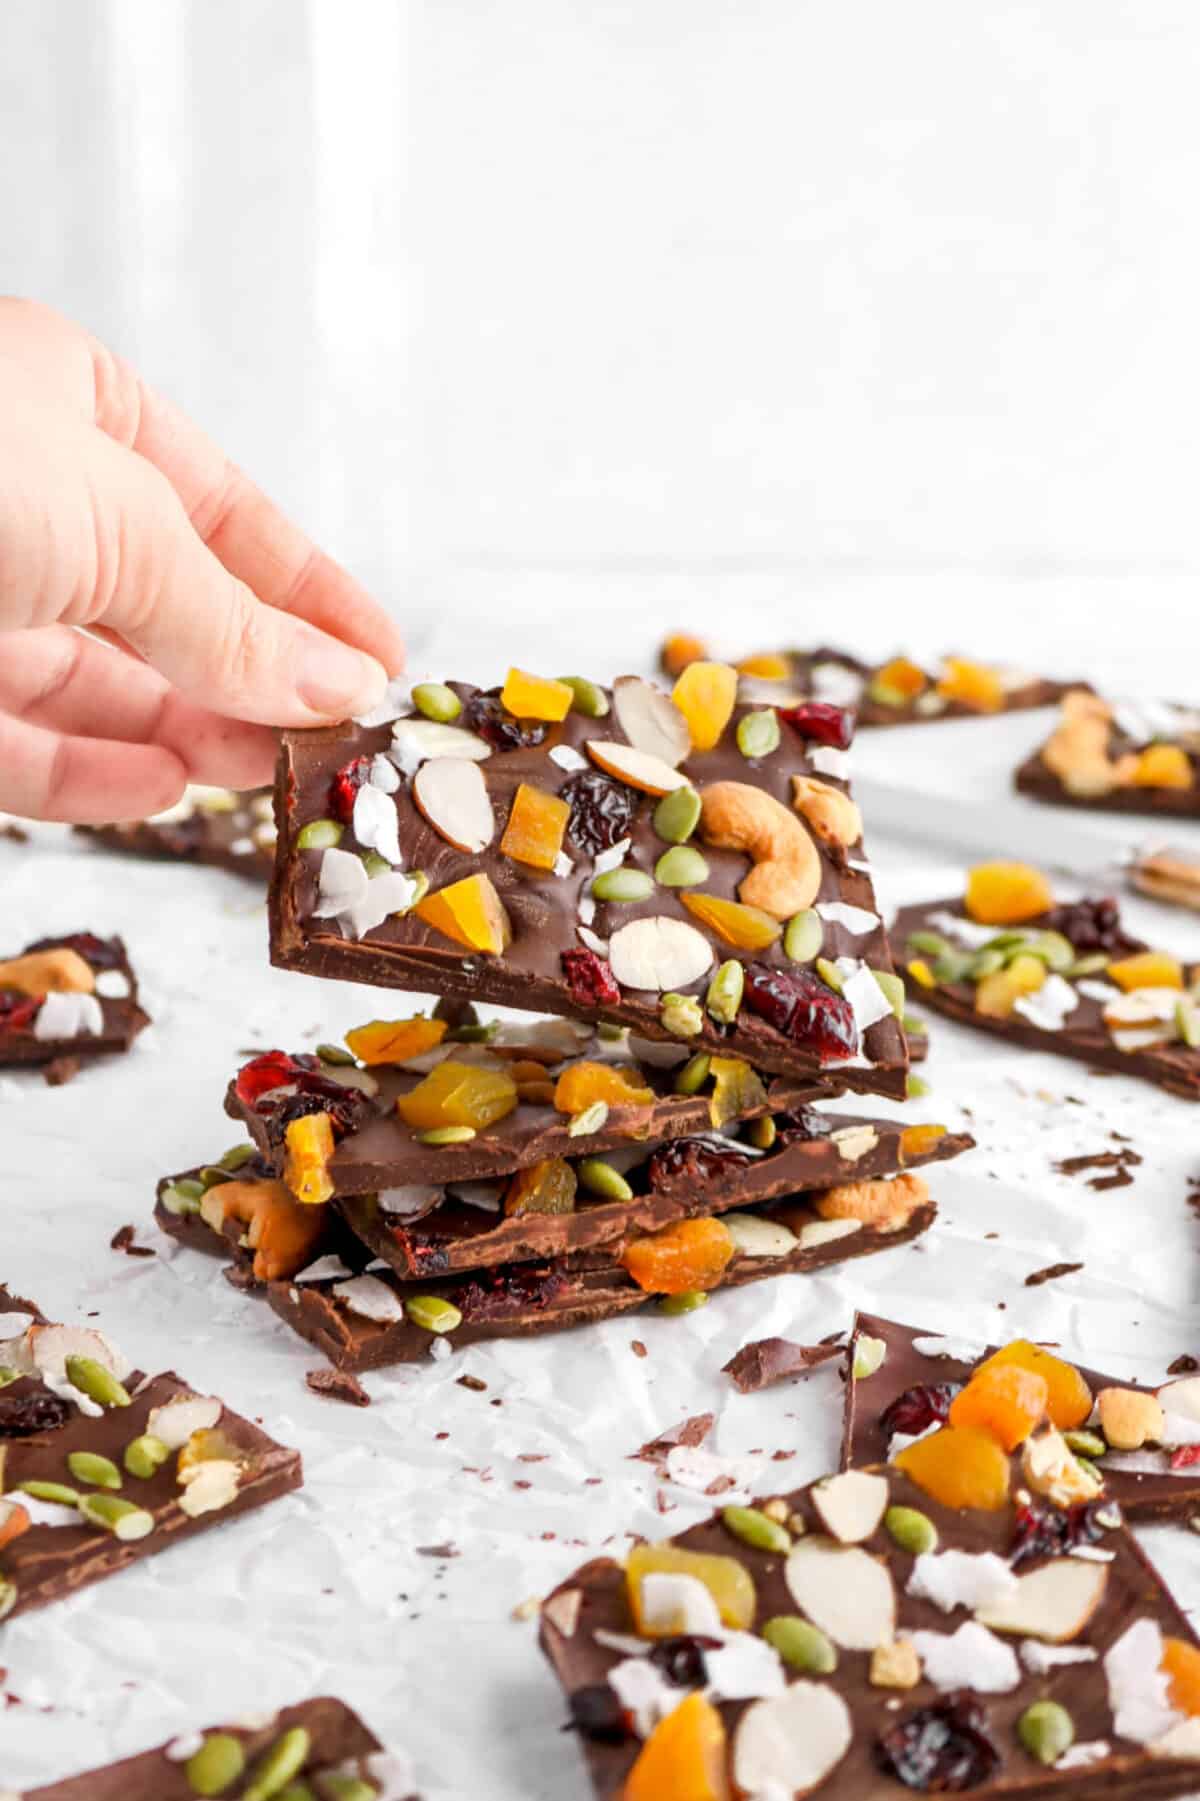
This winter just got a little bit sweeter with this Dark Chocolate Dried Fruit and Nut Bark! It’s so simple, but delicious. Tempered (or melted!) dark chocolate, layered with your favorite dried fruits and nuts, then topped with a sprinkling of coconut flakes. Finish this bark with a light sprinkle of flaked salt for something that’s sweet AND salty.
Ever find yourself craving the richness of peppermint bark, but without the holiday flavors? This Dark Chocolate Dried Fruit and Nut Bark has all the indulgence you want, with a mix of rich chocolate, crunchy nuts, and sweet, chewy dried fruit—perfect for any time of year.
The beauty of this recipe is its simplicity. While we love to use tempered chocolate for candies like dark chocolate peanut butter cups or mini cakes like homemade ding dongs, you can make it with just melted chocolate like we use for homemade almond joys.
Whether you’re whipping up a batch for a quick snack or gifting it to someone who loves chocolate, this naturally vegan and gluten-free bark is guaranteed to bring some joy.
What Makes This Dark Chocolate Dried Fruit and Nut Bark So Good?
- Quick and Easy: No need for special equipment—just melt, mix, and chill!
- Customizable: Swap in your favorite dried fruits and nuts for endless flavor combinations.
- Great for Gifting: Package it up as a homemade gift that feels thoughtful and indulgent.
- Perfect for Any Occasion: Whether you need a snack, dessert, or party treat, this bark fits the bill.
- Chocolate Lovers’ Dream: Rich dark chocolate is the star, with added texture and sweetness from the fruit and nuts.
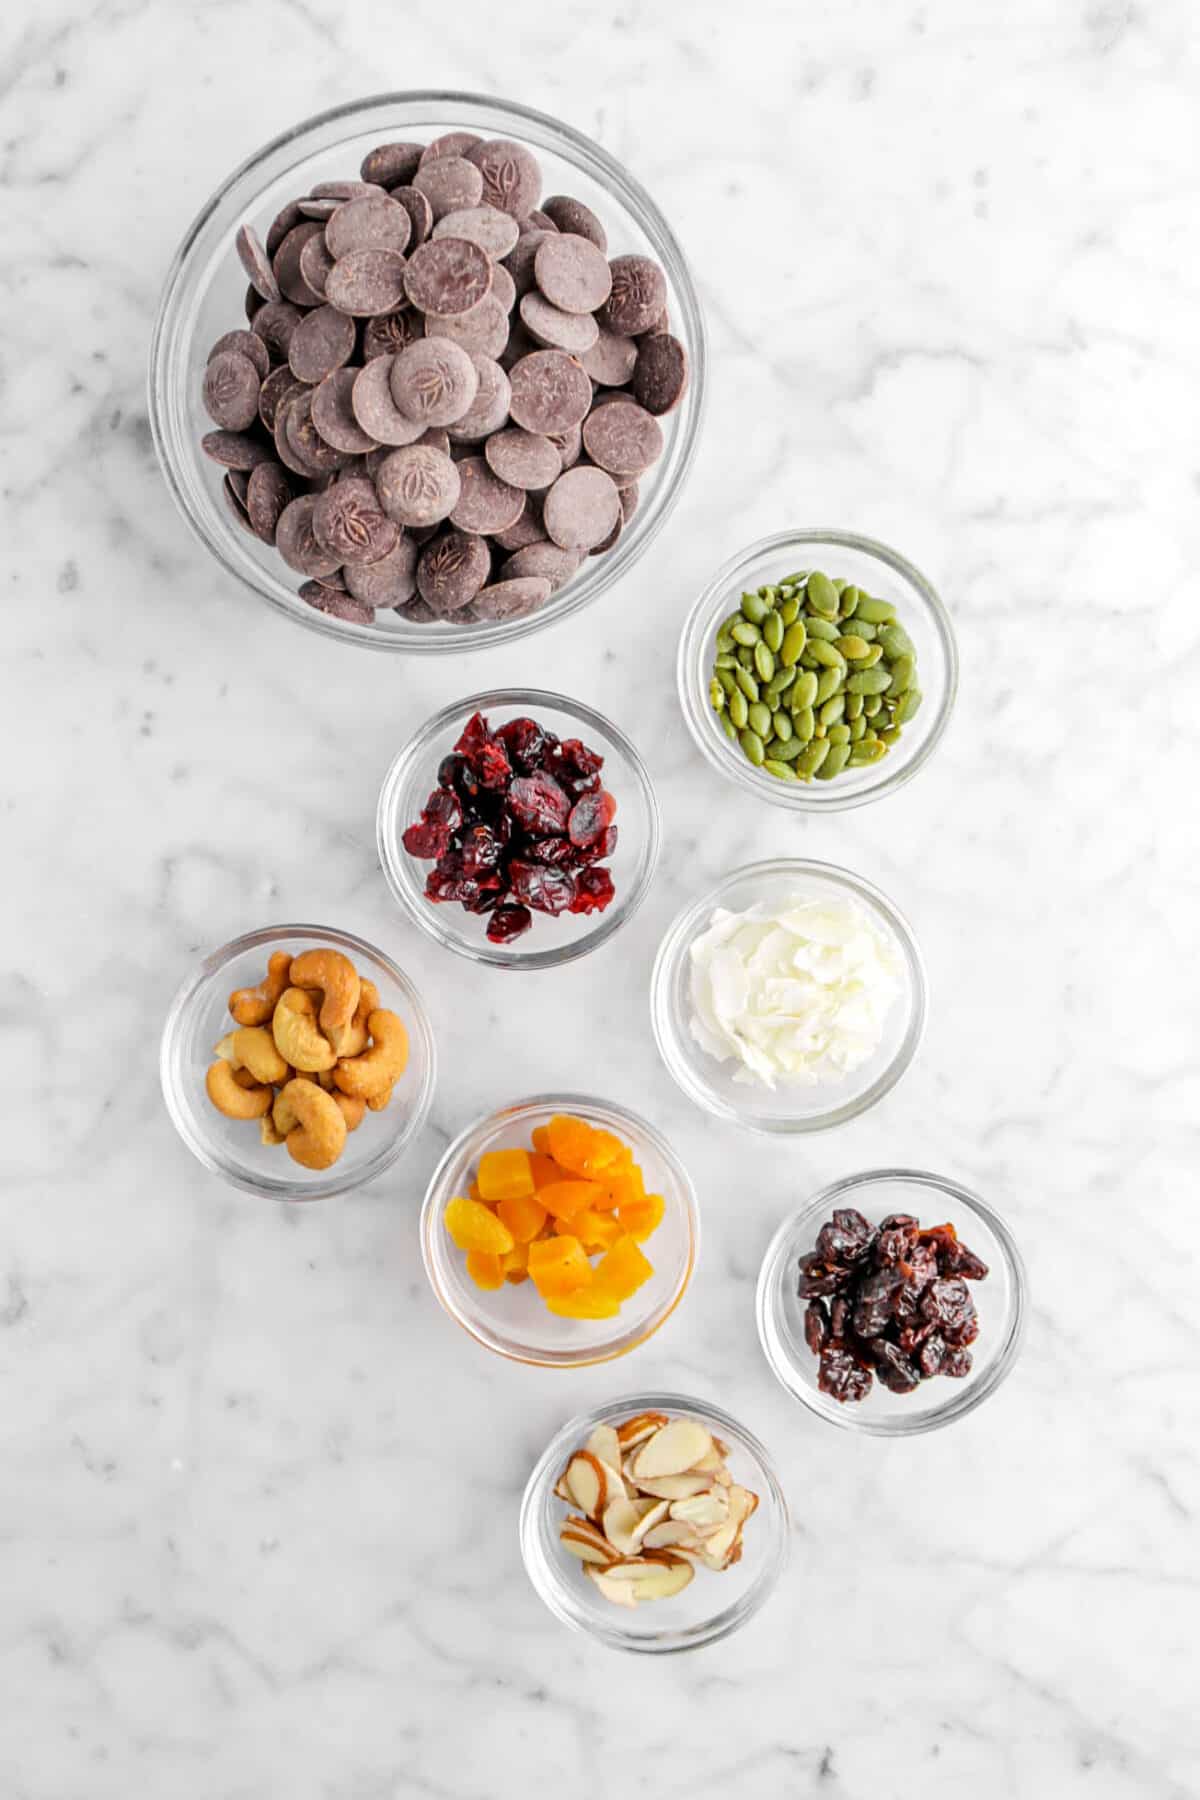
Ingredients
Full ingredient amounts and instructions can be found in the recipe card at the bottom of the post.
- Bittersweet Chocolate
- Cranberries
- Cherries
- Apricots
- Coconut Flakes
- Sliced Almonds
- Sea Salt Cashews
- Roasted and Salted Pumpkin Seeds
How To Make Dried Fruit and Nut Bark
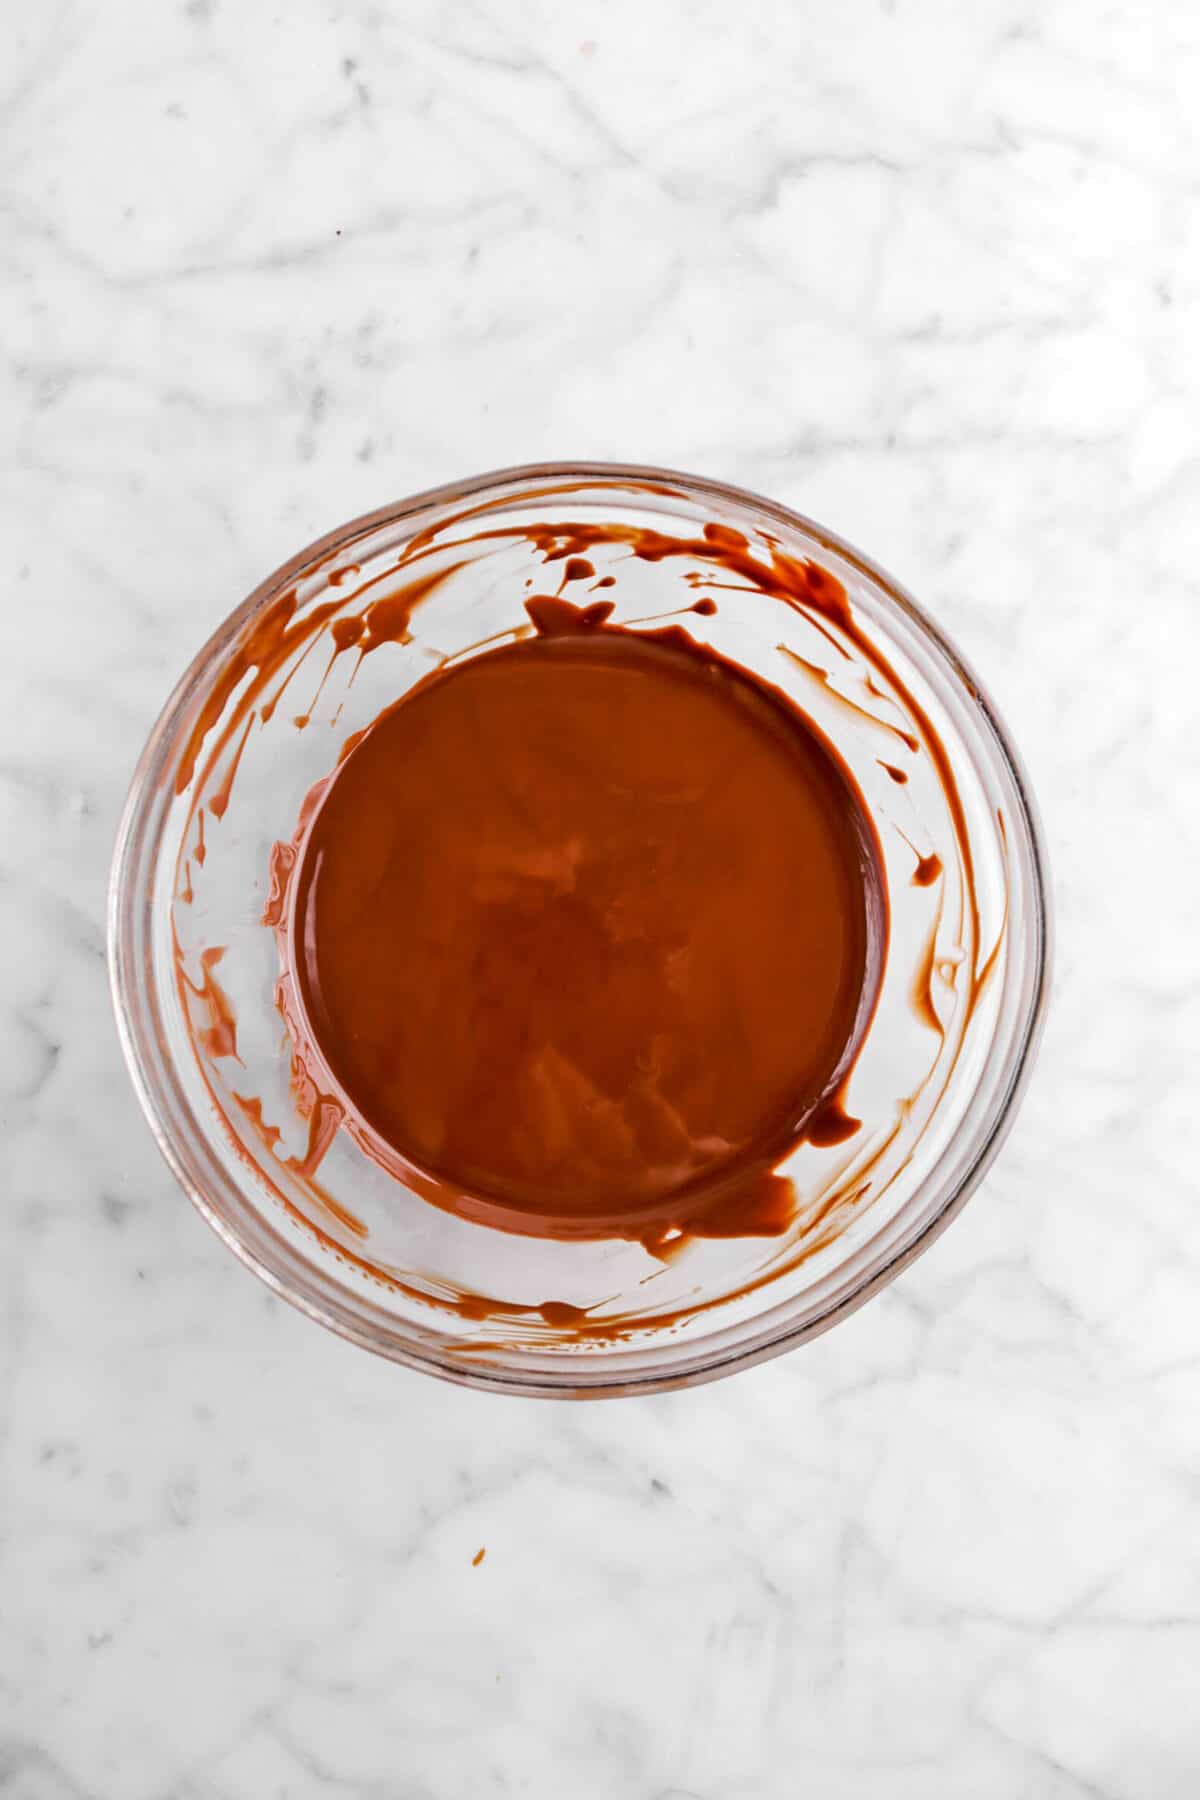
Step 1: Melt or temper chocolate
Depending on how you want to do this, you need to either melt or temper the chocolate! We tempered the chocolate. If you don’t know, there are instructions for tempering chocolate below!
Step 2: Assemble the bark
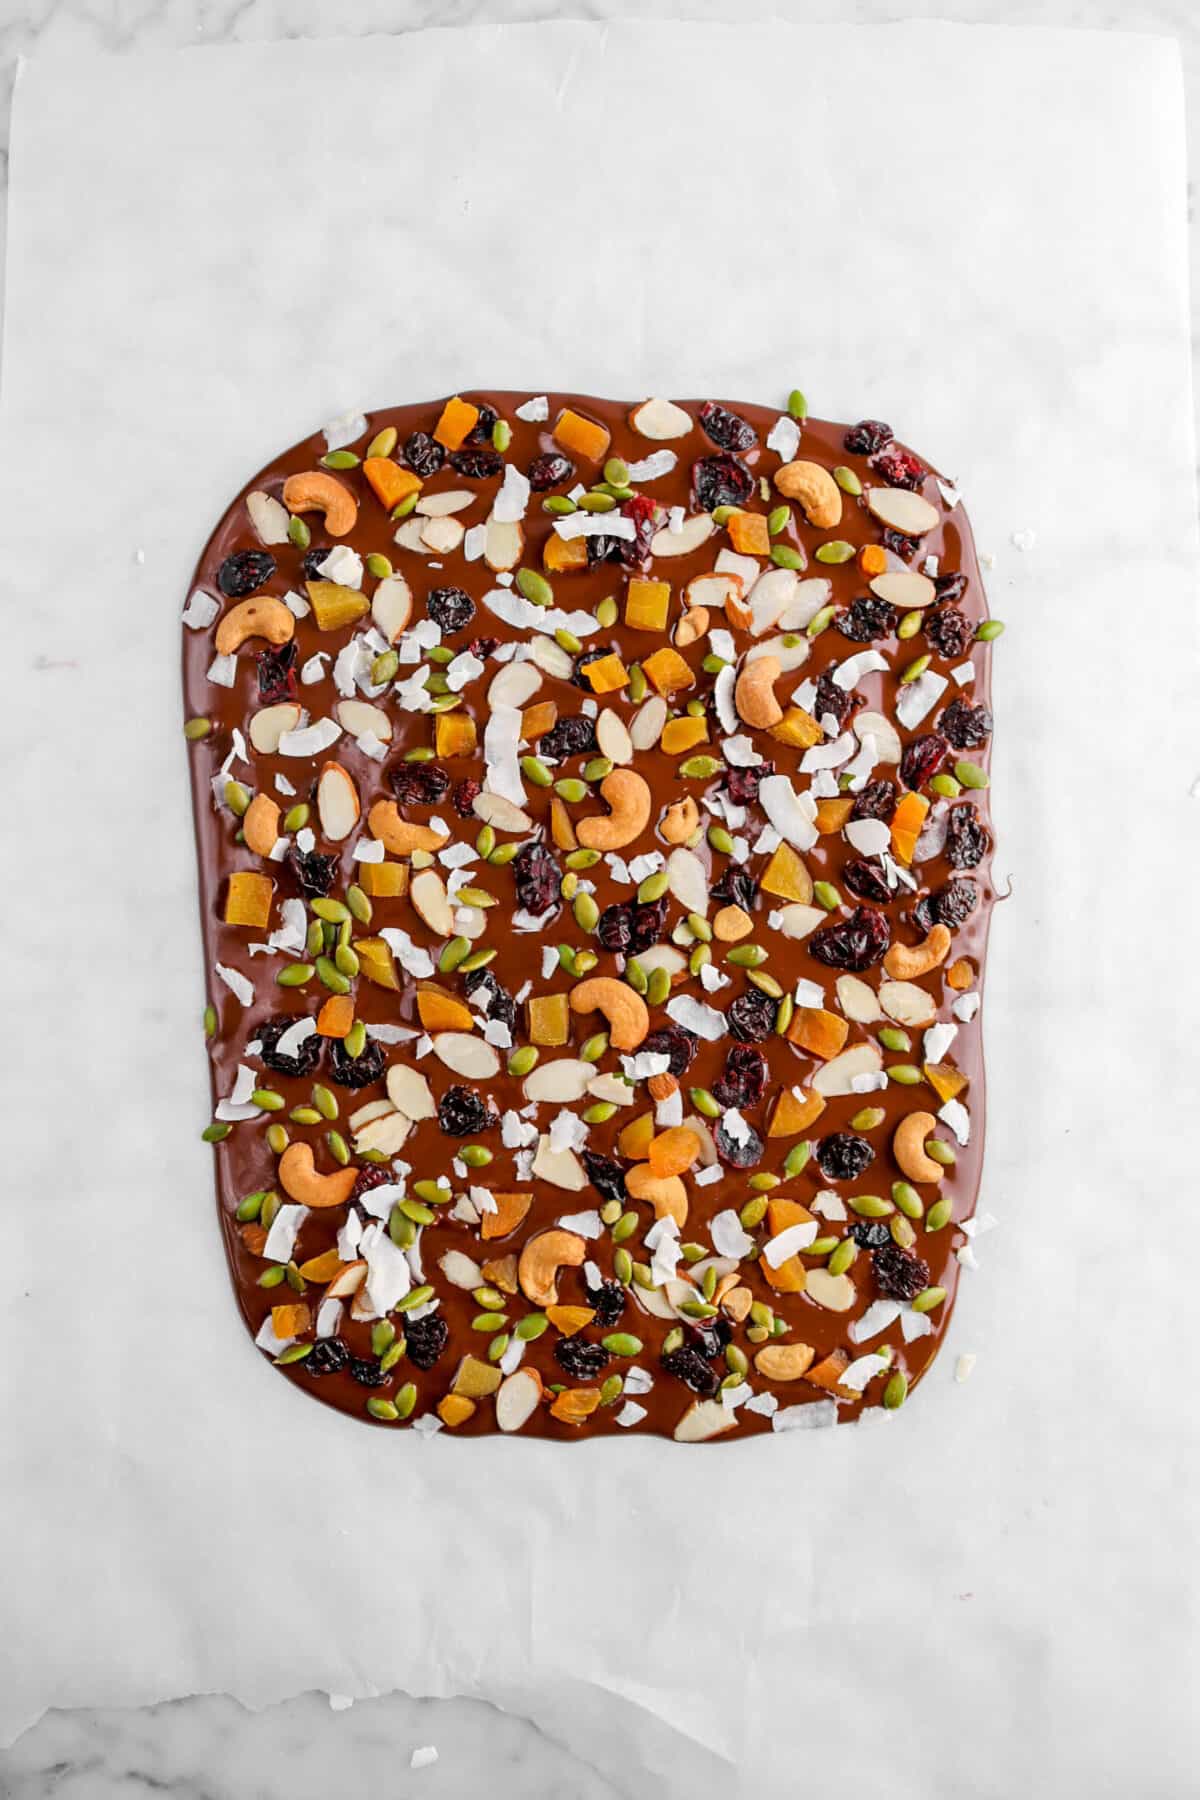
Pour the melted or tempered chocolate out onto parchment paper. Spread slightly with an offset spatula.
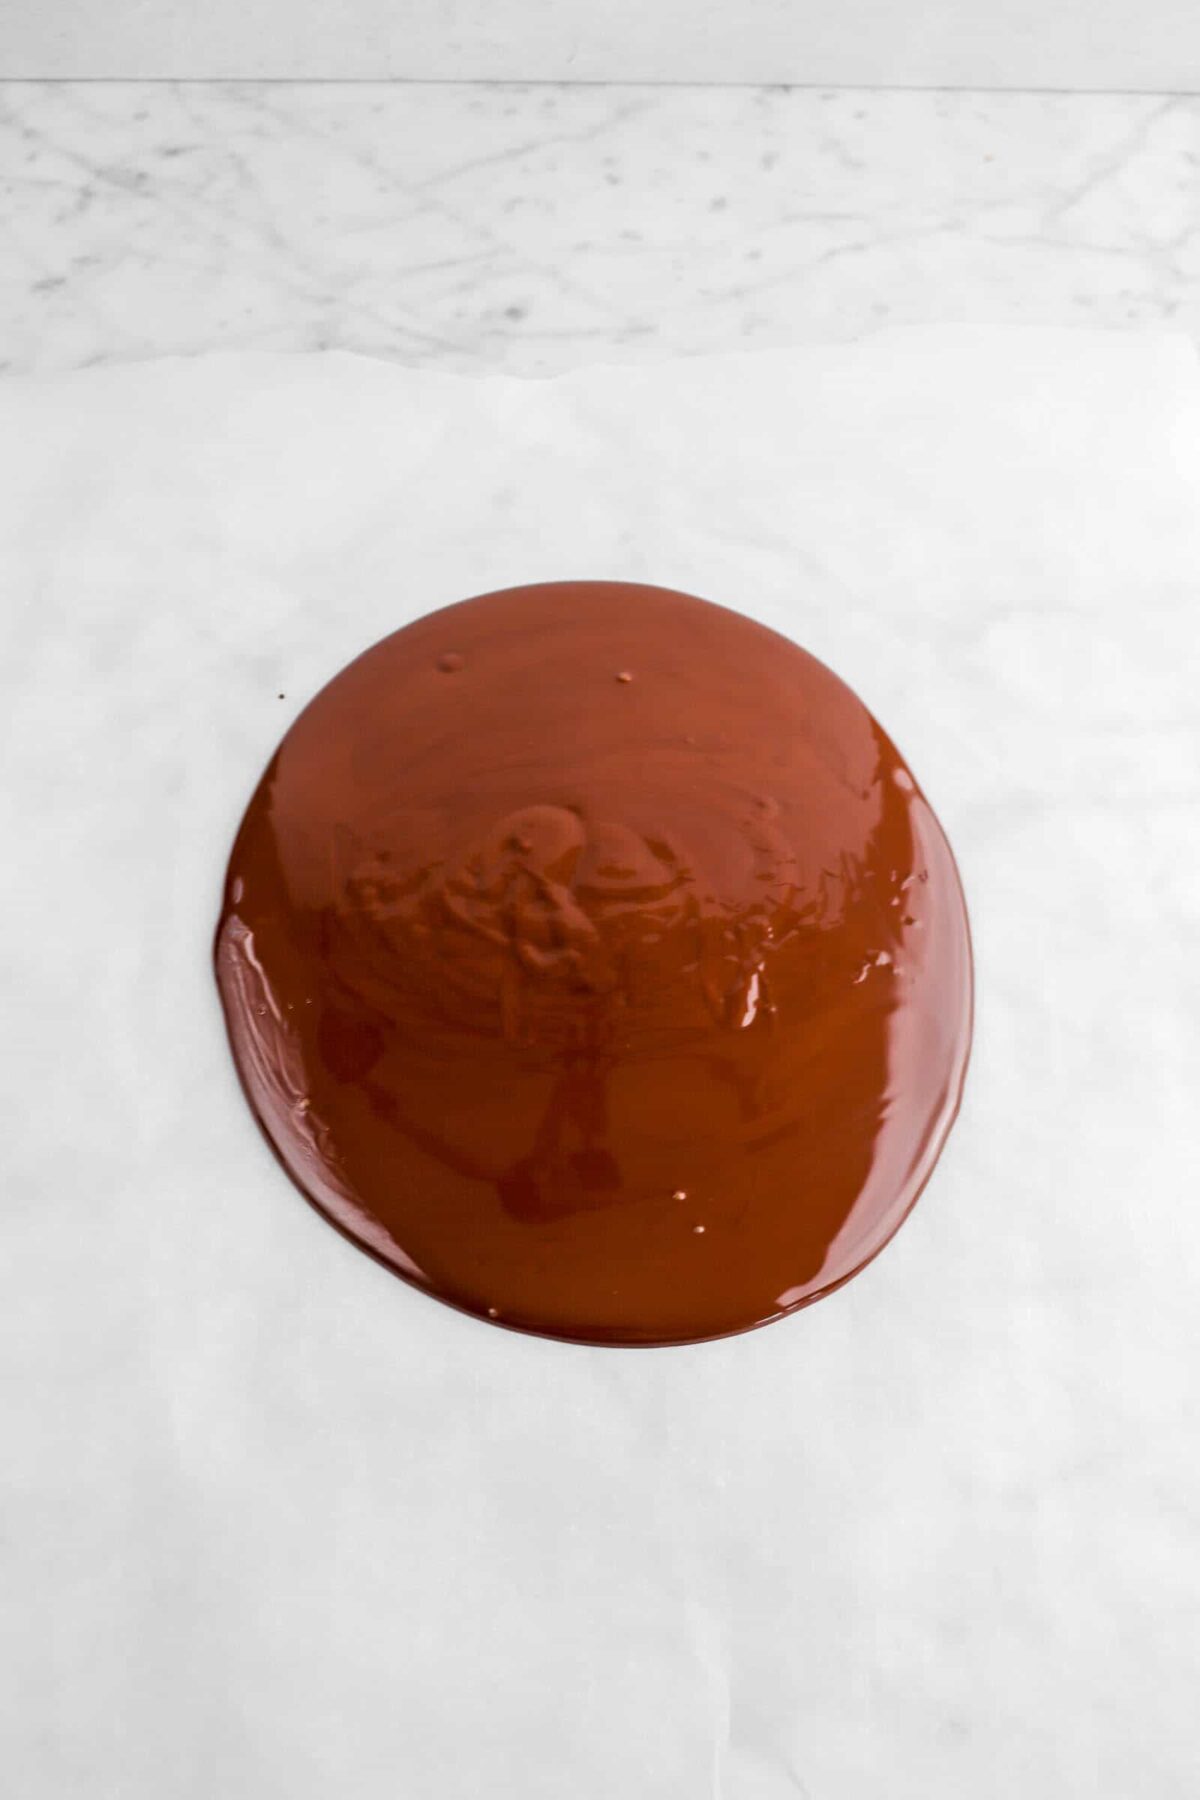
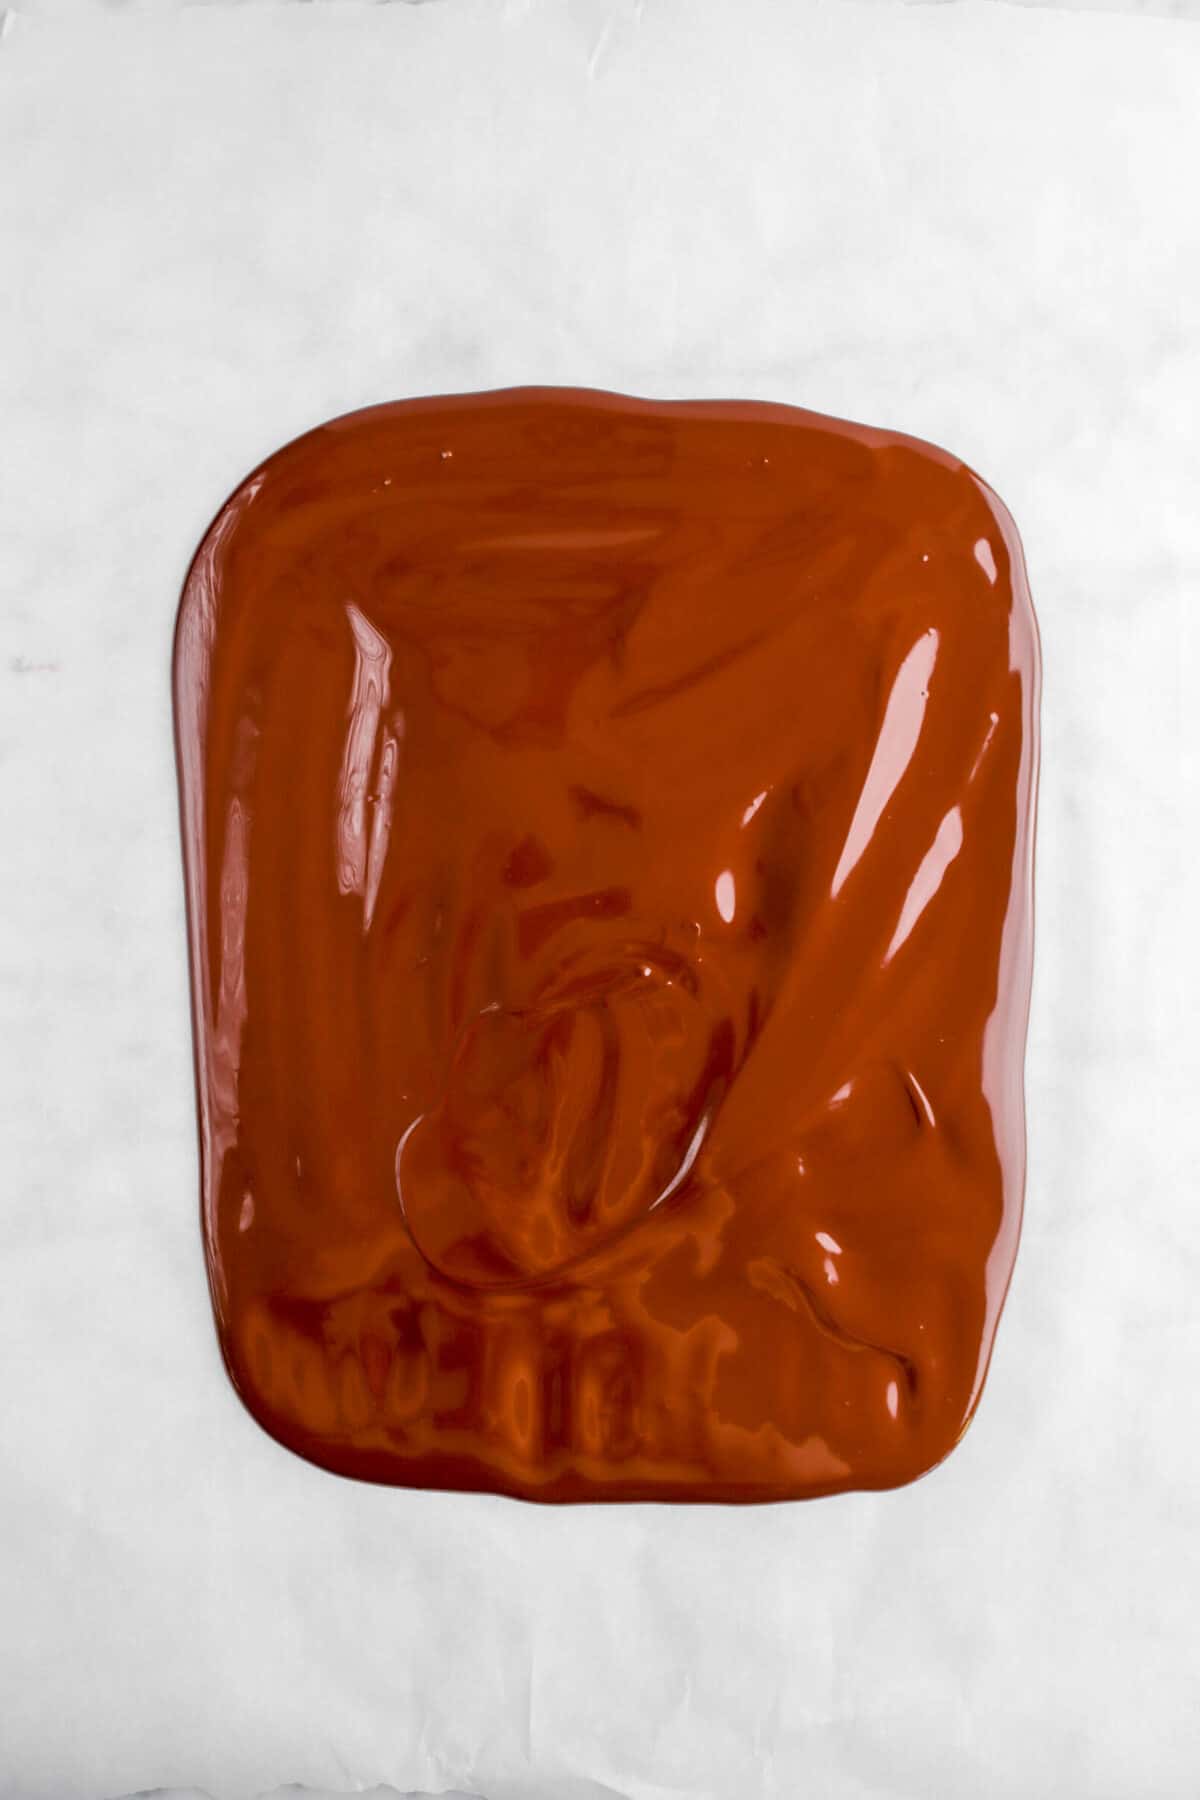
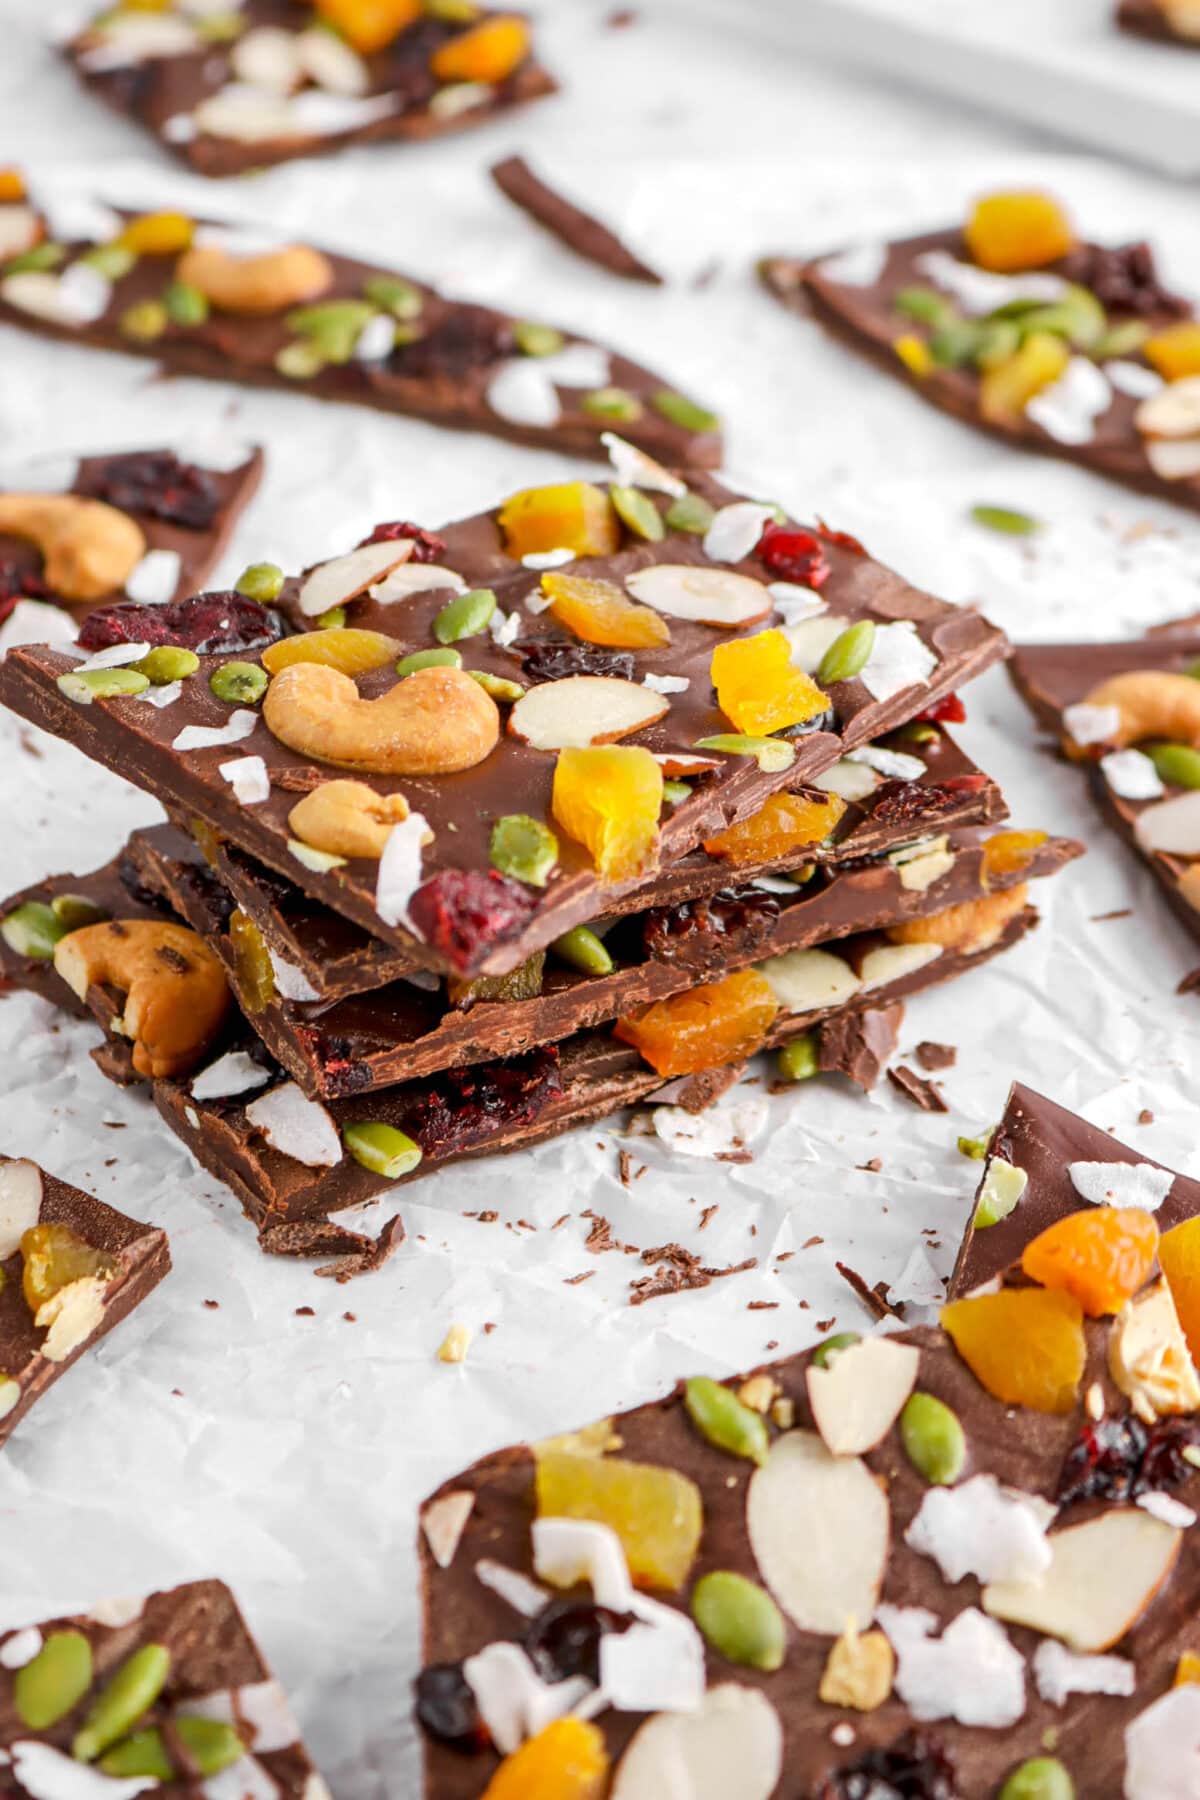
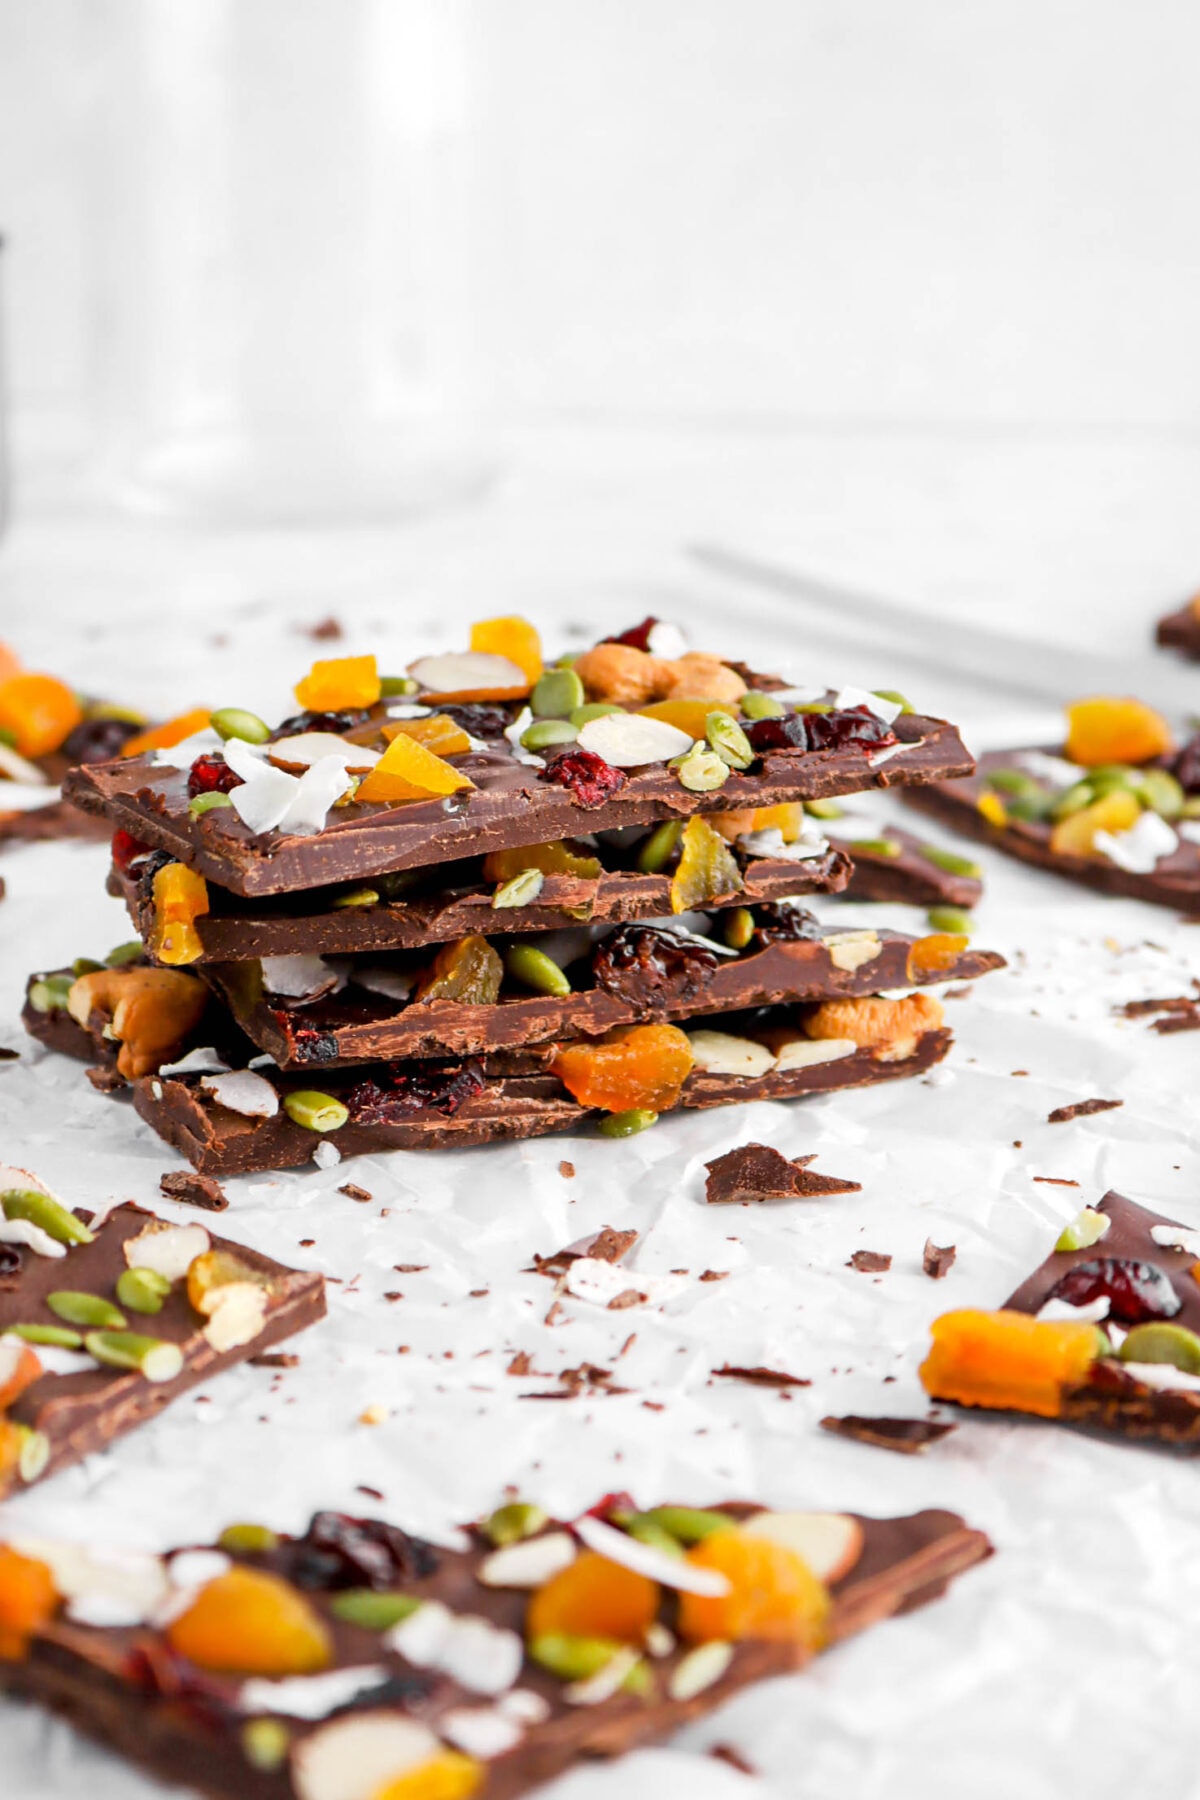
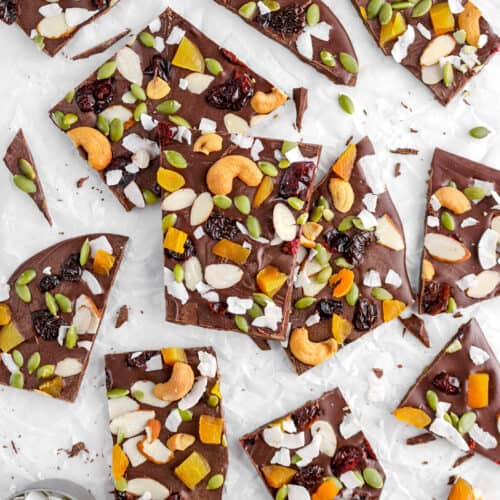
Sprinkle the dried fruits and nuts evenly across the top of the chocolate. Allow time to set. Cut.

How To Temper Dark Chocolate
If you would like to temper your chocolate rather than melt it, we’ve got you covered. In three simple steps, you can temper chocolate perfectly every time!
- Place the dark chocolate in a heatproof glass bowl and place over a pot of simmering water. Stir until the chocolate melts and temperature is around 124℉/51℃, but no higher than 130℉/54℃.
- Remove from heat and cool, stirring continually, to between 82℉ and 84℉/28℃ and 29℃.
- Place back over warm water and raise temperature to between 88℉ and 90℉/31℃ and 32℃. Hold at this temperature.
What Kind of Chocolate Should I Use?
For this recipe, you need to use a high quality chocolate. Be sure that you do not use candy melts or lower quality chocolate chips. We used a bittersweet chocolate (60%), but you can also use a semi-sweet (about 50%) or a dark (about 72%). If you are tempering the chocolate, do not use milk or white. If you do, the temperatures will not be accurate.
Should I Use Tempered or Melted Chocolate?
With this recipe, you can actually use either! Though, I will admit, it’s much better with tempered chocolate. With tempered chocolate, you will have a much harder set, which results in a much snappier/crispier chocolate. It’s also more resistant to heat! So, it’s less likely to melt in your hands. The downside to tempered chocolate is that it is more difficult to do than just melting chocolate.
With just melted chocolate, the only real upside to it is how simple it is! It doesn’t have the same qualities as tempered and it will melt in your hand. So, it’s up to you, but tempered is really the best way to go with this recipe.
How To Store
Once the chocolate is set, you can actually store it as one big piece or after it’s been cut/broken! Either way, the best way to store this chocolate bark is in am airtight container or in a zip-top bag and kept at room temperature for 7-8 days.
When you make this Dark Chocolate Dried Fruit and Nut Bark, leave a comment down below! We love hearing from you and answering any questions you might have! Also, be sure to tag us on social media and hashtag it #BakersTable.
Dark Chocolate Dried Fruit and Nut Bark
Ingredients
- 2 cups dark or semi-sweet chocolate
- ⅛ cup dried cranberries
- ⅛ cup dried cherries
- ⅛ cup dried chopped apricots
- ⅛ cup coconut flakes
- ⅛ cup sliced almonds
- ⅛ cup sea salted cashews
- ⅛ cup roasted and salted pumpkin seeds
Instructions
- Temper or melt chocolate.
- Pour out onto parchment paper.
- Spread into 12-inch x 9-inch rectangle.
- Sprinkle top with fruits and nuts.
- Allow to set.
- Cut or break into pieces.
Notes + Tips!
- Add-Ins: Any combinations of fruits or nut can be used. You can use raw or roasted nuts, as well as salted or unsalted.
- Chocolate: Use a good quality chocolate. Semi sweet or dark chocolate can be used in place of the bittersweet. If using milk chocolate, the tempering temperatures will not be accurate.
-
Tools You May Need (affiliate links)
– Still Hungry? –
Here are a few recipes may like!


