Mummy Brownies
This post may contain affiliate links, please visit our privacy policy for details.
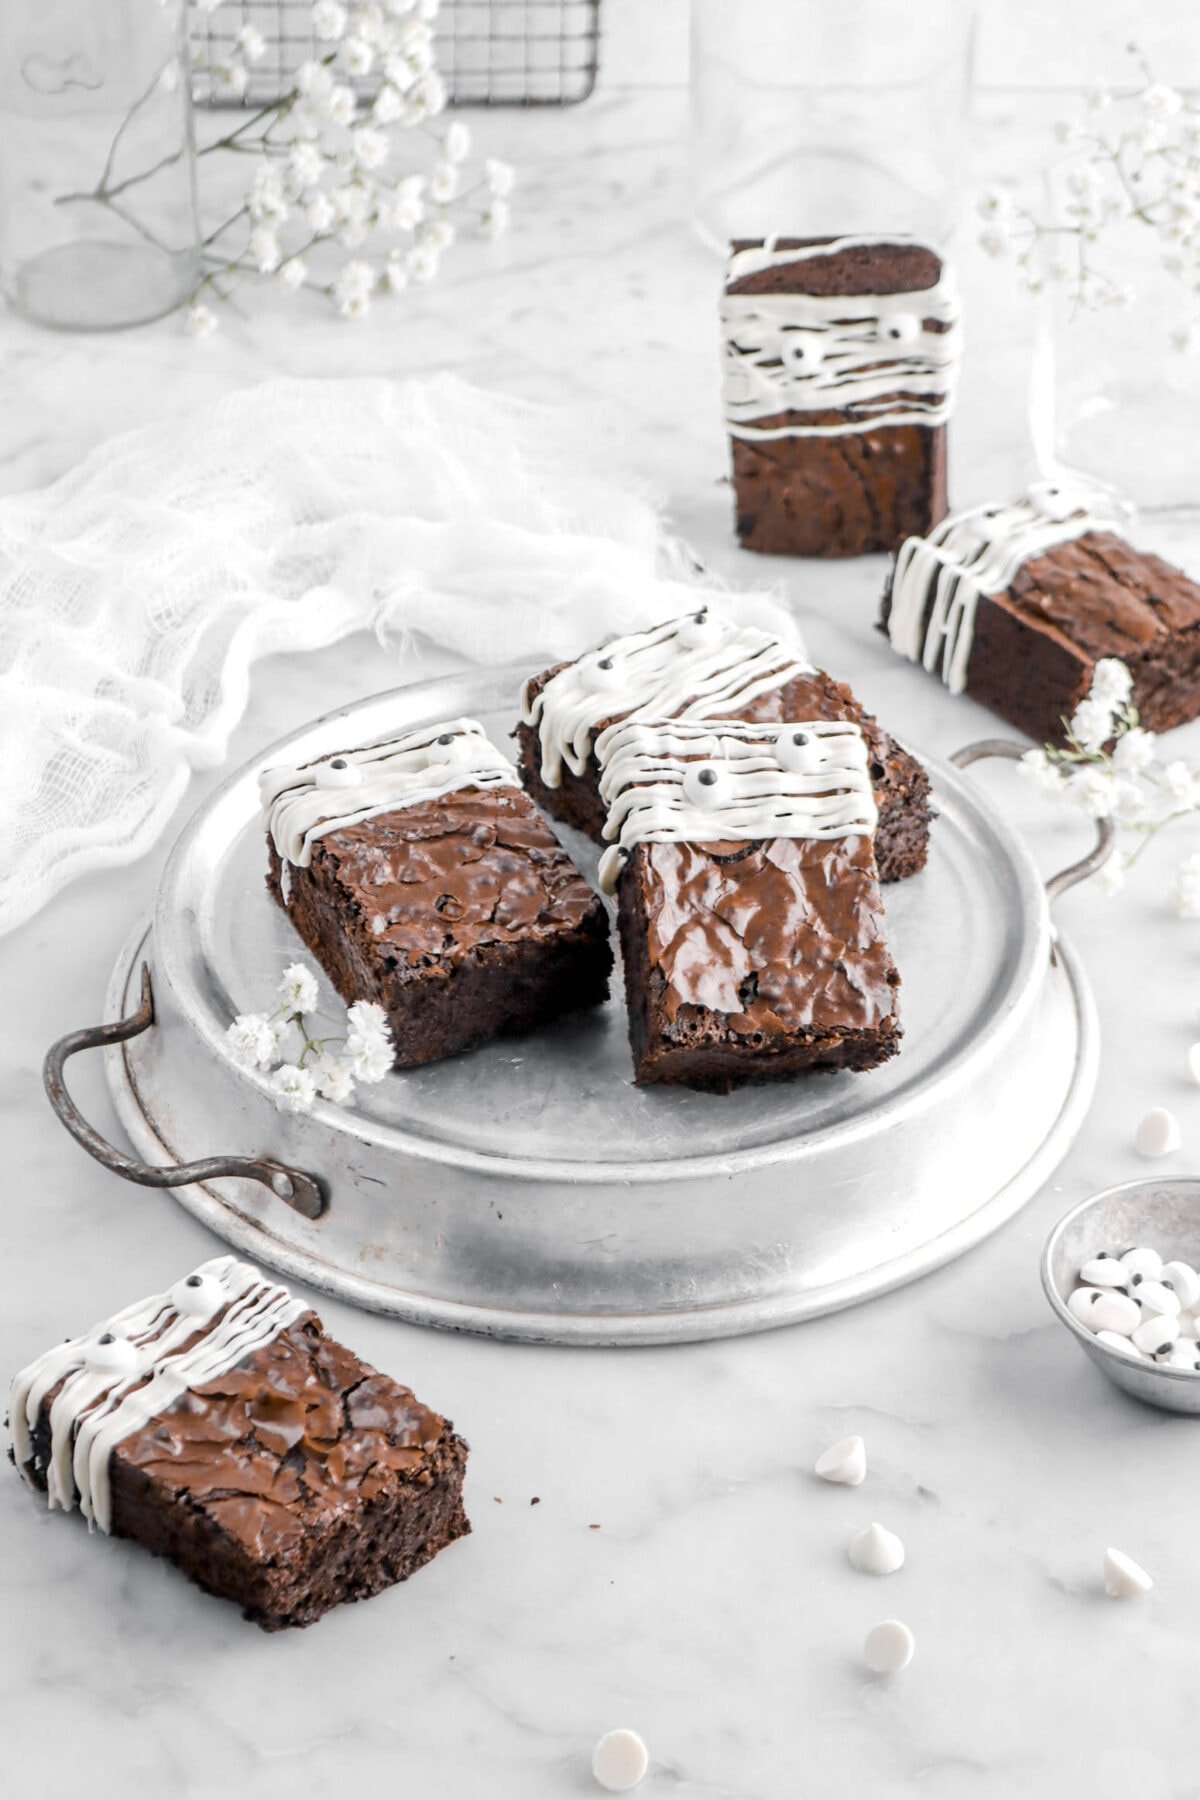
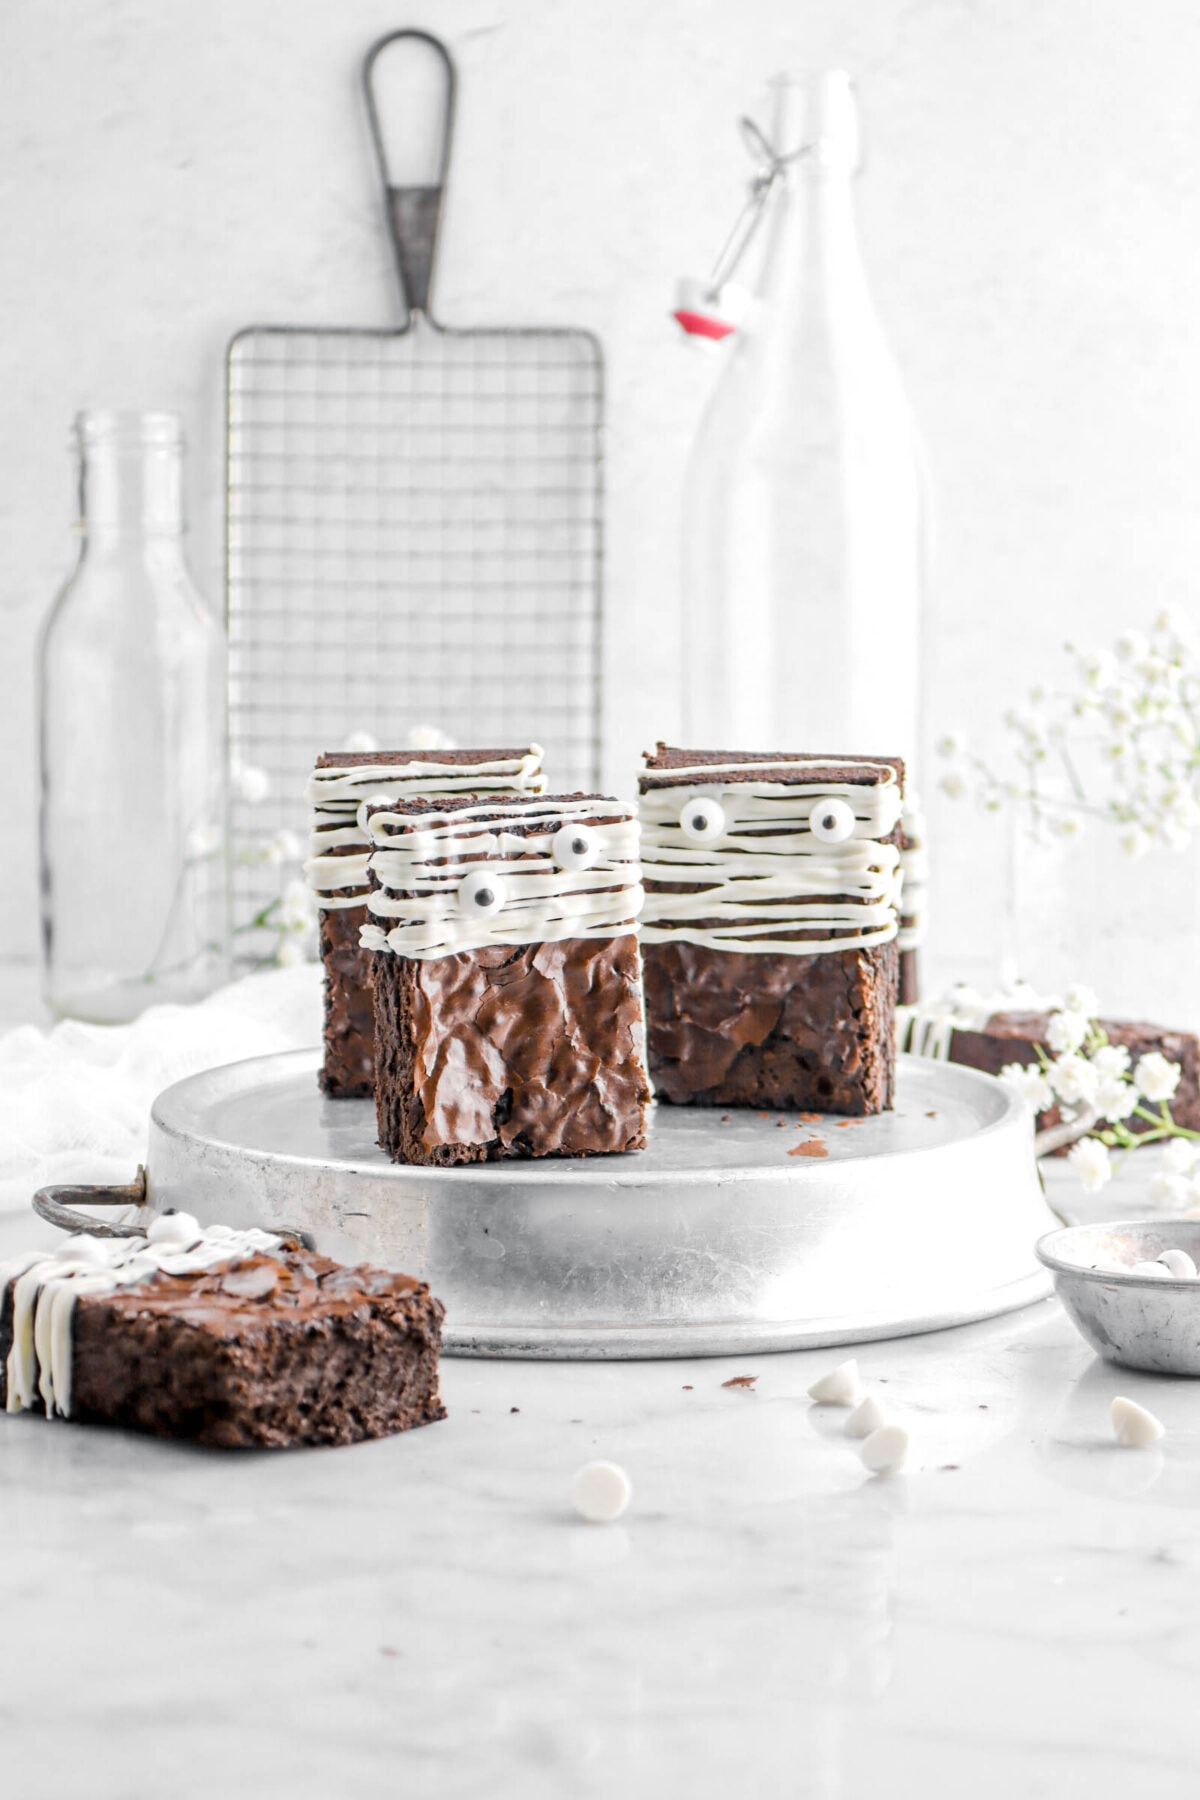
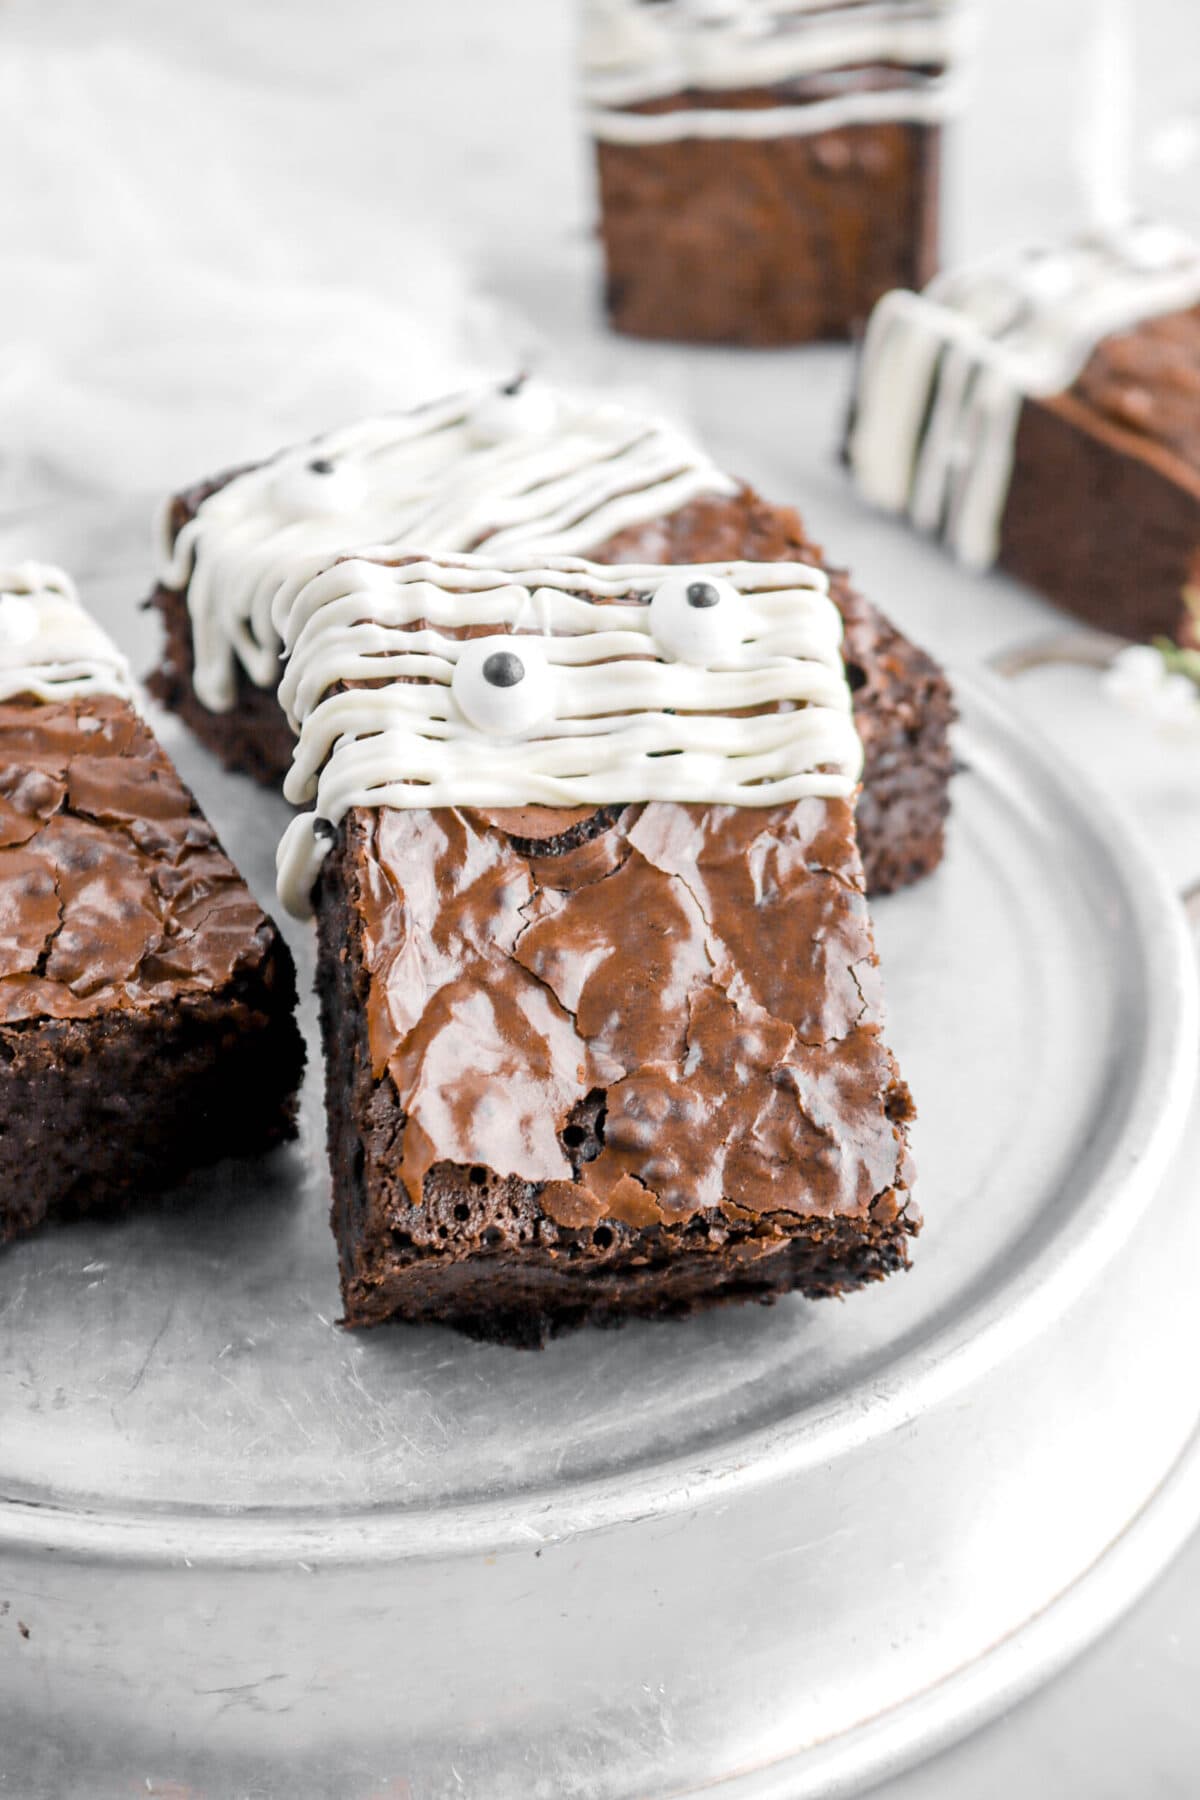
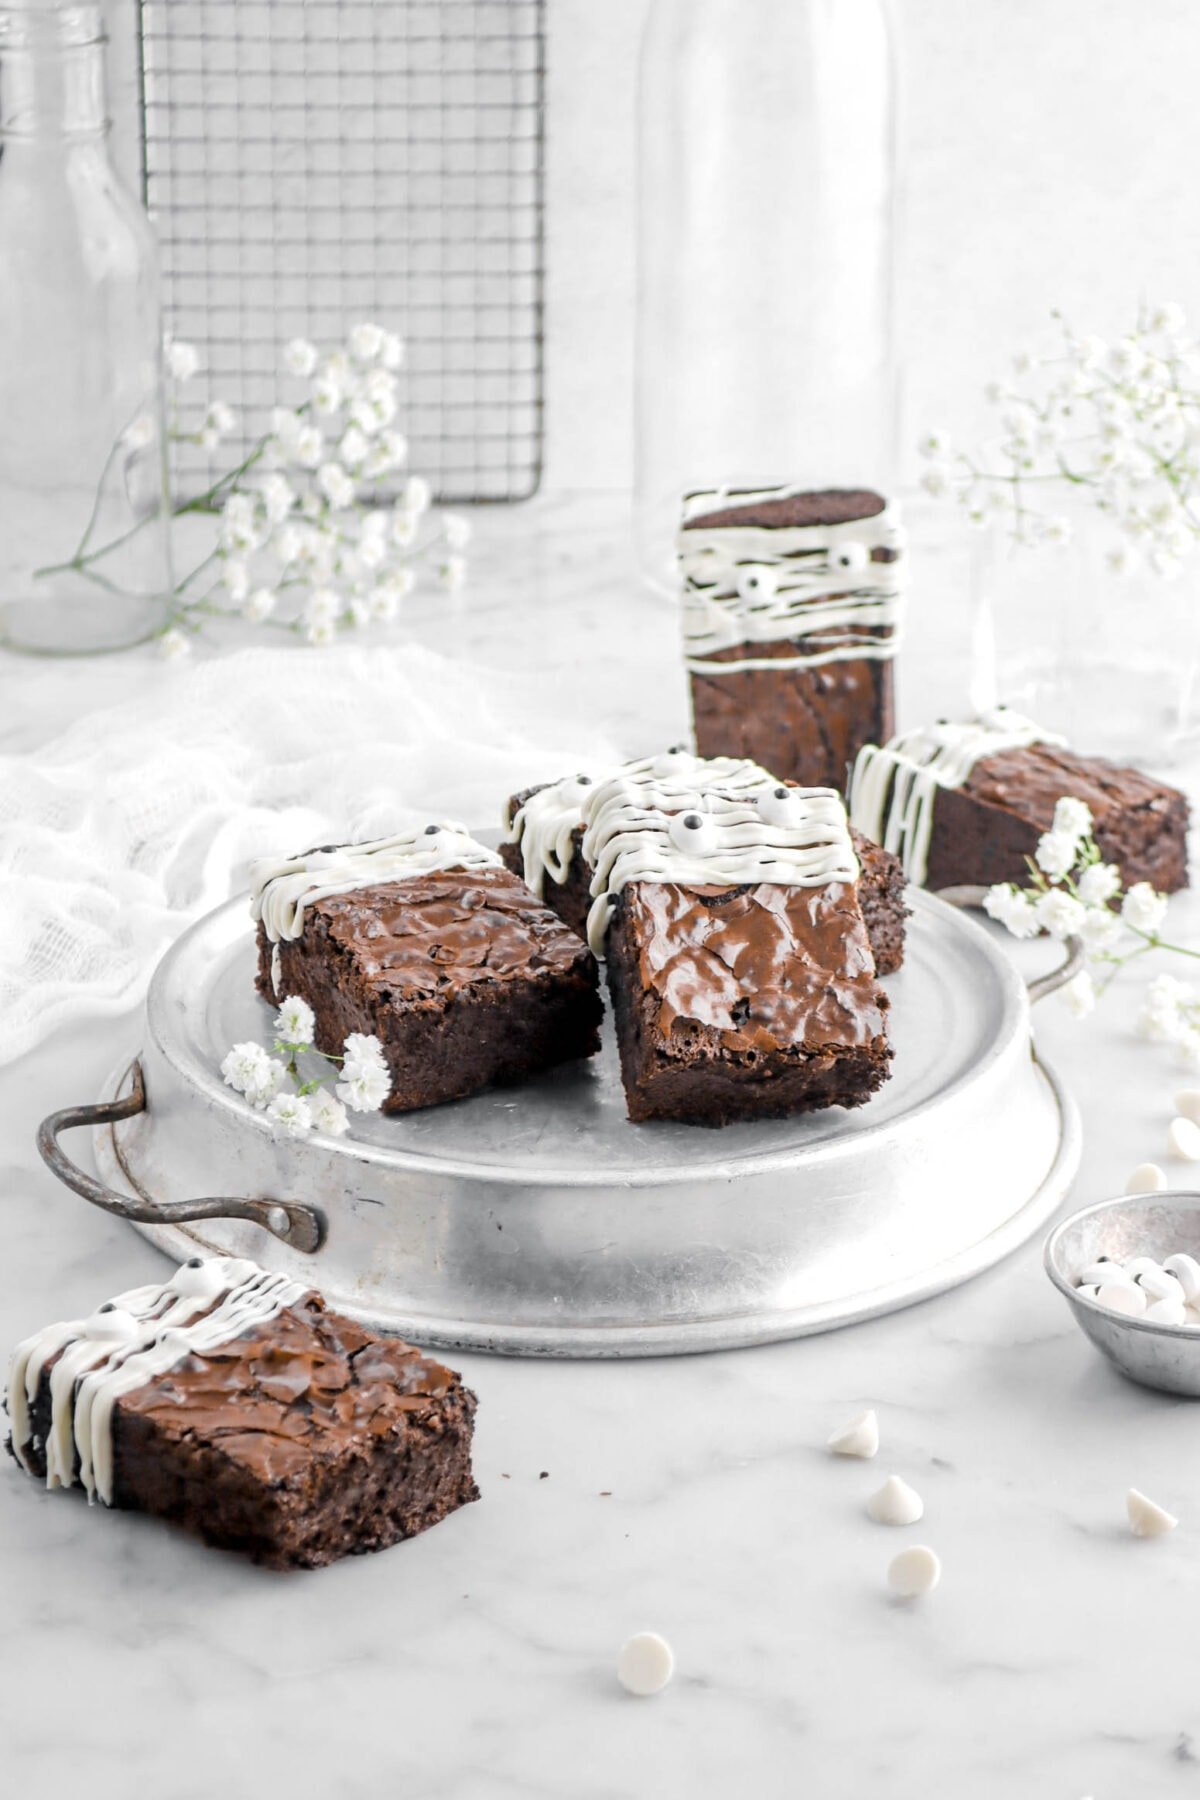
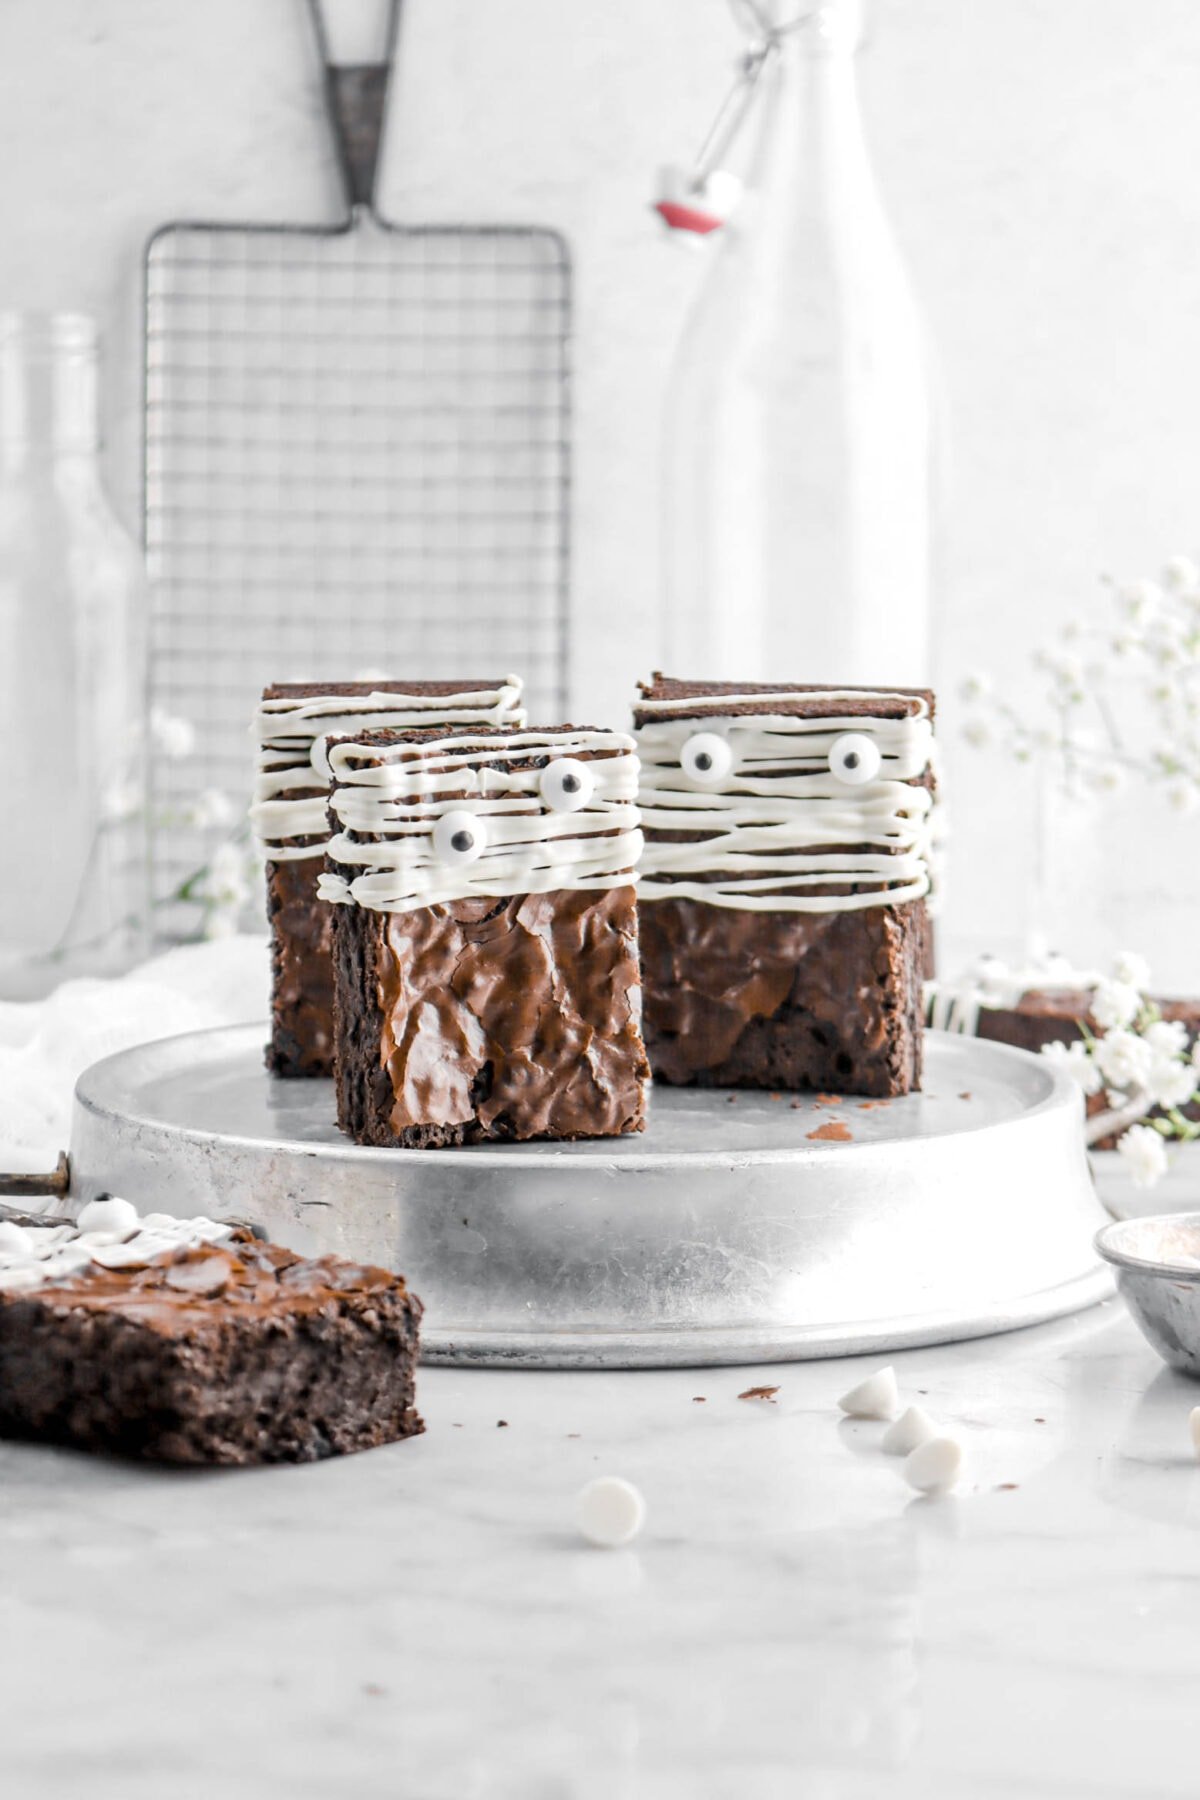
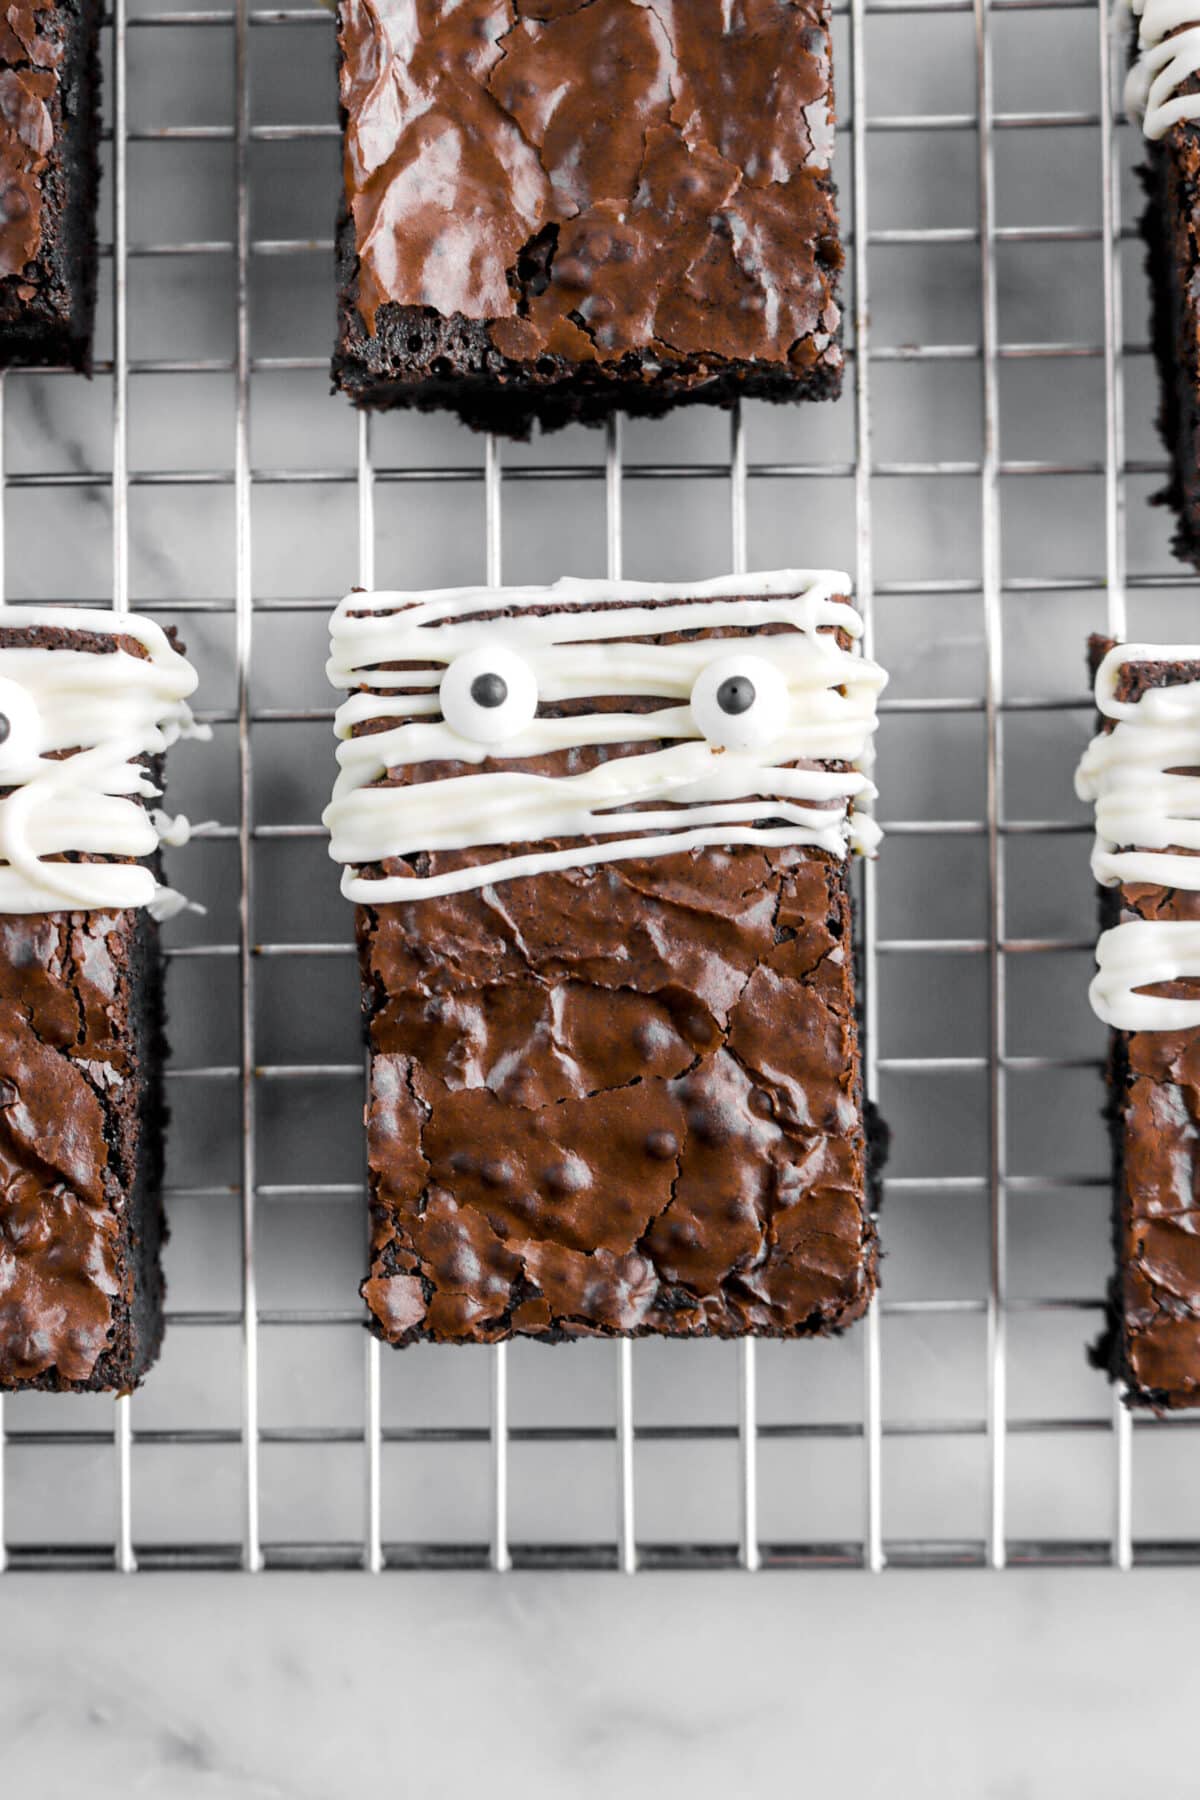
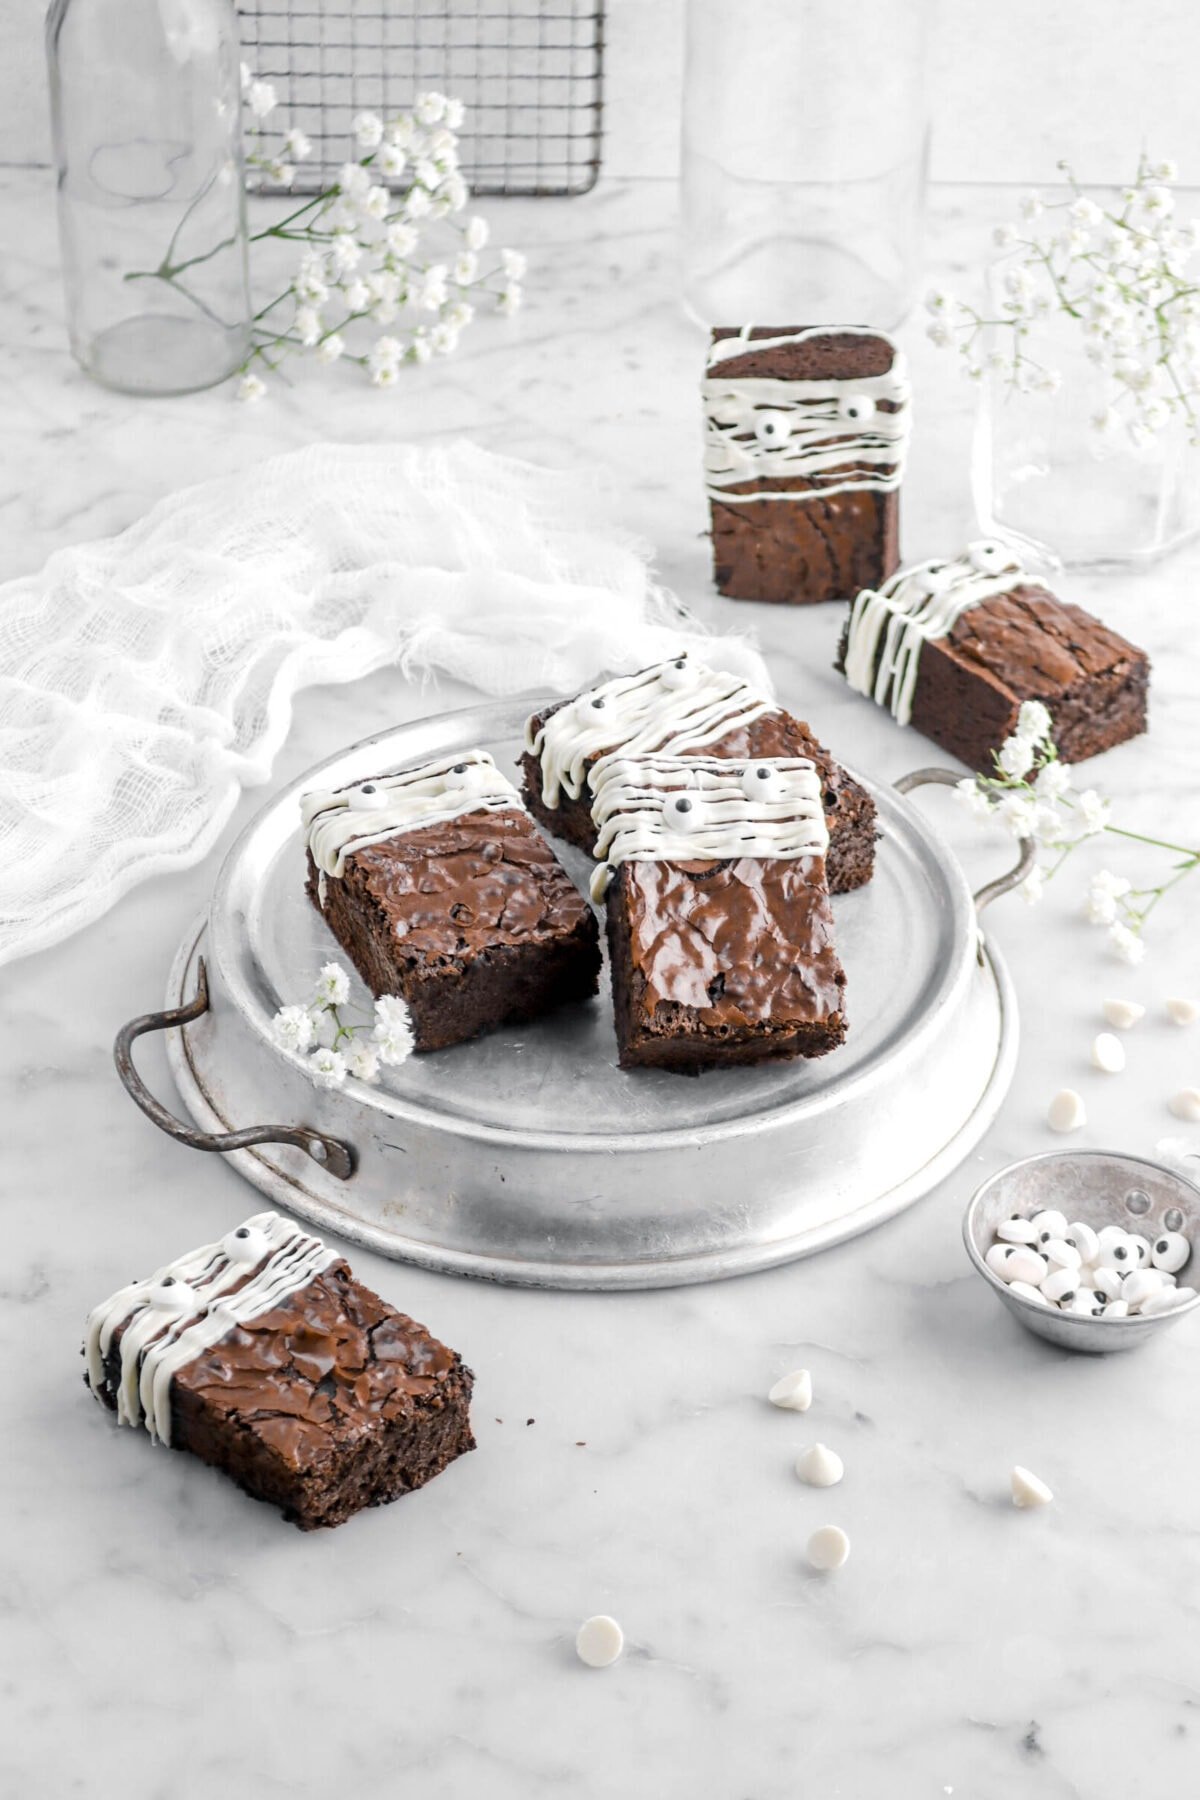
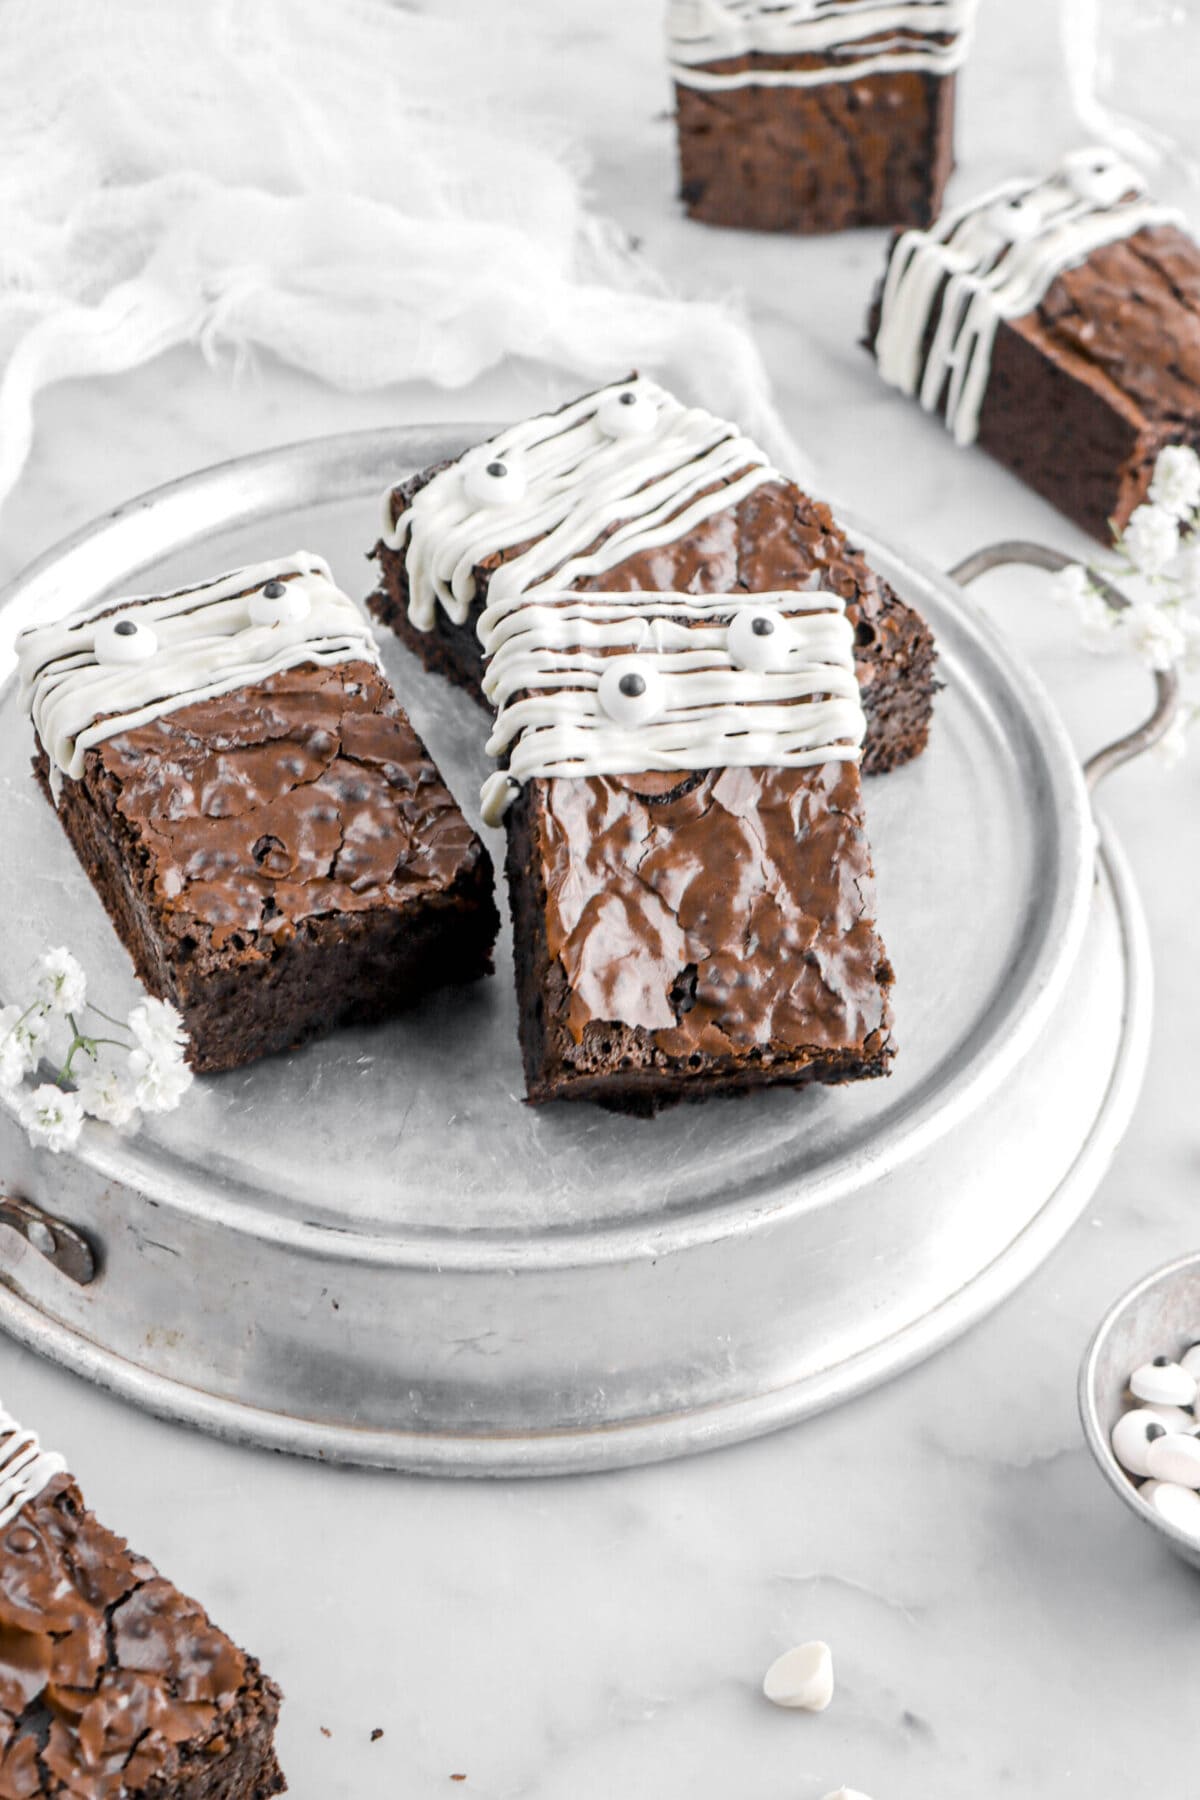
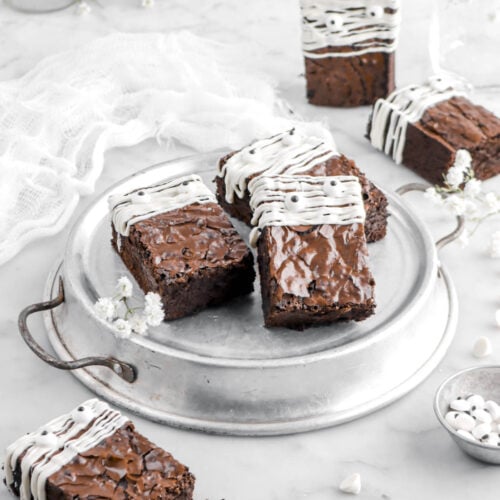
Extra spooky, but still super cute, and oh so fudge-y Mummy Brownies. The perfect October/Halloween night treat! A simple crinkle top brownie made with melted dark chocolate and black cocoa powder to give it the best flavor, while also being eerily dark and rich. After baking, the brownies are cut and drizzled with melted white chocolate and decorated with two candy eyes! These spooky brownies are sure to even make the undead heads turn! Such a simple bake, but so delicious and perfect for ghoulish Hallows Eve night!
About The Recipe
Happy Friday, everyone!
It’s officially Halloween weekend and I am SO excited for this year. Mostly because we’re sharing our first-ever Halloween themed recipe on the blog! It might sound a little dorky, but my mom and I really love Halloween. We have always been the family to throw big parties with friends and family, go all out with decorations, and give extra candy to the trick-or-treaters.
Though, with our big parties, we have always made Halloween themed treats. It’s always one of our favorite things to do! But, since starting the blog, we haven’t really had the time to do these kinds of things.
So, we thought this year, we would finally make some time and have some fun!
These mummy brownies were really kind of a last-minute idea. Brownies were always a go-to for us during Halloween (oh, and pecan pie!). I mean, who doesn’t love a good brownie, you know? Adults and kids alike! They’re just irresistible.
It was just figuring out how to really make them spooky, but still cute!
We had a couple of different ideas, but the favorite amongst everyone was definitely mummy’s! My mom and I already had some candy eyes and, just to be honest, we always have white chocolate. The idea just seemed to come together really quickly and REALLY well!
Making the brownies are a breeze, then decorating is actually even easier.
All you need is to melt so white chocolate, drizzle it over the tops of the cut brownies, then decorate with some candy eyes. It goes from a delicious brownie to a spookily delicious brownie! There really is no better treat to bake for your Halloween activities this weekend.
What Are Mummy Brownies?
Mummy brownies are a dark chocolate crinkle top brownie that have been simply decorated to look like mummy’s for Halloween!
Reasons You Will Love These Mummy Brownies
- Crowd pleasing!
- Extra chocolate-y.
- Super simple to make.
- Easy to decorate.
- Fun for kids and adults alike!
Ingredients
(Full ingredient amounts and instructions can be found in the recipe card at the bottom of the post)
For The Brownies:
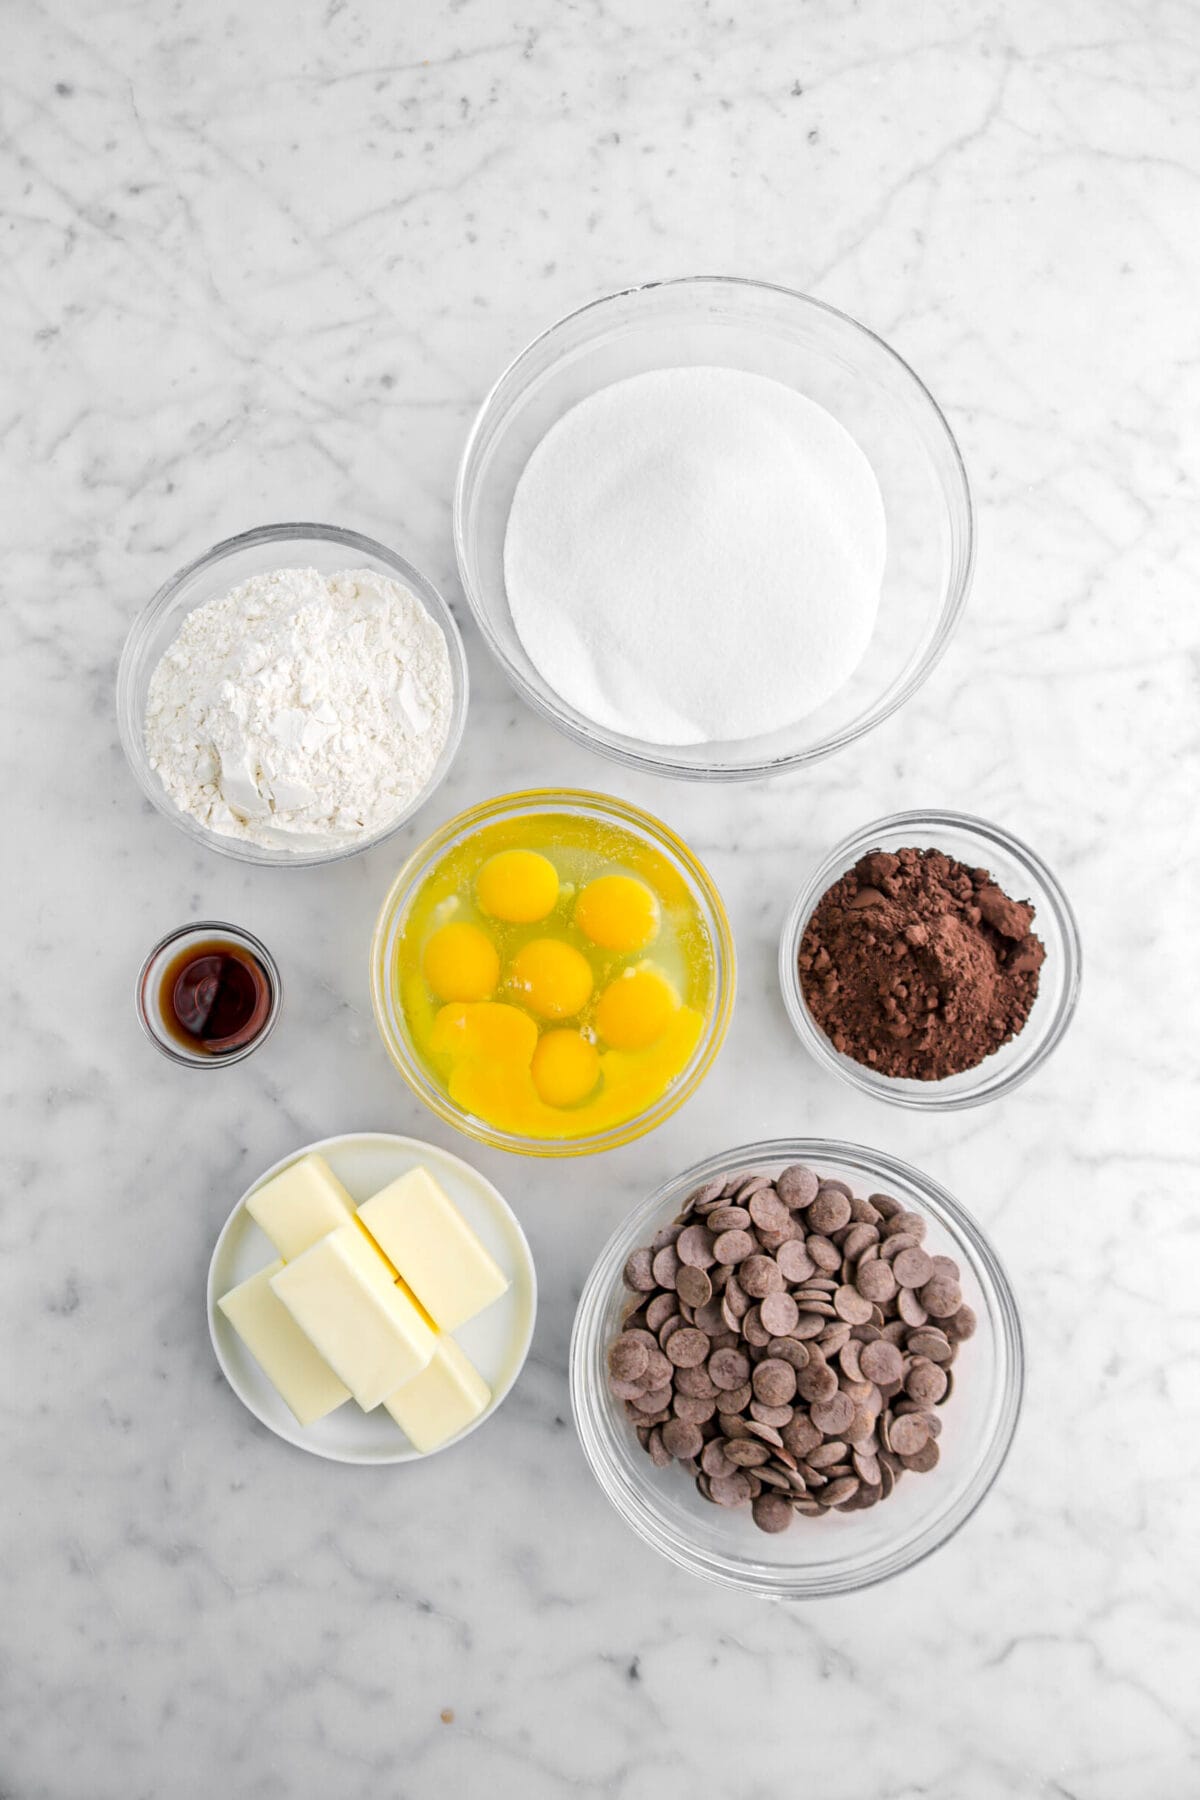
- Semi-Sweet Chocolate Chips
- Salted Butter
- Black Cocoa Powder
- Large Eggs
- Granulated Sugar
- All-Purpose Flour
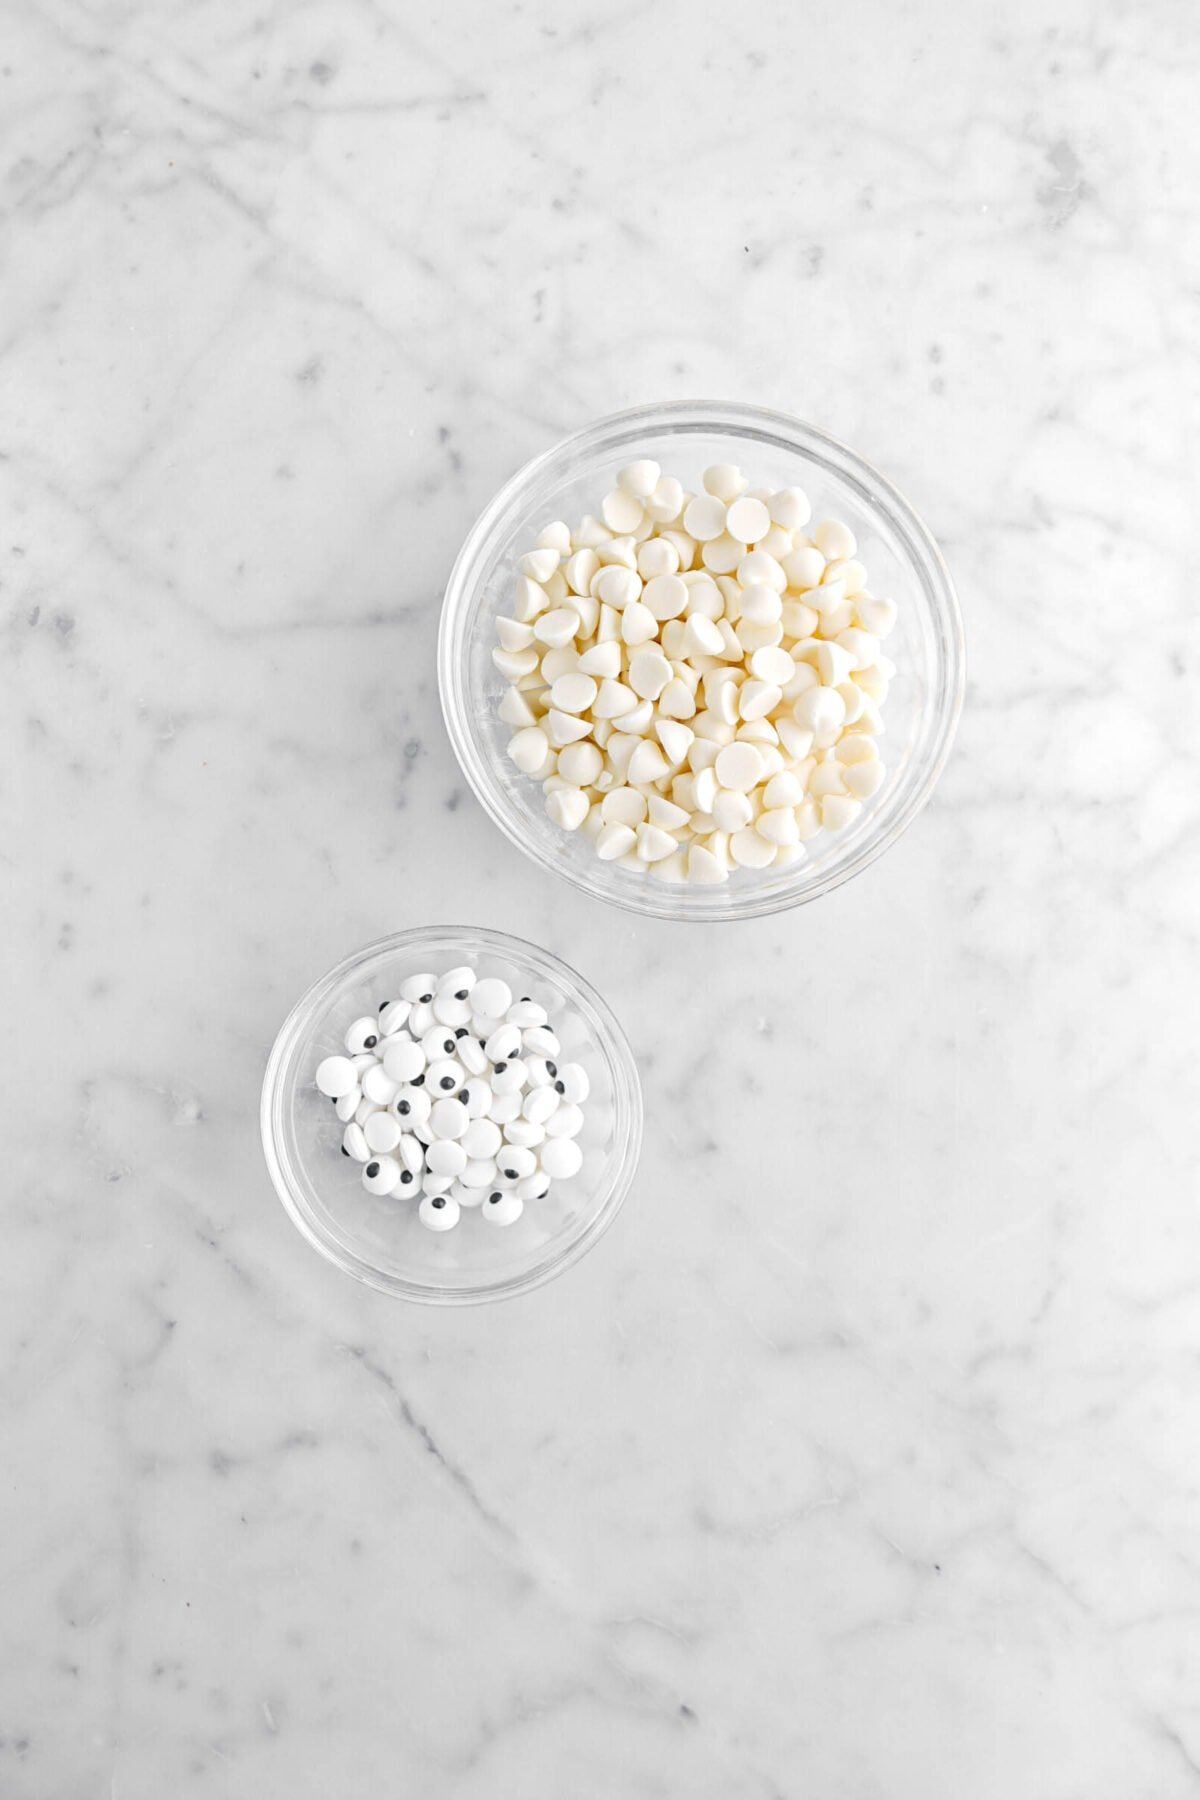
For The Decoration:
How To Make Mummy Brownies
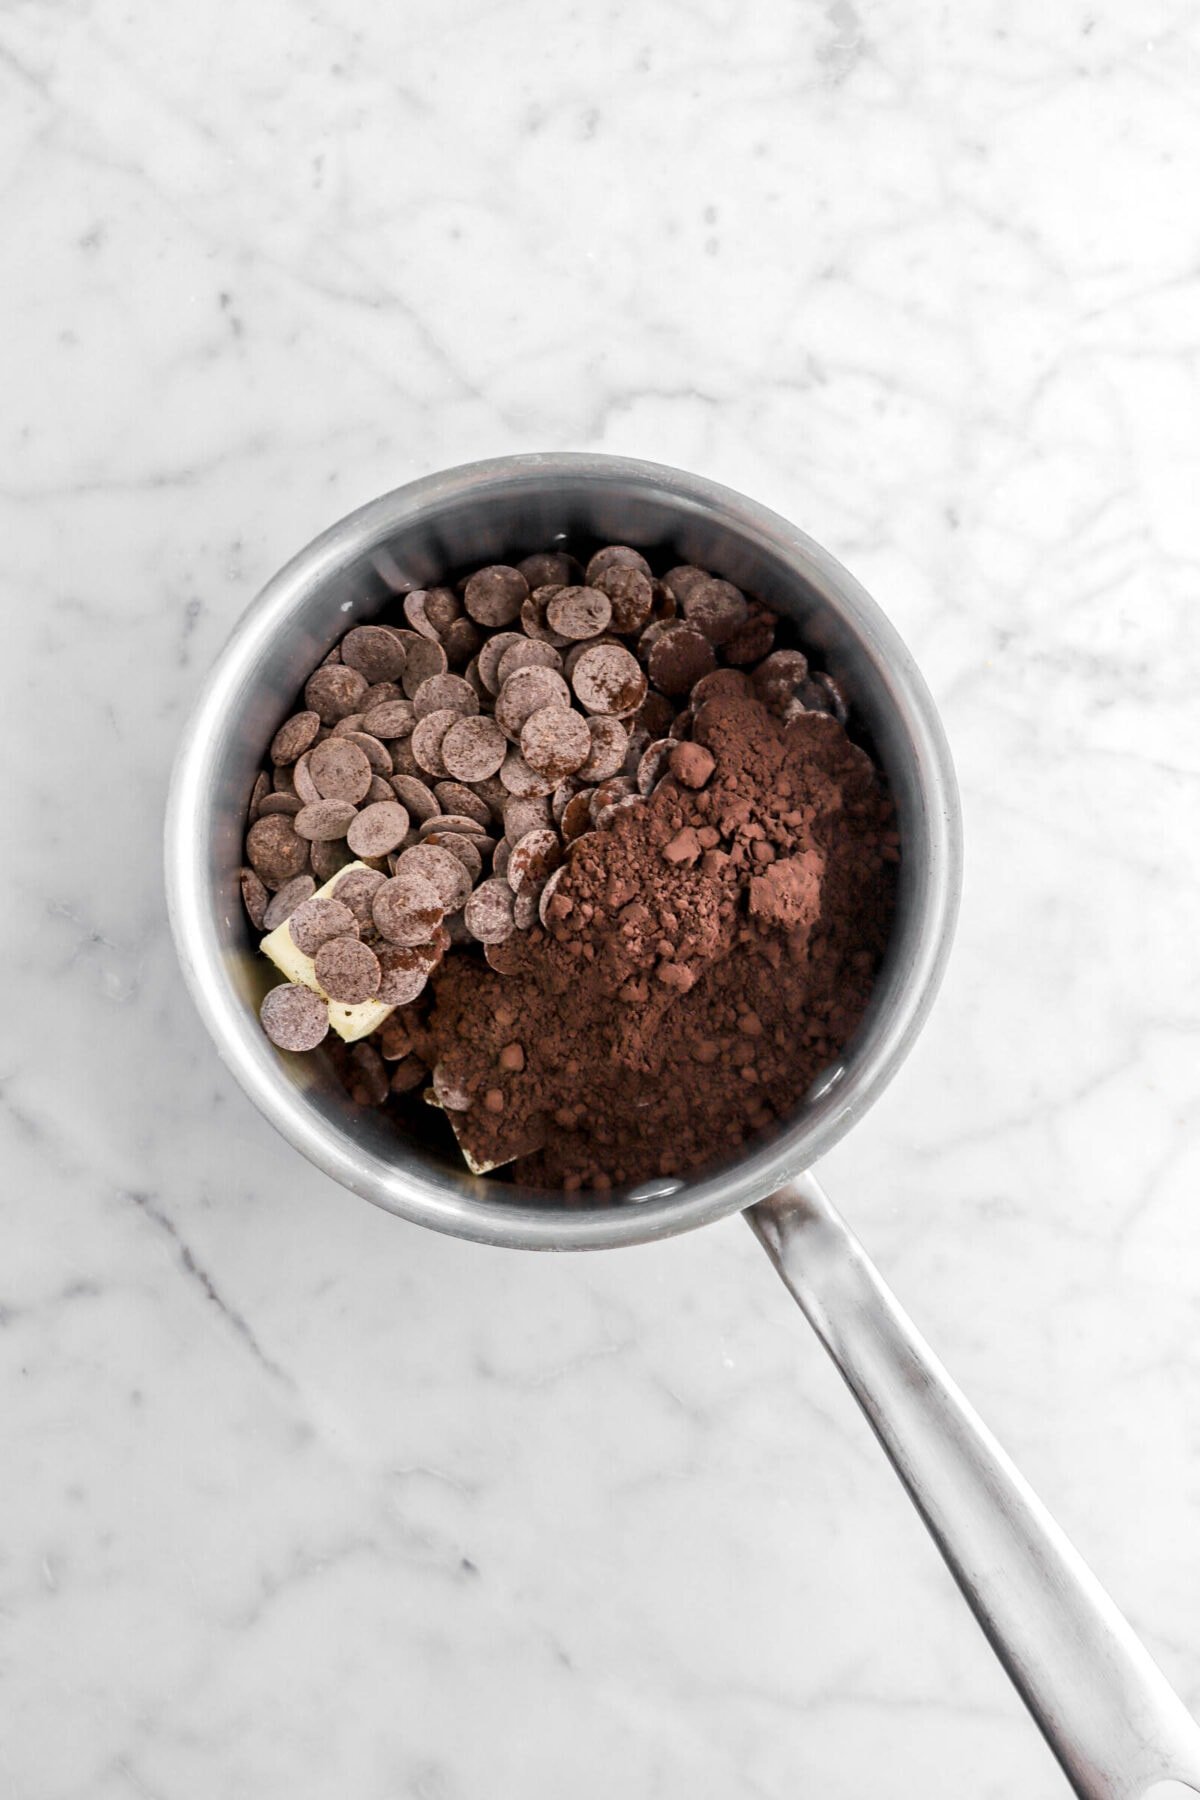
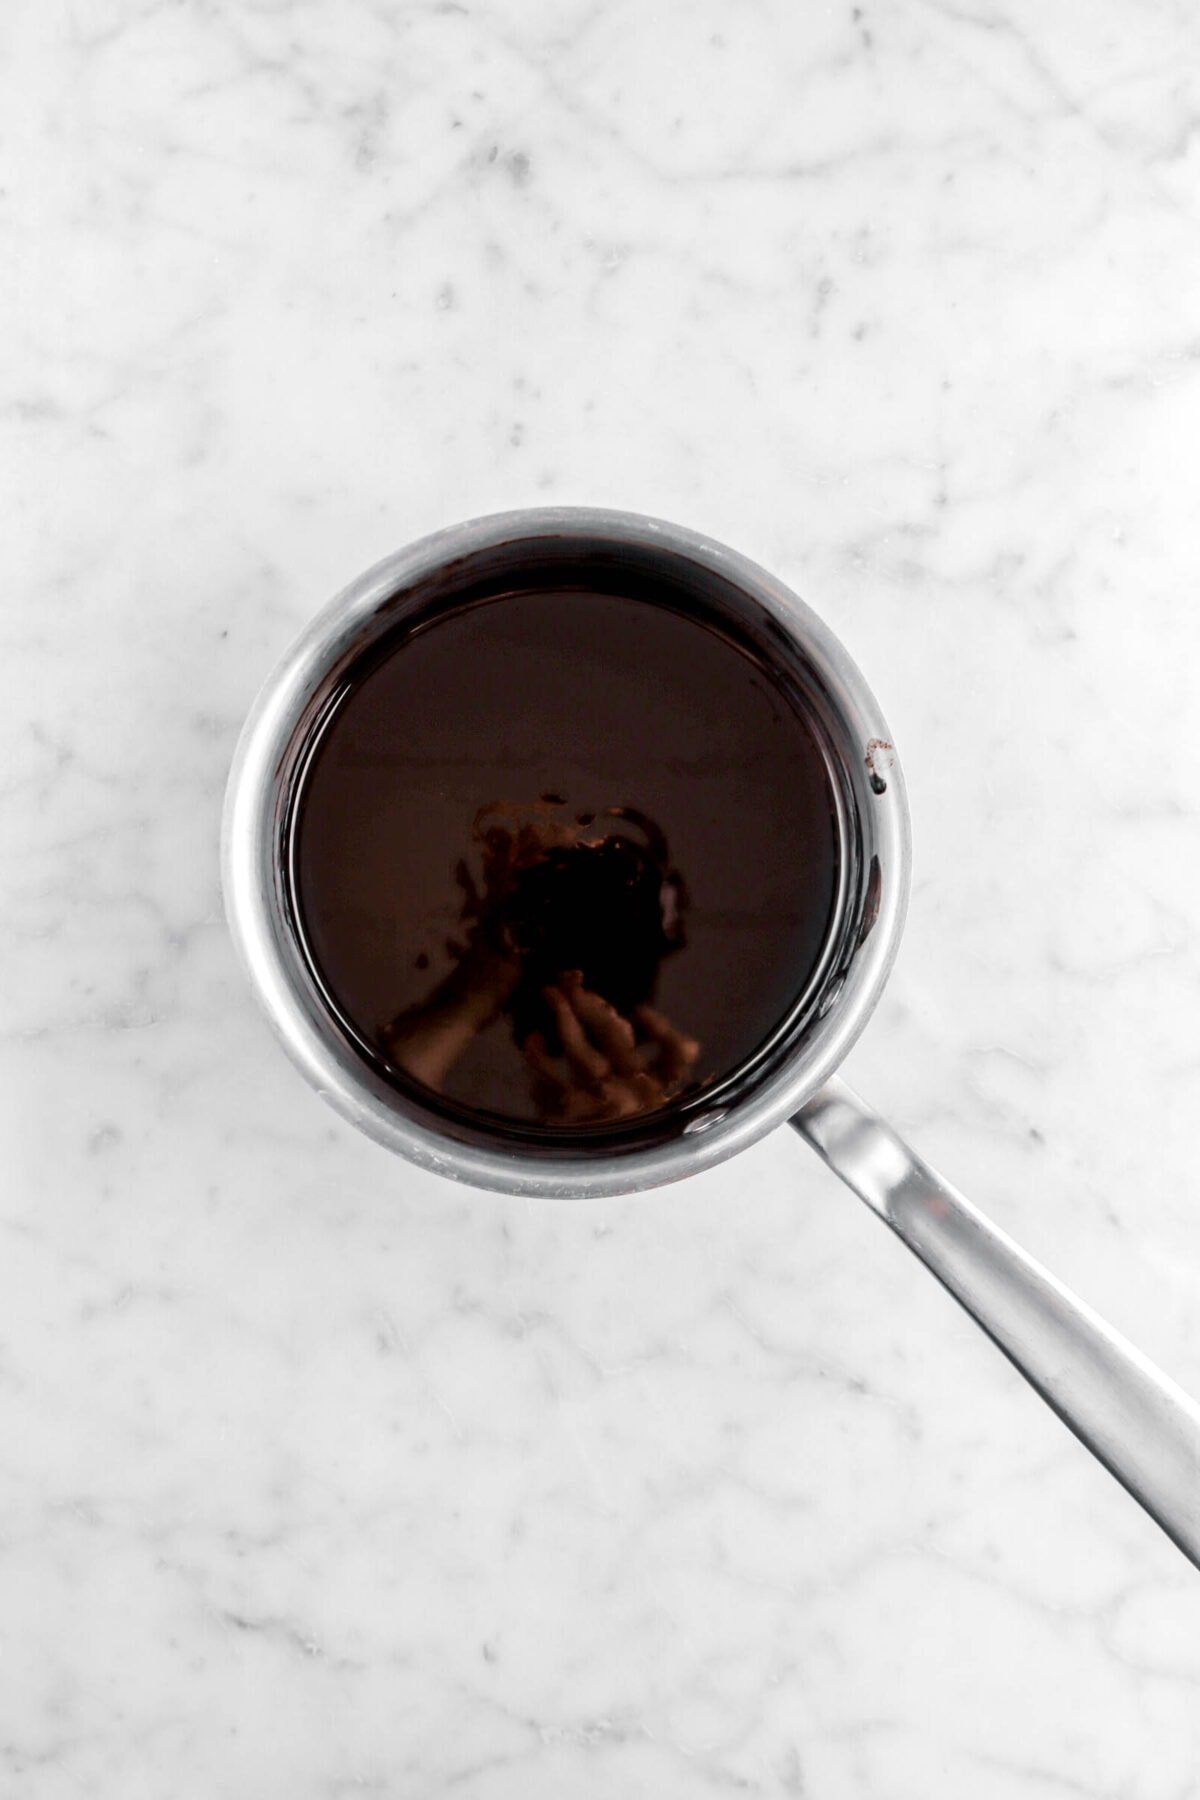
Step 1: Melt the chocolate
Combine chocolate pieces, cocoa, and butter in a medium saucepan. Heat and stir over medium low heat until melted and smooth. Set aside.
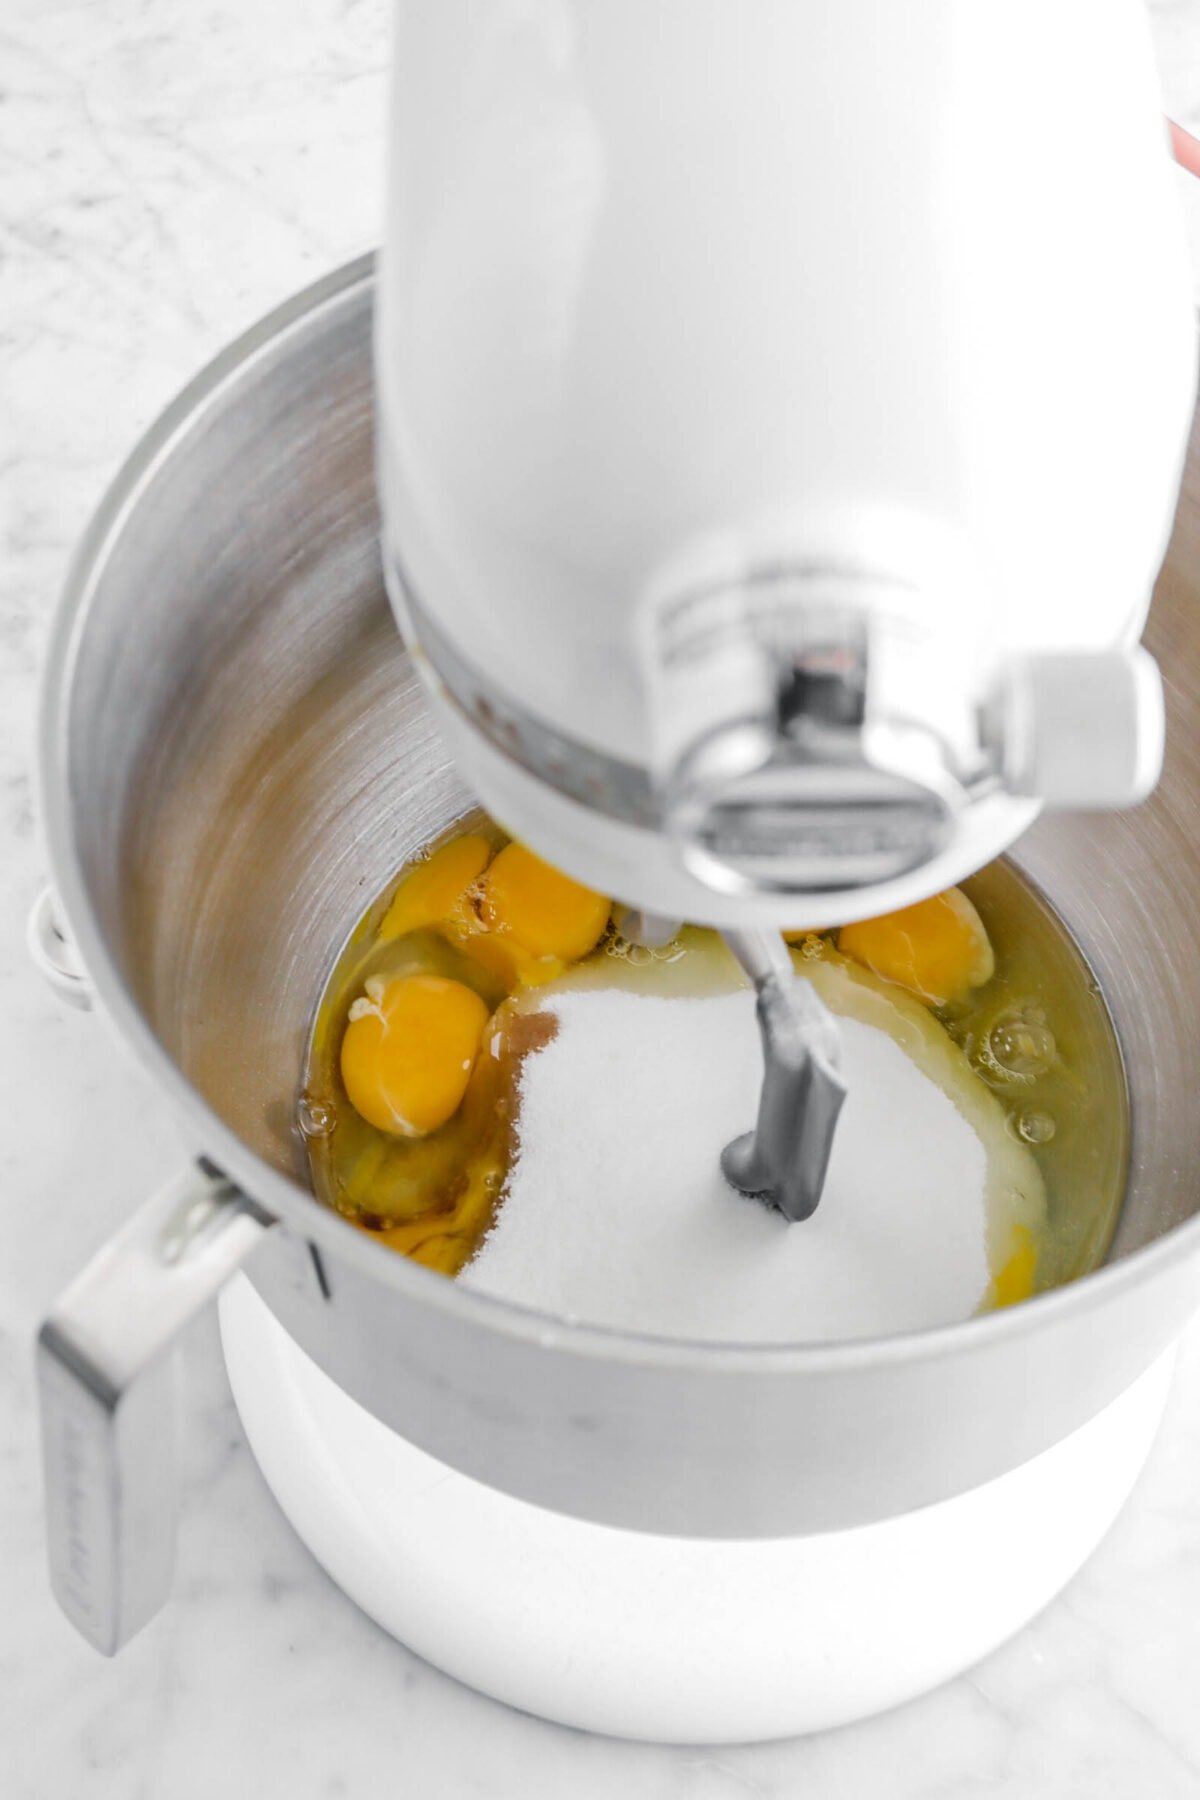
Step 2: Make brownies
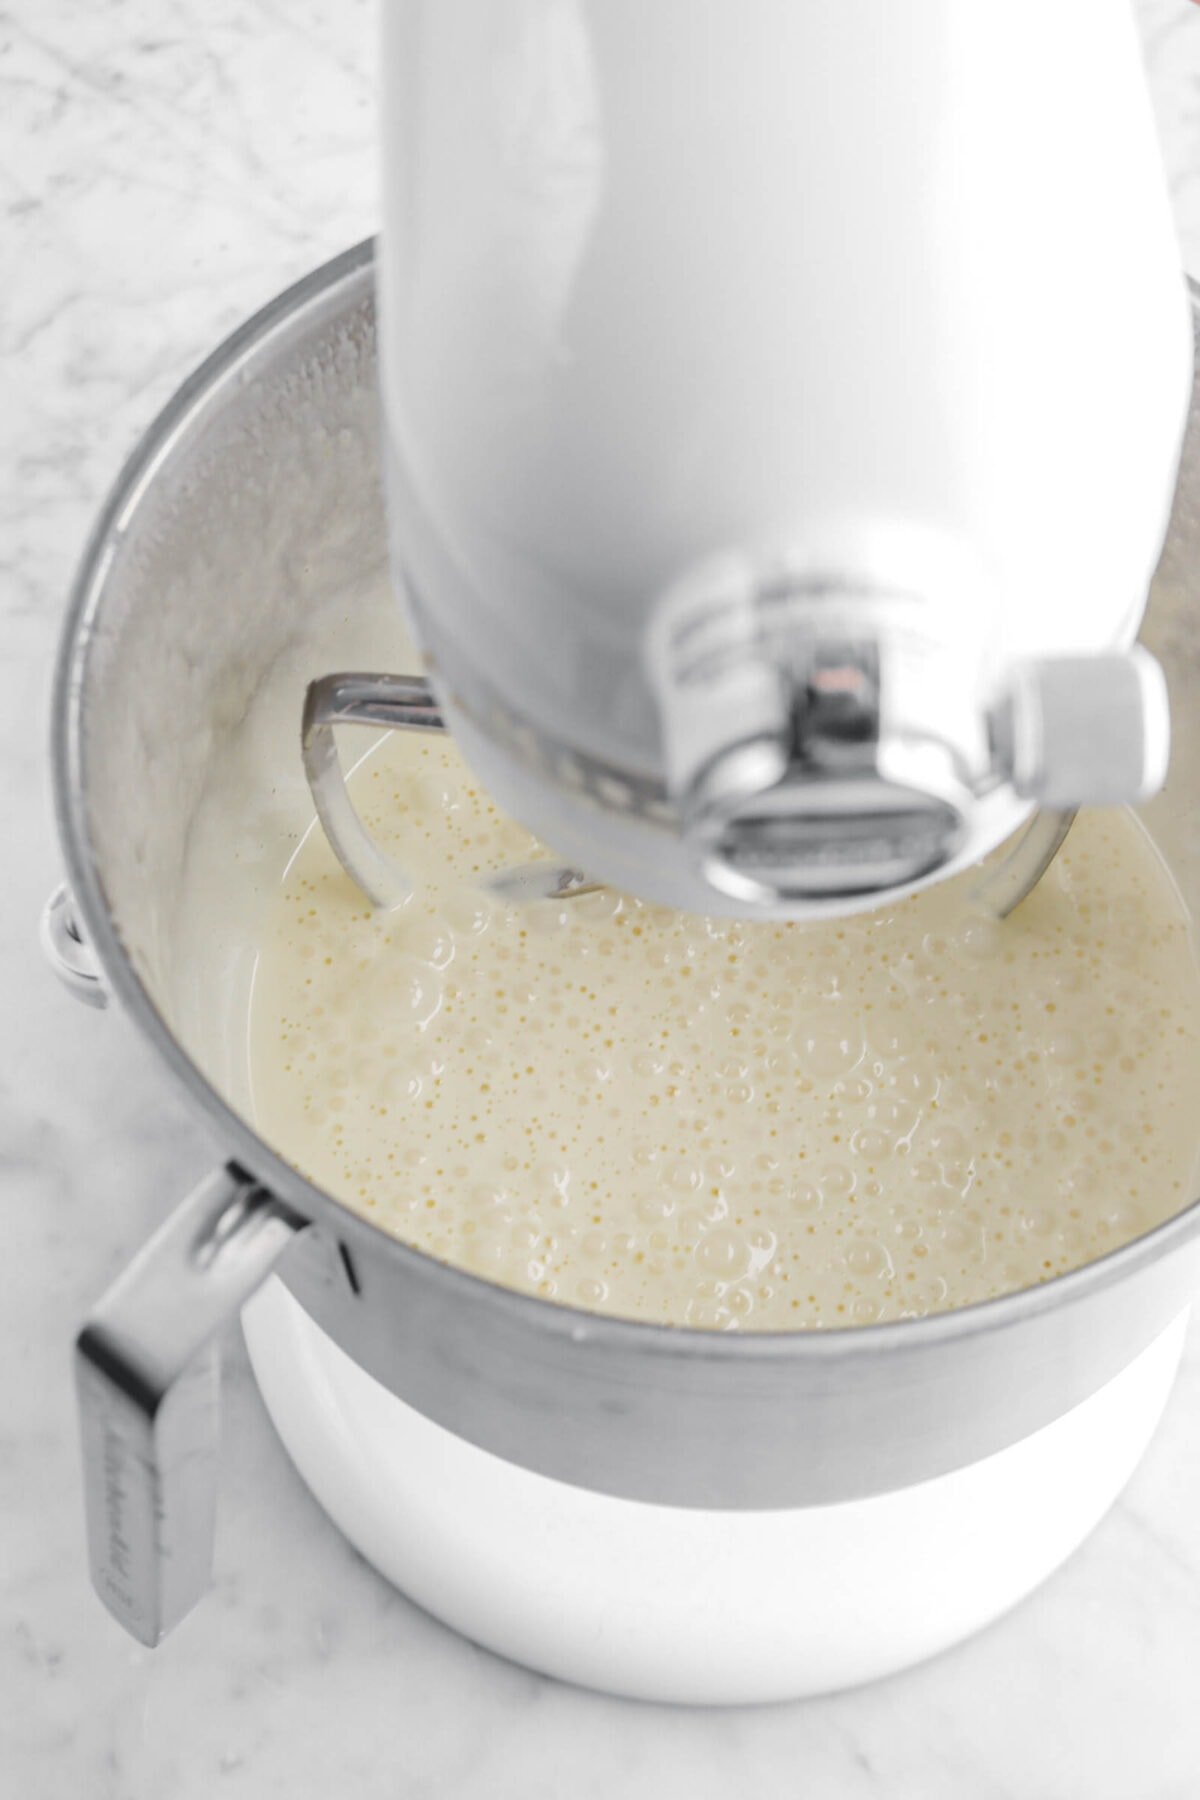
In the bowl of an electric mixer, combine eggs, sugar, and vanilla. Mix on low speed 1 minute. Increase the speed to high and beat for 10 minutes.
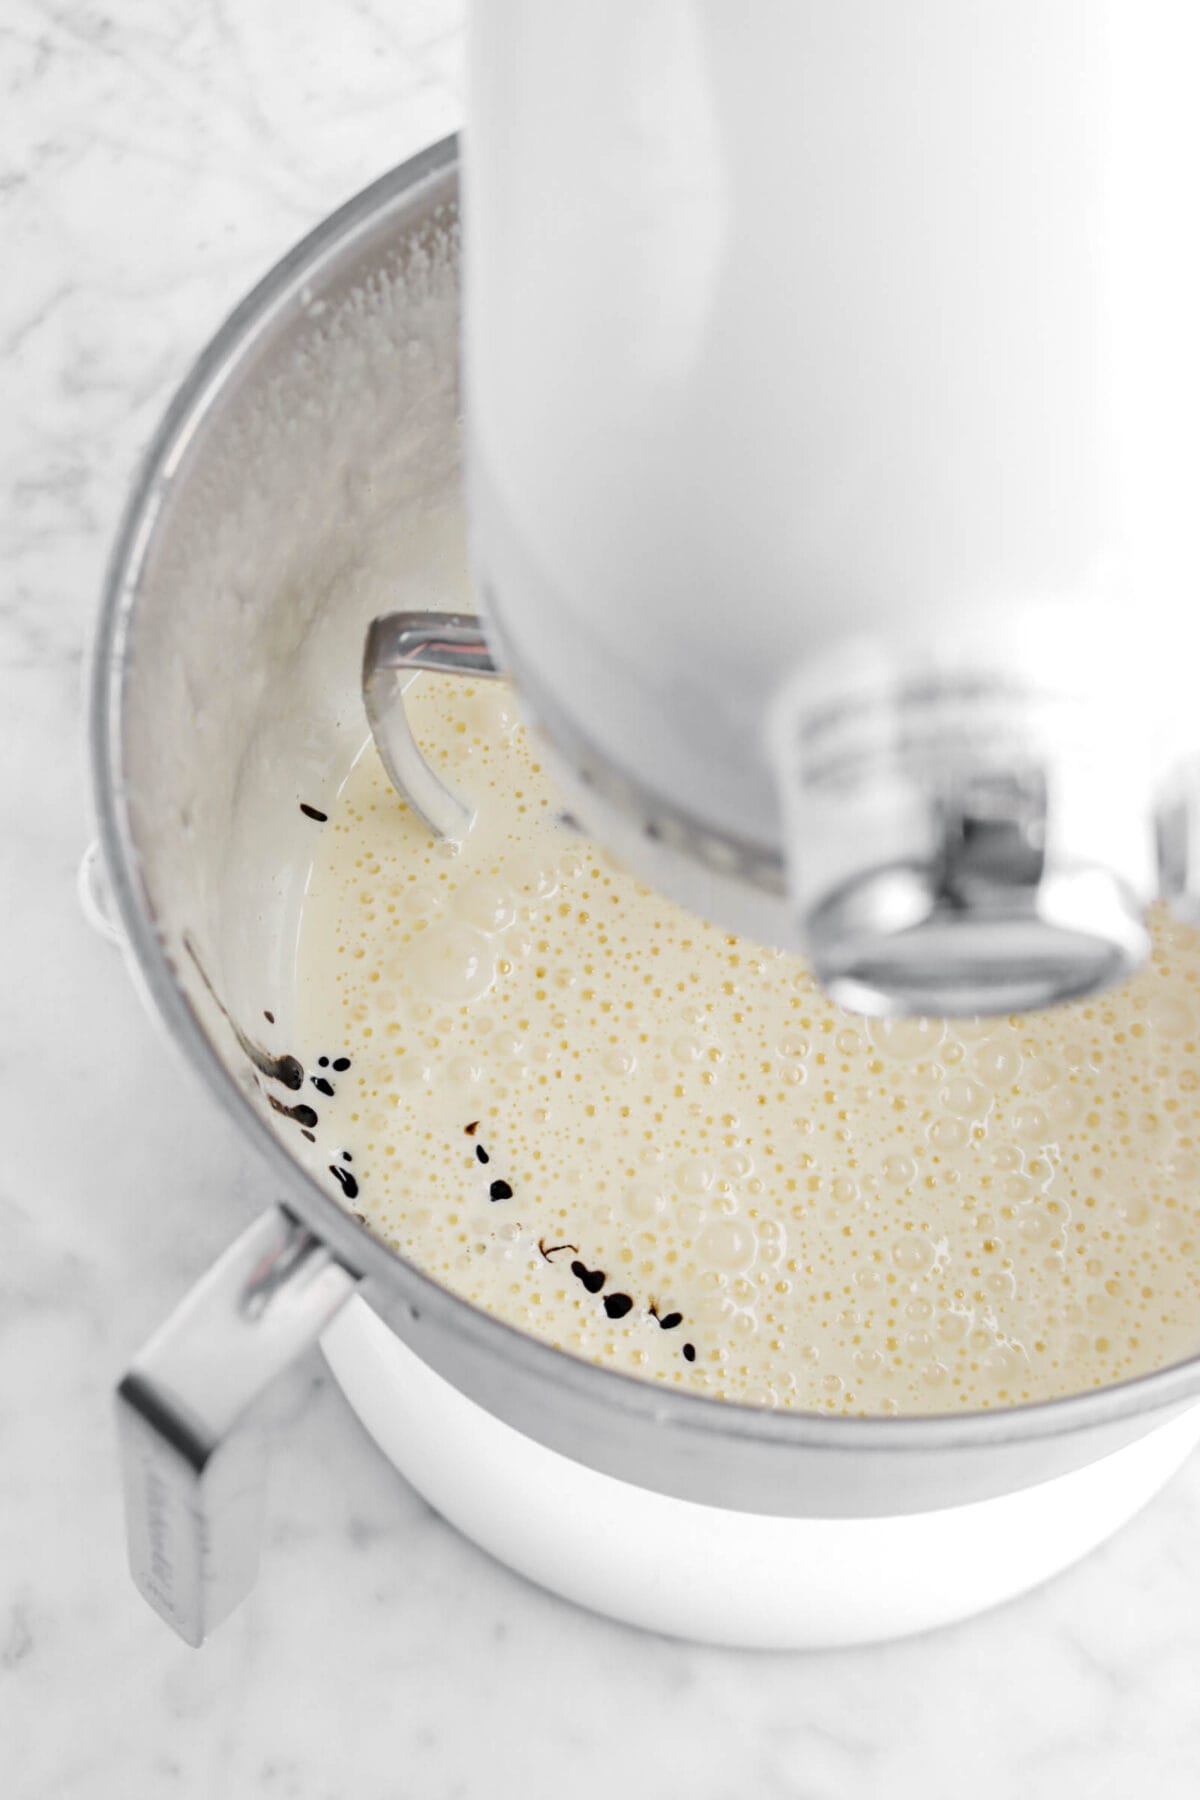
Mix in chocolate mixture.
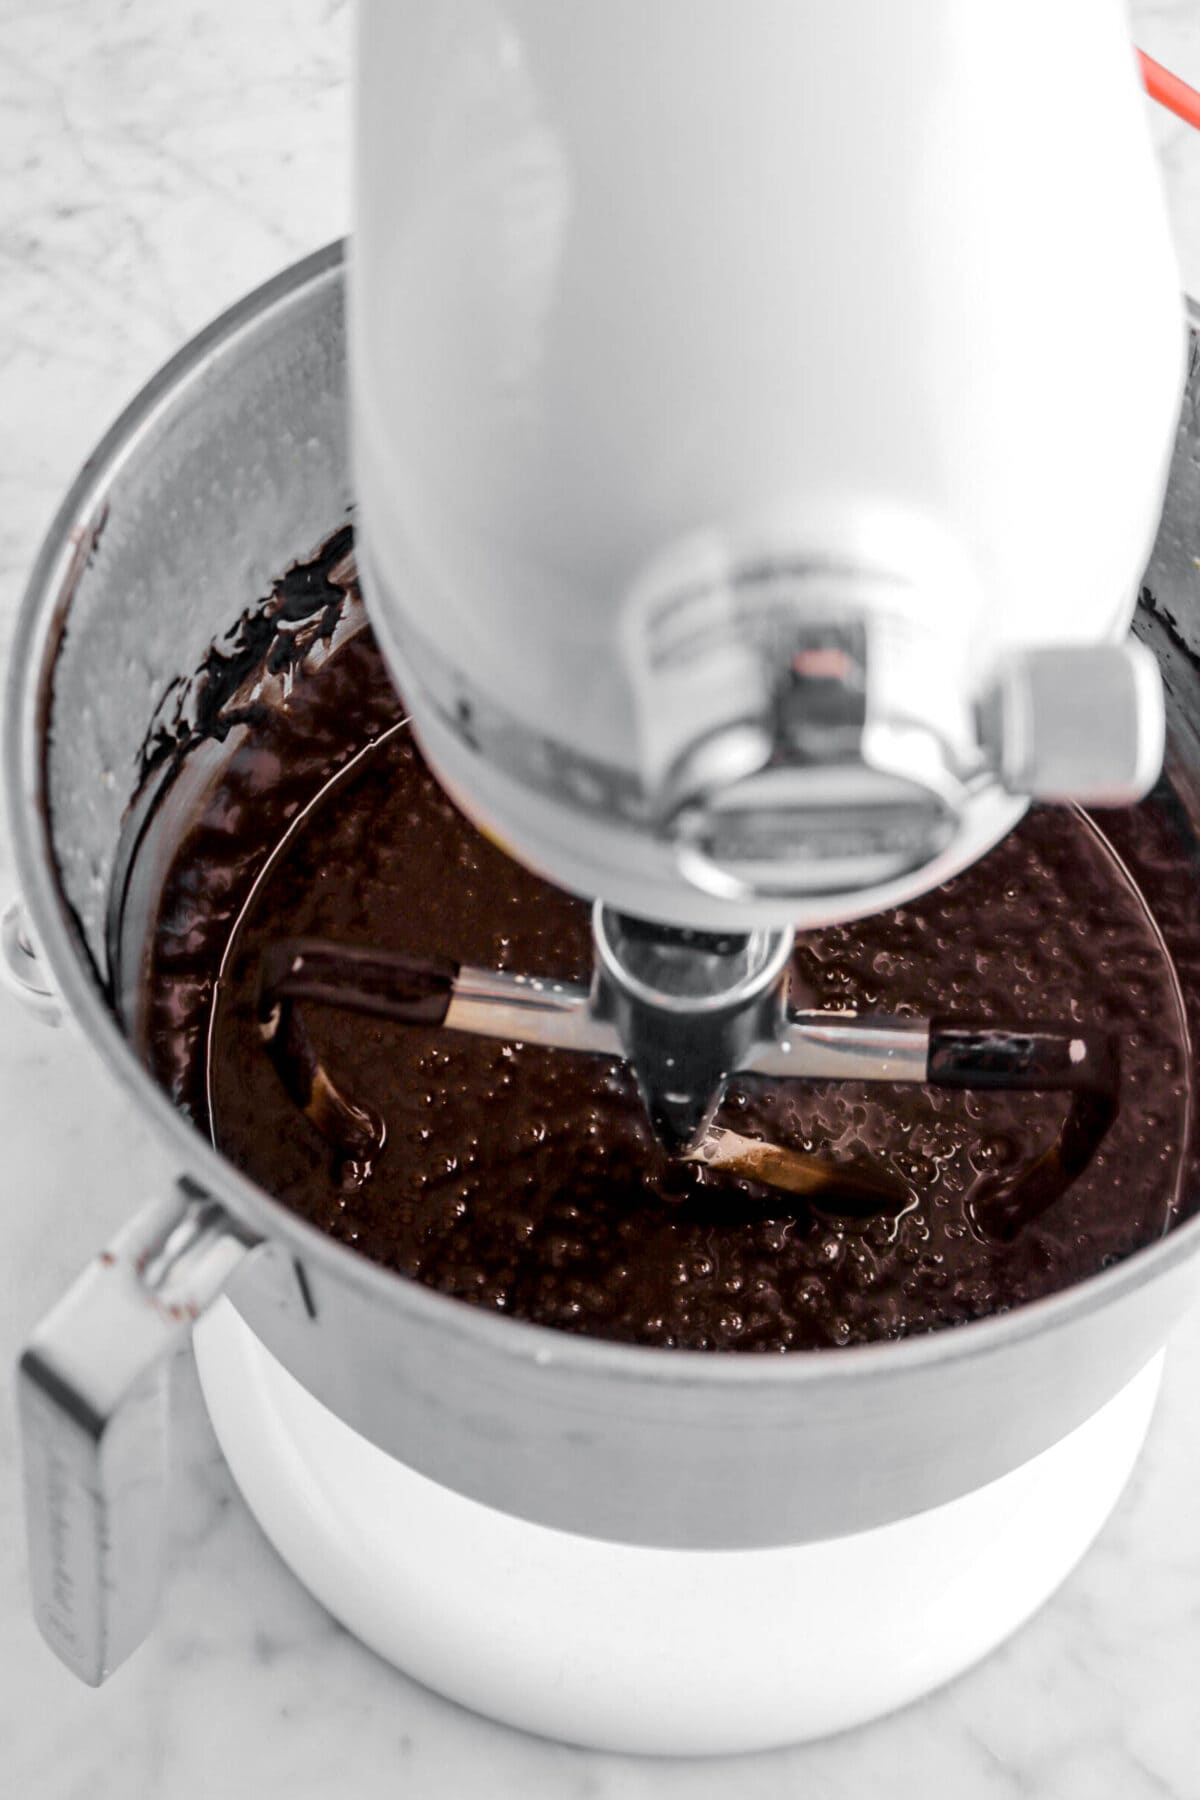
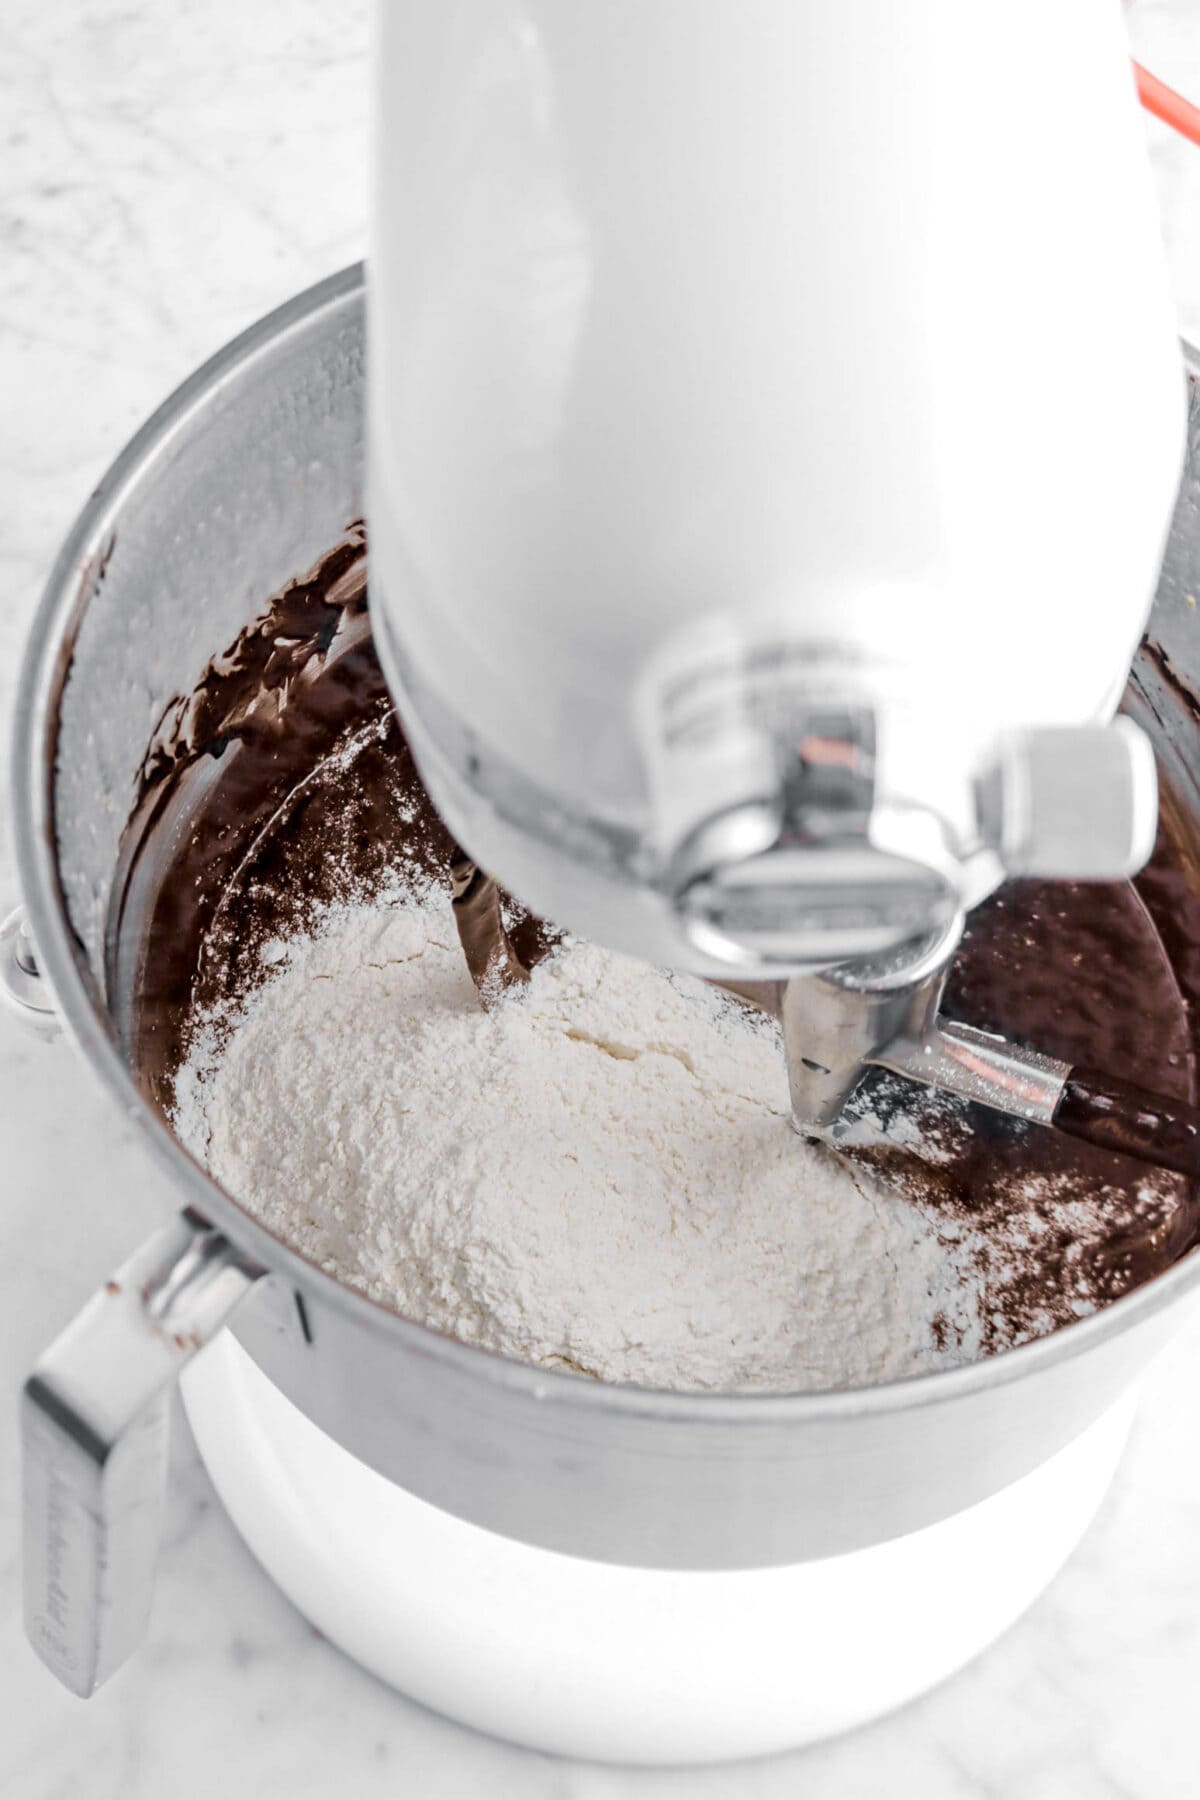
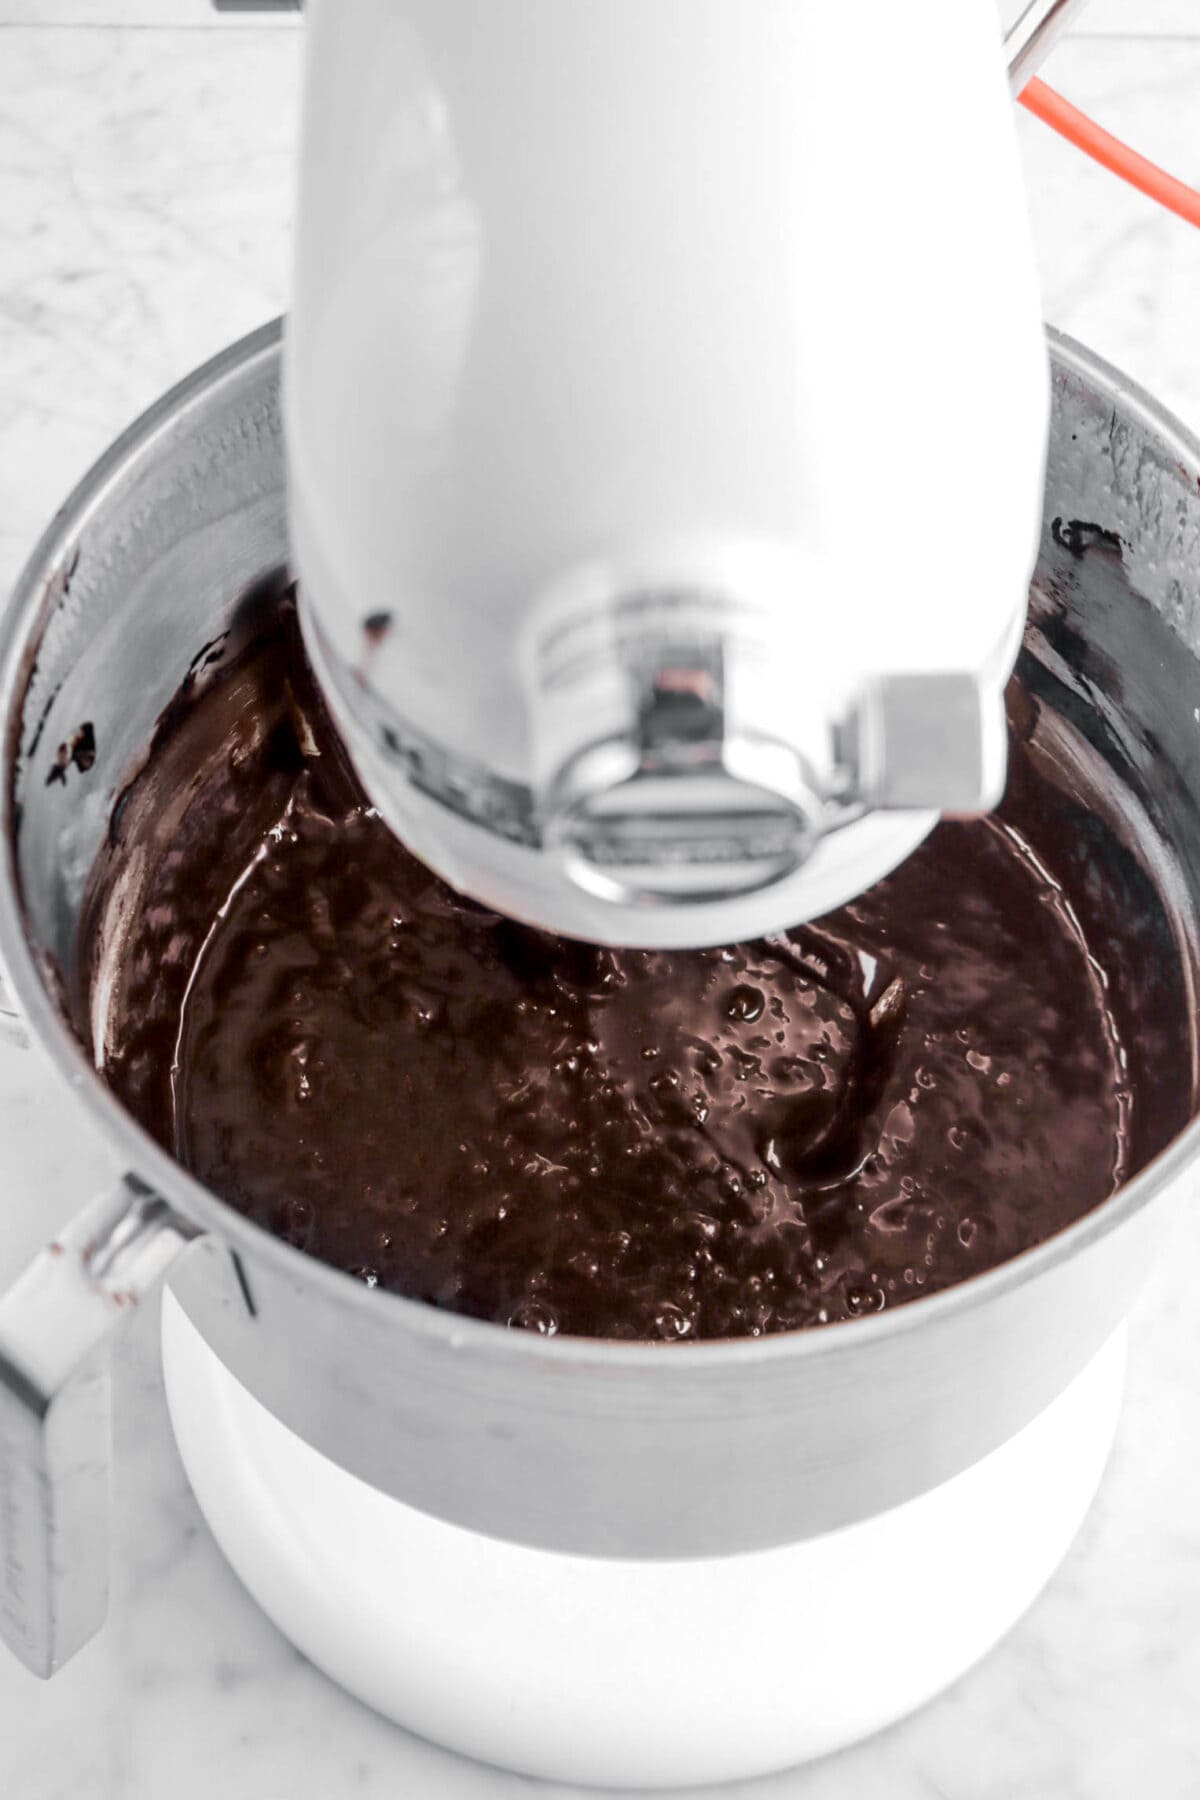
Stir in flour.
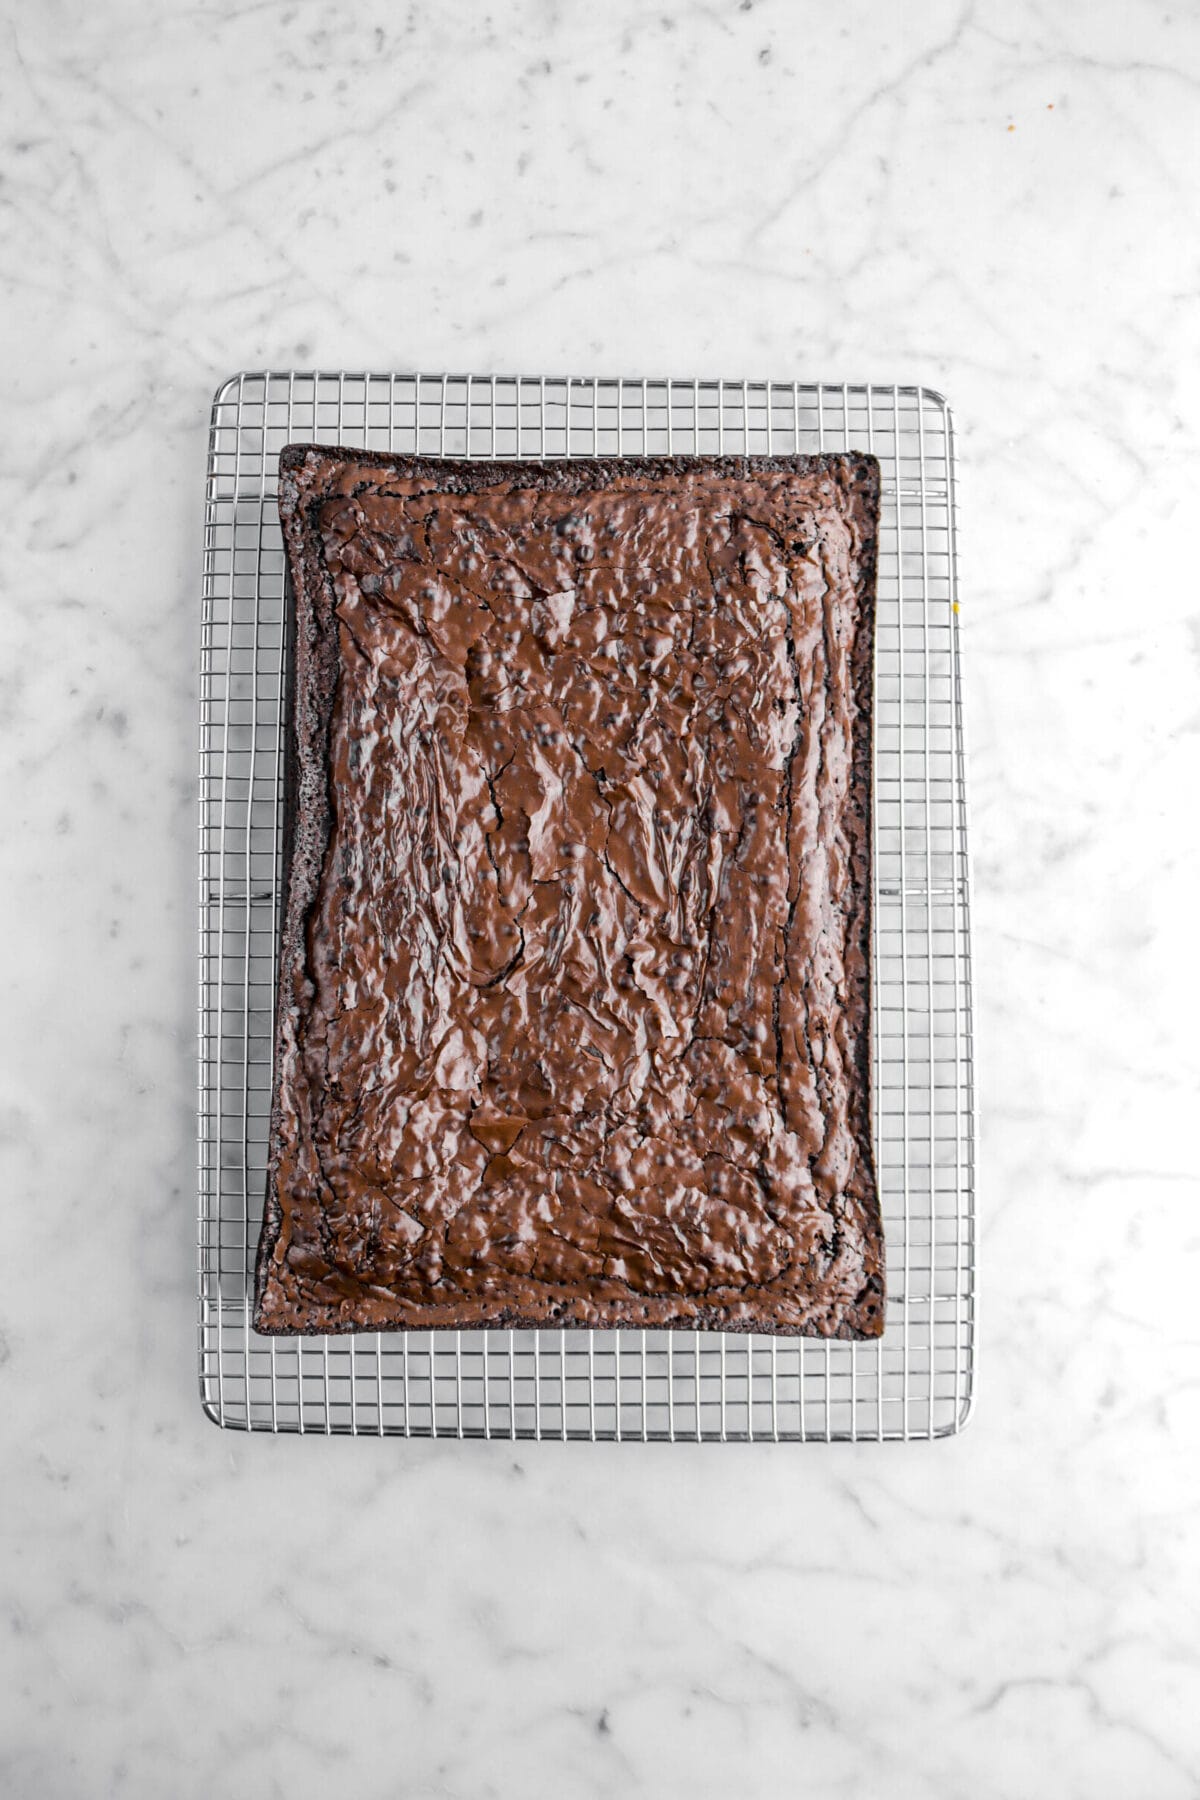
Step 3: Bake
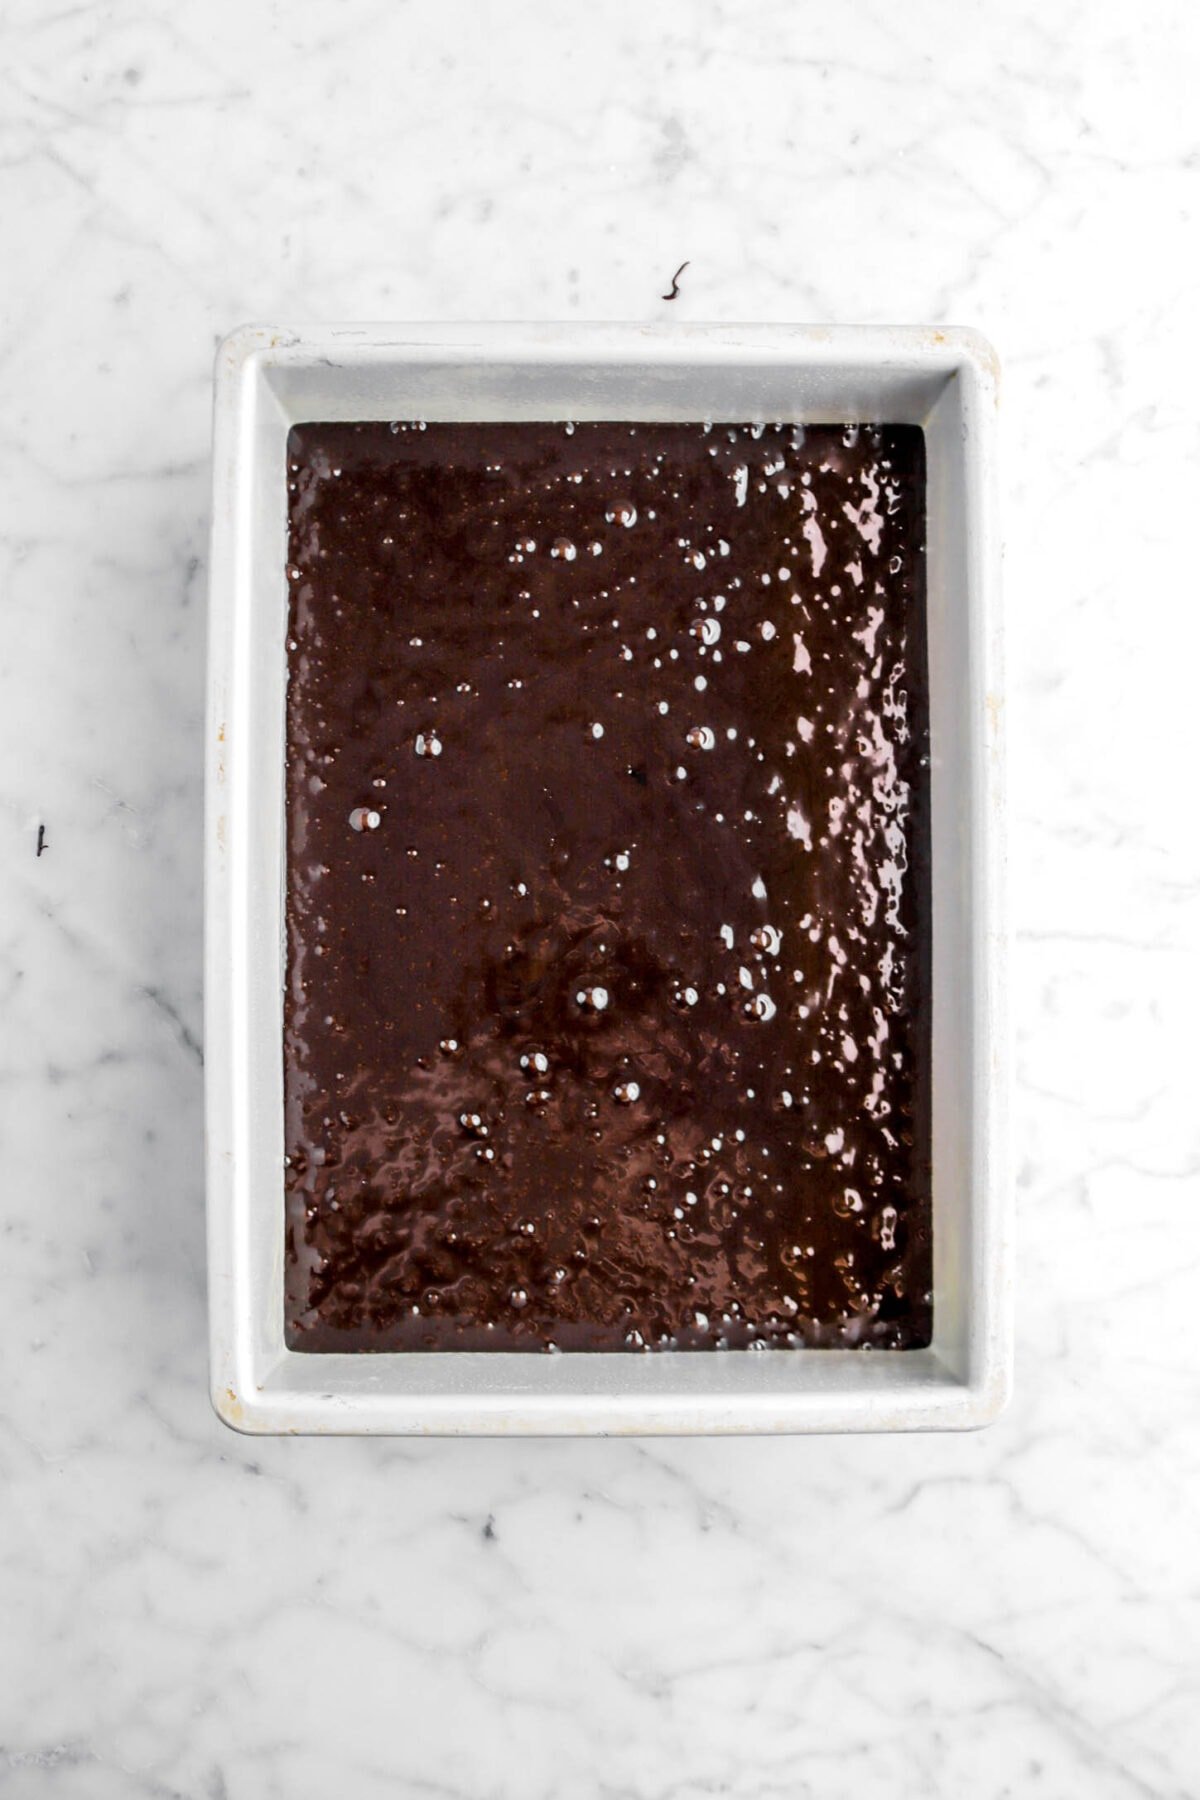
Pour into prepared pan and bake for 30-35 minutes, or until done. Take out of the oven and let cool.

Once cooled, turn the brownies out onto a wire cooling rack and cut.

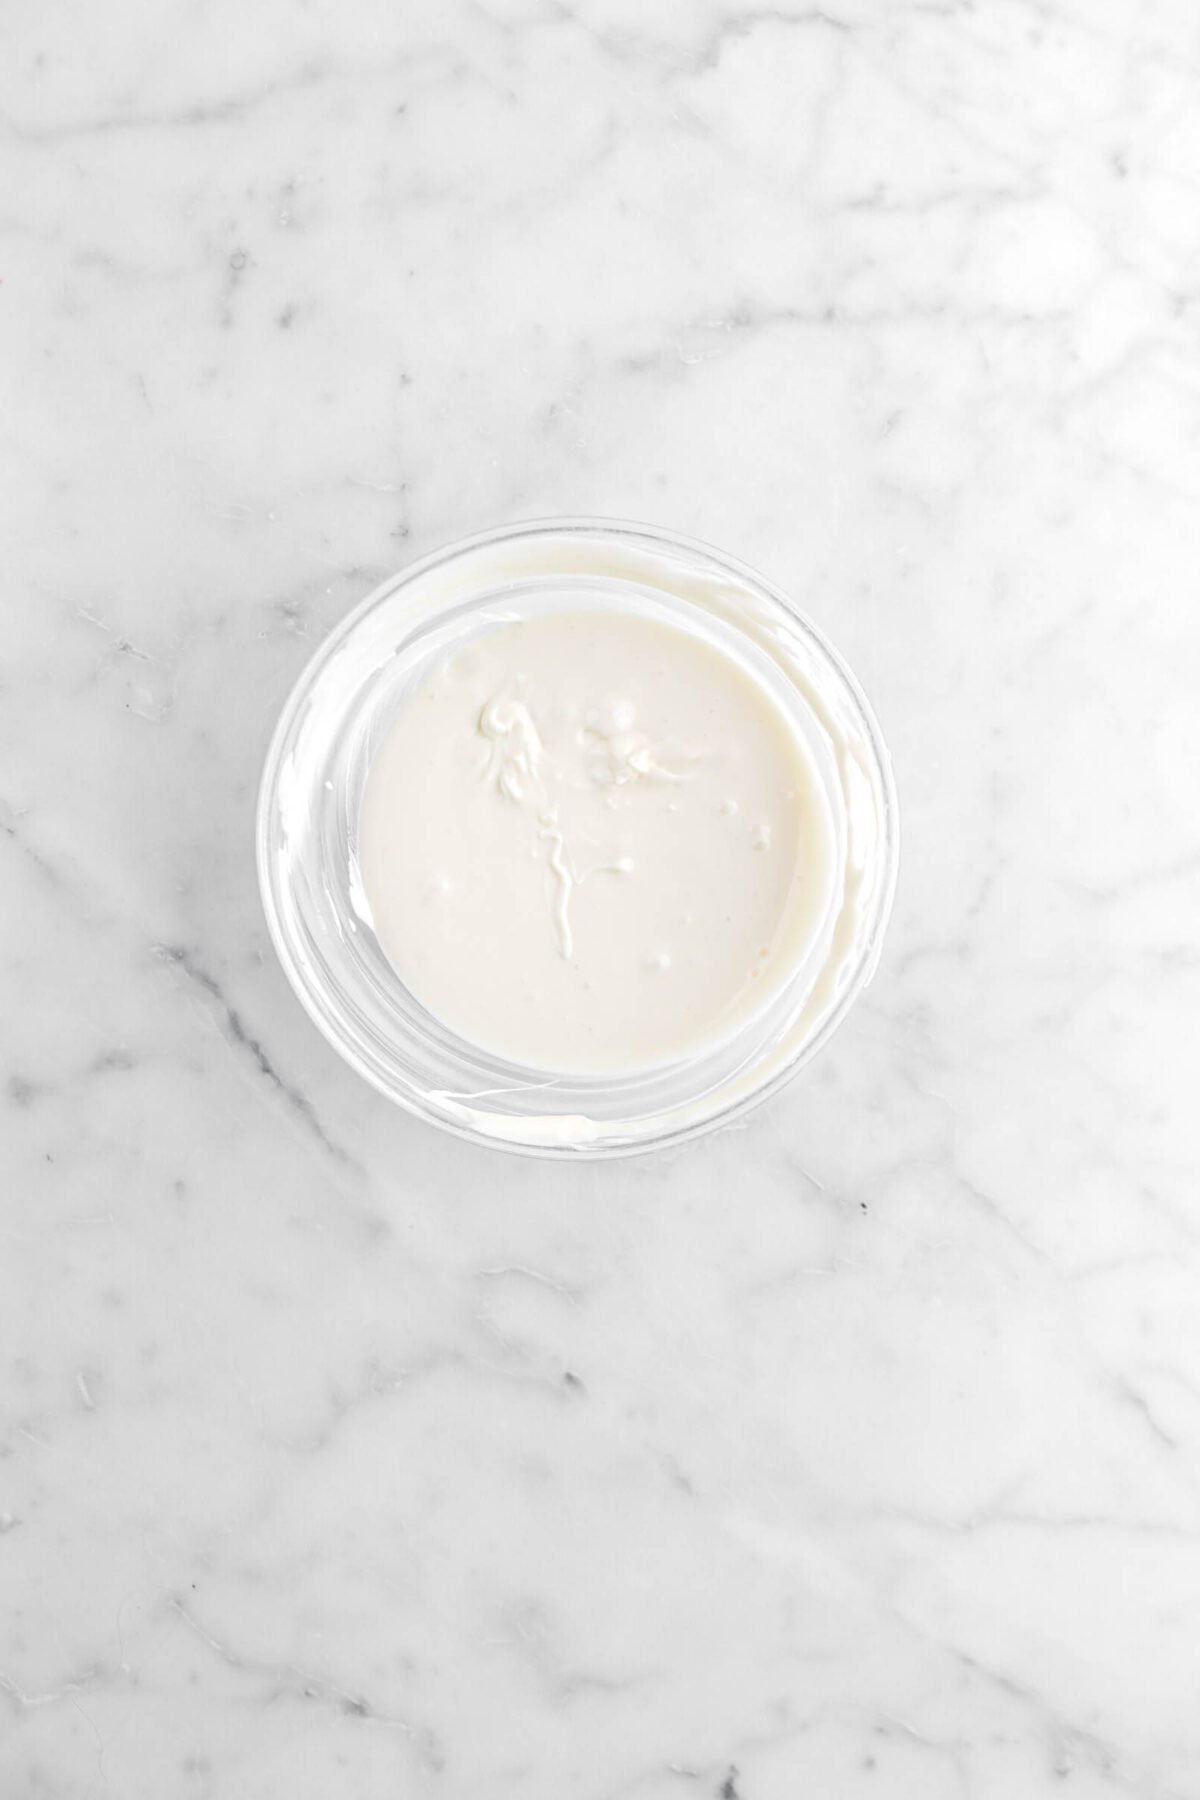
Step 4: Melt white chocolate
In a small bowl, microwave white chocolate in 15 second intervals, stirring well in-between, until smooth.
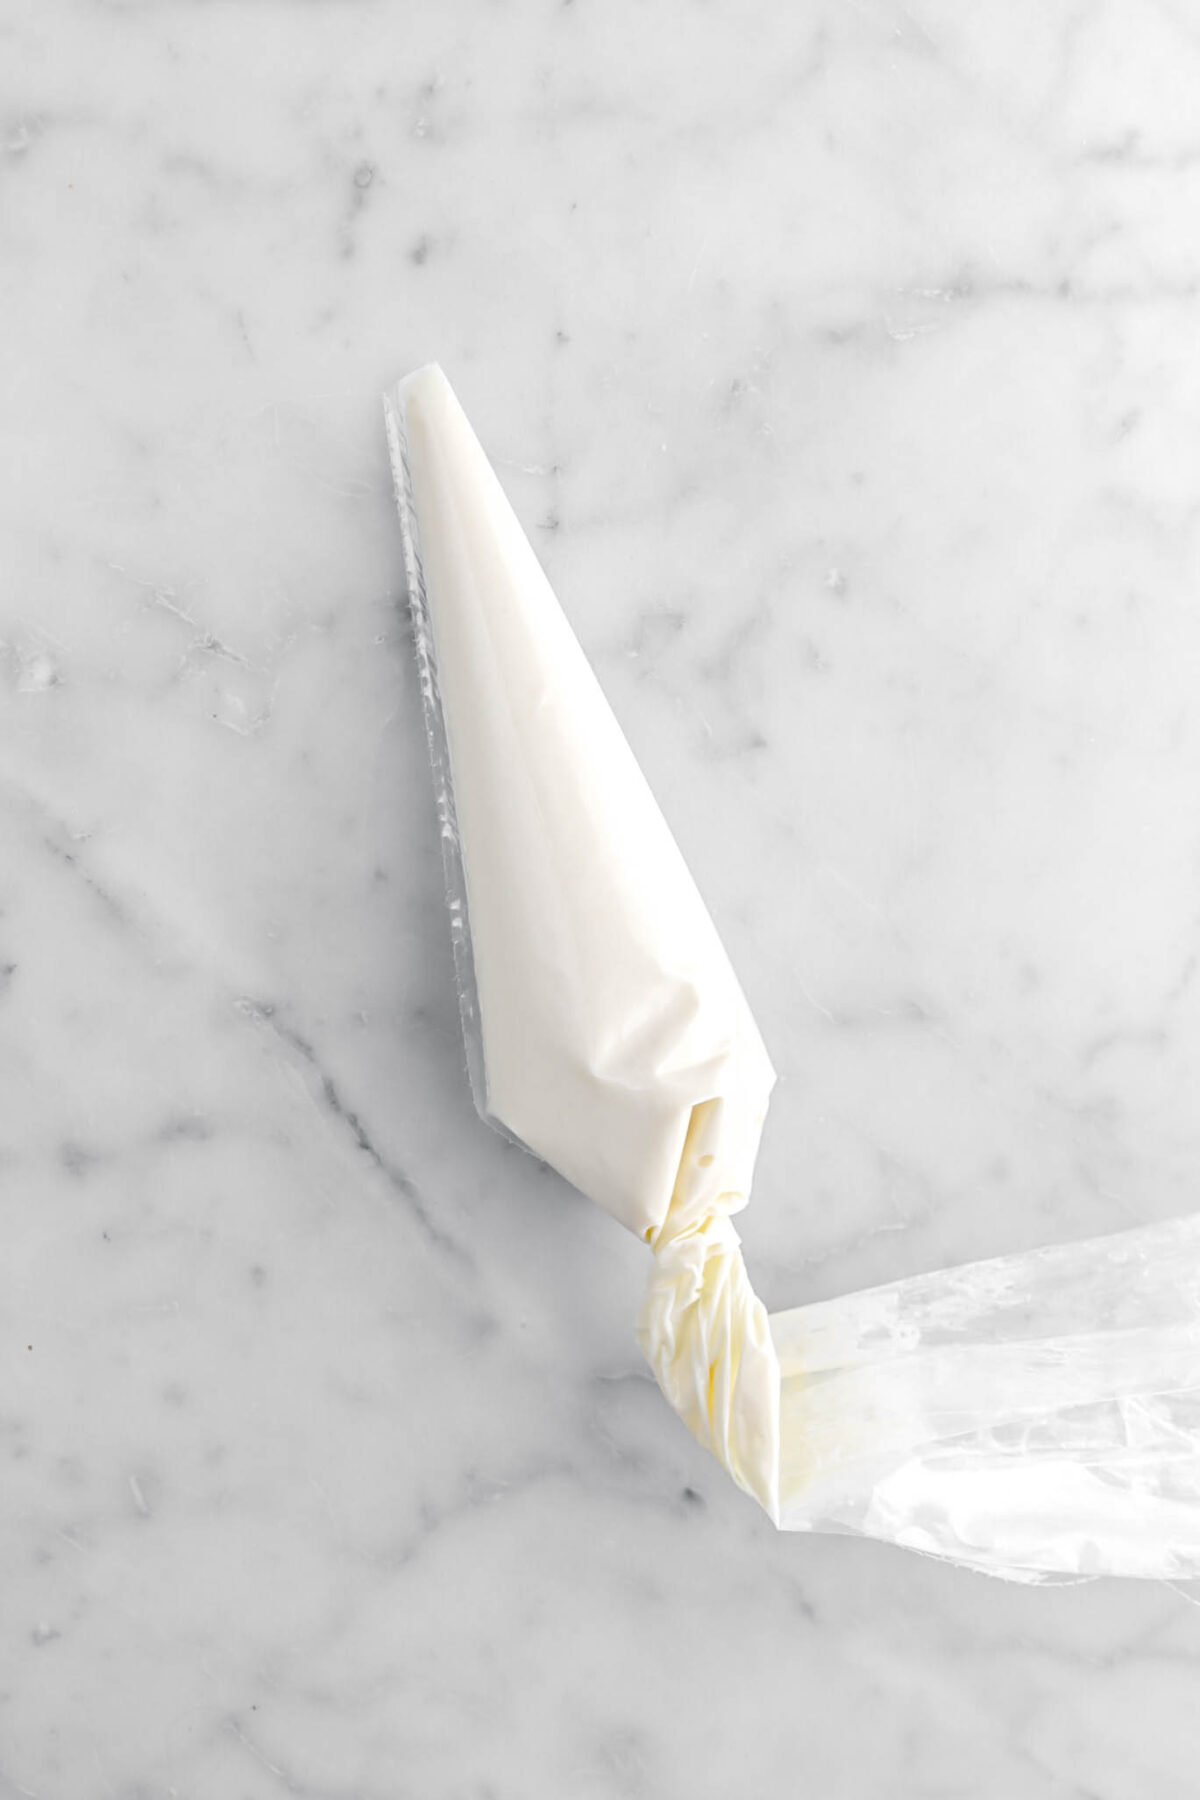
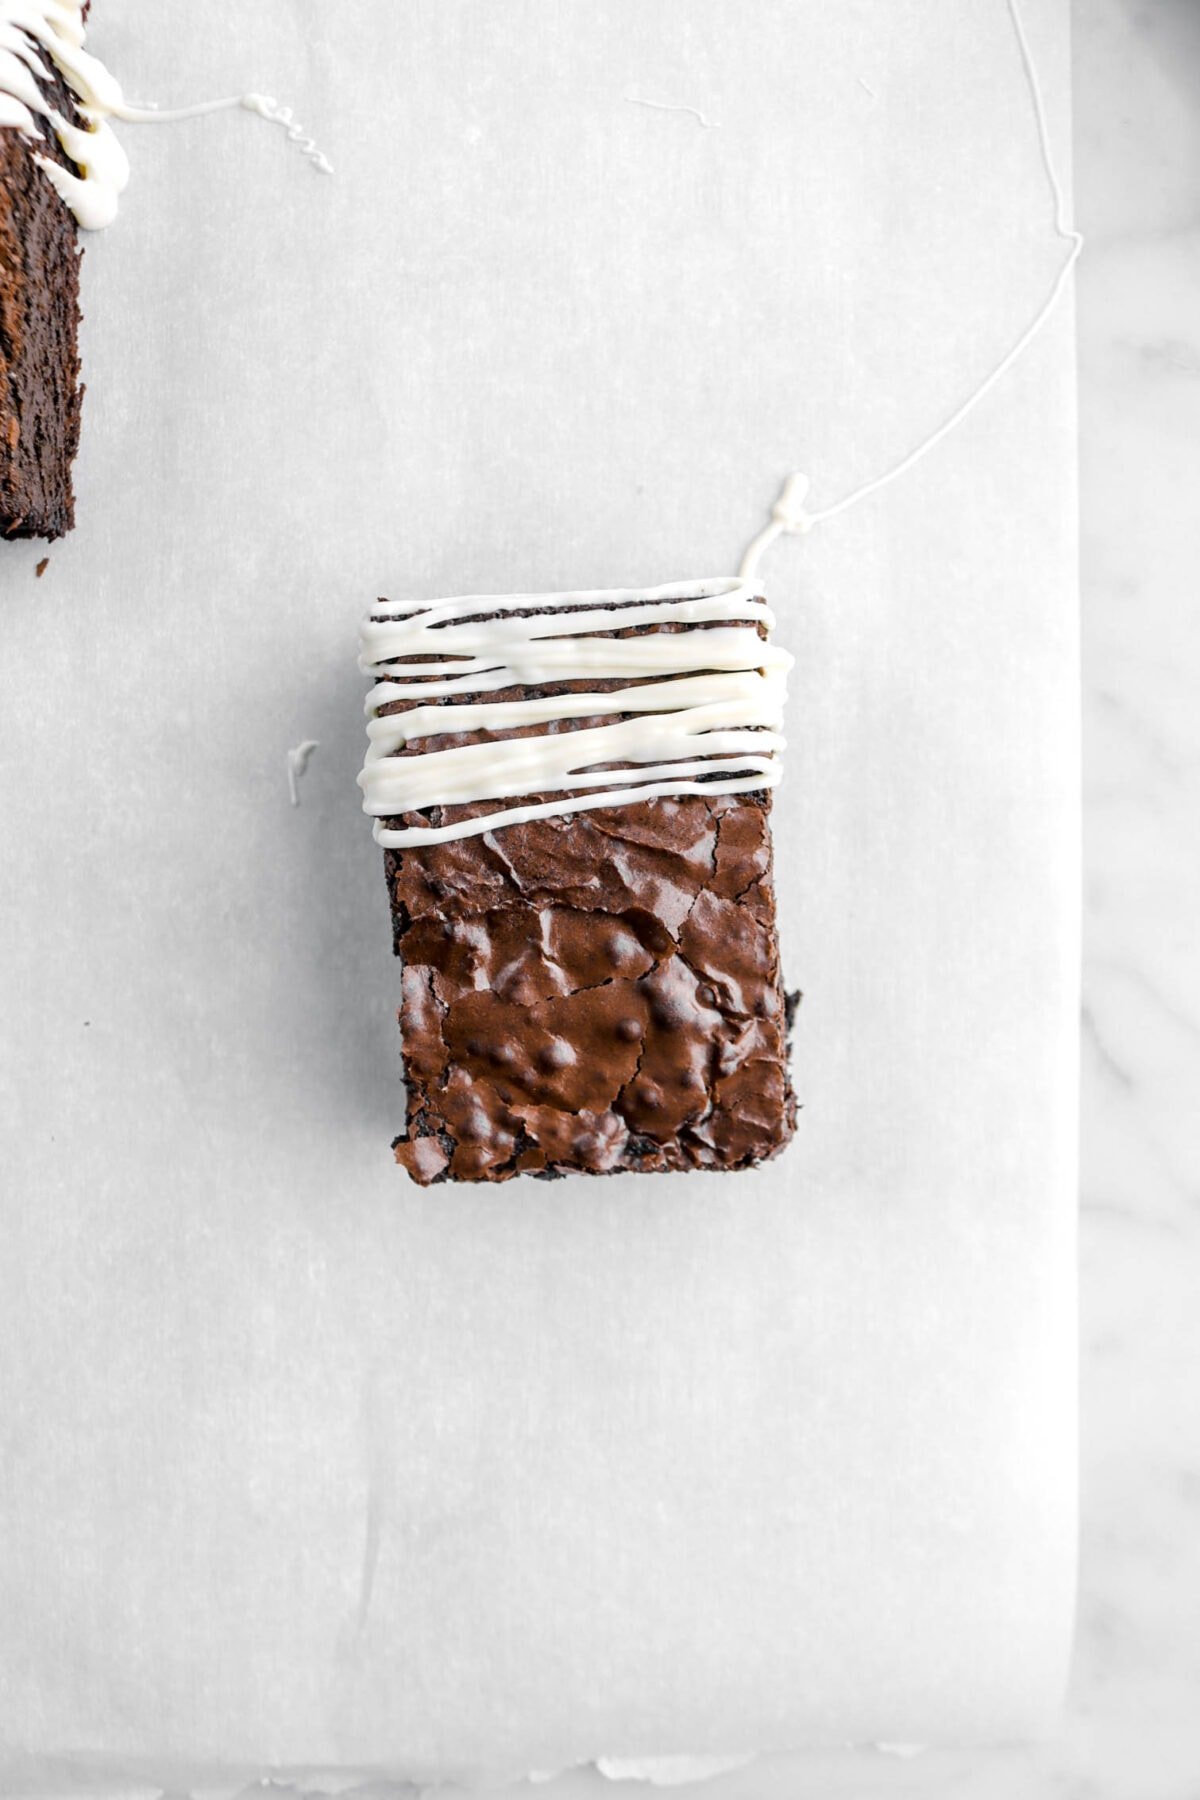
Step 5: Decorate
Place melted white chocolate in a piping bag. Snip off the end.
Drizzle melted white chocolate over the top half of each brownie. Decorate each brownie with two candy eyes. Set aside to let the chocolate set.
What Type of Chocolate Should I Use?
For this recipe, we highly recommend using a high quality dark or a semi-sweet chocolate! Anywhere from 60% – 70% works wonderfully with this recipe.
How To Tell When Brownies Are Perfectly Baked
We found that, with these brownies in particular, using a cake tester or tooth pick is the best way to tell when they’re perfectly baked. After inserting the cake tester, it should still be a little damp with maybe one or two crumbs on it.
This means that the brownies are still fudge-y and moist, while being just barely baked!
How To Store
After these brownies have cooled and they’ve been decorated, you can store them a few different ways! In an airtight container or a zip top bag and left at room temperature for 1-2 days, in an airtight container or zip top bag in the fridge for 5-7 days, or store in the freezer in a freezer safe bag for up to 2 months!
Looking for more recipes like this? Here are a few you may like: Edible Chocolate Chip Cookie Dough, Harry Potter’s Birthday Cake, Hocus Pocus Spellbook Brownies, Dark Chocolate and Dried Fruit Bark
When you make these Mummy Brownies, leave a comment down below! We love hearing from you and answering any questions you might have! Also, be sure to tag us on social media and hashtag it #BakersTable.
Mummy Brownies
Ingredients
Brownies
- 1¾ cups semi-sweet chocolate chips
- ⅔ cup black cocoa powder
- 1¼ cups salted butter
- 7 large eggs, room temperature
- 2½ cups granulated sugar
- 1½ teaspoons vanilla extract
- 1½ cups all purpose flour
Decoration
- 1 cup white chocolate, melted
- 32 candy eyes
Instructions
Brownies
- Heat oven to 350℉/177℃.
- Spray a 9-inch x 13-inch pan with baking spray. Set aside.
- Combine chocolate pieces, cocoa, and butter in a medium saucepan.
- Heat and stir over medium low heat until melted and smooth. Set aside.
- In the bowl of an electric mixer, combine eggs, sugar, and vanilla.
- Mix on low speed 1 minute.
- Increase speed to high.
- Beat for 10 minutes.
- Reduce speed to low.
- Mix in chocolate mixture.
- Add flour.
- Mix only to blend.
- Pour into prepared pan.
- Bake for 30-35 minutes.
Assembly
- Cut cooled brownies into 16 pieces.
- Drizzle top with melted white chocolate.
- Add candy eyes.
- Allow to dry before serving.
Notes + Tips!
- Room temperature is about 70℉/21℃.
- Make sure to beat the eggs, sugar, and vanilla for a full 10 minutes!
- The chocolate should not be hot when adding to the egg mixture.
- Use a cake tester to see when the brownies are done baking.
- If you would like to get more brownies out of this recipe, cut them into squares rather than rectangles.
- Once the white chocolate is melted, work quickly! As it cools, it will get harder to work with.
- If your white chocolate hardens, you can cut it out of the piping bag and place in a bowl. Then, just place it in the microwave and re-melt the chocolate.
- Place the candy eyes onto the brownies while the chocolate is still wet! If the chocolate sets, the candy eyes will not stick.
Tools You May Need (affiliate links)
– Still Hungry? –
Here are a few recipes may like!


