Red Velvet Swirl Loaf Cake with Cream Cheese Icing
This post may contain affiliate links, please visit our privacy policy for details.
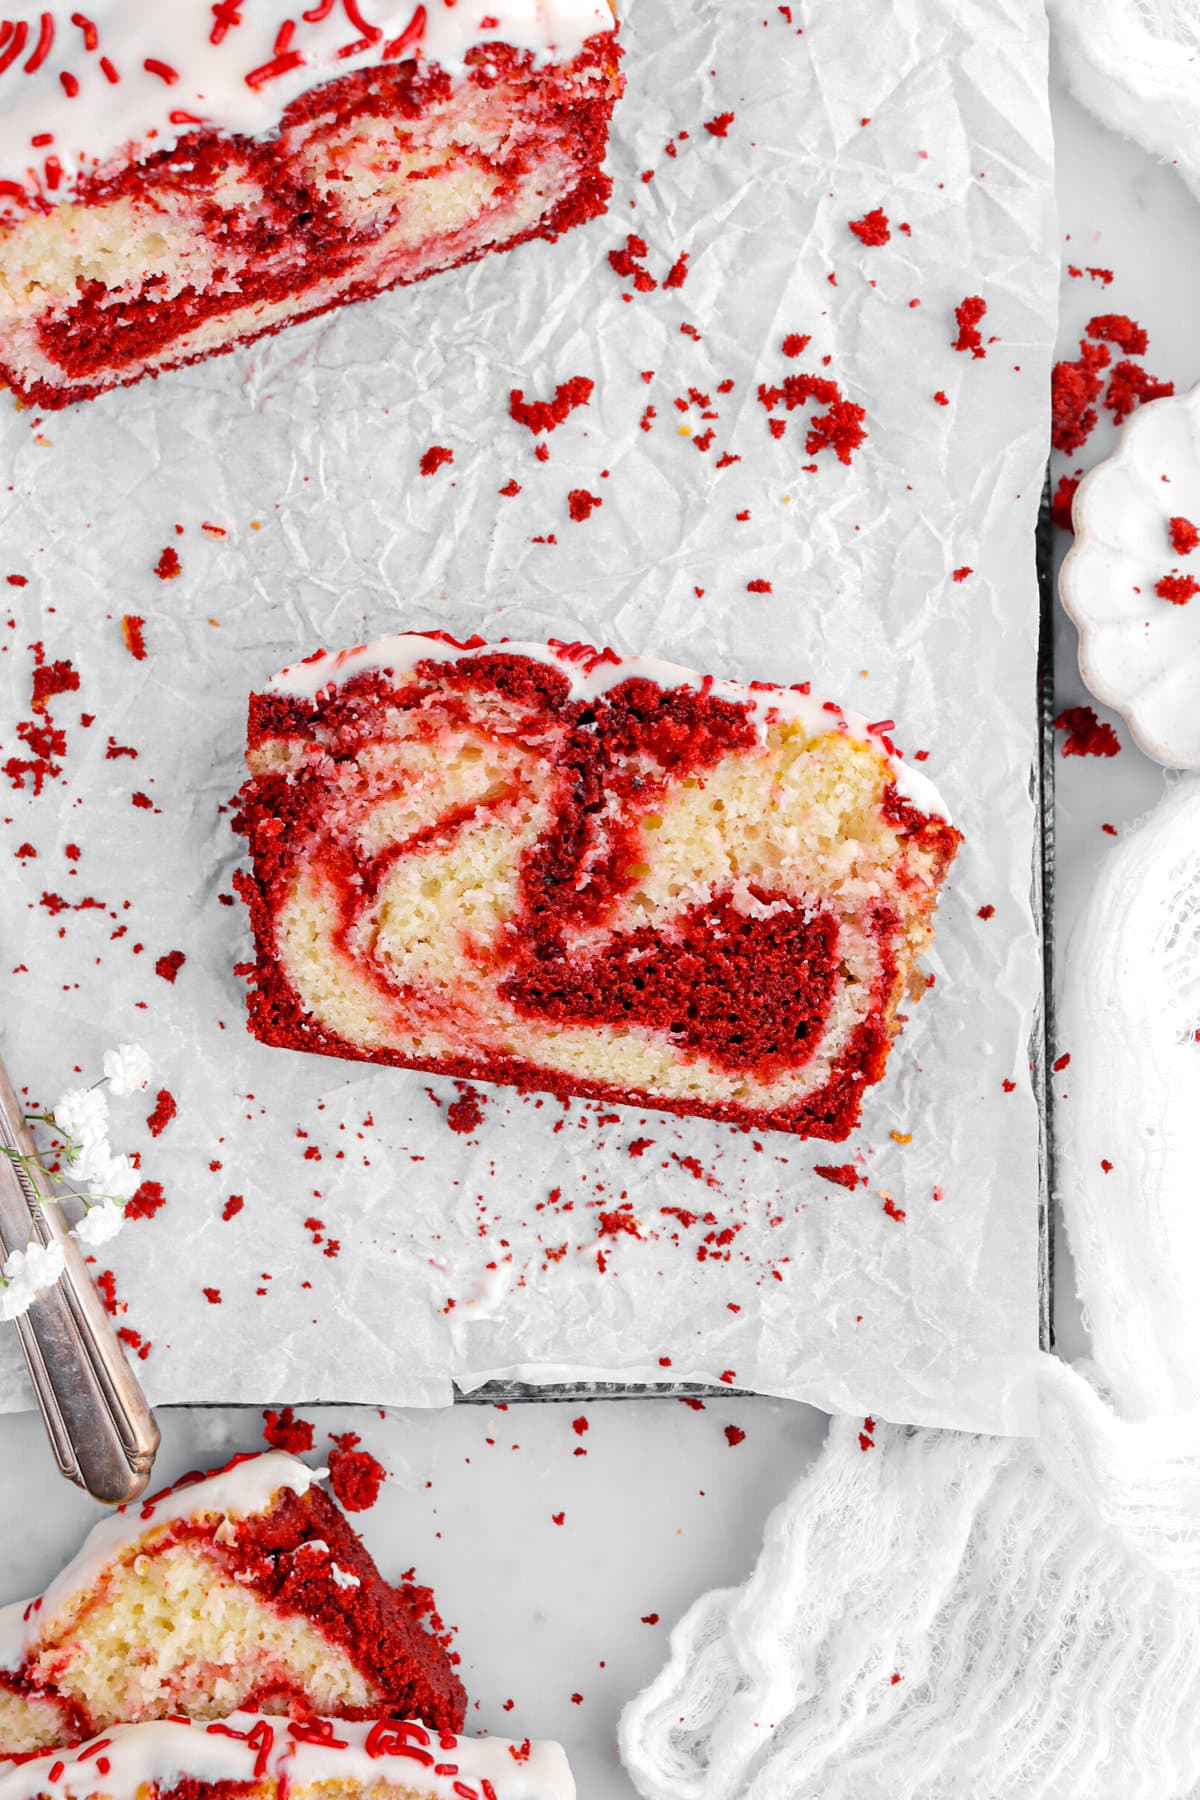
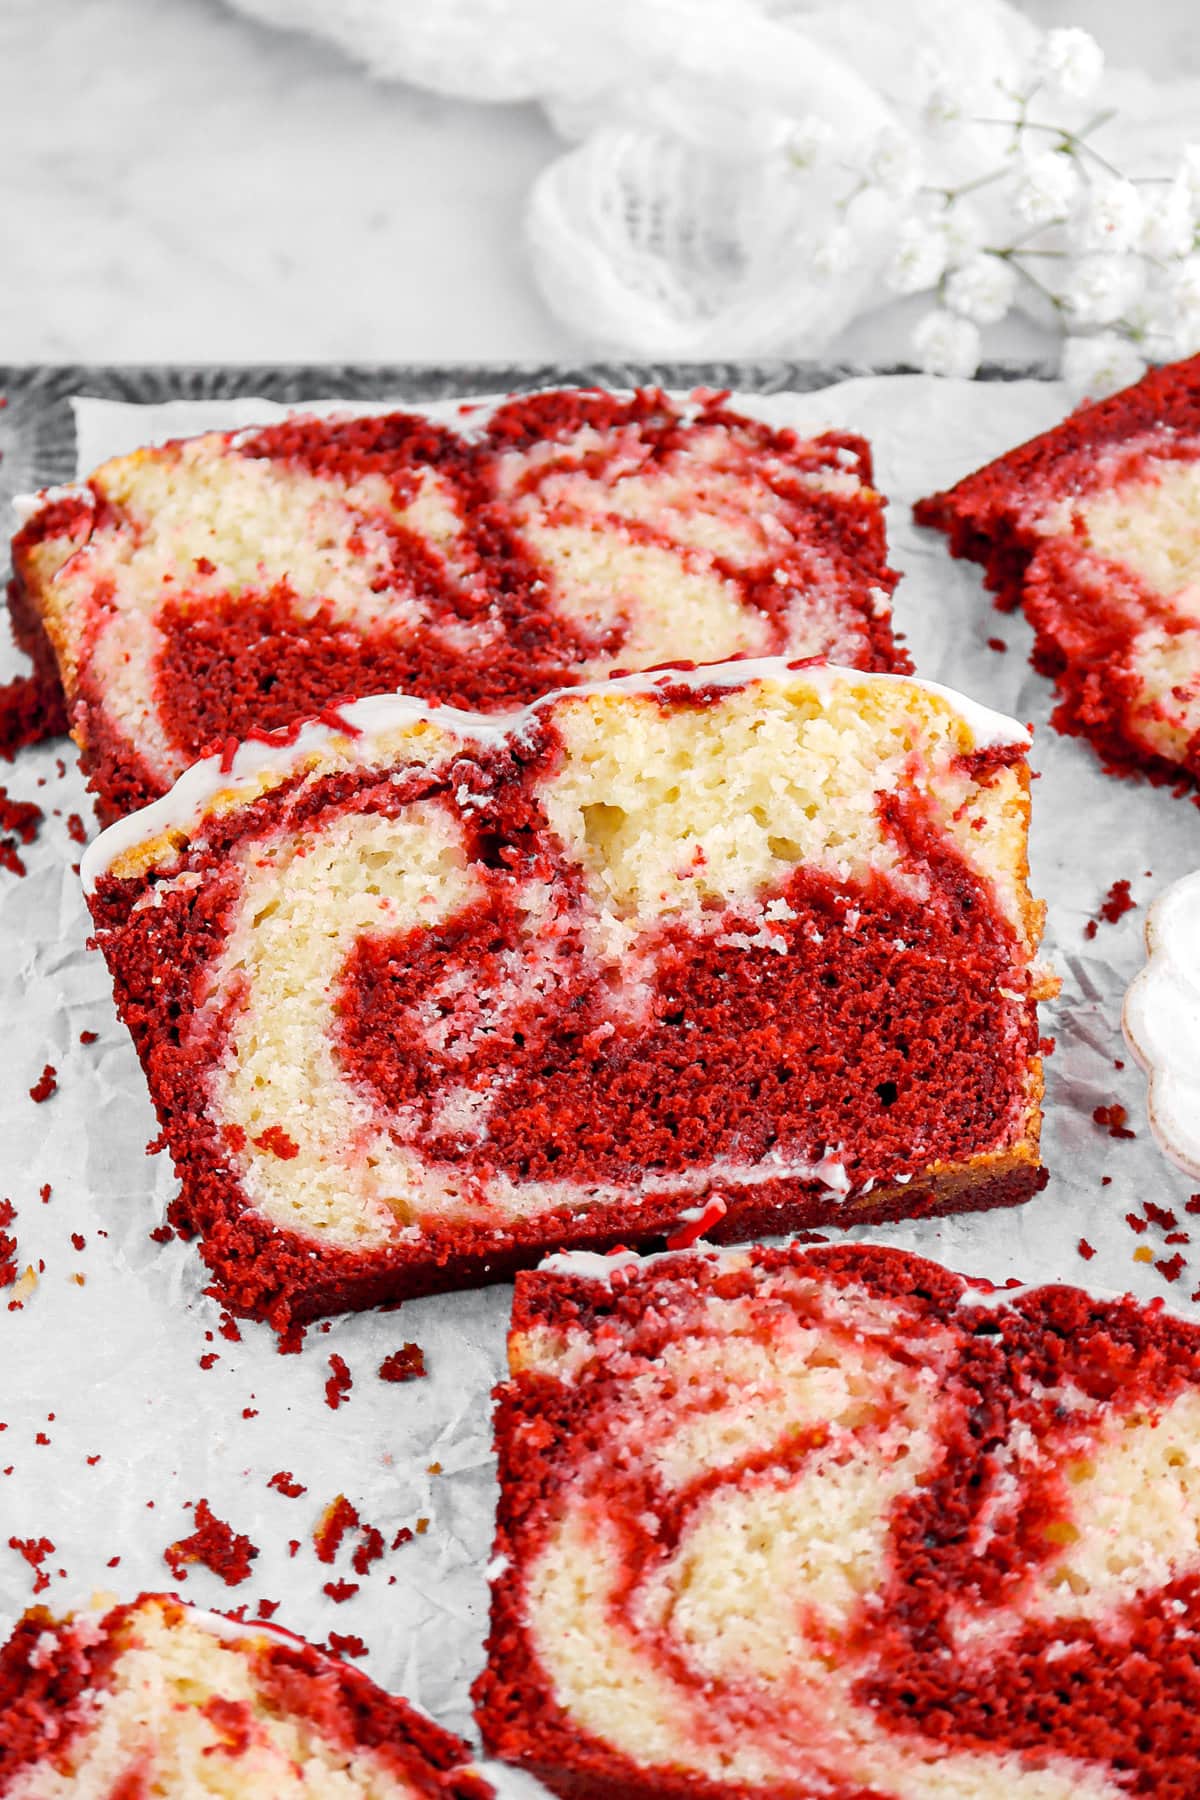
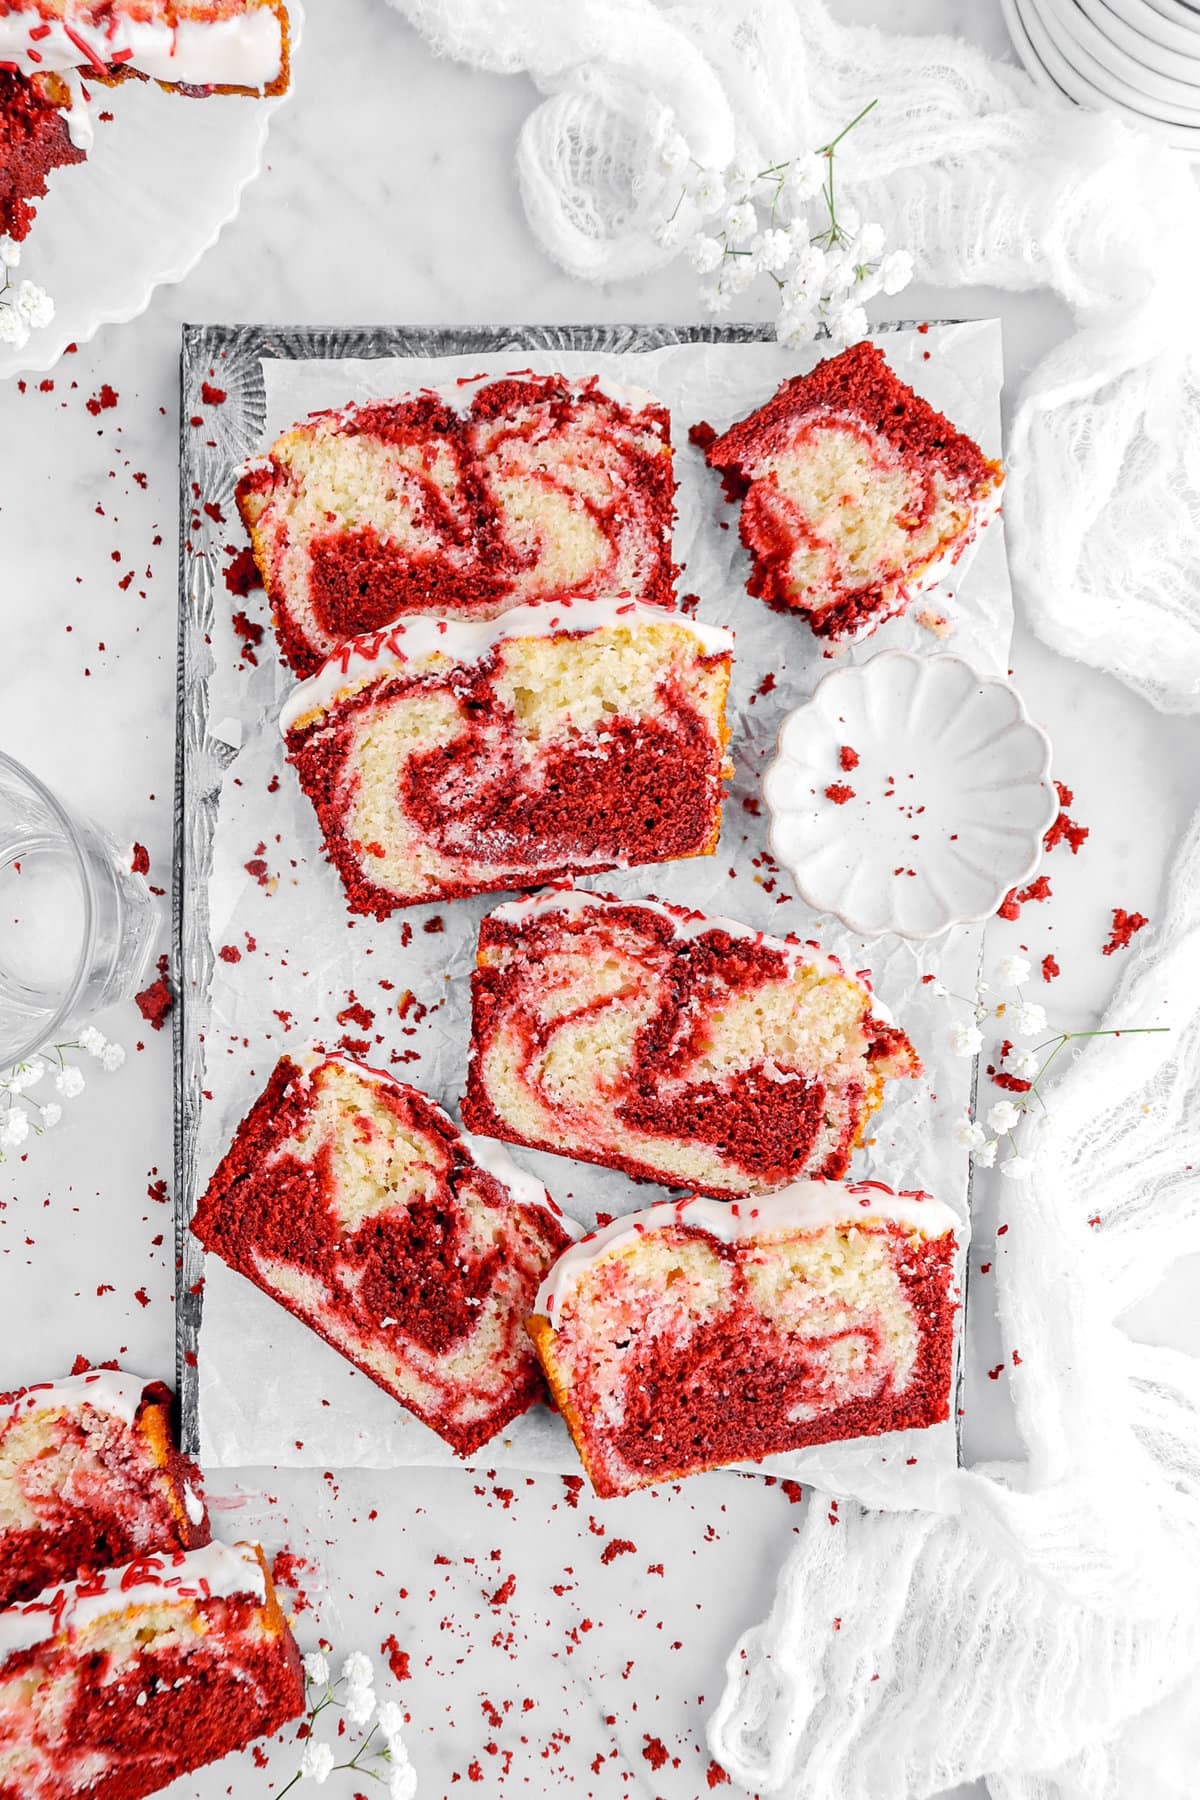
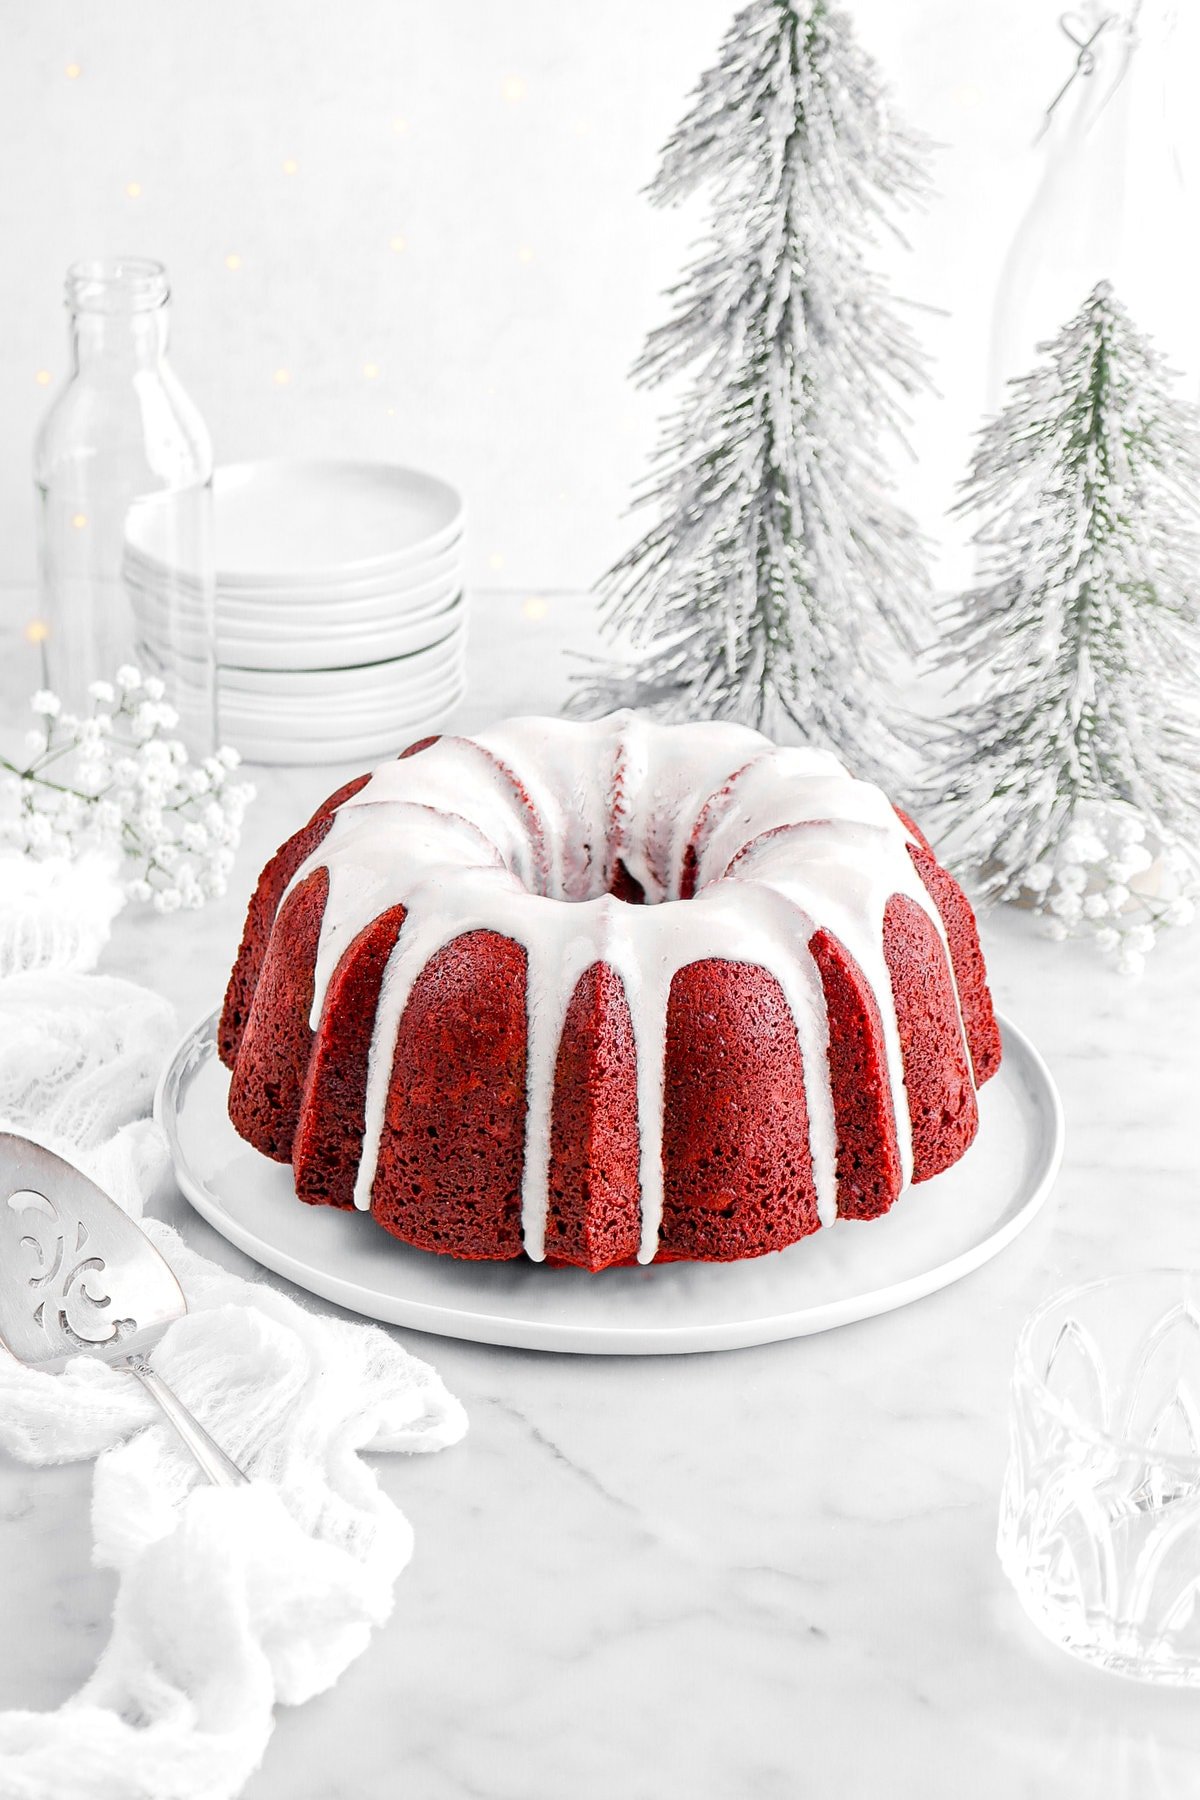
This tender, moist Red Velvet Swirl Cake is melt in your mouth delicious! A sweet vanilla infused cake, swirled with rich red velvet, hinted throughout with chocolate, and finished with a tangy cream cheese icing. It’s not only extremely flavorful and delicious, but also an effortlessly gorgeous dessert!
The Best Red Velvet Cake!
After 30+ years of baking and testing, we have finally achieved the perfect red velvet cake. It’s one of our favorite recipes to share around the holidays – whether that’s Christmas or Valentine’s Day. This loaf cake is no different!
Why You Will Love This Cake
- Flavor and texture. Just like the traditional cake, this loaf cake is tangy, subtly chocolatey, hinted throughout with vanilla, and irresistibly tender. It’s a cake that you’ll always find yourself wanting more of!
- Made in a simple loaf pan. Skip dividing a cake into layers and just spoon the batter into a loaf pan! It’s the perfect cake for when you’re not serving a big crowd.
- Two complimentary flavors. Unlike a red velvet cake, this loaf cake is swirled with a sweet vanilla cake batter to create an extra delicious treat!
- Effortlessly gorgeous. A simple swirl pattern inside the cake, topped with a silky smooth cream cheese icing, creates a beautiful contrast.

What’s The Difference Between Chocolate Cake and Red Velvet Cake?
While a red velvet cake DOES have cocoa powder in it, it’s actually very different from a chocolate cake! So, let’s get into it.
The main difference between chocolate cake and red velvet cake lies in their flavor profile and ingredients. While chocolate cake is rich and distinctly chocolatey, red velvet cake has a more subtle cocoa flavor with a hint of tanginess. Red velvet cake typically includes buttermilk and vinegar, which contribute to its unique taste and light, fluffy texture.
Additionally, red velvet cake is often topped with cream cheese frosting, adding a tangy contrast to the sweetness, while chocolate cake is commonly paired with chocolate frosting like our Buttermilk Chocolate Sheet Cake or vanilla frosting like our Classic Vanilla Cake. Both cakes are delicious, but red velvet offers a more complex flavor profile.
Here’s What You’ll Need (& Why!)
This recipe combines two components to create a delicious treat!
For The Cake:
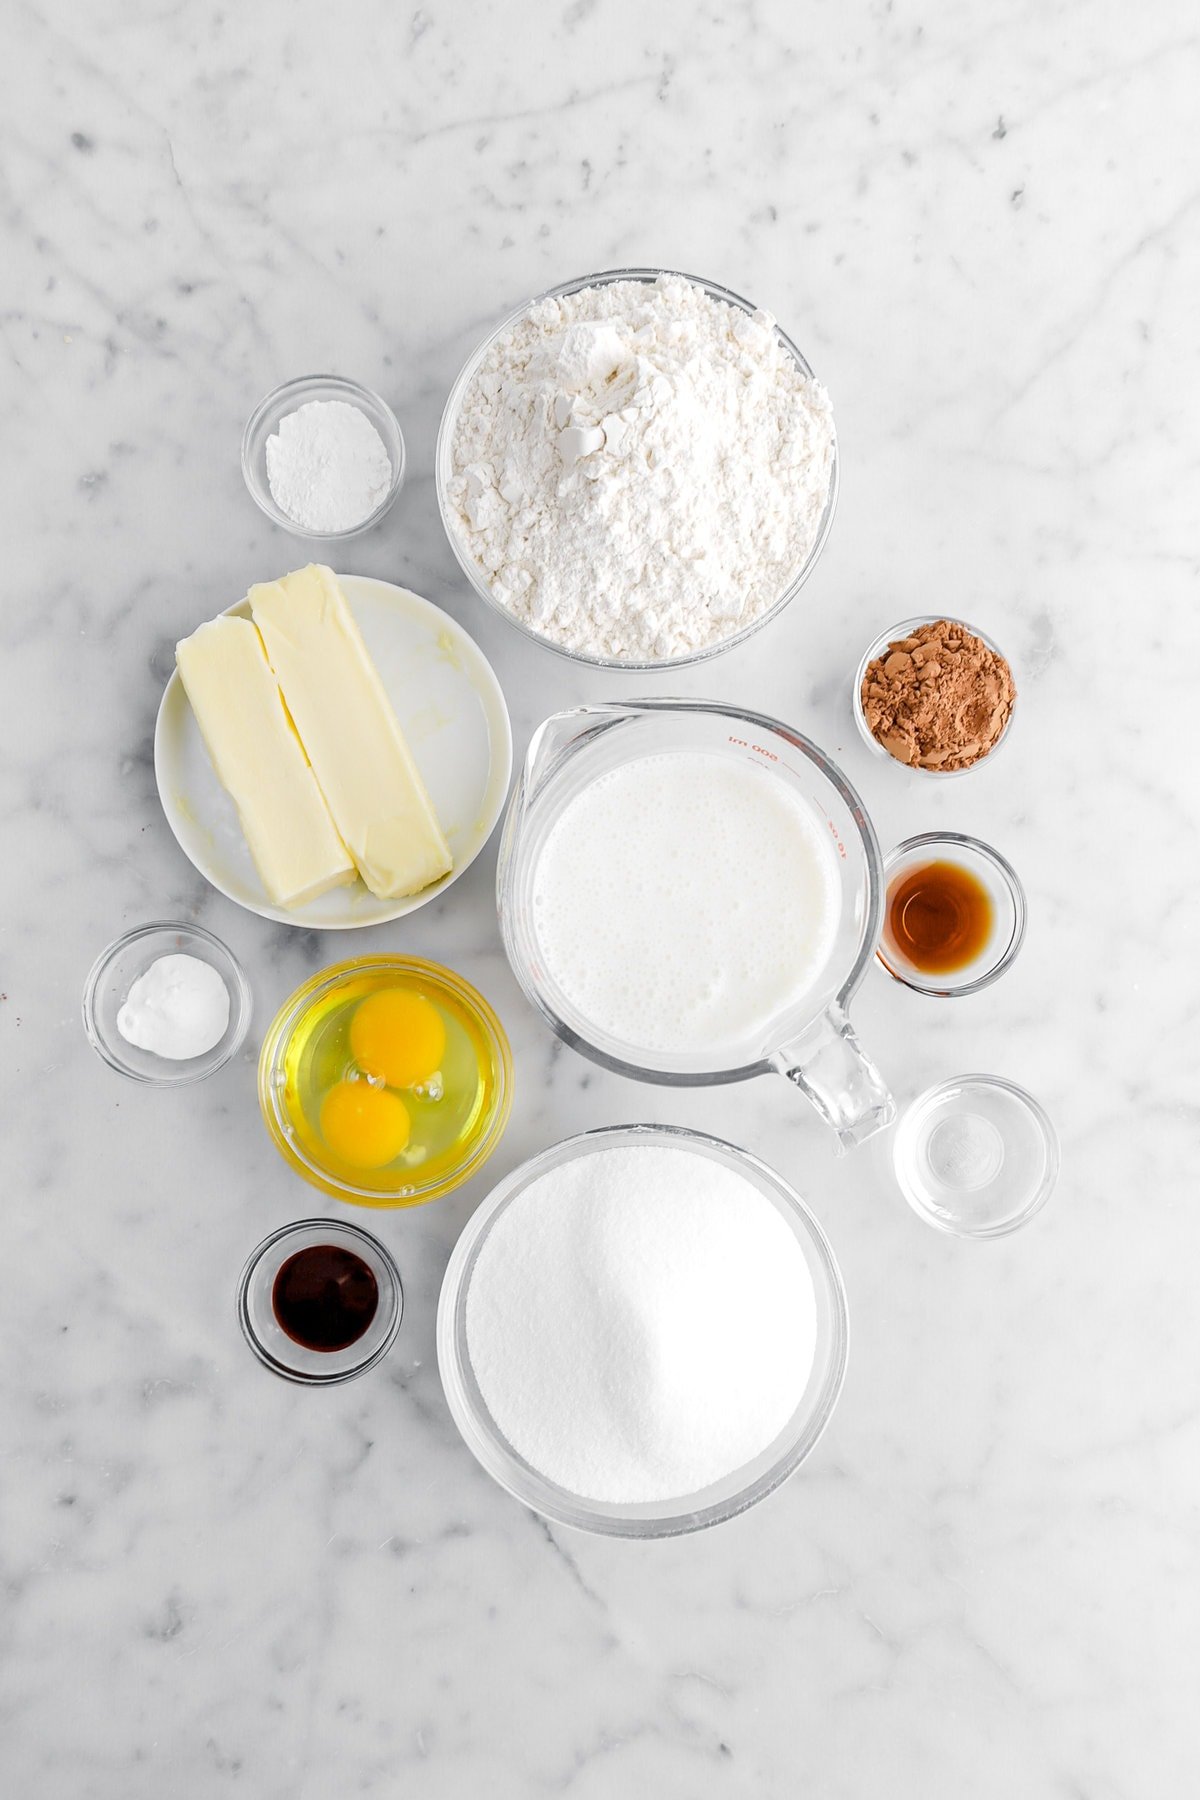
- All Purpose Flour – We wanted a moist, tender cake but one with enough structure to hold its shape without going to pieces. That’s where the all purpose flour comes in. It has the perfect amount of protein to create that structure.
- Baking Powder and Baking Soda – The leavenings used in this batter, baking powder and baking soda each make their own contributions to the texture and structure. Baking powder both starts and finishes the process of rise in this cake, starting as soon as it is mixed with liquid and continuing more robustly once it is in the oven. Baking soda reacts with the acidity in the buttermilk to give the rise a boost while also neutralizing enough of the acidity in the buttermilk to keep the cake from tasting sour.
- Salted Butter – Adding richness and moisture to the cake, salted butter also contributes to the overall flavor while eliminating the need for additional salt.
- Granulated Sugar – While adding the perfect amount of sweetness, it also helps with the texture and structure of the cake.
- Eggs – The binder that holds all the ingredients together, eggs also contribute structure, stability, moisture, and richness.
- Vanilla Extract – While vanilla works beautifully to enhance flavor, it is also the dominant flavor in this cake.
- Distilled Vinegar – You must used distilled vinegar, not apple cider, wine, or champagne vinegars. It brings out the red color and contributes to tenderness.
- Buttermilk – The main purpose of buttermilk in this cake is to help with rise. It helps give it a light fluffy texture, and it contributes to flavor as well.
- Deep Red Food Coloring – Gel food color is the best choice.
- Natural Process Cocoa Powder – The ingredient that gives the swirl in this cake its “velvet” appearance, cocoa powder also adds a light chocolate flavor.
For The Icing:
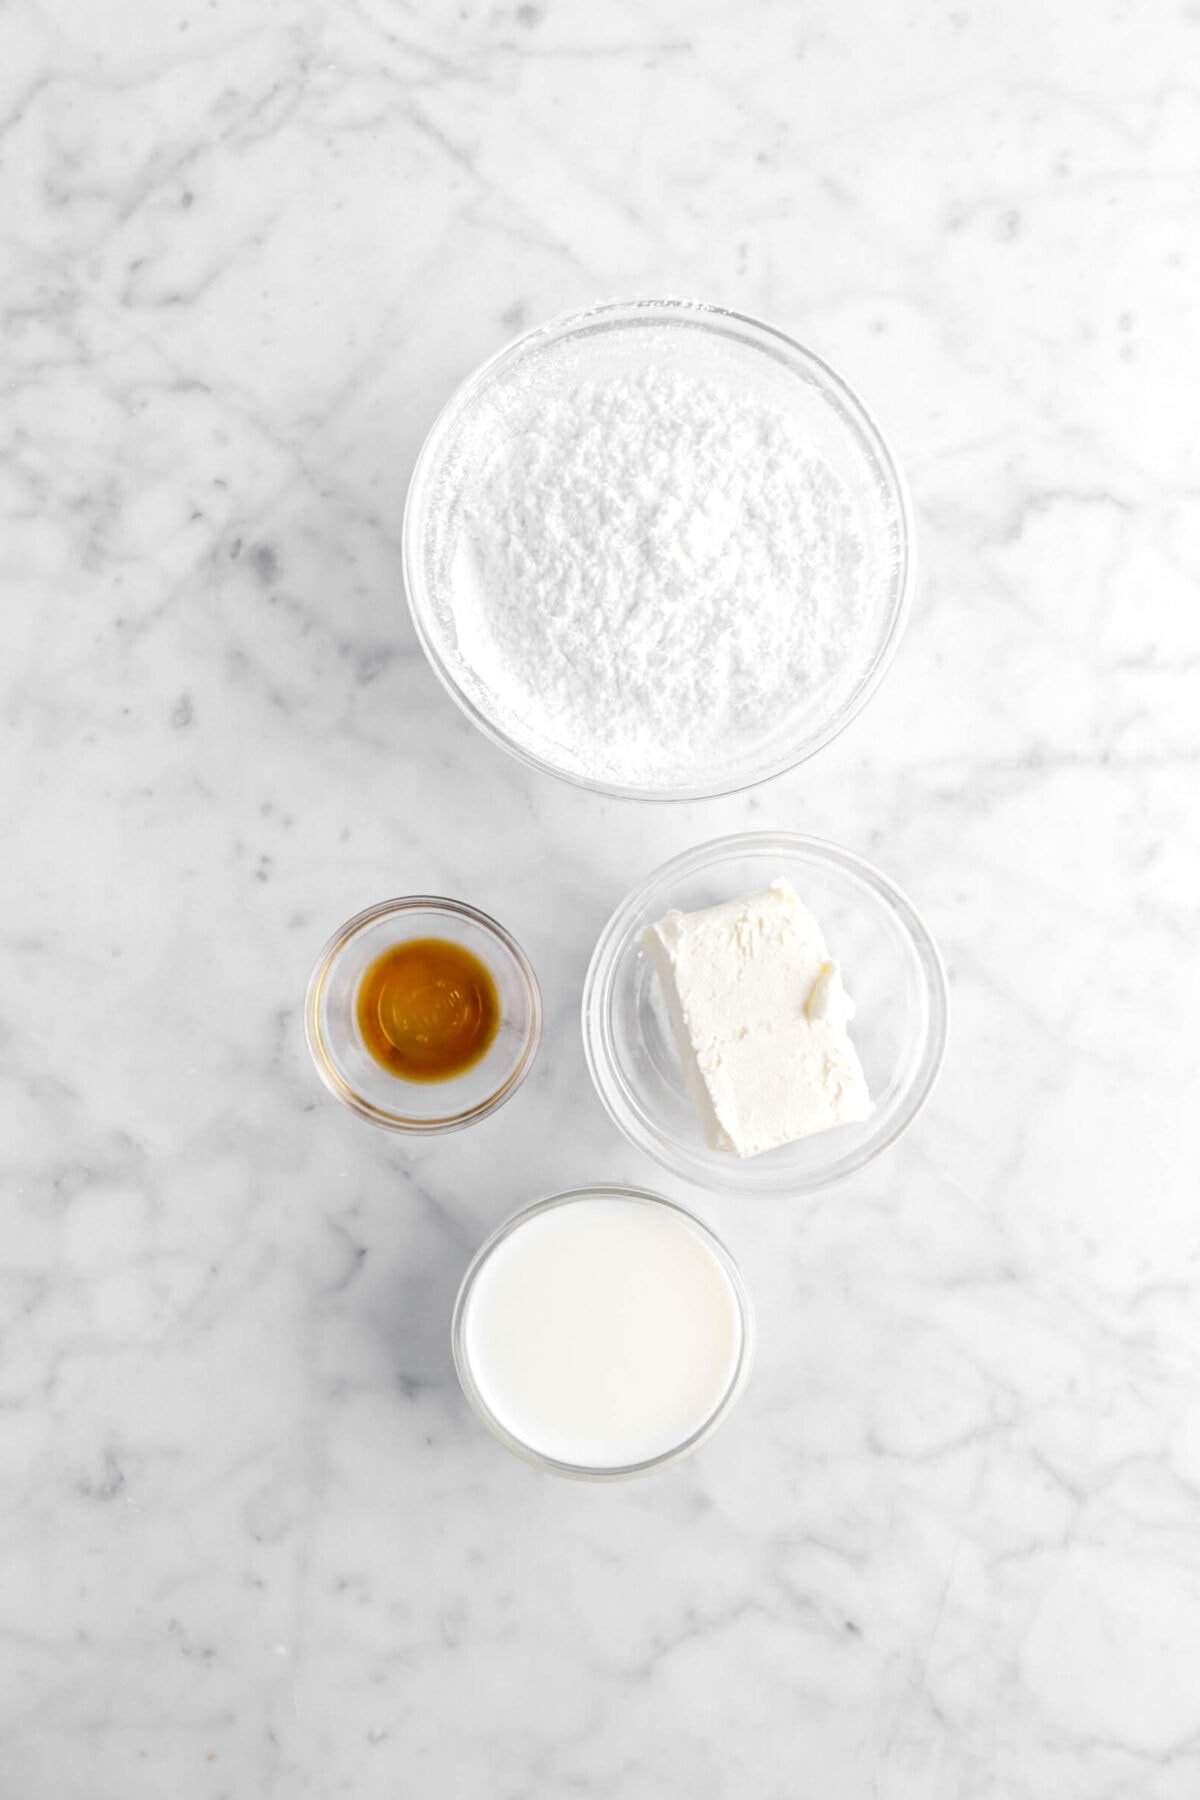
- Cream Cheese – This is the main ingredient in cream cheese icing. It is what gives it that little bit of tang that marries so well with red velvet cake.
- Powdered Sugar – Because it melts easily, powdered sugar ensures a smooth icing. It sweetens as well.
- Salt – Just a bit of salt enhances the flavor and tones down the sweetness a little.
- Whole Milk – We used whole milk because we wanted a neutral flavor and just a tiny bit of richness while also thinning the icing.
- Vanilla Extract – Adding a subtle undertone, vanilla extract is the perfect choice to enhance the flavor.
What About Food Coloring?
The vibrant red color of red velvet cake is thanks to red food dye! We recommend using a gel food coloring, as the color is much more concentrated than regular food coloring. But, if you prefer to use a natural coloring, the best thing to use would be beet powder. The red color may not be as deep, but it will still provide a beautiful shade of red. However, if you simply don’t want to color your batter, leave it out! The cake itself will have the same flavor, but half of it will be a light brown color instead of red.
How To Make This Red Velvet Swirl Loaf Cake
While marble cakes can seem intimidating and difficult, this cake is actually pretty simple to make! We’ve provided a quick overview on how to make this cake (the full recipe is in the recipe card at the bottom of the post!) with a few step-by-step photos to ensure baking success.
- Prep: Preheat your oven to 325°F/165℃ and grease a loaf pan. Once the oven is preheated, whisk together the flour, baking powder, and baking soda!
- Mix it Up: In another bowl, cream butter and sugar until fluffy. Beat in eggs one at a time with vanilla extract. Now, alternately add the dry ingredients (the flour mixture you whisked earlier!) with the buttermilk, beginning and ending with the dry ingredients. Be sure to give it a good stir after each addition.
- Time for Color: Divide the batter in half. Mix cocoa powder into one half for chocolate batter and add the red food coloring and vinegar to create a vibrant red batter! Leave the other half as-is (aka vanilla!).
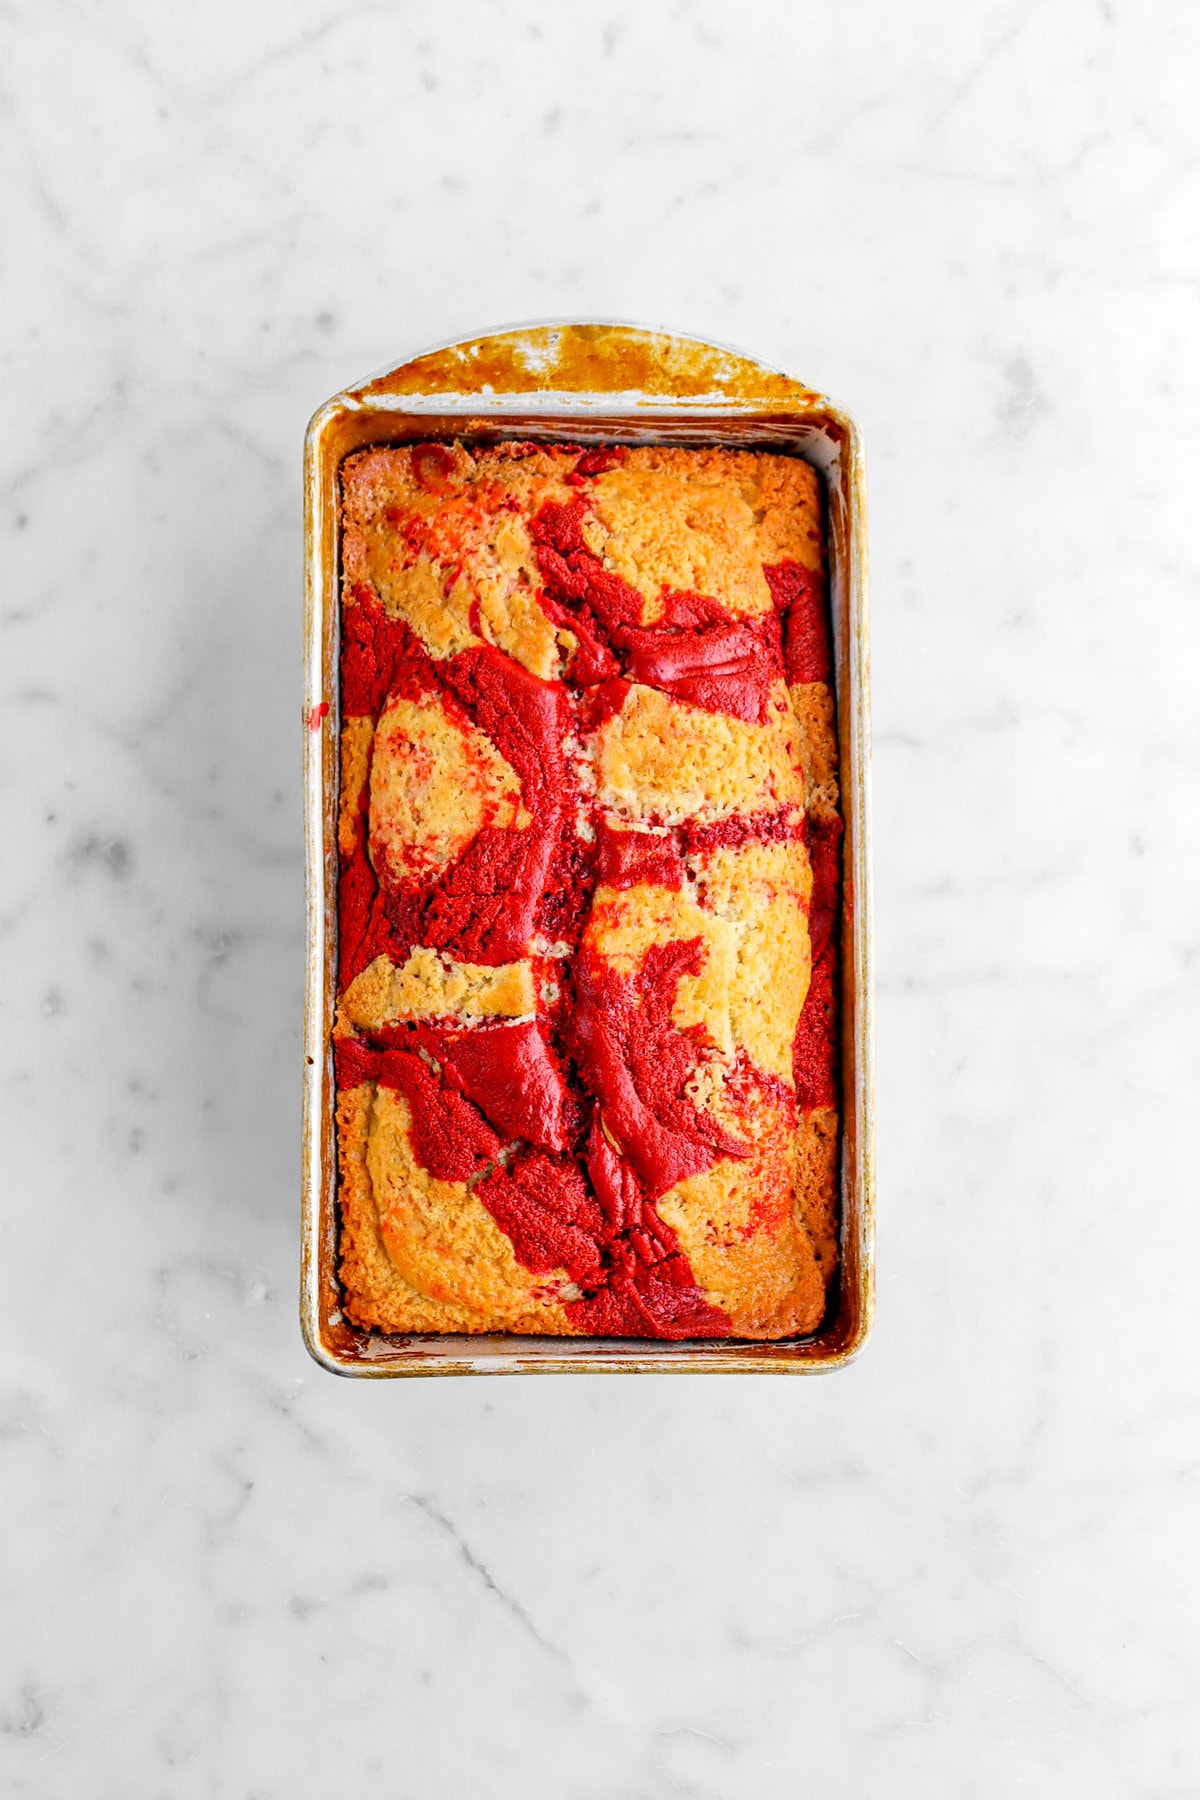
- Swirl and Bake: Spoon dollops of each batter alternately into the pan, then swirl them with a knife to create a marbled effect. Bake for 70 minutes (or until a cake tester comes out clean) and cool.
- Luscious Icing: Whip up the icing by beating cream cheese, powdered sugar, and salt until smooth. Add milk and vanilla, then pour over the cooled cake. Enjoy!


✳ A Few FAQ’s


When you make this Red Velvet Swirl Loaf Cake with Cream Cheese Icing, leave a comment down below! We love hearing from you and answering any questions you might have! Also, be sure to tag us on social media and hashtag it #BakersTable.
Happy baking!
x, Caylie

Red Velvet Swirl Loaf Cake with Cream Cheese Icing
Ingredients
Cake
- 2¼ cups all purpose flour
- 2¼ teaspoons baking powder
- ¾ teaspoon baking soda
- ⅔ cup salted butter, room temperature
- 1¼ cups granulated sugar
- 2 large eggs, room temperature
- 1¼ teaspoons vanilla extract
- 1 Tablespoon distilled vinegar
- 1½ cups buttermilk, room temperature
- ⅓ teaspoon deep red food coloring
- 2 Tablespoons natural process cocoa powder, sifted
- 1 teaspoon distilled vinegar
Cream Cheese Icing
- ¼ cup cream cheese, room temperature
- ½ cup powdered sugar, sifted
- Pinch salt
- 2 Tablespoons whole milk
- ¼ teaspoon vanilla extract
Instructions
Cake
- Heat oven to 325℉/165℃.
- Spray a 9 inch loaf pan with baking spray. Set aside.
- In a medium bowl, whisk flour, baking powder, and baking soda together. Set aside.
- In the bowl of a stand mixer fitted with the flat beater, beat butter and sugar until light and fluffy, about 2-3 minutes.
- Add eggs and vanilla, beating well after each addition.
- Continue beating until light and fluffy, about 2-3 minutes.
- Add flour mixture alternately with buttermilk, beginning and ending with flour mixture.
- Stir in vinegar.
- Spoon half of the batter into a clean bowl.
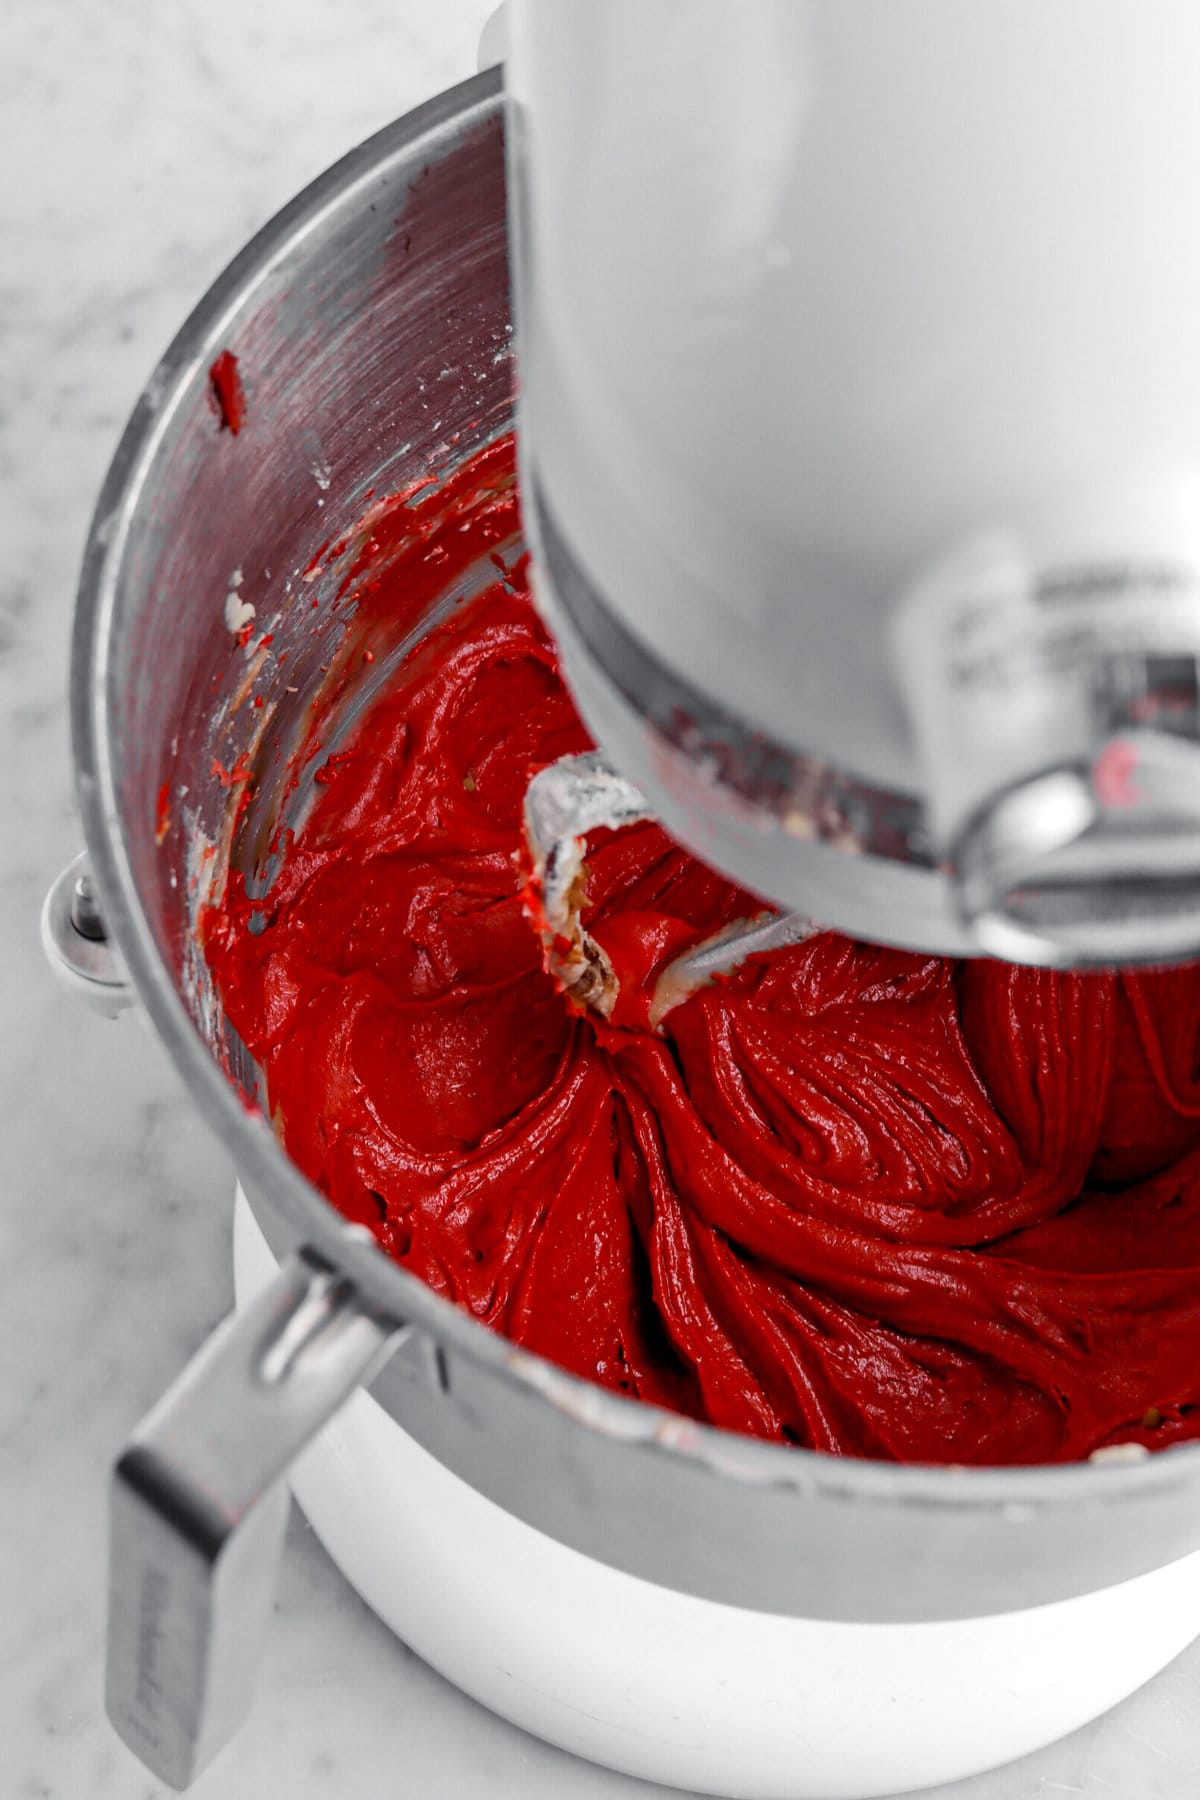
- Add cocoa powder to the half of the cake batter still inside the mixer.
- Mix until combined.
- Mix in red food dye and vinegar.
- Use a 3 Tablespoon scoop to drop batter in a alternating checkerboard pattern in prepared pan.
- Use a flat-bladed knife to swirl batters.
- Bake for 70 minutes, or until cake tests done.
- Cool in pan for 10-15 minutes.
- Turn out and finish cooling on wire rack.
Icing
- In a small bowl with an electric mixer, beat cream cheese until smooth, about 1-2 minutes.
- Add powdered sugar and salt.
- Beat until combined.
- Add milk and vanilla.
- Beat until smooth.
- Pour over cooled cake.
Notes + Tips!
- Check the expiration date on your baking powder and baking soda.
- Remember to preheat your oven!
- If you want to substitute unsalted butter, add ½ teaspoon salt.
- Be careful not to over-mix your cake batter.
- Room temperature is about 70℉/21℃.
- Use an oven thermometer to ensure accurate cooking temperatures.
- If you’re unsure if the cake is baked, use a cake tester or an instant read thermometer to check! A cake tester should come out clean with no crumbs once the cake is completely baked. If you use a thermometer, a completely baked cake should read about 210°F/99℃.
- Be sure to let this cake cool completely before icing.
Tools You May Need (affiliate links)
– Still Hungry? –
Here are a few recipes may like!


