How To Make The Perfect Pie Crust (+ Recipe!)

This post may contain affiliate links, please visit our privacy policy for details.
Learn how to make a perfectly flaky, buttery pie crust from scratch. This post includes all of our tried-and-true success tips, step-by-step photos, and a thoroughly detailed recipe. You’ll become a pro in no time with this recipe and the rest will be as easy as…well, apple pie!
We originally published this recipe in 2019 and have since added new photos, written a more in-depth tutorial, and added extra tips for pie baking success.

A great pie crust is the foundation of countless delicious desserts, from classic cherry pie to brownie pie, even a savory shepherd’s pie. The quality of your crust can truly make or break your bake.
That’s why we’ve always relied on this time-tested family recipe. Originally used by my great-great-grandmother for her famous strawberry pie (which we have adapted and turned into cutie strawberry hand pies!), it’s been a recipe that’s been passed down through generations.
Today we will be teaching you everything we know about making the perfect pie crust.
With all the recipe testing that goes into publishing the many pie recipes on this website, plus baking pies for our family at Thanksgiving, it’s no understatement to say that we have made a LOT of pies. Along the way, we have learned what works (and what doesn’t!), and the easiest ways to make that perfectly flaky, delicious pie crust.
You Only Need 4 Ingredients
The ingredient list for pie crust is so simple, you probably have these ingredients in your kitchen:
- Flour: For this pie crust, you only need all-purpose flour. Though, did you know that not all all-purpose flour is created equal? Our favorite all-purpose flour has 11.7% protein and we cannot recommend it enough!
- Salt: No bake is complete without a dash of salt. This adds SO much flavor!
- Butter: Butter adds flavor to the crust, as well as create the deliciously flaky layers.
- Water: Ice cold water brings brings the dough together without melting the butter.
You can use this pie dough for so many recipes beyond a traditional pie, such as apple slab pie, pecan hand pies, or even strawberry pop tarts!

The Secret To Perfect Pie Crust: Keeping It COLD
The refrigerator is just as important as the oven when you’re making pie.
But why? Keeping your pie dough cold helps prevent the fats from melting before the crust goes in the oven. If the butter melts before baking, you lose all the yummy flakiness. But when you have that perfectly cold pastry, the butter melts in the oven as it bakes, and the steam helps to separate the crust into multiple flaky layers. Butter that’s too warm will yield a hard, greasy crust instead of a beautifully tender, flaky crust.
The colder the ingredients, the easier your pie crust is to work with, and the better it will turn out!
⊹ A Few Quick Tips For The Best Pie Crust ⊹
- Keep it Cold: Like I said above, cold butter is key to a flaky crust. We often keep some of our butter in the freezer to make sure it’s extra cold.
- Rest the Dough: Remember to let your dough rest in the fridge. This helps to relax the gluten and make the crust more tender.
Perfect Pie Crust, Step-by-Step
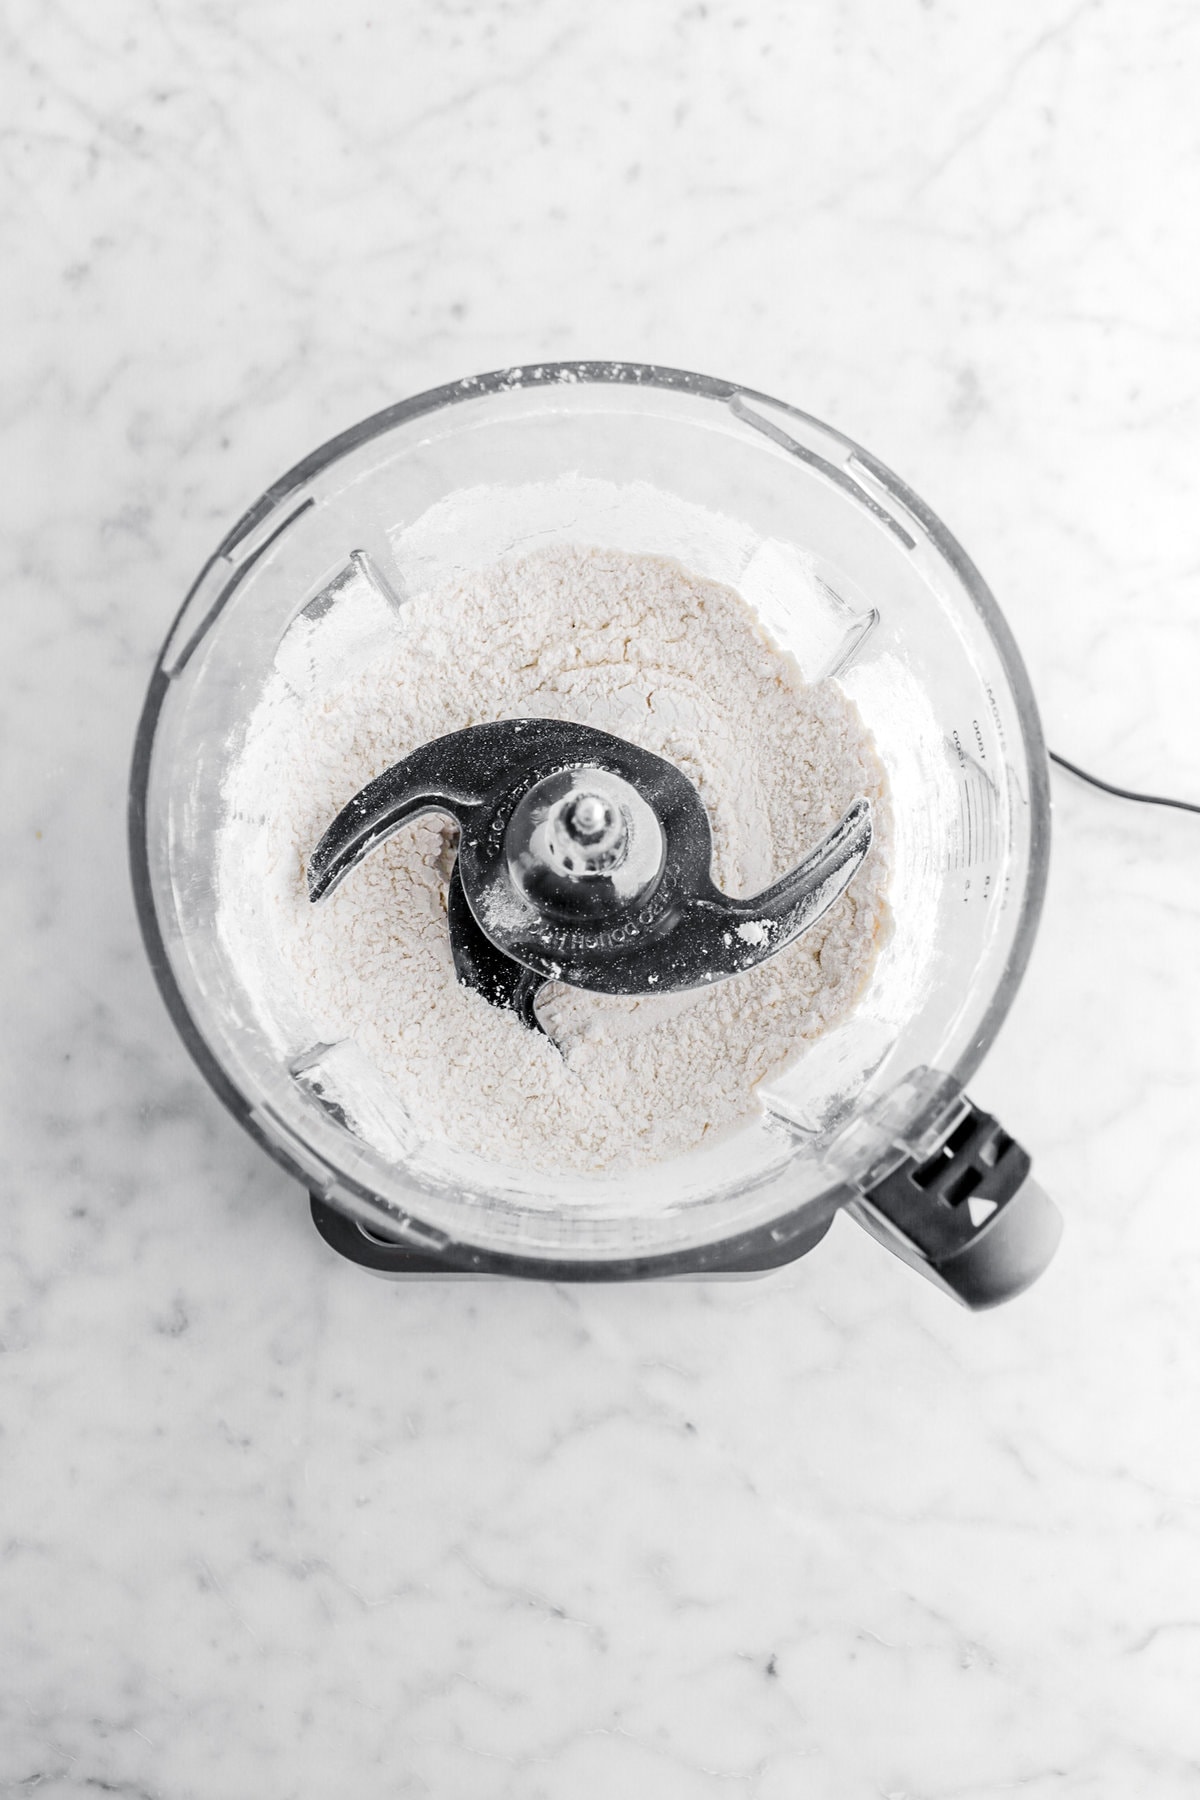
It’s time to start making our dough! Combine the flour and salt in the bowl of a food processor. Add the butter and pulse a few times to cut in the butter. Do not over-mix! Just a few pulses will do. In this step, you’re only breaking up the butter into small flour-coated pieces; you’re not completely incorporating it!
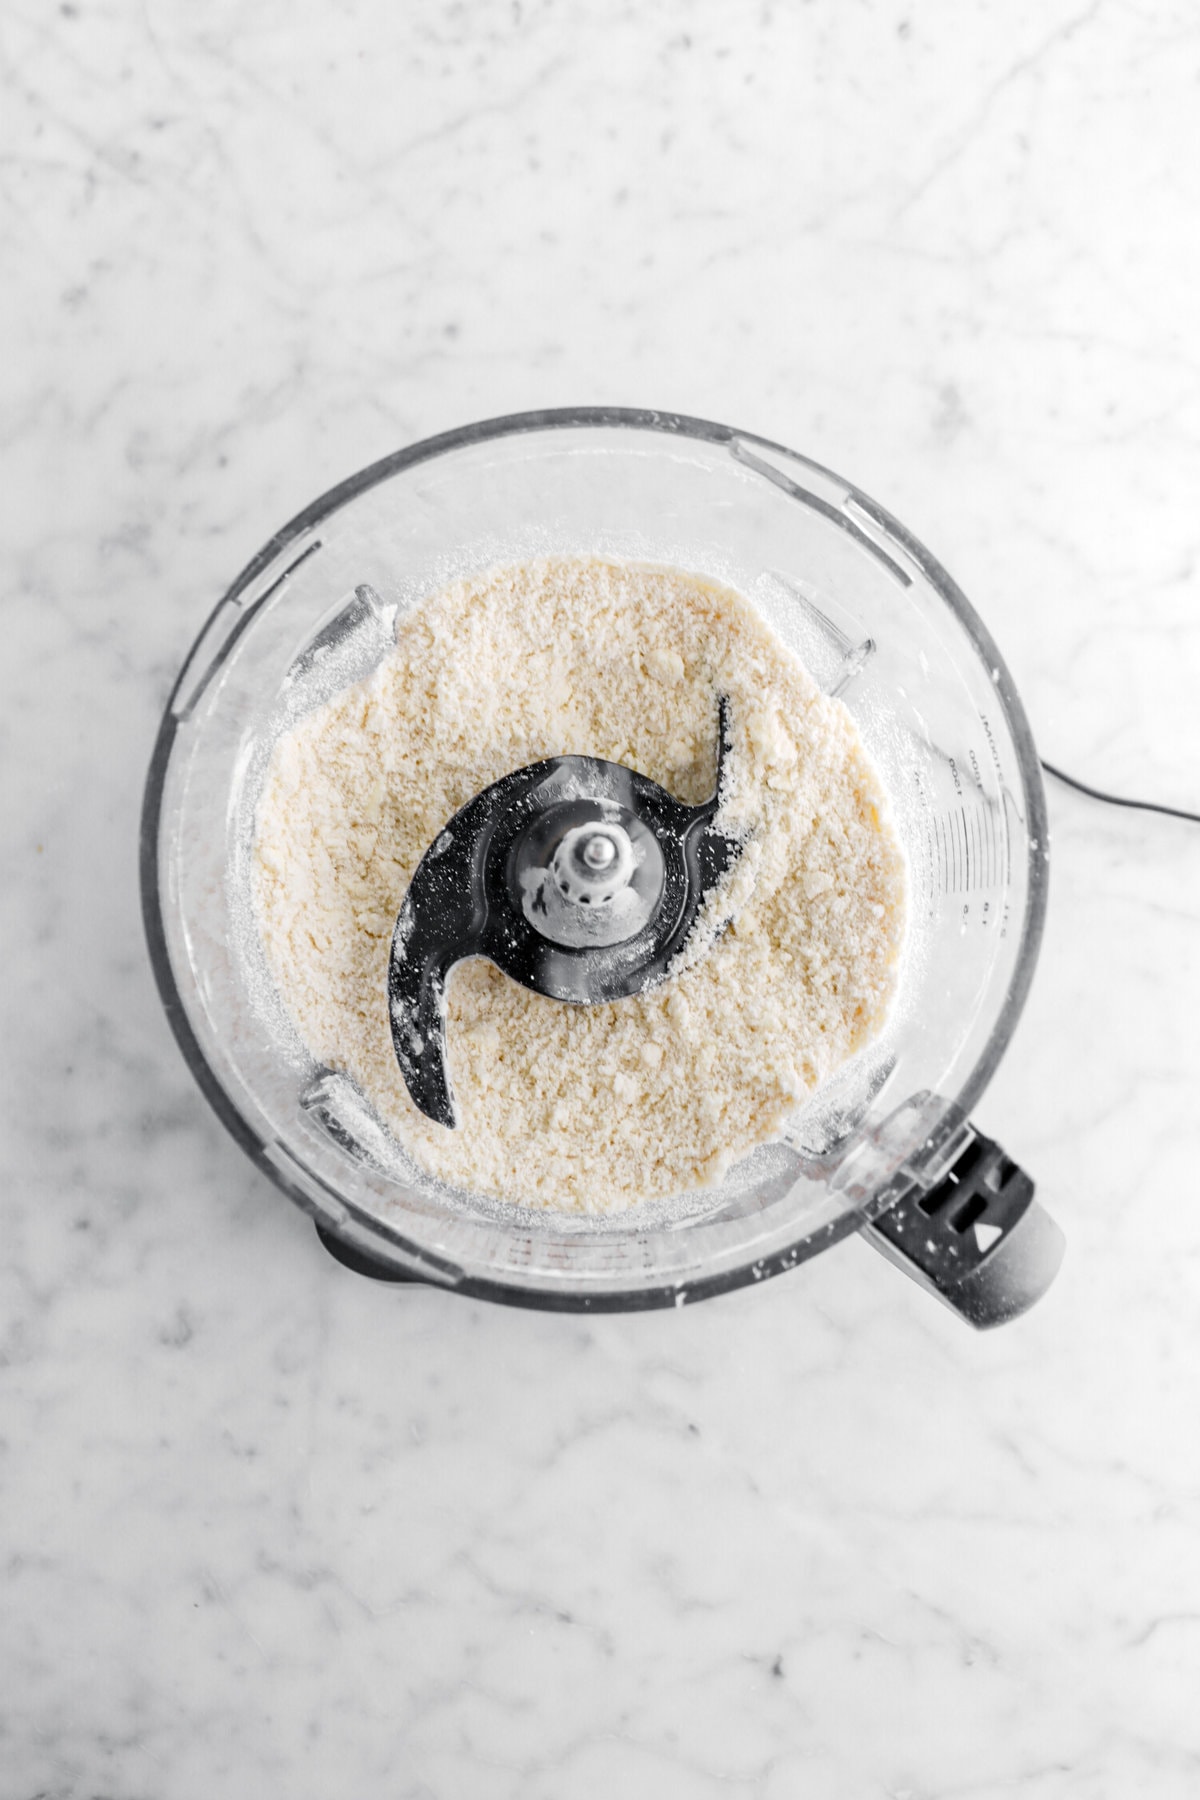
The mixture should be crumbly with lots of lumps, as you see above. You should still have some larger pieces of butter when you’re done.
Drizzle the cold water into the dough 1 Tablespoon (15ml) at a time, pulsing after every Tablespoon has been added. Stop adding water when the dough begins to form large clumps. We typically end up using about 4 Tablespoons (60 ml) of water, but if the weather is particularly humid, you may not need as much, and if the weather is dry, you may need a little more. Absorption rates change dramatically with the seasons, so it’s always good to start small and work your way up!
If too much water is added, the pie dough will be overly sticky and too soft to work with.
If too little water is added, you’ll notice the dough is dry and crumbly when you try to roll it out and handle it.
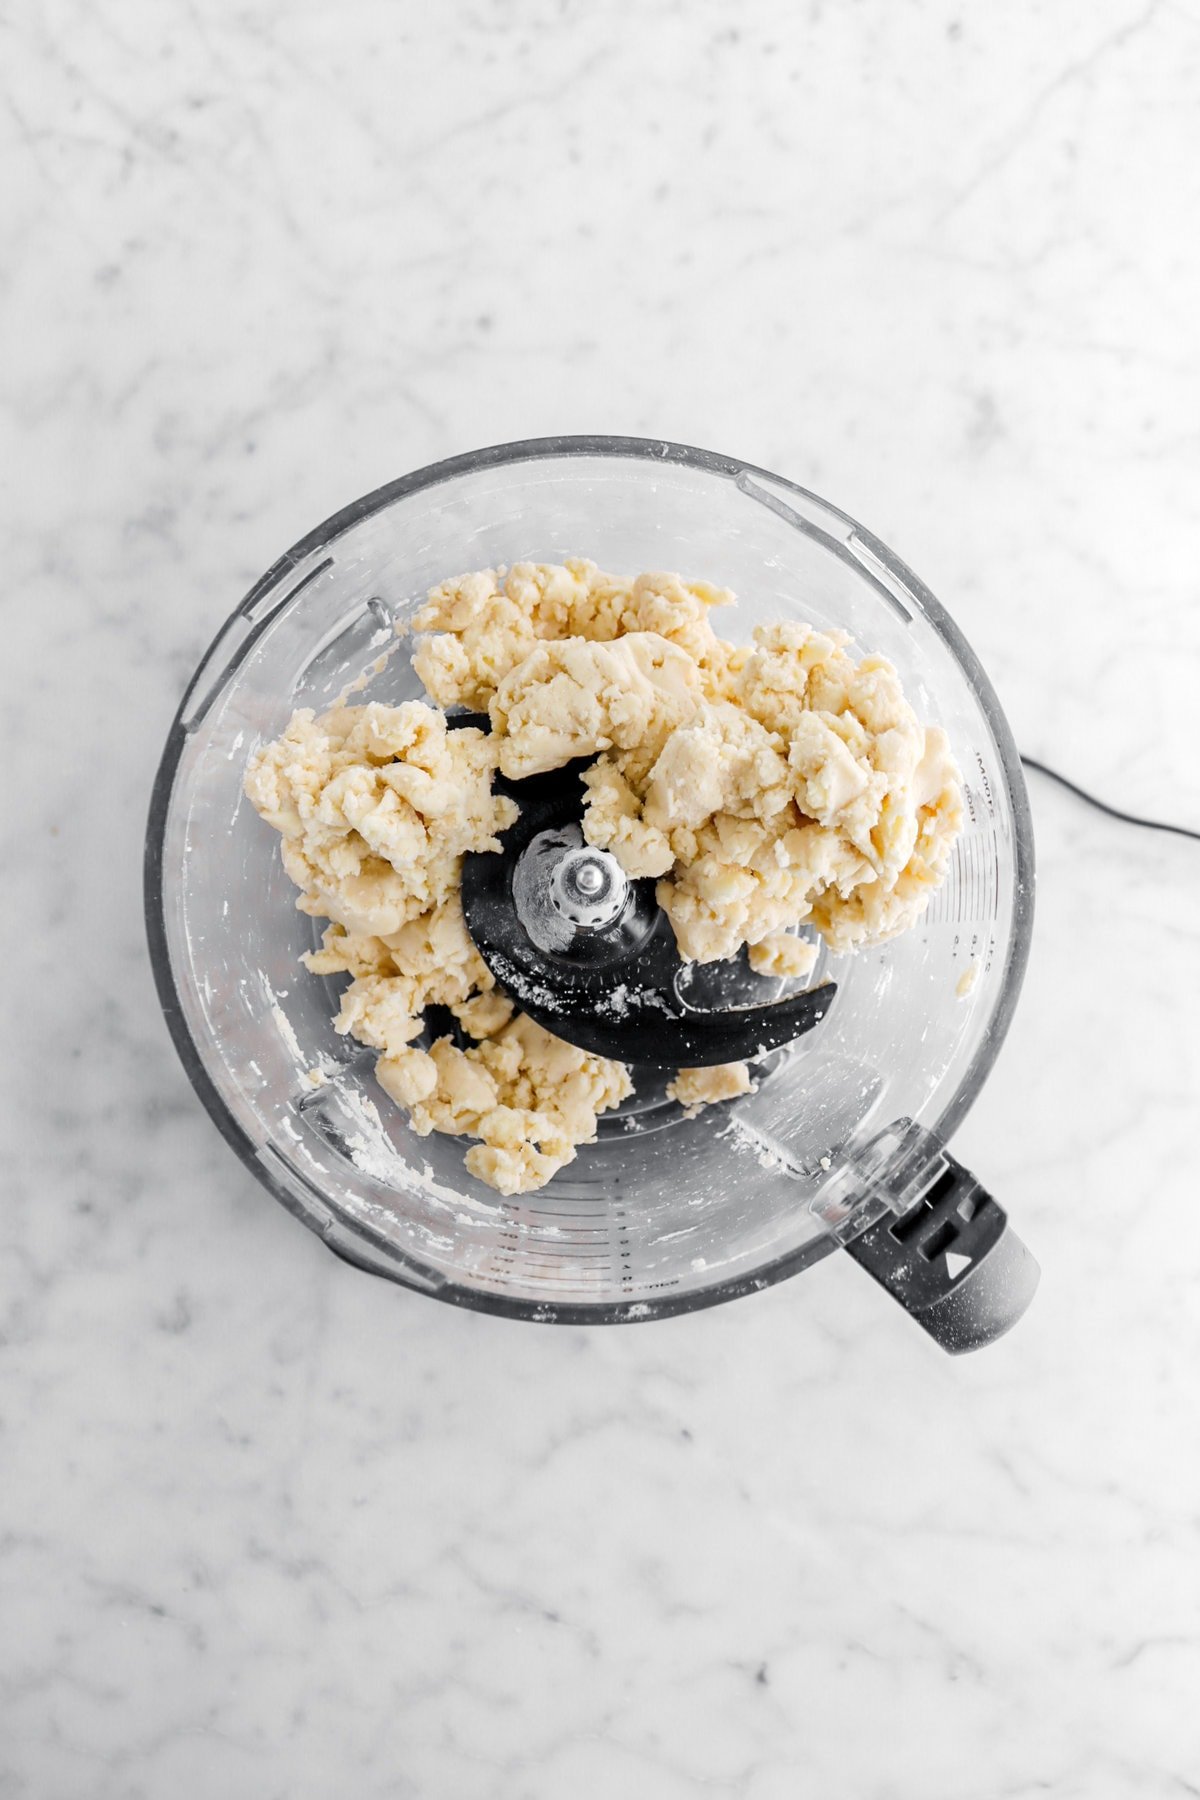
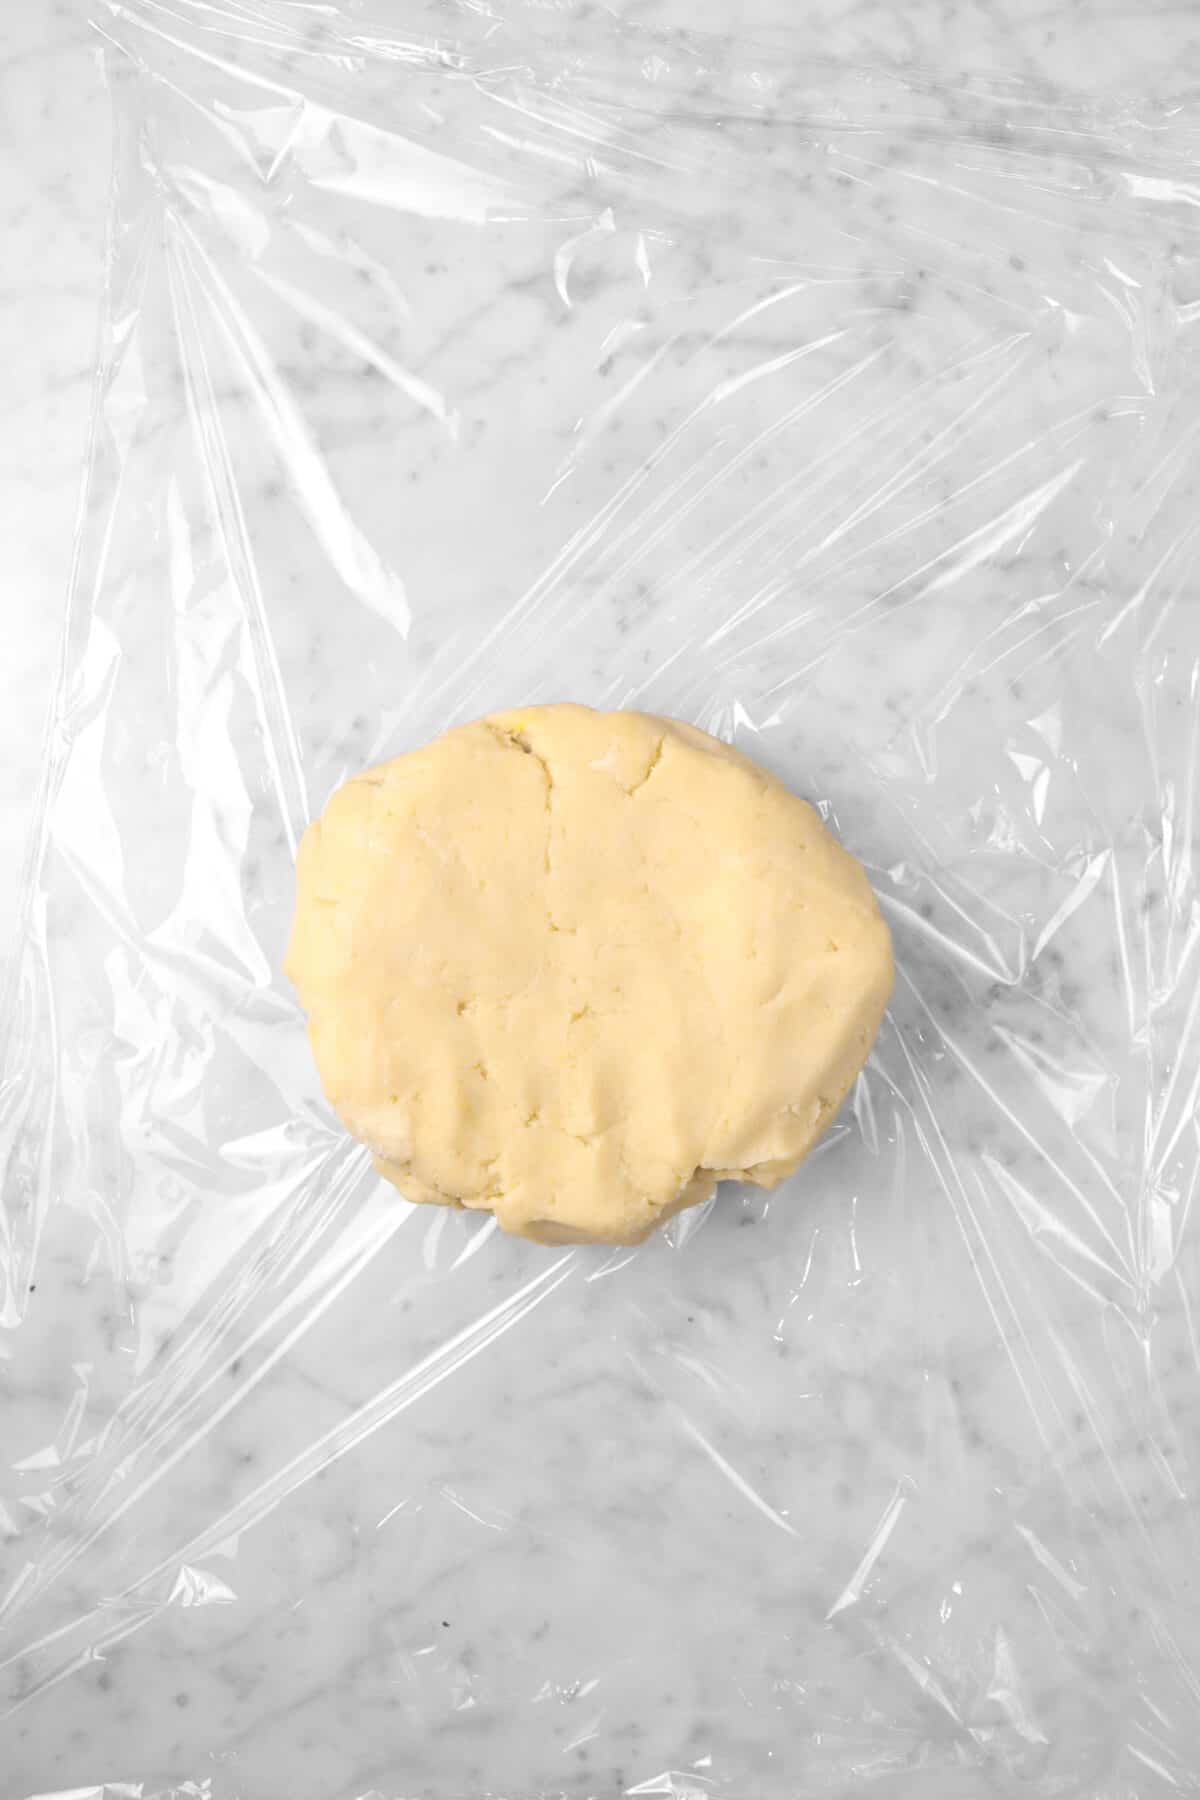
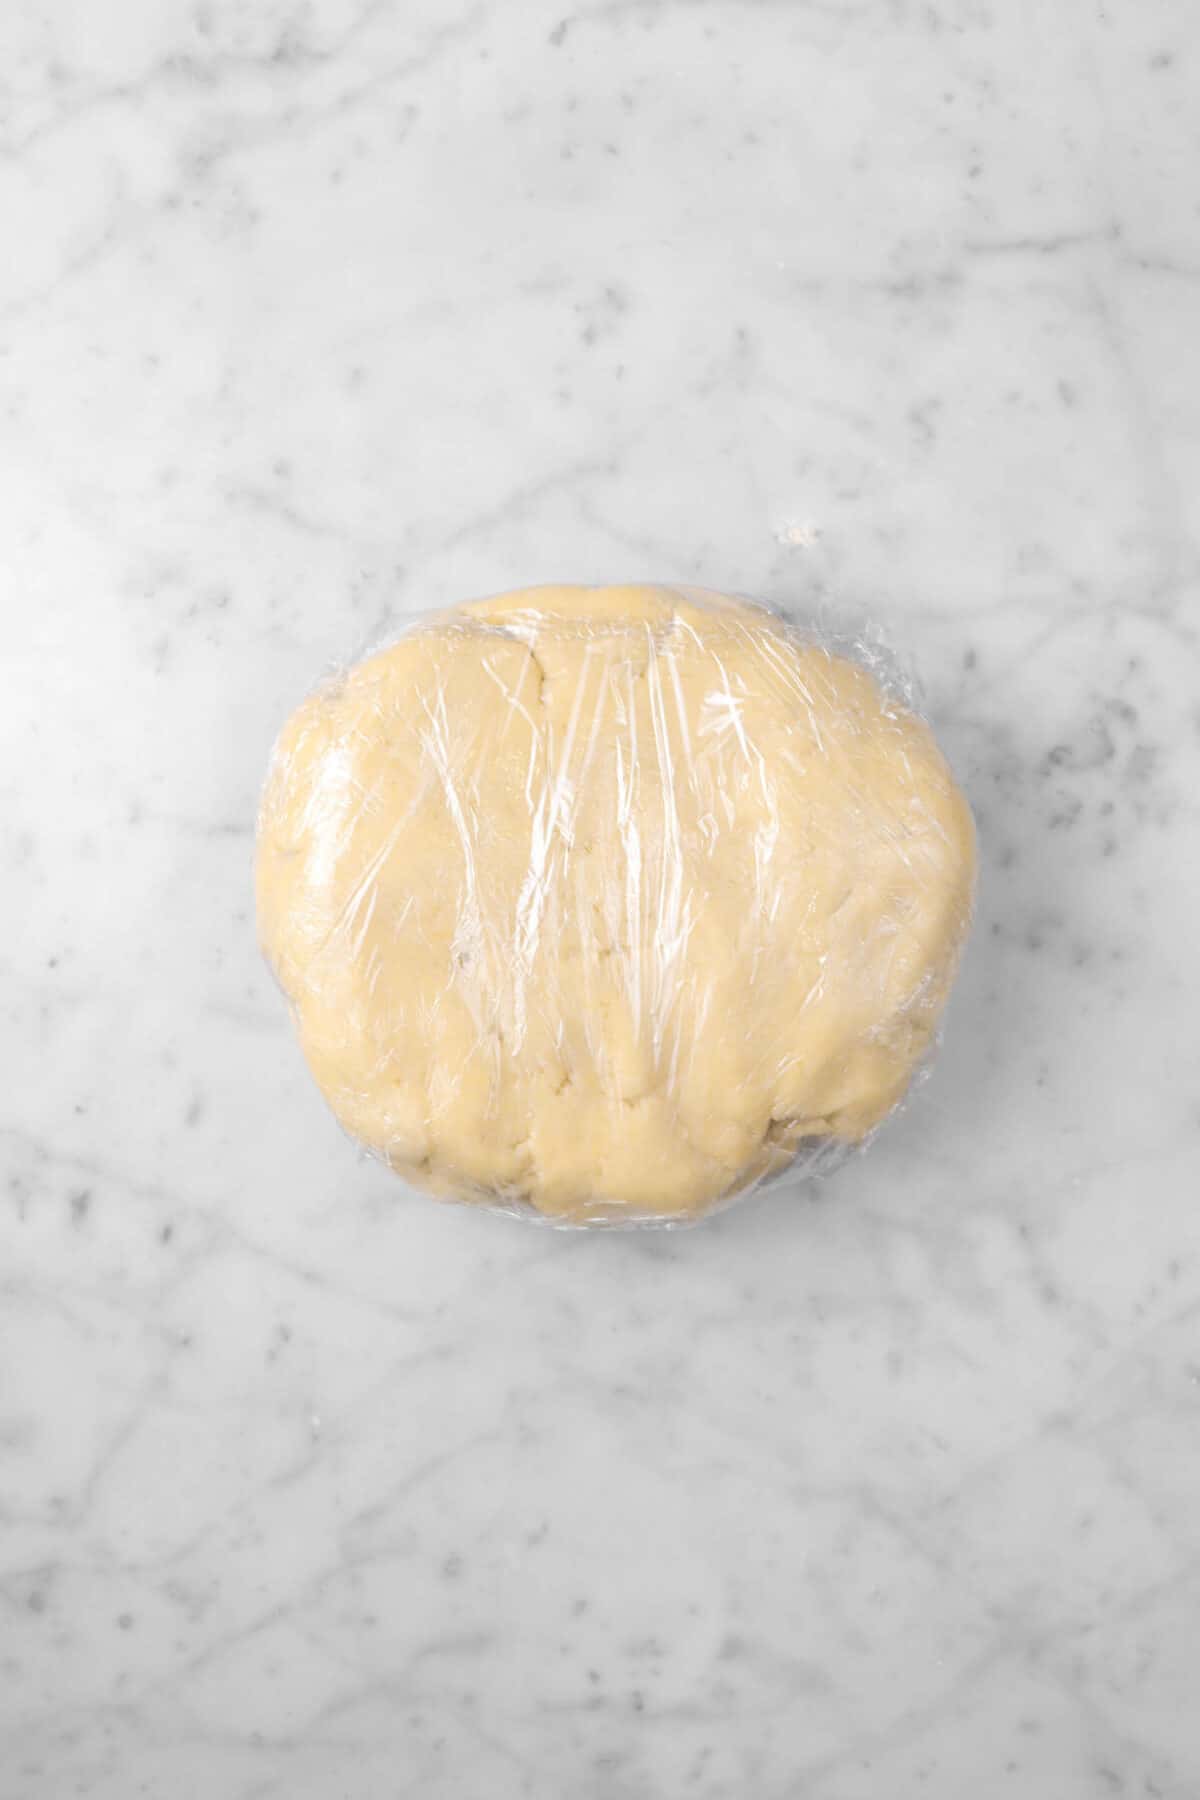
You want the dough to come together, but not feel sticky. Once the dough is starting to form, transfer the dough onto a piece of plastic wrap, gently bring together with your hands, and wrap tightly.
This is enough dough for 1 pie crust. If you want a double crust pie like apple pie or cherry pie, you will need to double the recipe below. If the pie you want to make doesn’t require a top crust, like lemon meringue pie, pecan pie, or french silk pie, you’re good to go with the recipe as-written.
And if you have any leftover dough, you can use cookie cutters to make an easy pie design, like we did on this apple cranberry pie, or try your hand at making a triple berry pandowdy!
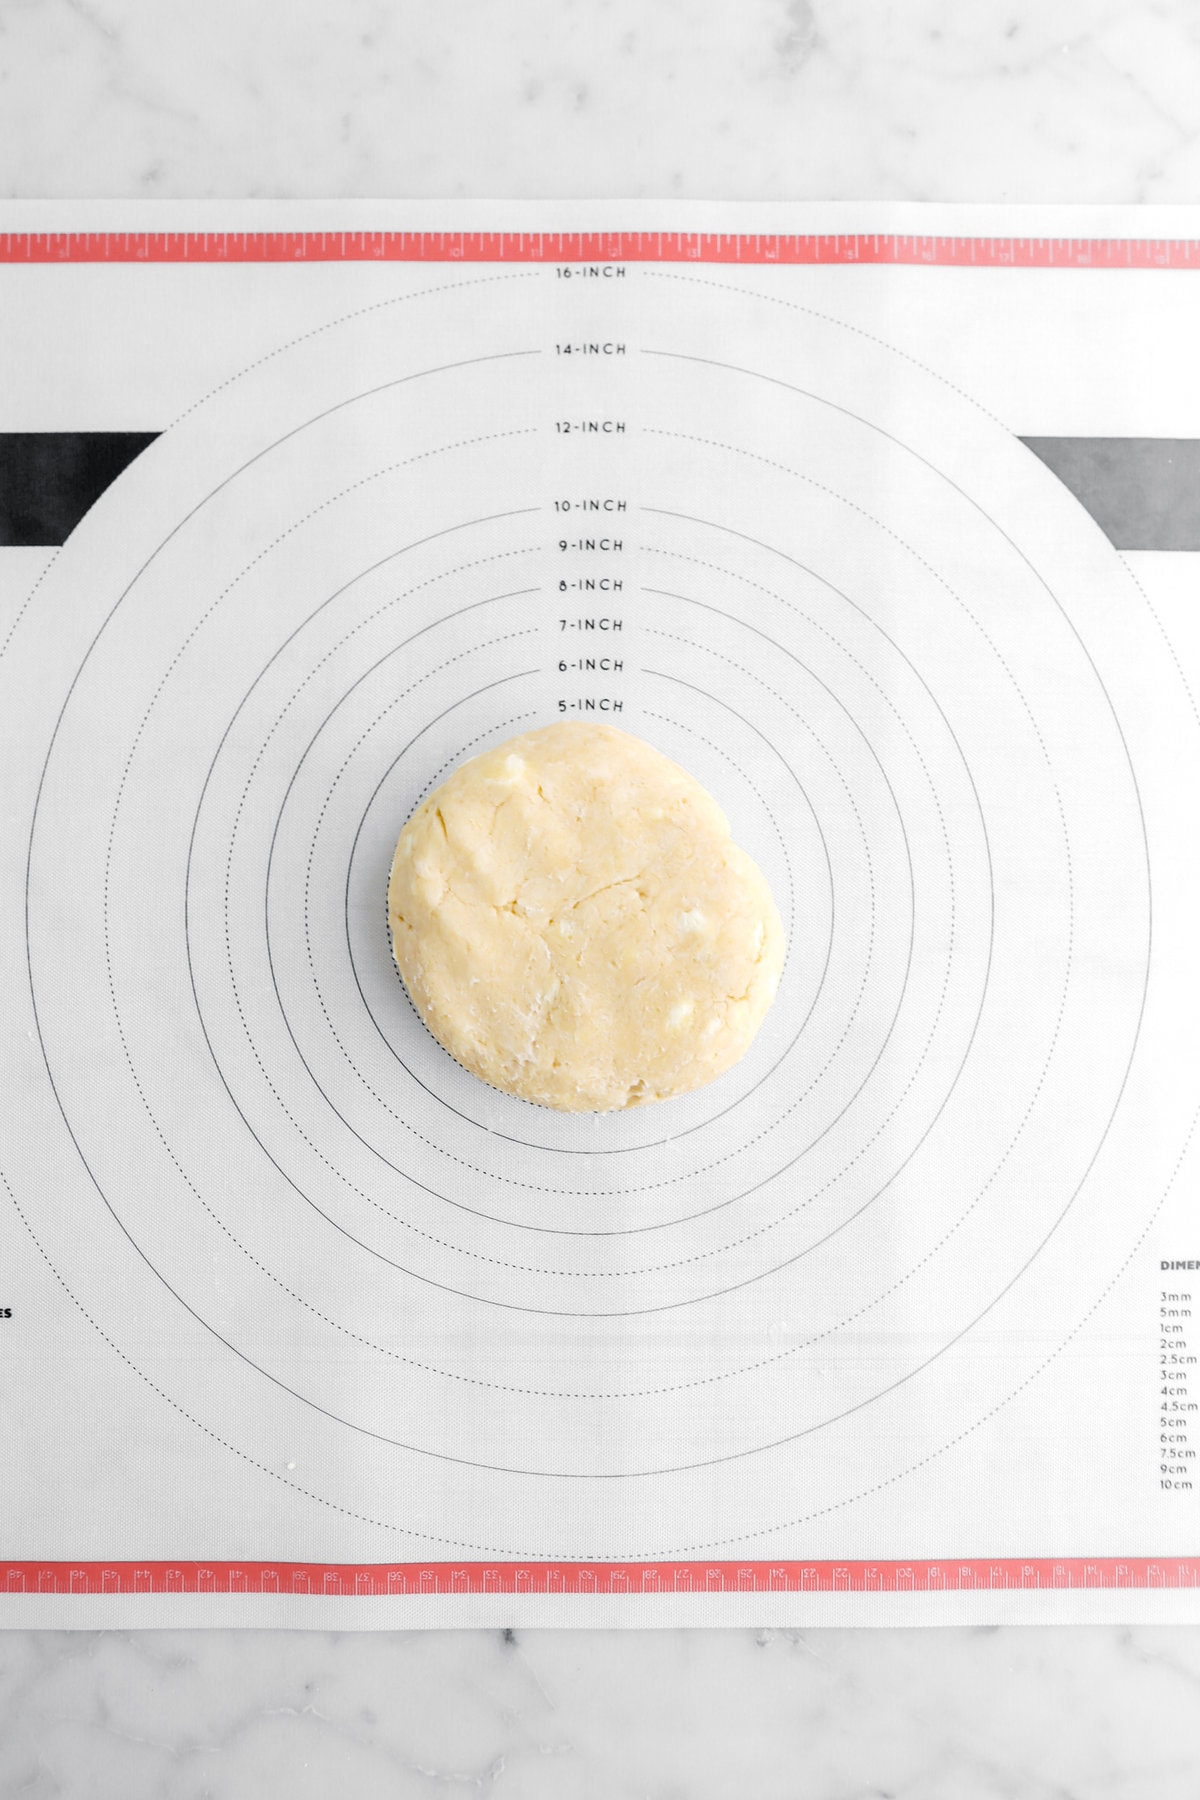
⊹ Take A Look At The Dough ⊹
Once you turn the dough out and form it, take a good look. Remember, you want to see pieces of butter throughout. These chunks of butter will help ensure a flaky pie dough. They are a GOOD thing!
How To Roll Out Pie Crust
After the dough has chilled slightly, you can roll it out. If you’re working with a double crust, remember to work with one crust at a time, keeping the other in the refrigerator until you’re ready to roll it out. You’ll need a clean work surface, a rolling pin, and a silicone pastry mat. Place the dough disc on a lightly floured pastry mat and lightly flour the top of the dough.
Use medium force with your rolling pin on the dough, but don’t press down too hard! You don’t want to cause splits/breaks in the dough while rolling.
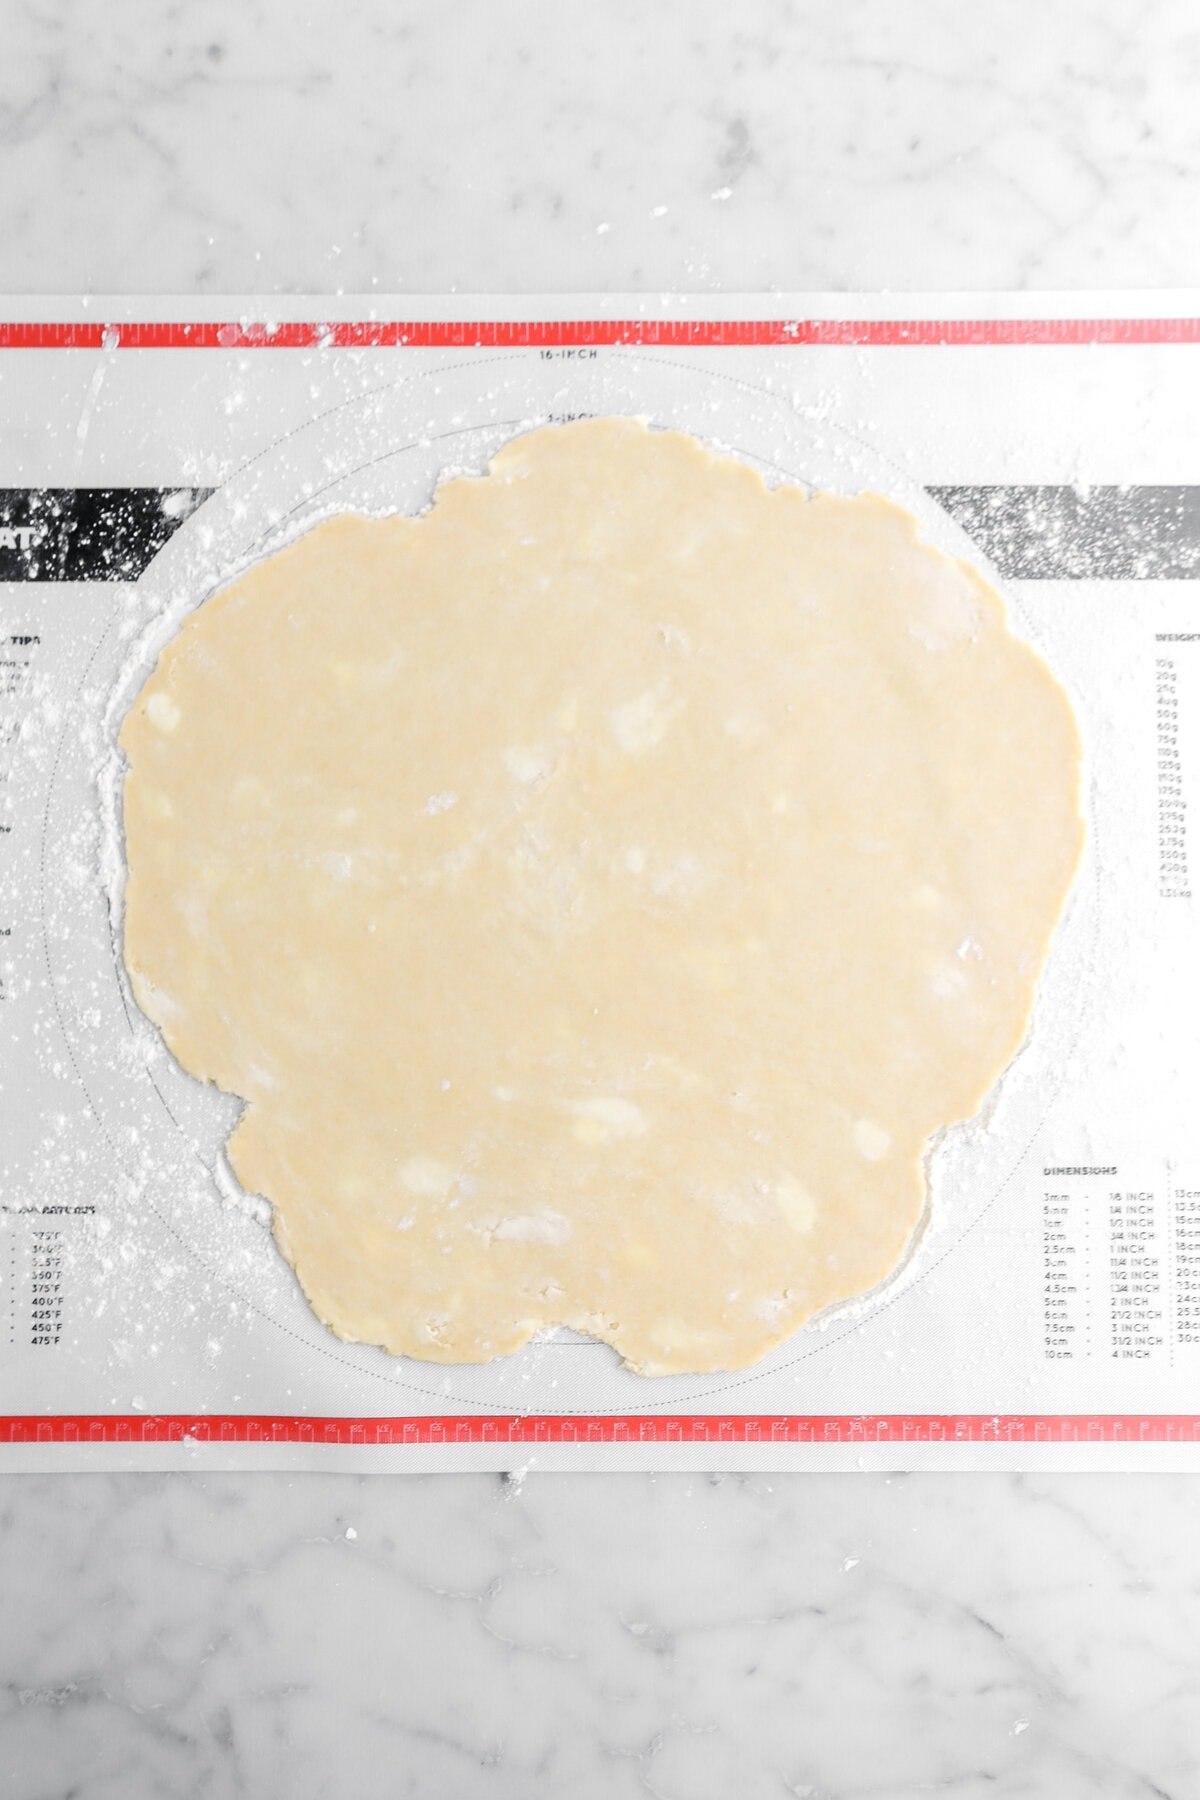
When rolling the dough, start from the center of the pastry and work your way out in every directions. Do you see that beautiful marbling of the butter throughout the dough? That’s what creates our flakey layers!
Roll the dough into a thin 12-inch circle (it doesn’t have to be perfect), which will fit a 9-inch pie dish. Remember, you want enough crust to have some overhang so you can make a decorative edge!
When all is said and done, your pie dough will be about ⅛ inch thick. This is the perfect thickness, as it’s strong enough to hold fillings, but not so thick that it takes forever to bake.
⊹Tip For Success⊹
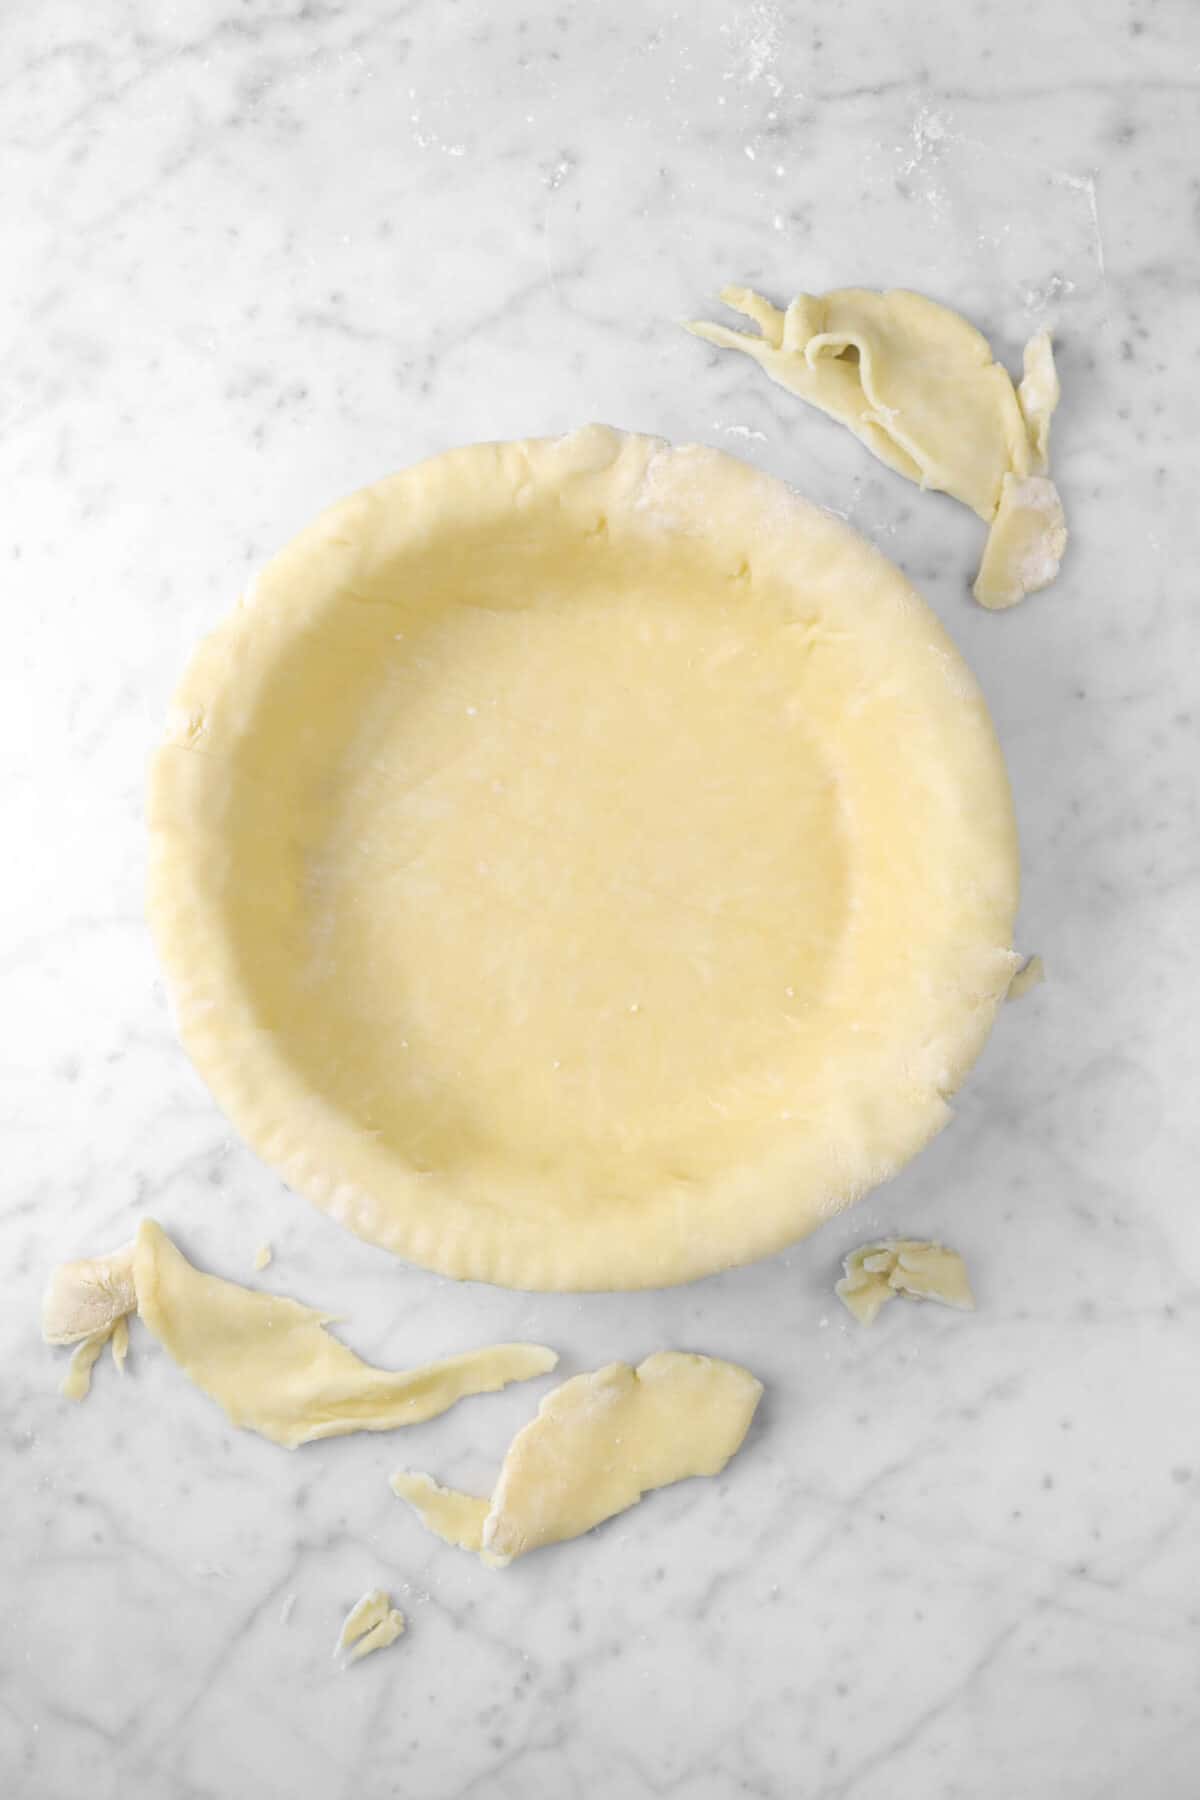
Since your dough is so thin, use the pastry mat or your rolling pin to help transfer the pie crust to the pie dish. If you are using your rolling pin, roll one end of the dough onto the rolling pin, rolling it back towards you, slowly peeling it off of the pastry mat as you go. Pick it up, and carefully roll it back out over the top of the pie dish. If you are transferring it using the pastry mat, just pick up the mat and flip it upside down onto your pie plate.

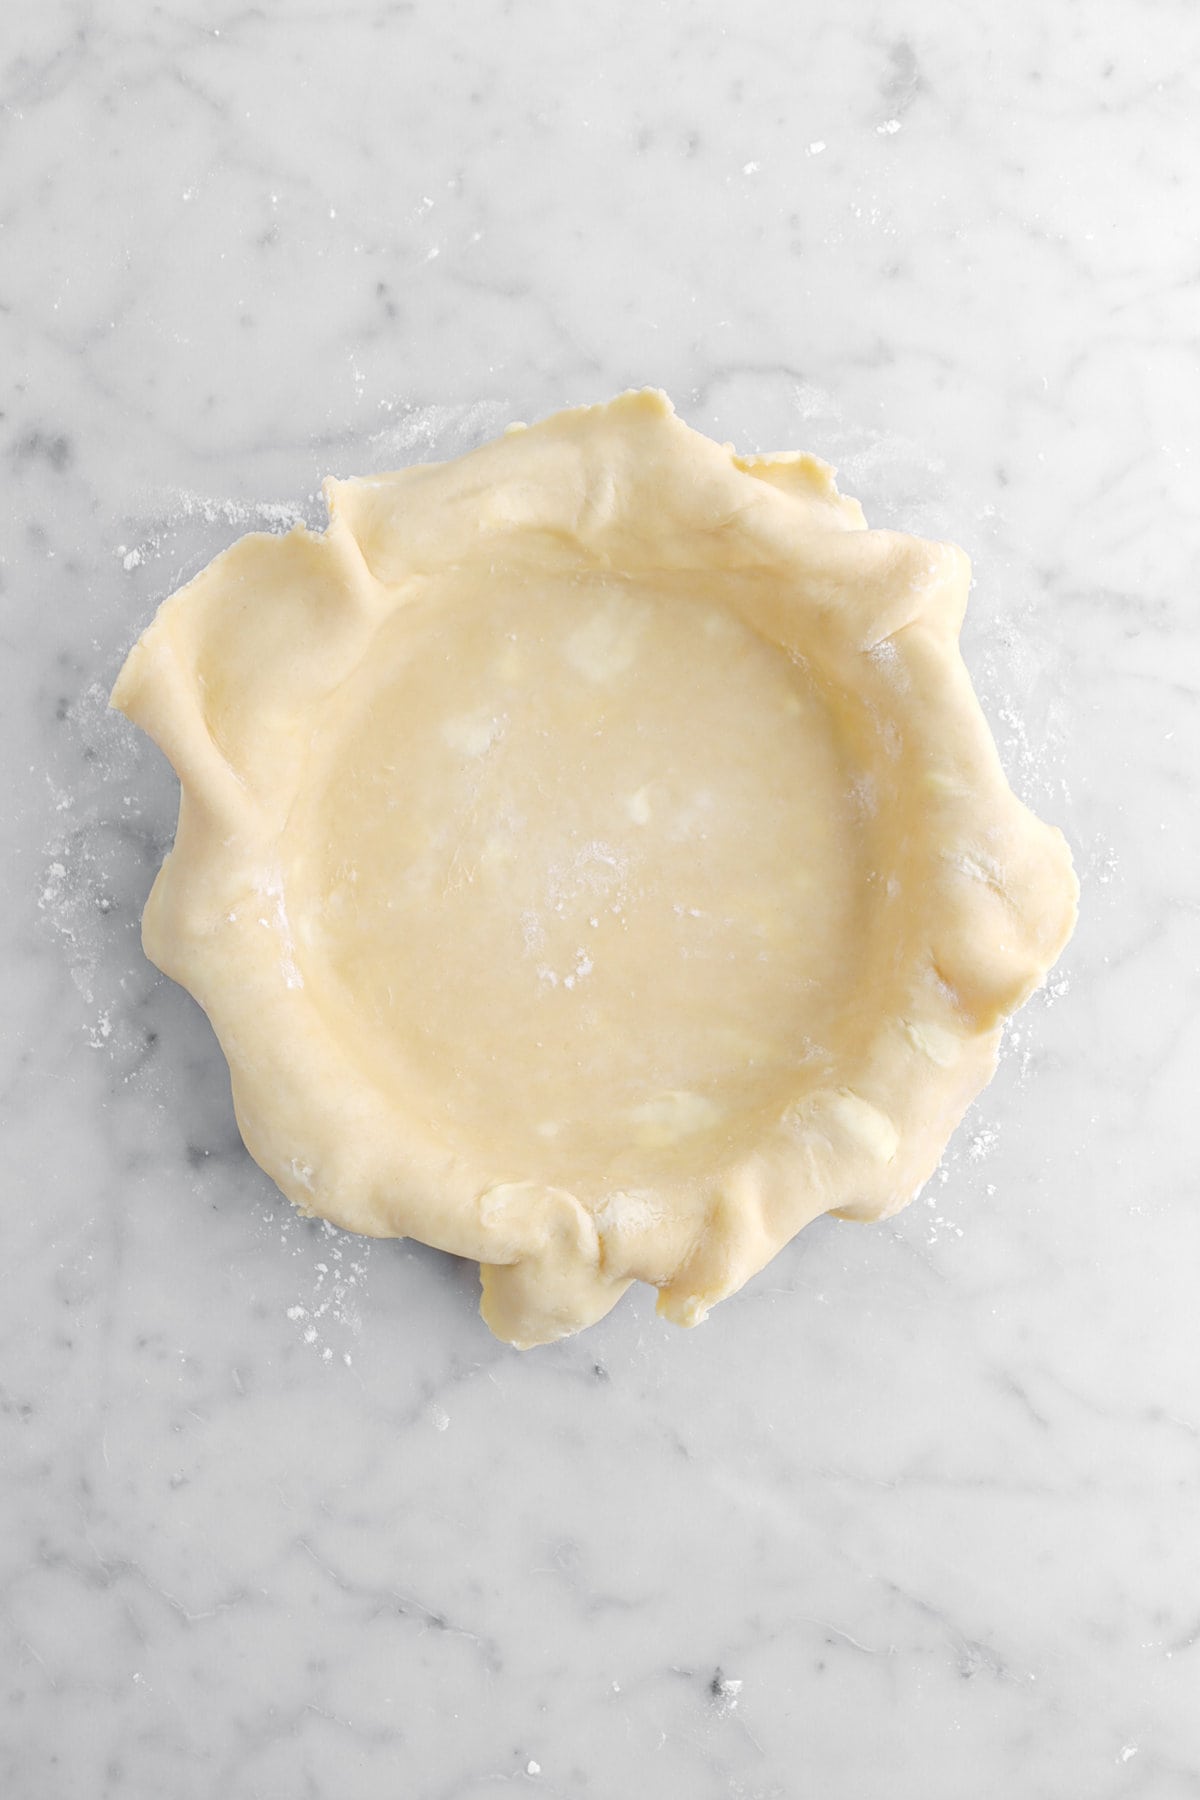
Trim dough around the edges if there’s excess dough in some spots—you want about 1-inch overhang. Fold the overhang back over and pinch the top and bottom crusts together. Now you can create a pretty edge, such as fluting or crimping!
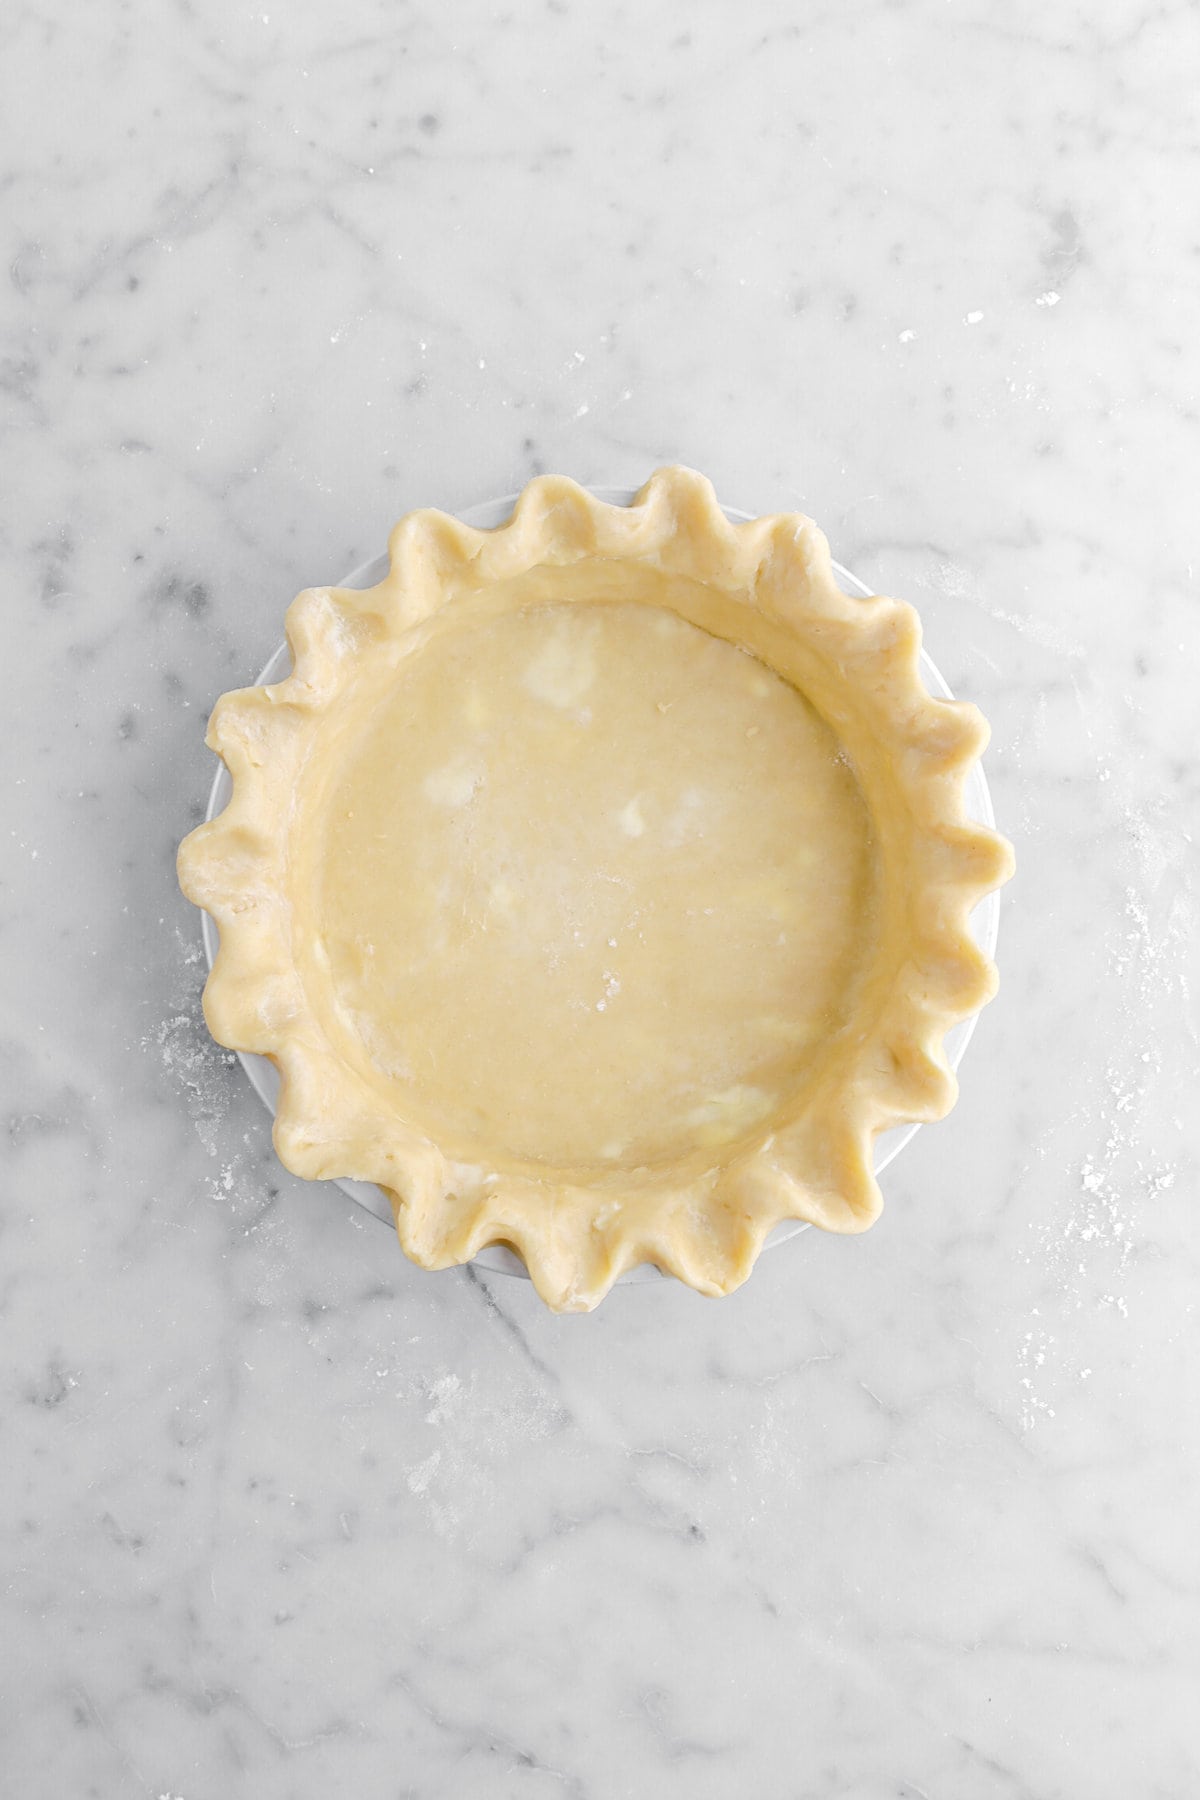
Fluting with fingers: To flute the edges, use a knuckle and 2 fingers to press around the edges of the pie crust, to give it a beautiful and classic scalloped look, like this cinnamon maple pecan pie.
Crimping with fork: You can also use a fork to crimp the edges, like we do with these peach hand pies.

Your pie crust is now ready to bake! From here, follow your pie’s recipe instructions from here. Some recipes may call for a fully baked crust, and some may call for a par-baked (or blind baked) crust. And some recipes, like this chess pie or pumpkin pie, don’t require any baking before adding the filling!
Your Common Pie Crust Issues: SOLVED!
- Pie crust is tough: Tough crusts are the result of not enough fat in the crust, as well as overworking the dough. Use the recipe below and avoid handling the dough more than you need.
- Don’t have enough pie dough: This recipe yields exactly 1 pie crust. To ensure you have enough pie dough for overhang and a pretty topping, roll your dough out to a 12-inch circle, about 1/8 inch thick. If you want a double crust recipe, use the 2x button below in the recipe card.
- Pie crust shrinks down the sides when baking: This is typically due to the crust not having enough overhang and therefore doesn’t have a way to “hang on”. Make sure your pie crust is over the edges to ensure it doesn’t shrink!
- Pie dough is cracking when rolling: In our experience, a pie dough that cracks when rolling is due to the dough itself being too cold (yes, this is a thing!). We found that about 15 minutes in the fridge chills the dough just enough to keep the butter from being too warm when rolling. If the dough is left in the fridge for hours and/or days, you will need to set the dough out on the counter about 30 minutes before you’re ready to roll it out.
- Pie dough is dry & crumbling when rolling: The dough is likely crumbling because there was not enough water. Luckily, this is a simple fix! Drizzle a small amount of ice water over the dough and gentle use your hands to fold it in. Add enough water that the dough comes together, but not so much that the dough is sticky.

The Basics of Blind Baking
If you’ve never blind/par-baked a pie crust, it can be quite intimidating, but no worries! If your pie recipe requires a fully baked or par-baked pie crust before adding the filling, follow these simple directions for success.
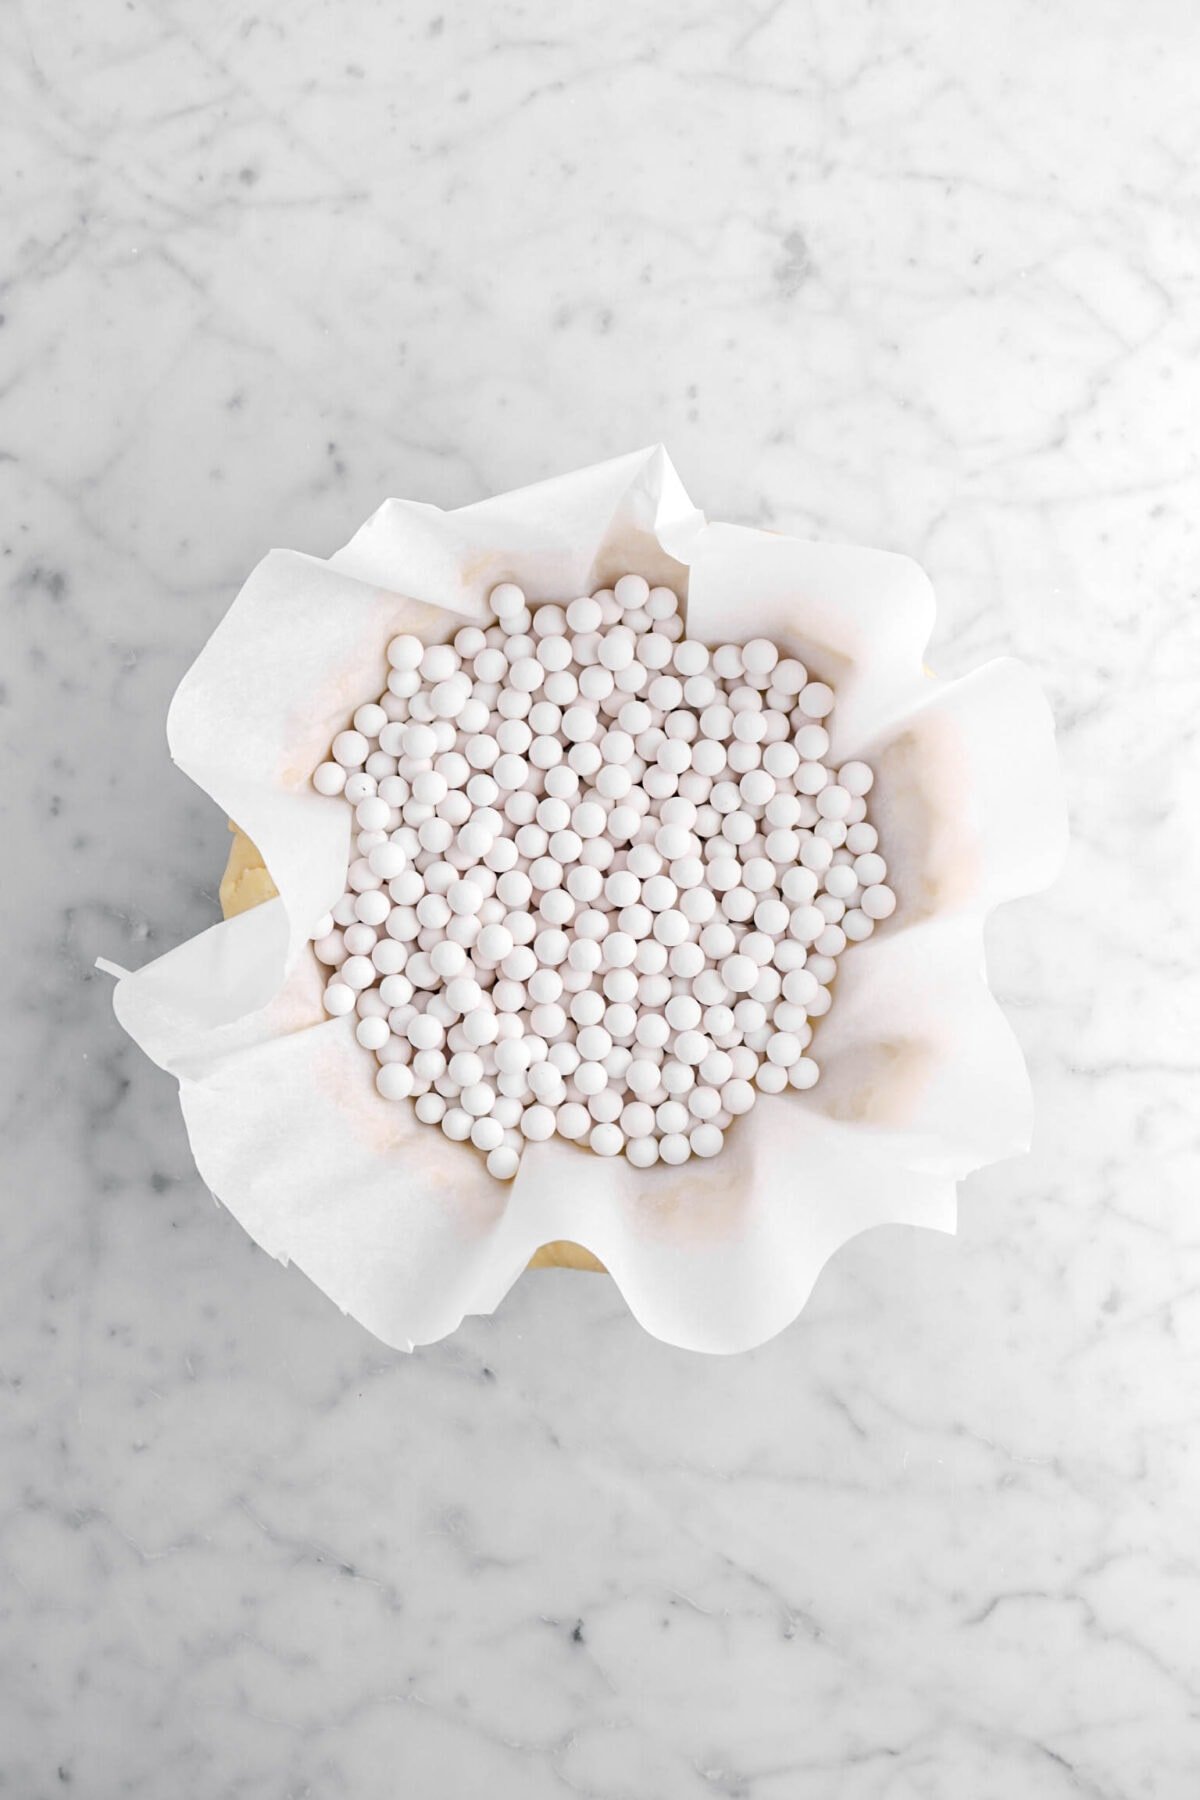
You need 3-4 packs of pie weights, which are typically ceramic beads (they can also be metal) that weigh down the crust to prevent the puffing/shrinking as it bakes. You can also use dried beans, if you don’t have pie weights. Whichever you choose, be sure to line the crust with parchment paper, then fill the empty shell with the weights prior to baking.
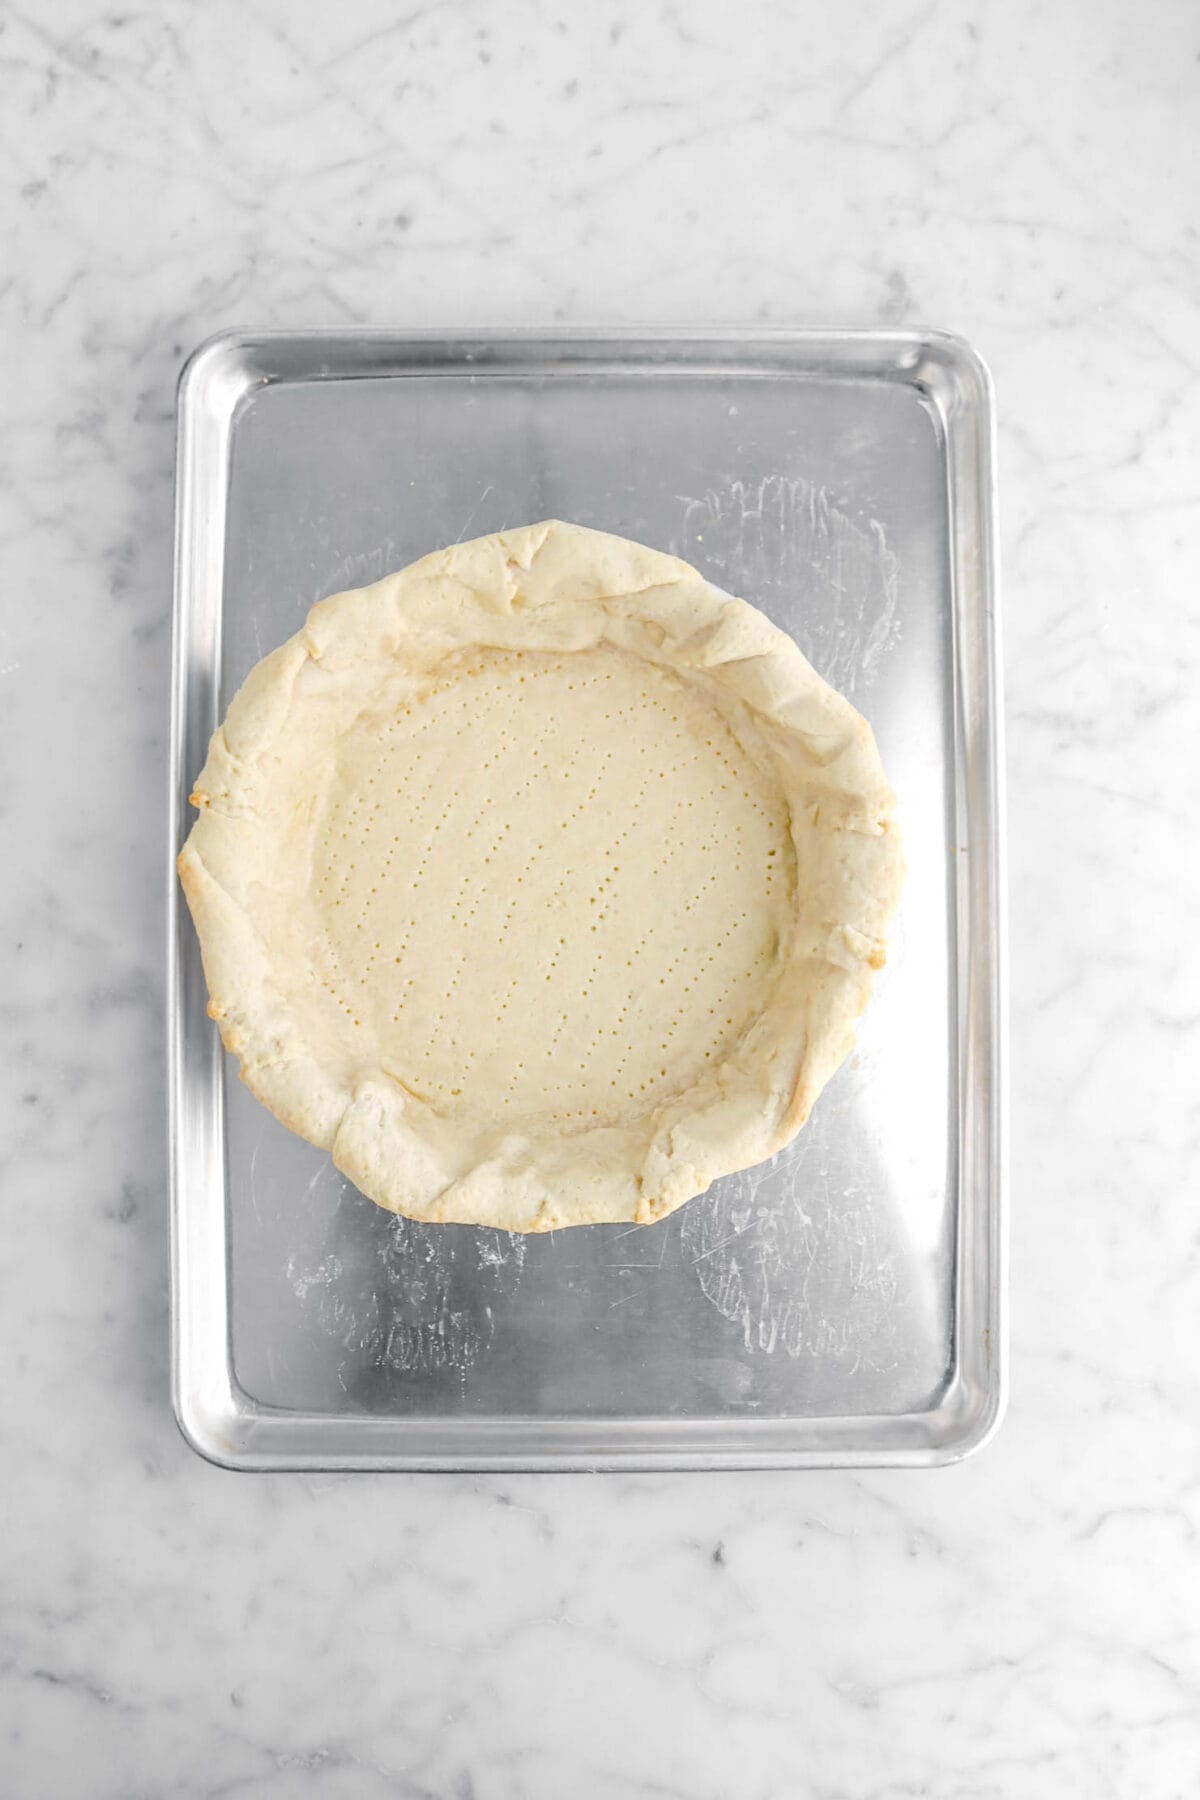
Without any pie weights (or even not enough weights) during par-baking, the dough will puff up, and then shrink down the sides.
Our Top 4 Tips For Pie Crust Success
- Use a ceramic or glass pie dish. We prefer baking in a ceramic pie dish or glass pie dish when we make pie. Why? Well, we’ve found that ceramic and glass dishes conduct heat more evenly, which allows the bottom of the crust to bake thoroughly (aka NO soggy bottoms!).
- The fridge is pie doughs best friend. Keep everything cold (including the dough!) is key to pie dough success. When you take the the pie dough out of the fridge to roll it, make sure your pie filling is ready to go. If not, keep the rolled out pie crust in the refrigerator until it is.
- Add a splash of vodka. It sounds weird, I know, but bear with me! Adding a small amount of vodka to your pie dough can help create a flakier crust. The alcohol evaporates during baking, leaving behind delicate layers.
- Protect the crust edges from burning: I cannot recommend this pie crust shield ENOUGH! If you notice the edges of your pie crust are browning before the pie has fully baked, carefully and gently place the shield over the edges of the pie. You can also make a pie shield out of aluminum foil, but in our experience, we had more luck with the silicone pie shield.
Recipes To Make With This Crust:


When you make this Homemade All-Butter Tender Pie Crust, leave a comment down below and/or give this recipe a rating! We love hearing from you and answering any questions you might have! Also, be sure to tag us on social media and hashtag it #BakersTable.
Happy Baking!
x, Caylie

Homemade All-Butter Tender Pie Crust
Ingredients
- 1½ cups all purpose flour
- ½ teaspoon salt
- 9 Tablespoons unsalted butter
- 3-4 Tablespoons water, ice cold
Instructions
- Slice butter and place back in refrigerator until ready to use.
- Combine flour and salt in food processor bowl fitted with the dough blade.
- Pulse 2 or 3 times to insure it is mixed.
- Add butter, a couple of pats at a time, pulsing after each addition.
- Pulse until mixture is crumbly.
- Add water, one tablespoon at a time, pulsing after each, just until dough holds together.
- Turn out onto a piece of plastic wrap.
- Wrap tightly.
- Flatten into a disc.
- Refrigerate for 15 minutes.
- Remove plastic and place on a piece of parchment paper sprinkled with flour.
- Sprinkle top of dough with flour.
- Roll out into a circle that is ⅛ inch thick.
- Fit dough into pie plate.
- Press gently along the bottom and sides to ensure there are no air bubbles.
- Trim.
To Blind Bake This Pie Crust
- Place a piece of parchment paper over crust and fill with pie weights. (If you don’t have pie weights, use rice or dried beans.)
- Bake at 375℉/190℃ for 20 minutes.
- Remove weights and parchment paper.
- Return to oven for another 10 minutes.
Tools You May Need (affiliate links)
– Still Hungry? –
Here are a few recipes may like!


Suggestion:
Under “Substitutions” please edit to read . . .”if you do not have UNSALTED butter,”
It currently reads salted butter.
Hi! Thank you so much for catching that! I don’t generally proof-read as well as I should. We all make mistakes 🙂 Xo, Caylie